Introduction
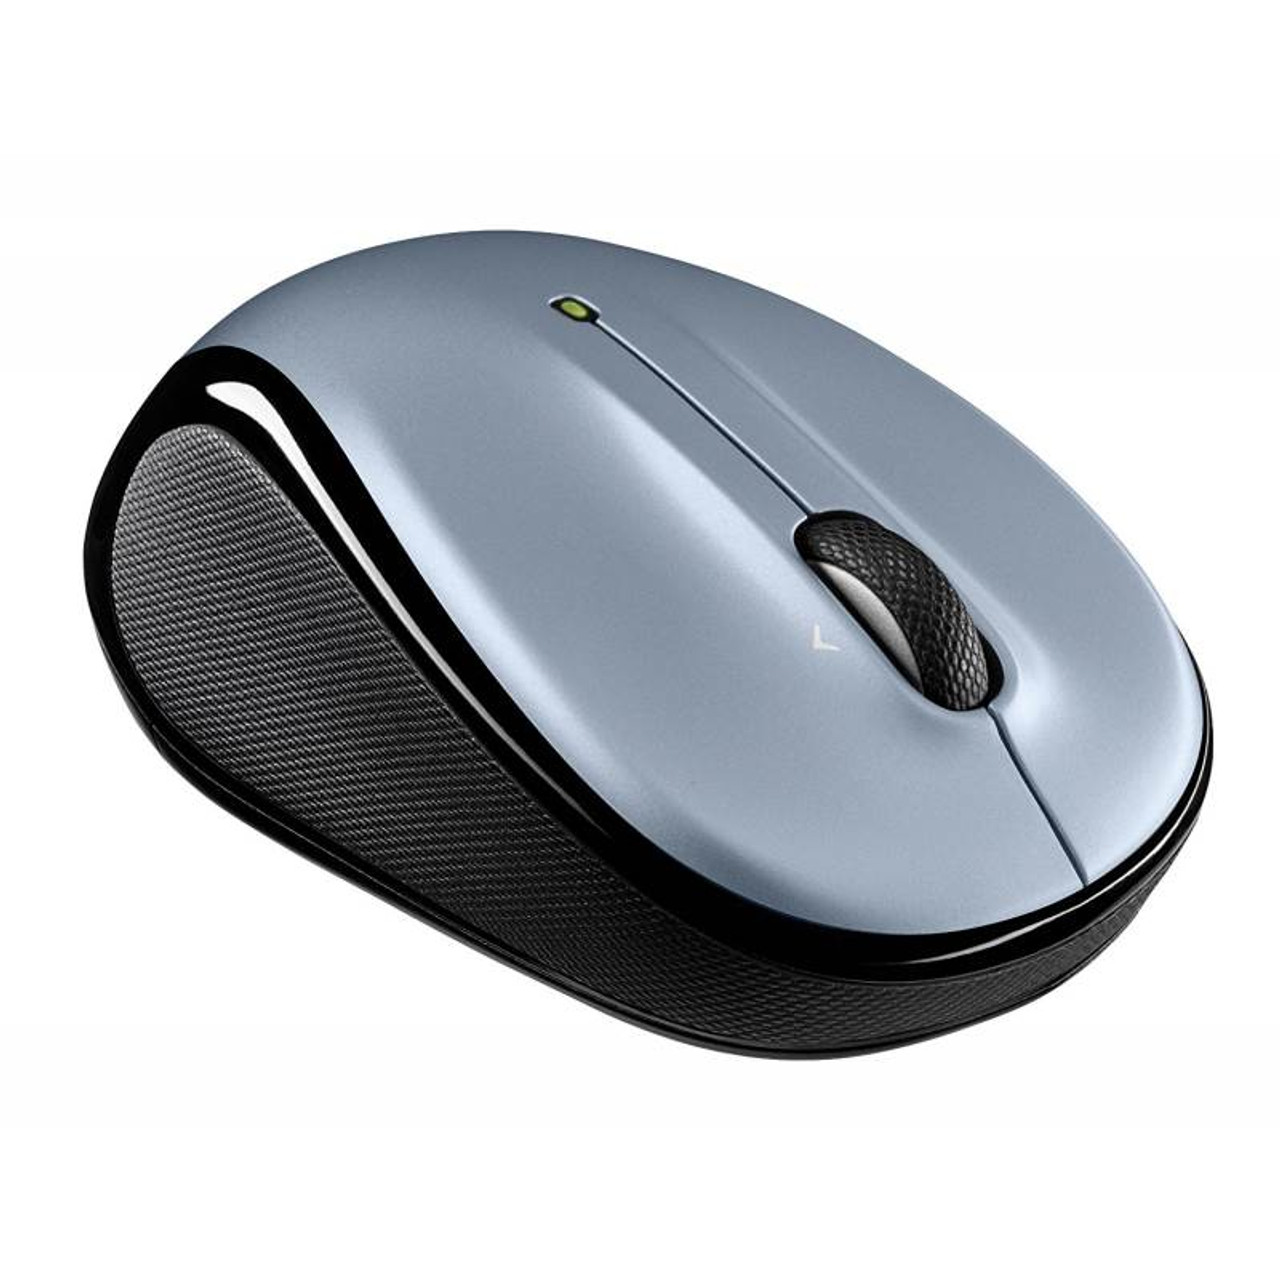
Welcome to this step-by-step guide on how to install the Logitech M325 Wireless Mouse. Whether you are a beginner or a tech-savvy individual, installing this wireless mouse is a straightforward process that will enhance your computing experience. The Logitech M325 offers smooth cursor control, comfortable ergonomics, and hassle-free wireless connectivity. With its compact design and advanced features, this mouse is a popular choice for both work and leisure.
In this guide, we will walk you through each step of the installation process, from preparing for the installation to testing the mouse. By following these instructions, you will be able to connect the Logitech M325 Wireless Mouse to your computer quickly and easily.
Before we dive into the installation process, it’s important to note that this guide assumes you are using a computer running a Windows operating system. The steps might vary slightly if you are using a different operating system, such as macOS or Linux. However, the overall process and principles of installation will be similar.
Now, let’s get started with the installation process of the Logitech M325 Wireless Mouse!
Step 1: Prepare for installation
Before we begin installing the Logitech M325 Wireless Mouse, it’s essential to gather all the necessary items and create a suitable workspace. By following these preparation steps, you can ensure a smooth and uninterrupted installation process.
1. Clear your workspace: Start by clearing any clutter from your desk or work area. This will provide you with enough space to maneuver the mouse and its accessories during the installation process.
2. Check the system requirements: Ensure that your computer meets the minimum system requirements for the Logitech M325 Wireless Mouse. Generally, the mouse is compatible with Windows, Mac, and Linux operating systems. However, it’s crucial to verify the specific requirements mentioned in the product documentation or Logitech’s official website.
3. Keep your computer turned on: It’s essential to keep your computer or laptop powered on during the installation process. This will allow the necessary drivers and software to be installed properly.
4. Have a USB port available: Locate a free USB port on your computer where you can connect the wireless receiver. Most modern computers have multiple USB ports, either on the front or back panel.
5. Ensure a stable internet connection: To download the Logitech Unifying Software and any required drivers, make sure your computer is connected to a stable internet connection. This will facilitate a seamless installation process.
6. Keep the mouse and its accessories nearby: Make sure the Logitech M325 Wireless Mouse and its accompanying accessories, such as the USB receiver and battery, are within reach. This will save you time searching for them during the installation process.
By following these preparation steps, you will create an optimal environment for installing the Logitech M325 Wireless Mouse. Now that you have made the necessary preparations, it’s time to move on to the next step: inserting the battery.
Step 2: Insert the AA battery
Now that you have prepared your workspace, it’s time to insert the AA battery into the Logitech M325 Wireless Mouse. Follow these simple steps to ensure the mouse is powered and ready for use:
1. Locate the battery compartment: Flip the Logitech M325 Wireless Mouse upside down and locate the battery compartment on the underside of the mouse. You will find a small latch or tab that allows you to open the compartment.
2. Open the battery compartment: Slide the latch or press the tab to open the battery compartment. Be cautious not to apply excessive force, as you don’t want to damage the mouse.
3. Insert the AA battery: Take the AA battery and align it with the polarity markings inside the battery compartment. The polarity markings usually consist of plus (+) and minus (-) symbols. Ensure that the battery is inserted correctly to prevent any power issues.
4. Close the battery compartment: Once the battery is inserted, gently close the battery compartment by sliding the latch or pressing the tab back into place. You should hear a clicking sound, indicating that the compartment is securely closed.
5. Check the battery level: To check the battery level of your Logitech M325 Wireless Mouse, you can refer to the battery indicator located on the top of the mouse. The indicator will provide you with an estimate of the battery’s remaining charge.
By correctly inserting the AA battery, you have powered up the Logitech M325 Wireless Mouse. This battery-powered mouse offers convenience and mobility, allowing you to use it without the need for a wired connection. With the battery in place, let’s move on to the next step: connecting the USB receiver.
Step 3: Connect the USB receiver
Now that the Logitech M325 Wireless Mouse is powered, the next step is to connect the USB receiver to your computer. Follow these simple steps to establish a wireless connection between the mouse and your computer:
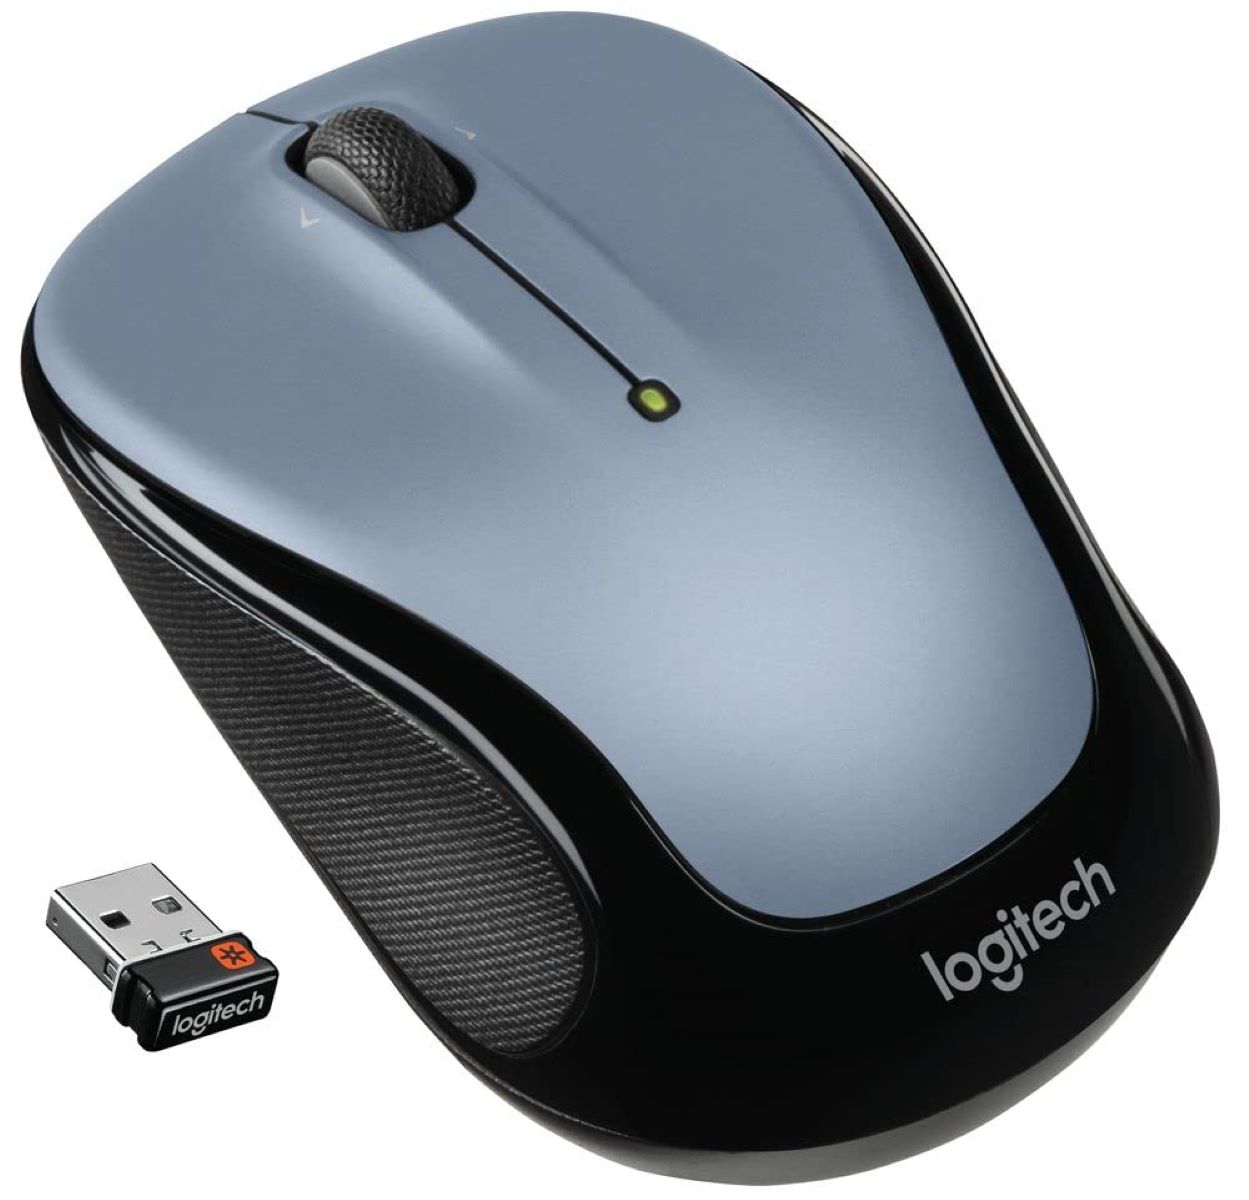
1. Locate the USB receiver: The Logitech M325 Wireless Mouse comes with a small USB receiver that allows it to communicate wirelessly with your computer. Locate the USB receiver that is included in the packaging.
2. Insert the USB receiver: Plug the USB receiver into an available USB port on your computer. The receiver is designed to fit snugly into the port, ensuring a secure connection. If you have a laptop, you can use any available USB port, located either on the sides or back of the device.
3. Wait for the driver installation: Once the USB receiver is inserted, your computer will begin installing the necessary drivers automatically. This process may take a few moments, depending on your system’s speed and configuration. Allow the installation to complete before proceeding to the next step.
4. Ensure a successful connection: Once the driver installation is complete, the Logitech M325 Wireless Mouse and the USB receiver should establish a successful wireless connection. You can verify this by checking the mouse. The LED light on the mouse should start blinking, indicating that the wireless connection is active.
With the USB receiver connected, the Logitech M325 Wireless Mouse is now ready to be used. You can enjoy the freedom of wireless control and navigation as you move on to the next steps of the installation process. The USB receiver provides a stable and reliable connection, enabling seamless communication between the mouse and your computer. Now, let’s proceed to step 4 and turn on the mouse.
Step 4: Turn on the mouse
Now that the USB receiver is connected to your computer, it’s time to turn on the Logitech M325 Wireless Mouse. By following these simple steps, you can activate the mouse and establish a functional connection:
1. Locate the power switch: Look for the power switch on the Logitech M325 Wireless Mouse. The location may vary depending on the specific model, but it is commonly located either on the sides or bottom of the mouse.
2. Turn on the mouse: Slide or press the power switch to the “on” position. Once the mouse is turned on, the LED indicator light should illuminate, indicating that the mouse is powered and ready for use.
3. Wait for the mouse to connect: After turning on the Logitech M325 Wireless Mouse, it will attempt to establish a connection with the USB receiver. Allow a few moments for the mouse to establish the connection. Once connected, the LED light on the mouse should stop blinking and remain steady.
4. Verify the mouse functionality: To ensure the mouse is working correctly, move it around on the desktop or a mouse pad. The cursor on your computer screen should respond accordingly, indicating that the mouse is functioning correctly.
With the Logitech M325 Wireless Mouse powered on, you can now enjoy the convenience and versatility it offers. The ergonomic design and precise cursor control make this mouse an excellent choice for both work and leisure activities. The wireless connection ensures freedom of movement, eliminating the need for tangled wires and cables.
Now that your Logitech M325 Wireless Mouse is turned on and connected, it’s time to move on to the next step: installing the Logitech Unifying Software.
Step 5: Install Logitech Unifying Software
To optimize the functionality and customization options of your Logitech M325 Wireless Mouse, it is recommended to install the Logitech Unifying Software. This software allows you to manage multiple Logitech devices and access advanced features. Follow these steps to install the Logitech Unifying Software:
1. Visit the Logitech website: Open your web browser and navigate to the Logitech official website. Look for the support section or search for “Logitech Unifying Software” in the search bar.
2. Locate the software download: On the Logitech website, find the page or section where you can download the Logitech Unifying Software. Ensure that you download the appropriate version that is compatible with your operating system.
3. Begin the installation: Once the Logitech Unifying Software download is complete, locate the downloaded file and double-click on it to start the installation process. Follow the on-screen instructions to proceed with the installation.
4. Accept the license agreement: During the installation process, you will be prompted to review and accept the license agreement. Read through the terms and conditions and click “Agree” or “Accept” to continue.
5. Customize the installation (if necessary): If the Logitech Unifying Software offers customization options during the installation process, you can tailor the settings according to your preferences. This includes options such as language selection and program shortcuts. Make your desired choices and proceed with the installation.
6. Complete the installation: Once the installation process is complete, you will receive a confirmation message. Click “Finish” or “Close” to exit the installer and launch the Logitech Unifying Software.
By installing the Logitech Unifying Software, you unlock a range of advanced features and customization options for your Logitech M325 Wireless Mouse. This software enables you to adjust button functions, set scrolling preferences, and manage multiple Logitech devices simultaneously.
With the Logitech Unifying Software installed, you are now ready to proceed to the next step: pairing the mouse with the wireless receiver.
Step 6: Pair the mouse with the wireless receiver
Now that you have installed the Logitech Unifying Software, it’s time to pair your Logitech M325 Wireless Mouse with the USB receiver. Following these steps will ensure a successful pairing process:
1. Launch the Logitech Unifying Software: Open the Logitech Unifying Software by either clicking on the desktop shortcut or accessing it through the Start menu. The software will detect and display all compatible Logitech devices connected to your computer.
2. Click on “Add Devices”: Within the Logitech Unifying Software, locate and click on the “Add Devices” or “Add New Device” button. This will initiate the pairing process and prompt the software to search for available Logitech devices.
3. Put the mouse in pairing mode: On the Logitech M325 Wireless Mouse, there should be a button or switch to enter pairing mode. Press and hold this button or switch for a few seconds until the LED light on the mouse begins to blink rapidly. This indicates that the mouse is now in pairing mode and ready to be connected.
4. Complete the pairing process: Within the Logitech Unifying Software, the mouse should now appear in the list of available devices. Select the mouse from the list and click “Next” or “Pair” to initiate the pairing process. Follow any further prompts or instructions provided by the software to complete the pairing process.
5. Verify the successful pairing: After the pairing process is complete, the Logitech Unifying Software will display a confirmation message indicating that the mouse has been successfully paired with the wireless receiver. Ensure that the LED light on the mouse has stopped blinking and remains steady, indicating a stable connection.
By pairing your Logitech M325 Wireless Mouse with the USB receiver, you establish a secure and reliable wireless connection. The pairing process allows the mouse to communicate with your computer, enabling seamless cursor control and button functionality.
With the mouse successfully paired, you can now move on to the final step: testing the mouse to ensure it is working as expected.
Step 7: Test the mouse
Now that you have completed the installation and pairing process, it’s important to test the Logitech M325 Wireless Mouse to ensure it is functioning correctly. Follow these steps to perform a quick test:
1. Move the mouse: Start by moving the Logitech M325 Wireless Mouse across your desk or mousepad. As you move the mouse, you should see the cursor on your computer screen responding accordingly. The mouse’s optical sensor should accurately track your movements.
2. Test the buttons: Click the left and right buttons on the Logitech M325 Wireless Mouse to verify their functionality. The mouse should perform the corresponding actions, such as selecting items or opening links in a web browser.
3. Try the scrolling wheel: Test the scrolling wheel on the mouse. Roll the wheel up and down to navigate through documents, web pages, or any other scrollable content. The scrolling should be smooth and precise.
4. Test additional buttons (if applicable): Depending on the specific model of the Logitech M325 Wireless Mouse you have, there may be additional buttons present. Test these buttons to ensure they perform the designated functions, such as navigating forward or backward on a web page.
5. Check battery life: Keep an eye on the battery life indicator on the Logitech M325 Wireless Mouse. If the battery level is low, it’s a good idea to replace the AA battery with a fresh one to ensure uninterrupted use.
By thoroughly testing the Logitech M325 Wireless Mouse, you can confirm its proper functionality and address any potential issues early on. If you encounter any problems during the testing process, refer to the user manual or the Logitech support website for troubleshooting assistance.
Congratulations! You have successfully installed and tested the Logitech M325 Wireless Mouse. Now you can enjoy the benefits of a reliable, wireless mouse that offers smooth cursor control and comfortable usage. This versatile mouse enhances your computing experience, whether for work or leisure activities.
Conclusion
Installing the Logitech M325 Wireless Mouse is a simple and straightforward process that enhances your computer usage experience. By following the steps outlined in this guide, you have successfully prepared your workspace, inserted the AA battery, connected the USB receiver, turned on the mouse, installed the Logitech Unifying Software, paired the mouse with the wireless receiver, and tested its functionality.
The Logitech M325 Wireless Mouse offers smooth cursor control, ergonomic design, and hassle-free wireless connectivity. With its compact form factor and advanced features, it is a popular choice for both work and leisure activities. The installation process ensures a seamless connection between the mouse and your computer, providing you with the freedom to navigate and interact with your device effortlessly.
Remember to keep the Logitech Unifying Software and any necessary drivers updated for optimal performance. This software enables you to customize button functions, set scrolling preferences, and manage multiple Logitech devices simultaneously. It allows you to tailor your mouse settings to suit your unique needs and preferences.
Now that you have successfully installed and tested the Logitech M325 Wireless Mouse, you can enjoy its benefits in your daily computing tasks. Whether you are browsing the internet, working on documents, or engaging in creative projects, this wireless mouse offers precise control and enhances your productivity.
If you encounter any issues or have further questions regarding the Logitech M325 Wireless Mouse, refer to the user manual or visit the Logitech support website for additional assistance. Enjoy the convenience and freedom of a wireless mouse as you navigate and interact with your computer seamlessly!