Introduction
Welcome to this guide on how to fix the scroll wheel on your Logitech mouse. The scroll wheel is an essential component of any mouse, allowing you to navigate smoothly through documents, web pages, and applications. However, it can sometimes encounter issues that hinder its functionality.
Common problems with the Logitech mouse scroll wheel include scrolling not working correctly, scrolling in the wrong direction, or the scroll wheel becoming unresponsive. These issues can be frustrating and impact your productivity or enjoyment while using your computer. Fortunately, there are several methods you can try to troubleshoot and fix these problems.
In this article, we will walk you through step-by-step solutions to resolve issues with your Logitech mouse’s scroll wheel. From cleaning the scroll wheel to adjusting mouse scroll settings, updating drivers, and even replacing the scroll wheel, we will cover various techniques to get your mouse back to its optimal functioning state.
Before diving into the troubleshooting methods, it’s essential to have a few tools ready. These tools will help you carry out the necessary tasks more effectively. You will need:
- A soft, lint-free cloth
- Isopropyl alcohol or lens cleaner
- A small screwdriver (if required for scroll wheel replacement)
- A replacement scroll wheel (if needed)
With these tools at hand, let’s get started with the first method, which focuses on cleaning the scroll wheel to remove any dirt or debris that may be affecting its performance.
Common Issues with Logitech Mouse Scroll Wheel
The Logitech mouse scroll wheel issues can be frustrating and impact your overall user experience. Here are some common problems that users encounter with their Logitech mouse scroll wheel:
- Scrolling not working correctly: One of the most common issues is when the scroll wheel fails to scroll smoothly or doesn’t respond consistently. This can make it challenging to navigate through documents or web pages.
- Scrolling in the wrong direction: Another common problem is when the scroll wheel scrolls in the opposite direction than intended. For example, scrolling down moves the page up, and scrolling up moves the page down.
- Unresponsive scroll wheel: Sometimes, the scroll wheel becomes unresponsive and doesn’t register any scrolling motion. This can be frustrating, especially when you need to scroll through lengthy documents or web content.
- Inconsistent scrolling speed: Some users face issues with inconsistent scrolling speed. The scroll wheel may jump or scroll too fast or slow, making it difficult to control the scrolling motion effectively.
- Scroll wheel making noise: If your scroll wheel emits unusual noises, such as clicking or grinding sounds, it may indicate a mechanical problem that needs to be addressed.
These issues can occur due to various reasons, such as accumulated dirt or debris inside the scroll wheel, incorrect mouse settings, outdated or incompatible drivers, or hardware defects.
Now that we have discussed the common problems with the Logitech mouse scroll wheel, let’s move on to the next section, where we will outline the necessary tools you’ll need to perform the troubleshooting methods.
Necessary Tools
Before you begin troubleshooting your Logitech mouse scroll wheel issues, it’s essential to gather a few tools that will aid in the process. Having these tools on hand will ensure a smoother and more effective troubleshooting experience. Here are the necessary tools you’ll need:
- Soft, lint-free cloth: A soft cloth is essential for cleaning the scroll wheel and other parts of the mouse. It helps remove dust, dirt, and grime without causing any scratches or damage to the surface.
- Isopropyl alcohol or lens cleaner: For stubborn dirt or sticky residue on the scroll wheel, you may need to use isopropyl alcohol or a lens cleaner. These cleaning agents can effectively dissolve and remove the buildup, ensuring optimal scroll wheel performance.
- Small screwdriver (if required for scroll wheel replacement): If you’re planning to replace the scroll wheel, you may need a small screwdriver to disassemble the mouse and access the internal components. Make sure to use the appropriate screwdriver size to avoid damaging the mouse casing.
- Replacement scroll wheel (if needed): If all troubleshooting methods fail to fix the scroll wheel issues, you may consider replacing the scroll wheel altogether. Ensure you have a compatible replacement scroll wheel that is specifically designed for your Logitech mouse model.
These tools are readily available and can be found in most households or purchased from local stores or online retailers. Gathering these tools in advance will save you time and enable a seamless troubleshooting process.
Now that you’re equipped with the necessary tools, we can move on to the next section, where we will dive into the first troubleshooting method: cleaning the scroll wheel.
Method 1: Cleaning the Scroll Wheel
One of the primary causes of Logitech mouse scroll wheel issues is a buildup of dirt, dust, or debris. Over time, these particles can interfere with the smooth functioning of the scroll wheel. Cleaning the scroll wheel can often resolve these issues. Here’s how you can clean the scroll wheel:
- Step 1: Disconnect the mouse: Start by disconnecting your Logitech mouse from your computer or laptop. This will prevent any accidental clicks or movements while you clean the scroll wheel.
- Step 2: Turn the mouse upside down: Carefully turn your mouse upside down, holding it over a clean surface or a soft cloth to catch any loose debris that may fall out during the cleaning process.
- Step 3: Remove the scroll wheel (if possible): Some Logitech mouse models allow you to remove the scroll wheel for easier cleaning. Check the user manual or manufacturer’s website for instructions specific to your mouse model. If your mouse does not have a removable scroll wheel, proceed to the next step.
- Step 4: Clean the surface: Using a soft, lint-free cloth, gently wipe the surface of the scroll wheel and its surrounding area. This helps remove any visible dust or grime that may be affecting its performance.
- Step 5: Remove stubborn debris: If there are stubborn particles or sticky residue on the scroll wheel, dampen the cloth slightly with isopropyl alcohol or lens cleaner. Gently rub the scroll wheel in a circular motion to dislodge and remove the debris. Avoid applying excessive pressure to prevent damage to the scroll wheel.
- Step 6: Allow the mouse to dry: If you used any cleaning agents, make sure to let the mouse and scroll wheel dry completely before reconnecting it to your computer or laptop. This prevents any potential damage that could occur from moisture.
- Step 7: Reconnect and test: Once the scroll wheel and mouse are dry, reconnect your Logitech mouse to your computer or laptop. Test the scroll wheel to see if the cleaning process has resolved the issues. It should now scroll smoothly and respond accurately to your inputs.
If the scroll wheel is still not functioning correctly after cleaning, don’t worry. There are additional troubleshooting methods we will explore in the following sections. However, cleaning the scroll wheel is an excellent and simple first step that often resolves scroll wheel issues.
Now that you have cleaned the scroll wheel, let’s move on to the next method: adjusting the mouse scroll settings.
Method 2: Adjusting the Mouse Scroll Settings
If cleaning the scroll wheel didn’t resolve the issue with your Logitech mouse, you can try adjusting the mouse scroll settings. Sometimes, the scroll settings may be misconfigured or set to an incompatible option, causing problems with the scroll wheel. Here’s how you can adjust the mouse scroll settings:
- Step 1: Open Mouse settings: Go to the Control Panel on your Windows computer or the System Preferences on your Mac. Look for the Mouse or Mouse & Trackpad settings.
- Step 2: Navigate to the Scroll settings: Within the Mouse settings, find the section that specifically deals with scrolling. This section may vary depending on your operating system and mouse model. Look for options like “Scrolling,” “Mouse Wheel,” or similar.
- Step 3: Adjust the scroll speed: In the scroll settings, you should find options to adjust the scroll speed. This determines how fast or slow the scroll wheel moves the content on your screen. Try adjusting the scroll speed to a different setting to see if it improves the scroll wheel’s functionality.
- Step 4: Check other scroll-related settings: Besides the scroll speed, there may be other settings that affect the behavior of the scroll wheel. Look for options like “Scroll direction” to ensure it is set to the desired direction (up or down), and “Scroll inertia” to control the smoothness of scrolling. Make any necessary adjustments to these settings.
- Step 5: Apply and test the changes: Once you have made the desired adjustments, apply the settings and test the scroll wheel’s functionality. Try scrolling in different applications and web pages to ensure that the changes have positively impacted the scroll wheel’s performance.
If adjusting the mouse scroll settings didn’t resolve the issue, there could be a problem with the mouse drivers. In the next section, we will explore how to update the Logitech mouse drivers, which can often fix compatibility or performance-related issues.
Now that you have adjusted the mouse scroll settings, let’s move on to the next method: updating Logitech mouse drivers.
Method 3: Updating Logitech Mouse Drivers
If the scroll wheel issues persist after cleaning and adjusting the mouse scroll settings, it may be necessary to update the Logitech mouse drivers. Outdated or incompatible drivers can often cause problems with the scroll wheel’s functionality. Here’s how you can update your Logitech mouse drivers:
- Step 1: Identify your mouse model: Before updating the drivers, you need to know the exact model of your Logitech mouse. Check the underside or the packaging of your mouse for the model name or number. Make a note of it.
- Step 2: Visit the Logitech website: Go to the official Logitech website using a web browser on your computer. Look for the “Support” or “Downloads” section of the website.
- Step 3: Find the drivers for your mouse: Within the Support or Downloads section, search for the drivers that correspond to your mouse model. This may involve manually selecting the product category, sub-category, or searching by the model name or number that you noted earlier.
- Step 4: Download and install the latest drivers: Once you have located the drivers for your mouse model, download the latest version of the drivers. Follow the instructions provided on the Logitech website to install the drivers on your computer.
- Step 5: Restart your computer: After installing the updated drivers, it is recommended to restart your computer. This ensures that the changes take effect and any conflicting settings or processes are refreshed.
- Step 6: Test the scroll wheel: Once your computer has restarted, test the scroll wheel to see if the driver update has resolved the issues. Check if the scroll wheel now functions smoothly and accurately.
If the driver update did not resolve the scroll wheel problems, there is another troubleshooting method to consider. In the next section, we will discuss how to reset the mouse settings to default.
Now that you have updated the Logitech mouse drivers, let’s move on to the next method: resetting the mouse settings to default.
Method 4: Resetting Mouse Settings to Default
If you are still experiencing issues with your Logitech mouse scroll wheel after cleaning, adjusting settings, and updating the drivers, resetting the mouse settings to default can help resolve any configuration-related problems. Here’s how you can reset your Logitech mouse settings to default:
- Step 1: Open Mouse settings: Navigate to the Control Panel on your Windows computer or the System Preferences on your Mac. Look for the Mouse or Mouse & Trackpad settings.
- Step 2: Locate the reset option: Within the Mouse settings, look for an option that allows you to reset the mouse settings. This option may vary depending on your operating system and mouse model. It could be labeled as “Reset,” “Defaults,” or similar.
- Step 3: Confirm the reset: Before proceeding, the system may prompt you to confirm the reset action as it will revert all mouse settings to their default values. Ensure that you want to proceed with the reset.
- Step 4: Apply the default settings: Once you confirm the reset, the mouse settings will be restored to their default configurations. This includes scroll wheel settings, sensitivity, button assignments, and other related options.
- Step 5: Test the scroll wheel: After the settings have been reset to default, test the scroll wheel to check if the issues have been resolved. Scroll through different applications and web pages to evaluate its functionality.
If resetting the mouse settings did not resolve the scroll wheel problems, it may be necessary to consider replacing the scroll wheel itself. This will be discussed in the next section.
Now that you have reset the mouse settings to default, let’s move on to the next method: replacing the mouse scroll wheel.
Method 5: Replacing the Mouse Scroll Wheel
If all previous troubleshooting methods have failed to fix the scroll wheel issues with your Logitech mouse, it may be necessary to replace the scroll wheel itself. Over time, the scroll wheel can suffer from wear and tear or develop internal defects that cannot be resolved through cleaning or software adjustments. Here’s how you can replace the mouse scroll wheel:
- Step 1: Obtain a replacement scroll wheel: Before you begin the replacement process, ensure that you have a compatible replacement scroll wheel that is specifically designed for your Logitech mouse model. You can usually find these replacement parts online or through Logitech customer support.
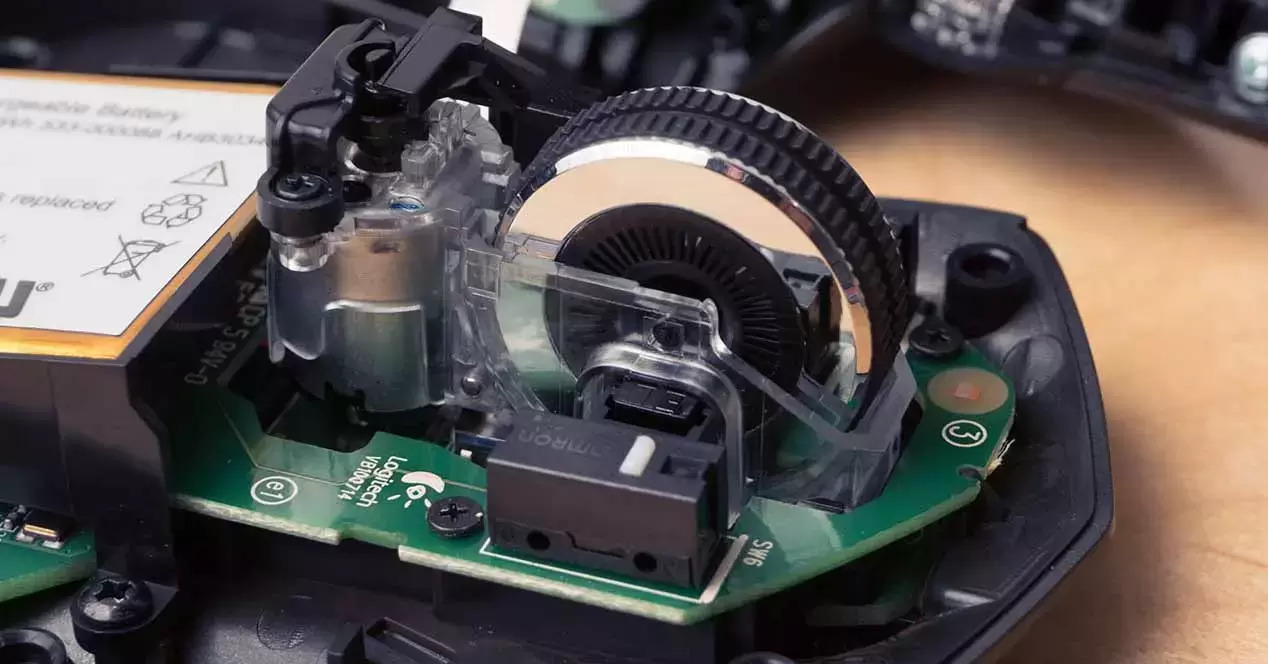
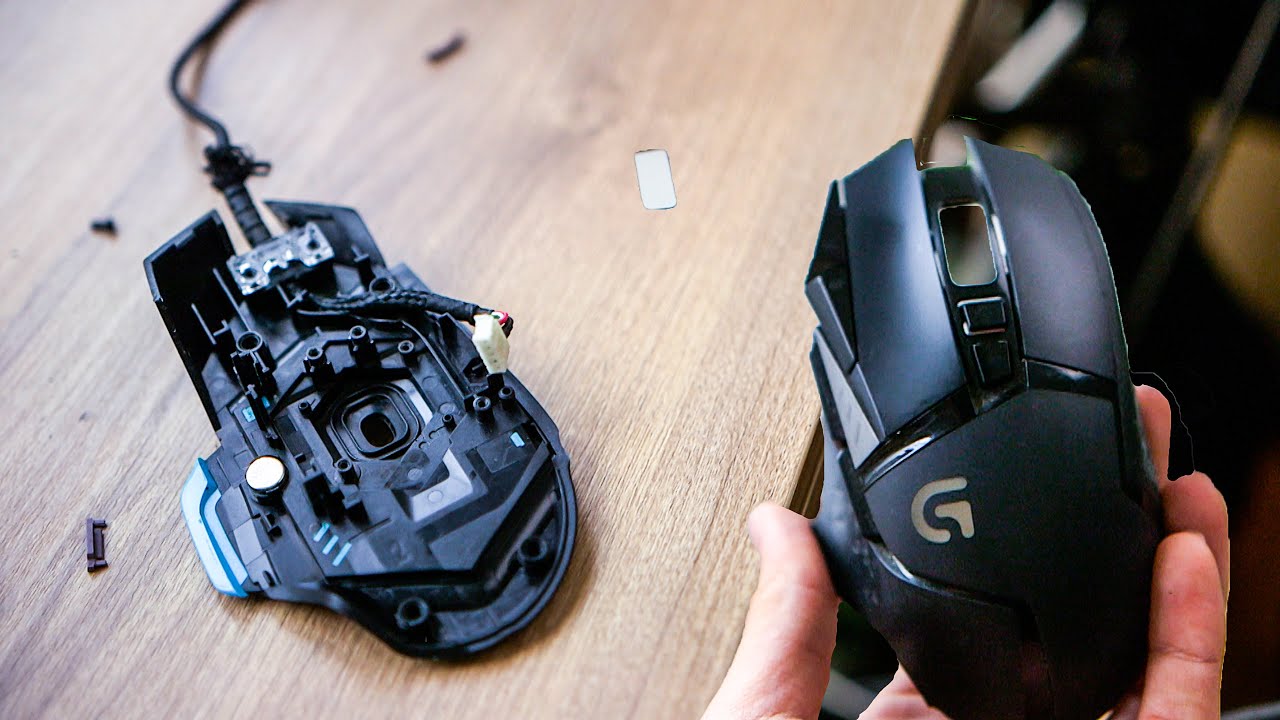
- Step 2: Disassemble the mouse: Use a small screwdriver to carefully disassemble the mouse casing, following the instructions provided by Logitech for your particular model. Take note of the assembly order and any additional components or connectors that may need to be removed before accessing the scroll wheel.
- Step 3: Remove the old scroll wheel: Once you have gained access to the scroll wheel, disconnect any cables or connectors attached to it, if applicable. Remove the old scroll wheel carefully, making sure not to damage any surrounding components or circuitry.
- Step 4: Install the replacement scroll wheel: Take the new scroll wheel and align it properly with the designated slot or connectors. Gently secure the new scroll wheel in place, ensuring a snug fit and proper alignment. Reconnect any cables or connectors that were detached during the removal process.
- Step 5: Reassemble the mouse: Carefully reassemble the mouse, following the reverse order of the disassembly process. Make sure all components are properly secured and aligned. Use the screwdriver to fasten any screws, if applicable.
- Step 6: Test the new scroll wheel: Once the mouse is fully reassembled, reconnect it to your computer and test the functionality of the new scroll wheel. Verify that it scrolls smoothly and correctly responds to your inputs.
If replacing the mouse scroll wheel did not resolve the scroll wheel issues, it may be necessary to seek professional assistance or consider purchasing a new Logitech mouse altogether.
With the troubleshooting methods covered, let’s wrap up this guide on fixing Logitech mouse scroll wheel problems.
Conclusion
Having a functional scroll wheel on your Logitech mouse is essential for smooth navigation and optimal user experience. If you have been facing issues with the scroll wheel, this guide has provided you with several troubleshooting methods to try and resolve them.
We started with cleaning the scroll wheel to remove any dirt or debris that may be hindering its performance. Adjusting the mouse scroll settings allowed us to fine-tune its behavior, while updating the Logitech mouse drivers helped ensure compatibility and resolve any software-related issues.
If these methods didn’t solve the scroll wheel problems, resetting the mouse settings to default or even replacing the scroll wheel itself were viable options for more advanced troubleshooting.
Remember, each method should be attempted one at a time, testing the scroll wheel’s functionality after each step. This will help identify the specific solution that works for your Logitech mouse.
If you have exhausted all troubleshooting options and the scroll wheel issues persist, it may be time to seek professional assistance or consider replacing the mouse altogether.
We hope this guide has been helpful in resolving the scroll wheel issues with your Logitech mouse. Remember to take regular care of your mouse by keeping it clean and maintaining its firmware and software updates to prevent future problems.
Thank you for reading, and we wish you smoother scrolling with your Logitech mouse!


