Introduction
Welcome to our step-by-step guide on how to install a hard disk drive into your MacBook Pro 3 1. If you find that your current hard drive is running out of storage space or experiencing issues, upgrading to a new hard disk drive can significantly improve the performance and storage capacity of your MacBook Pro.
Installing a new hard drive may seem like a daunting task, but with the right guidance and tools, it can be done easily and successfully. Whether you’re a tech enthusiast or a beginner, this guide will walk you through the process, ensuring a smooth installation and minimizing any potential risks or damage to your device.
Before getting started, it’s essential to gather the necessary tools and materials, including a new hard disk drive, a few screwdrivers, and an external storage device to back up your data. It’s crucial to back up your data to prevent any loss during the installation process.
Once you’ve gathered all the necessary tools and backed up your data, you can proceed to power off your MacBook Pro. This will help ensure your safety and prevent any damage to your device during the installation process.
In the following steps, we’ll guide you through removing the bottom case of your MacBook Pro, locating the hard drive slot, removing the old hard drive (if applicable), preparing the new hard disk drive, and installing it into your MacBook Pro. We’ll then walk you through reassembling your device, powering it on, and formatting the new hard drive to ensure it’s ready for use.
Without further ado, let’s dive into the step-by-step process of installing a hard disk drive into your MacBook Pro 3 1!
Step 1: Gather the Required Tools and Materials
Before you begin the installation process, it’s essential to gather all the necessary tools and materials to ensure a smooth and successful installation. Here’s a list of items you’ll need:
- New hard disk drive (compatible with your MacBook Pro 3 1)
- Small Phillips screwdriver
- Small Torx screwdriver
- External storage device (such as an external hard drive or a USB flash drive) for data backup
- Antistatic wrist strap (optional but recommended to prevent static electricity)
- Clean, static-free workspace
When selecting a new hard disk drive, ensure that it’s compatible with your MacBook Pro 3 1. Check the specifications and requirements of your device to find the appropriate hard drive size (typically 2.5 inches) and storage capacity.
Having a small Phillips screwdriver and a small Torx screwdriver is crucial for disassembling and reassembling your MacBook Pro. These screwdrivers will be needed to remove the screws and open up your device.
Prior to beginning the installation process, it’s essential to back up your data to prevent any loss during the hard drive installation. Use an external storage device, such as an external hard drive or a USB flash drive, to store your important files, documents, photos, and any other data you wish to preserve.
Wearing an antistatic wrist strap is optional but highly recommended. It helps to prevent any static electricity buildup, which could potentially damage sensitive electronic components of your MacBook Pro.
Lastly, make sure to set up a clean and static-free workspace. This will minimize the risk of dust or debris entering your device during the installation process. Find a clear and stable surface to work on, away from any liquids or potential hazards.
Now that you have all the necessary tools and materials ready, it’s time to move on to the next step: backing up your data. Don’t skip this important step to ensure the safety of your files and documents.
Step 2: Back Up Your Data
Before proceeding with the installation of a new hard disk drive, it’s crucial to back up all of your important data. This step is essential to prevent any potential loss or damage to your files during the installation process. Follow these steps to back up your data:
- Connect an external storage device, such as an external hard drive or a USB flash drive, to your MacBook Pro.
- Open the Finder application on your MacBook Pro.
- In the Finder window, locate and select the files, documents, photos, and other data that you want to back up. You can select multiple files and folders by holding down the “Command” key and clicking on each item.
- Once you’ve selected all the files and folders you want to back up, right-click on any of the selected items and choose “Copy” from the context menu.
- Navigate to the external storage device connected to your MacBook Pro and right-click in an empty area of the device’s window. Select “Paste” from the context menu to copy the selected files and folders to the external storage device.
- Wait for the copying process to complete. The time it takes will depend on the size and number of files being backed up.
- Once the copying process is finished, verify that all the files and folders have been successfully copied to the external storage device. You can do this by navigating through the device’s file directory and checking the contents.
- Safely eject the external storage device from your MacBook Pro by right-clicking on its icon and selecting “Eject” from the context menu. Alternatively, you can drag the device’s icon to the trash bin, and it will change to an eject symbol.
It’s crucial to double-check that you have backed up all the necessary data before proceeding further. This step will give you peace of mind, knowing that your files are safely stored and can be easily restored after the installation process.
With your data successfully backed up, you can now proceed to the next step: powering off your MacBook Pro. Ensuring your device is powered off will prevent any accidents or damage during the subsequent steps of the installation process.
Step 3: Power Off Your MacBook Pro
Before you begin working on your MacBook Pro, it is crucial to power off the device. This step ensures your safety and prevents any accidental damage during the installation process. Follow these simple steps to power off your MacBook Pro:
- Save any ongoing work and close all open applications on your MacBook Pro.
- Click on the Apple menu located at the top left corner of the screen.
- A drop-down menu will appear. Select the “Shut Down” option.
- A confirmation window will appear, asking if you want to shut down your MacBook Pro. Click on the “Shut Down” button to confirm.
- Wait patiently while your MacBook Pro shuts down. You will notice the screen turning off, and the device will become silent.
- Ensure that the device is completely powered off by checking that there are no lights or sounds coming from your MacBook Pro.
By following these steps, you can safely power off your MacBook Pro and proceed to the next steps of the installation process. It’s important to note that you should never attempt to perform any hardware modifications or installations while your device is powered on. Doing so can cause serious damage to your MacBook Pro and compromise your safety.
Once you have confirmed that your MacBook Pro is powered off, you’re ready to move on to the next step: removing the bottom case. This step will grant you access to the internal components of your MacBook Pro, making it possible to install the new hard disk drive.
Step 4: Remove the Bottom Case
With your MacBook Pro powered off, it’s time to remove the bottom case to gain access to the internal components. Follow these simple steps to remove the bottom case:
- Place your MacBook Pro on a soft, static-free surface to prevent any scratches or static electricity damage.
- Locate the ten screws that secure the bottom case of your MacBook Pro. These screws are evenly distributed around the edges of the device.
- Using a small Phillips screwdriver, carefully unscrew and remove all ten screws from the bottom case. Place the screws in a safe location to prevent them from getting lost.
- Once all the screws are removed, gently slide the bottom case away from the top case of the MacBook Pro.
- Be cautious when removing the bottom case, as it may still be attached to the device due to the connectors for the battery indicator light and the trackpad.
- To disconnect the battery indicator light connector, gently lift the connector using a plastic spudger or a pair of tweezers.
- Next, locate the trackpad ribbon cable connector and carefully disconnect it by flipping up the locking bar with a plastic spudger. Once unlocked, gently pull the ribbon cable out of its socket.
- With both connectors disconnected, you can now fully remove the bottom case from your MacBook Pro.
Ensure that you handle the bottom case with care to avoid any unnecessary damage to the delicate internal components. It’s recommended to store the screws in a safe place or use a magnetic mat to keep track of them for easy reassembly later.
By following these steps, you have successfully removed the bottom case of your MacBook Pro. You now have access to the internal components, allowing you to proceed to the next steps of the installation process. In the following steps, we’ll guide you through locating the hard drive slot and removing the old hard drive (if applicable).
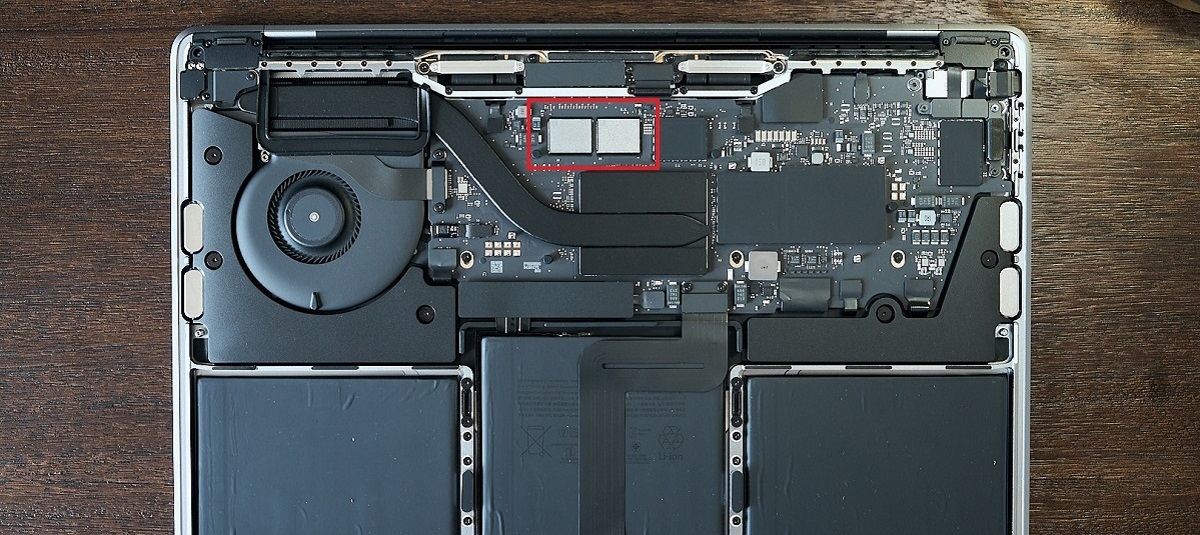
Step 5: Locate the Hard Drive Slot
Now that you have removed the bottom case of your MacBook Pro, it’s time to locate the hard drive slot where the new hard disk drive will be installed. Follow these steps to locate the hard drive slot:
- Locate the area in your MacBook Pro where the hard drive is typically located. In most models, the hard drive slot is located towards the center or one side of the device.
- Look for a rectangular-shaped opening or slot where the hard drive should be inserted. You may also see connectors or cables leading to this slot.
- Take note of any screws or brackets around the hard drive slot that might need to be removed to access the slot. These screws and brackets are typically used to secure the hard drive in place.
- If you’re unsure about the exact location of the hard drive slot, you can consult the user manual or search for specific instructions for your MacBook Pro model online. The Apple Support website or forums can be a helpful resource for finding detailed information about your specific device.
Locating the hard drive slot is an important step as it will guide you when removing the old hard drive (if applicable) and installing the new one. Understanding the layout and components of your MacBook Pro will make the installation process smoother and more efficient.
Once you have located the hard drive slot, you’re ready to proceed to the next step: removing the old hard drive (if applicable). If your MacBook Pro doesn’t have an existing hard drive or you’re installing a second hard drive, you can skip this step and move directly to preparing the new hard disk drive.
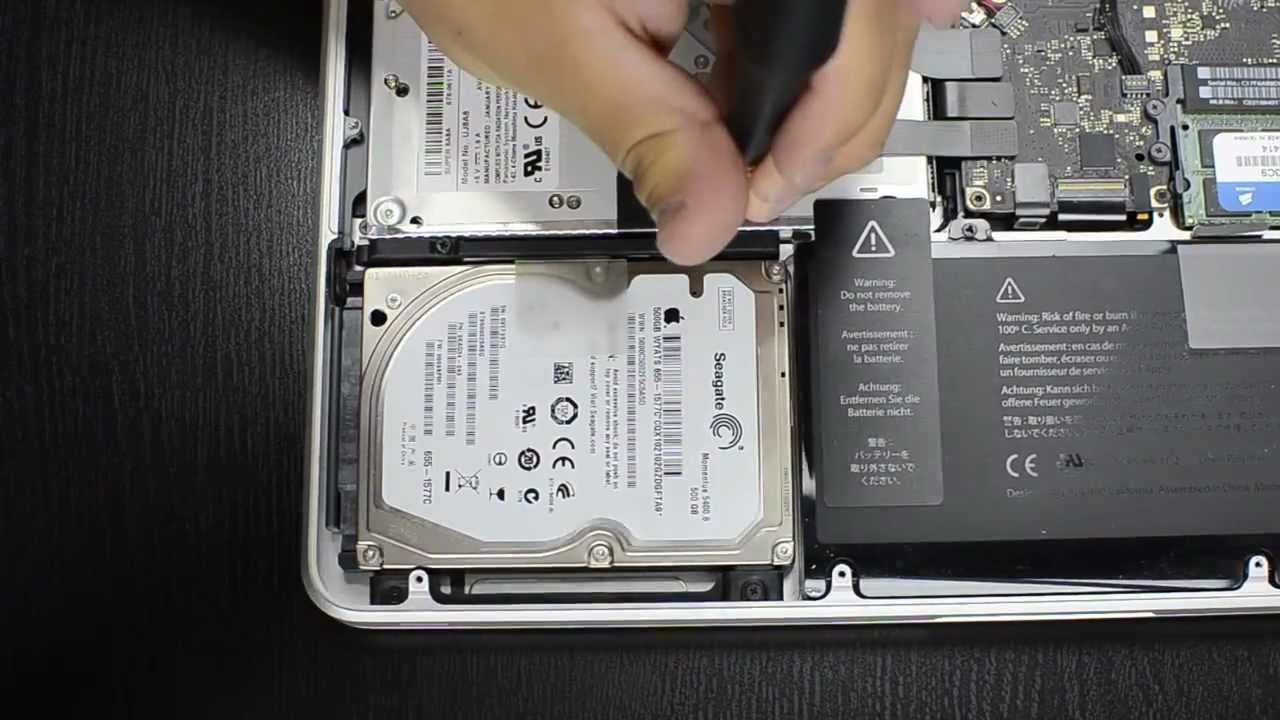
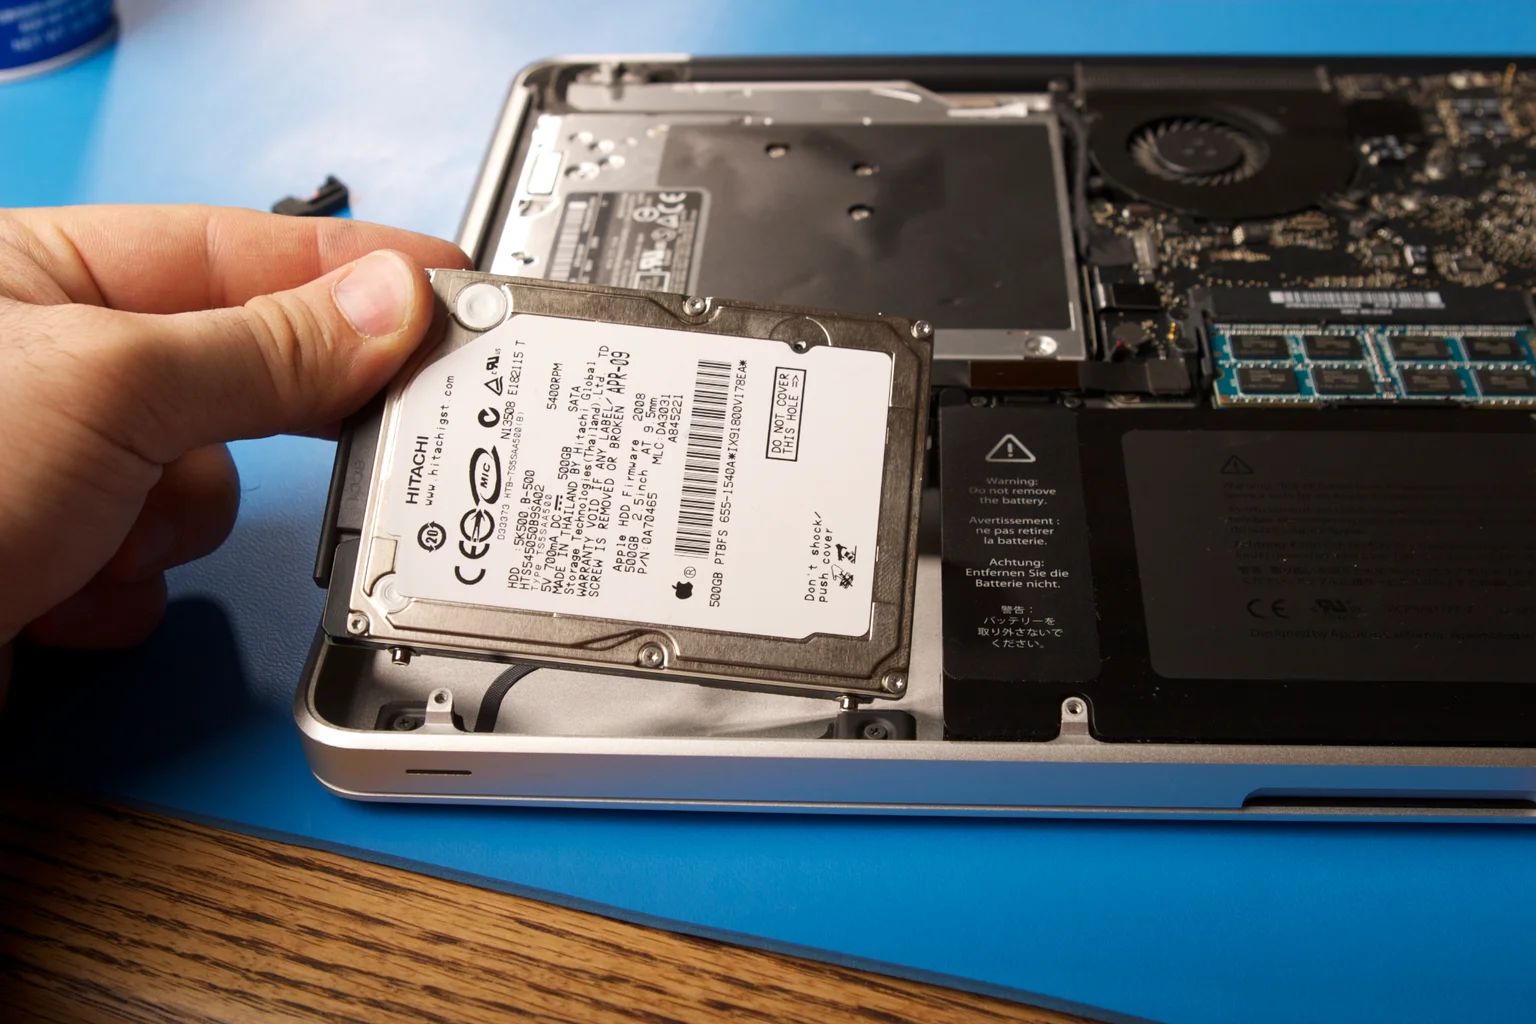
Step 6: Remove the Old Hard Drive (if applicable)
If your MacBook Pro already has an existing hard drive that needs to be replaced or if you’re installing a second hard drive, you’ll need to remove the old hard drive. Follow these steps to remove the old hard drive:
- Locate the screws or brackets that are securing the old hard drive in place within the hard drive slot.
- Using a small Phillips screwdriver, carefully unscrew and remove any screws that are holding the old hard drive in place. Place the screws in a safe location for later use.
- If there are brackets securing the old hard drive, use a small Phillips screwdriver to remove them as well.
- Gently disconnect any cables or connectors attached to the old hard drive. These cables may include the SATA data cable and the power cable. Take note of the cable connections so that you can reconnect them to the new hard drive later.
- Once all the screws, brackets, and cables are disconnected, carefully slide the old hard drive out of the hard drive slot.
- Place the old hard drive in an anti-static bag or on an anti-static mat to protect it from static electricity while you continue with the installation process.
Removing the old hard drive is a crucial step in the installation process. Take your time and handle the old hard drive with care to prevent any damage to the device or yourself. Keeping the screws and brackets organized is important to ensure a smooth reassembly later.
If you’re installing a second hard drive, it’s important to understand the specific requirements and limitations of your MacBook Pro model. Some models may require additional hardware or adapters to accommodate a second hard drive, so make sure to research and consult the user manual or online resources specific to your device.
With the old hard drive successfully removed (if applicable), you’re now ready to move on to the next step: preparing the new hard disk drive for installation.
Step 7: Prepare the New Hard Disk Drive
Now that you have removed the old hard drive (if applicable), it’s time to prepare the new hard disk drive for installation. Follow these steps to prepare the new hard drive:
- Take the new hard disk drive out of its packaging and handle it with care. Avoid touching the connectors or the circuit board to prevent any damage from static electricity or fingerprints.
- If necessary, remove any protective covers or labels from the new hard drive. These covers are typically placed on the connectors or the bottom of the drive.
- Inspect the connectors on the new hard drive and compare them to the connectors in the hard drive slot of your MacBook Pro. Ensure that they are the same type and size.
- If your new hard drive has any jumper pins, consult the documentation or manufacturer’s instructions to determine the appropriate jumper settings. These settings may be required for specific configurations.
- Take note of the orientation of the connectors on the new hard drive. Identify the SATA data connector and the power connector. These connectors need to align with the corresponding cables in the MacBook Pro.
- If necessary, attach any mounting brackets or adapters provided with the new hard drive. These accessories may be needed to properly secure the drive in the hard drive slot.
- If you’re replacing the existing hard drive, remove any mounting screws or brackets from the old drive and transfer them to the new drive.
Preparing the new hard disk drive is an important step to ensure a successful installation. It’s crucial to handle the new drive with care, protect it from static electricity, and make any necessary adjustments or attachments before inserting it into the MacBook Pro.
Take your time to familiarize yourself with the new hard drive, its connectors, and any additional requirements. This will help ensure a smooth installation process and the proper functioning of the drive in your MacBook Pro.
With the new hard disk drive properly prepared, you’re now ready to move on to the next step: installing the new hard drive into your MacBook Pro.
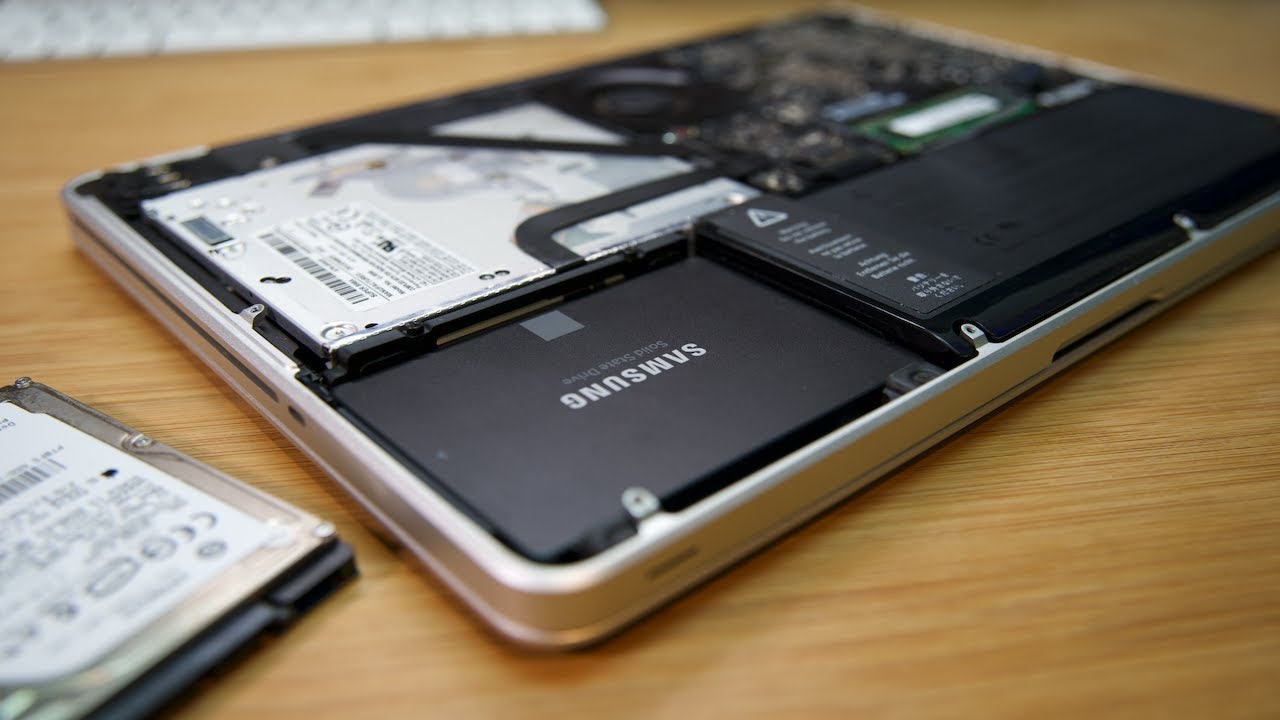
Step 8: Install the New Hard Drive
With the new hard disk drive prepared, it’s time to install it into your MacBook Pro. Follow these steps to install the new hard drive:
- Carefully align the connectors on the new hard drive with the corresponding cables in the hard drive slot of your MacBook Pro. The SATA data connector and the power connector should fit snugly into their respective slots.
- Gently slide the new hard drive into the hard drive slot in the same orientation as the previous drive or according to the instructions provided by the manufacturer.
- If necessary, use the mounting screws or brackets that you transferred from the old hard drive, or any included accessories, to secure the new hard drive in place.
- Ensure that the new hard drive is securely fastened and properly aligned within the hard drive slot.
- If you removed any brackets or cables during the removal of the old hard drive, reconnect them to the new drive accordingly. Pay attention to the correct alignment and connection of the SATA data cable and the power cable.
During the installation process, it’s important to handle the new hard drive with care and ensure the proper alignment and connection of the cables. Take your time to align the connectors correctly and ensure a secure fit within the hard drive slot.
With the new hard drive successfully installed, you’re now ready to move on to the next step: reassembling your MacBook Pro.
Step 9: Reassemble Your MacBook Pro
Now that you have installed the new hard drive, it’s time to reassemble your MacBook Pro. Follow these steps to carefully put all the components back together:
- Attach the bottom case to your MacBook Pro by aligning it with the edges and gently sliding it back into place.
- Ensure that the bottom case is properly aligned with the top case and that all the screw holes line up.
- Using a small Phillips screwdriver, reinsert and tighten the ten screws that hold the bottom case in place. Be careful not to overtighten the screws.
- Reconnect the battery indicator light connector and the trackpad ribbon cable connector to their respective slots. Ensure that they are properly inserted and secured.
- Once all the connectors and cables are reattached, double-check that everything is securely connected and properly seated.
As you reassemble your MacBook Pro, pay attention to the alignment of the bottom case and the connectors. Take care to properly seat the connectors and ensure a secure connection to avoid any operational issues.
Make sure to tighten the screws evenly and avoid overtightening them, as this can cause damage to the case or the underlying components.
With the reassembly complete, you’re now ready to move on to the final step: powering on your MacBook Pro and formatting the new hard drive.
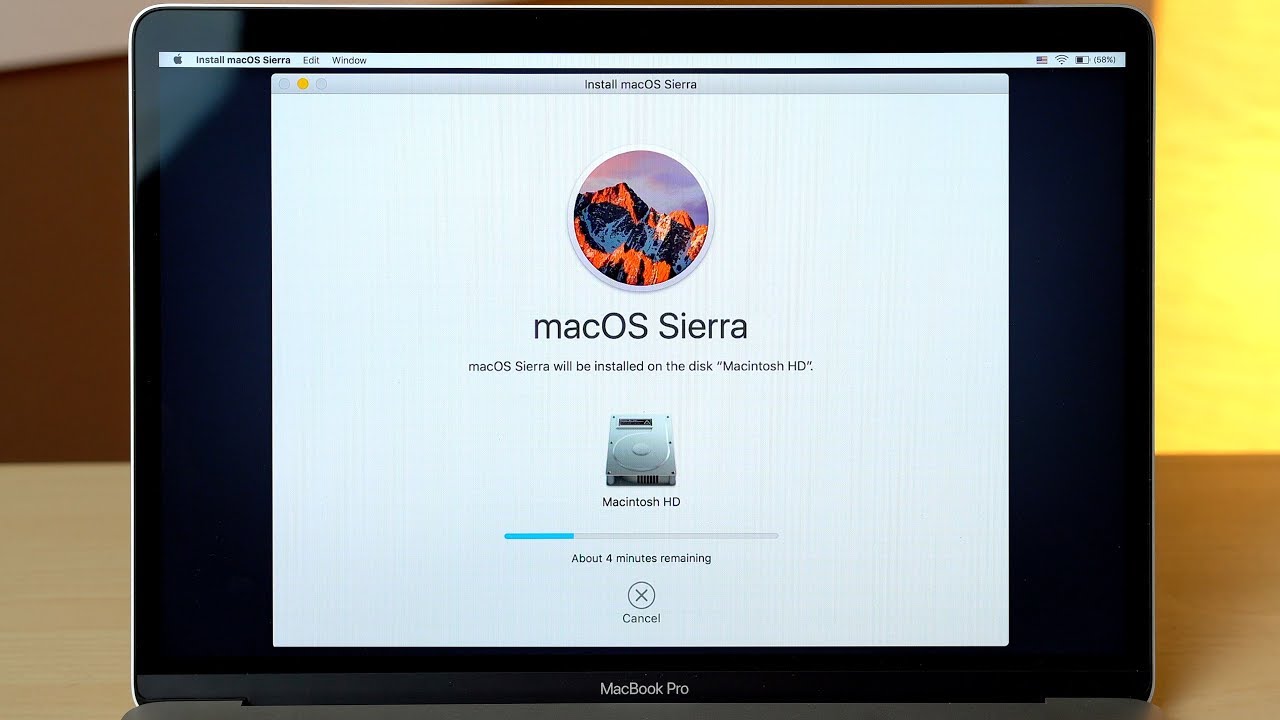
Step 10: Power On and Format the New Hard Drive
With your MacBook Pro reassembled, it’s time to power it on and format the new hard drive. Follow these steps to complete the installation process:
- Connect your MacBook Pro to a power source using the power adapter.
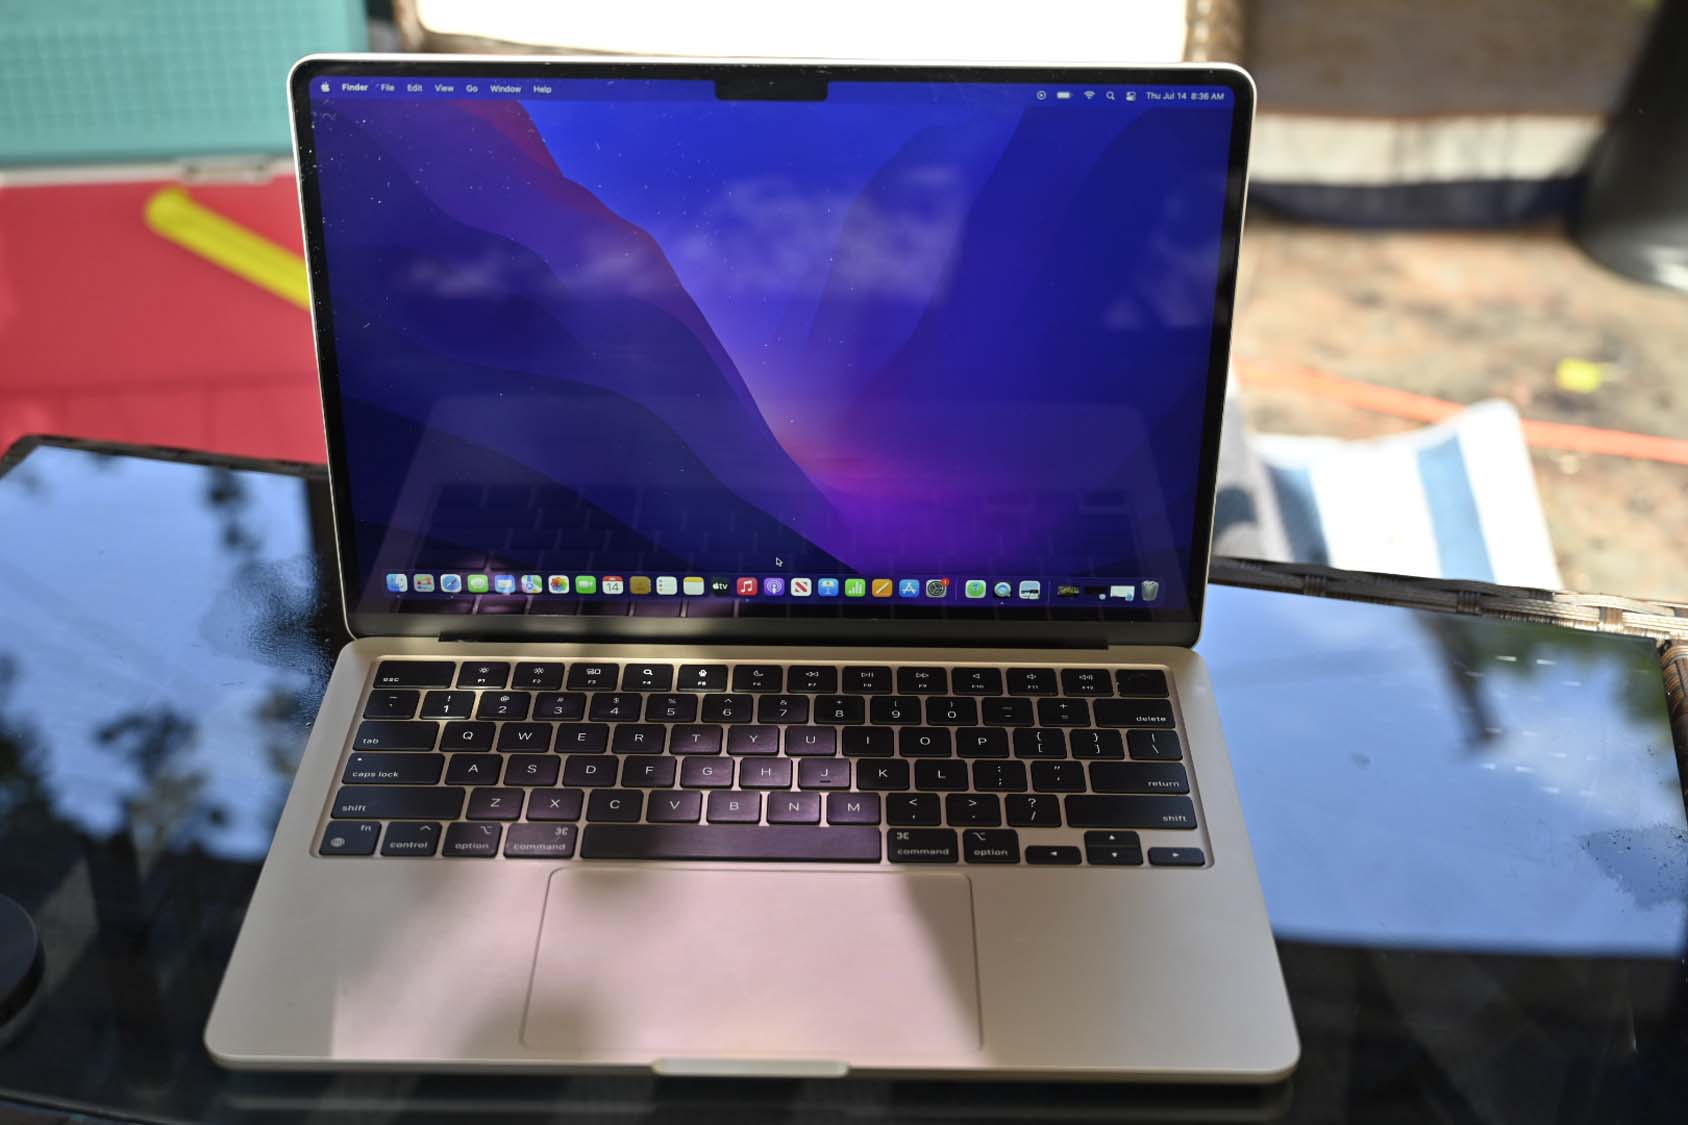
- Press the power button to turn on your MacBook Pro. You should see the Apple logo appear on the screen.
- Wait for your MacBook Pro to boot up. This may take a few moments as it recognizes the new hard drive.
- Once your MacBook Pro has finished booting up, go to the “Utilities” folder within the “Applications” folder.
- Open the “Disk Utility” application.
- In the “Disk Utility” window, you should see the new hard drive listed on the left side. Select it.
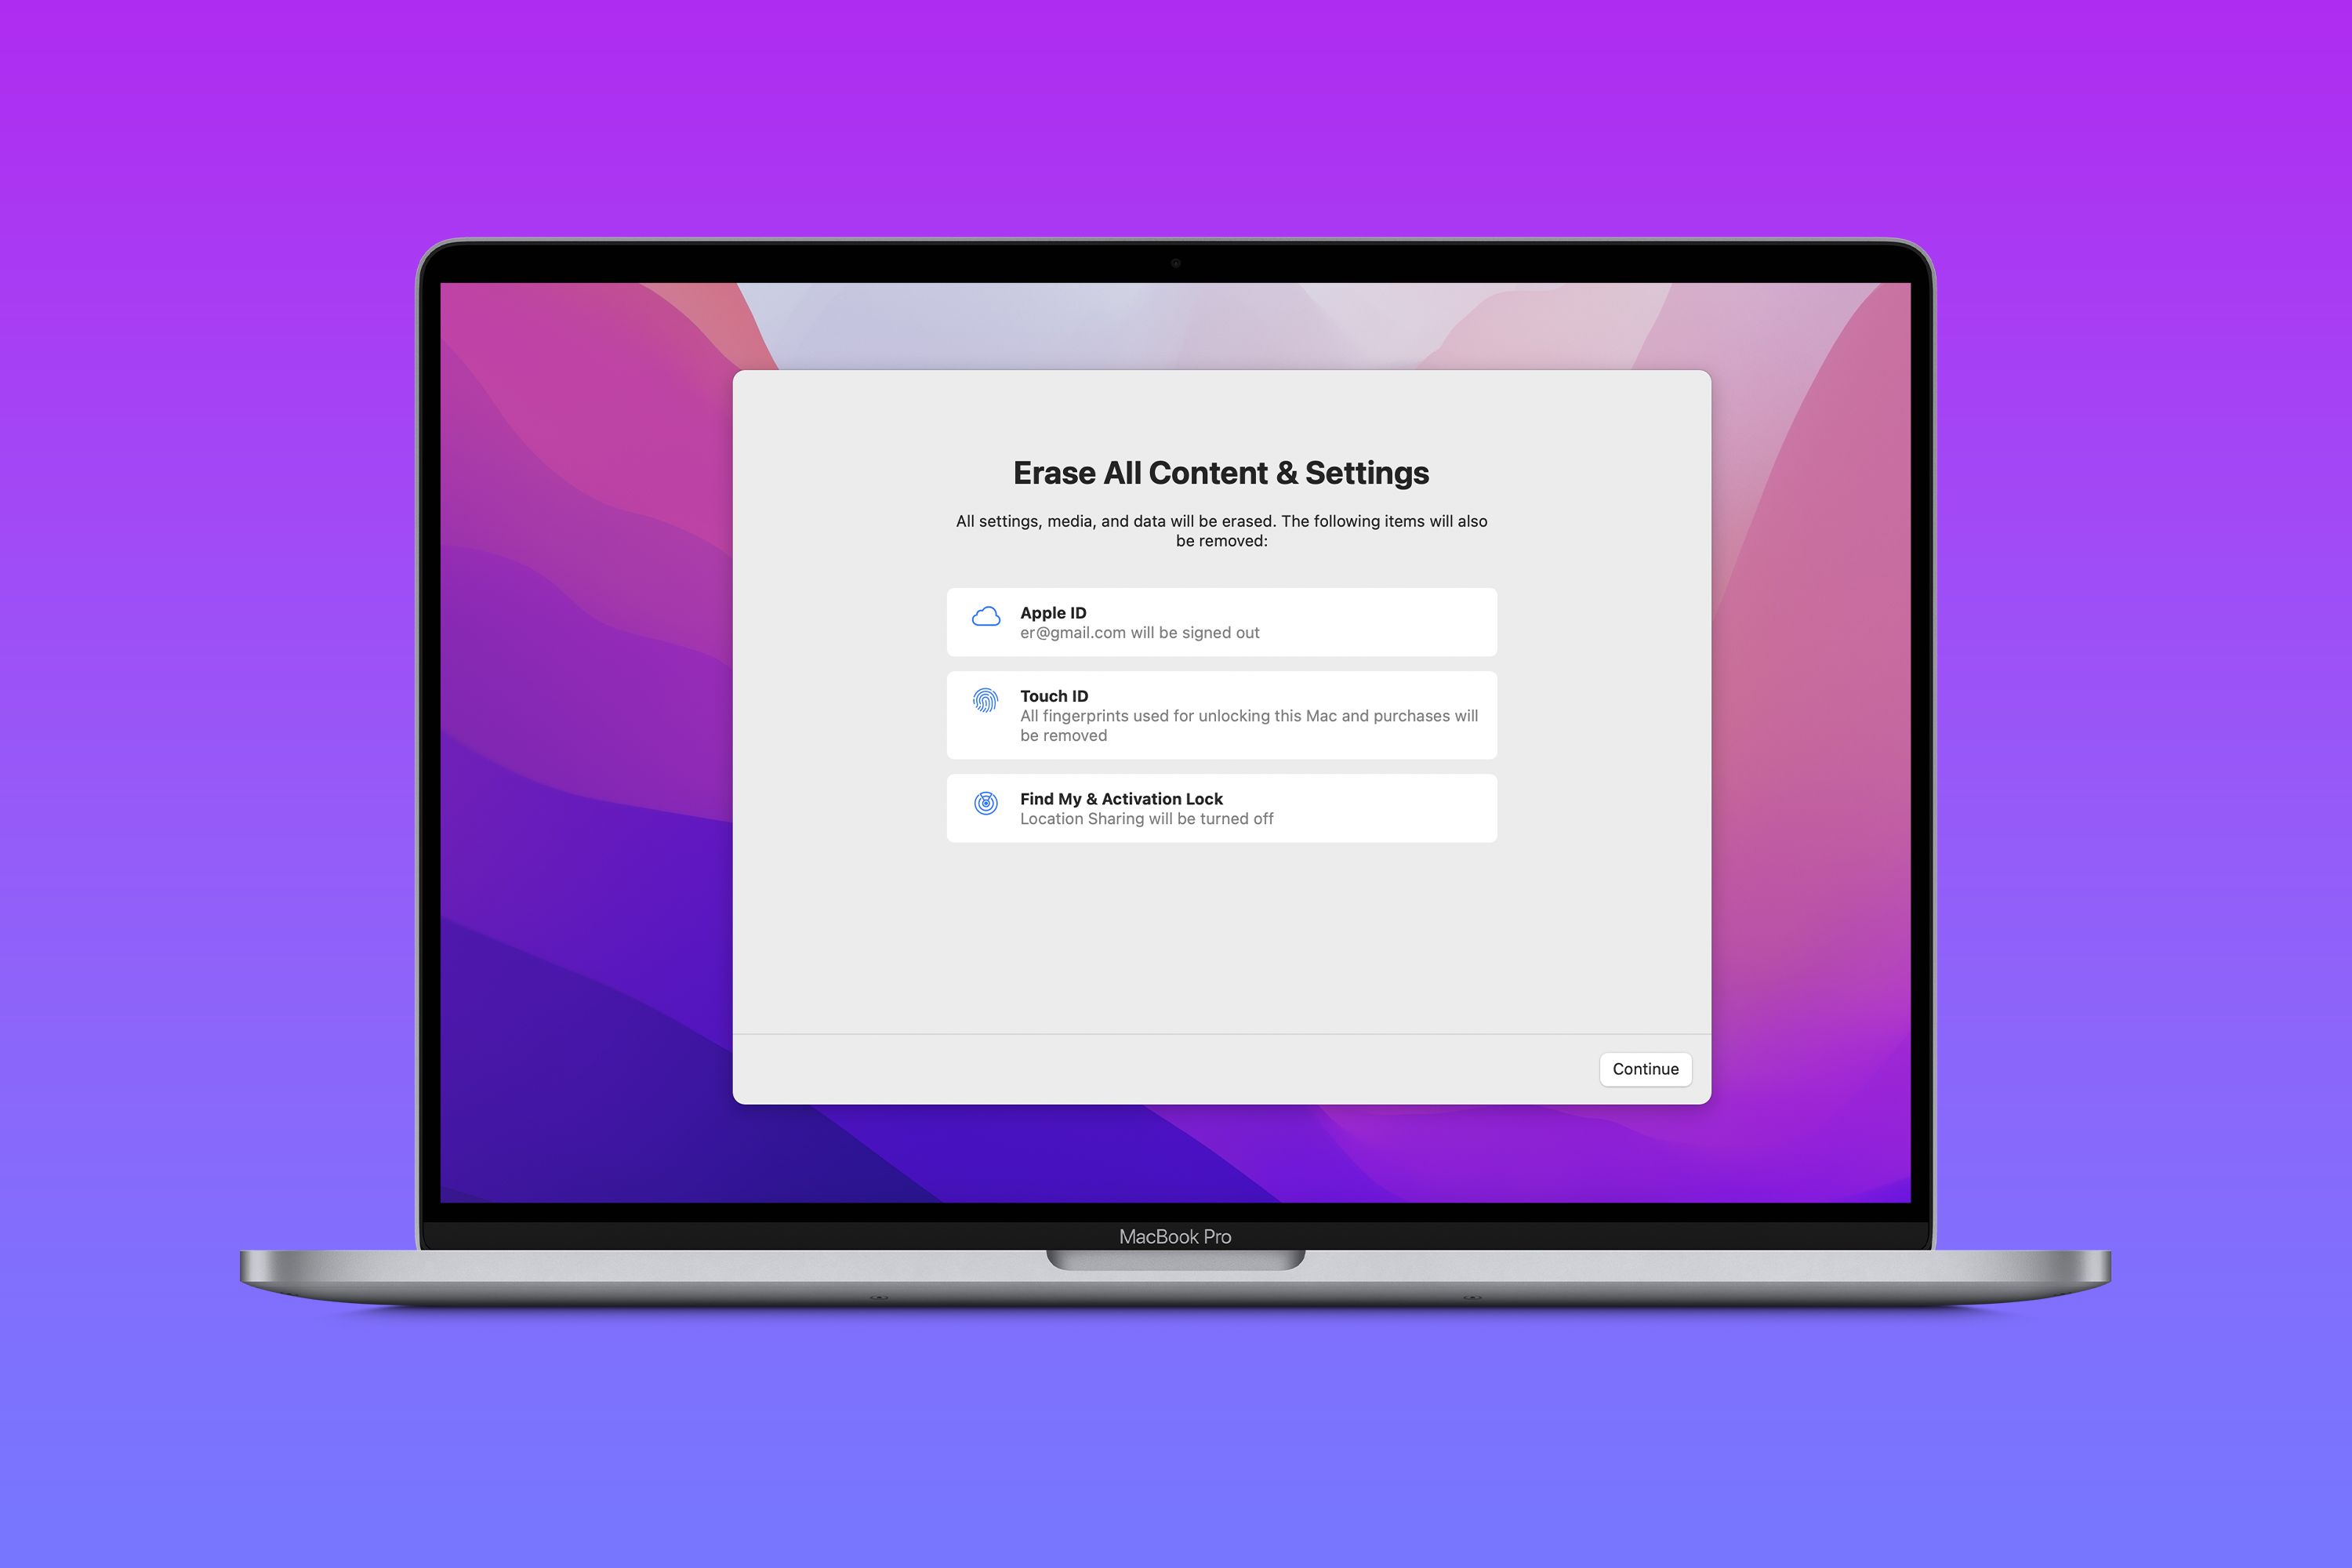
- Click on the “Erase” tab and choose a format for the new hard drive. Typically, the recommended format is “Mac OS Extended (Journaled)”.
- Give the new hard drive a name and click on the “Erase” button.
- Wait for the formatting process to complete. This may take some time depending on the size of the new hard drive.
- Once the formatting is finished, close the “Disk Utility” application.
Formatting the new hard drive is necessary to prepare it for use with your MacBook Pro. By erasing and formatting the drive, you’ll be able to install the operating system and start using it to store your files and data.
After completing the formatting process, you can proceed with installing your preferred operating system. This can be done by following the on-screen instructions or using an installation disk or USB drive.
Congratulations! You have successfully installed and formatted the new hard drive in your MacBook Pro. It’s now ready for use, providing you with enhanced storage capacity and improved performance.
Conclusion
Congratulations on successfully installing a new hard disk drive into your MacBook Pro 3 1! By following the step-by-step guide, you have expanded the storage capacity of your device and potentially improved its overall performance.
We started by gathering all the necessary tools and materials, ensuring you had everything needed for a smooth installation process. Backing up your data was emphasized to prevent any loss or damage during the installation. You then powered off your MacBook Pro, removed the bottom case, located the hard drive slot, and removed the old hard drive (if applicable).
Next, you prepared the new hard disk drive, making sure it was ready for installation. Aligning the connectors and securing the drive within the slot were key considerations. The reassembly process involved carefully attaching the bottom case, tightening the screws, and reconnecting the necessary cables and connectors.
Finally, you powered on your MacBook Pro, formatted the new hard drive, and prepared it for use. By following the steps, you ensured the compatibility and functionality of the drive, allowing you to enjoy the enhanced storage and performance capabilities.
Remember, every installation process may have some unique considerations based on your MacBook Pro model and the specific hard drive you choose. It’s always essential to consult the user manual or seek additional resources to ensure a successful installation.
We hope this guide has been helpful and has provided you with the confidence to install a new hard disk drive into your MacBook Pro. Enjoy the increased storage space and improved performance of your device!