Introduction
Welcome to the world of multimedia and gaming! If you’re someone who enjoys playing visually stunning games or working with graphics-intensive applications, you may already be familiar with the concept of Dedicated Video RAM (VRAM). Simply put, VRAM is a dedicated portion of your computer’s memory specifically allocated to handle graphics-related tasks.
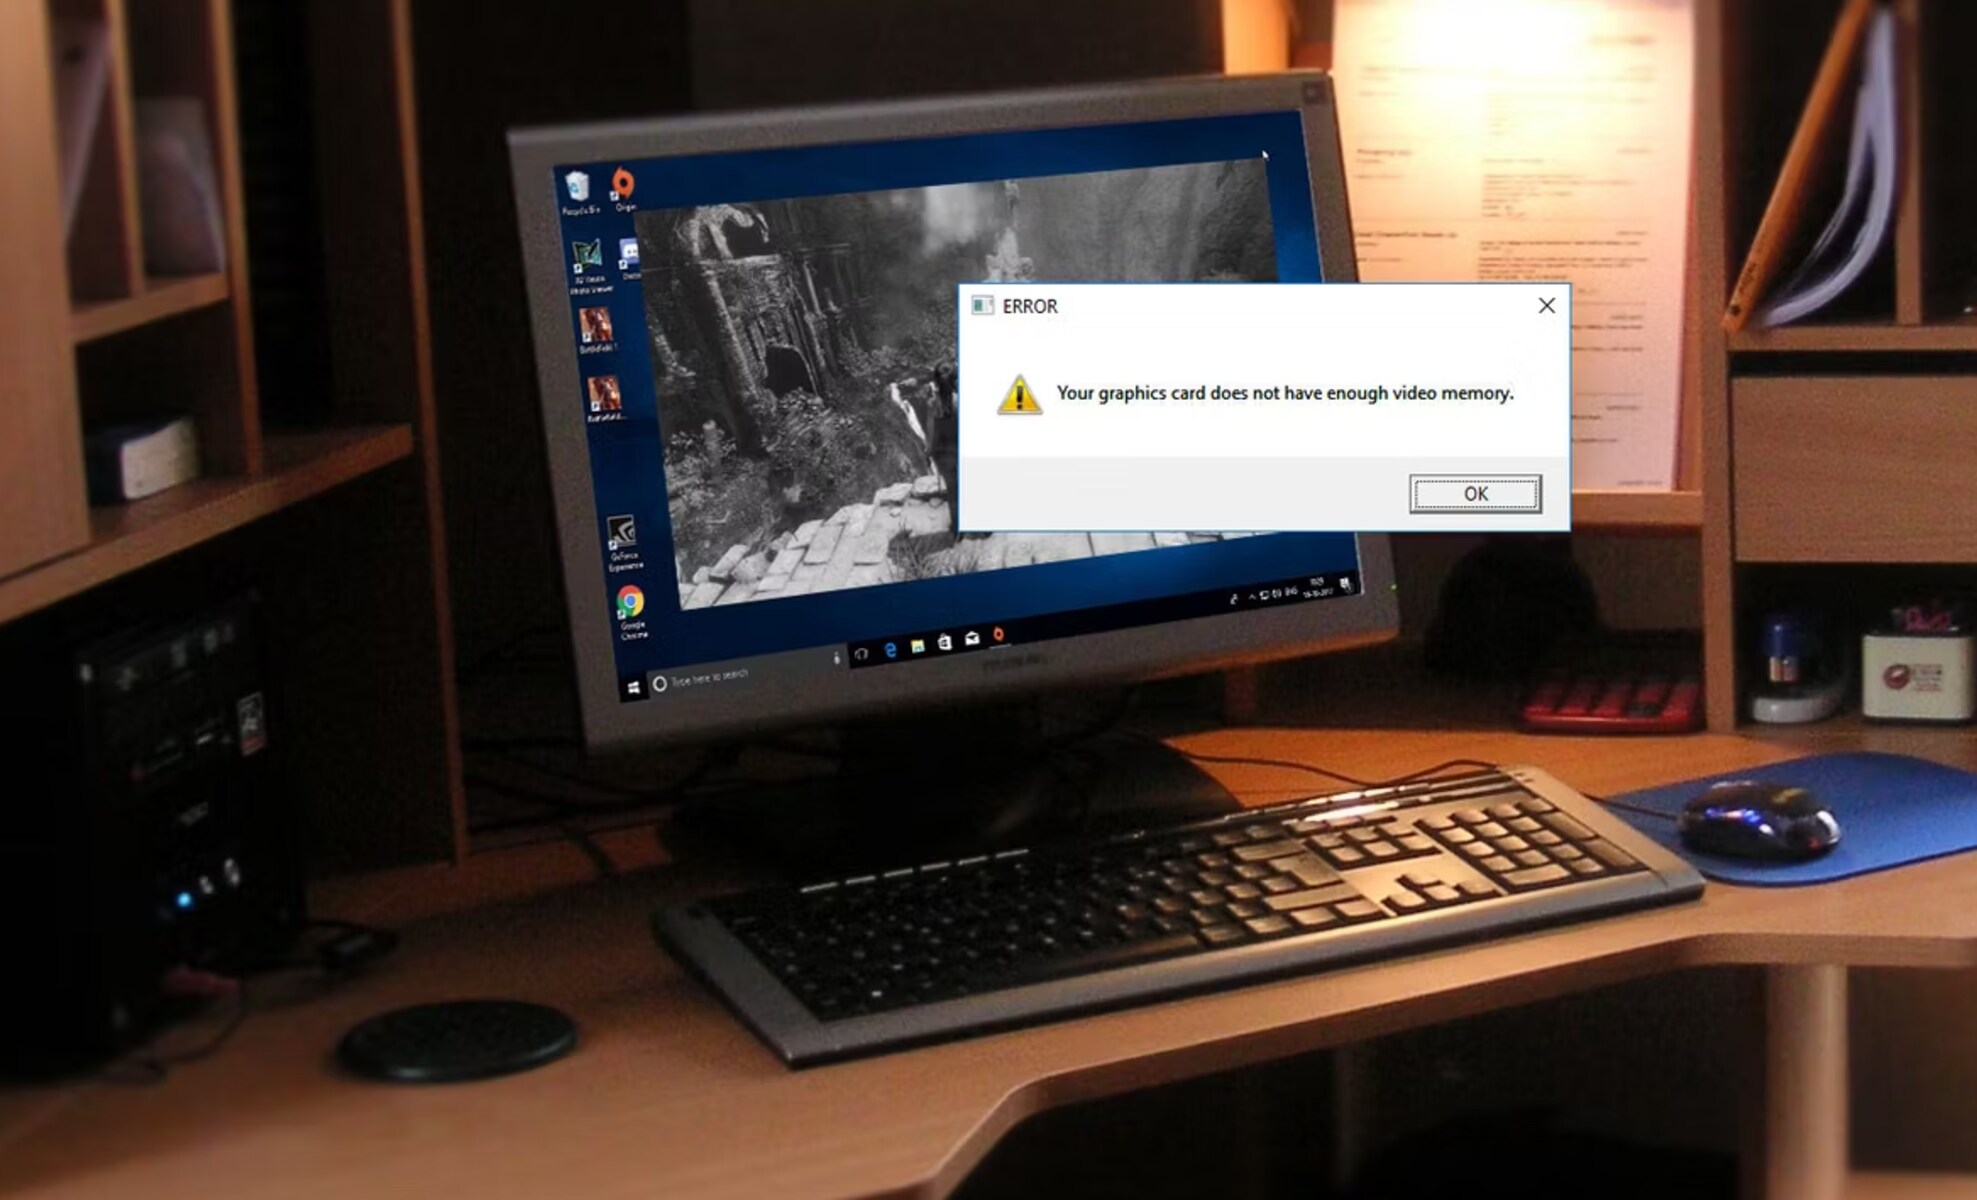
Why is VRAM important, you might ask? Well, the amount of VRAM available directly affects the performance and visual quality of your computer’s graphics. Inadequate VRAM can result in lagging gameplay, choppy video playback, and reduced image resolution. Therefore, if you’re looking to enhance your gaming or multimedia experience, increasing your Dedicated Video RAM is a crucial step.
In this article, we will guide you through the process of increasing your Dedicated Video RAM. Whether you’re using a Windows or a Mac system, we’ve got you covered. The good news is that with a few simple tweaks, you can optimize your VRAM settings and unleash the full potential of your graphics capabilities.
Before we dive into the methods of increasing Dedicated Video RAM, let’s take a moment to understand what it actually is and how it works.
Understanding Dedicated Video RAM
Dedicated Video RAM, often referred to as VRAM or GPU memory, is a specialized type of memory that is solely dedicated to handling the visual output on your computer. Unlike the Random Access Memory (RAM) that is used for general computing tasks, VRAM is specifically designed to store and process graphical data.
When you watch a video, play a game, or work with graphic-intensive applications, the dedicated video memory is responsible for rendering and displaying the visuals on your screen. The more VRAM your system has, the smoother and more detailed the graphics will appear.
VRAM operates at a much higher speed compared to regular system memory, allowing it to quickly process and deliver the visual information to your display. It acts as a buffer that holds the graphical data before sending it to the GPU (Graphics Processing Unit) for rendering.
The size of your Dedicated Video RAM is determined by the graphics card installed in your system. It can range anywhere from 2GB to 16GB or even more in high-end gaming rigs or professional workstations. Higher VRAM capacity is especially important for running graphically demanding games or software that requires complex 3D rendering.
It’s worth noting that Dedicated Video RAM is different from shared system memory, which is a portion of the main RAM that is allocated for video processing when a dedicated graphics card is not present. Shared memory can be slower and less efficient compared to dedicated VRAM, as it has to perform multiple purposes simultaneously.
Understanding the concept of Dedicated Video RAM is essential when it comes to optimizing your computer’s graphics performance. In the following sections, we will explore different methods to check and adjust the allocation of Dedicated Video RAM on both Windows and Mac systems, enabling you to get the most out of your hardware.
Checking Your Current Dedicated Video RAM
Before you can make any adjustments to your Dedicated Video RAM, it’s important to know how much VRAM is currently allocated on your system. This information will help you determine whether an increase is necessary and guide you in making the appropriate changes.
On Windows:
To check your Dedicated Video RAM on a Windows system, you can follow these steps:
- Press the “Windows” key and type “Display Settings” in the search bar. Click on the matching result.
- In the Display Settings window, scroll down and click on “Advanced display settings”.
- Under the Advanced display settings, click on “Display adapter properties” for the display you want to check.
- In the Adapter tab of the Properties window, you will find details about your graphics card, including the total amount of Dedicated Video RAM (VRAM) allocated to it.
On Mac:
To check your Dedicated Video RAM on a Mac system, you can follow these steps:
- Click on the Apple menu in the top-left corner of your screen and select “About This Mac”.
- In the pop-up window, click on “System Report”.
- In the System Report, click on “Graphics/Displays” under the Hardware section.
- Here, you will find detailed information about your graphics card, including the total amount of VRAM allocated to it.
By following these steps, you can easily check your current Dedicated Video RAM allocation. This knowledge will be useful when determining whether to increase your VRAM and how much additional memory you may need. With this information in hand, you can proceed to the next sections to learn how to adjust and increase your Dedicated Video RAM on both Windows and Mac systems.
Adjusting Dedicated Video RAM in BIOS
If you’re using a desktop computer, you can access the BIOS (Basic Input/Output System) settings to make adjustments to your Dedicated Video RAM allocation. However, please note that not all BIOS versions have this option, and it may vary depending on your hardware manufacturer. Here’s how you can give it a try:
- Start by restarting your computer and continuously tap the appropriate key (usually Esc, Del, F2, or F10) to access the BIOS during the startup process. Refer to your computer’s manual or the manufacturer’s website if you’re unsure about the specific key.
- Once you’re in the BIOS settings, navigate to the section related to your system’s graphics or integrated graphics.
- Look for an option related to the “Memory” or “Video Configuration”. Here, you may find the option to adjust the amount of Dedicated Video RAM. Keep in mind that the available options and terminology may vary depending on your system.
- Depending on your preferences and the specific BIOS settings, you may be able to choose a specific amount of VRAM or set it to “Auto” to let the system dynamically allocate the memory.
- Save the changes and exit the BIOS settings. Your computer will reboot with the new Dedicated Video RAM allocation.
It’s important to note that not all BIOS versions have the flexibility to adjust Dedicated Video RAM. If you don’t find such an option in your BIOS settings, don’t worry. There are alternative methods to increase Dedicated Video RAM in Windows and Mac systems, which we will cover in the following sections.
Now that you have an understanding of how to potentially adjust Dedicated Video RAM in the BIOS settings, let’s explore how to increase VRAM on Windows and Mac systems through other means.
Increasing Dedicated Video RAM in Windows
If you’re using a Windows system, there are methods you can employ to increase your Dedicated Video RAM allocation. Keep in mind that these methods may vary depending on your specific hardware and graphics card. Here are a few steps you can try:
Method 1: Adjusting VRAM in the BIOS settings (if available)
As mentioned earlier, accessing the BIOS settings and adjusting the Dedicated Video RAM allocation can be an effective way to increase VRAM. Follow the steps mentioned in the previous section ‘Adjusting Dedicated Video RAM in BIOS’ to try this method.
Method 2: Utilizing system settings (Windows 10 and newer versions)
- Right-click on the desktop and select “Display settings” from the dropdown menu.
- In the Display settings window, scroll down and click on “Graphics settings” link under the “Advanced display settings” section.
- Under the Graphics settings window, you will see two options: “Classic app” and “Universal app”. Click on “Universal app”.
- Click on the “Browse” button and navigate to the application or game executable file for which you want to increase the Dedicated Video RAM.
- Once the application is added, click on the application’s entry in the list and then click on “Options”.
- In the Options menu, you can choose the “High performance” option, which will allocate more VRAM to the selected application.
- Click on “Save” to apply the changes and exit the Graphics settings window.
Method 3: Upgrading your graphics card
If the above methods don’t yield the desired results, it might be worth considering upgrading your graphics card. A graphics card with a higher VRAM capacity can significantly enhance your system’s graphics performance. However, upgrading your graphics card requires technical expertise and compatibility considerations, so it’s advisable to seek professional help if necessary.
By employing these methods, you can increase your Dedicated Video RAM in Windows and optimize your system’s performance for graphics-intensive tasks. Now, let’s move on to the next section to discover how to increase Dedicated Video RAM in Mac systems.
Increasing Dedicated Video RAM in Mac
Mac systems have a different approach when it comes to adjusting Dedicated Video RAM. While you may not have direct control over the VRAM allocation, there are still ways to optimize the graphics performance. Here are a few methods you can try:
Method 1: Adjusting graphics performance settings
- Click on the Apple menu in the top-left corner of your screen and select “System Preferences”.
- In the System Preferences window, click on “Energy Saver”.
- Under the Energy Saver settings, navigate to the “Graphics” tab.
- Here, you may find options to switch between “Higher performance” and “Better battery life” modes. Selecting the “Higher performance” mode can optimize your system for graphics-intensive tasks and potentially allocate more VRAM as needed.
Method 2: Utilizing Third-party Tools
There are some third-party applications available that can help optimize your Mac’s graphics performance. These tools can allocate more system resources, including VRAM, to enhance the visuals and overall performance. Be sure to research and choose a reputable tool that suits your needs and follows best practices.
Method 3: Upgrading your Mac
If you require a substantial increase in Dedicated Video RAM, you may need to consider upgrading your Mac. Some Mac models allow for the upgrade of certain hardware components, such as the graphics card. Research your specific Mac model to determine if it supports graphics card upgrades, and consult with an authorized service provider for assistance.
It’s important to note that Mac systems dynamically allocate VRAM based on the requirements of the running applications. This means that the system will allocate more VRAM when needed and scale it back when not in use. While you may not have direct control over the allocation, optimizing your system’s settings can help enhance the graphics performance.
With these methods in mind, you can make the most out of your Mac’s graphics capabilities and improve the overall visual experience. In the next section, we’ll provide a brief recap of the methods discussed and conclude our guide to increasing Dedicated Video RAM.
Conclusion
Dedicated Video RAM plays a crucial role in ensuring optimal graphics performance on your computer. Increasing the allocation of Dedicated Video RAM can enhance your gaming experience, improve multimedia playback, and boost the performance of graphics-intensive applications.
In this guide, we have explored various methods to check and adjust your Dedicated Video RAM on both Windows and Mac systems. For Windows users, options include adjusting settings in the BIOS, utilizing system settings, or upgrading the graphics card. Mac users, on the other hand, can optimize graphics performance through settings adjustments or third-party tools, and may also consider upgrading their hardware if necessary.
It’s important to note that when increasing Dedicated Video RAM, it’s essential to monitor your system’s compatibility and performance requirements. While allocating more VRAM can potentially improve graphics performance, it’s equally important to ensure that your hardware can handle the increased load.
Remember that increasing Dedicated Video RAM is just one aspect of optimizing your computer’s graphics performance. Keeping your graphics drivers up to date, managing system resources, and maintaining proper cooling are all factors that contribute to a smooth and reliable visual experience.
By following the methods outlined in this guide and considering the specific requirements of your system, you can effectively increase your Dedicated Video RAM and maximize the potential of your graphics capabilities. Whether you’re a passionate gamer, a graphic designer, or simply someone who enjoys high-quality visuals, taking the time to optimize your Dedicated Video RAM allocation will undoubtedly enhance your computing experience.