Introduction
Welcome to the digital age, where communication and entertainment have transcended borders. One platform that has gained immense popularity among K-pop fans worldwide is Weverse. Developed by Big Hit Entertainment, the company behind global sensations like BTS and TXT, Weverse has become a virtual hub for fans to connect with their favorite artists and access exclusive content.
As an international fan, you might face a language barrier while navigating the Weverse platform. However, worry not! In this article, we will guide you on how to get English subtitles on Weverse, ensuring that you don’t miss out on any exciting updates, announcements, or interactions with your beloved artists.
With English subtitles, you’ll be able to understand and appreciate the content on Weverse, including videos, posts, and comments, enhancing your overall experience as a fan. Whether it’s watching behind-the-scenes footage, reading heartwarming messages from your favorite artists, or engaging in conversations with fellow fans, English subtitles will bridge the gap and make your Weverse journey even more enjoyable. So, let’s dive in and discover how you can access English subtitles on Weverse!
What is Weverse?
Weverse is a unique social platform designed to connect fans with their favorite K-pop artists. Created by Big Hit Entertainment, the company known for managing globally renowned groups like BTS and TXT, Weverse serves as a virtual community where fans can engage with artists and other fans from around the world.
With Weverse, you can access exclusive content, such as behind-the-scenes videos, photos, and updates directly from the artists themselves. It’s a one-stop destination for all things related to your favorite K-pop groups and singers.
One of the standout features of Weverse is the ability to interact with artists through comments and messages. Fans have the opportunity to leave comments on posts, ask questions, and even receive personalized replies from their idols. This level of direct engagement is a major draw for fans, as it allows for a more intimate and interactive experience.
Moreover, Weverse offers a sense of community and connection among fans. Through various discussion boards and chatrooms, fans can communicate with each other, share their love for their favorite artists, and form lasting friendships. Weverse has truly created a space where fans can come together to celebrate their shared passion for K-pop.
Initially launched as a fan community platform for Big Hit artists, Weverse has expanded to include artists from other prominent labels such as Pledis Entertainment, Source Music, and more. This expansion has further diversified the content and widened the fanbase, making Weverse even more inclusive and exciting for K-pop enthusiasts.
Overall, Weverse provides a vibrant and dynamic online environment for fans to connect with artists, engage in meaningful interactions, and stay updated on the latest happenings in the world of K-pop. With its user-friendly interface and plethora of features, Weverse has become a go-to platform for fans seeking a deeper connection with their favorite artists.
Why do you need English subtitles on Weverse?
English subtitles play a vital role in enhancing your experience on Weverse as an international fan. Here are a few reasons why you need English subtitles:
1. Understand the Content: Weverse provides a wide range of content, including videos, posts, and comments, from your favorite K-pop artists. With English subtitles, you can fully comprehend the messages conveyed in these materials. It allows you to engage with the content on a deeper level and appreciate the nuances in the artists’ communication.
2. Stay Updated: As a fan, staying up to date with the latest news and announcements from your favorite artists is crucial. English subtitles enable you to understand important updates, whether it’s about upcoming concerts, new releases, or special events. You won’t miss out on any exciting opportunities or important information.
3. Engage with Artists and Fellow Fans: Weverse promotes interaction between artists and fans. By having access to English subtitles, you can actively participate in conversations, leave comments, and ask questions, knowing that you understand what is being said. It helps you connect with your idols and fellow fans, fostering a sense of belonging and community.
4. Appreciate Behind-the-Scenes Footage: Weverse often shares exclusive behind-the-scenes videos of the artists at work, giving fans a glimpse into their lives behind the spotlight. English subtitles allow you to understand the conversations, interactions, and humorous moments captured in these videos. It enhances your appreciation for the efforts and personalities of your beloved artists.
5. Enjoy Fan Interactions: Weverse is a platform where artists occasionally interact directly with fans through posts and comments. English subtitles enable you to fully understand these interactions, ensuring that you can engage in meaningful conversations and fully appreciate the artists’ responses. It’s a memorable experience to have your questions answered or to receive a personalized message from your favorite artist.
Overall, English subtitles on Weverse are essential for international fans to fully enjoy and engage with the platform. It allows you to understand the content, stay informed, connect with artists and fellow fans, and immerse yourself in the exciting world of K-pop. So, let’s move on to the next section to learn how to get English subtitles on Weverse!
How to Get English Subtitles on Weverse?
Getting English subtitles on Weverse is a straightforward process. Follow these steps to enable English subtitles and enhance your experience on the platform:
Step 1: Download and Install Weverse App
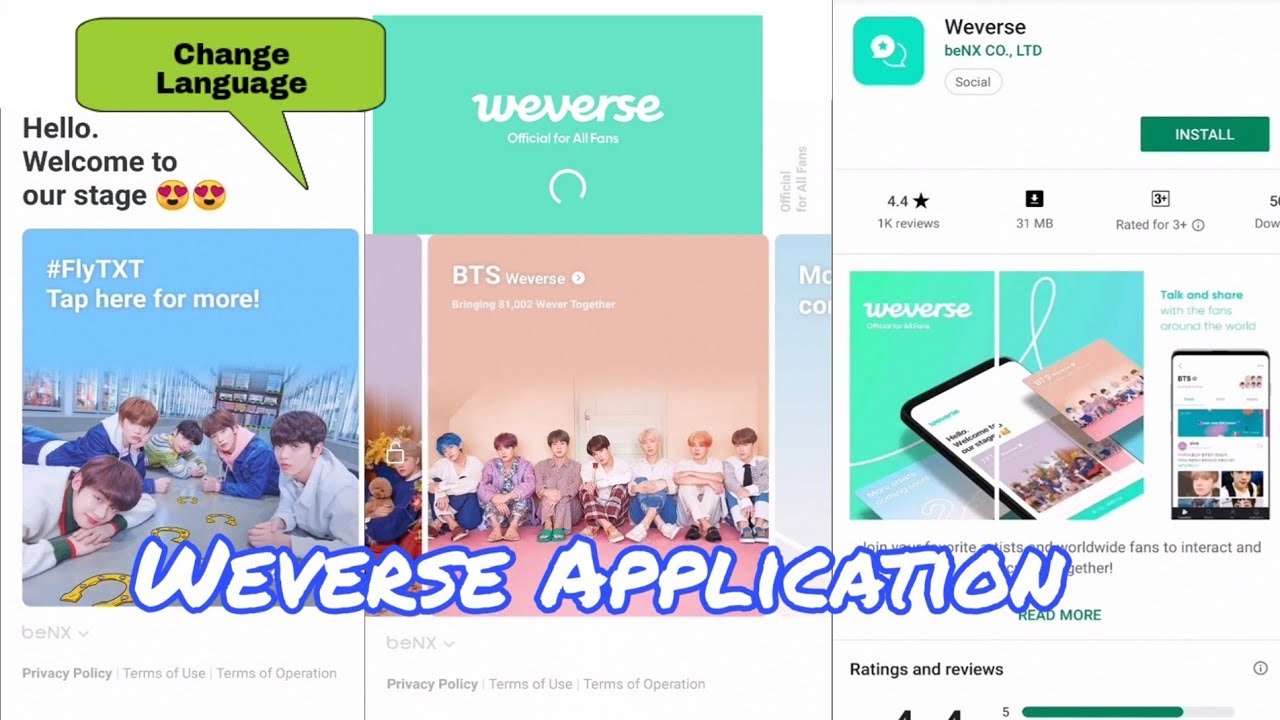
The first step is to download and install the Weverse app on your mobile device. You can find the app on both the App Store for iOS devices and the Google Play Store for Android devices. Simply search for “Weverse” and tap on the download/install button.
Step 2: Open the Weverse App and Sign In
Once the app is installed, open it and sign in to your Weverse account. If you don’t have an account yet, you can easily create one by providing your email address and creating a password.
Step 3: Select the Artist’s Community
After signing in, you’ll see a list of artist communities available on Weverse. Choose the community of your favorite artist by tapping on their profile picture or name.
Step 4: Access the Content
Once you’re in the artist’s community, you’ll have access to various types of content, including posts, videos, photos, and more. Explore and navigate through the different sections to find the content you’re interested in.
Step 5: Enable English Subtitles
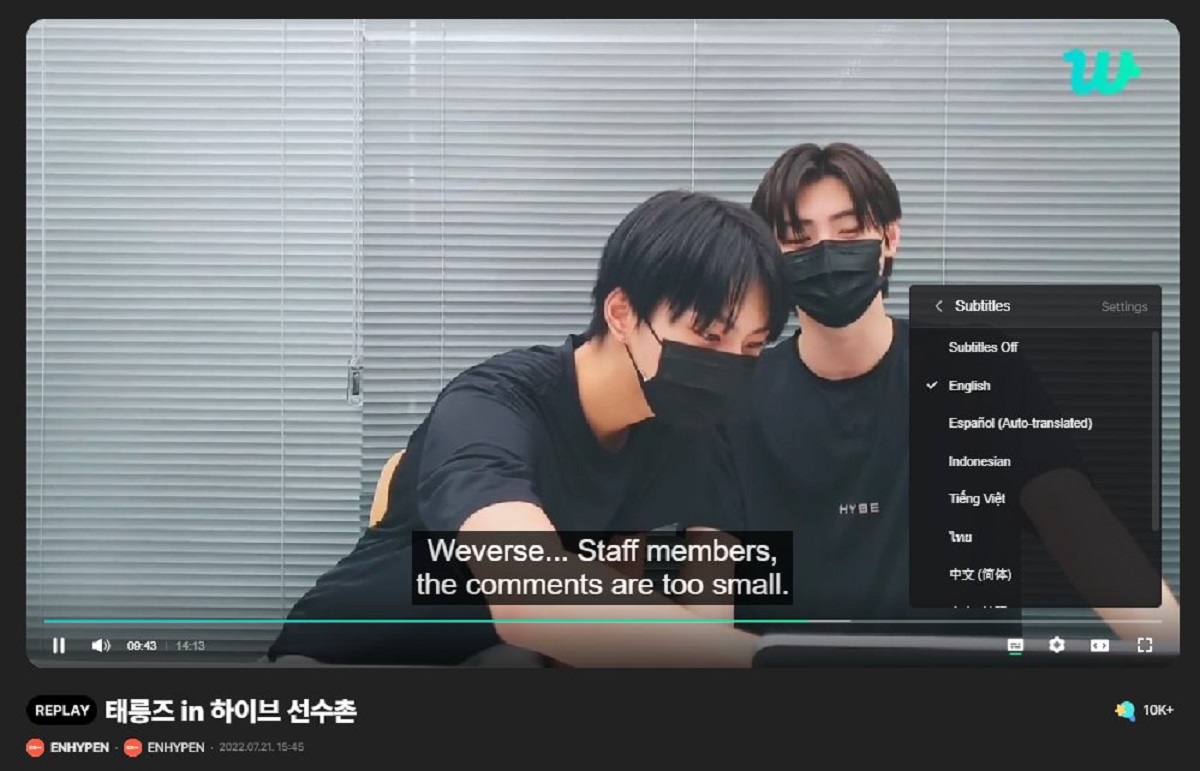
To enable English subtitles, look for the subtitle icon or an option related to subtitles on the screen while watching a video. It’s usually represented by a speech bubble or the letters “CC” (closed captions). Tap on it to activate the subtitles.
Step 6: Adjust Subtitle Preferences
Weverse provides additional options to customize your subtitle preferences. You can adjust the font size, style, and language settings according to your preference. Explore the settings menu within the app to make any necessary adjustments.
That’s it! You have successfully enabled English subtitles on Weverse. Now you can enjoy all the content with the convenience of understanding the dialogue and messages in your preferred language.
Remember to check for subtitles whenever you access new videos or content on Weverse, as it may not be enabled by default. Enjoy exploring the world of your favorite K-pop artists with the help of English subtitles!
Step 1: Download and Install Weverse App
The first step towards getting English subtitles on Weverse is to download and install the Weverse app on your mobile device. The app is available for both iOS and Android devices, making it accessible to a wide range of users.
To download the Weverse app, follow these simple steps:
For iOS Devices (iPhone and iPad):
- Open the App Store on your device.
- Tap on the search bar and type “Weverse”.
- From the search results, select the official Weverse app.
- Tap the “Get” or “Download” button to initiate the installation.
- Enter your Apple ID password or use touch ID/facial recognition to authorize the download.
- Wait for the app to finish downloading and installing on your device.
For Android Devices:
- Open the Google Play Store on your device.
- Tap on the search bar and type “Weverse”.
- Select the official Weverse app from the search results.
- Tap the “Install” button to begin the installation process.
- Wait for the app to finish downloading and installing on your device.
Once the Weverse app is successfully installed on your mobile device, you’re ready to proceed to the next step and sign in to your Weverse account. If you don’t have an account yet, you can create one using your email address and a password of your choice.
Downloading and installing the Weverse app is a crucial first step in accessing the platform and unlocking the benefits of English subtitles. So, take a moment to install the app and get ready for an exciting Weverse journey!
Step 2: Open the Weverse App and Sign In
After downloading and installing the Weverse app on your mobile device, it’s time to open the app and sign in to your Weverse account. By signing in, you can access exclusive content and enable English subtitles to enhance your Weverse experience.
Here’s a step-by-step guide on how to open the Weverse app and sign in:
- Open the Weverse app by tapping on its icon on your device’s home screen.
- On the app’s main screen, you’ll be presented with a login page.
- If you already have a Weverse account, enter your email address and password in the provided fields.
- Alternatively, you can choose to sign in with your Apple ID or social media accounts like Facebook or Twitter, if those options are available.
- If you don’t have a Weverse account yet, tap on the “Sign Up” or “Create Account” button.
- Follow the prompts to enter your email address, create a password, and provide any additional information required to complete the sign-up process.
- Once you’ve entered your login credentials or successfully signed up for a new account, tap on the “Sign In” or “Log In” button.
After signing in, you’ll have access to your personalized account on Weverse. This will allow you to explore various artist communities, engage with content, and enable English subtitles for a seamless browsing experience.
It’s important to keep in mind that signing in to your Weverse account is necessary to fully access and enjoy the features of the platform. So, make sure to sign in using the correct credentials to unlock the full potential of Weverse!
Step 3: Select the Artist’s Community
Once you have opened the Weverse app and signed in to your account, it’s time to select the artist’s community you want to explore. Weverse offers a wide range of artist communities, each representing a different K-pop artist or group.
Here’s how to select the artist’s community on Weverse:
- On the main screen of the Weverse app, you will see a list of available artist communities.
- Scroll through the list or use the search bar at the top to find the specific artist or group you are interested in.
- Tap on the artist’s profile picture or name to access their dedicated community page.
- Once you are on the artist’s community page, you will find various sections and tabs that contain their content, such as posts, videos, photos, and more.
- Explore the different sections to see what the artist has shared with their fans.
Selecting the artist’s community of your choice is crucial as it allows you to immerse yourself in their world and access exclusive content tailored specifically for their fans. Whether it’s updates, behind-the-scenes footage, or interactions with the artist, the artist’s community page is where you’ll find all of that.
Furthermore, being a part of an artist’s community on Weverse opens up opportunities for fan engagement and interaction. You can leave comments on posts, participate in discussions, and connect with fellow fans who share the same passion for the artist or group.
Make sure to take your time exploring different artist communities on Weverse and choose the ones that resonate with you the most. This will ensure that you have a fulfilling experience and stay connected with your favorite K-pop artists through the Weverse platform.
Step 4: Access the Content
Once you have selected the artist’s community on Weverse, it’s time to access the exciting content they have to offer. Weverse provides a variety of content types, from posts to videos, photos, and more, allowing you to get a deeper look into the artist’s world.
Follow these steps to access the content on Weverse:
- Within the artist’s community page, you will find different sections and tabs that organize the content.
- Explore the various sections to discover what the artist has shared with their fans.
- Look for the posts section, where you will find updates, announcements, and messages from the artist.
- Check out the video section to watch behind-the-scenes footage, music videos, live performances, and more.
- Browse through the photo gallery to see captivating images of the artist.
- Explore any additional sections or tabs that may be available depending on the artist’s community.
- Tap on the content you’re interested in to view it in more detail.
While navigating through the content, make sure to take your time and immerse yourself in the artist’s world. Read the posts, watch the videos, and appreciate the images shared by the artist. This will allow you to stay updated on their activities, get exclusive insights, and feel a closer connection with them.
Additionally, take advantage of the comment section below each post or video to engage with other fans. Leave comments, share your thoughts, and join in on conversations to connect with fellow fans and contribute to the vibrant community on Weverse.
Remember, the content on Weverse is regularly updated, so make it a habit to check for new posts, videos, and other materials to ensure you don’t miss out on any exciting updates from your favorite artist.
Enjoy the journey of exploring and accessing the captivating content within the artist’s community on Weverse!
Step 5: Enable English Subtitles
To fully enjoy the content on Weverse as an international fan, it’s important to enable English subtitles. By enabling English subtitles, you can understand the dialogue, messages, and captions in the content you’re consuming, whether it’s videos, live streams, or other types of media.
Here’s how to enable English subtitles on Weverse:
- While watching a video or accessing content that has spoken or written dialogue, look for the subtitle icon or an option related to subtitles.
- Typically, the subtitle icon is represented by a speech bubble symbol or the letters “CC” (closed captions).
- If the subtitles are not automatically enabled, tap on the subtitle icon or the option related to subtitles.
- This action will activate the subtitles and display them on the screen.
Once you have successfully enabled the English subtitles, you will be able to understand the content more effectively, ensuring that you don’t miss out on any important information or messages conveyed by the artist.
Furthermore, keep in mind that not all content on Weverse may have English subtitles available. The availability of subtitles may vary depending on the artist, the type of content, and other factors. However, Weverse continues to work towards expanding the availability of subtitles to provide a more inclusive experience for international fans.
So, whenever you access new videos or content on Weverse, make sure to check for subtitles and enable them if available. This way, you can fully immerse yourself in the artist’s world and have a seamless understanding of the content being shared.
By enabling English subtitles on Weverse, you can fully appreciate the efforts and messages delivered by your favorite artist, fostering a deeper connection with them and the fandom.
Now that you have enabled English subtitles, let’s move on to the next step and learn how to adjust subtitle preferences to customize your experience on Weverse!
Step 6: Adjust Subtitle Preferences
After enabling English subtitles on Weverse, you have the option to further customize your subtitle preferences to enhance your viewing experience. Weverse provides various settings that allow you to adjust the appearance and behavior of the subtitles according to your personal preference.
Here’s how to adjust subtitle preferences on Weverse:
- While watching a video or accessing content with subtitles, look for the settings icon or an option related to subtitle preferences.
- Tap on the settings icon or the subtitle preferences option to access the subtitle settings menu.
- Within the subtitle settings menu, you’ll find options to adjust font size, font style, subtitle color, and subtitle language.
- Tap on each setting to customize it according to your liking.
- For example, you can increase or decrease the font size to make the subtitles more readable, choose a font style that suits your preference, adjust the subtitle color for better contrast, and select the subtitle language, such as English, if multiple language options are available.
- Make the necessary adjustments to the subtitle settings based on your preferences.
- Once you’re satisfied with your selections, exit the subtitle settings menu.
By adjusting the subtitle preferences, you can create a personalized viewing experience that enhances your comprehension and enjoyment of the content on Weverse. It allows you to tailor the subtitles to your visual preferences and ensure maximum readability.
Keep in mind that the availability and range of subtitle preferences may vary depending on the Weverse app version, the device you’re using, and other factors specific to your setup. However, Weverse strives to provide flexibility in subtitle settings to accommodate the diverse preferences of its users.
Feel free to explore the subtitle settings menu and experiment with different settings to find the perfect combination that suits your needs. This way, you can fully immerse yourself in the content on Weverse with subtitles that are visually appealing and easy for you to understand.
Now that you have adjusted the subtitle preferences, you’re all set to enjoy the content on Weverse with personalized subtitles tailored to your liking. Dive in and make the most of your Weverse experience!
Conclusion
Congratulations! You have now learned how to get English subtitles on Weverse, enabling you to fully immerse yourself in the world of your favorite K-pop artists. By following the steps outlined in this guide, you can enhance your experience on Weverse as an international fan and stay connected with your beloved artists.
Weverse provides a platform where fans can engage with artists, access exclusive content, and connect with fellow fans from around the world. English subtitles play a crucial role in breaking down language barriers and allowing international fans to fully understand and appreciate the content shared on Weverse.
From downloading and installing the Weverse app to signing in, selecting the artist’s community, and accessing the content, each step is vital in navigating the platform and immersing yourself in the artist’s world. Enabling English subtitles ensures that you don’t miss any important updates, announcements, interactions, or behind-the-scenes moments.
Remember, Weverse is constantly evolving, and new features and updates may be introduced over time. It’s always a good idea to stay up to date with any changes and explore the various options within the app to make the most of your Weverse experience.
Now, armed with the knowledge of how to get English subtitles on Weverse, enjoy exploring the diverse artist communities, engaging with content, and connecting with artists and fellow fans. Weverse opens up a world of opportunities for you to share your love for K-pop and create unforgettable memories in the process.
So, what are you waiting for? Start your Weverse journey today and let the magic of English subtitles enhance your fan experience on this incredible platform!


