Introduction
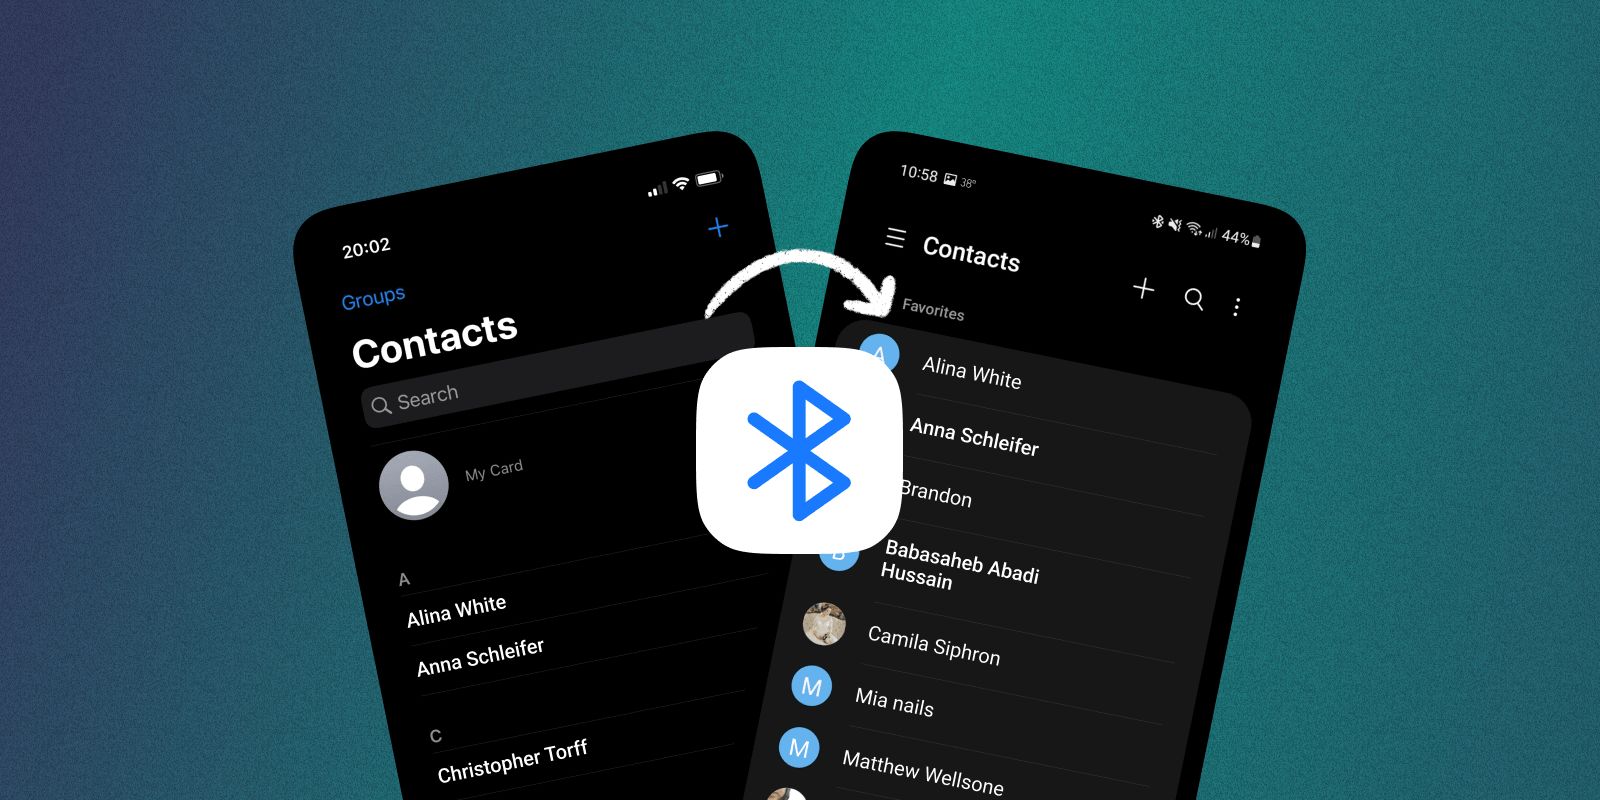
Switching from an Android device to an iPhone can be an exciting journey, but one concern many users have is how to transfer their contacts seamlessly. Fortunately, there are several methods available that can help you transfer your contacts from your Android device to your new iPhone effortlessly. In this article, we will explore three different methods – using your Google account, using a SIM card, and using a third-party app – to ensure you can quickly and easily access all of your contacts on your shiny new iPhone.
Transferring contacts between different operating systems can seem daunting, but with the right tools and techniques, it can be a smooth process. No matter which method you choose, the objective remains the same: to securely and accurately transfer all of your valuable contacts without losing any important information.
Throughout this article, we will guide you through each method step-by-step, highlighting the necessary actions and precautions you need to take. Whether you prefer to use your Google account, SIM card, or a third-party app, you will find a solution that works best for your specific needs and preferences.
So, without further ado, let’s dive into the different methods that will enable you to seamlessly transfer your contacts from your Android device to your new iPhone!
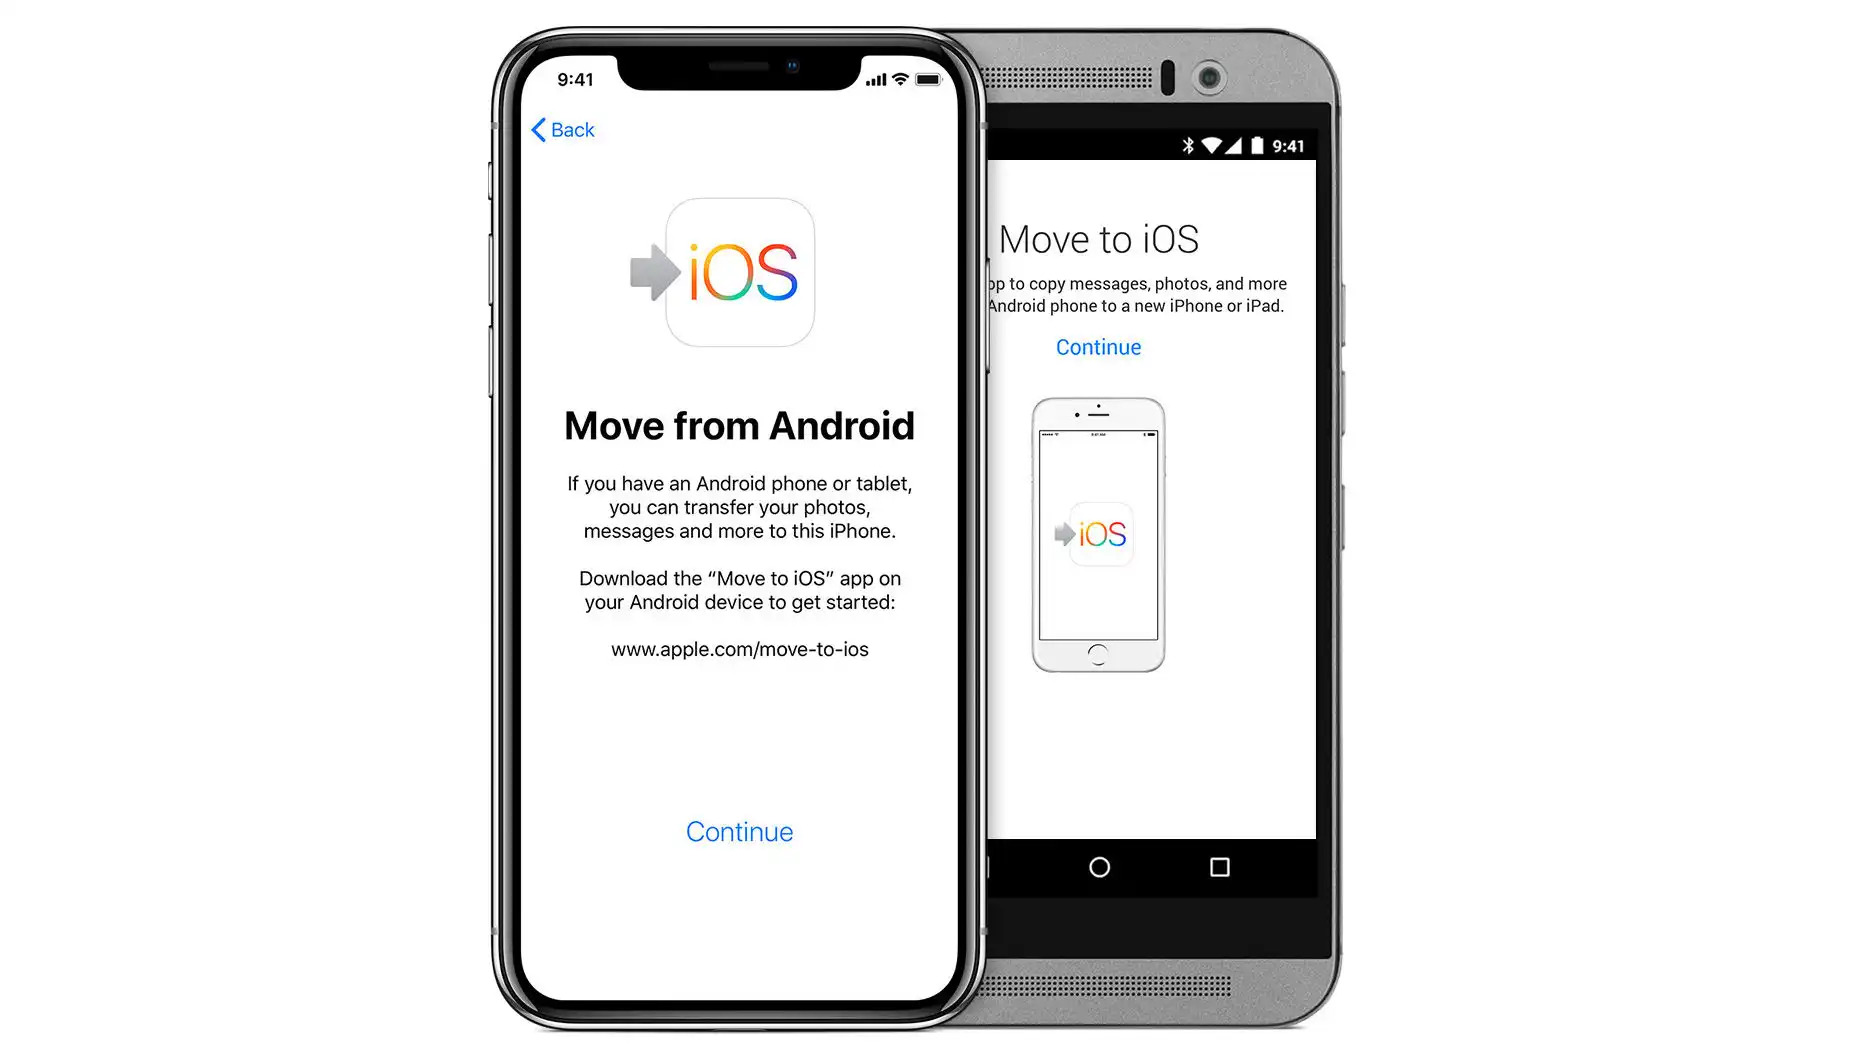
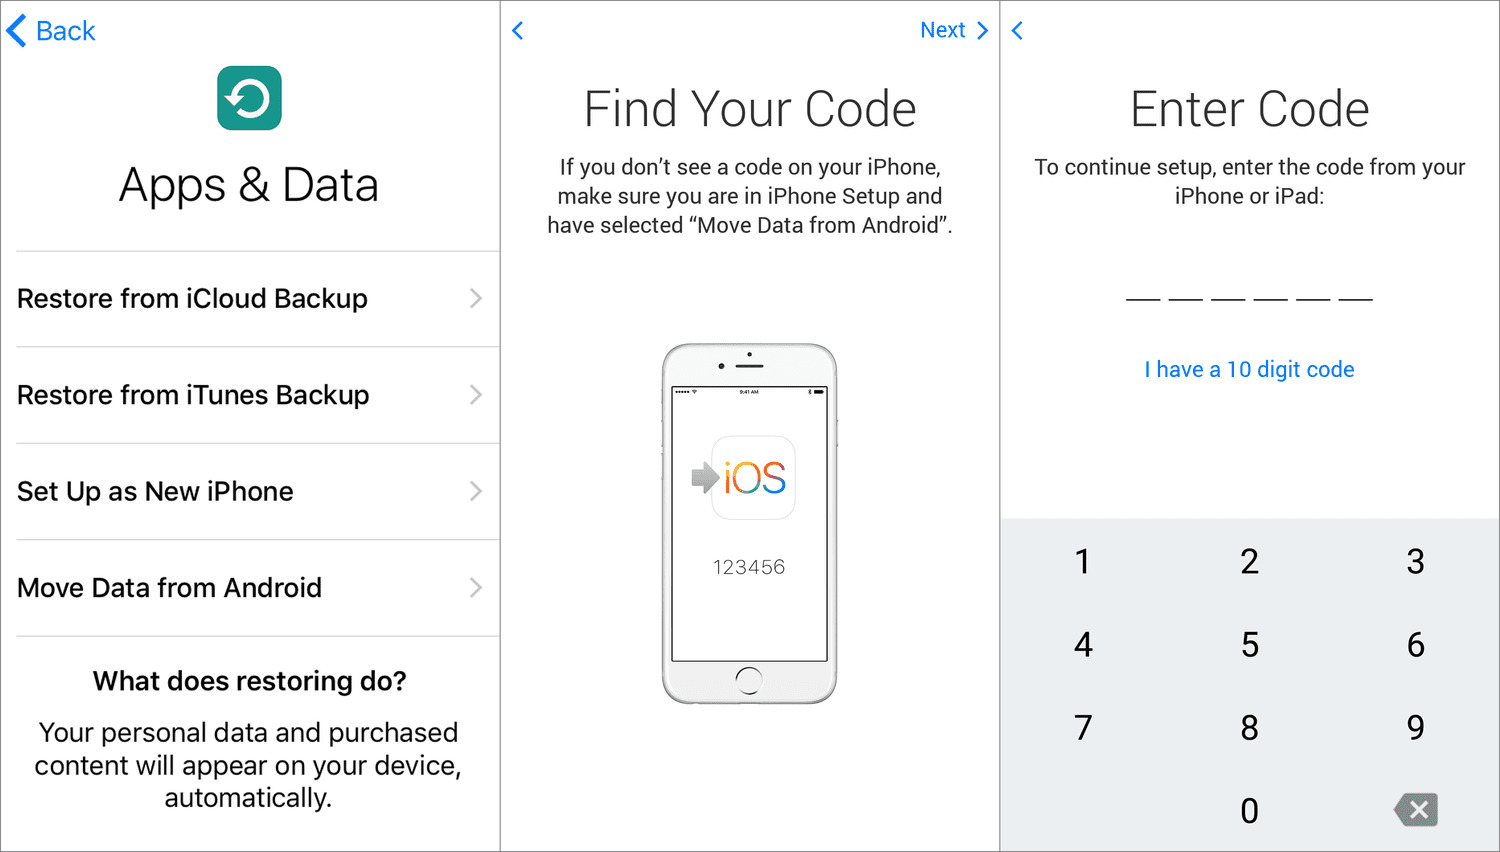
Method 1: Using Google Account
One of the most convenient and widely used methods to transfer contacts from an Android device to an iPhone is by utilizing your Google account. This method works because both Android and iPhone devices allow you to sync your contacts with your Google account, making it easy to transfer them between platforms.
Here’s how you can transfer your contacts using your Google account:
- On your Android device, go to “Settings” and select “Accounts.” Look for the option to add an account and choose “Google.”
- Enter your Google account credentials and sign in.
- Once you’ve signed in, you’ll see a list of items that can be synced, including contacts. Make sure the contacts option is enabled.
- Next, open the settings on your iPhone and select “Mail,” “Contacts,” and “Calendars.”
- Choose “Add Account” and select “Google” from the list of available options.
- Enter your Google account credentials and sign in, ensuring that the “Contacts” option is enabled.
- Wait for your iPhone to sync with your Google account. This process may take a few moments, especially if you have a large number of contacts.
- Once the sync is complete, open the Phone or Contacts app on your iPhone, and you should see all of your Android contacts populated in the list.
By following these steps, you can seamlessly transfer all of your contacts from your Android device to your new iPhone using your Google account. This method ensures that your contacts remain intact, including their names, phone numbers, email addresses, and any additional details you’ve associated with them.
It’s important to note that this method requires a stable internet connection and an active Google account. Additionally, some older Android devices may have slightly different menu options, but the general process remains the same. Consulting your device’s user manual or checking online resources specific to your device can provide further guidance if needed.
Now that you have successfully transferred your contacts using your Google account, let’s explore another method to transfer your contacts using a SIM card.
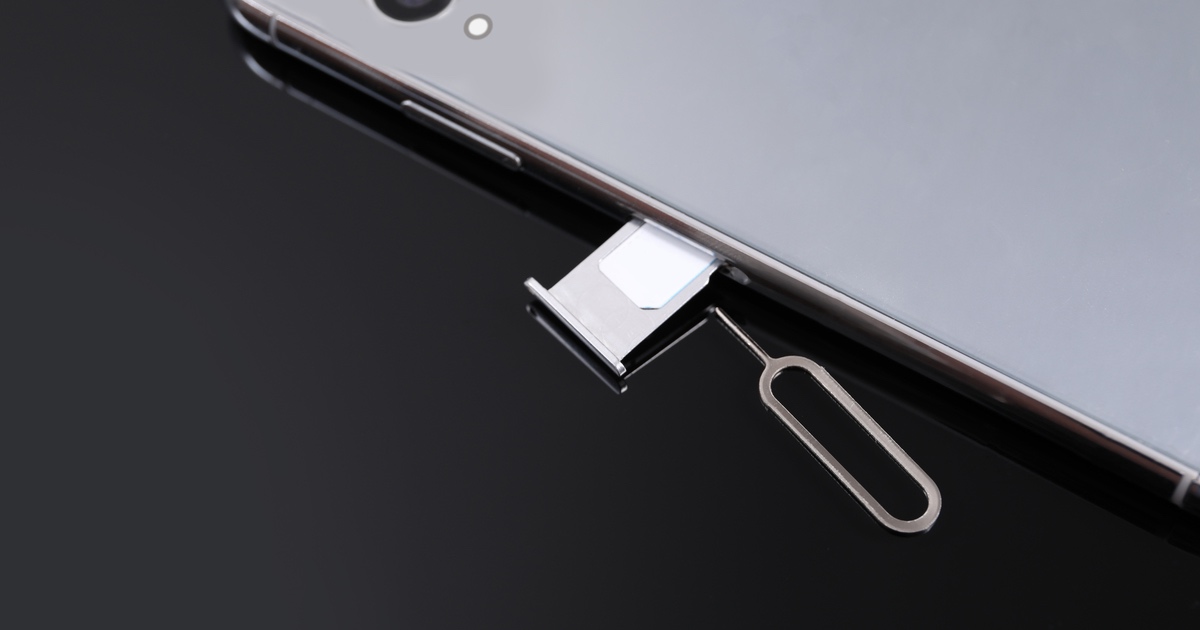
Method 2: Using SIM Card
If you prefer a more traditional approach, using a SIM card to transfer contacts from your Android device to your new iPhone can be an effective method. This method is especially useful if you don’t have access to an active internet connection or prefer not to rely on cloud services.
Follow these steps to transfer your contacts using a SIM card:
- On your Android device, go to the Contacts app and select the option to export contacts. The exact location of this option may vary depending on your device model and operating system version.
- Choose the option to export contacts to SIM card. This will save your contacts onto the SIM card.
- Once the export is complete, remove the SIM card from your Android device.
- Insert the SIM card into your iPhone. Ensure that it is properly inserted and recognized by your iPhone.
- On your iPhone, go to the Settings app and select “Contacts.”
- Scroll down and choose the option to import contacts from SIM card. Your iPhone will then prompt you to import the contacts.
- Wait for the contacts to be imported. This process may take a few moments, depending on the number of contacts stored on your SIM card.
- Once the import is complete, open the Phone or Contacts app on your iPhone, and you should see all of your Android contacts listed.
Using a SIM card to transfer contacts is a straightforward method that does not rely on any external services or apps. However, it’s important to note that SIM cards have limited storage capacity, so if you have a large number of contacts, you may need to export them in batches or consider using another method.
Additionally, not all information associated with your contacts may be transferred using this method. Some details, such as photos and custom labels, may not be supported or transferred via a SIM card.
Now that you’ve learned how to transfer contacts using a SIM card, let’s explore another method that involves using a third-party app.
Method 3: Using a Third-Party App
If you’re looking for an alternative method to transfer contacts from your Android device to your new iPhone, using a third-party app can be a convenient option. There are various apps available in both the Google Play Store and the App Store that specialize in contact transfer and synchronization between different operating systems.
Here’s how you can transfer contacts using a third-party app:
- Download and install a reliable contact transfer app from the Google Play Store on your Android device.
- Open the app and follow the instructions to grant the necessary permissions to access your contacts.
- Select the option to “Export” or “Backup” your contacts to the app’s cloud storage or online server.
- Once the export is complete, install the same contact transfer app on your iPhone from the App Store.
- Open the app on your iPhone and sign in using the same account you used on your Android device.
- Select the option to “Import” or “Restore” your contacts from the app’s cloud storage or online server.
- Wait for the contacts to be imported onto your iPhone. The time taken will depend on the size of your contact list and the speed of your internet connection.
- After the import is complete, open the Phone or Contacts app on your iPhone, and you’ll find all of your Android contacts available.
Using a third-party app can offer more flexibility and features than other methods. These apps often provide additional options such as merging duplicate contacts, backing up contacts to multiple cloud services, and customizable transfer settings.
However, it’s essential to choose a reputable app from a trusted developer and read reviews to ensure its reliability before installing it on your device. Additionally, some third-party apps may require a subscription or offer in-app purchases for certain features or premium version access.
Now that you know how to transfer contacts using a third-party app, you can choose the method that suits you best and seamlessly transfer your contacts from your Android device to your new iPhone.
Conclusion
Transferring contacts from an Android device to an iPhone may initially seem like a daunting task, but with the right methods and tools, it can be a smooth and hassle-free process. In this article, we explored three different methods to help you seamlessly transfer your contacts: using your Google account, using a SIM card, and using a third-party app.
If you prefer a straightforward and widely used method, syncing your contacts with your Google account is a reliable option. By following a few simple steps, you can sync your contacts from your Android device to your Google account and then easily sync them to your iPhone. This method ensures that all of your contact details, including names, phone numbers, and email addresses, are transferred accurately.
If you prefer a more traditional approach or don’t have access to an internet connection, using a SIM card to transfer contacts can be a practical solution. By exporting your contacts to the SIM card on your Android device and then importing them on your iPhone, you can quickly transfer your contacts without relying on cloud services.
Alternatively, if you want more flexibility and additional features, using a third-party app can be an excellent choice. Many reliable apps are available that specialize in contact transfer and synchronization between different operating systems. These apps often offer advanced options like merging duplicate contacts and backing up contacts to various cloud services.
Ultimately, the method you choose to transfer your contacts depends on your preferences and specific circumstances. By following the steps outlined in each method, you can ensure a smooth and successful transfer of your valuable contacts to your new iPhone.
Now that you’re equipped with the knowledge and tools to transfer your contacts, you can confidently make the switch to your new iPhone without worrying about losing any essential contact information. Enjoy your new device and stay connected with all your important contacts!