Introduction
Welcome to the world of 3D printing, where you can bring your wildest imaginations to life. However, printing objects with overhangs can be a challenging task. An overhang is any part of a model that extends horizontally from a vertical surface without any additional support. It often leads to issues such as drooping, rough surfaces, and even failed prints. But fear not, as we are here to guide you on how to get better overhangs in your 3D prints.
Understanding the intricacies of printing overhangs is crucial for achieving optimal results. In this article, we will delve into the various factors that influence successful overhang printing and explore the techniques you can employ to enhance your prints.
First and foremost, it is essential to select the right material for your project. Different materials have different characteristics when it comes to overhangs. Some materials, like PLA and PETG, are more forgiving, while others, like ABS or nylon, require extra attention. Understanding the properties of your chosen filament will enable you to adjust printing parameters accordingly.
Speaking of parameters, adjusting your printer settings is another crucial step. By fine-tuning settings such as print speed, layer height, and extrusion multiplier, you can optimize the printing process for overhangs. Additionally, understanding the impact of cooling settings is vital. Proper cooling can help maintain the structural integrity of overhangs and prevent deformations.
The use of support structures is often indispensable when it comes to printing overhangs. Support structures act as temporary support during printing and are removed afterward. They provide a foundation for overhanging parts, ensuring a successful print. Knowing when and how to use supports is crucial for achieving desirable results without sacrificing print quality.
Optimizing the design of your model can significantly impact the success of overhang prints. By altering the design and breaking down overhangs into printable angles or incorporating gradual inclines, you can minimize the need for excessive supports. Design considerations such as chamfers, bridging, and ribbing can also improve overhang performance.
Lastly, troubleshooting overhang issues is part of the journey. Despite careful preparation, there may be instances where overhangs still pose challenges. By identifying common issues such as sagging, rough surfaces, or print failures, and understanding their underlying causes, you can quickly troubleshoot and improve your overhang prints.
Through the exploration of these techniques and an understanding of the factors influencing overhang printing in 3D, you will gain the knowledge and skills necessary to create impressive and structurally sound overhangs in your future prints. So, let’s jump right in and discover the secrets to getting better overhangs in 3D printing!
Understanding Overhangs in 3D Printing
In the realm of 3D printing, overhangs refer to the areas of a model that extend horizontally from a vertical surface without any additional support. While printing simple objects with mostly vertical surfaces is relatively easy, printing complex models with overhangs can be tricky.
Overhangs pose a challenge because the molten filament needs support to hold its shape during the printing process. Without proper support, the filament tends to droop or sag, resulting in distorted or failed prints. This is mainly because the hot filament is subject to the forces of gravity as it is being deposited.
The degree of difficulty in printing overhangs depends on the angle at which they protrude from the vertical surface. Shallow angles, between 30 to 45 degrees, may be manageable without additional support structures. However, as the angle becomes steeper, the likelihood of printing issues increases significantly.
When attempting to print overhangs, it’s important to consider the capabilities of your 3D printer and the properties of the printing material. Some printers handle overhangs better than others due to factors such as the design of the nozzle and the cooling system. Similarly, different materials have varying levels of flexibility, adhesion, and resistance to warping, all of which affect their ability to handle overhangs.
To successfully print overhangs, it is crucial to strike a balance between the printing speed and the cooling of the filament. Printing too quickly without sufficient cooling can lead to filament deformations and a loss of structural integrity. On the other hand, excessive cooling can cause the filament to cool too rapidly, making it prone to warping and lifting from the print bed.
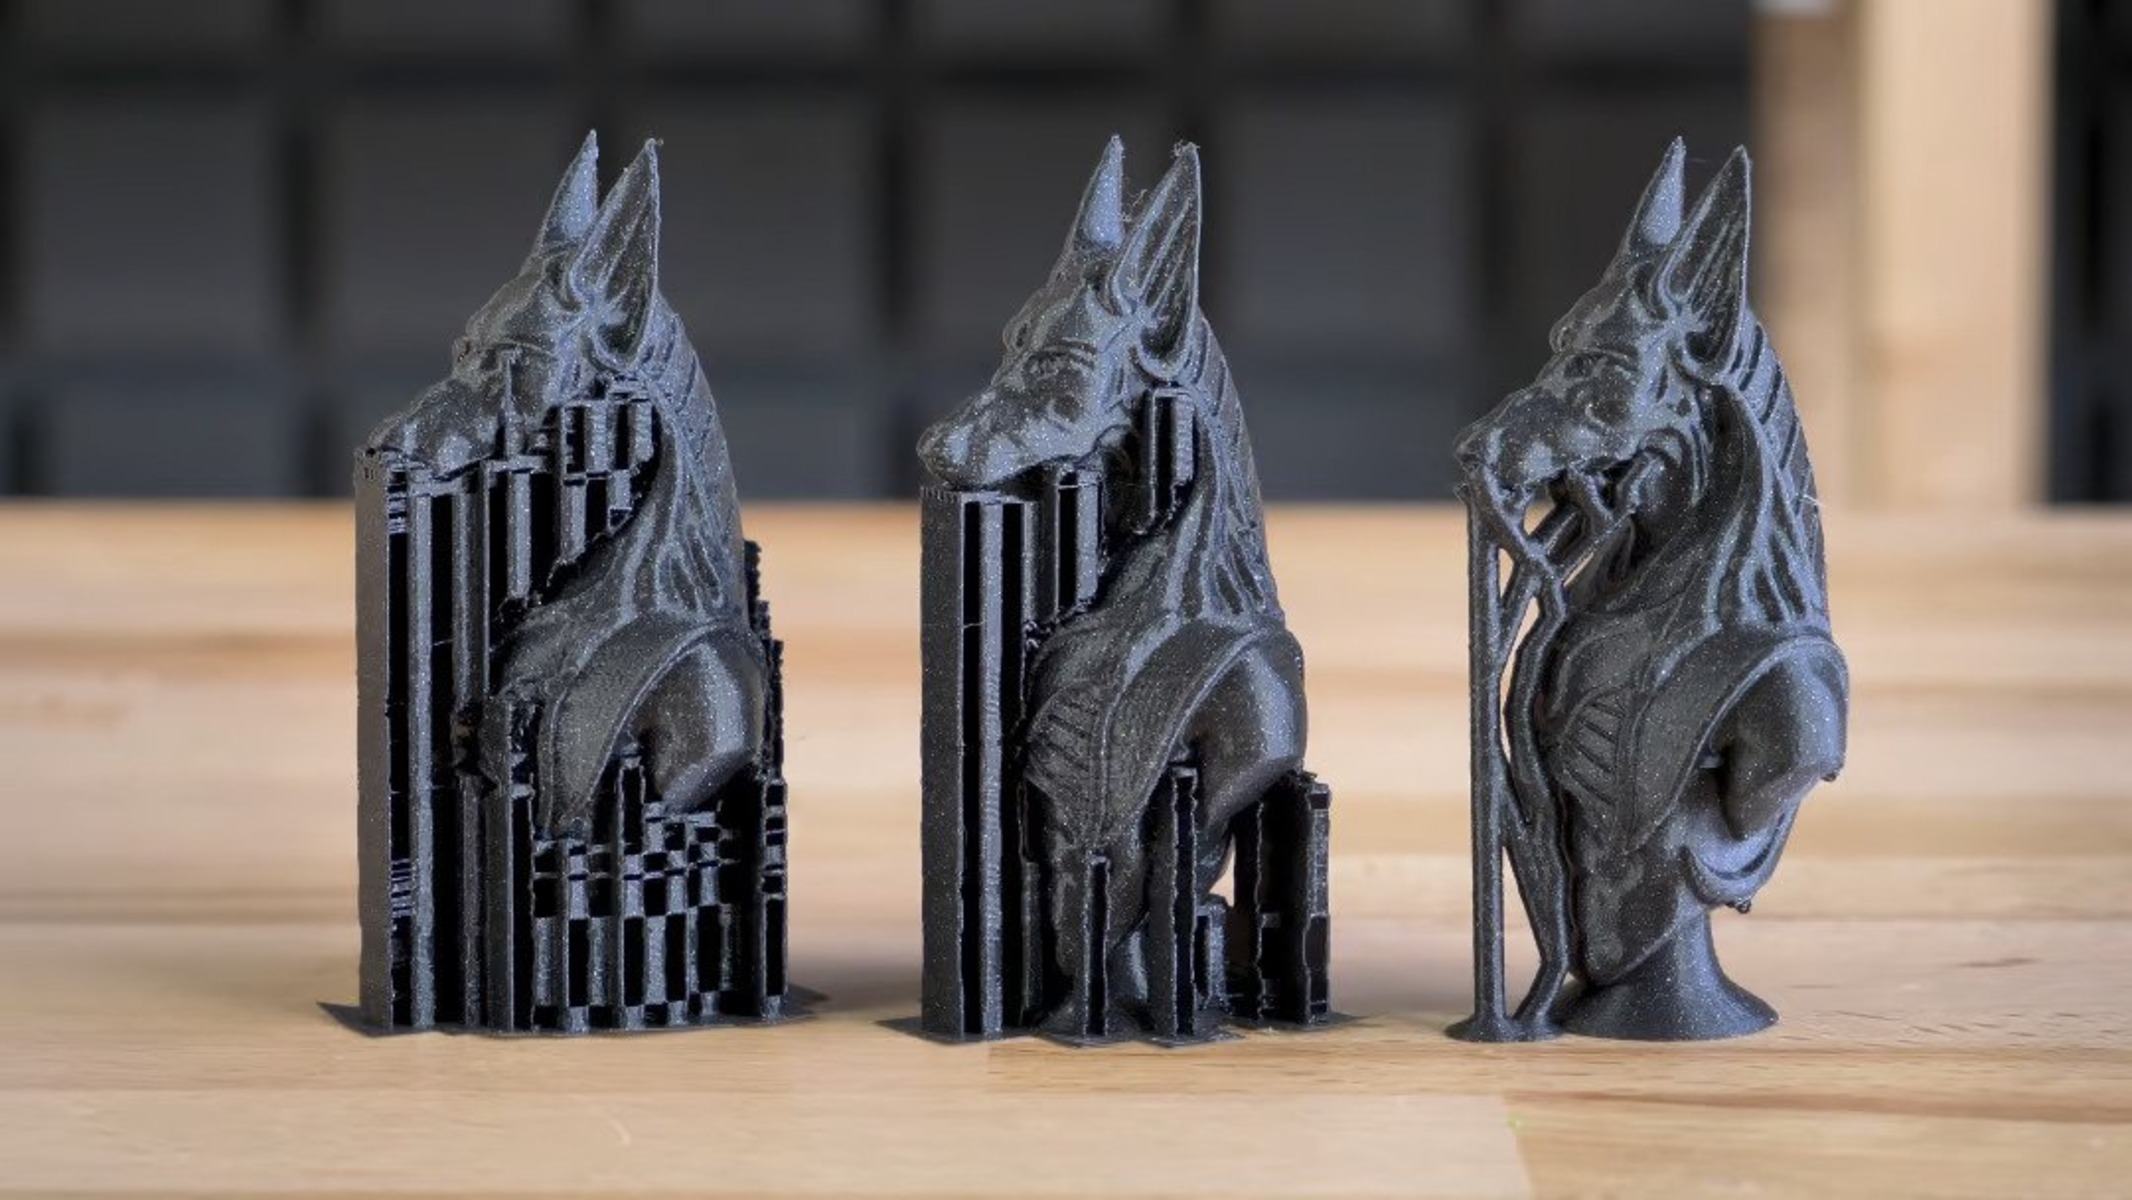
Fortunately, several techniques can be employed to overcome the challenges of printing overhangs. One such technique is the use of support structures. Support structures are temporary structures printed alongside the model to provide support for overhanging sections. Once the print is complete, these structures can be removed easily.
Another technique is adjusting the printer settings, such as reducing the print speed or increasing the cooling fan’s speed and airflow. These adjustments help in maintaining the proper shape and stability of the overhangs during printing.
In summary, understanding overhangs in 3D printing involves recognizing the challenges they pose due to gravity and the limitations of the printer and material. By implementing techniques like support structures and adjusting printer settings, you can achieve successful prints with challenging overhangs. With this understanding, let’s move on to the next crucial aspect: selecting the right material for your overhang prints.
Selecting the Right Material
When it comes to printing overhangs, choosing the right material is crucial to achieving successful prints. Different materials have varying properties that can significantly impact the printability of overhangs.
One of the most popular materials for 3D printing is PLA (polylactic acid). PLA has relatively good bridging capabilities, making it suitable for printing overhangs. It has lower thermal expansion and warping tendencies, which contribute to better overhang performance. PLA is a great choice for beginners or when printing models with moderate overhang angles.
If you need increased strength and durability, ABS (acrylonitrile butadiene styrene) is a commonly used filament. However, ABS has a higher tendency to warp, making it more challenging to print overhangs. To mitigate this, it is recommended to use an enclosed printer or incorporate a heated build platform to maintain better adhesion and reduce warping.
For applications that require better flexibility and impact resistance, materials like TPU (thermoplastic polyurethane) or PETG (polyethylene terephthalate glycol-modified) can be considered. These materials exhibit improved bed adhesion and good bridging capabilities, making them suitable for moderate overhangs.
If you’re looking for higher temperature resistance and strength, materials like nylon or polycarbonate are excellent choices. These materials have good bridging properties and are capable of printing more challenging overhangs. However, they may require additional printer modifications, such as a heated chamber or an enclosure, to achieve optimal results.
When selecting a material, consider its printing temperature range. Some filaments require higher nozzle and heated bed temperatures to ensure proper adhesion and layer bonding. It is essential to find the balance between temperature and print speed to prevent issues like excessive drooping or insufficient filament flow.
Additionally, it’s worth noting that moisture can affect filament performance. Some materials, such as nylon or PVA (polyvinyl alcohol) used for support structures, are particularly sensitive to moisture absorption. Proper filament storage, such as using airtight containers or desiccant packs, can help maintain material quality and reduce the risk of print defects.
By understanding the characteristics of different 3D printing materials and evaluating their suitability for overhangs, you can make informed choices that will improve your printing success. Experimenting with different materials and optimizing their settings can further enhance your ability to achieve high-quality overhang prints. Now that we have explored material selection, let’s move on to the next crucial aspect: adjusting printing parameters for optimal overhang results.
Adjusting Printing Parameters
When it comes to achieving successful overhang prints, adjusting the printing parameters is paramount. Fine-tuning various settings in your 3D printer can significantly improve the performance and quality of overhangs.
One of the critical parameters to consider is the printing speed. Slowing down the print speed for overhangs allows the material more time to cool and solidify, reducing the chances of drooping or sagging. Decreasing the print speed for specific layers, especially those with challenging overhangs, can enhance the overall print quality.
Layer height, or the thickness of each printed layer, also plays a significant role. Smaller layer heights provide finer detail but may require additional support, particularly for steeper overhang angles. Increasing the layer height can help improve print speed and reduce the need for excessive support structures, but it may compromise on surface quality.
Extrusion multiplier, which determines the amount of filament extruded during printing, can be adjusted to optimize overhang performance. Increasing the extrusion multiplier slightly can compensate for the material’s tendency to shrink during cooling, resulting in stronger overhangs. However, it’s important to strike a balance and avoid over-extrusion, which can cause blobbing or stringing.
Another parameter to consider is the fan speed. Increasing fan speed facilitates faster cooling, allowing overhangs to solidify more efficiently. However, be cautious when adjusting fan speed, as excessive cooling can lead to warping or poor bed adhesion. Finding the right balance between cooling and print speed is crucial for successful overhang prints.
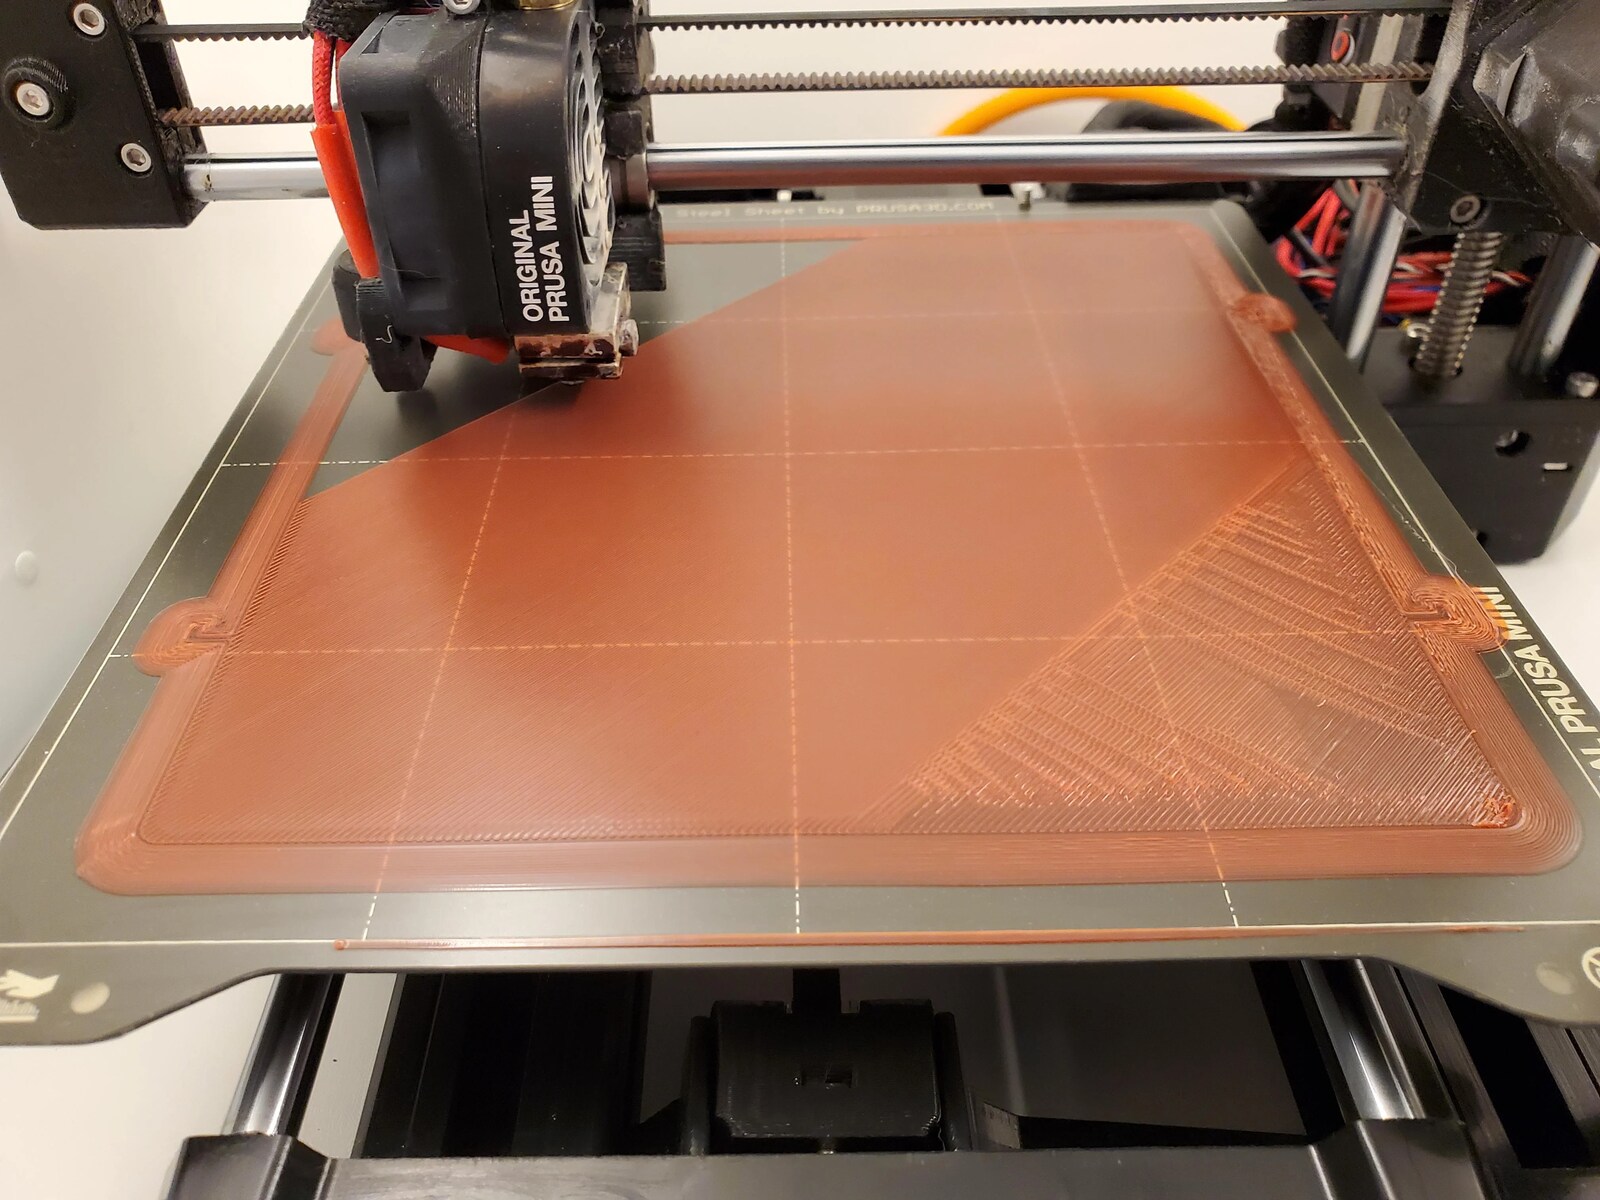
Furthermore, optimizing the first layer height and proper bed leveling contribute to better adhesion and stability during the print. Ensuring that the first layer adheres well to the build plate creates a solid foundation for subsequent layers and improves overhang performance.
When adjusting these parameters, it is crucial to keep a record of the changes made and observe the effect on print quality. Experimentation and iterations may be necessary to find the ideal settings for your specific printer, material, and overhang design.
By understanding and adjusting the various printing parameters, you can overcome the challenges of printing overhangs and achieve optimal results. However, keep in mind that each print job may require different parameter adjustments, so be prepared to fine-tune the settings accordingly. With the right parameters in place, you can move on to the next technique to enhance overhang printing: using support structures.
Using Support Structures
Support structures are a valuable tool when it comes to printing overhangs successfully. These temporary structures act as a scaffold to provide support and prevent the overhangs from sagging or collapsing during the printing process.
Support structures are generated automatically by slicing software based on the model’s geometry and the specified overhang angle. They are typically printed using the same material as the main object, although some slicers allow for the use of different support materials.
When using support structures, it’s important to strike a balance between providing enough support and minimizing the impact on the print’s aesthetics. Excessive support material can be difficult to remove and may leave behind marks or require additional post-processing. On the other hand, insufficient support can result in failed overhangs, affecting the overall quality of the print.
Most slicing software provides options to control the density and pattern of support structures. Increasing the support density strengthens the support structures, while reducing the density saves time and material. Choosing an appropriate density depends on the overhang angle and the material being used.
The support structure pattern also plays a role in affecting the final print’s quality. Common patterns include rectilinear (grid-like), honeycomb, or tree-like structures. The chosen pattern should provide both strong support and ease of removal. Tree-like structures, for example, are often preferred for their ease of removal and accessibility to the overhangs.
Once the print is complete, the support structures must be removed carefully. This can be done using a combination of tools such as pliers, tweezers, or flush cutters. It’s essential to remove the supports without damaging the main object and to clean up any artifacts left behind by the support removal process.
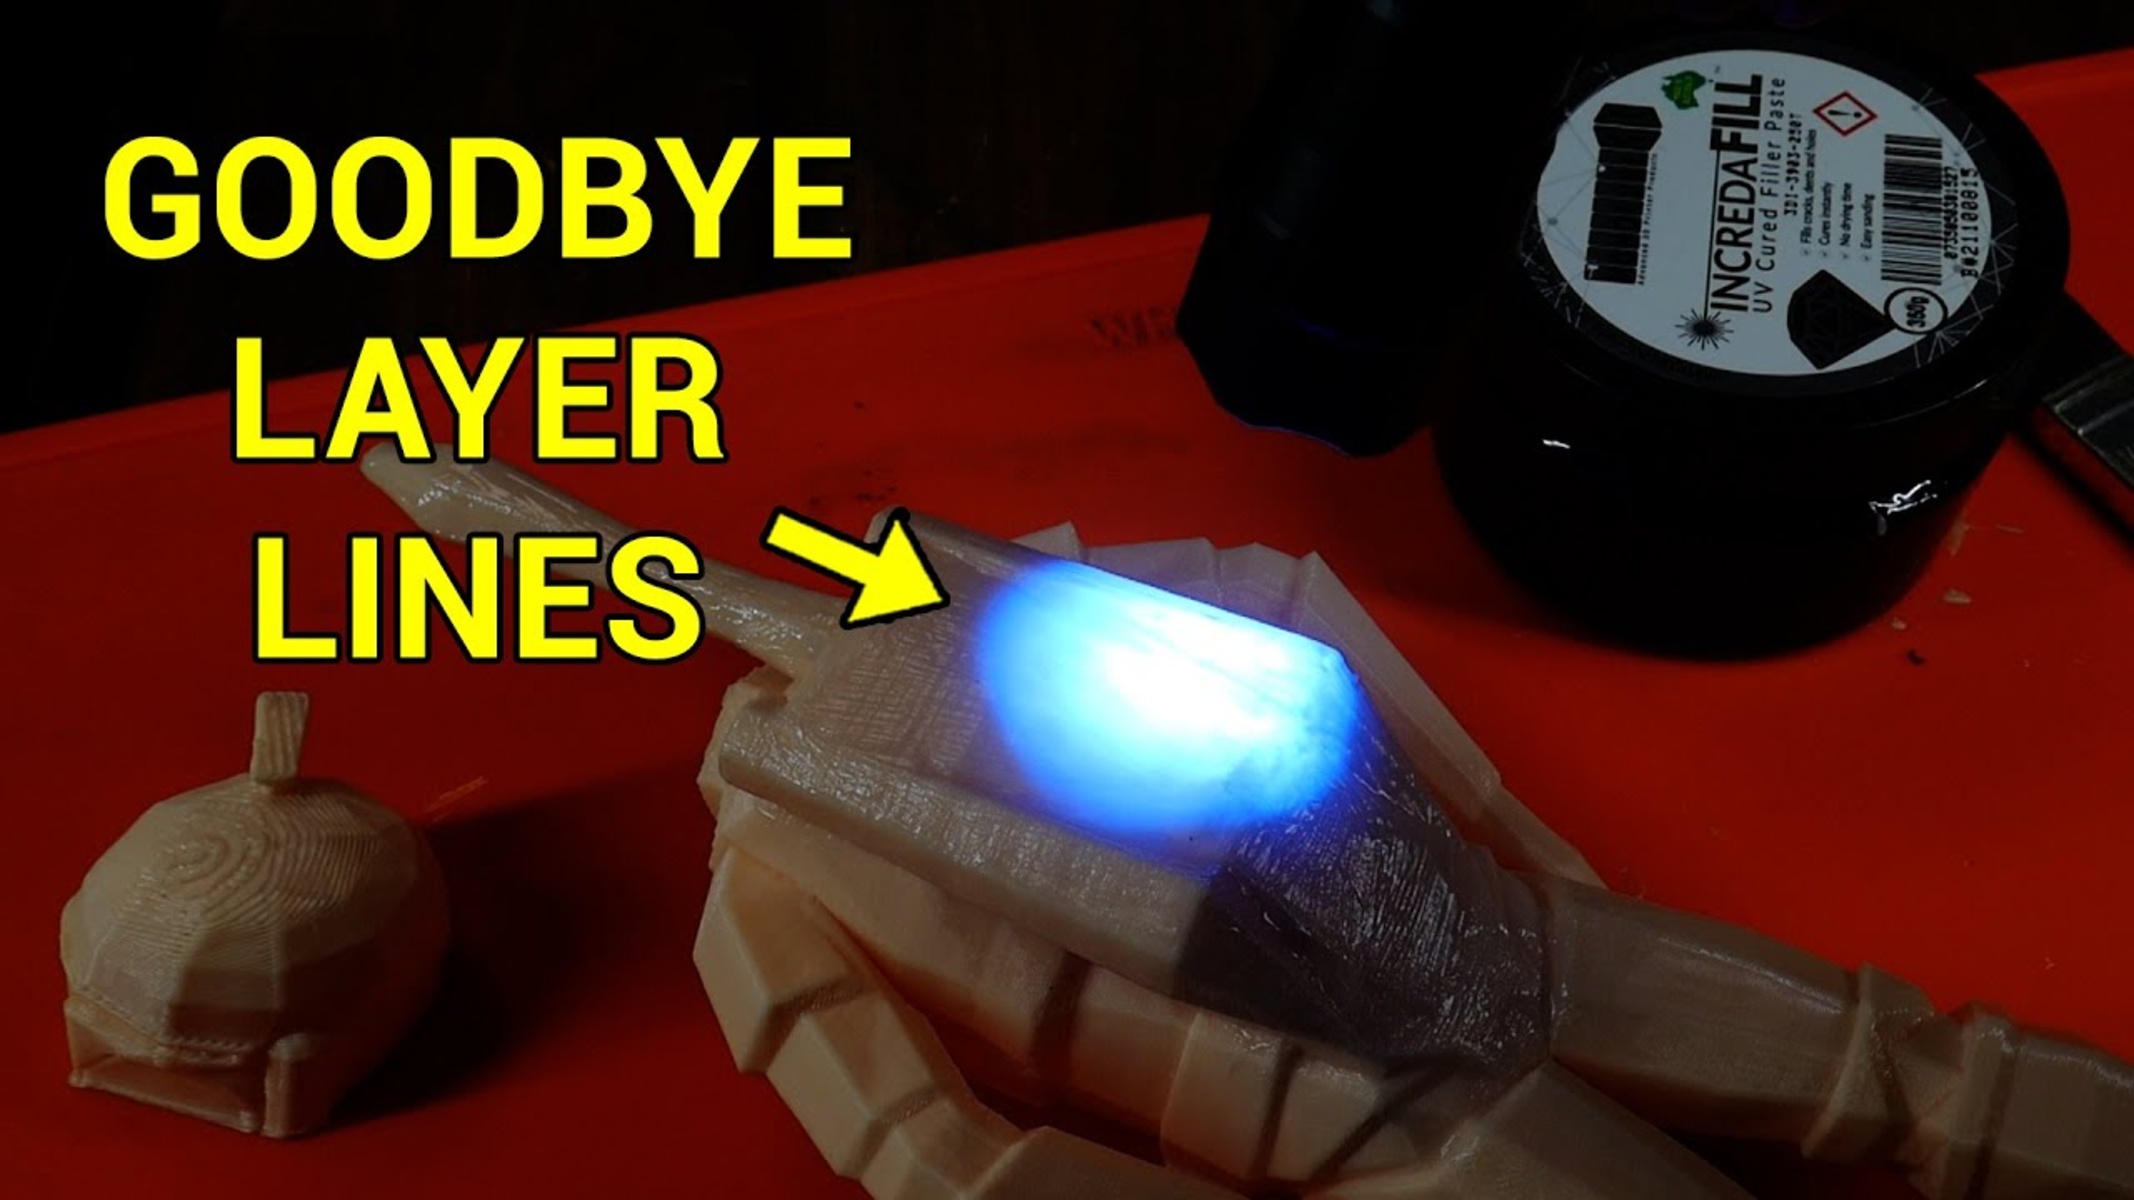
While support structures are an effective solution for overhangs, it’s worth noting that they may leave small marks or blemishes on the print’s surface. Depending on the intended application and aesthetic requirements, these marks may require additional post-processing, such as sanding or filling, to achieve the desired finish.
Overall, support structures are a valuable aid in overcoming the challenges of printing overhangs. By utilizing support structures effectively, you can achieve cleaner, more accurate, and structurally sound prints with challenging overhangs. With support structures covered, let’s move on to the next aspect of optimizing overhang printing: fine-tuning cooling settings.
Fine-tuning Cooling Settings
Proper cooling is essential for achieving successful overhang prints. Cooling helps solidify the printed filament quickly, preventing drooping or sagging of overhanging sections. Fine-tuning the cooling settings in your 3D printer can greatly improve the overall quality of your overhang prints.
The cooling settings typically include the fan speed and the layer fan settings. The fan speed determines the rotation speed of the cooling fan, while the layer fan settings control when the cooling fan turns on or off during the printing process.
For overhangs, it is generally beneficial to have a dedicated cooling fan or fans directed towards the print. Increasing the cooling fan speed helps in faster cooling and solidifying the printed filament, especially for small or intricate overhangs. However, it’s important to find the right balance. Too much cooling can lead to warping or poor layer adhesion, while too little cooling can result in excessive drooping or sagging.
Layer fan settings allow you to adjust when the cooling fan turns on and off during printing. Typically, the layer fan is set to start at a certain height, usually after a few layers have been printed. This delay in cooling helps ensure adequate layer adhesion and prevents premature cooling that can cause issues with overhangs. Experimenting with different layer fan settings can help find the optimal balance for your printer and material.
It’s also worth noting that different materials may require different cooling settings. Some materials, such as PLA, benefit from increased cooling to enhance overhang performance. On the other hand, materials like ABS may require less cooling to maintain thermal stability and prevent warping.
Monitoring the print as it progresses can provide valuable insights into the cooling requirements. Observe the behavior of the overhangs and make adjustments to the cooling settings accordingly. When fine-tuning cooling settings, it’s often beneficial to print a calibration model specifically designed to test overhangs and cooling performance.
Remember, cooling settings can vary not only between different printers but also between different models and materials. Take the time to experiment and find the optimal cooling settings for each specific case. With well-adjusted cooling settings in place, you can move forward to the next important consideration: optimizing model design for better overhang performance.
Optimizing Model Design
Optimizing the design of your model is crucial for achieving better overhang performance in 3D printing. By making thoughtful design considerations, you can minimize the need for excessive support structures and enhance the overall quality of your overhang prints.
One key aspect of model design for overhangs is the angle at which the overhang extends from the vertical surface. Shallow angles, between 30 to 45 degrees, are more manageable without additional support structures. By designing your model with gentle inclines or gradual curves, you can reduce the steepness of overhang angles and improve printability.
Another design consideration is the use of chamfers and fillets. Adding chamfers or small bevels to the edges of overhangs can help reduce the stress concentration and improve the overall strength of the printed part. Fillets can smooth out sharp corners, allowing for more efficient filament deposition and better overhang performance.
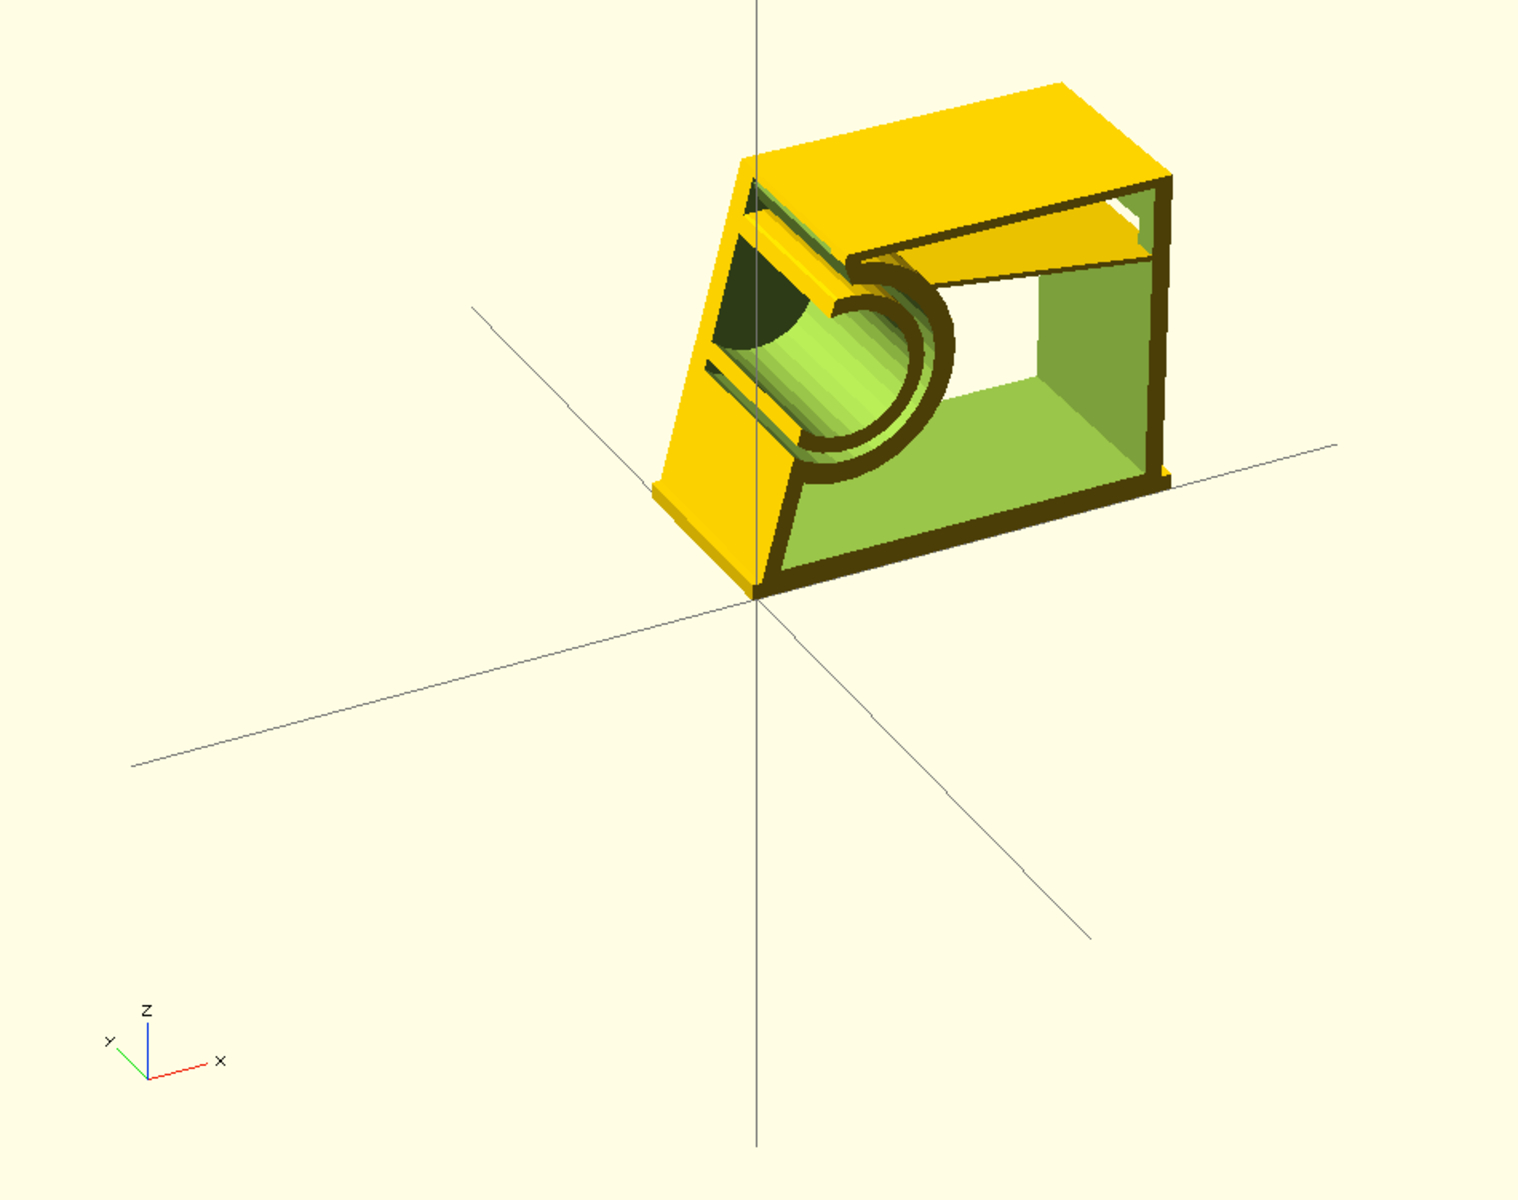
Bridging is another technique that can enhance overhang performance. By incorporating bridging sections in your model design, you can create opportunities for the extruded filament to span over gaps without the need for support structures. Ensuring proper bridging parameters in your slicer software, such as bridging speed and fan settings, is crucial for successful bridging overhangs.
Ribbing, or adding thin horizontal ribs underneath overhangs, can provide additional support during printing. These ribs act as mini-bridges, reinforcing the overhangs and reducing the likelihood of drooping or sagging. Carefully spacing and designing the ribs can distribute the weight evenly and promote better stability.
When designing models for better overhang performance, it’s important to consider the capabilities of your printer. Each printer has its own limitations, such as the minimum overhang angle it can handle or the resolution it can achieve. Familiarize yourself with your printer’s capabilities and design within those limitations to maximize printability.
Using design software with advanced features like support generation tools and overhang analysis can also aid in optimizing the model design. These tools can help identify potential overhang issues before printing and provide insights for necessary design modifications.
Remember to view your model from different angles and orientations to identify potential overhang challenges. Previewing the slicing process using your slicer software can also help visualize how the model will be printed and highlight areas that may require extra support or design adjustments.
By optimizing the design of your models for better overhang performance, you can achieve more successful prints with cleaner and more structurally sound overhangs. However, keep in mind that depending on the complexity of the design and desired outcome, certain trade-offs may need to be made in terms of aesthetics or print time. With optimized model design, you are one step closer to mastering overhang printing. Let’s now move on to the next section: troubleshooting overhang issues.
Troubleshooting Overhang Issues
Printing overhangs can sometimes present challenges, even with the best preparation and optimization. However, with a systematic approach to troubleshooting, you can identify and overcome common issues to achieve better overhang prints.
One common problem encountered with overhangs is excessive drooping or sagging. This usually happens when the filament lacks enough support during the printing process. To address this, consider adjusting the printing parameters, such as reducing print speed or increasing cooling, to allow the filament more time to solidify before moving to the next layer.
Warped or curled overhangs can occur due to excessive cooling or insufficient bed adhesion. Ensure that the print bed is properly leveled and the first layer adheres well to prevent warping. Additionally, adjusting the cooling settings, such as reducing fan speed or increasing layer fan delay, can help to mitigate warping issues.
Rough surfaces on overhangs can be attributed to the layer height or print speed. When printing overhangs, lowering the layer height can improve surface quality by providing more precise layer deposition. Adjusting the print speed for overhang areas can also help, as slower speeds allow for better filament control and finer details.
If your prints are failing at overhangs, it may indicate an issue with the support structures or the model design itself. Ensure that the support structures are generated correctly and provide sufficient support for the overhangs. Double-check the model design for any flaws, such as unsupported geometry or thin sections that may be prone to failure.
Bridging problems, where the filament fails to span a gap between two supports, can be addressed by adjusting bridging parameters in your slicer software. Increasing bridging fan speed or tweaking the bridging extrusion multiplier can help improve bridging performance. Additionally, optimizing the design by adding small bridging sections within the model can provide additional support.
If you encounter stringing or oozing between overhangs, it may be necessary to fine-tune retraction settings. Retraction helps pull the filament back to prevent oozing when the printhead moves between non-printing areas. Adjusting retraction distance and speed can minimize stringing and improve the cleanliness of the overhangs.
Lastly, consider consulting online forums, discussions, or support resources specific to your printer or slicer software. These communities often provide valuable insights into troubleshooting overhang issues and share tips and solutions based on their experiences.
Remember, troubleshooting overhang issues requires patience and experimentation. By systematically addressing each issue and making targeted adjustments, you can overcome challenges and achieve better overhang prints. With the troubleshooting steps covered, let’s summarize the key points we’ve discussed so far.
Conclusion
Printing overhangs in 3D printing can be a challenging task, but with the right techniques and adjustments, you can achieve better results. By understanding the intricacies of overhangs and selecting the appropriate printing material, adjusting parameters, using support structures, fine-tuning cooling settings, and optimizing model design, you can overcome the challenges and improve the quality of your overhang prints.
It is important to choose the right material for your specific overhang requirements, taking into account factors such as flexibility, strength, and temperature resistance. Adjusting printing parameters, including speed, layer height, extrusion multiplier, and cooling settings, can significantly impact overhang performance. Using support structures gives temporary support to overhanging sections, ensuring successful prints. Fine-tuning cooling settings helps solidify the filament and prevent drooping or warping. Optimizing the model design by considering overhang angles, chamfers, fillets, bridging, and ribbing can minimize the need for excessive support and enhance printability.
Throughout the process, troubleshooting overhang issues is essential. By identifying common issues such as drooping, warping, rough surfaces, failed prints, and stringing, and employing the appropriate solutions, you can overcome these challenges and achieve better results.
Remember, each printer and material combination may require some experimentation and adjustments to optimize overhang printing. By understanding the principles and techniques discussed in this guide, you can continue to refine your skills and achieve impressive overhang prints.
So, go forth and apply these techniques to enhance your 3D printing capabilities. Explore the possibilities of creating intricate designs with challenging overhangs, and let your imagination soar. Happy printing!