What Is Z Offset 3D Printing
Z Offset in 3D printing refers to the adjustment made to the vertical positioning of the print nozzle or bed to ensure proper adhesion and accurate layer deposition. It is an important parameter that helps compensate for variations in the bed level or material thickness, resulting in precise and high-quality prints.
When 3D printing, the Z-offset comes into play as the printer moves along the Z-axis. It determines the distance between the nozzle and the print bed, allowing for optimal layer height consistency. The Z offset setting influences the quality, surface smoothness, and overall success of the print job.
Getting the Z offset correctly set can be crucial for achieving successful prints. If the offset is too high, the nozzle may be too far from the bed, resulting in poor adhesion and potential filament jamming. On the other hand, if the offset is too low, the nozzle could scrape against the bed, leading to nozzle damage or inaccurate layer deposition.
Understanding and properly utilizing the Z offset parameter is particularly important when dealing with delicate and intricate prints. Precise control over the distance between the nozzle and the bed can help prevent nozzle collisions and ensure that the layers adhere properly to each other.
Adjusting the Z offset requires careful calibration to find the optimal distance between the nozzle and the print bed. This calibration process involves iterative adjustments until the desired results are achieved. Depending on the 3D printer model and firmware, the Z offset can be fine-tuned through software settings or manual adjustments.
By calibrating the Z offset, you can compensate for any imperfections in the print bed, variations in print surface materials, or changes in the filament’s thickness. This helps you achieve consistent and accurate prints across different materials and models, regardless of any inherent bed or nozzle irregularities.
As a valuable tool in 3D printing, the Z offset contributes significantly to the overall print quality and success rate. Understanding its functions and mastering the calibration process is essential for any 3D printing enthusiast or professional, as it ensures precise and reliable results with every print.
Introduction
3D printing has revolutionized manufacturing and prototyping by enabling the creation of intricate and complex objects. To achieve optimal print quality, various parameters and settings need to be carefully adjusted. One such crucial parameter is the Z offset.
Z offset, specifically in the context of 3D printing, refers to the vertical offset or adjustment made to the print nozzle or bed. It ensures proper adhesion and accurate layer deposition, ultimately influencing the success and quality of the printed object.
In this article, we’ll explore the concept of Z offset in 3D printing, its importance, and how it works. We’ll also delve into the calibration process, factors affecting Z offset, and common troubleshooting techniques to help you achieve the best results with your 3D prints.
Understanding and properly utilizing the Z offset parameter is critical for achieving successful prints with accurate layer height and proper adhesion. Whether you’re a hobbyist or a professional in the field, having a solid grasp of Z offset and its impact on print quality is essential.
We’ll start by unraveling the concept of Z offset and why it matters in 3D printing. Then, we’ll dive into the working mechanism of Z offset and how it helps compensate for variations in the print bed or material thickness. Calibration is an important step in achieving the optimal Z offset, and we’ll guide you through the process.
Furthermore, we’ll explore the factors that can affect Z offset and provide tips for troubleshooting common Z offset issues. By the end of this article, you’ll have a comprehensive understanding of Z offset and be equipped with the knowledge to calibrate it effectively for your 3D printing projects.
Understanding Z Offset
To grasp the concept of Z offset in 3D printing, it’s essential to understand its role in achieving precise layer deposition and proper adhesion.
Z offset refers to the adjustment made to the vertical positioning of the print nozzle or bed during the printing process. It determines the distance between the nozzle and the print bed, ensuring that each layer is accurately deposited.
One important aspect of 3D printing is layer height—the thickness of each individual layer in the printed object. Achieving consistent layer height is crucial for producing high-quality prints. The Z offset plays a significant role in maintaining this consistency.
Imagine a scenario where the print bed is perfectly level, and the nozzle is at the ideal distance from the bed for proper adhesion. However, the first layer of filament being extruded is slightly thicker due to variations in the filament or the way it is laid down. Without adjusting the Z offset, the subsequent layers would be deposited at the same distance from the nozzle, resulting in layers that do not stick well together.
By adjusting the Z offset, you can compensate for these variations in filament thickness or minor imperfections in the print bed. If the first layer is slightly thicker, you can bring the nozzle closer to the bed and ensure better adhesion and a more precise layer height in subsequent layers.
Conversely, if the first layer is slightly thinner, you can raise the nozzle slightly, ensuring that the subsequent layers adhere properly without the nozzle scratching against the bed.
The Z offset is not only relevant for the first layer but for every subsequent layer as well. Each layer needs to be accurately positioned and adhere properly to ensure the integrity and strength of the final print.
Proper understanding and control of the Z offset parameter are fundamental to achieving consistent, high-quality prints. It allows for fine-tuning the distance between the nozzle and the print bed, compensating for any minor deviations and variations in the printing process.
In the next section, we will explore the importance of Z offset in 3D printing and how it contributes to successful print outcomes.
Importance of Z Offset
The Z offset parameter plays a crucial role in ensuring successful 3D prints and maintaining optimal print quality. Here are some reasons why Z offset is important in the 3D printing process:
1. Proper Adhesion: Achieving proper adhesion between the first layer of filament and the print bed is vital for successful prints. The Z offset allows you to fine-tune the distance between the nozzle and the bed, ensuring that the first layer adheres firmly without any gaps or detachment.
2. Accurate Layer Height: Consistency in layer height is essential for achieving precise and high-quality prints. By adjusting the Z offset, you can compensate for variations in filament thickness or minor bed imperfections, ensuring that each layer is deposited at the desired height.
3. Print Surface Compatibility: Different print surfaces, such as glass, PEI, or BuildTak, have varying levels of adhesion and surface textures. The Z offset allows you to make small adjustments to accommodate these different surfaces and achieve optimal adhesion for each material.
4. Compensation for Bed Level Variations: Despite calibration, print beds can have slight imperfections or inconsistencies. The Z offset helps compensate for these variations, ensuring that the nozzle is always at the correct distance from the bed, resulting in uniform layer deposition.
5. Print Quality: The Z offset directly affects the overall print quality. When properly calibrated, it helps eliminate common print defects such as insufficient adhesion, warping, under-extrusion, or nozzle dragging. By fine-tuning the Z offset, you can achieve smoother and more accurate prints.
6. Wide Range of Filament Usage: Many users experiment with different types of filaments that have varying properties such as viscosity or diameter. The Z offset allows for adjustments to accommodate these differences, ensuring optimal printing conditions regardless of the filament being used.
7. Consistency Across Prints: As you fine-tune and establish the optimal Z offset for your printer, you will achieve a level of consistency across different print jobs. This means that once calibrated, you don’t need to readjust the Z offset for every print, resulting in time savings and reliable results.
Understanding the importance of Z offset and its impact on print quality is essential for achieving successful and reliable 3D prints. The next section will delve into how Z offset works and the mechanisms behind its adjustments.
How Z Offset Works
Z offset works by adjusting the vertical positioning of the print nozzle or the print bed to achieve the desired distance and alignment between them. This adjustment is crucial for accurate layer deposition and proper adhesion throughout the printing process.
In most 3D printers, the Z-axis is responsible for the vertical movement of the print head or the print bed. The Z offset comes into play as the printer moves along this axis, determining the distance between the nozzle and the print bed.
When the 3D printer starts a print job, the nozzle needs to be at the correct distance from the bed to ensure optimal adhesion and layer height. The Z offset allows for fine adjustments to precisely position the nozzle at the desired distance.
To create the first layer, the printer usually performs a process called “bed leveling” to ensure that the bed is parallel to the print head or nozzle. This helps compensate for any inherent imperfections in the print bed’s level. However, even with proper leveling, variations in filament thickness or minor discrepancies in the print bed can still impact the print quality.
By adjusting the Z offset, you can compensate for these variations, ensuring that the nozzle is at the correct height above the bed for consistent layer deposition. If the first layer of filament being extruded is slightly thicker, increasing the Z offset brings the nozzle closer to the bed. This allows for better adhesion and ensures that subsequent layers are deposited at the desired height.
Conversely, if the first layer is slightly thinner, decreasing the Z offset raises the nozzle slightly, preventing it from scraping against the bed and ensuring proper adhesion without compromising the layer height.
Proper calibration and adjustment of the Z offset are essential for achieving precise and high-quality prints. It allows for compensation of variations in filament thickness, material properties, and print bed variations, resulting in better adhesion, accurate layer height, and overall print success.
In the next section, we will discuss the process of calibrating the Z offset to fine-tune this critical parameter for optimal 3D printing performance.
Calibrating Z Offset
Calibrating the Z offset is a crucial step in achieving optimal print quality and ensuring accurate layer deposition in 3D printing. The calibration process involves fine-tuning the distance between the print nozzle and the print bed to compensate for variations and achieve consistent results.
Here are the general steps to calibrate the Z offset:
- Prepare the printer: Ensure that the printer is properly leveled and ready for calibration. Make sure the build plate is clean and free from any debris or residues that may affect adhesion.
- Select a calibration method: There are different methods for calibrating the Z offset, depending on the printer model and firmware. Some printers offer manual adjustments through software settings, while others require manual adjustments using a piece of paper or a feeler gauge to measure the distance between the nozzle and the print bed.
- Start with conservative settings: Begin by setting a conservative Z offset value, which keeps the nozzle slightly higher from the print bed. This prevents the nozzle from scratching the bed or causing adhesion issues. It also provides a starting point for subsequent fine-tuning adjustments.
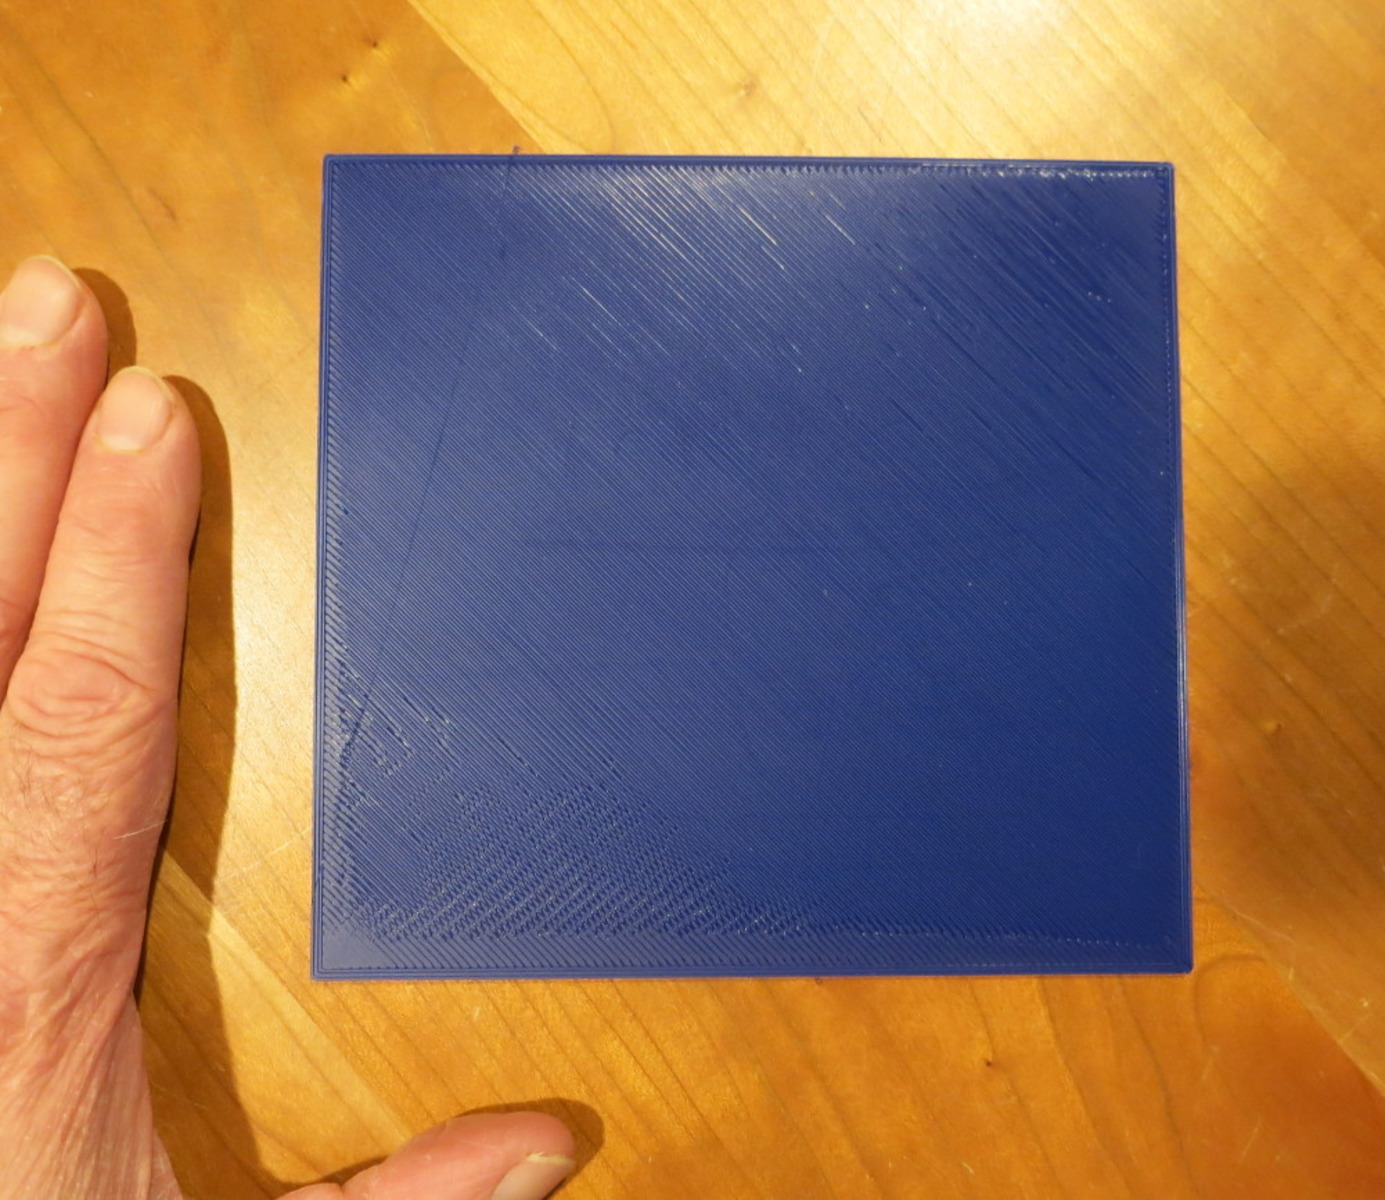
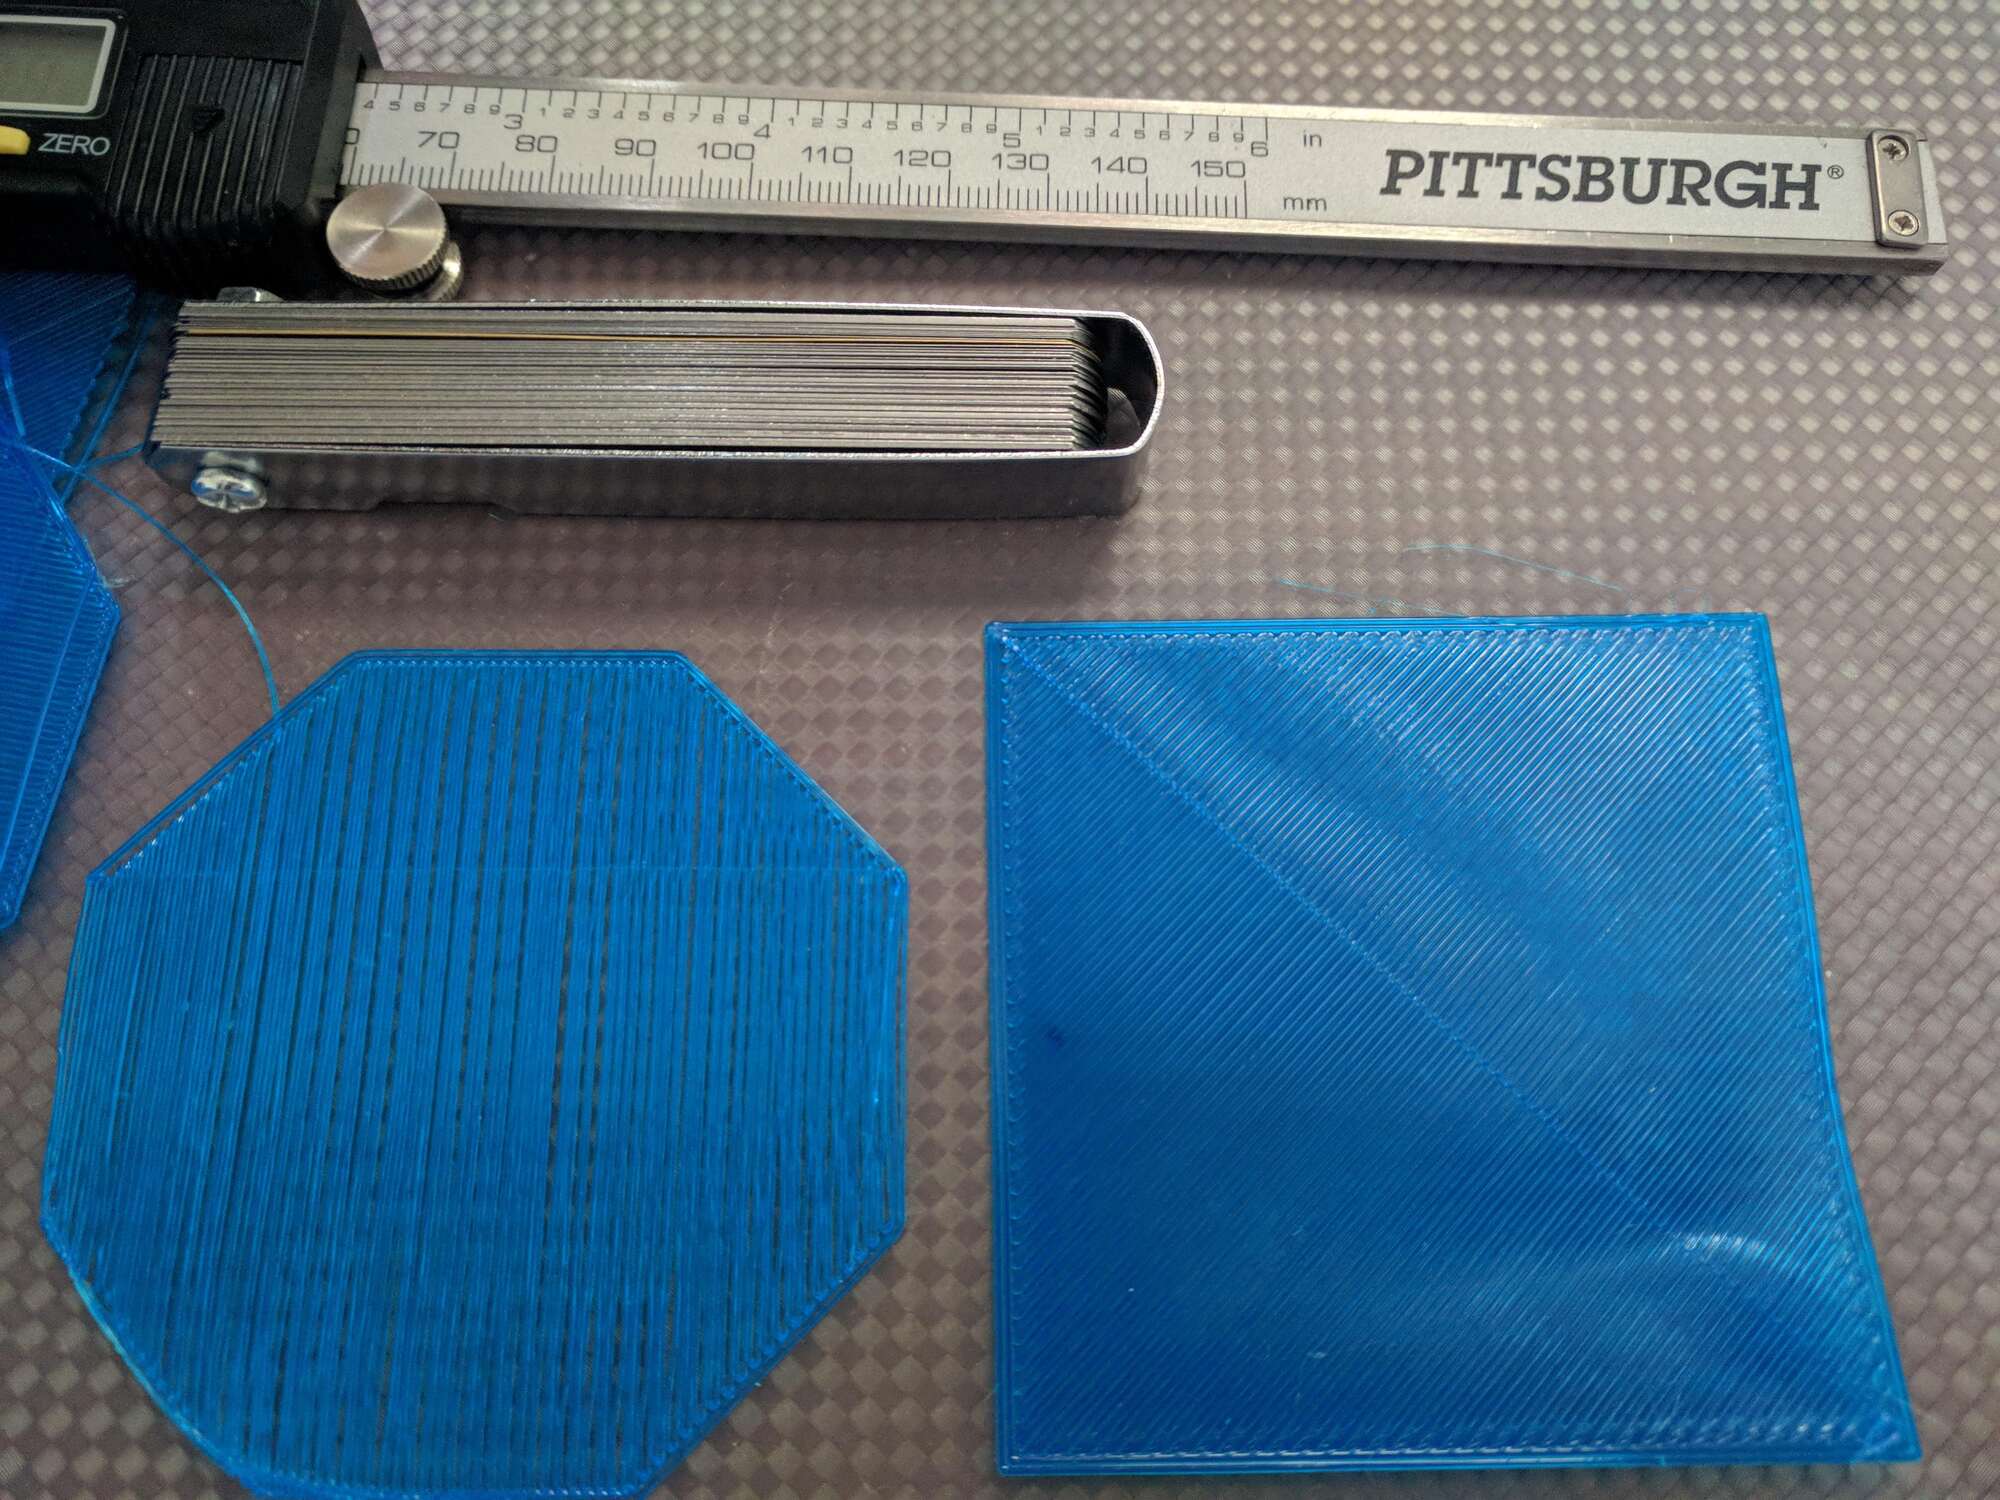
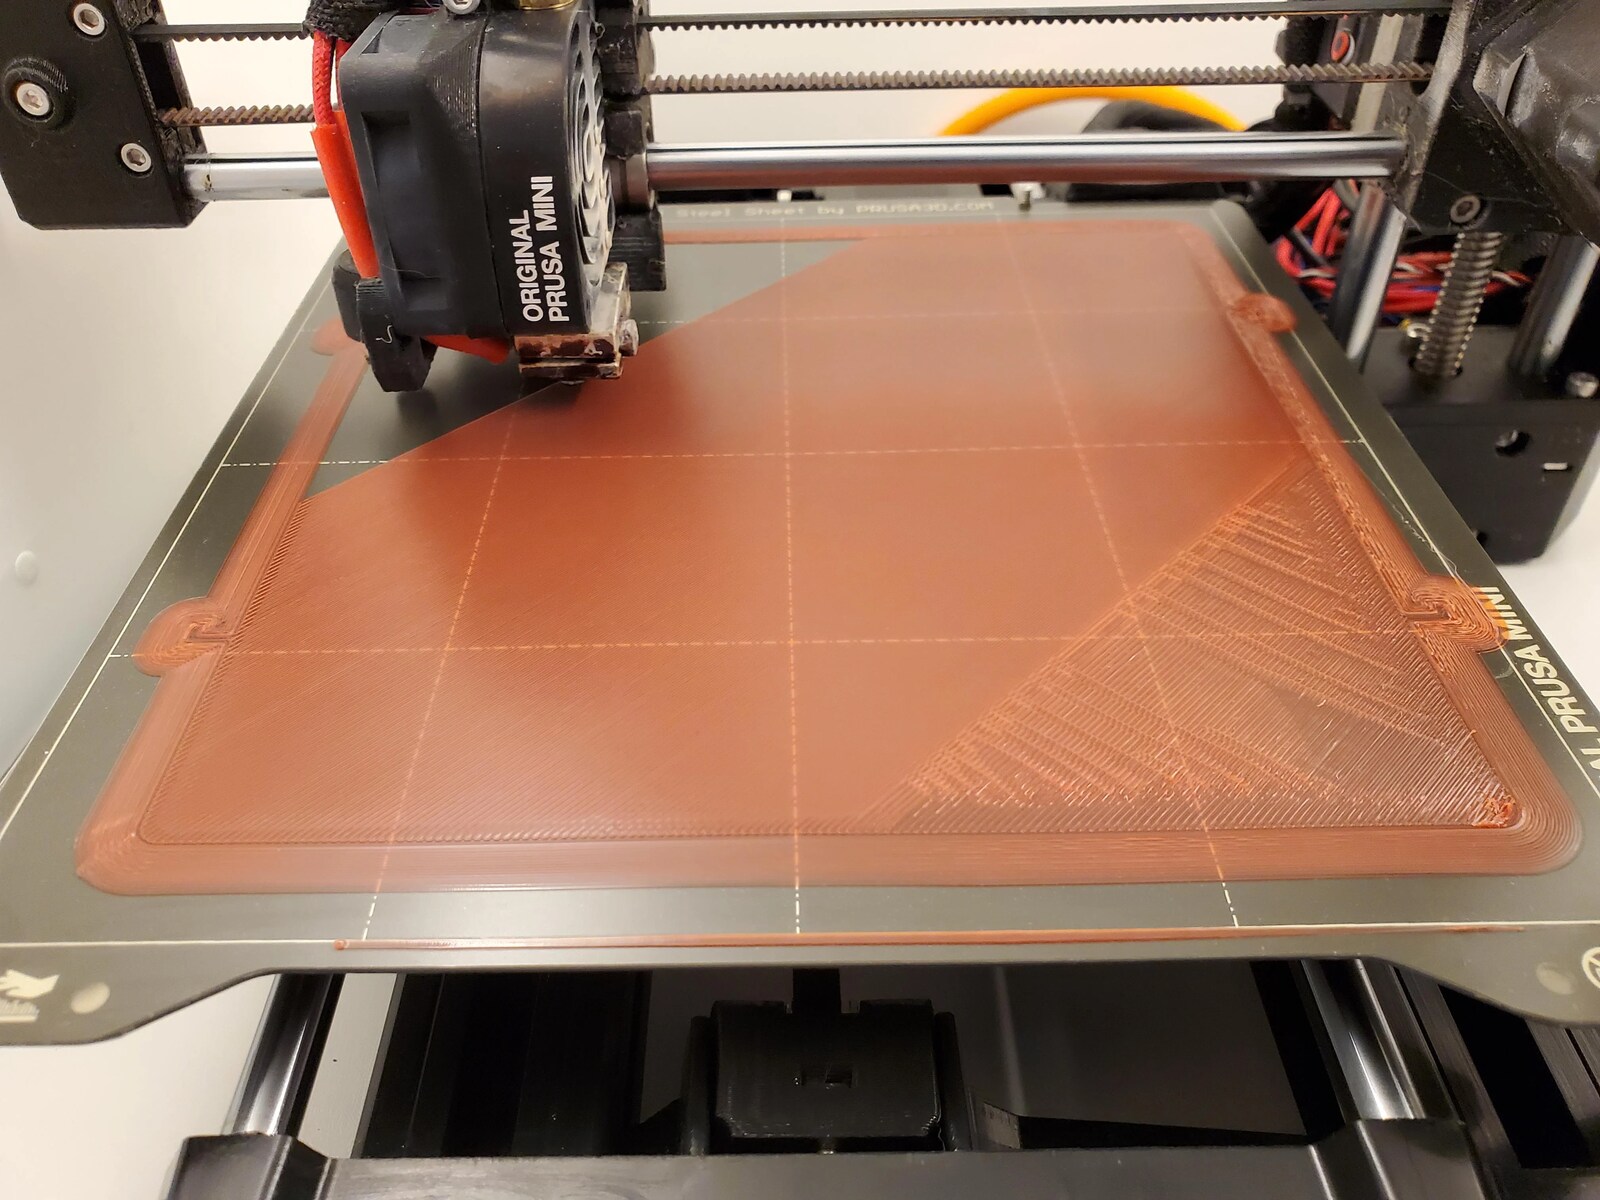
- Perform test prints: Print a calibration test print that includes features such as a single layer or a first layer square, which allows you to observe the quality, adhesion, and layer height consistency. Examine the print and evaluate the initial layer’s adhesion and appearance for any issues or imperfections.
- Make Z offset adjustments: Based on the results of the test print, make incremental adjustments to the Z offset. Lower the Z offset slightly if the first layer lacks adhesion or is too thin, or raise it if the first layer is difficult to remove or appears squished. Repeat the test print after each adjustment to evaluate the impact.
- Iterate and refine: Continue making small adjustments to the Z offset and repeating the test prints until you achieve the desired results. Take note of the Z offset values used for each successful print, as this will help establish a baseline for future printing.
It’s important to be patient and systematic during the calibration process. Make small adjustments between each test print and carefully observe the changes in print quality. Take your time and be willing to go through the iteration process to dial in the optimal Z offset value for your printer and specific printing conditions.
Once you have successfully calibrated the Z offset, it’s advisable to periodically recheck and readjust it as necessary. Factors such as changes in filament brand or type, print bed conditions, or other modifications may require recalibration of the Z offset to maintain consistent print quality.
In the next section, we will explore some methods for testing and verifying the Z offset to ensure its accuracy and reliability.
Testing Z Offset
Testing the Z offset is an essential step to ensure its accuracy and to verify that the adjustments made during calibration have resulted in optimal print quality. Testing allows you to evaluate the adhesion, layer height consistency, and overall performance of your printer’s Z offset settings. Here are some commonly used methods for testing the Z offset:
1. First Layer Squares: Printing a test object with multiple single-layer squares can help you assess the quality of the first layer and the accuracy of the Z offset. Each square should adhere well to the print bed and have consistent layer height. Adjust the Z offset if there are adhesion issues or inconsistencies in the squares.
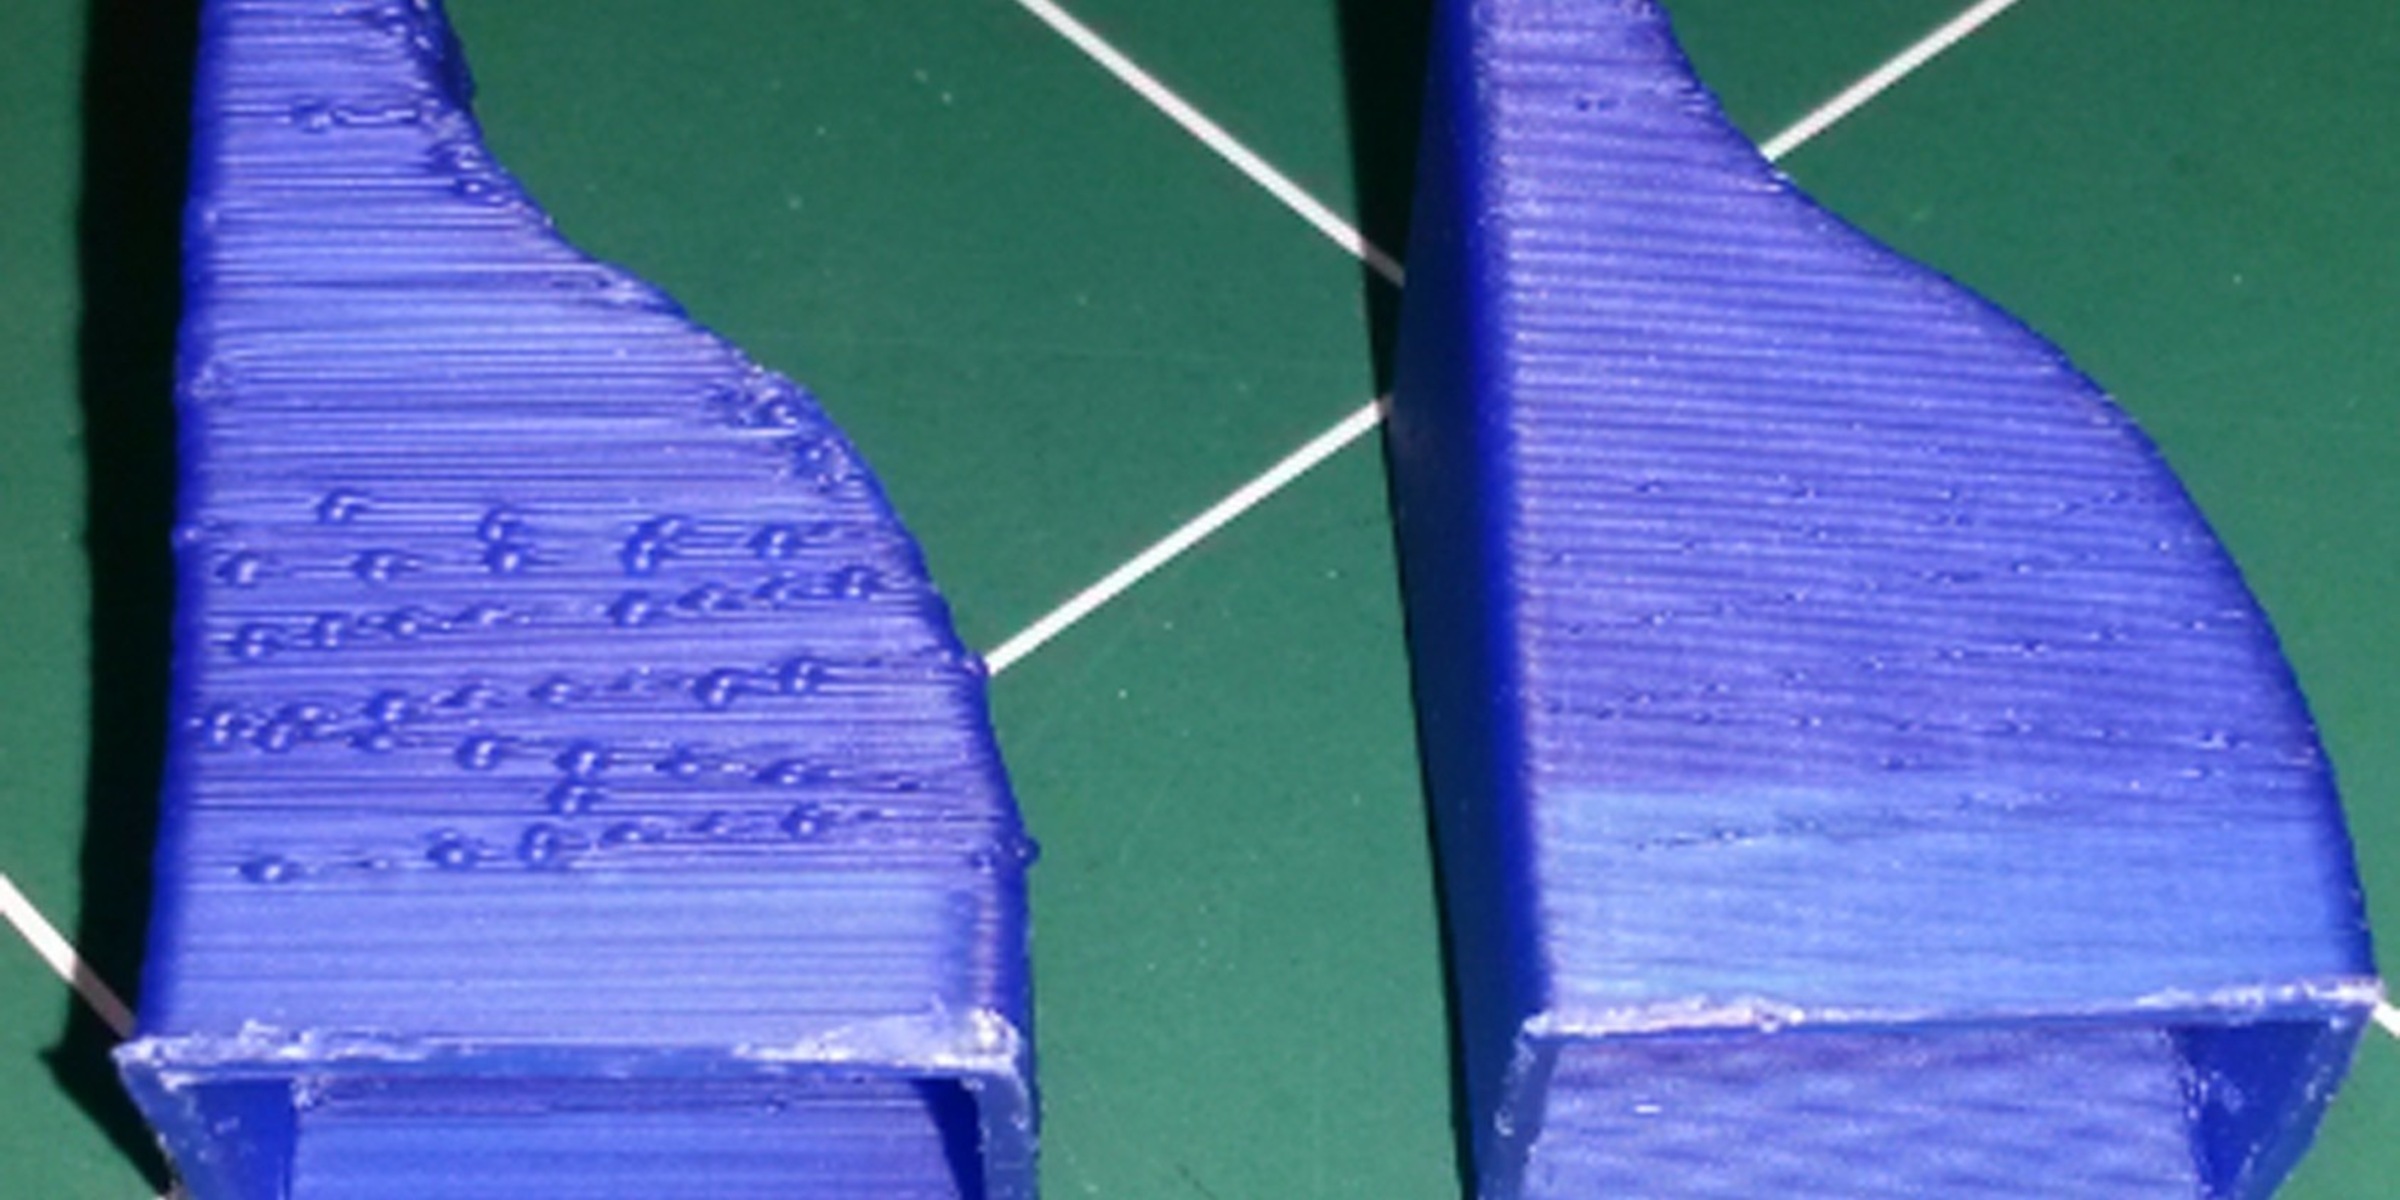
2. Overhang Tests: Printing models with challenging overhangs can reveal the effectiveness of the Z offset calibration. These models typically have gradually increasing overhang angles, allowing you to observe at which point the overhangs start to fail. If the overhangs are sagging or not properly supported, adjusting the Z offset can help improve their quality.
3. Benchy or Torture Tests: Complex models like the Benchy or torture tests contain a variety of challenging features, including overhangs, bridging, small details, and vertical walls. Printing these models with different Z offset settings can help you compare and assess the print quality and performance under different conditions.
4. Calibration Patterns: Some calibration patterns specifically designed for Z offset testing include patterns with varying layer heights or patterns with text or numbers. These patterns can be printed, and any inconsistencies or imperfections can be used to adjust the Z offset accordingly.
5. Filament Feeler Gauge Test: This method involves printing a layer directly onto a piece of paper or a feeler gauge of a known thickness. The printed layer’s texture and appearance can indicate whether the Z offset is too high or too low. Adjustments can be made based on the outcome of this test.
6. Visual Inspection: A straightforward method to assess the Z offset is to visually inspect the finished prints. Look for signs of good adhesion, even layer height, and absence of gaps or inconsistencies between layers. Adjustments can be made if there are noticeable print issues related to layer adhesion or height.
Testing the Z offset allows you to fine-tune the parameters for optimal print quality. It’s important to document the testing process, including the settings used and the results obtained, to help establish a baseline and refer back to it in future printing projects or when troubleshooting.
Ultimately, the goal of testing the Z offset is to ensure that your printer is producing consistent, high-quality prints across different models and materials. Regularly reviewing and verifying the Z offset settings will help you achieve reliable and accurate results with your 3D prints.
Factors Affecting Z Offset
Several factors can influence the Z offset in 3D printing, and understanding these factors is crucial for achieving accurate layer deposition and proper adhesion. Here are some key factors that can affect the Z offset:
1. Print Bed Surface: The type and condition of the print bed surface can impact the Z offset. Different surfaces such as glass, PEI, or BuildTak have varying levels of adhesion and textures. Adjustments may be needed to ensure proper nozzle-to-bed distance and optimal adhesion for each specific surface.
2. Filament Diameter and Properties: Filament diameter variations can affect the Z offset as the extrusion amount can change. Additionally, different filaments have varying material properties such as viscosity and flow characteristics. Adjustments to the Z offset may be required to accommodate these variations for optimal print quality.
3. Filament Thickness: Differences in filament thickness can impact the height at which the nozzle is positioned off the bed. Adjustments to the Z offset may be necessary to compensate for variations in filament thickness to maintain consistent layer height throughout the print.
4. Temperature and Print Environment: Changes in ambient temperature and humidity can affect the print bed and filament behavior, resulting in variations in layer height and adhesion. Monitoring and adjusting the Z offset accordingly can help mitigate the impact of these environmental factors on print quality.
5. Bed Leveling and Tramming: Inaccurate bed leveling or tramming can lead to uneven nozzle-to-bed distance, affecting the Z offset. Ensuring proper bed leveling and tramming is essential for consistent and accurate Z offset settings.
6. Printer Rigidity and Mechanics: The rigidity and mechanics of the 3D printer can impact the Z offset. If the printer’s frame or components are not stable, it can result in variations in nozzle height during printing. Maintaining proper printer calibration and addressing any mechanical issues can help minimize the effects on the Z offset.
7. Firmware and Software Settings: The firmware and software settings of the 3D printer control the Z offset adjustment and its behavior. Understanding and correctly configuring these settings is essential for effectively adjusting and maintaining the Z offset for optimal print quality.
8. Printer Upgrades and Modifications: Upgrading or modifying the printer with aftermarket components or modifications can affect the Z offset. Adjustments may be necessary to accommodate any changes in the hardware configuration or to optimize the printer’s performance with the new components.
Considering these factors and the potential impact they can have on the Z offset is important when calibrating and fine-tuning your 3D printer. By identifying and addressing these factors, you can optimize the Z offset settings and achieve consistent, high-quality prints.
In the next section, we will explore common troubleshooting techniques to help resolve Z offset-related issues and ensure optimal print results.
Troubleshooting Z Offset Issues
Despite careful calibration and adjustment, Z offset issues can still arise during 3D printing. Identifying and troubleshooting these issues is crucial for achieving optimal print quality. Here are some common Z offset-related issues and potential solutions:
1. Poor Adhesion: If the first layer does not adhere properly to the print bed, it may indicate an incorrect Z offset. Try lowering the Z offset slightly to bring the nozzle closer to the bed, ensuring better adhesion. Additionally, double-check that the print bed is properly cleaned and leveled.
2. Over-Extrusion or Under-Extrusion: If you notice excessive filament being extruded or insufficient material being deposited, it may be due to an improper Z offset. Adjust the Z offset incrementally until you achieve the desired extrusion consistency and layer height.
3. Excessive Nozzle Dragging: If the nozzle is dragging against the print bed or previous layers, it indicates a Z offset that is too low. Increase the Z offset slightly to provide more clearance between the nozzle and the print surface, preventing dragging and improving print quality.
4. Inconsistent Layer Height: Inconsistent layer height throughout the print can be caused by an incorrect Z offset. Make sure the first layer is properly calibrated, and adjust the Z offset as needed to maintain a consistent layer height for the entire print.
5. Crunching or Skipping Sounds: If you hear crunching or skipping sounds during the print, it may indicate that the nozzle is either too close to the bed or too far away. Adjust the Z offset to find the optimal distance, ensuring smooth filament extrusion without any obstruction or grinding noises.
6. Uneven or Warped Prints: Uneven or warped prints can be caused by an incorrect Z offset or an uneven print bed. Ensure that the print bed is properly leveled, and adjust the Z offset to compensate for any bed variations. Additionally, consider using a heated bed or implementing adhesive aids to improve bed adhesion.
7. Visual Imperfections in Layer Adhesion: If you notice gaps, separation, or weak layer adhesion, it may be due to an incorrect Z offset. Fine-tune the Z offset to ensure proper contact and adhesion between layers, resulting in a stronger and more cohesive print.
When troubleshooting Z offset issues, it’s important to make incremental adjustments and perform test prints after each change. Document your adjustments and the resulting print quality to track the progress and find the optimal Z offset for your specific printer and materials.
If troubleshooting the Z offset does not resolve the issues, consider examining other aspects of the printing process, such as filament quality, extruder calibration, or slicer settings, as they may also contribute to print problems.
By addressing these common Z offset issues, you can optimize your 3D printing setup and achieve consistent, high-quality prints with accurate layer deposition.
Conclusion
Understanding and effectively utilizing the Z offset parameter in 3D printing is crucial for achieving optimal print quality and reliable results. By adjusting the vertical distance between the print nozzle and the print bed, the Z offset ensures proper adhesion and accurate layer deposition throughout the printing process.
In this article, we explored the concept of Z offset and its importance in 3D printing. We discussed how Z offset works, allowing for adjustments to compensate for variations in bed level, filament thickness, and material properties. We also explained the calibration process and provided some common testing methods to verify and fine-tune the Z offset settings.
Factors such as bed surface, filament properties, temperature, and printer mechanics can influence the Z offset, emphasizing the need for careful calibration and monitoring. We also discussed troubleshooting techniques for addressing common Z offset issues such as poor adhesion, inconsistent layer height, and nozzle dragging.
By mastering the Z offset parameter, you can achieve consistent layer height, improve print quality, and reduce the likelihood of print failures. Through iterative adjustments and careful testing, you can find the optimal Z offset for your specific printer, materials, and printing conditions.
Remember that Z offset calibration is not a one-time process. Environmental changes, filament variations, and printer modifications may require periodic readjustments to maintain optimal print quality.
With a solid understanding of Z offset and its impact on the 3D printing process, you are poised to take your prints to the next level. By fine-tuning the Z offset parameter, you can unlock the full potential of your 3D printer and produce consistent, high-quality prints that meet your expectations.