Introduction
Welcome to the world of 3D printing! Whether you are a seasoned enthusiast or a curious beginner, understanding the various settings and adjustments on a 3D printer is essential for achieving optimal results. One such setting that plays a crucial role in the printing process is the Z offset. In this article, we will delve into what the Z offset is, why it is important, how to adjust it, and some common issues you may encounter.
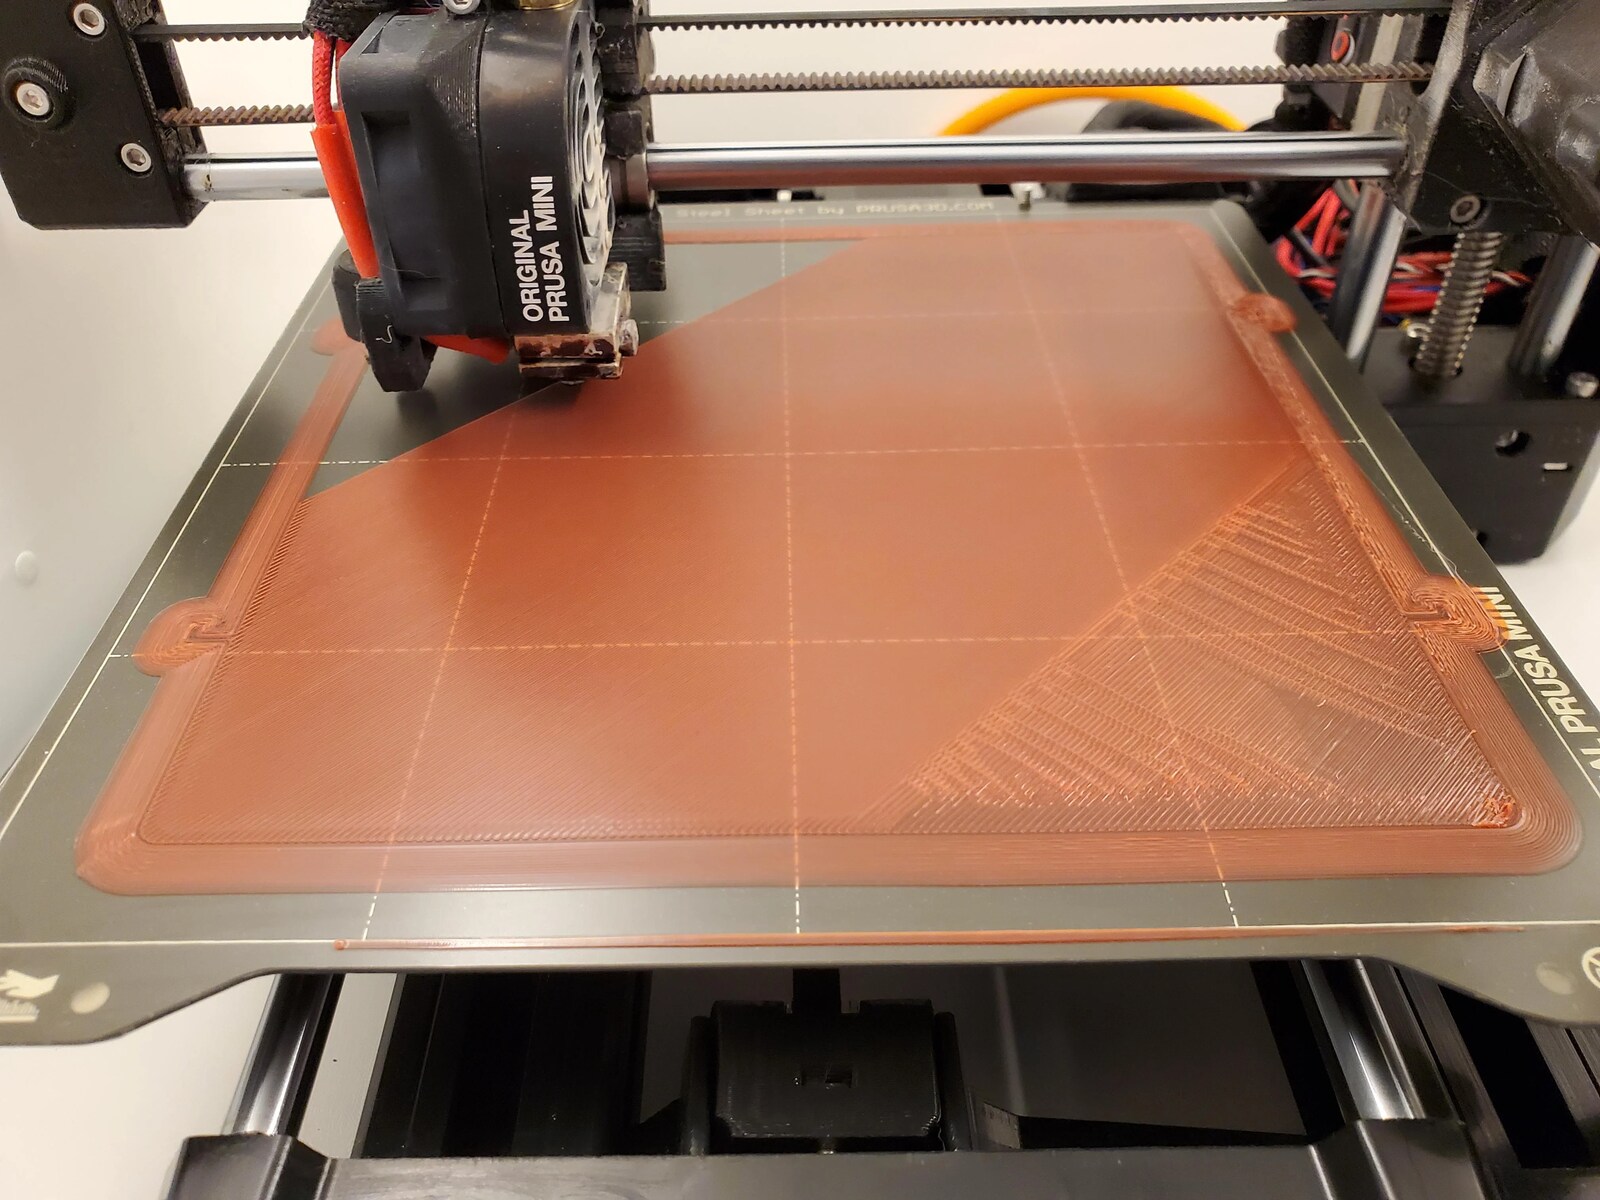
When it comes to 3D printing, precision is key. The Z offset is a setting that determines the distance between the printer’s nozzle and the print bed. This distance is crucial as it dictates the initial layer height, which directly impacts adhesion, print quality, and overall print success. By fine-tuning the Z offset, you can ensure that the nozzle is at the optimal height above the print bed, resulting in accurate and well-adhered prints.
So, why is the Z offset important? Well, imagine trying to build a tall, intricate structure like a skyscraper. If the foundation is uneven or too high from the ground, it would throw off the entire construction. The same principle applies to 3D printing. If the nozzle is too far from the print bed, the filament won’t adhere properly, leading to failed prints. On the other hand, if the nozzle is too close, it can result in the filament being squished or dragged, compromising the print quality.
Adjusting the Z offset allows you to find that sweet spot where the nozzle is positioned just right above the print bed. By making small adjustments, you can achieve optimal adhesion, fine details, and a smooth first layer. However, keep in mind that the Z offset may need to be recalibrated when using different materials or changing the print surface. It’s always a good idea to check and adjust the Z offset before starting a new print.
Now that we understand the importance of the Z offset, let’s delve into how to adjust this setting on your 3D printer. Grab your tools and get ready to fine-tune your prints for optimal results!
What is the Z Offset on a 3D Printer?
The Z offset is a significant setting on a 3D printer that determines the distance between the printer’s nozzle and the print bed. It represents the height at which the nozzle begins printing the first layer of a 3D model. This distance is critical to achieving proper adhesion and print quality.
During the printing process, the nozzle moves along the X and Y axes, depositing melted filament onto the print bed. The Z axis is responsible for controlling the up and down movement of the nozzle. The Z offset allows you to adjust the height between the nozzle and the print bed, ensuring that the filament adheres properly to the surface when the printing begins.
Without a correctly calibrated Z offset, several issues can arise. If the nozzle is too far from the print bed, the filament may not adhere properly, resulting in a failed print. On the other hand, if the nozzle is too close to the bed, the filament may be squished or dragged, causing a loss of detail and compromising print quality.
The exact method and terminology for adjusting the Z offset may vary depending on the 3D printer model and the slicing software you are using. Some printers and software provide a dedicated Z offset setting, while others may refer to it as bed leveling or initial layer height correction. Regardless of the terminology, the purpose remains the same: to fine-tune the nozzle height for optimal printing.
It’s important to note that the Z offset is typically set and adjusted for each print job. Different factors, such as different materials or the addition of an adhesive or print surface, may require slight changes to the Z offset. It is crucial to find the right balance to ensure proper adhesion, good print quality, and successful prints.
Now that you have a clear understanding of what the Z offset is and its importance in 3D printing, let’s explore how to adjust this setting to optimize your prints and achieve excellent results.
Why is the Z Offset important?
The Z offset is a critical setting in 3D printing that directly impacts the success and quality of your prints. Let’s take a closer look at why the Z offset is important and how it affects the printing process.
First and foremost, the Z offset determines the initial layer height of your print. The first layer is crucial as it sets the foundation for the rest of the print. With an incorrect Z offset, the first layer may not adhere properly or may become too squished, leading to poor print quality or even failed prints.
Proper adhesion between the filament and the print bed is essential to ensure the stability and integrity of the print. If the Z offset is not set correctly, the filament may not adhere securely to the bed, resulting in lifted corners, warping, or even detached prints. Achieving the right Z offset ensures that the filament is firmly attached to the print bed, minimizing the risk of print failures.
In addition to adhesion, the Z offset also affects the level of detail in your prints. If the nozzle is too far from the print bed, the filament may not be compressed enough, leading to flattened or blurred details. Conversely, if the nozzle is too close, it may cause excess pressure, resulting in smashed or distorted details. By adjusting the Z offset, you can find the optimal height for the nozzle, allowing for precise and high-quality prints.
Moreover, different materials may require different Z offset values. The viscosity and flow characteristics of various filaments can vary significantly. Adjusting the Z offset when switching between materials helps ensure that the nozzle is at the ideal distance for each specific filament, optimizing print quality and adhesion.
Overall, the Z offset plays a vital role in achieving successful 3D prints. It determines the initial layer height, impacts adhesion, affects print quality and level of detail, and allows for customization based on the filament being used. Taking the time to properly calibrate the Z offset for each print job will result in more reliable, consistent, and visually appealing prints.
How to adjust the Z Offset?
Adjusting the Z offset on your 3D printer may seem daunting at first, but with a few simple steps, you can fine-tune this setting for optimal print results. Here’s a basic guide to help you adjust the Z offset:
- Start by ensuring that your printer’s bed is level. Proper bed leveling is essential for accurate Z offset adjustments. Refer to your printer’s manual or online tutorials for guidance on bed leveling.
- Next, open your 3D slicer software. The location of the Z offset adjustment may vary depending on the software you are using. Look for settings related to bed leveling, initial layer height, or Z offset correction.
- Prepare a test print with a simple and small model that allows you to easily assess the first layer quality. This will help you gauge the impact of your Z offset adjustments.
- Begin by setting your initial Z offset to a neutral value, usually around zero. This ensures that the nozzle is at a starting position above the print bed, but not touching it.
- Start the test print. Observe the first layer as it begins to print. Pay attention to the smoothness of the extrusion, the adhesion of the filament to the bed, and the overall quality of the print.
- Based on your observations, make small adjustments to the Z offset. If the filament is not adhering well or appears too squished, increase the Z offset slightly. If the filament is not adhering at all or the first layer is too loose, decrease the Z offset slightly.
- Continue iterating this process, making incremental adjustments to the Z offset and observing the print results until you achieve the desired first layer quality. Remember to record the changes you make for future reference.
- Once you have found the optimal Z offset for your specific printer and filament, you can store this value in your slicer software or directly on your printer, depending on the capabilities of your setup. This allows you to easily apply the correct Z offset for future prints.
Remember, adjusting the Z offset can be a trial-and-error process, and it may require multiple test prints to find the perfect setting. Be patient, take notes, and make gradual adjustments until you achieve the desired results.
Now that you know how to adjust the Z offset, let’s explore some of the tools and features that can assist you in this process.
Tools for adjusting the Z Offset
When it comes to adjusting the Z offset on your 3D printer, there are several tools and features that can simplify and streamline the process. Let’s explore some of these tools to help you fine-tune your Z offset:
- Manual Bed Leveling: Most 3D printers require manual bed leveling, which involves adjusting the position of the print bed to ensure it is parallel to the nozzle. This step is crucial for accurate Z offset adjustments, as an uneven bed can lead to inconsistent first layers. Use a leveling tool, such as a piece of paper or a feeler gauge, to achieve an optimal bed level.
- Auto Bed Leveling: Some 3D printers come with automatic bed leveling features, which utilize sensors or probes to measure the distance between the nozzle and the bed. Auto bed leveling can simplify the Z offset adjustment process, as it eliminates the need for manual adjustments. Consult your printer’s documentation to learn how to enable and utilize this feature.
- Z Offset Adjustment in Slicer Software: Most slicer software provides settings to adjust the Z offset. These settings may be labeled as “bed leveling,” “initial layer height,” or “Z offset correction.” Use these features to fine-tune the Z offset value and achieve the desired first layer quality. Refer to the documentation or online tutorials for your specific slicer software to learn how to access and modify these settings.
- Print Surface Adhesives: Using adhesives on your print surface, such as glue sticks, hairspray, or specialized 3D printing adhesives, can improve bed adhesion and help compensate for slight variations in the Z offset. Experiment with different adhesives to find the one that works best for your printer and filament combination.
- Z Offset Calibration Prints: Some 3D printer users have created specific calibration models for adjusting the Z offset. These models typically feature a variety of test patterns and are designed to help fine-tune the Z offset settings. Look for these calibration models online or in 3D printing communities and forums for assistance with your Z offset adjustments.
Exploring and utilizing these tools and features will make the process of adjusting the Z offset on your 3D printer more efficient and effective. Remember to take your time, make small adjustments, and test the results with each modification to achieve the optimal Z offset for your prints.
Now that you are equipped with knowledge about the tools for adjusting the Z offset, let’s address some common issues that you may encounter in the Z offset calibration process.
Common issues with Z Offset
When adjusting the Z offset on your 3D printer, you may encounter some common issues that can impact the quality of your prints. Understanding these issues and knowing how to address them will help you achieve optimal Z offset calibration. Let’s explore some of the most common issues:
- Poor Bed Adhesion: If your prints are not sticking well to the print bed, it may indicate that the Z offset is too high. Increase the Z offset slightly to bring the nozzle closer to the bed and improve adhesion. Additionally, using a print surface adhesive or adjusting the bed leveling may help improve bed adhesion.
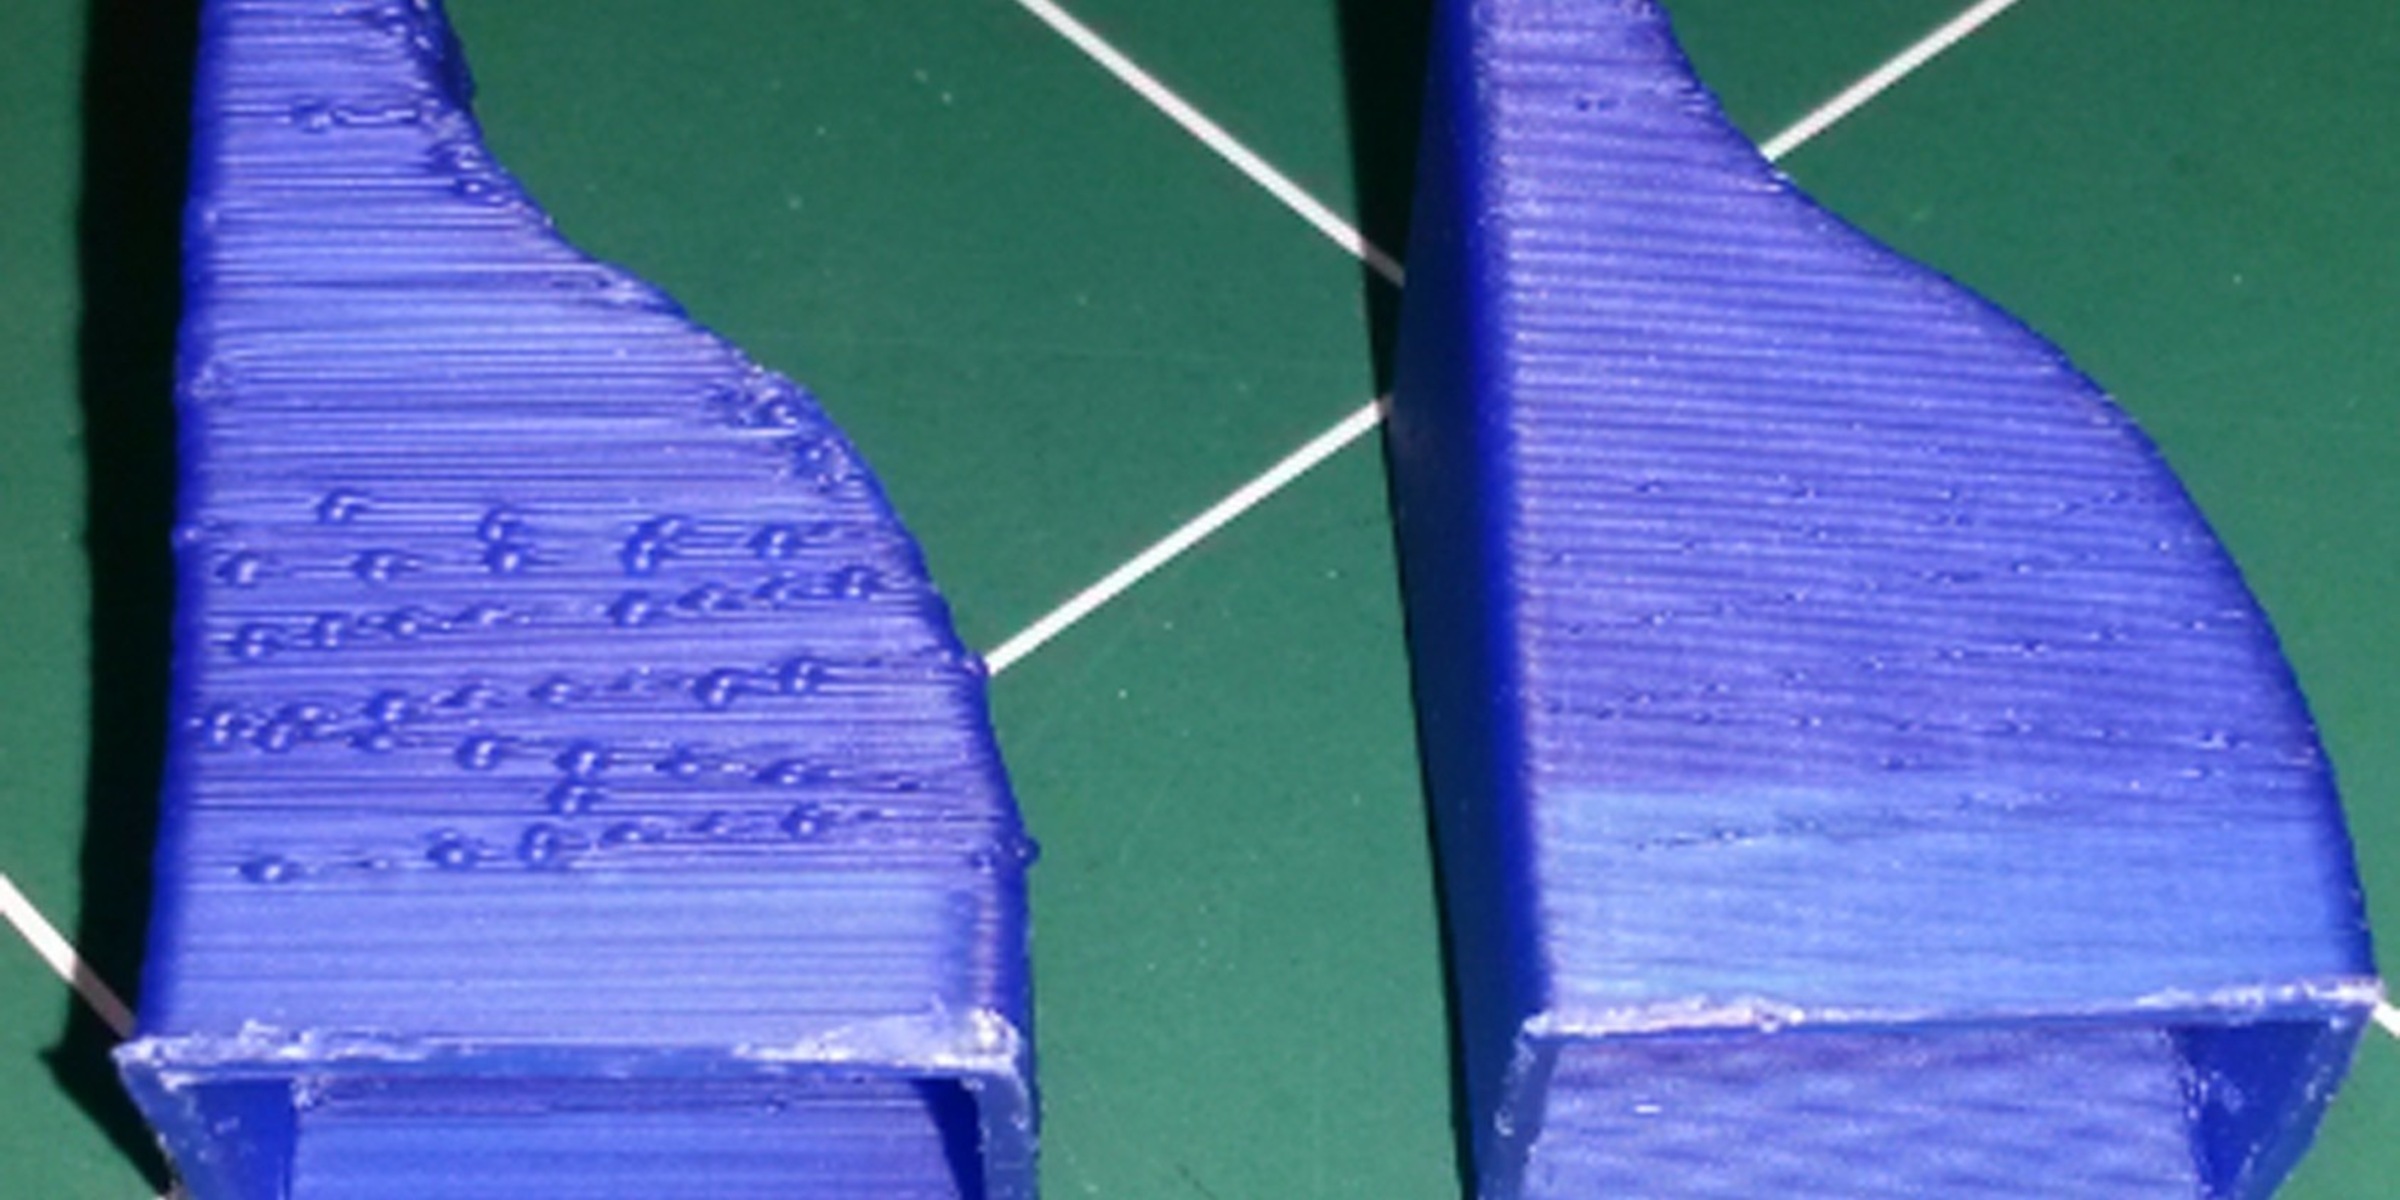
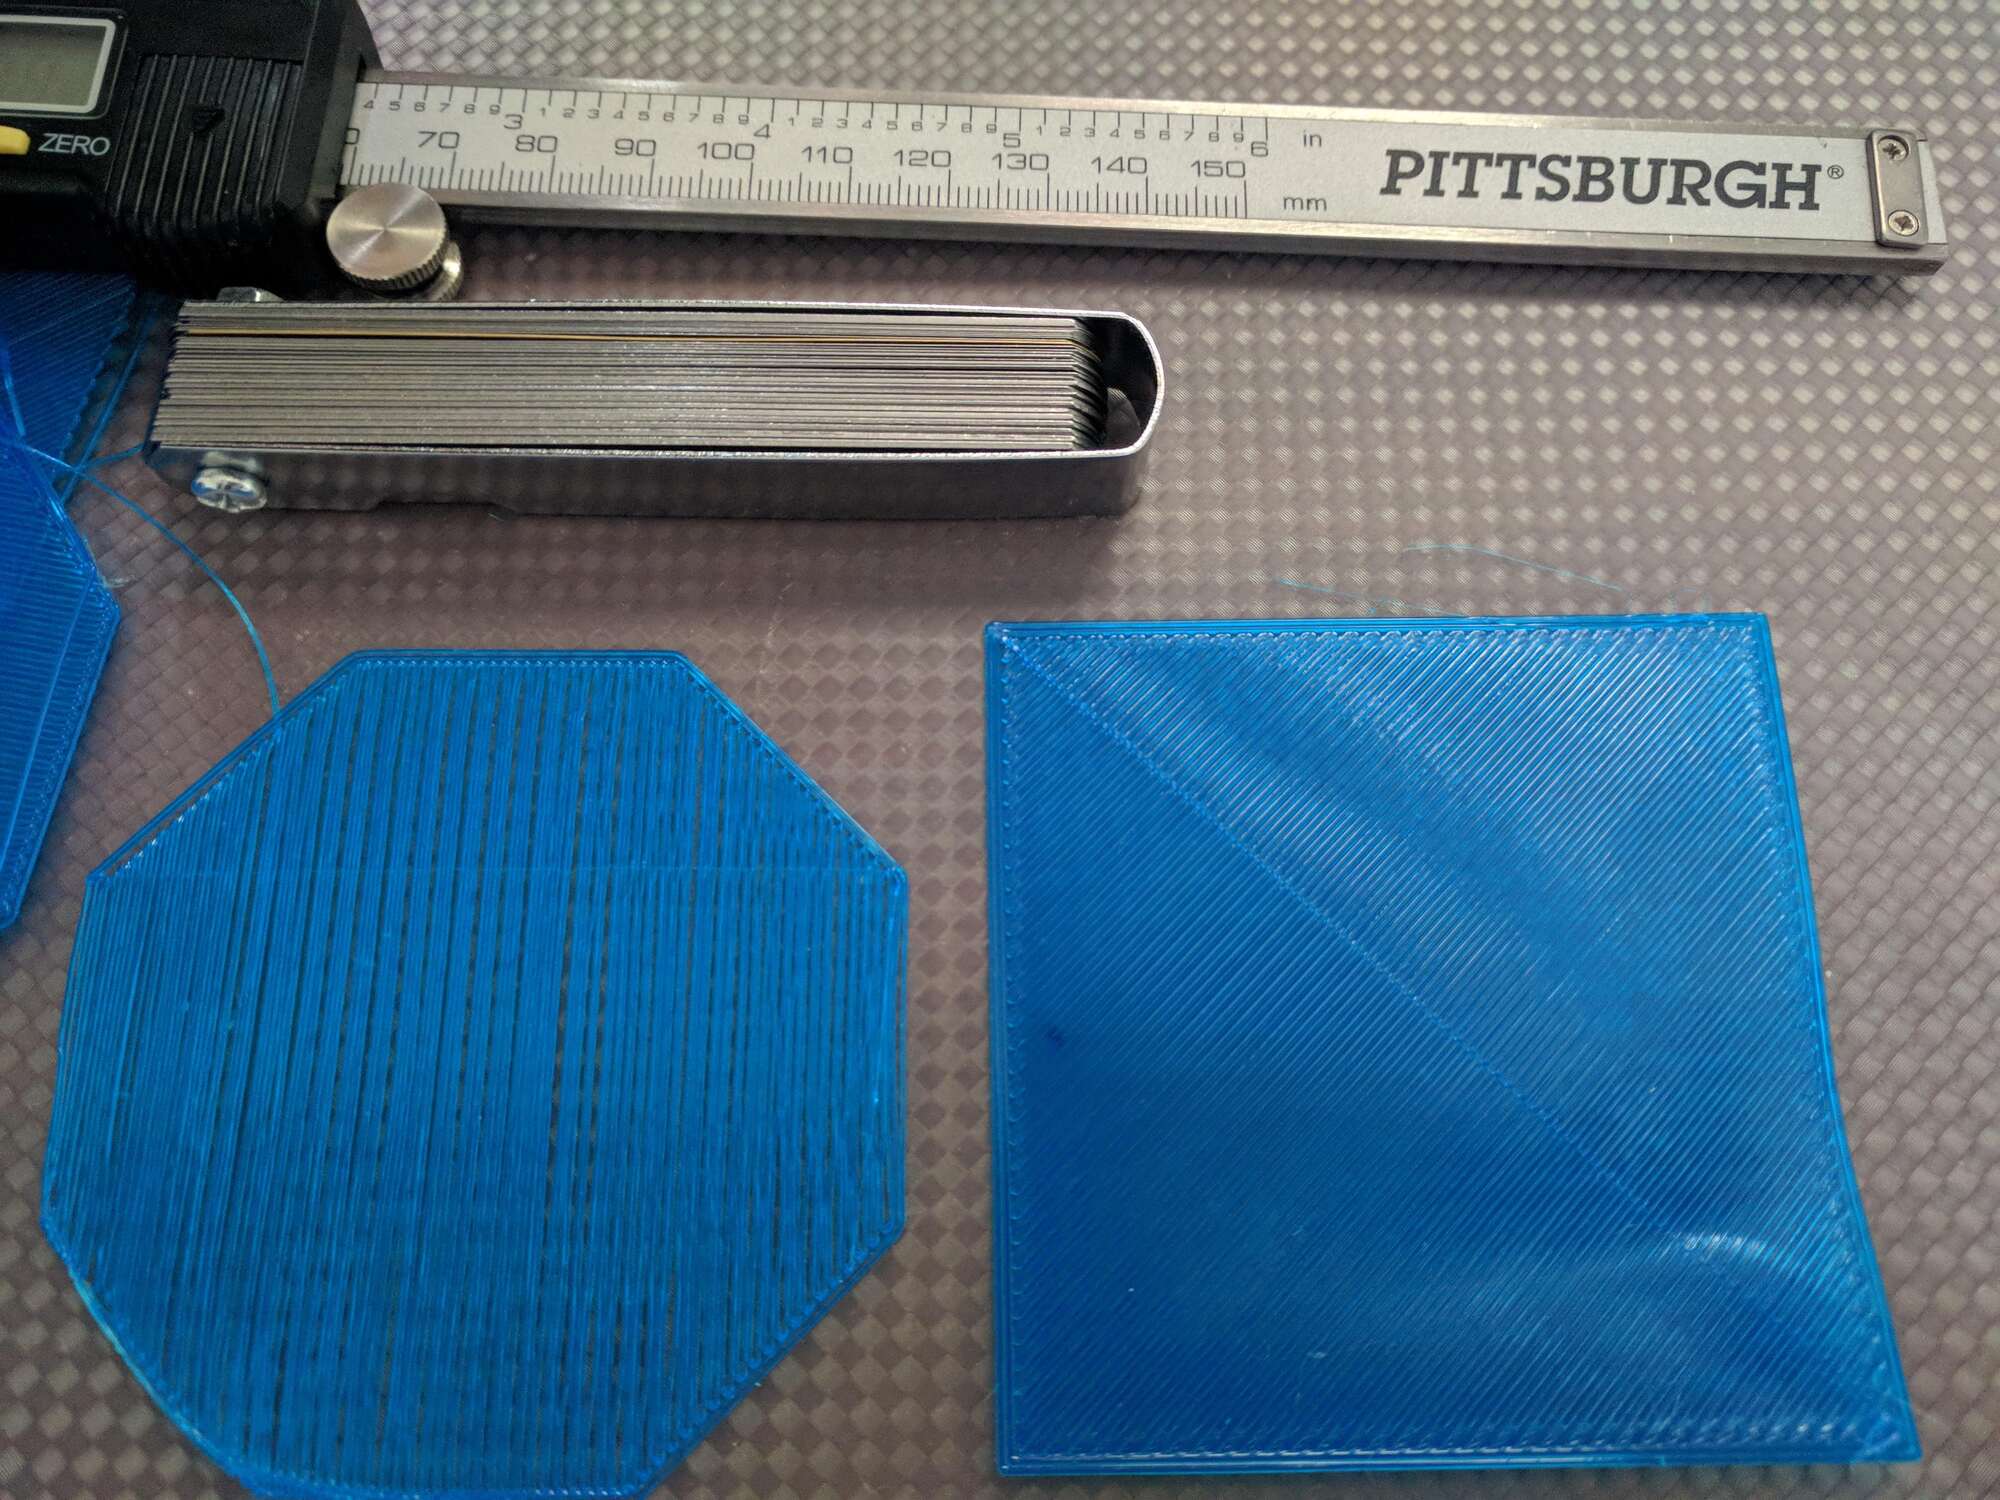
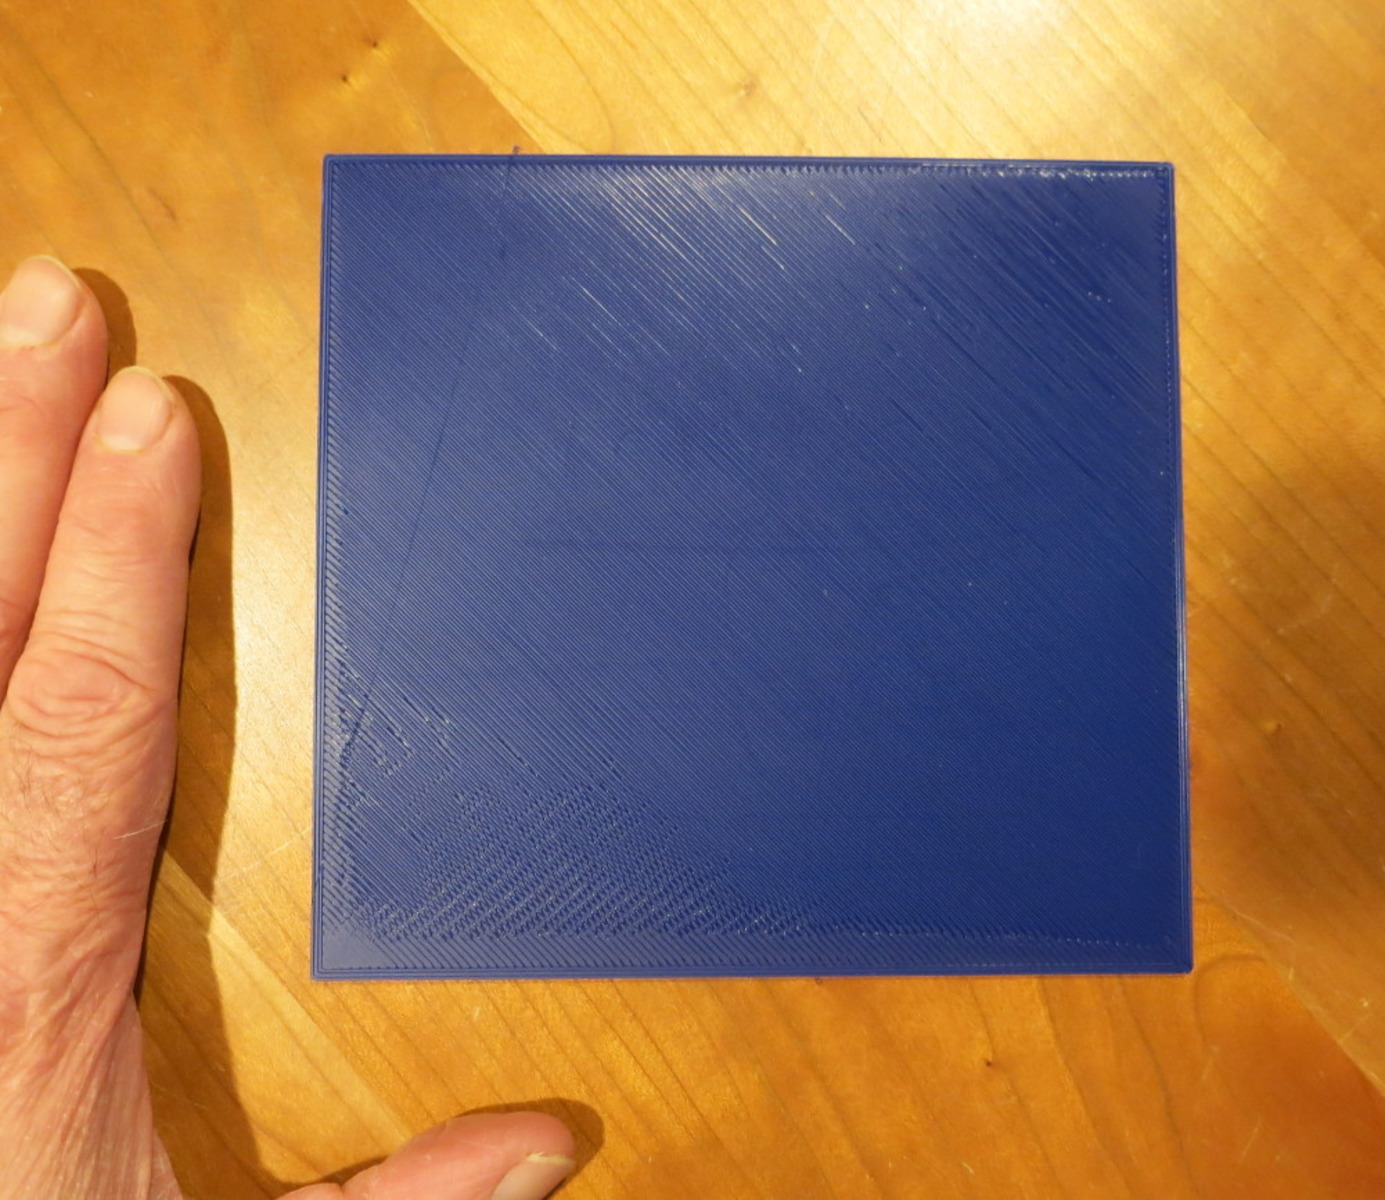
- Squashed First Layer: If the filament appears flattened or mashed on the first layer, it suggests that the Z offset is too low. Decrease the Z offset slightly to increase the distance between the nozzle and the bed, allowing for proper filament deposition. Remember to make small adjustments to avoid overcompensating.
- Elephant’s Foot: Elephant’s foot is a phenomenon where the edges of the first layer appear wider or bulged. It often occurs when the Z offset is too low, causing excessive squishing of the filament. Increase the Z offset to give more space for the filament to spread evenly on the bed, reducing the elephant’s foot effect.
- Poor Detail Resolution: If your prints lack fine details or appear blurry, it could be an indication that the Z offset is not set optimally. Adjust the Z offset slightly to find the right nozzle height that allows for precise filament deposition, resulting in clearer and more defined details on the print.
- Inconsistent Layer Height: Inconsistent layer height throughout the print can be a result of an inaccurate Z offset. Make sure to level your bed thoroughly and adjust the Z offset carefully to ensure a consistent and uniform layer height across the entire print.
Remember, the Z offset calibration process may require multiple iterations and adjustments to achieve the desired print quality. Take note of the changes you make and the corresponding impact on the print results. It’s essential to be patient, make incremental adjustments, and perform test prints to identify and address these common issues.
Now that we have discussed the common issues with Z offset calibration, let’s summarize the key takeaways and conclude this guide.
Conclusion
Adjusting the Z offset on your 3D printer is a crucial step in achieving high-quality prints. By understanding the purpose and importance of the Z offset, as well as learning how to adjust it effectively, you can optimize your print results and minimize common issues.
We explored the significance of the Z offset, which determines the distance between the nozzle and the print bed. Proper Z offset calibration ensures proper adhesion, detail resolution, and overall print quality. Whether you are manually leveling the bed or utilizing automatic bed leveling features, finding the right Z offset is key to successful 3D printing.
Throughout this guide, we discussed the steps for adjusting the Z offset, including leveling the bed, using slicer software settings, and performing test prints. We also highlighted some of the tools and features that can assist in the process, such as print surface adhesives and Z offset calibration prints.
Furthermore, we addressed common issues that may arise during Z offset calibration, such as poor bed adhesion, squashed first layers, elephant’s foot, and inconsistent layer height. Understanding these issues and their potential solutions will help you troubleshoot and fine-tune your prints.
Remember, achieving the perfect Z offset may require some experimentation and patience. Make gradual adjustments, keep track of your changes, and perform test prints to assess the impact of each modification. With time and practice, you will develop a keen eye for calibrating the Z offset to ensure consistent, reliable, and visually pleasing 3D prints.
Now that you have a comprehensive understanding of the Z offset and its significance in 3D printing, go ahead and apply this knowledge to level up your 3D printing game. Happy printing!