Introduction
Google Photos is a popular cloud-based storage solution that allows users to back up and share their photos and videos. With its generous free storage options, it has become a go-to app for many smartphone users. However, as you capture more memories and accumulate a large collection of media files, you may find yourself running out of storage space.
Fortunately, there are several methods to free up Google Photos storage and make room for new memories. In this article, we will explore different ways to optimize your Google Photos storage and maximize the available free space.
Whether you want to delete unwanted photos, archive them for future reference, or optimize storage settings, we’ve got you covered. We will also discuss how you can utilize Google One storage plans to increase your storage capacity if needed.
It’s important to note that freeing up Google Photos storage can be a personal choice. It’s always recommended to review and back up your photos before deleting or making any changes. Now, let’s dive into the various methods you can use to declutter your Google Photos storage and keep your memories organized.
Understanding Google Photos Storage
Before we dive into the methods of freeing up storage on Google Photos, let’s first understand how the storage system works.
Google Photos offers two types of storage options – original quality and high quality. Original quality storage preserves the original resolution and file size of your photos and videos, while high quality storage compresses them to save space. Photos and videos uploaded in high quality do not count towards your Google account storage limit, making it a preferred option for many users.
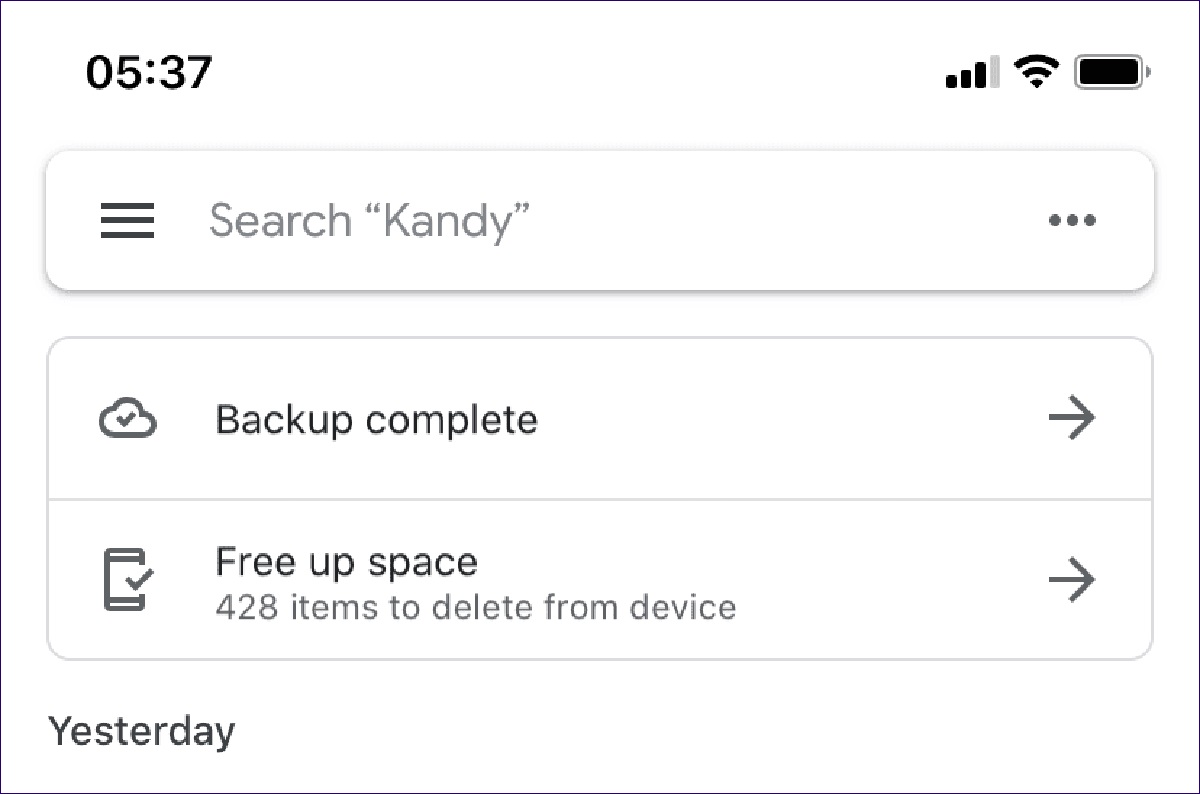
Google Photos also provides a feature called “Free Up Space,” which allows you to remove photos and videos from your device’s gallery that have already been backed up to the cloud. This helps free up space on your device while ensuring that your memories are securely stored in the cloud.
It’s important to note that starting from June 1, 2021, any new photos or videos uploaded in high quality will count towards your Google account storage limit. However, any files uploaded before this date will still be eligible for the free storage benefit.
Google Photos also offers a convenient search feature, allowing you to find specific photos or videos based on people, places, or objects. This intelligent search capability is powered by advanced algorithms that analyze and tag your media files, making it easier for you to locate and revisit your favorite moments.
Understanding the basics of Google Photos storage system will help you make informed decisions when it comes to freeing up space on your account. Now let’s explore the different methods you can use to declutter your Google Photos storage and ensure that you have enough room for new memories.
Ways to Free Up Google Photos Storage
If you’re looking to free up storage space on your Google Photos account, there are several effective methods you can employ. Let’s explore these methods in detail:
1. Delete Unwanted Photos/Videos: The simplest way to free up storage is by deleting photos and videos that you no longer need. Go through your Google Photos library and identify any duplicates, blurry images, or screenshots that are taking up unnecessary space. Select and delete these files to reclaim storage space.
2. Archive Photos/Videos: Instead of deleting important photos or videos, you can archive them. Archiving removes the media files from the main library, but they can still be accessed in the Archive folder. This allows you to declutter your main library while ensuring that your memories are safely stored.
3. Optimize Storage: Google Photos offers an option to optimize storage, which allows the app to automatically compress the size of your photos and videos. Enabling this feature can significantly reduce the amount of storage space your media files occupy without compromising their quality.
4. Use Google One Storage Plan: If you need additional storage beyond the free limit offered by Google Photos, you can consider subscribing to a Google One storage plan. This will give you access to more storage space for your photos, videos, and other files across multiple Google services.
5. Download and Backup Photos/Videos: Another way to free up Google Photos storage is by downloading your photos and videos to your device or computer and then backing them up to an external hard drive or a different cloud storage service. Once you’ve securely backed up your media files, you can safely delete them from your Google Photos account.
By utilizing these methods, you can effectively declutter your Google Photos storage and make room for new memories without losing any important files. Take the time to explore these different options and find the ones that suit your needs best.
Method 1: Delete Unwanted Photos/Videos
A straightforward way to free up storage space on your Google Photos account is by deleting photos and videos that are no longer needed. Here’s a step-by-step guide on how to delete unwanted media files:
Step 1: Open the Google Photos app on your device or access Google Photos through your web browser.
Step 2: Navigate to the album or the main library where the photos or videos you want to delete are located.
Step 3: Select the photos or videos you wish to delete by tapping on them or using the checkboxes.
Step 4: Once you have made your selection, tap on the trash can icon or the delete button. Confirm the deletion when prompted.
Step 5: The selected photos or videos will be moved to the trash or bin folder. To permanently delete the files and free up storage space, go to the trash folder and empty it.
When deleting photos or videos, it’s essential to review your selection to avoid accidentally deleting precious memories. Consider removing duplicates, blurry images, or photos/videos that are no longer relevant or needed.
It’s worth noting that deleting media files from Google Photos does not delete them from your device’s gallery. If you want to remove them from your device completely, you will need to delete them from your device’s gallery separately.
By regularly decluttering your Google Photos library and deleting unwanted photos/videos, you can create more room for new memories while keeping your storage usage in check.
Method 2: Archive Photos/Videos
If you have photos or videos in your Google Photos library that you want to keep but don’t frequently access, archiving them is a great way to free up storage space without losing those precious memories. Here’s how you can archive photos/videos on Google Photos:
Step 1: Open the Google Photos app on your device or access Google Photos through your web browser.
Step 2: Navigate to the album or the main library where the photos or videos you want to archive are located.
Step 3: Select the photos or videos you wish to archive by tapping on them or using the checkboxes.
Step 4: Once you have made your selection, tap on the three-dot menu icon or the archive button.
Step 5: The selected photos or videos will be moved to the Archive folder, which removes them from the main library but keeps them safely stored for future reference.
To access the archived items, you can either go to the Archive folder directly or use the search feature to find specific archived photos/videos based on people, objects, or locations.
Archiving is an excellent option for decluttering your main Google Photos library while still retaining access to important or sentimental media files. It’s particularly useful for photos/videos that you may not need to view frequently but still want to keep for sentimental reasons.
Please note that archived photos/videos will still contribute to your overall Google Photos storage usage. If you’re concerned about storage space and want to free up more room, consider using other methods like deleting unwanted files or optimizing storage settings in combination with archiving.
By leveraging the archive feature effectively, you can maintain a clean and organized Google Photos library while ensuring that all your important memories are securely stored and easily accessible when you need them.
Method 3: Optimize Storage
To make the most out of your Google Photos storage, you can enable the “Optimize Storage” feature, which allows the app to automatically compress the size of your photos and videos. This not only helps you save storage space but also ensures that your files are still of high quality. Here’s how you can optimize storage on Google Photos:
Step 1: Open the Google Photos app on your device or access Google Photos through your web browser.
Step 2: Tap on your profile picture or the three-line menu icon to access the settings menu.
Step 3: From the settings menu, select “Back up & sync” or “Storage & backup.”
Step 4: Look for the “Optimize device storage” or “Upload size” option and enable it.
Once enabled, Google Photos will automatically compress the size of your photos and videos when they are uploaded to the cloud, saving you precious space on your account. The compression process is done in a way that ensures minimal loss in quality and preserves the essence of your memories.
It’s important to note that when you opt for “Optimize Storage,” Google Photos will make a distinction between photos and videos already on your device and those that are newly captured. The app will only compress and optimize the newly captured media files, leaving the existing ones untouched.
If you have concerns about the quality of your photos and videos being affected by the compression process, you can consider using the original quality storage option or manually upload files in their original size. However, it’s worth noting that using the original quality option will count towards your Google account storage limit.
By optimizing storage on Google Photos, you can make the most efficient use of your storage space while preserving the quality of your precious memories. It’s a convenient way to keep your account organized and ensure that you have enough room to store new photos and videos.
Method 4: Use Google One Storage Plan
If you find yourself running out of storage space on your Google Photos account, you can consider subscribing to a Google One storage plan. Google One provides additional storage that can be shared across multiple Google services, including Google Photos. Here’s how you can use a Google One storage plan to increase your storage capacity:
Step 1: Open your web browser and go to the Google One website or access it through the Google One app.
Step 2: Sign in with your Google account credentials if you haven’t already.
Step 3: Browse through the available storage plans and select the one that suits your needs. Google One offers various options, ranging from 100GB to multiple terabytes of storage.
Step 4: Follow the prompt to complete the subscription process, including providing your payment information.
Step 5: Once your subscription is active, the additional storage will be added to your Google Photos account. You can check your storage usage and manage your plan through the Google Photos app or the Google One website.
By upgrading to a Google One storage plan, you can significantly expand your storage capacity on Google Photos. This allows you to store more photos, videos, and other files without worrying about running out of space.
Additionally, Google One offers other benefits, such as access to Google experts for support, family sharing options, and exclusive member benefits. It’s a comprehensive storage solution that caters to the needs of users who require more storage space or additional services.
Before subscribing to a Google One storage plan, it’s recommended to evaluate your storage needs and consider the cost implications. Assess how much storage you require and if it makes financial sense to invest in a monthly or yearly subscription.
Using a Google One storage plan is a convenient way to expand your storage capacity on Google Photos and ensure that you have ample room to store all your precious memories without worrying about running out of space.
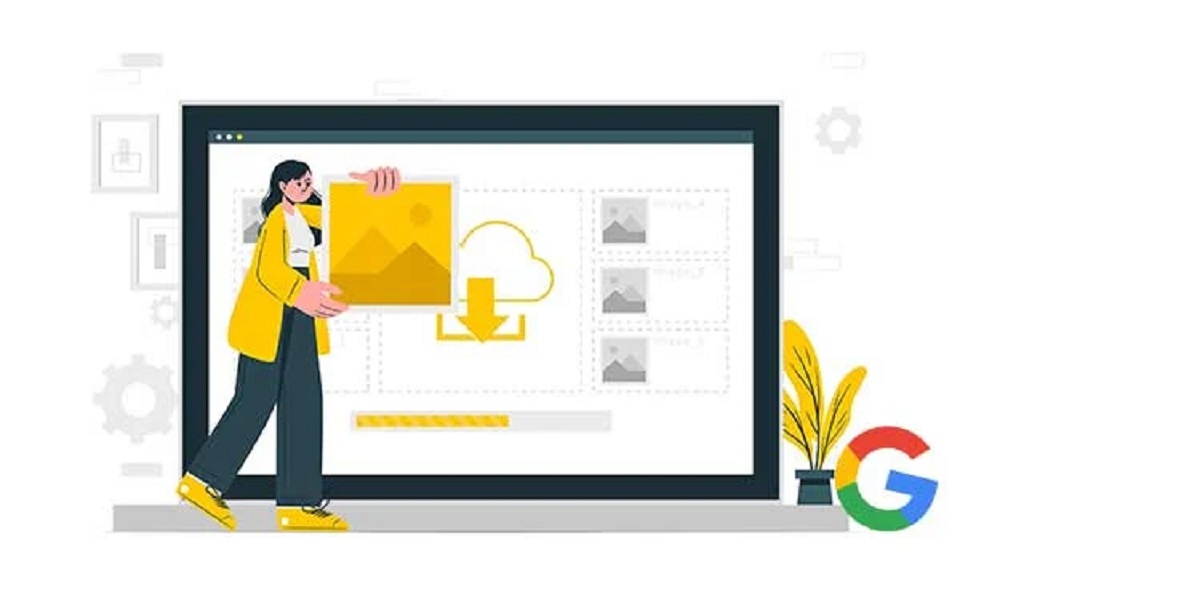
Method 5: Download and Backup Photos/Videos
If you need to free up storage space on your Google Photos account, one effective method is to download your photos and videos to your device or computer and then back them up to an external hard drive or a different cloud storage service. Here’s how you can download and backup your photos and videos:
Step 1: Open the Google Photos app on your device or access Google Photos through your web browser.
Step 2: Navigate to the album or the main library where the photos or videos you want to download are located.
Step 3: Select the photos or videos you wish to download by tapping on them or using the checkboxes.
Step 4: Once you have made your selection, tap on the three-dot menu icon or the download button.
Step 5: The selected photos or videos will be downloaded to your device or computer. Depending on the number of files and their size, this process may take some time.
After downloading your photos and videos, it’s crucial to back them up to an external hard drive or a different cloud storage service. This ensures that your precious memories are safely stored in multiple locations, providing an extra layer of protection. You can use a USB cable or wireless transfer methods to move the files to your chosen backup location.
There are various cloud storage services available, such as Dropbox, OneDrive, or iCloud, where you can securely store your files. Choose a service that fits your needs in terms of storage space, accessibility, and security features.
Once you’ve successfully backed up your media files, you can delete them from your Google Photos account to free up storage space. However, make sure to review your backup and confirm that all files are safely stored before removing them from your Google Photos library.
Remember, downloading and backing up your photos and videos is an excellent way to ensure that your memories are protected. It also allows you to organize your files in a way that suits your preferences and keeps your Google Photos account streamlined.
By utilizing this method, you can effectively free up storage space on your Google Photos account while securing your cherished memories in an external location.
Frequently Asked Questions (FAQs)
1. Will deleting photos or videos from Google Photos delete them from my device?
No, deleting photos or videos from Google Photos does not delete them from your device’s gallery. You will need to delete them separately from your device if you want to remove them completely.
2. Can I recover photos or videos that have been deleted from Google Photos?
If you’ve deleted photos or videos from Google Photos, they will move to the trash or bin folder and remain there for 60 days. You can restore them within this period by going to the trash folder and selecting the files you want to recover.
3. Does archiving photos/videos free up storage space on Google Photos?
Archiving photos/videos on Google Photos removes them from the main library but does not free up storage space. However, archiving can help declutter and organize your main library while still allowing you to access the archived files.
4. Is there a limit to the number of photos/videos I can store on Google Photos?
Google Photos offers free storage space; however, there is a limit to the amount of storage available. Photos and videos uploaded in high quality before June 1, 2021, do not count towards this limit. After this date, new uploads in high quality will count towards your storage limit.
5. What happens if I exceed my Google Photos storage limit?
If you exceed your Google Photos storage limit, you may need to either delete or purchase additional storage. Exceeding the limit could lead to issues with uploading or syncing media files to your account.
6. Can I change the storage quality of my existing photos/videos on Google Photos?
No, the storage quality of existing photos/videos cannot be changed once they are uploaded. You can, however, choose the storage quality option for future uploads.
7. Is there a time limit for how long I can use my Google One storage plan?
If you subscribe to a Google One storage plan, you can use it for as long as you maintain an active subscription. The storage plan will renew automatically according to the selected billing cycle (monthly or yearly) unless you cancel it.
These are some frequently asked questions about managing storage on Google Photos. If you have further questions or need additional assistance, refer to the official Google Photos support documentation or reach out to Google support for personalized help.
Conclusion
Freeing up storage space on your Google Photos account is essential to ensure that you can continue capturing and storing new memories. By utilizing the methods discussed in this article, such as deleting unwanted photos/videos, archiving files, optimizing storage settings, using a Google One storage plan, and downloading/backing up your files, you can effectively manage and maximize your storage capacity.
By regularly reviewing and organizing your Google Photos library, you can remove duplicates, blurry images, and unnecessary files, making room for new memories. Archiving provides a convenient way to declutter your main library while still retaining access to important photos/videos. Optimizing storage settings allows you to compress the size of your files without compromising quality.
If you find that you need more storage beyond the free limit, a Google One storage plan offers additional capacity that can be shared across multiple Google services, including Google Photos. This is particularly useful for those who capture and store a high volume of media files.
Finally, downloading and backing up your photos/videos provides an extra layer of protection and allows you to organize your files in a way that suits your preferences. This ensures that your precious memories are securely stored in multiple locations.
Remember to evaluate your storage needs and choose the methods that work best for you. It’s important to strike a balance between freeing up storage space and maintaining access to important files. Always review and back up your files before making any changes to your Google Photos account.
By implementing these strategies, you can efficiently manage and maximize your Google Photos storage, ensuring that you have enough space for countless moments and memories in the future.