Introduction
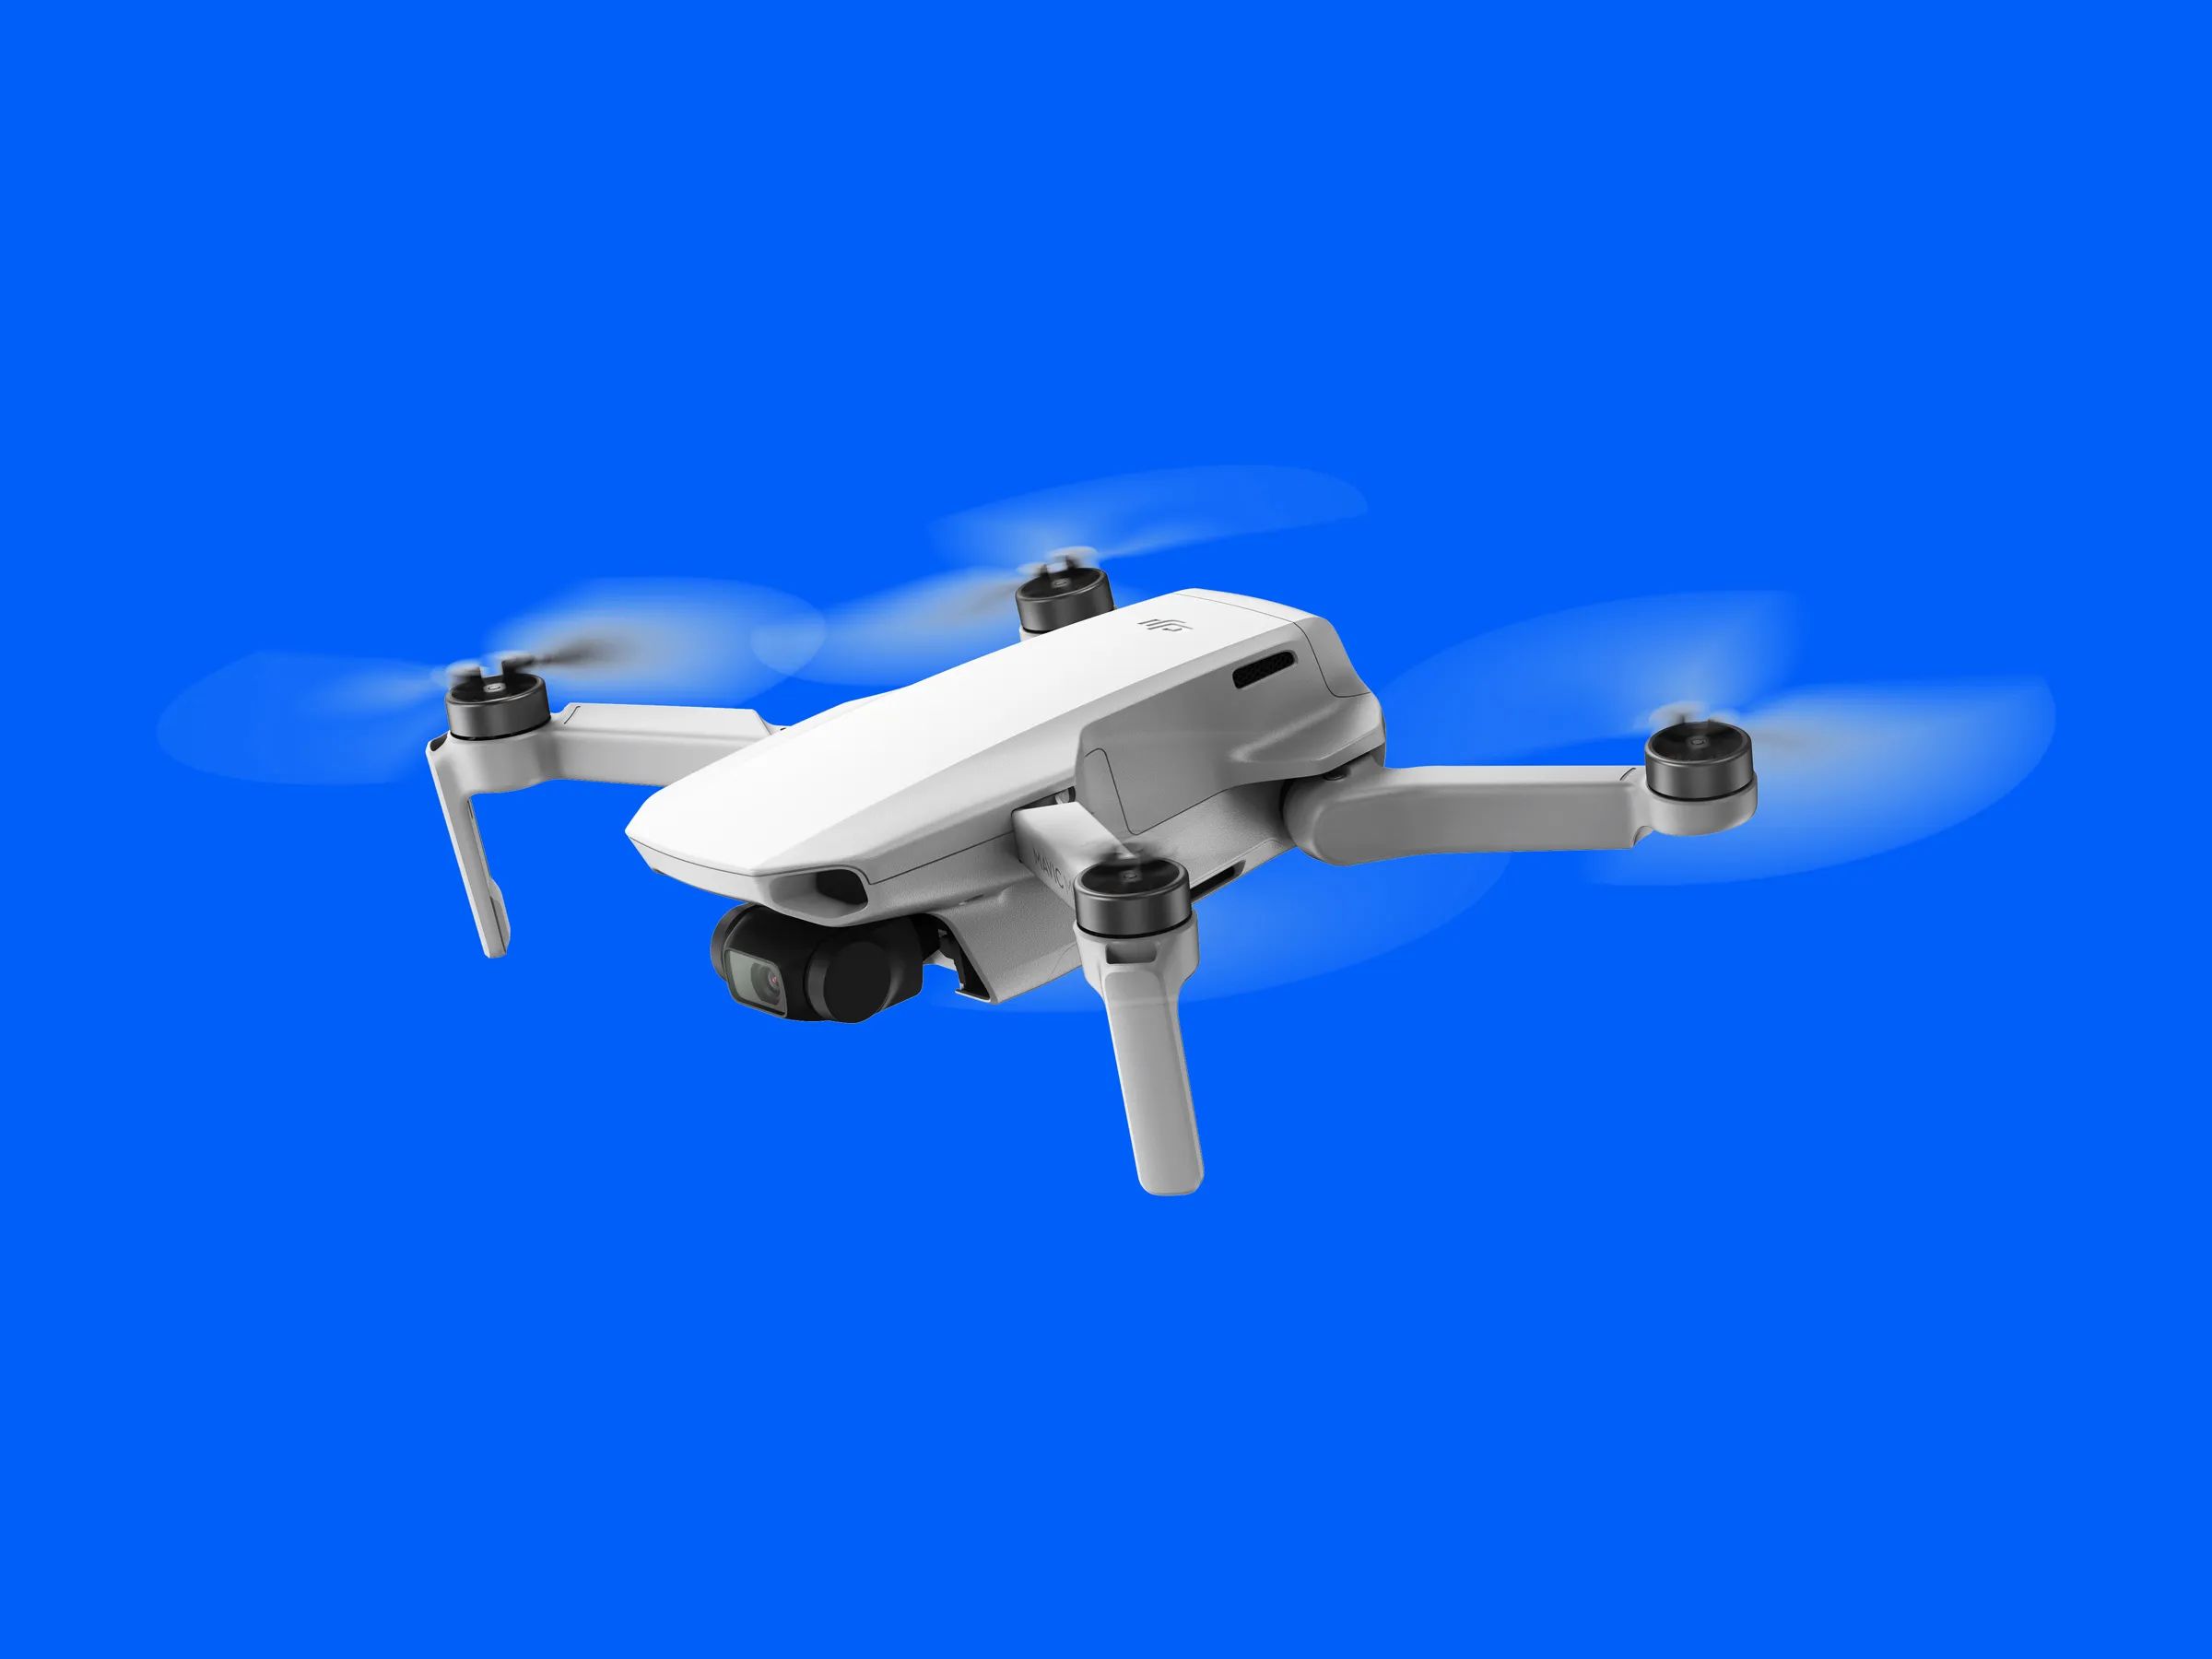
Welcome to the exciting world of flying with the DJI Mavic Mini! Whether you’re a seasoned drone enthusiast or a beginner looking to explore the skies, the Mavic Mini is the perfect compact drone for capturing stunning aerial footage and experiencing the thrill of flight. This lightweight and portable drone packs a punch with its impressive features and user-friendly interface.
In this guide, we will take you through every step to ensure you have a smooth and enjoyable flying experience with your DJI Mavic Mini. From unboxing and setting up your drone to mastering flight controls and capturing breathtaking photos and videos, we’ve got you covered.
Before we delve into the specifics, let’s take a moment to appreciate the Mavic Mini’s key features. Weighing under 250 grams, this drone falls below the threshold for FAA registration, making it extremely convenient for recreational use. Its 12-megapixel camera and 3-axis gimbal deliver high-quality images and stable video footage, while the 30-minute maximum flight time ensures ample opportunity to explore the sky.
With the DJI Fly app, designed specifically for the Mavic Mini, you’ll have access to a range of intelligent flight modes, making it easier than ever to capture professional-quality shots. Whether you’re a photography enthusiast, outdoor adventurer, or simply want to expand your creative horizons, the DJI Mavic Mini is the perfect companion.
Now, let’s dive into the thrilling world of drone flight and discover all the incredible things you can accomplish with your DJI Mavic Mini.
Unboxing and Setting Up Your DJI Mavic Mini
Once you have your DJI Mavic Mini in your hands, it’s time to unbox and set it up for your first flight. The unboxing experience of this drone is a treat in itself, as you uncover the sleek design and compactness of the Mavic Mini. Here’s how to get started:
1.1 Unboxing:
1. Carefully open the packaging of the Mavic Mini and remove all the contents.
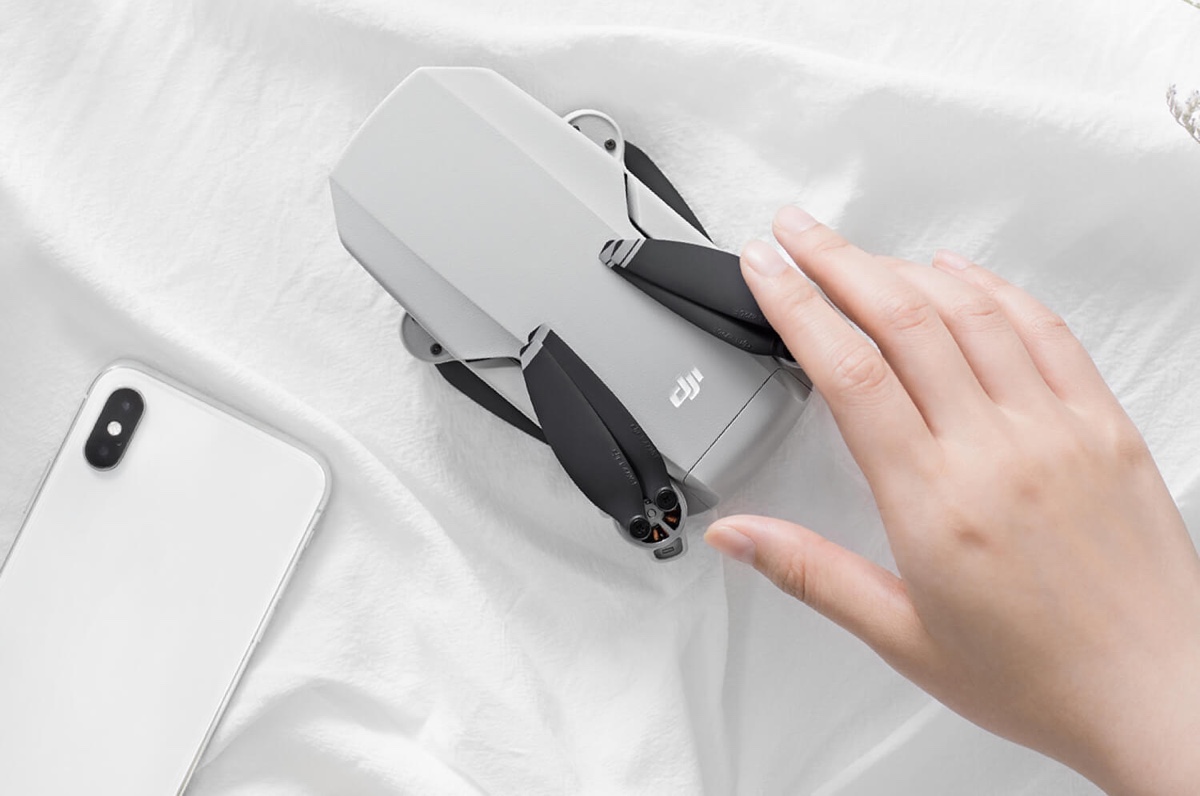
2. Take a moment to appreciate the drone’s compact size and lightweight build.
3. Inside the box, you’ll find the Mavic Mini drone, the remote controller, one intelligent flight battery, propellers, a USB cable, and a charger. Ensure that all the components are present and undamaged.
4. Remove any protective stickers or covers from the drone and its accessories.
1.2 Setting Up:
1. Before you can fly the Mavic Mini, you’ll need to charge the intelligent flight battery. Connect the charger to a power source and insert the battery into the charging port. While the battery is charging, take the time to read the user manual and familiarize yourself with the drone’s features.
2. While the battery is charging, download and install the DJI Fly app on your smartphone or tablet. This app is essential for controlling the Mavic Mini and accessing its various functions.
3. Once the battery is fully charged, insert it into the drone’s battery compartment. Make sure it is properly secured.
4. Power on the Mavic Mini by pressing the power button on the side of the aircraft. The LED lights should start flashing.
5. Turn on the remote controller by pressing and holding the power button. The status LED lights on the remote will also start flashing.
6. Open the DJI Fly app on your smartphone or tablet and connect it to the remote controller via the provided USB cable. Follow the on-screen instructions to establish a connection between the app, remote controller, and drone.
7. Once the app is connected, you’ll be prompted to update the firmware if necessary. It’s essential to keep your Mavic Mini up to date for optimal performance and safety.
With the unboxing and initial setup complete, you’re now ready to explore the world of aerial photography and flight with your DJI Mavic Mini. In the next sections, we’ll guide you through the essential steps to ensure a successful and enjoyable flying experience.
Charging Your DJI Mavic Mini Battery
Before taking to the skies with your DJI Mavic Mini, it’s crucial to ensure that the battery is properly charged. This section will guide you through the process of charging your Mavic Mini battery, so you’re ready for an extended flight session.
2.1 Checking the Battery Level:
1. Before charging, check the battery level of your Mavic Mini. You can do this by pressing the power button on the battery. The LED lights will indicate the current charge level.
2. Ideally, it’s best to charge the battery when it’s below 50% to maximize its lifespan. If the battery level is above 50%, consider discharging it slightly before charging.
2.2 Connecting the Charger:
1. Connect the charging cable to the battery charger and plug the charger into a power outlet.
2. Make sure the charger is compatible with your region’s power voltage to prevent any damage to the battery.
2.3 Inserting the Battery:
1. Slide the Mavic Mini battery into the charging port on the charger. Ensure that it is firmly connected.
2. The charger’s LED light will indicate the charging process: red light means the battery is charging, and green light indicates a fully charged battery.
2.4 Monitoring the Charging:
1. While the battery is charging, it’s crucial to keep an eye on its progress to avoid overcharging.
2. Never leave the battery unattended while charging. If you need to step away, make sure to disconnect the battery and charger.
2.5 Completing the Charging Process:
1. Once the battery is fully charged, the LED light on the charger will turn green.
2. Disconnect the battery from the charger by gently sliding it out of the charging port.
3. It’s recommended to unplug the charger from the power outlet when not in use to prevent any unnecessary power consumption.
Remember, it’s essential to use the official DJI charger provided with your Mavic Mini to ensure safe and efficient charging. Avoid using third-party chargers that may not be compatible and could potentially damage the battery.
By following these steps, you can ensure that your DJI Mavic Mini battery is always ready for your next flight adventure. In the next section, we’ll guide you through the process of downloading and installing the DJI Fly app, which is indispensable for controlling and maximizing the features of your drone.
Downloading and Installing the DJI Fly App
The DJI Fly app is an essential companion for the DJI Mavic Mini drone. It allows you to control your drone, access intelligent flight modes, download firmware updates, and view and edit your captured photos and videos. In this section, we’ll guide you through the process of downloading and installing the DJI Fly app on your mobile device.
3.1 Compatible Devices:
1. Before proceeding, ensure that your mobile device is compatible with the DJI Fly app. The app is available for both iOS and Android devices. You can check the DJI website or your respective app store to verify compatibility.
3.2 Downloading the DJI Fly App:
1. Open the App Store or Google Play Store on your mobile device.
2. In the search bar, type “DJI Fly” and select the official DJI Fly app from the search results.
3. Tap on the “Download” or “Install” button to begin the download process.
4. Wait for the app to finish downloading and installing on your device.
3.3 Signing In or Creating an Account:
1. Open the DJI Fly app on your device.
2. If you already have a DJI account, tap on “Sign In” and enter your login credentials. If you don’t have an account, tap on “Create an Account” and follow the on-screen instructions to create a new account.
3.4 Connecting Your Mobile Device to the Remote Controller:
1. Ensure that your remote controller is powered on and in range of your mobile device.
2. Connect your mobile device to the remote controller using a compatible USB cable. The USB port is located on the bottom of the remote controller.
3.5 Establishing Connection and Updating Firmware:
1. Once your mobile device is connected to the remote controller, the DJI Fly app should automatically detect the Mavic Mini and establish a connection.
2. If prompted, follow the on-screen instructions to update the firmware of your Mavic Mini. Firmware updates are crucial for improving the performance and stability of your drone. Make sure your Mavic Mini is connected to a stable Wi-Fi network for the firmware update process.
3.6 Configuring Settings:
1. After successfully establishing a connection, you can now explore the various settings and options in the DJI Fly app.
2. Take some time to navigate through the app and customize the settings according to your preferences. You can adjust camera settings, flight parameters, control sensitivity, and more.
By following these steps, you can easily download, install, and set up the DJI Fly app on your mobile device. This app will serve as your main interface for controlling and accessing the features of your DJI Mavic Mini. In the next section, we will discuss the remote controller and its functionalities.
Understanding the Remote Controller
The remote controller is a vital component of the DJI Mavic Mini drone as it allows you to navigate, control, and communicate with your drone during flights. In this section, we will walk you through the key features and functions of the Mavic Mini remote controller to ensure you have a thorough understanding of its capabilities.
4.1 Layout and Buttons:
The Mavic Mini remote controller has a user-friendly layout with well-placed buttons and controls. Here are the key components:
– Power Button: Located on the top left, the power button is used to turn the remote controller on and off.
– Control Sticks: The two control sticks on the top surface of the remote controller allow you to maneuver the aircraft in different directions.
– Fly/Stop Button: This button, usually found on the left side, is used to start and stop the flight of the Mavic Mini.
– Gimbal Dial: Located on the right side, the gimbal dial helps you control the tilt and rotation of the camera gimbal for capturing precise shots.
– Return-to-Home (RTH) Button: Pressing this button automatically commands the Mavic Mini to return to its take-off point.
– Intelligent Flight Mode Button: It allows you to access the various intelligent flight modes available on the Mavic Mini, such as QuickShots or Waypoints.
– Pause Button: This button enables you to pause the drone’s flight and hover in place.
– Customizable Buttons: The Mavic Mini remote controller has customizable buttons that can be assigned various functions in the DJI Fly app.
– Safety Switch: This switch, usually located on the back of the remote controller, needs to be slid to the right and held for a few seconds to power on the remote.
4.2 Linking the Remote Controller to the Mavic Mini:
1. Ensure that both the Mavic Mini drone and remote controller are powered on.
2. Open the DJI Fly app and connect it to the remote controller via the USB cable.
3. The app will guide you through the process of linking the remote controller to the Mavic Mini.
4. Follow the on-screen instructions and wait for the connection to be established.
4.3 Remote Controller Settings:
The DJI Fly app provides you with a range of customizable settings for the remote controller, allowing you to tailor the controls to your preference. These settings include control stick sensitivity, button assignments, and more. Explore the app and adjust these settings based on your flying style and comfort.
Understanding the remote controller is crucial for taking full advantage of the Mavic Mini’s capabilities. By familiarizing yourself with the layout, buttons, and functions, you’ll be ready to confidently control your drone and navigate the skies. In the next section, we will discuss the pre-flight checklist to ensure a safe and successful flight.
Pre-flight Checklist
Before embarking on any flight with your DJI Mavic Mini drone, it’s essential to perform a thorough pre-flight checklist. This checklist will help ensure the safety of your flight and minimize the risk of any unforeseen issues or accidents. Let’s go through the key steps of a pre-flight checklist:
5.1 Check the Weather Conditions:
Before you take off, it’s essential to check the weather conditions. Avoid flying in strong winds, rain, or adverse weather conditions that may affect the stability and control of your drone. Also, be mindful of any local regulations or restrictions related to weather conditions.
5.2 Verify the Flight Area:
Make sure that the area in which you plan to fly your Mavic Mini is authorized for drone flight. Check for any restricted airspace, no-fly zones, or any other geographical limitations. Ensure that you have proper permission or permits if required.
5.3 Inspect the Drone:
Carefully inspect your Mavic Mini for any physical damage or issues that could affect its flight performance. Check the propellers, motors, camera gimbal, and overall body for any signs of wear, loose parts, or damage. Ensure that the battery is securely attached.
5.4 Check the Battery Level:
Check the battery level of both the Mavic Mini and the remote controller to ensure they are adequately charged for the intended flight duration. It’s advised to have spare batteries on hand for longer flights.
5.5 Verify GPS Signal:
Ensure that your DJI Mavic Mini has a strong GPS signal before taking off. GPS connectivity is crucial for accurate positioning, flight stability, and access to certain flight modes. Wait until the drone has acquired a sufficient GPS signal before initiating the flight.
5.6 Clear Take-off and Landing Area:
Ensure that the take-off and landing area is clear of any obstacles, people, or animals. Make sure the area is spacious enough to provide a safe and smooth take-off and landing. Avoid launching or landing near buildings, trees, power lines, or other potential hazards.
5.7 Update Firmware and Check Settings:
Before each flight, make sure that both the Mavic Mini and the DJI Fly app are updated to the latest firmware versions. This will ensure that you have access to the latest features, performance improvements, and important safety updates. Double-check all the settings in the DJI Fly app, including camera settings, flight limits, and safety features.
5.8 Calibrate Compass and IMU:
Perform compass and IMU (Inertial Measurement Unit) calibrations, as outlined in the user manual. These calibrations help improve flight stability, accuracy, and the overall performance of your Mavic Mini. Follow the calibration instructions carefully for reliable flight operations.
By diligently following this pre-flight checklist, you can significantly reduce the risk of accidents and ensure a safe and successful flight with your DJI Mavic Mini. Once you have completed the pre-flight checks, you’re ready to explore the exhilarating world of drone flight. In the next section, we will discuss how to calibrate the compass and IMU of your Mavic Mini for optimal performance.
Calibrating the Compass and IMU
Calibrating the compass and IMU (Inertial Measurement Unit) of your DJI Mavic Mini drone is essential for ensuring accurate flight performance and stable navigation. In this section, we’ll guide you through the process of calibrating both the compass and IMU of your Mavic Mini.
6.1 Compass Calibration:
Compass calibration is necessary to ensure that your Mavic Mini accurately detects its orientation and maintains stable flight. Follow these steps to calibrate the compass:
1. Find an open area away from any magnetic interference such as metal objects, power lines, or high-voltage sources.
2. Open the DJI Fly app and power on your Mavic Mini.
3. Tap on the three dots on the top right corner of the screen to access the main menu, then select “Safety” and “Calibrate Compass”.
4. Follow the on-screen instructions provided by the app to complete the compass calibration process.
5. The calibration will involve rotating the drone along multiple axes until the app confirms a successful calibration.
6.2 IMU Calibration:
IMU calibration is necessary to ensure accurate sensor data and precise flight controls. Follow these steps to calibrate the IMU of your Mavic Mini:
1. Find a stable and level surface to place your Mavic Mini on during the calibration process.
2. Open the DJI Fly app and power on your Mavic Mini.
3. Tap on the three dots on the top right corner of the screen to access the main menu, then select “Safety” and “Advanced Safety Settings”.
4. From the advanced safety settings, select “IMU Calibration”.
5. Follow the on-screen instructions provided by the app to complete the IMU calibration process.
6. The calibration will involve keeping the drone stationary while it records and analyzes the sensor data.
It’s important to ensure that you perform both the compass and IMU calibrations in a location free from magnetic interference and on a stable surface. Following these calibration procedures will optimize the flight performance of your DJI Mavic Mini and enhance the accuracy of its flight controls.
Regularly performing compass and IMU calibrations is recommended, especially if you notice any unusual flight behavior or after any updates to the firmware or DJI Fly app. Always refer to the user manual or the DJI website for specific instructions related to compass and IMU calibration for your particular drone model.
With the compass and IMU properly calibrated, you’re now ready to explore the various features and flight controls of your DJI Mavic Mini. In the next section, we will guide you through the basic functionalities and controls of the DJI Fly app.
Using the DJI Fly App
The DJI Fly app is your gateway to unlocking the full potential of your DJI Mavic Mini. This user-friendly and intuitive application provides a wealth of features and controls that enhance your flying experience. In this section, we will explore how to navigate and maximize the capabilities of the DJI Fly app.
7.1 Connecting the App to Your Mavic Mini:
1. Ensure that your Mavic Mini is powered on and the remote controller is connected to your mobile device.
2. Open the DJI Fly app on your mobile device.
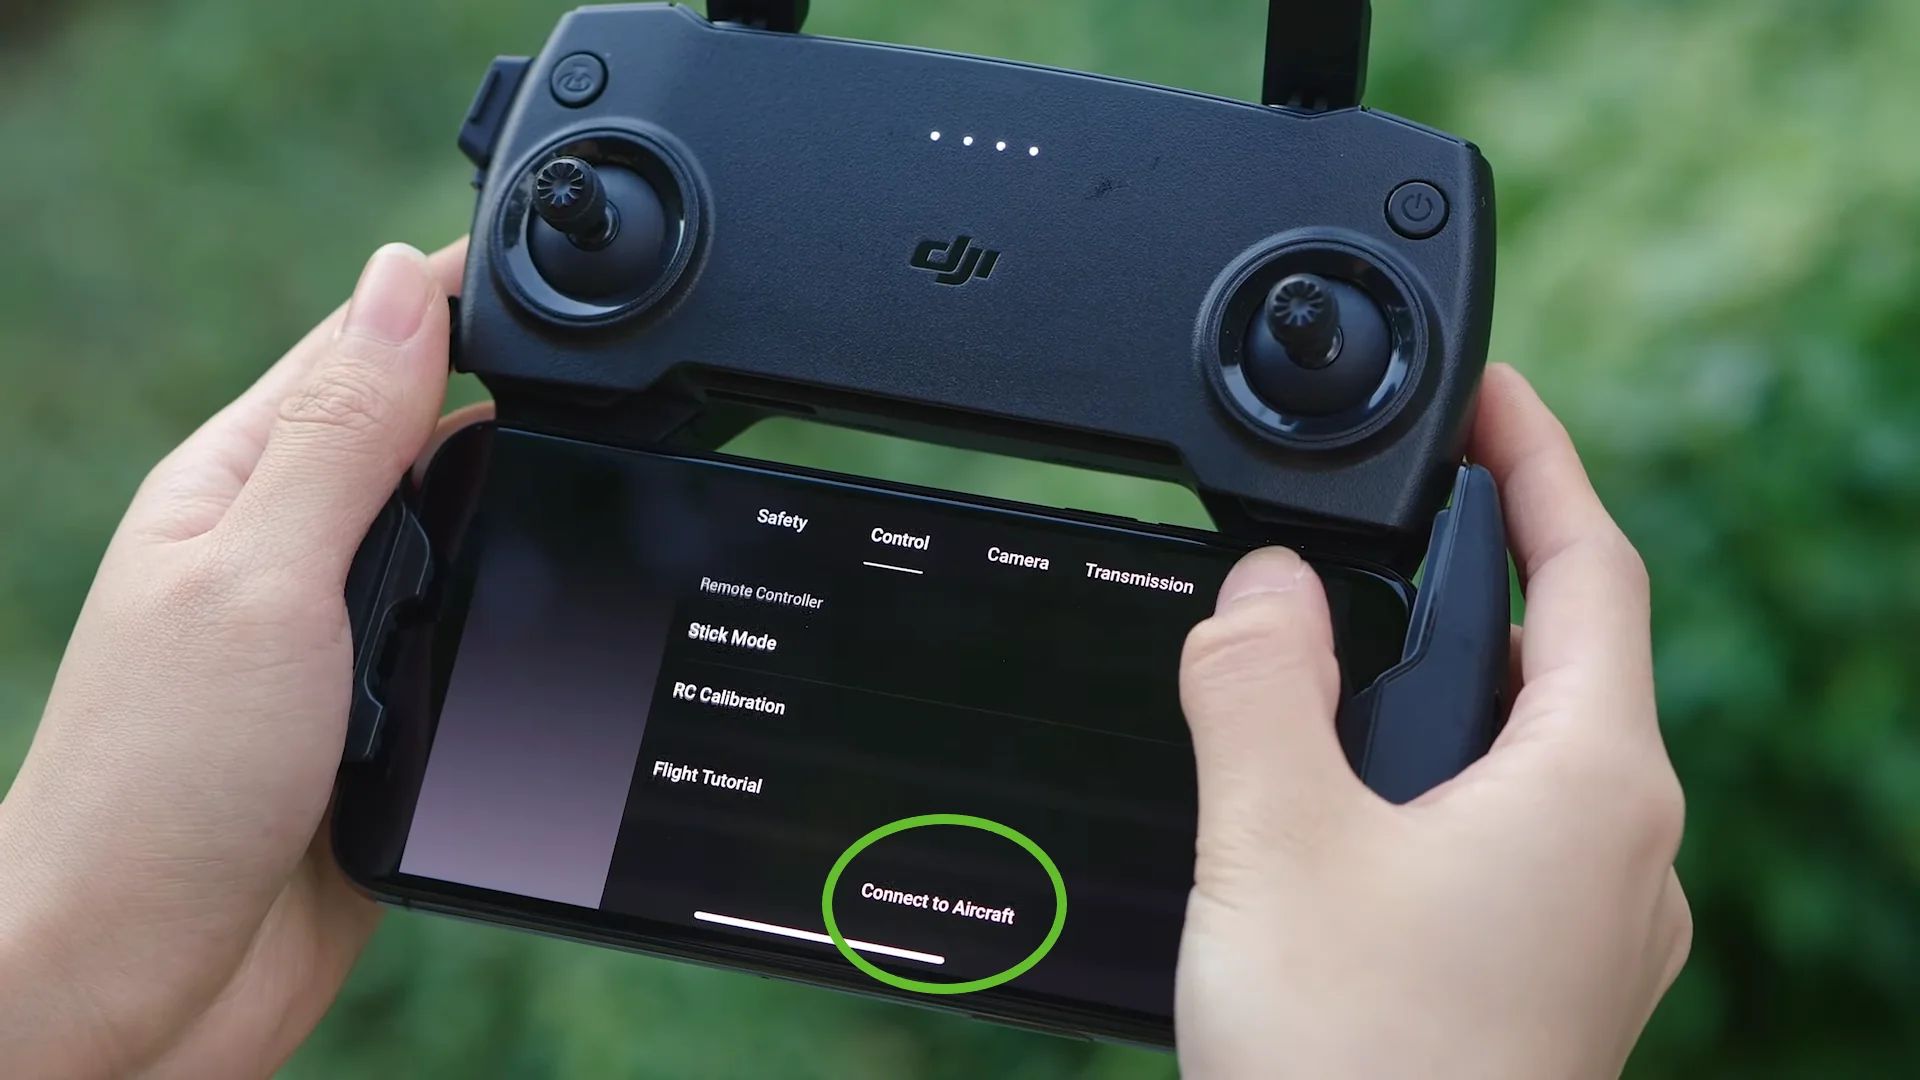
3. Tap on the “Connect Aircraft” button on the app’s home screen.
4. Follow the on-screen instructions to establish the connection between the app and your Mavic Mini.
5. Once connected, you will have access to the various features and flight controls of your drone.
7.2 Home Screen and Settings:
The DJI Fly app’s home screen is the central hub for navigating its features. Here, you’ll find important information such as your drone’s battery level, GPS signal strength, and flight mode. You can also access various settings and features through the menu icon (usually three dots) on the top right corner of the screen. Spend some time familiarizing yourself with the settings and customizable options available in the app.
7.3 Flight Modes:
The DJI Fly app offers a range of flight modes to enhance your aerial photography and videography. These modes include:
– QuickShots: Automated flight modes that capture stunning cinematic shots with just a few taps. Examples include Dronie, Circle, Helix, and Rocket.
– ActiveTrack: Allows you to select a subject to track, keeping it in the frame as the drone follows its movements.
– Waypoints: Helps you plan a flight route by setting specific coordinates for the drone to follow.
– TapFly: Tap on the screen to set a destination, and the drone will fly to that point automatically.
– Cinematic Mode: Enables smoother and more controlled flights for capturing cinematic footage.
7.4 Camera and Media Control:
Through the DJI Fly app, you have full control over your Mavic Mini’s camera settings, including exposure, white balance, and photo/video resolution. You can also access and manage your captured photos and videos directly within the app, allowing for quick editing, sharing, and downloading of media files.
7.5 Flight Telemetry and Safety Features:
The DJI Fly app provides real-time telemetry data, including altitude, distance, speed, and battery status. This information helps you keep track of your drone’s performance and flight conditions. Additionally, the app includes safety features such as low battery alerts, obstacle detection, and geofencing to ensure safe and responsible flying.
7.6 Firmware Updates:
The DJI Fly app will prompt you to update your Mavic Mini’s firmware when new versions are available. It’s vital to keep your firmware up to date to access the latest features, bug fixes, and performance improvements. Ensure that your mobile device is connected to a stable Wi-Fi network to download and install firmware updates smoothly.
By utilizing the various features and controls of the DJI Fly app, you can take full advantage of the capabilities of your DJI Mavic Mini drone. Take the time to explore the app and experiment with different flight modes and settings to enhance your aerial photography and videography experience.
In the next section, we will discuss the basic flight controls and maneuvers you can perform with your DJI Mavic Mini.
Basic Flight Controls and Maneuvers
Mastering the basic flight controls and maneuvers is essential for piloting your DJI Mavic Mini with confidence and precision. In this section, we’ll explore the fundamental controls and maneuvers that will allow you to navigate your drone effectively.
8.1 Control Sticks:
The control sticks on the remote controller are used to maneuver the Mavic Mini. The left control stick controls the throttle and yaw, while the right control stick controls the pitch and roll.
– Throttle (Left Stick Up/Down): Push the left control stick upward to increase the drone’s altitude or pull it downward to decrease the altitude.
– Yaw (Left Stick Left/Right): Move the left control stick to the left or right to rotate the drone in that direction.
– Pitch (Right Stick Up/Down): Push the right control stick forward to make the drone move forward or pull it backward to make it move backward.
– Roll (Right Stick Left/Right): Move the right control stick to the left or right to make the drone tilt or bank in that direction.
8.2 Takeoff and Landing:
– To take off, ensure that the drone is in an open and safe space. Hold the control sticks inward and downward to start the motors. Slowly push the throttle control stick upward to raise the drone off the ground.
– To land, ensure that the landing area is clear of obstacles. Slowly lower the throttle control stick to decrease the altitude until the drone safely lands on the ground.
8.3 Hovering in Place:
To hover the Mavic Mini in place, release the control sticks and let the drone stabilize itself using its built-in stabilization systems and GPS. It’s important to ensure that the drone has a stable GPS signal for accurate hovering.
8.4 Changing Flight Speed:
You can adjust the flight speed of your Mavic Mini to suit your preferences or the specific requirements of your flight. Most DJI drones, including the Mavic Mini, have different speed settings, such as Slow, Normal, and Sport modes. Access the flight mode settings in the DJI Fly app to adjust the speed of your drone.
8.5 Emergency Stop:
In case of an emergency or if you need to stop the drone immediately, you can use the Emergency Stop feature. The exact method of activating the Emergency Stop feature may vary depending on the firmware version, so refer to the user manual or DJI website for specific instructions for your drone model.
It’s essential to practice and familiarize yourself with the basic flight controls and maneuvers before attempting more advanced techniques. Spend time honing your skills and gaining confidence in controlling your Mavic Mini. Remember to always fly safely, following local regulations and guidelines.
In the next section, we will explore the various flight modes available on the DJI Mavic Mini and how they can enhance your aerial photography and videography.
Understanding Flight Modes
The DJI Mavic Mini offers a variety of flight modes that enhance your creative possibilities and make capturing stunning aerial shots easier than ever. In this section, we’ll explore the different flight modes available on the Mavic Mini and how they can elevate your aerial photography and videography skills.
9.1 QuickShots:
The QuickShots flight modes are pre-programmed flight paths that allow you to capture professional-looking shots with just a tap of a button. Here are some of the QuickShots available on the Mavic Mini:
– Dronie: Capture a selfie-like video as the drone flies backward and upward, keeping the subject in the frame.
– Circle: The drone flies in a circular path around a subject, creating a sweeping and cinematic shot.
– Helix: The drone ascends while spiraling upward, resulting in an impressive and dynamic shot.
– Rocket: Fly straight up into the air, capturing the subject from the ground up.
9.2 ActiveTrack:
The ActiveTrack mode allows you to select a subject for the Mavic Mini to track and follow. Simply draw a box around the subject on your mobile device, and the drone will keep it in the frame as it moves. This is perfect for capturing action shots or following moving subjects with ease.
9.3 Waypoints:
The Waypoints mode enables you to plan a flight path by setting specific coordinates or points of interest for the Mavic Mini to follow. You can precisely control the drone’s flight path and capture footage from different angles along the designated waypoints.
9.4 TapFly:
TapFly allows you to simply tap on your mobile device’s screen to set a destination, and the Mavic Mini will fly towards it automatically. This mode is ideal for capturing shots while focusing on framing, as the drone takes care of the navigation.
9.5 Cinematic Mode:
Engaging Cinematic Mode slows down the drone’s movements, providing smoother and more controlled flight for capturing cinematic shots. This mode minimizes the drone’s response to stick commands, allowing for elegant and graceful footage.
It’s important to familiarize yourself with each of these flight modes and practice using them in various scenarios. Remember to always fly responsibly and safely, keeping the surroundings and regulations in mind. The DJI Fly app provides easy access to these flight modes and allows you to customize settings for optimal results.
By leveraging the flight modes available on the DJI Mavic Mini, you can elevate your aerial photography and videography to new heights. Experiment with different modes and techniques to unleash your creativity and capture stunning and dynamic shots.
In the next section, we will discuss how to capture photos and videos using your DJI Mavic Mini.
Taking Photos and Videos
The DJI Mavic Mini is equipped with a high-quality camera that allows you to capture breathtaking photos and videos from the sky. In this section, we will explore the different shooting modes, camera settings, and techniques to help you capture stunning imagery with your Mavic Mini.
10.1 Shooting Modes:
– Single Shot: This mode captures a single photo with a single press of the camera shutter button on the remote controller or within the DJI Fly app.
– Burst Mode: Burst mode captures a series of photos in quick succession when holding down the camera shutter button. This mode is useful for capturing fast-moving subjects or action shots.
– Interval Mode: Interval mode takes a series of photos at a set interval to create a time-lapse sequence. You can adjust the interval between shots in the DJI Fly app.
10.2 Camera Settings:
– Exposure: Adjust the exposure settings to control the brightness and darkness of your photos. You can set the exposure manually or use the auto-exposure feature in the DJI Fly app.
– White Balance: White balance settings determine the color temperature of your photos. You can choose from preset options like Auto, Sunny, Cloudy, or manually adjust the color temperature.
– Photo Formats: The Mavic Mini supports JPEG format for photos. You can select the image size and quality in the camera settings.
– Video Resolution and Frame Rate: For video recording, you can select different resolutions and frame rates depending on your preferences and the desired output quality. Higher resolutions will offer more detail, but keep in mind that they may also require more storage space.
10.3 Camera Movement and Angles:
Exploring different camera angles and movements can greatly enhance the visual impact of your aerial photos and videos. Try experimenting with the following techniques:
– Panorama Shots: Use the panoramic mode in the DJI Fly app to capture sweeping landscape shots. The app will guide you on how to capture multiple photos, which will be stitched together to create a wider, more immersive image.
– Dolly Shots: Slowly move the drone horizontally or vertically while capturing video to create smooth and dynamic cinematic shots.
– Tilt and Reveal: Tilt the camera gimbal in various angles to reveal different perspectives and subject compositions. This technique adds depth and visual interest to your footage.
It’s essential to practice and experiment with different camera settings and techniques to find your preferred style and achieve captivating aerial imagery. Take the time to review and critique your photos and videos to further improve your skills and refine your artistic vision.
With the knowledge and understanding of capturing photos and videos using the DJI Mavic Mini, you’re now ready to document stunning aerial vistas and record breathtaking moments from the sky.
In the next section, we will delve into the intelligent flight modes of the Mavic Mini, which offer advanced features and automated flight controls for a more seamless flying experience.
Using Intelligent Flight Modes
The DJI Mavic Mini is equipped with intelligent flight modes that make capturing professional-quality shots easier and more accessible. These flight modes provide automated flight controls and advanced features that enhance your flying experience. In this section, we will explore the intelligent flight modes available on the Mavic Mini and how they can elevate your aerial photography and videography.
11.1 QuickShots:
The QuickShots flight modes are designed to allow you to capture stunning shots easily. With just a few taps, the Mavic Mini will autonomously fly along pre-determined paths while capturing cinematic footage. Some examples of QuickShots include Dronie, Circle, Helix, and Rocket. These modes are perfect for capturing dynamic and visually impressive shots without the need for complex piloting skills.
11.2 ActiveTrack:
The ActiveTrack mode enables the Mavic Mini to intelligently track and follow a subject. Simply select the subject on the DJI Fly app, and the drone will automatically track and keep it in the frame as it moves. This mode is ideal for capturing action shots or filming subjects in motion.
11.3 Waypoints:
The Waypoints mode allows you to plan and customize a flight path using specific GPS coordinates. Set waypoints on the DJI Fly app, and the Mavic Mini will autonomously fly along the designated route, capturing footage at each waypoint. This mode is ideal for capturing consistent and smooth aerial shots in a predetermined flight pattern.
11.4 Cinematic Mode:
Cinematic Mode reduces the drone’s speed and sensitivity to give you smoother and more controlled flights. This mode is perfect for capturing slow and graceful movements, creating cinematic shots that have a more professional and polished look.
11.5 Gesture Mode:
In Gesture Mode, you can control your Mavic Mini using simple hand gestures from a distance. This mode is great for capturing selfies or group photos without needing a controller.
It’s important to familiarize yourself with the intelligent flight modes and practice using them in different scenarios. Experiment with various compositions, angles, and settings to unleash your creativity and capture unique aerial shots.
Remember, while the intelligent flight modes offer automation and ease of use, it’s still crucial to have proper situational awareness and control over the drone during flights. Always fly responsibly, follow local regulations, and maintain a clear line of sight with your Mavic Mini.
In the next section, we will discuss flight safety and regulations that you should be aware of to ensure safe and responsible drone operation.
Understanding Flight Safety and Regulations
Flight safety and adherence to regulations are of utmost importance when operating the DJI Mavic Mini or any other drone. Understanding and following these guidelines will help ensure a safe and responsible flying experience. In this section, we will explore some key flight safety practices and regulations to keep in mind.
12.1 Know Your Local Regulations:
It’s crucial to familiarize yourself with the specific drone regulations and guidelines in your region or country. Regulations may vary, but they typically cover areas such as flight altitude limits, no-fly zones, registration requirements, privacy considerations, and more. Stay updated on any changes or updates to regulations to ensure compliance.
12.2 Fly in Safe Locations:
Choose your flight locations wisely. Fly in open areas away from airports, helipads, and other sensitive locations. Avoid flying over crowds, people, or buildings, and be mindful of your surroundings. Consider the privacy and safety of others when determining where to fly your Mavic Mini.
12.3 Maintain Visual Line of Sight (VLOS):
Always keep your drone within visual line of sight while flying. Maintain a clear view of your Mavic Mini to ensure safe navigation and to avoid collisions with obstacles or other aircraft. Avoid flying your drone behind obstacles that obstruct your view.
12.4 Respect Privacy:
Respect the privacy of others when flying your drone. Avoid capturing images or videos of individuals without their consent. Be aware of any local privacy laws and regulations governing the use of drones for photography or videography.
12.5 Adhere to Weather Conditions:
Consider weather conditions before each flight. Avoid flying in strong winds, rain, or adverse weather conditions that may compromise the stability and control of your drone. Always prioritize safety and control, and land your Mavic Mini if weather conditions deteriorate during a flight.
12.6 Check Pre-flight Checklist:
Prior to each flight, it’s essential to run through a pre-flight checklist. Ensure that your drone is in proper working condition, batteries are fully charged, GPS signals are strong, and you have a clear understanding of your flight plan. Confirm that your equipment is calibrated and ready for flight.
12.7 Respect Wildlife and the Environment:
When flying your drone, be conscious of your impact on wildlife and the environment. Avoid disturbing animals, nesting areas, and natural habitats. Take care to leave no trace and minimize any disruption to the surroundings during your flights.
By adhering to flight safety practices and regulations, you can ensure a safe and enjoyable flying experience with your DJI Mavic Mini. Always prioritize safety, respect the privacy of others, and be aware of your surroundings and local regulations to uphold responsible flying practices.
In the next section, we will discuss some common troubleshooting tips to help you address potential issues that may arise during your drone operations.
Troubleshooting Common Issues
While operating the DJI Mavic Mini, you may encounter some common issues that can be easily resolved with a few troubleshooting steps. In this section, we will discuss common problems that may arise during drone operations and offer potential solutions to address them.
13.1 Connectivity Issues:
If you’re experiencing difficulties with the remote controller or app connectivity, try the following:
– Ensure that the Mavic Mini and remote controller are powered on and within range of each other.
– Check that your mobile device is connected to the remote controller via the USB cable.
– Restart the DJI Fly app and reconnect the device to the remote controller.
13.2 GPS Signal Weakness:
If you’re experiencing a weak GPS signal, follow these steps:
– Ensure that you are flying in an open area away from tall buildings, power lines, and other sources of interference.
– Wait for the Mavic Mini to acquire a strong GPS signal before taking off.
13.3 Battery Issues:
If you’re having problems with your battery, consider the following troubleshooting steps:
– Ensure that the battery is properly inserted into the Mavic Mini and securely fastened.
– Check the battery levels and the charging status using the DJI Fly app.
– If the battery is not charging or discharging properly, try using a different charger or battery.
13.4 Gimbal Calibration:
If you’re experiencing issues with the gimbal, perform a gimbal calibration:
– Place the Mavic Mini on a flat and level surface.
– Open the DJI Fly app and navigate to the settings to initiate the gimbal calibration.
– Follow the on-screen instructions to calibrate the gimbal.
13.5 Propeller Problems:
If you notice unusual vibrations, noise, or issues with the propellers:
– Check that the propellers are properly seated and tightened to the motors.
– Inspect the propellers for any damage, such as cracks or bends, and replace them if necessary.
– Ensure that the correct propellers are installed in their respective positions (marked A or B).
13.6 Firmware Updates:
If you encounter issues with the Mavic Mini’s performance, consider updating the firmware:
– Connect your mobile device to a stable Wi-Fi network and open the DJI Fly app.
– If a firmware update is available, you will be prompted to download and install it.
– Follow the on-screen instructions to complete the firmware update process.
If the troubleshooting steps mentioned above do not resolve the issue, consult the user manual or visit the DJI website for further assistance or contact their customer support for expert guidance.
By following these troubleshooting tips, you can address common issues and ensure a smooth flying experience with your DJI Mavic Mini.
In the next section, we will share some valuable tips and tricks to enhance your overall flying experience and maximize the potential of your Mavic Mini.
Tips and Tricks for a Better Flying Experience
To enhance your overall flying experience and unlock the full potential of your DJI Mavic Mini, consider these helpful tips and tricks:
14.1 Plan Your Flights:
Before each flight, plan your flight path and location to ensure efficient and successful operations. Research the area, identify potential obstacles or restrictions, and select the best vantage points for your desired shots.
14.2 Fly in Optimal Lighting Conditions:
Take advantage of golden hours, which occur during sunrise and sunset, to capture stunning and magical lighting in your aerial shots. Avoid harsh midday sunlight that can lead to strong shadows and overexposure.
14.3 Experiment with Different Perspectives:
To add visual interest, explore various perspectives and angles. Fly at different altitudes, use the drone’s tilt functionality to capture unique overhead views, or fly low to the ground for dynamic shots.
14.4 Utilize ND Filters:
Neutral Density (ND) filters help control the amount of light entering the camera lens, allowing you to achieve more balanced and cinematic footage even in bright conditions. ND filters are particularly beneficial when capturing cinematic shots or long exposures.
14.5 Adjust Camera Settings:
Take the time to experiment with different camera settings, such as ISO, shutter speed, and white balance. Understanding and adjusting these settings can significantly impact the quality and artistic expression of your photos and videos.
14.6 Use Intelligent Flight Modes Creatively:
Explore the creative possibilities offered by the Mavic Mini’s intelligent flight modes. Mix and match different modes, such as ActiveTrack and Waypoints, to capture complex and engaging shots that tell a compelling visual story.
14.7 Maintain a Spare Battery:
Carry additional fully charged batteries with you to extend your flight sessions. Having spare batteries allows you to capture more footage and maximize your time in the air.
14.8 Always Follow Local Regulations:
Ensure that you adhere to local regulations and guidelines governing the operation of drones. Familiarize yourself with the rules and obtain any necessary permits or certifications required for flying in specific areas.
14.9 Practice and Learn:
Consistent practice is key to improving your flying skills and capturing exceptional shots. Fly regularly, experiment with different techniques, and review your footage to identify areas for improvement and refine your piloting and photography skills.
14.10 Respect and Educate:
Be a responsible drone pilot and an ambassador for the drone community. Respect the privacy and safety of others, educate those around you about responsible drone usage, and promote a positive image of drone flying.
By implementing these tips and tricks, you can elevate your flying experience with the DJI Mavic Mini. Unleash your creativity, explore new perspectives, and capture breathtaking aerial imagery that will leave a lasting impression.
Now that you are equipped with valuable insights and knowledge, it’s time to take flight and unleash the full potential of your DJI Mavic Mini. Happy flying!
Conclusion
Congratulations on completing this comprehensive guide to flying with the DJI Mavic Mini! We have covered essential aspects of unboxing, setting up, using the DJI Fly app, and understanding various flight modes and controls. We have also explored capturing stunning photos and videos, troubleshooting common issues, and provided valuable tips and tricks for a better flying experience.
The DJI Mavic Mini offers an incredible range of features and capabilities that empower users to capture breathtaking aerial footage and explore the skies with ease. By following the best practices, understanding flight safety regulations, and continuously honing your skills, you can make the most of your Mavic Mini and create stunning imagery.
Remember to always fly responsibly and respect the rules and guidelines governing drone usage in your area. Prioritize safety, be mindful of your surroundings, and respect the privacy and safety of others, as well as the environment.
Keep practicing, experimenting, and pushing the boundaries of your creativity. With each flight, you’ll gain more confidence and develop your own unique flying style. Cherish the moments and memories you’ll capture as you take to the skies with your DJI Mavic Mini.
Now it’s time to go out, explore the world from a new perspective, and create incredible aerial content. Happy flying!