Introduction
Welcome to the world of computer enthusiasts and DIY troubleshooting! As technology continues to advance, our reliance on computers has become more prominent than ever. From gaming and graphic design to basic daily tasks, computers have become an integral part of our lives. However, with such heavy usage, computer components can experience wear and tear, and one common issue faced by many users is a malfunctioning computer case fan.
Computer case fans play a crucial role in maintaining optimal temperatures within the computer. They ensure that the internal components are cooled effectively, preventing overheating and potential damage. When a computer case fan starts to fail, it can lead to increased temperatures, decreased performance, and even system crashes.
Recognizing the signs of a failing computer case fan is essential to ensure the longevity and smooth operation of your computer. In this guide, we will delve into the importance of computer case fans, discuss common signs of a failing fan, and provide steps to fix or replace a faulty fan.
Whether you are a seasoned computer enthusiast or a beginner troubleshooter, understanding the ins and outs of fixing a computer case fan will surely come in handy at some point. So, roll up your sleeves, grab your toolkit, and let’s dive into the world of fixing computer case fans!
Understanding the Importance of Computer Case Fans
Computer case fans may seem like small components in the grand scheme of a computer, but their role should not be underestimated. These fans are responsible for maintaining the overall temperature inside the computer case, ensuring that the internal components operate within safe temperatures.
When your computer is running, the various components such as the CPU, GPU, and hard drives generate heat. If this heat is not properly dissipated, it can lead to a range of issues including reduced performance, system instability, and even permanent damage to the hardware.
Computer case fans work by drawing in cooler air from the surrounding environment and directing it towards the heat-generating components of the computer. This airflow helps to lower the temperature of these components, allowing them to function optimally.
Furthermore, case fans help to circulate the air within the computer case, preventing stagnant pockets of hot air from forming. This constant movement of air promotes better heat dissipation and creates a healthier operating environment for the computer.
The importance of computer case fans becomes even more evident in high-performance systems, such as gaming rigs or workstations that undergo heavy and prolonged processing tasks. These systems generate a significant amount of heat and require robust cooling solutions to prevent overheating and performance degradation.
By properly cooling your computer components, you not only ensure their longevity and reliability but also maintain their performance. Overheating can cause components to throttle and reduce their clock speeds to prevent damage. This results in decreased performance and slower response times, negatively impacting your overall computing experience.
Additionally, excessive heat can cause electronic components to degrade over time, reducing their lifespan and potentially leading to premature failure. Investing in a reliable cooling system, which includes properly functioning case fans, is an economical step to protect your valuable hardware.
Now that we understand the importance of computer case fans, let’s move on to identifying the warning signs of a failing fan.
Signs of a Failing Computer Case Fan
A failing computer case fan can have detrimental effects on the overall performance and lifespan of your computer. It’s important to be aware of the signs indicating that your fan may be experiencing issues. By recognizing these signs early on, you can take the necessary steps to fix or replace the fan before further damage occurs.
One of the most common signs of a failing case fan is increased noise. If you start hearing unusual grinding, rattling, or buzzing sounds coming from your computer case, it’s likely that the fan blades or bearings have become worn or damaged. The noise is a result of the fan struggling to rotate smoothly, which may indicate that it’s time for a repair or replacement.
Another telltale sign of a failing case fan is decreased cooling performance. If you notice that your computer is running hotter than usual, with increased temperatures during heavy usage or long periods of operation, it may be due to a faulty fan. Inadequate airflow caused by a malfunctioning fan can result in poor heat dissipation, potentially leading to overheating of sensitive components.
Unstable system behavior is another indicator that your case fan may be failing. If you experience frequent system crashes, random reboots, or unexplained freezes, it could be a result of overheating. When components reach critical temperatures, the system may shut down to prevent damage. Monitoring your system’s temperature during such events can help determine if the fan is the culprit.
Visual inspection can also reveal signs of a failing fan. Dust accumulation or an excessive buildup of debris on the fan blades can hinder airflow and cause the fan to work inefficiently. Additionally, any visible damage to the fan, such as bent blades or loose connections, should not be ignored.
While these signs are indicative of a failing case fan, it’s important to note that other factors, such as a faulty power supply or motherboard, can also contribute to similar symptoms. To effectively diagnose the issue, it’s recommended to perform thorough troubleshooting and consider seeking professional assistance if needed.
Now that we have identified the signs of a failing computer case fan, we can move on to the important factors to consider before fixing or replacing the fan.
Things to Consider Before Fixing a Computer Case Fan
Before diving into the process of fixing or replacing a computer case fan, there are a few important factors to consider. By taking these factors into account, you can ensure a smooth and successful repair or replacement process.
The first consideration is to determine whether the fan is actually the cause of the issue. While the symptoms mentioned earlier may point to a failing fan, it’s crucial to rule out other potential causes. Make sure to check for any loose connections, damaged cables, or issues with the power supply or motherboard that may be affecting the fan’s operation. By eliminating other possibilities, you can confidently proceed with the fan-related troubleshooting.
Next, assess the level of technical expertise required for the repair or replacement. Fixing a case fan can range from a simple cleaning to a complex replacement procedure. If you’re comfortable working with computer hardware and have experience with such tasks, you may be able to handle the repair on your own. However, if you lack the necessary knowledge or feel uncertain about the process, it’s advisable to seek professional assistance. This will ensure that the repair is done correctly and minimize the risk of further damage.
Consider the age and warranty status of your computer. If your computer is relatively new and still covered by a warranty, attempting to fix the fan on your own could void the warranty. It’s recommended to consult the manufacturer or authorized service centers to determine the best course of action. They can provide guidance regarding the warranty terms and options available for repairing or replacing the fan.
Additionally, take into account the availability and cost of replacement parts. Depending on the specific fan model and manufacturer, replacement parts may either be readily available or challenging to find. Consider the cost-effectiveness of repairing versus replacing the fan. In some cases, it may be more practical and cost-efficient to invest in a new fan rather than trying to fix a severely damaged or outdated one.
Lastly, ensure that you have the necessary tools and resources for the repair or replacement. Common tools may include screwdrivers, thermal paste, and compressed air for cleaning. It’s always helpful to have a reliable internet connection to access troubleshooting guides or watch tutorial videos that provide step-by-step instructions for the specific fan model.
By considering these factors before proceeding with the repair or replacement, you can make an informed decision and approach the process with confidence. Now, let’s gather the required tools for fixing a computer case fan.
Tools Needed for Fixing a Computer Case Fan
Before you begin the process of fixing a computer case fan, it’s important to gather the necessary tools. Having the right tools on hand will make the repair or replacement process smoother and more efficient. Here is a list of tools you may need:
- Screwdriver: A screwdriver with the appropriate size and type (typically a Phillips or flathead) is essential for removing screws that secure the fan to the computer case. Ensure that the screwdriver fits snugly to prevent damage to the screws.
- Compressed Air Canister: Over time, dust and debris can accumulate on the fan blades, hindering its performance. A canister of compressed air can be used to blow away the dust and clean the fan. Make sure to use it in a well-ventilated area.
- Isopropyl Alcohol and Cotton Swabs: If the fan blades are heavily soiled or have sticky residue, isopropyl alcohol can be used to clean them. Dampen a cotton swab with the alcohol and gently wipe down the blades to remove any stubborn dirt or grime.
- Replacement Fan: If the fan is beyond repair or you prefer to replace it rather than fix it, you will need a new fan. Make sure to choose a fan that is compatible with your computer case and meets your cooling requirements. Refer to the specifications provided by the manufacturer.
- Thermal Paste: If you need to remove the heat sink from the component the fan cools (e.g., CPU or graphics card), you will need to reapply thermal paste. This paste facilitates proper heat transfer between the component and the heat sink. It’s advisable to have high-quality thermal paste on hand for this purpose.
- Anti-static Wrist Strap: While not necessary for everyone, an anti-static wrist strap can provide an extra layer of protection against static electricity. This is particularly important when working with sensitive components to prevent damage caused by electrostatic discharge.
It’s important to note that the tools required may vary depending on the specific model and design of your computer case and fan. Some cases may have unique screw types or require additional tools for access. Always consult the documentation or research online to ensure you have the appropriate tools for your specific situation.
Now that you have gathered the necessary tools, it’s time to proceed with the step-by-step process of fixing the computer case fan. The first step is to shut down and disconnect your computer, which we will cover in the next section.
Step 1: Shutting Down and Disconnecting Your Computer
Before you begin working on your computer case fan, it’s essential to shut down your computer and disconnect it from the power source. This step ensures your safety and prevents any potential damage to the computer components.
The following steps outline the proper procedure for shutting down and disconnecting your computer:
- Save your work: Make sure to save any open files or documents you are working on. Closing all running programs and properly shutting down your computer will prevent data loss or corruption during the process.
- Shut down your computer: Click on the “Start” menu or press the Windows key, then select “Shut Down” or “Power Off” from the options. Allow your computer to complete the shutdown process before proceeding.
- Unplug the power cord: Locate the power cord connected to your computer and unplug it from the electrical outlet. This ensures that there is no power running through the system, reducing the risk of electrical shock or damage.
- Disconnect peripherals: If any devices such as external hard drives, USB devices, or printers are connected to your computer, disconnect them. This step ensures that no external devices can interfere with the repair or replacement process.
- Ground yourself: Before working inside the computer case, it’s important to discharge any static electricity from your body to avoid damaging sensitive components. You can do this by touching a grounded metal object (e.g., a metal part of the computer case) or wearing an anti-static wrist strap.
Always follow safety precautions when working with computer hardware. Handling internal components without proper precautions can result in electrostatic discharge (ESD), which can cause irreparable damage to your computer.
By following these steps to shut down and disconnect your computer, you ensure a safe and stable environment for the repair or replacement of the computer case fan. Once you have completed this step, you can proceed to the next section, which covers opening the computer case.
Step 2: Opening the Computer Case
Now that you have shut down and disconnected your computer, it’s time to open the computer case to gain access to the internal components, including the case fan. Opening the case requires careful handling to ensure that you don’t cause any damage to the computer or its components. Follow the steps below to safely open your computer case:
- Identify the type of computer case: There are various types of computer cases, such as tower, desktop, or small form factor cases. The process of opening the case may vary depending on the design. Refer to the documentation or the manufacturer’s website for specific instructions on your case type.
- Locate the screws or latches: Most computer cases have screws that secure the side panel or panels in place. Depending on the case, you may need to remove one or multiple screws using a screwdriver. Some cases may have latches that need to be disengaged to open the case.
- Remove the side panel: Once you have identified the screws or latches, carefully remove the side panel of the computer case. Place it aside in a safe location, ensuring that it doesn’t get damaged or misplaced.
- Observe the internal components: With the side panel removed, you will now have a clear view of the internal components of your computer. Take a moment to familiarize yourself with the layout and location of the case fan that you are planning to fix or replace.
It’s important to note that some computer cases may require additional steps or precautions when opening them. For example, certain cases may have a hinged design, removable panels on both sides, or a sliding mechanism. Always refer to the documentation provided by the manufacturer or conduct online research specific to your case model.
When opening the computer case, be mindful of static electricity and avoid touching any exposed circuitry or components. Handle the case with care to prevent accidental damage or injury. Additionally, ensure that you are working in a well-lit and properly ventilated area to facilitate ease of access and prevent overheating during the repair or replacement process.
Now that you have successfully opened the computer case, we can move on to the next section, which focuses on locating the faulty fan.
Step 3: Locating the Faulty Fan
With the computer case open, the next step is to locate the faulty fan that requires repair or replacement. Identifying the specific fan can help you focus your efforts and ensure that you address the correct issue. Follow the steps below to locate the faulty fan:
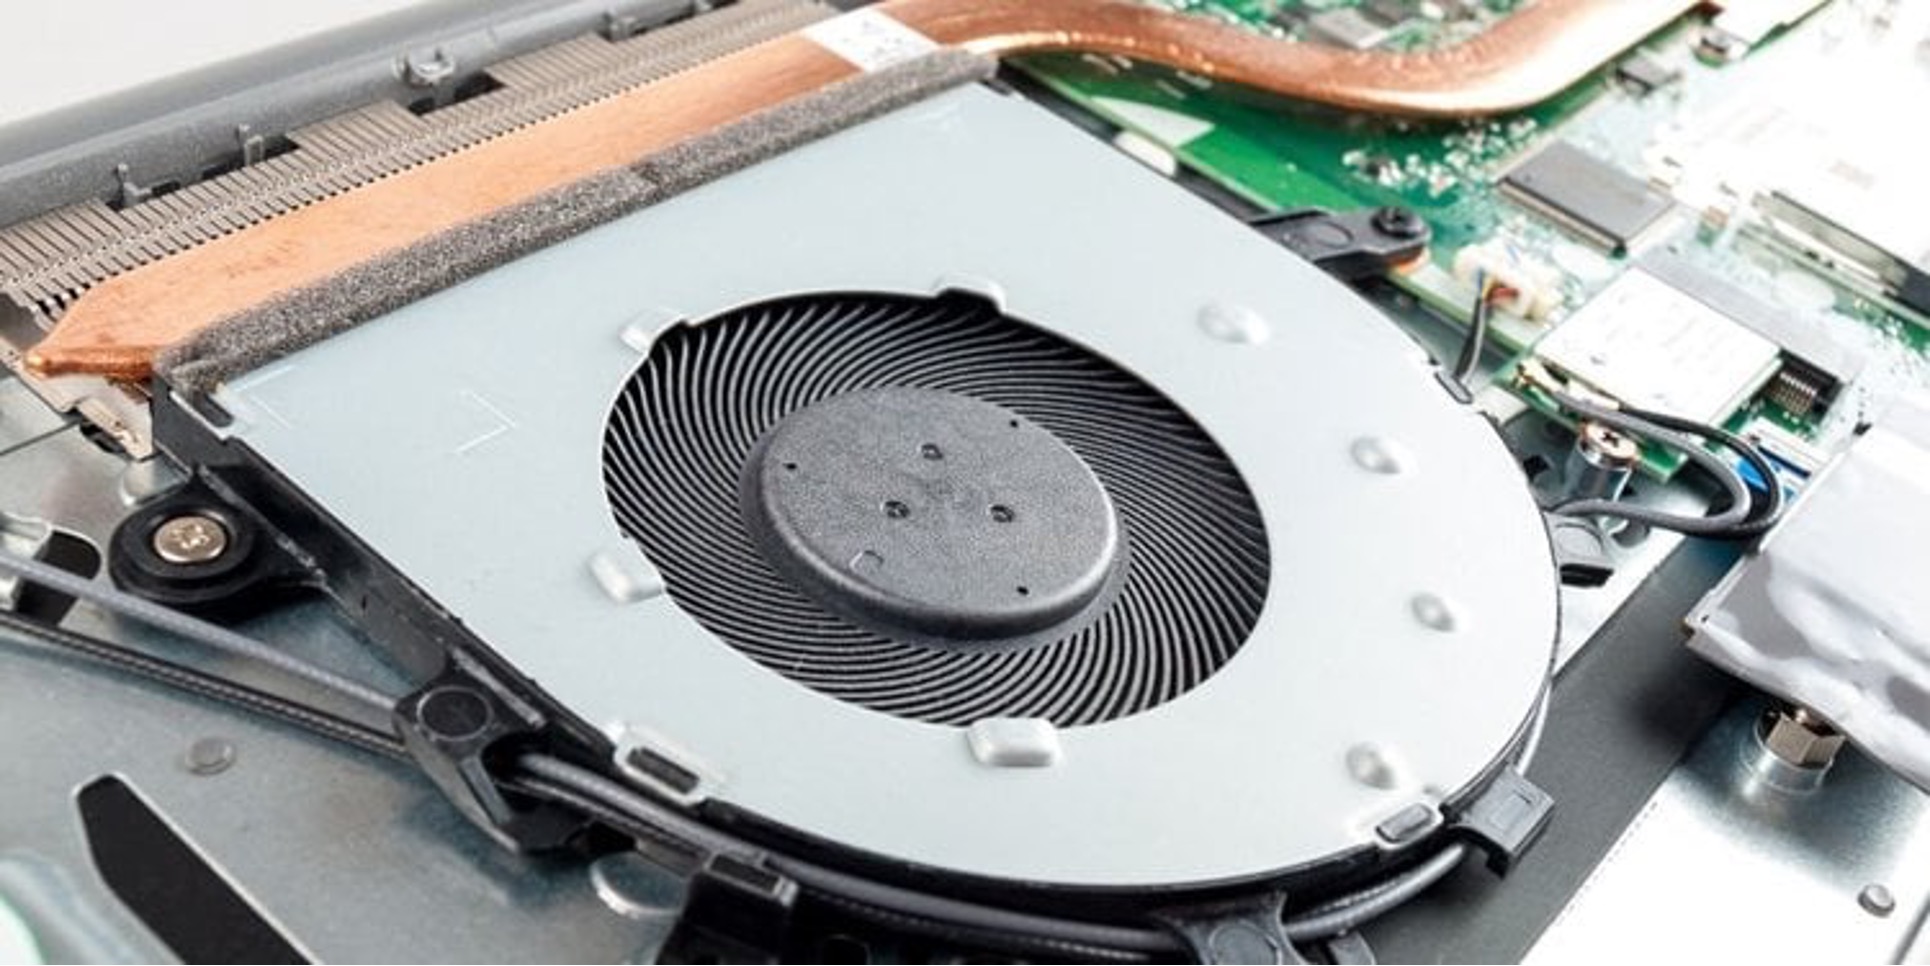
- Observe the interior: Take a moment to visually inspect the interior of the computer case. Look for any fans that are clearly visible and determine if any of them are exhibiting signs of damage, such as broken blades or loose connections.
- Refer to the documentation: Consult the documentation provided with your computer or the motherboard manual to locate the fan headers. Fan headers are the connectors on the motherboard where the fans are attached. This can help you identify the specific fans connected to your system.
- Use a flashlight: In some cases, the faulty fan may be hidden or not easily visible. Use a flashlight to carefully inspect the deeper recesses of the computer case, paying attention to areas behind components or obstructed by cables.
- Follow the cables: Look for cables connected to the fans and follow their path. This can help you trace the fans to their specific locations and identify any fans that may be obstructed from direct view.
- Listen for noise: If the faulty fan is still functional but making unusual noises, carefully listen for the location of the noise. This can help you isolate the fan that requires attention.
Keep in mind that larger computer cases may have multiple fans, including additional fans for the CPU or graphics card. Take note of the specific fan that is causing issues or exhibiting signs of failure. If you’re unsure which fan is faulty, you can also disconnect each fan temporarily and power on the computer to identify the fan generating the noise or exhibiting the problem.
It’s important to exercise caution during this step to avoid touching any internal components and causing accidental damage. Additionally, be mindful of any nearby cables or other components that may obstruct your access to the fan. Take note of the location of the faulty fan as you will need this information for the subsequent steps of the repair or replacement process.
Now that you have successfully located the faulty fan, we can move on to the next section, which covers the importance of cleaning the fan.
Step 4: Cleaning the Fan
Regularly cleaning the computer case fan is essential to maintain optimal performance and prevent overheating. Dust, debris, and buildup can hinder the fan’s operation, leading to increased noise, reduced airflow, and potential overheating. In this step, we will guide you through the process of cleaning the fan to ensure proper functionality.
- Gather cleaning supplies: Before you begin, gather the necessary cleaning supplies. You will need a can of compressed air and possibly isopropyl alcohol and cotton swabs if the fan blades require more intensive cleaning.
- Discharge static electricity: To avoid damaging sensitive components, it’s important to discharge any static electricity by touching a grounded metal object or wearing an anti-static wrist strap.
- Focus on the fan blades: Using a can of compressed air, aim the nozzle at the fan blades and apply short bursts of air to dislodge any dust or debris. Ensure that you keep the can upright and use short, controlled bursts to prevent any moisture from escaping the canister.
- Remove stubborn dirt: If the fan blades are heavily soiled or have sticky residue, use isopropyl alcohol and cotton swabs to clean them. Dampen a cotton swab with the alcohol and gently wipe down the blades, removing any stubborn dirt or grime. Allow the blades to dry completely before proceeding.
- Clean the surrounding area: After cleaning the fan blades, use the compressed air to blow away any dust or debris from the surrounding area, including the fan’s housing and the nearby components. Ensure that all nooks and crannies are thoroughly cleaned.
As you clean the fan, it’s advisable to hold the fan blades in place to prevent them from spinning uncontrollably. This can help avoid potential damage to the fan motor or other components.
Remember to never use excessive force or liquids when cleaning the fan, as this can damage the delicate components. Always follow the instructions provided with the cleaning supplies and exercise caution.
Regularly cleaning your computer case fan can significantly improve its performance and extend its lifespan. By removing dust and debris, you ensure better airflow and cooling efficiency. Now that your fan is clean, it’s time to proceed to the next step: replacing the fan if necessary.
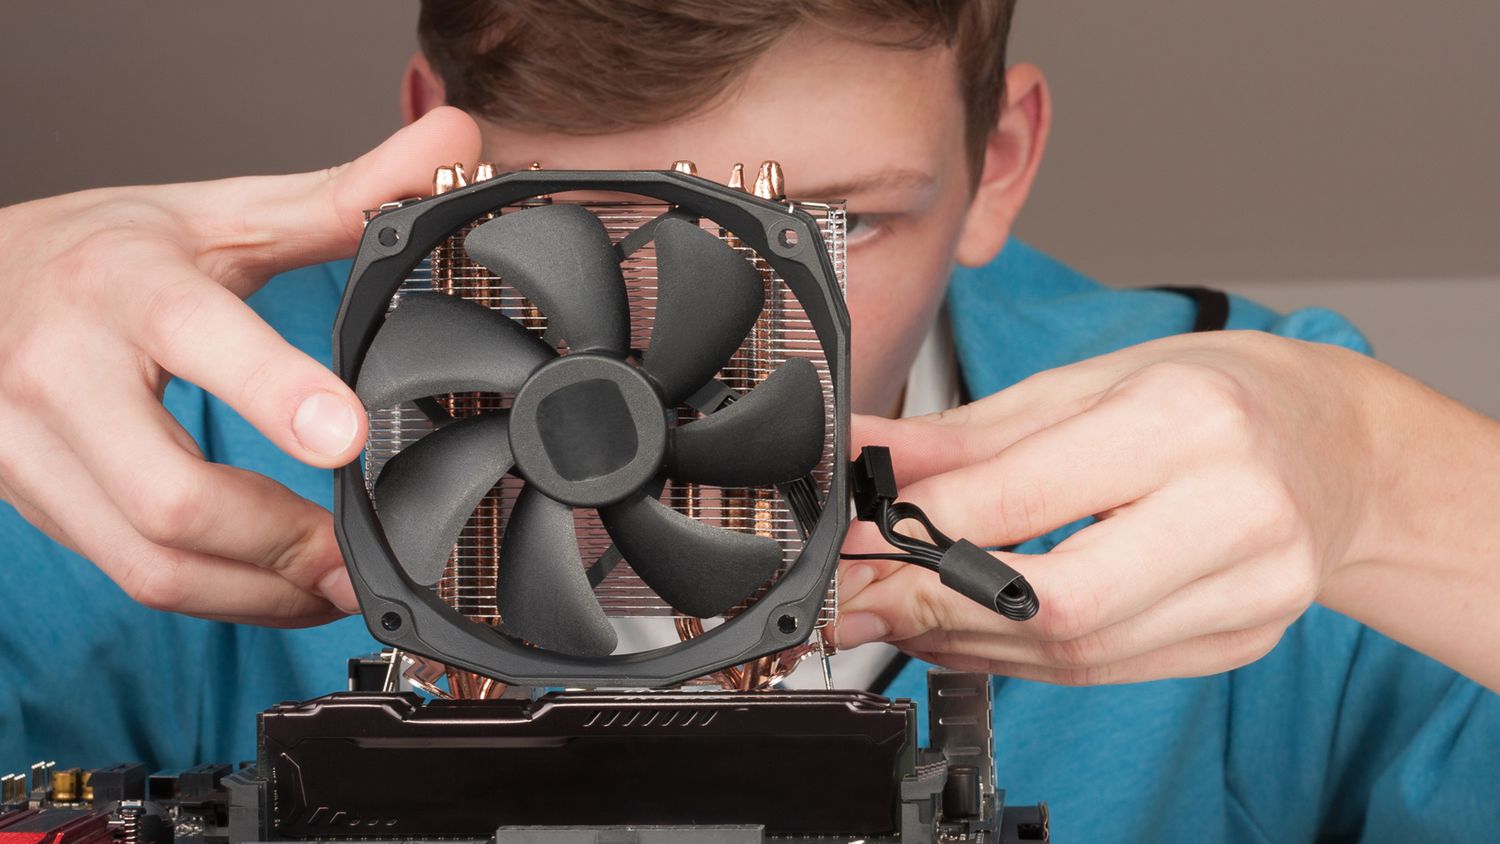
Step 5: Replacing the Fan
If cleaning the fan did not resolve the issue or if the fan is severely damaged, it may be necessary to replace it. Replacing a faulty fan will ensure proper cooling and prevent further damage to your computer. Follow the steps below to safely and effectively replace the computer case fan:
- Ensure compatibility: Before purchasing a new fan, ensure that it is compatible with your computer case and meets your cooling requirements. Check the specifications provided by the manufacturer or consult the documentation for any specific recommendations.
- Power off and disconnect: As a safety precaution, shut down your computer and disconnect it from the power source following the steps mentioned earlier.
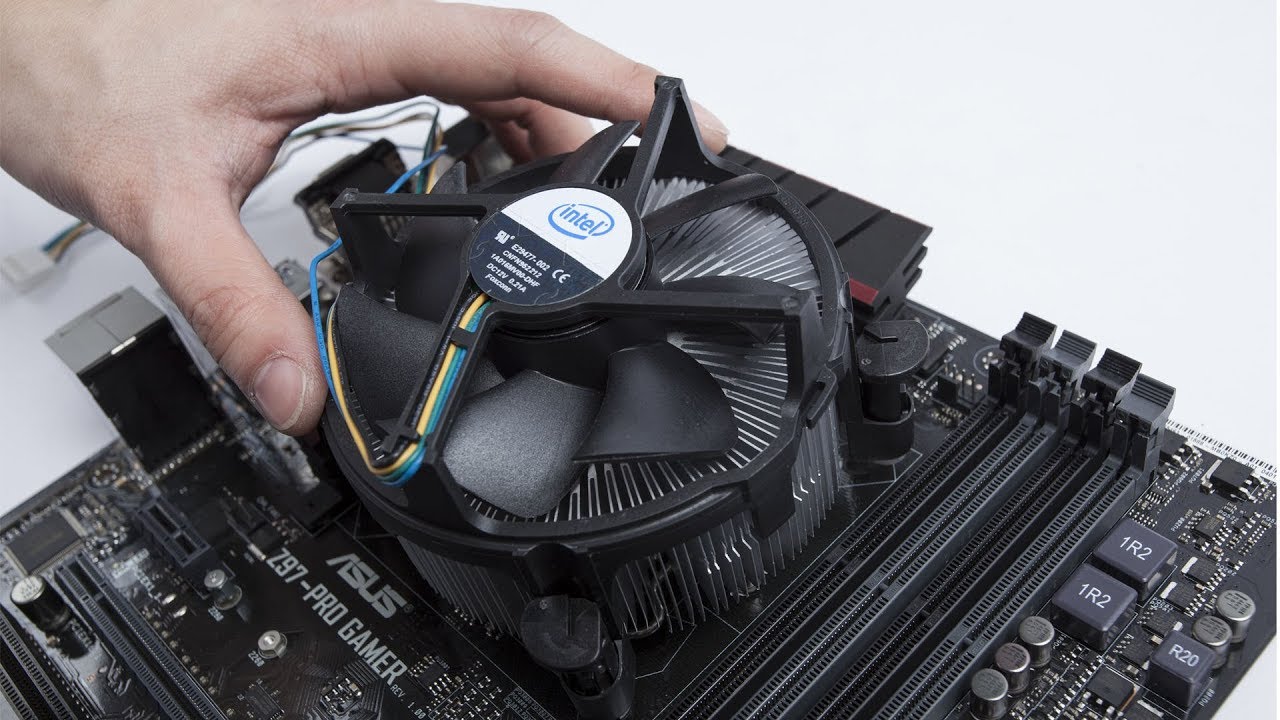
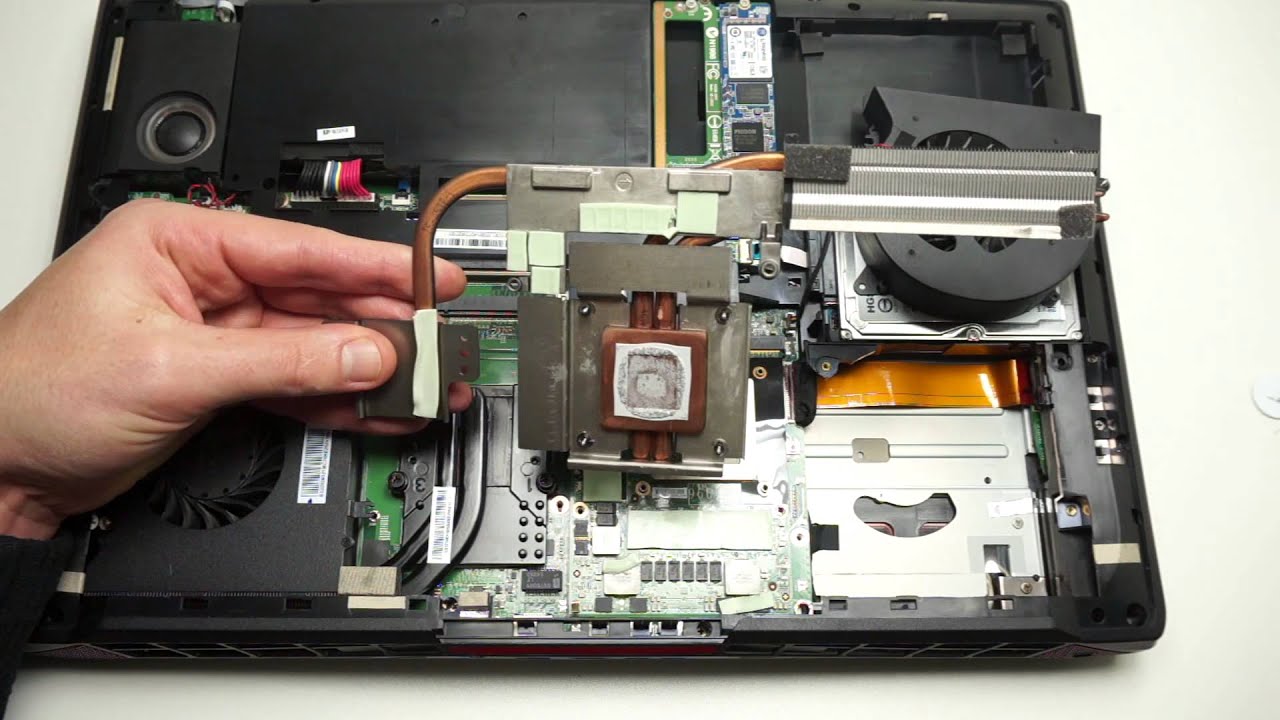
- Detach the old fan: Locate and disconnect any cables or connectors attached to the faulty fan. Depending on the fan model, you may need to unscrew it from the computer case. Use a screwdriver with the appropriate size and type to remove the screws holding the fan in place. Carefully lift the fan out of the case.
- Prepare the new fan: Take the new fan out of its packaging and ensure it is in good condition. If necessary, transfer any rubber mounts or anti-vibration pads from the old fan to the new one.
- Install the new fan: Position the new fan in the designated spot within the computer case. Align the screw holes on the fan with those on the case and secure it in place using the screws that came with the fan. Ensure that the fan is properly seated and securely attached.
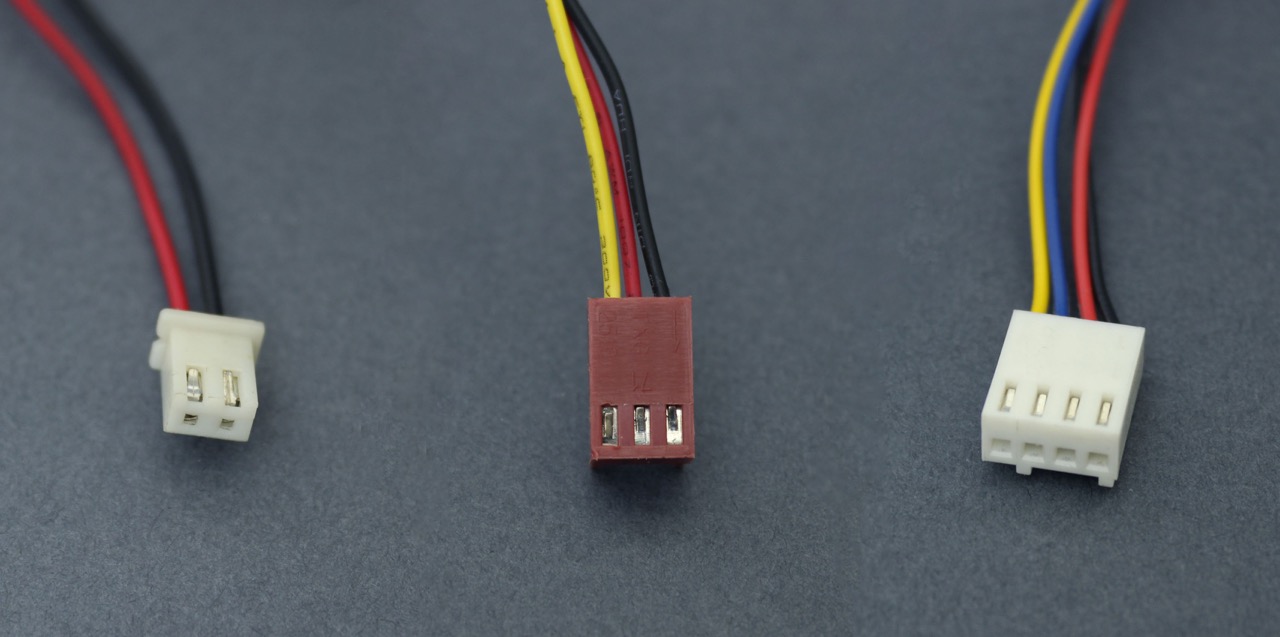
- Connect the cables: Plug any necessary connectors from the new fan into the corresponding fan headers on the motherboard. Refer to the documentation provided with your motherboard for the specific locations of the fan headers.
- Double-check: Verify that all connections are secure and properly aligned. Ensure that the fan’s cables are neatly routed and do not interfere with other components or obstruct airflow.
When replacing the fan, it’s important to follow manufacturer guidelines and recommendations. Some fans may have additional features or requirements that need to be considered during installation. Refer to the fan’s documentation or online resources for any specific instructions.
Once you have completed the installation of the new fan, you can proceed to the final step: testing the fixed fan.
Step 6: Testing the Fixed Fan
After replacing or fixing the computer case fan, it’s crucial to test its functionality to ensure that it is working properly. Testing the fan will help you verify that the repair or replacement was successful and that the fan is effectively cooling the internal components. Follow the steps below to test the fixed fan:
- Power on your computer: Reconnect the power cord to your computer and power it on. Allow the computer to boot up fully and reach the operating system.
- Monitor fan operation: Observe the newly replaced or fixed fan to ensure that it is spinning smoothly and without any unusual noises. Pay attention to its speed, as it should be maintaining an adequate airflow to cool the components.
- Check temperatures: Use temperature monitoring software or the BIOS settings to check the temperatures of your computer’s internal components. Compare the current temperatures to the ones you observed before fixing or replacing the fan. If the temperatures have dropped or remain within a safe range, it indicates that the fan is functioning properly.
- Run stress tests: To further verify the fan’s performance, you can run intensive tasks or stress tests that put a heavy load on the computer’s components. Monitor the temperatures during this process to ensure that the fan can maintain low temperatures even under high loads.
- Listen for abnormalities: While the system is under stress, listen for any unusual noises coming from the fan. If you hear grinding, scraping, or excessively loud noises, it may indicate a problem with the fan or its installation.
If you encounter any issues during the testing phase, such as the fan not spinning, making unusual noises, or failing to cool the components effectively, you may need to retrace your steps and ensure that the fan is properly installed and connected. Consider seeking professional assistance if you’re unable to resolve the issue on your own.
By carefully testing the fixed fan, you can ensure that your computer’s cooling system is functioning optimally, providing adequate airflow and preventing overheating. Once you are satisfied with the fan’s performance, you can proceed to reassemble the computer case and enjoy a properly cooled system.
Additional Tips and Precautions
When fixing or replacing a computer case fan, it’s important to keep in mind a few additional tips and precautions to ensure a successful and safe process. These tips can help you avoid common pitfalls and maximize the effectiveness of your repair or replacement:
- Maintain a clean and dust-free environment: Dust accumulation can hinder the performance of your computer case fan over time. Regularly cleaning the interior of your computer case can help prevent dust buildup, prolong the lifespan of the fan, and maintain optimal cooling.
- Follow proper ESD precautions: Electrostatic discharge (ESD) can damage sensitive computer components. When handling the fan or any internal components, ground yourself by using an anti-static wrist strap or by touching a grounded metal surface to discharge any static electricity.
- Avoid excessive force: When installing the new fan or tightening screws, be careful not to apply excessive force. Over-tightening screws can damage the fan or the casing, while excessive force during installation can lead to misalignment or damage to other components.
- Consult manuals and documentation: Always refer to the manuals and documentation provided by the manufacturer for your computer case, motherboard, and fan. These resources often contain specific instructions, guidelines, and troubleshooting tips.
- Update your BIOS and fan control software: Make sure your computer’s BIOS and fan control software are up to date. This can help ensure compatibility with new fans and enable efficient fan speed control for optimal cooling performance.
- Regularly monitor temperatures: Keep an eye on the temperatures of your computer’s internal components using temperature monitoring software. This can help you identify any potential issues with cooling efficiency and take necessary actions to rectify them.
- Consider upgrading to more efficient fans: If you frequently face cooling issues or have an older computer, you may want to consider upgrading to more efficient and quieter fans. High-quality fans with better airflow and lower noise levels can greatly improve the overall cooling performance of your system.
By following these additional tips and taking precautions throughout the process, you can enhance the lifespan of your computer case fan, maintain an adequately cooled system, and ensure the safety of your computer components.
Now that you have all the tips and precautions at your disposal, you are ready to proceed with fixing or replacing your computer case fan. Once you have completed the necessary steps, enjoy a cooler and more reliable computing experience!
Conclusion
Fixing or replacing a computer case fan is a crucial task to maintain the optimal cooling of your system and ensure the smooth operation of your computer. By understanding the importance of computer case fans and recognizing the signs of a failing fan, you can proactively address any issues and prevent potential damage to your hardware.
In this guide, we’ve covered the necessary steps to fix or replace a faulty fan, starting from shutting down and disconnecting your computer to testing the fixed fan. We explored the significance of properly cleaning the fan and provided tips and precautions to enhance the effectiveness of the repair or replacement process.
Remember to consider factors such as compatibility, technical expertise, warranty status, and availability of replacement parts before proceeding with the repair. It’s essential to ensure you have the necessary tools and resources to complete the task successfully.
Always follow safety precautions and consult the documentation provided by the manufacturer for specific instructions. If you’re uncertain or uncomfortable with performing the repairs yourself, don’t hesitate to seek professional assistance to avoid the risk of further damage.
By keeping your computer case fans in good working condition, you can extend the lifespan of your hardware, optimize system performance, and keep your computer running smoothly for years to come.
Now that you have all the knowledge and guidance necessary, it’s time to take action and fix or replace that faulty fan. Happy troubleshooting and enjoy a cool and reliable computing experience!