Introduction
A graphics card is an essential component in a computer system that is responsible for rendering images, videos, and animations. Whether you’re a gamer, a graphic designer, or someone who uses resource-intensive software, a malfunctioning graphics card can be a frustrating experience. Glitches, artifacts, or even complete system crashes can occur when there’s an issue with the graphics card.
Fortunately, many graphics card problems can be fixed without having to replace the card entirely. In this article, we’ll explore several troubleshooting steps to help you fix common graphics card issues. These steps range from simple actions like updating drivers to more involved tasks like cleaning the card or adjusting graphical settings. By following these steps, you can potentially resolve the issues and get your graphics card back in top working condition.
Before diving into the solutions, it’s important to note that not all graphics card problems can be fixed. If your graphics card has physical damage or is severely malfunctioning, it may need to be replaced. However, in many cases, software-related issues or minor hardware problems are to blame, and those can often be resolved.
Now, let’s take a look at the common problems and the troubleshooting steps that can help restore your graphics card’s functionality.
Check for common problems
When experiencing issues with your graphics card, it’s always a good idea to start by checking for common problems. Sometimes the solution can be as simple as adjusting a setting or reconnecting a cable. Here are a few common problems to look out for:
- Loose cable connections: Ensure that all cables connecting your graphics card are securely plugged in. Sometimes loose connections can cause display problems or prevent the graphics card from functioning properly.
- Outdated drivers: Graphics card drivers are regularly updated by manufacturers to improve performance and fix bugs. Outdated drivers can lead to compatibility issues, graphical glitches, or even system crashes. Check the manufacturer’s website for the latest driver updates.
- Incompatible software: Certain software applications or games may not be compatible with your graphics card. Check the system requirements of the software you’re trying to use and ensure that your graphics card meets those requirements.
- Overclocking issues: If you have overclocked your graphics card to increase performance, it could be causing instability. Resetting the card to its default clock speeds might resolve any issues.
- Memory allocation: Insufficient or incorrect allocation of system memory to the graphics card can lead to performance problems. Check your system settings to ensure the correct amount of memory is allocated to the graphics card.
By checking for these common problems, you might be able to quickly identify the cause of your graphics card issues and take the necessary steps to fix them. However, if none of these common problems are the issue, don’t worry. There are still plenty of troubleshooting steps to explore.
Update graphics card drivers
Outdated graphics card drivers are a common cause of various issues, including poor performance, graphical glitches, and system crashes. Updating your graphics card drivers can often resolve these problems. Here’s how to do it:
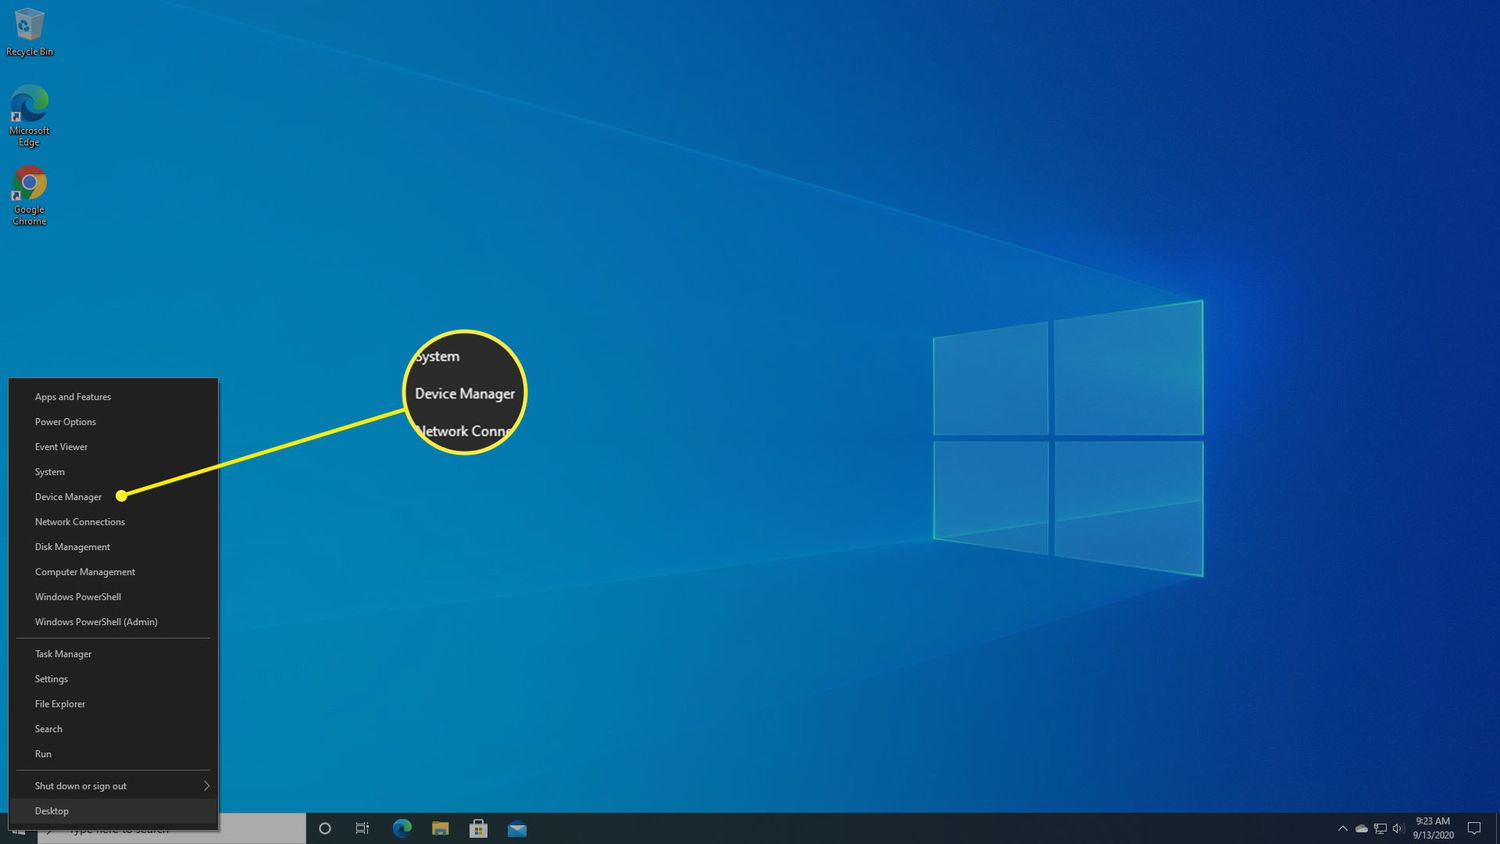
- Identify your graphics card model: Before updating your drivers, you need to know the exact model of your graphics card. You can usually find this information in the Device Manager or by checking the documentation that came with your computer or graphics card.
- Visit the manufacturer’s website: Once you know your graphics card model, visit the manufacturer’s website. Most manufacturers have a support or downloads section on their site where you can find the latest drivers for your graphics card.
- Download and install the latest drivers: Locate the latest drivers for your graphics card on the manufacturer’s website and download them. Make sure to select the correct driver for your operating system and graphics card model. Once downloaded, run the installer and follow the on-screen instructions to install the new drivers.
- Restart your computer: After installing the new drivers, it’s important to restart your computer. This ensures that the driver changes take effect and helps eliminate any driver-related issues that may have been causing problems.
- Test your graphics card: Once your computer has restarted, test your graphics card to see if the issues have been resolved. Open a demanding application or game that previously experienced problems and observe if there are any improvements in performance or graphical stability.
Regularly updating your graphics card drivers is crucial to ensure optimal performance and compatibility with the latest software. It’s recommended to check for driver updates periodically or enable automatic updates if your graphics card supports it.
If updating the drivers doesn’t resolve your graphics card issues, there are still several other troubleshooting steps you can try. Let’s explore some additional solutions.
Clean the graphics card and fans
Over time, dust and debris can accumulate on the surface of your graphics card and its cooling fans, leading to overheating and performance issues. Cleaning your graphics card and fans can help improve airflow and prevent thermal problems. Follow these steps to clean your graphics card:
- Power off and unplug your computer: Before cleaning any internal components, it’s crucial to power off your computer and unplug it from the power source. This ensures your safety and prevents any accidental damage to the hardware.
- Open the computer case: Remove the side panel or access panel of your computer case to gain access to the internal components. Refer to your computer’s manual or manufacturer’s website for specific instructions on how to open the case.
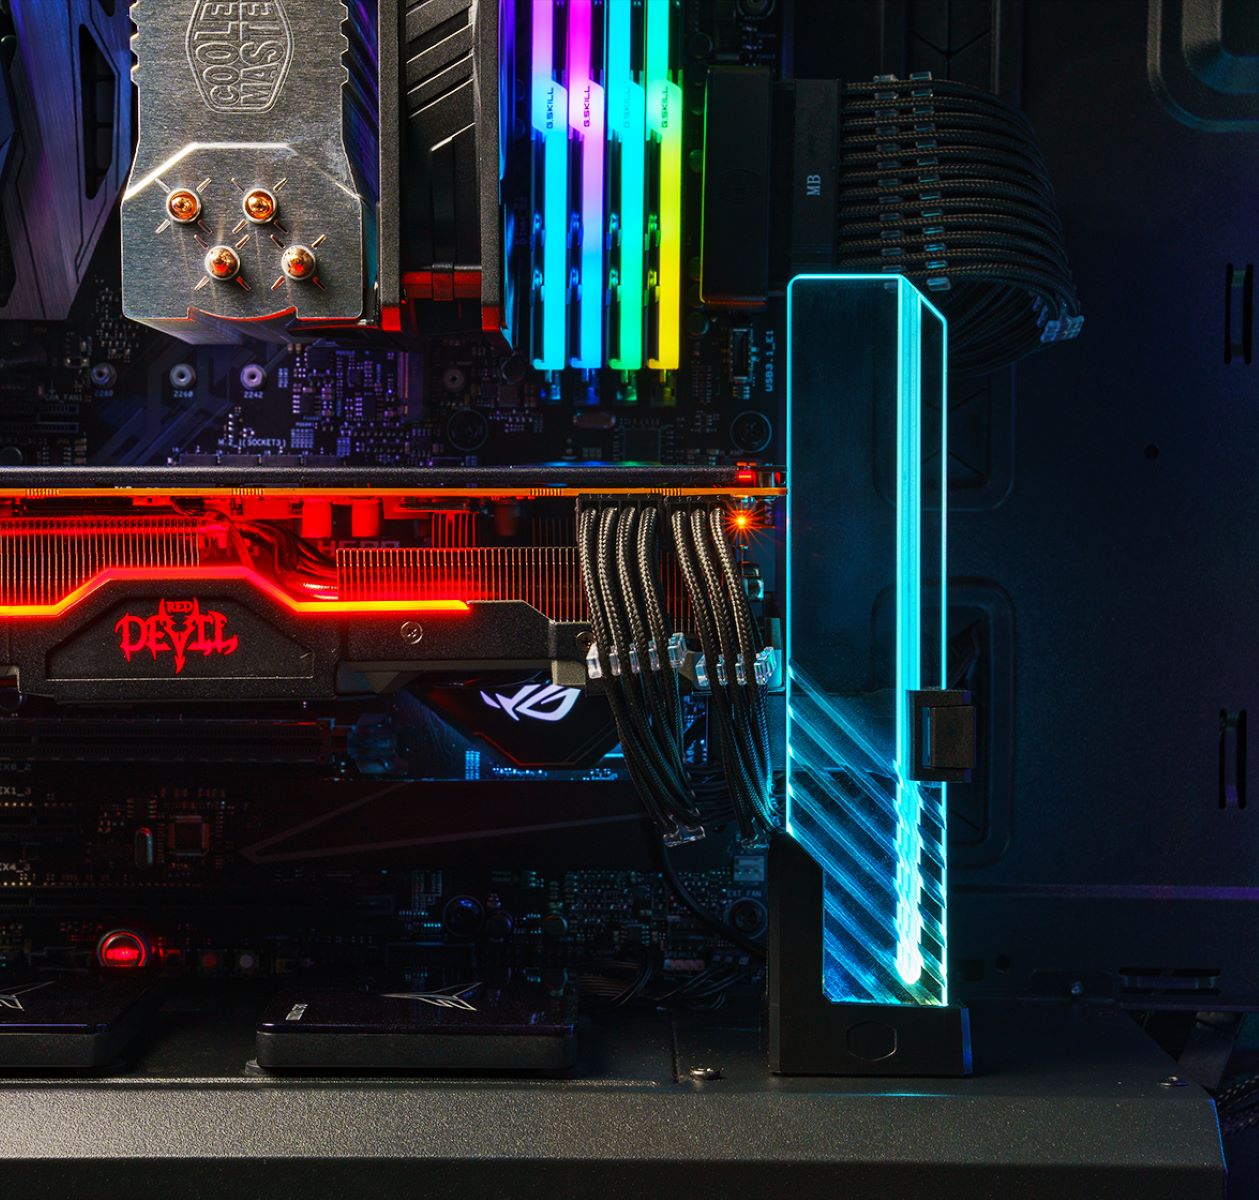
- Locate the graphics card: Identify the graphics card inside your computer. It is usually inserted into a PCI-Express slot on the motherboard and may have a dedicated fan or heatsink attached to it.
- Clean the graphics card: Use a can of compressed air or a soft brush to gently remove any dust or debris from the surface of the graphics card. Be careful not to apply too much pressure or touch any delicate components. Pay close attention to the cooling fans and heatsinks, as they tend to accumulate the most dust.
- Clean the fans: If your graphics card has cooling fans, make sure to clean them thoroughly. Use the compressed air or a brush to remove any dust that may be clogging the fan blades. This will help improve airflow and prevent overheating.
- Close the computer case: Once you’ve finished cleaning the graphics card and fans, carefully close the computer case and secure the side panel or access panel.
- Power on your computer: Plug your computer back in and power it on. Monitor the temperatures of your graphics card using software utilities to ensure that it is running at an optimal temperature.
Regularly cleaning your graphics card and fans can help prolong the lifespan of your hardware and maintain optimal performance. It’s recommended to clean them at least once every few months, or more frequently if you notice a buildup of dust or experience overheating issues.
If cleaning the graphics card and fans doesn’t resolve the problems with your graphics card, don’t worry. There are still more troubleshooting steps we can explore.
Check the power supply
A stable and adequate power supply is crucial for the proper functioning of your graphics card. Insufficient power or voltage fluctuations can cause various issues, including system crashes, artifacts, and instability. Here are some steps to check the power supply:
- Ensure the power supply meets the card’s requirements: Check the power requirements of your graphics card and compare them to the specifications of your power supply unit (PSU). Ensure that your PSU provides enough power and the necessary connectors to support your graphics card.
- Check the power connections: Inspect the power connections between the PSU and the graphics card. Make sure the power cables are securely plugged into the card and the PSU. Check for any loose connections or damaged cables.
- Test with a different power supply: If possible, try using a different power supply unit to see if the issues with your graphics card persist. This can help determine if the PSU is the cause of the problem.
- Monitor voltage levels: Use software utilities or a multimeter to monitor the voltage levels of your PSU. Check if the voltages are within the specified ranges. Significant deviations from the normal voltages can indicate a faulty PSU.
- Replace the power supply: If you suspect that your PSU is faulty or insufficient to power your graphics card, consider replacing it with a more powerful and reliable unit that meets the card’s requirements.
Problems with the power supply can often masquerade as issues with the graphics card. By ensuring a stable and sufficient power supply, you can potentially resolve the problems you’re experiencing with your graphics card.
If checking the power supply doesn’t solve the issues, don’t worry. There are still more troubleshooting steps we can explore to fix your graphics card.
Adjust graphical settings
Incorrect or overly demanding graphical settings can put a strain on your graphics card, leading to performance issues and graphical glitches. Adjusting the graphical settings can help alleviate these problems. Here are some steps to consider:
- Lower the graphics settings in games: If you’re experiencing performance issues or graphical glitches while playing games, try reducing the graphical settings within the game itself. Lowering settings such as resolution, texture quality, and anti-aliasing can lessen the load on the graphics card.
- Adjust the graphics settings in software applications: Graphic design or 3D rendering applications often have adjustable settings that determine the quality or complexity of the rendered output. Experiment with lowering these settings to see if it improves performance or stability.
- Turn off unnecessary visual effects: In your operating system settings, disable or reduce unnecessary visual effects such as animations, transparency, or shadows. These effects can consume system resources and strain the graphics card.
- Manage graphics card control panel settings: Depending on your graphics card manufacturer, there may be a control panel software that allows you to tweak various settings. Explore the control panel settings for options such as power management, performance profiles, or overclocking.
- Update the software: Ensure that your software applications, games, and operating system are up to date. Sometimes, software updates can include performance optimizations or bug fixes that can improve compatibility with your graphics card.
By adjusting the graphical settings, you can find a balance between visual quality and performance, potentially resolving issues with your graphics card. Experiment with different settings and monitor the impact on performance and stability.
If adjusting the graphical settings doesn’t solve the problems with your graphics card, there are still more troubleshooting steps we can explore. Let’s move on to the next section.
Check for overheating issues
Overheating is a common problem that can affect graphics cards, especially during intense gaming or resource-intensive tasks. When a graphics card overheats, it can cause performance issues, system crashes, and even permanent damage. Here’s how to check for and address overheating issues:
- Monitor temperatures: Use monitoring software to check the temperatures of your graphics card during operation. Elevated temperatures, especially above the manufacturer’s recommended limits, indicate potential overheating issues.
- Clean the cooling system: Just like with the previous section, cleaning the graphics card and its cooling components is essential. Use compressed air to remove dust and debris from the cooling fans, heatsinks, and vents. This helps improve airflow and dissipate heat more effectively.
- Ensure proper ventilation: Make sure that your computer case has adequate ventilation. Check that the fans are working properly and that there are no obstructions blocking the airflow. Consider installing additional case fans if necessary.
- Use cooling pads or stands: If you’re using a laptop, using a cooling pad or stand can help improve air circulation around the device and dissipate heat more efficiently.
- Apply thermal paste: Over time, the thermal paste between the graphics card’s GPU and the heatsink may dry out or lose its effectiveness. Applying a fresh layer of high-quality thermal paste can enhance heat transfer and reduce temperatures.
- Consider aftermarket cooling solutions: If your graphics card continues to overheat even after cleaning and applying thermal paste, you may need to explore aftermarket cooling solutions, such as aftermarket GPU coolers or water cooling systems.
By addressing overheating issues, you can help ensure that your graphics card operates within safe temperature ranges, prolonging its lifespan and preventing performance issues. Regular monitoring and maintenance of the cooling system are essential to prevent overheating.
If checking for overheating issues doesn’t resolve your graphics card problems, don’t worry. There are still more troubleshooting steps we can explore. Let’s move on to the next section.
Troubleshoot display problems
If you’re experiencing display problems with your graphics card, such as a blank screen, distorted images, or no signal, it can be concerning. However, there are several steps you can take to troubleshoot and potentially resolve these display issues:
- Check the display connections: Ensure that the cables connecting your monitor or display to the graphics card are securely plugged in. Disconnect and reconnect the cables to eliminate any loose connections.
- Try a different display: If possible, connect your computer to a different monitor or display. This helps determine whether the issue lies with the graphics card or the display itself. If the problem disappears with a different display, the issue may be with your monitor.
- Verify the display settings: Check the settings on your computer and ensure that the display resolution, refresh rate, and other parameters are set correctly. Incorrect settings can lead to display problems.
- Update the BIOS: Outdated or incorrect BIOS settings can sometimes cause display issues. Visit your motherboard manufacturer’s website and check for any BIOS updates or recommended settings for your specific graphics card.
- Check for software conflicts: Certain software applications, especially those related to graphics or display settings, can conflict with your graphics card and cause display issues. Try closing or uninstalling any recently installed software that may be causing conflicts.
- Remove and reseat the graphics card: If none of the above steps resolve the display problems, try removing the graphics card from its slot and then reinstalling it. Ensure that it is properly seated in the PCIe slot and that any power connections are secure.
- Try a different PCIe slot: If you have multiple PCIe slots on your motherboard, try inserting the graphics card into a different slot. This can help determine if the issue is related to a faulty PCIe slot.
By troubleshooting display problems, you can identify and resolve issues that may be preventing your graphics card from properly displaying images. It’s important to try these steps sequentially to eliminate potential causes and narrow down the source of the problem.
If troubleshooting display problems doesn’t solve the issues with your graphics card, don’t worry. There are still more troubleshooting steps we can explore to fix the problem. Let’s move on to the next section.
Reset the graphics card settings
If you’ve exhausted the previous troubleshooting steps and are still experiencing issues with your graphics card, it may be worth resetting the graphics card settings. Sometimes, incorrect or conflicting settings can cause problems that a simple reset can resolve. Here’s what you can do:
- Access the graphics card control panel: Depending on your graphics card manufacturer, there may be a control panel software installed on your computer. Open the control panel by right-clicking on the desktop and selecting the appropriate option.
- Locate the reset or restore default settings: Within the control panel, search for an option that allows you to reset or restore the graphics card settings to their default values. The location of this option may vary depending on the graphics card manufacturer and the control panel software being used.
- Initiate the reset: Once you’ve found the reset or restore default settings option, select it and follow any prompts or confirmation dialogues to initiate the reset process. Be aware that resetting the graphics card settings will revert any changes you’ve made, so make sure to back up any important configurations or profiles if needed.
- Restart your computer: After resetting the graphics card settings, it’s essential to restart your computer to ensure that the changes take effect and any remaining conflicting settings are cleared.
- Observe the performance: Once your computer has rebooted, test your graphics card to see if the issues have been resolved. Check for any improvement in performance, stability, or graphical glitches that were present before the reset.
Resetting the graphics card settings can often act as a fresh start and eliminate any problematic configurations or conflicts. It can help restore the default settings and potentially resolve any lingering issues you may have been experiencing.
If resetting the graphics card settings doesn’t solve your problems, don’t worry. There are still a few more troubleshooting steps we can explore to fix your graphics card. Let’s move on to the next section.
Conclusion
Dealing with graphics card issues can be frustrating, but fortunately, many problems can be resolved without having to replace the entire card. By following the troubleshooting steps mentioned in this article, you can potentially fix common graphics card issues and restore its functionality.
We started by checking for common problems, such as loose connections, outdated drivers, and incompatible software. If these were not the cause of the problem, we moved on to updating the graphics card drivers and cleaning the card and its fans. If the issues persisted, we checked the power supply to ensure it met the card’s requirements and monitored for overheating issues. We also explored adjusting graphical settings and troubleshooting display problems. Lastly, we considered resetting the graphics card settings as a potential solution.
It’s important to remember that not all graphics card problems can be fixed, especially if the card has physical damage or severe malfunctioning. In such cases, it may be necessary to replace the graphics card. However, by following these troubleshooting steps, you can often resolve software-related issues or minor hardware problems.
If you’ve tried all the troubleshooting steps and are still experiencing problems with your graphics card, it might be worth seeking professional assistance. A certified technician will have the necessary expertise to diagnose and fix more complex issues.
Remember to regularly maintain your graphics card by keeping it clean and up to date with the latest drivers. By doing so, you can help prolong its lifespan and ensure optimal performance for your gaming, design, or resource-heavy tasks.
We hope that this guide has been helpful in resolving your graphics card issues. Good luck and happy computing!