Introduction
When it comes to enjoying a movie night or delivering a professional presentation, projectors are a popular choice for many. However, there’s nothing more frustrating than dealing with a blurry projector that ruins the viewing or presentation experience. Blurriness not only hampers the quality of the displayed content but also makes it difficult to focus and fully engage with the projected images.
In this article, we will explore some common causes of a blurry projector and provide practical solutions to fix this issue. Whether you’re using a home theater projector or a business projector, these troubleshooting tips will help you regain clear and crisp visuals.
Before we start troubleshooting, it’s crucial to understand that various factors can contribute to a blurry projection. It could be an issue with the projector itself, the source material, or something as simple as a smudged lens. By identifying and addressing the root cause of the blurriness, we can effectively rectify the problem and restore the projector’s performance.
Throughout this article, we will walk you through each step, making it easy to follow along and implement the necessary adjustments. So, if you’re tired of blurry projections and want to enjoy sharp and vibrant visuals, let’s dive in and discover how to fix a blurry projector.
Common Causes of Blurry Projector
A blurry projector can have multiple causes, and understanding these underlying factors is essential in troubleshooting and resolving the issue. Here are some common culprits that can lead to a blurry projector:
- Incorrect focus: One of the primary reasons for a blurry projection is an incorrect focus setting. If the focus ring on the projector lens is not properly adjusted, it can result in fuzzy images. Ensuring the focus is properly set is the first step in rectifying this issue.
- Dirty or smudged lens: Over time, dust, fingerprints, and other debris can accumulate on the projector lens. This can obstruct light and cause blurriness in the projected image. Regularly cleaning the lens will not only improve image clarity but also prevent other potential issues.
- Incorrect projection distance: Each projector has a specific throw distance, which is the distance between the projector and the screen. When this distance is not properly set, it can result in a blurry image. Adjusting the projection distance according to the manufacturer’s guidelines is crucial for achieving sharp visuals.
- Incorrect screen size and aspect ratio: Using an improperly sized screen or selecting an incorrect aspect ratio can also lead to a blurry projection. The screen size and aspect ratio should match the projector’s capabilities and the content being displayed for optimal clarity.
- Suboptimal projector settings: Incorrect settings on the projector, such as brightness, contrast, or display mode, can cause blurriness. Tweaking these settings to match the viewing environment and content type can significantly improve image quality.
- Worn-out or damaged lamp: The projector lamp plays a crucial role in producing bright and sharp images. If the lamp is nearing the end of its lifespan or has been damaged, it can result in a blurry projection. Replacing the lamp with a new one can often solve this problem.
- Poor source quality: Sometimes, the blurriness may not be due to the projector itself but rather the quality of the source material. Low-resolution videos or images can appear blurry when projected, emphasizing the need for high-quality source content.
By understanding these common causes of a blurry projector, you can now move on to the next step and implement the necessary adjustments to fix the issue. Let’s explore each of these solutions in detail.
Adjusting the Focus Ring
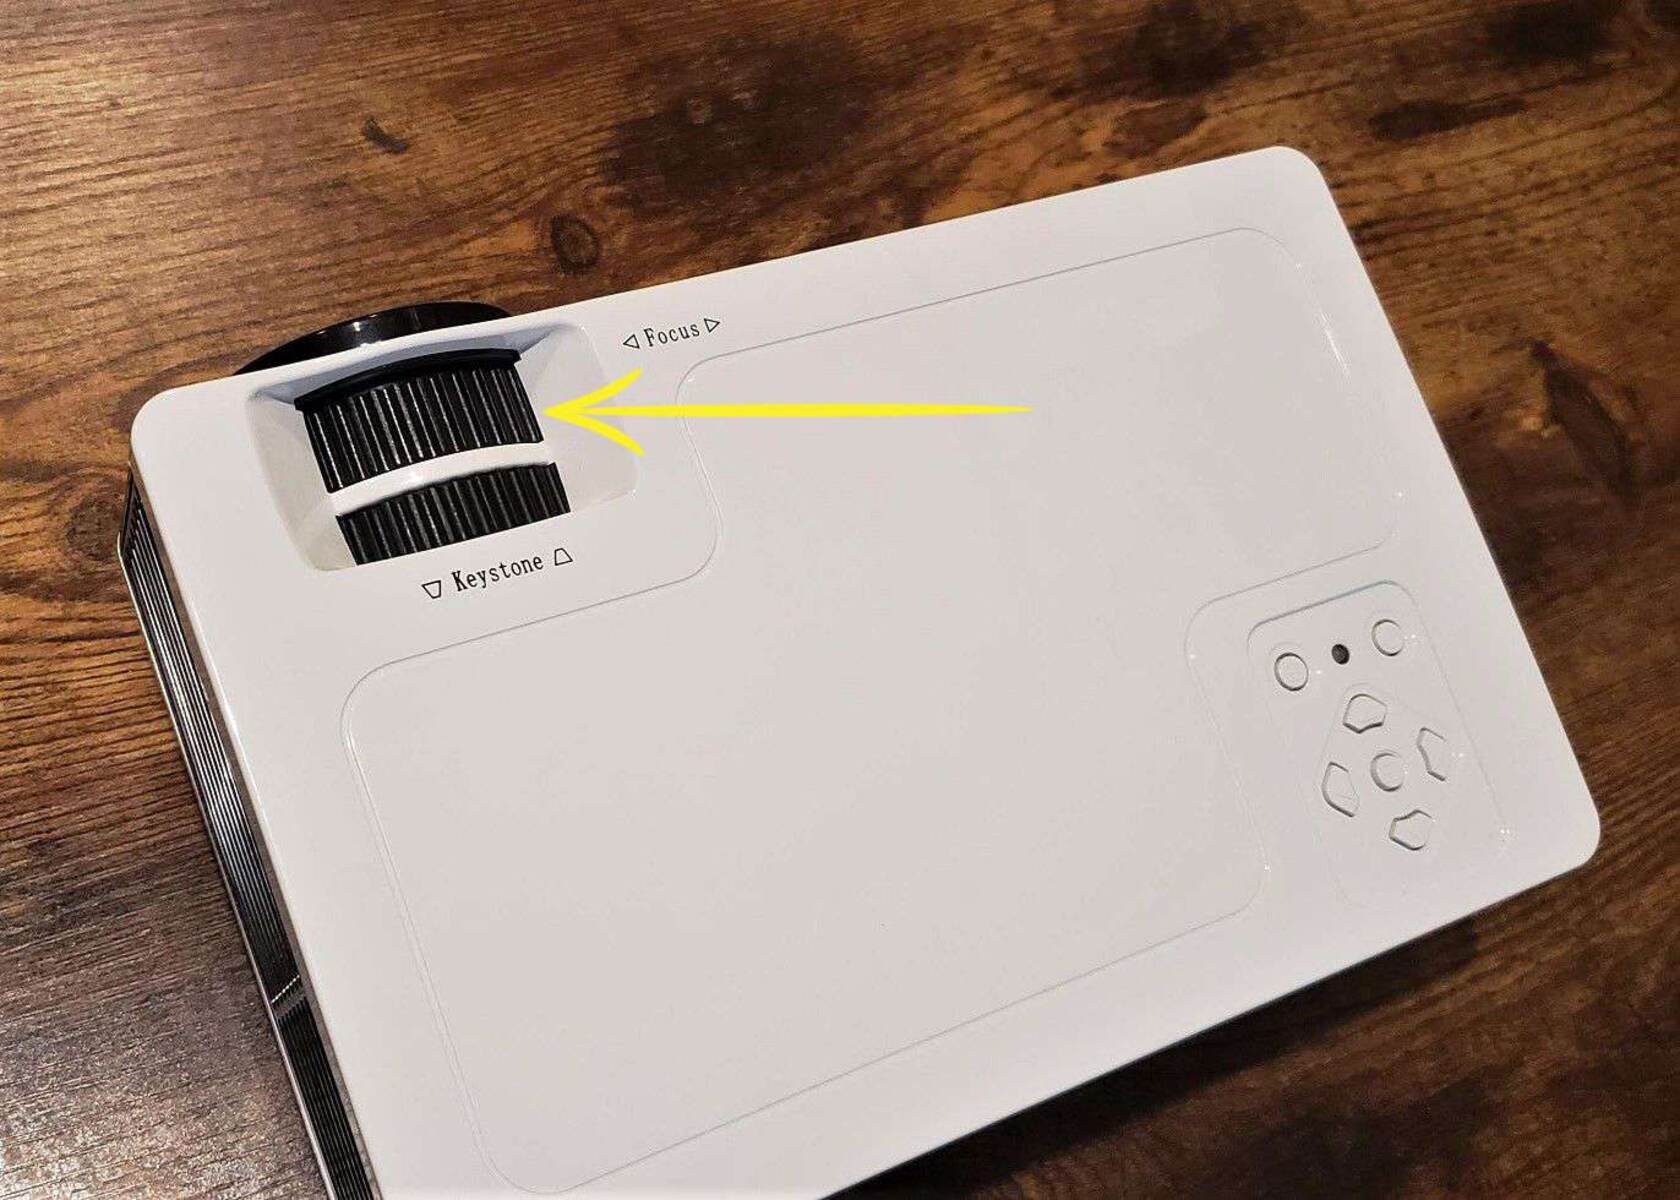
One of the primary reasons for a blurry projector image is an incorrectly adjusted focus ring. The focus ring is usually located on the lens of the projector and allows you to manually adjust the focus and sharpness of the projected image. Follow these steps to properly adjust the focus:
- Start by displaying a test pattern or a clear image on the screen. This will make it easier to observe the changes in focus.
- Stand at a reasonable distance from the screen, ensuring that you have a clear view of the projected image.
- Locate the focus ring on the projector lens. It is typically a rotating ring that you can turn clockwise or counterclockwise.
- With the test pattern or image displayed, slowly rotate the focus ring in one direction while observing the changes in image clarity.
- Continue adjusting the focus ring until the image appears clear and sharp. Be sure to check the center and the edges of the image for consistent focus.
- If needed, fine-tune the focus by making small adjustments to the focus ring.
- Once you are satisfied with the focus, lock the focus ring in place, if applicable, to prevent accidental adjustments.
It is important to note that the distance between the projector and the screen can affect the focusing. If you have moved the projector or changed the projection distance, you may need to readjust the focus accordingly.
By properly adjusting the focus ring, you can significantly improve the sharpness and clarity of the projected image, eliminating any blurriness that was previously present. If adjusting the focus does not resolve the issue, move on to the next troubleshooting step.
Cleaning the Lens
Another common culprit behind a blurry projector is a dirty or smudged lens. Over time, dust particles, fingerprints, and other debris can accumulate on the lens surface, obstructing the path of light and resulting in a reduction of image clarity. Cleaning the lens can often restore the projector’s performance and eliminate blurriness.
Follow these steps to clean the lens of your projector:
- Turn off the projector and unplug it from the power source. This will prevent any accidental damage and ensure your safety during the cleaning process.
- Allow the projector to cool down, as the lens and other components may be hot after usage.
- Gently remove any visible dust or debris from the lens surface using a soft brush or compressed air. Be careful not to apply excessive pressure or touch the lens with your fingers.
- To remove smudges or fingerprints, dampen a microfiber cloth with lens cleaning solution or isopropyl alcohol. Wipe the lens surface in a circular motion, starting from the center and moving outward.
- Avoid using harsh chemicals or abrasive materials, as they can damage the lens coating.
- Once you’ve cleaned the lens, use a dry microfiber cloth to gently remove any remaining moisture or streaks.
- Ensure that the lens is completely dry before turning the projector back on.
Regularly cleaning the lens of your projector will help maintain optimal image quality and prevent blurriness caused by dust or smudges. It is recommended to clean the lens periodically or whenever you notice a decrease in image clarity.
If cleaning the lens does not resolve the blurry projection issue, there may be other factors contributing to the problem. Let’s move on to the next troubleshooting step to further investigate and resolve the issue.
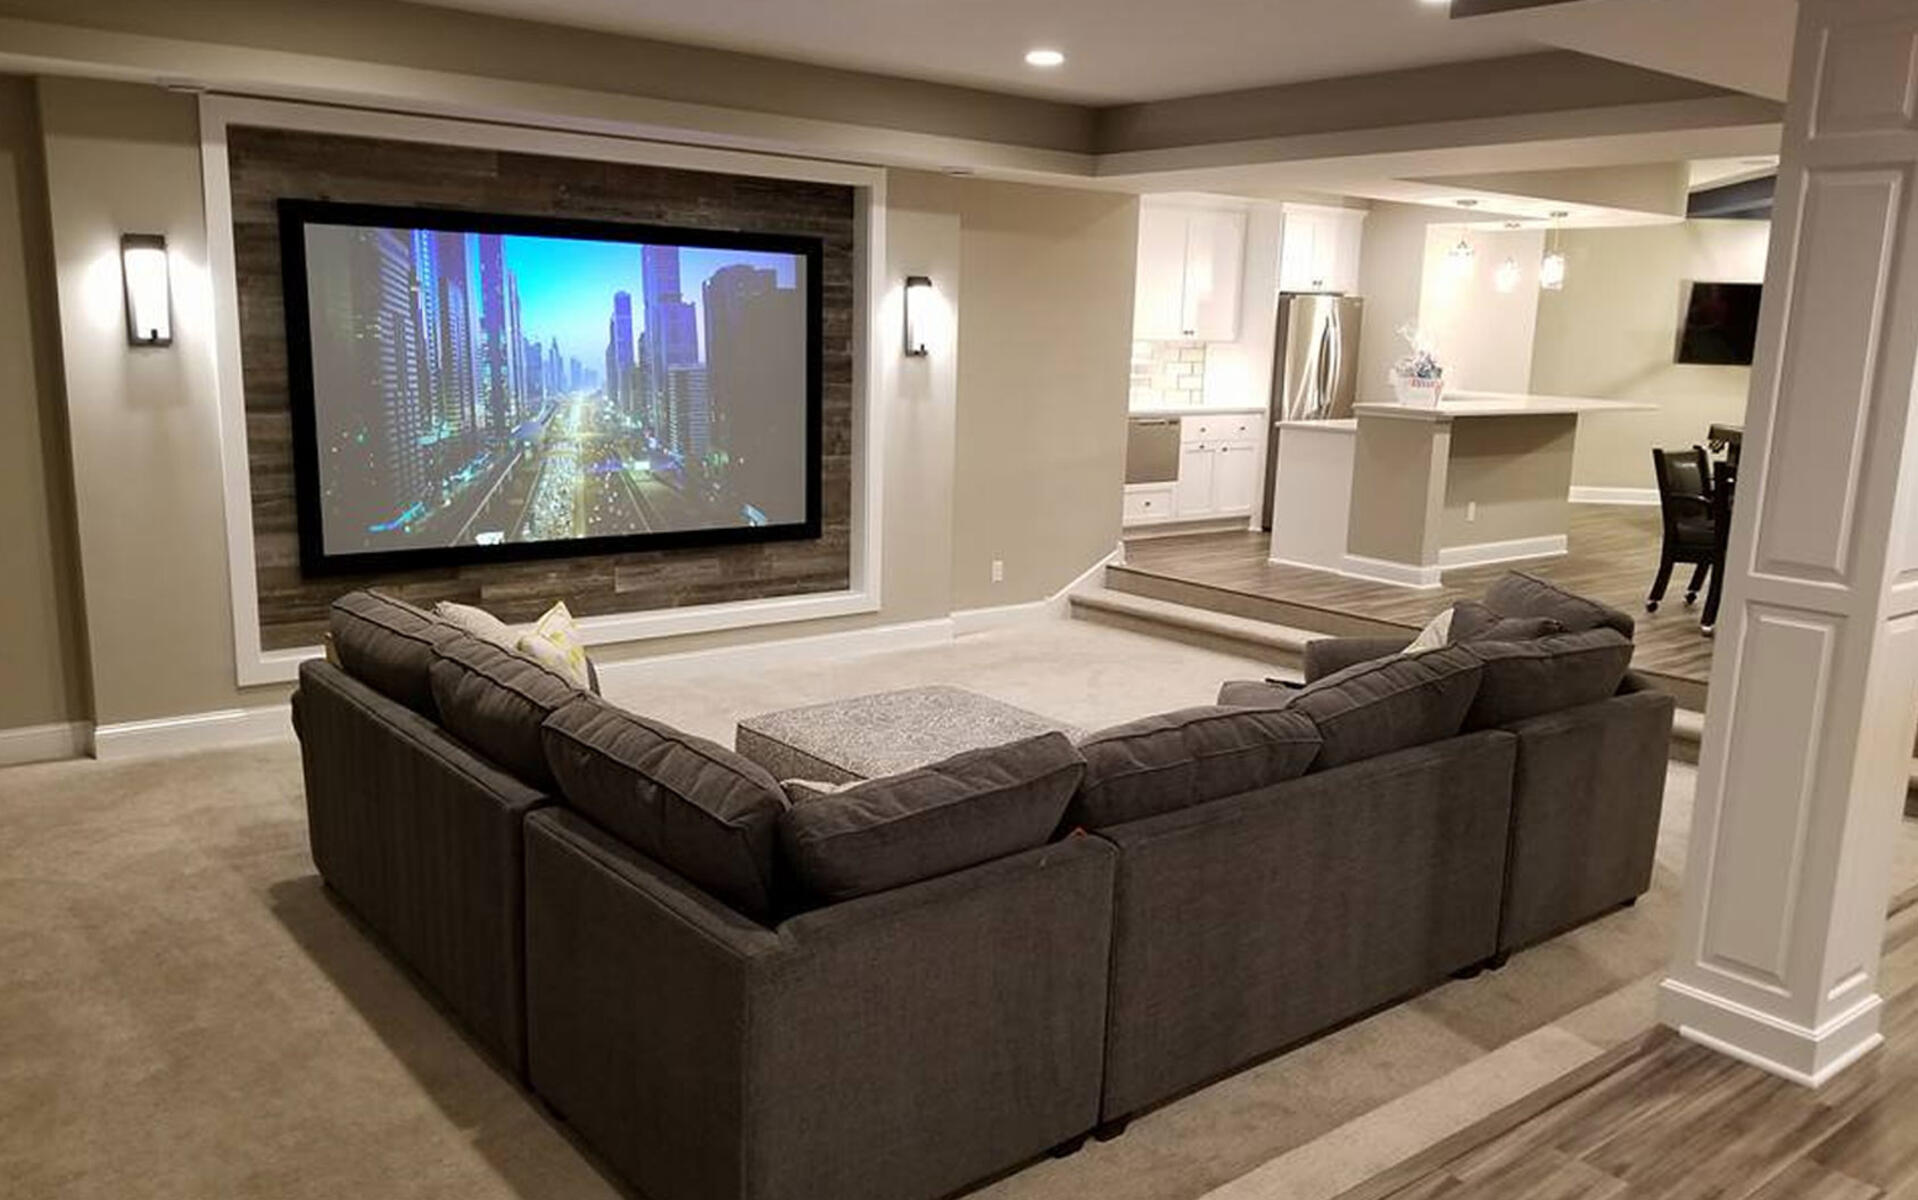
Checking the Projection Distance
The projection distance plays a crucial role in determining the clarity and sharpness of the projected image. If the projector is too far or too close to the screen, it can result in a blurry projection. Checking and adjusting the projection distance can help resolve this issue and improve the overall image quality.
Follow these steps to properly check and adjust the projection distance:
- Refer to the projector’s user manual or specifications to determine the recommended throw distance for your specific model.
- Measure the distance between the projector and the screen. Ensure that the measurement matches the recommended throw distance specified for your projector.
- If the distance is incorrect, adjust the placement of the projector accordingly. This may involve physically moving the projector closer or farther away from the screen.
- Once you have adjusted the projector’s position, retest the projection and observe the image clarity.
- If the image is still blurry, double-check the projection distance to ensure it aligns with the manufacturer’s recommendations. Fine-tuning the placement can make a significant difference in the projected image quality.
- Take into account any zoom or focus adjustments that may be necessary after modifying the projection distance.
It’s important to note that different projectors have varying throw distances, so what works for one model may not work for another. Always refer to the manufacturer’s guidelines to ensure you are setting the projection distance correctly.
By verifying and adjusting the projection distance, you can optimize the positioning of your projector and eliminate blurriness, resulting in a clearer and more enjoyable projection experience.
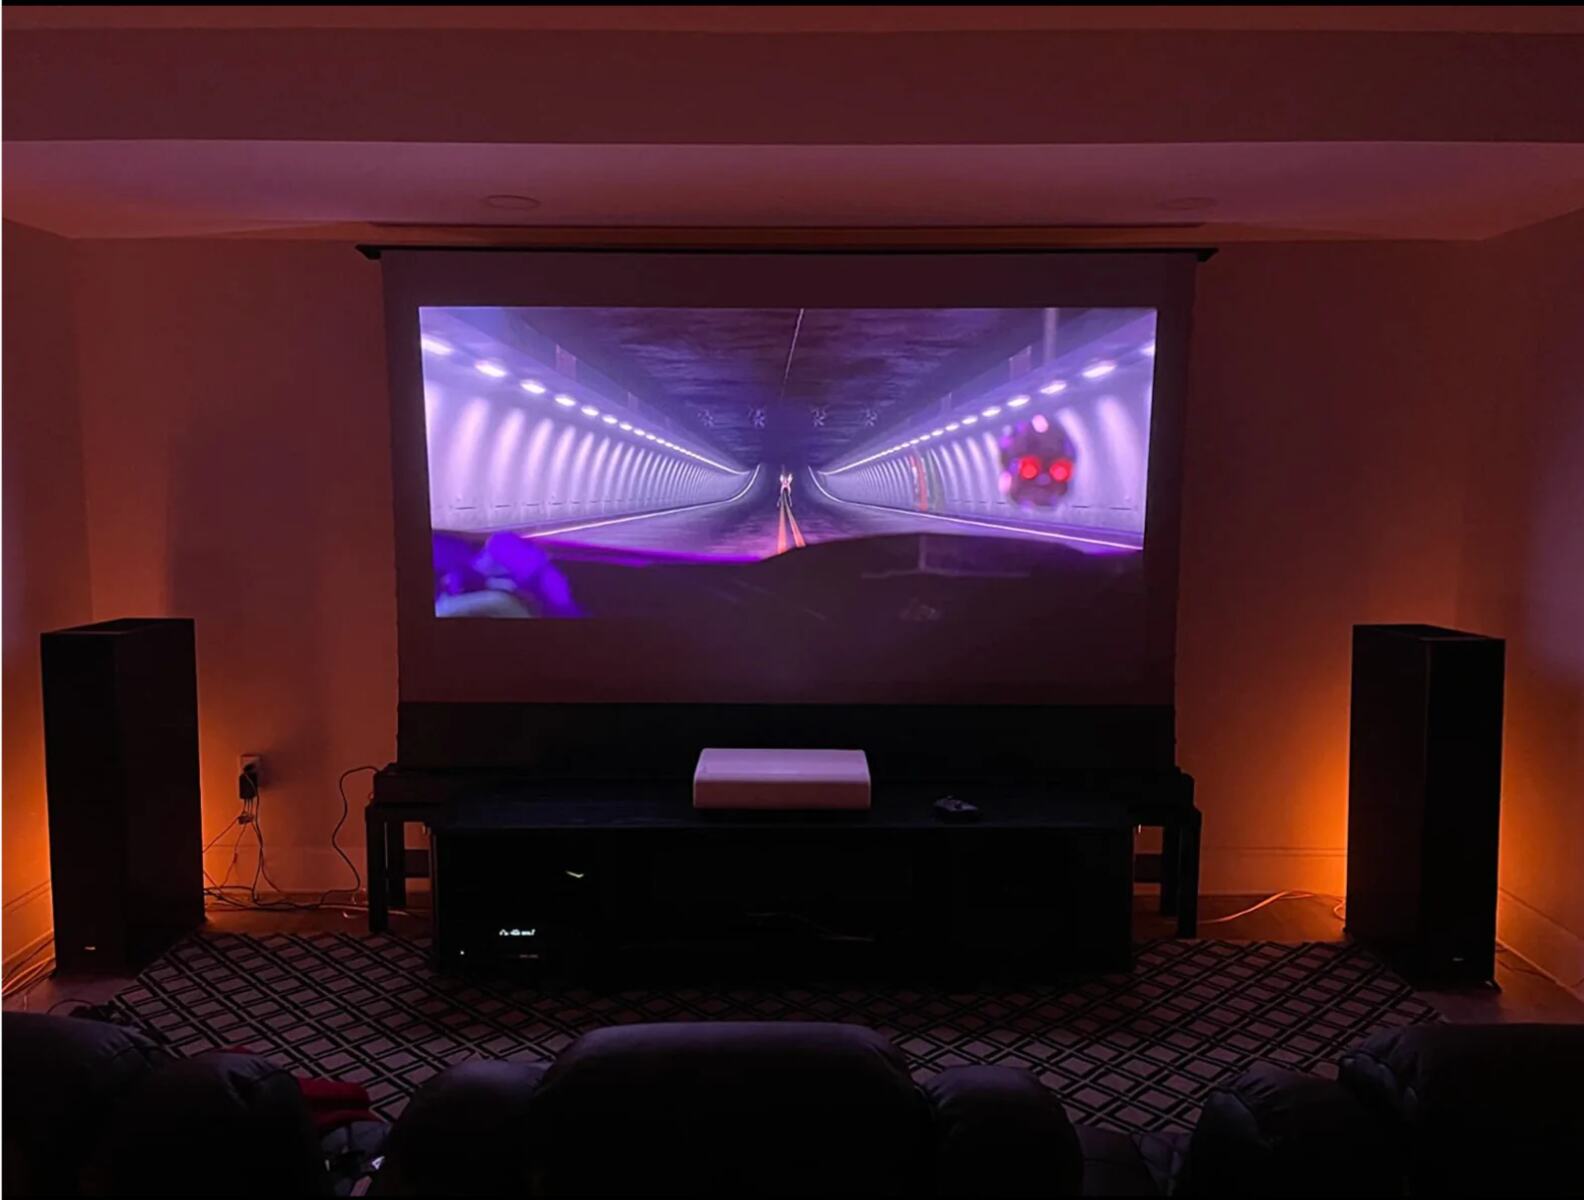
Adjusting the Screen Size and Aspect Ratio
Having an improperly sized screen or using the incorrect aspect ratio can contribute to a blurry projector image. It is crucial to ensure that the screen size and aspect ratio align with the capabilities of the projector and the content being displayed. Adjusting these settings appropriately can greatly improve the clarity and sharpness of the projected image.
Here are the steps to properly adjust the screen size and aspect ratio:
- Determine the native resolution and compatible aspect ratios of your projector. This information can be found in the projector’s user manual or specifications.
- Measure the size of your screen, ensuring that it matches the recommended screen size for your projector.
- If the screen size is too large or too small, adjust it accordingly by either replacing the screen or adjusting the display settings on the projector.
- Access the projector’s menu or settings and navigate to the aspect ratio options. Select the aspect ratio that matches the content you are displaying (e.g., 16:9 for widescreen movies).
- If the projected image appears distorted or stretched, adjust the aspect ratio settings until the image appears in the correct proportions.
- Test the projection with different content types, such as videos, presentations, or images, to ensure that the aspect ratio and screen size adjustments have resolved any blurriness.
Keep in mind that different content formats and sources may have varying aspect ratios. It is important to select the appropriate aspect ratio for each content type to maintain optimal clarity and avoid distortion.
By adjusting the screen size and aspect ratio to match your projector’s capabilities and the content being displayed, you can enhance the overall image quality and eliminate blurriness.
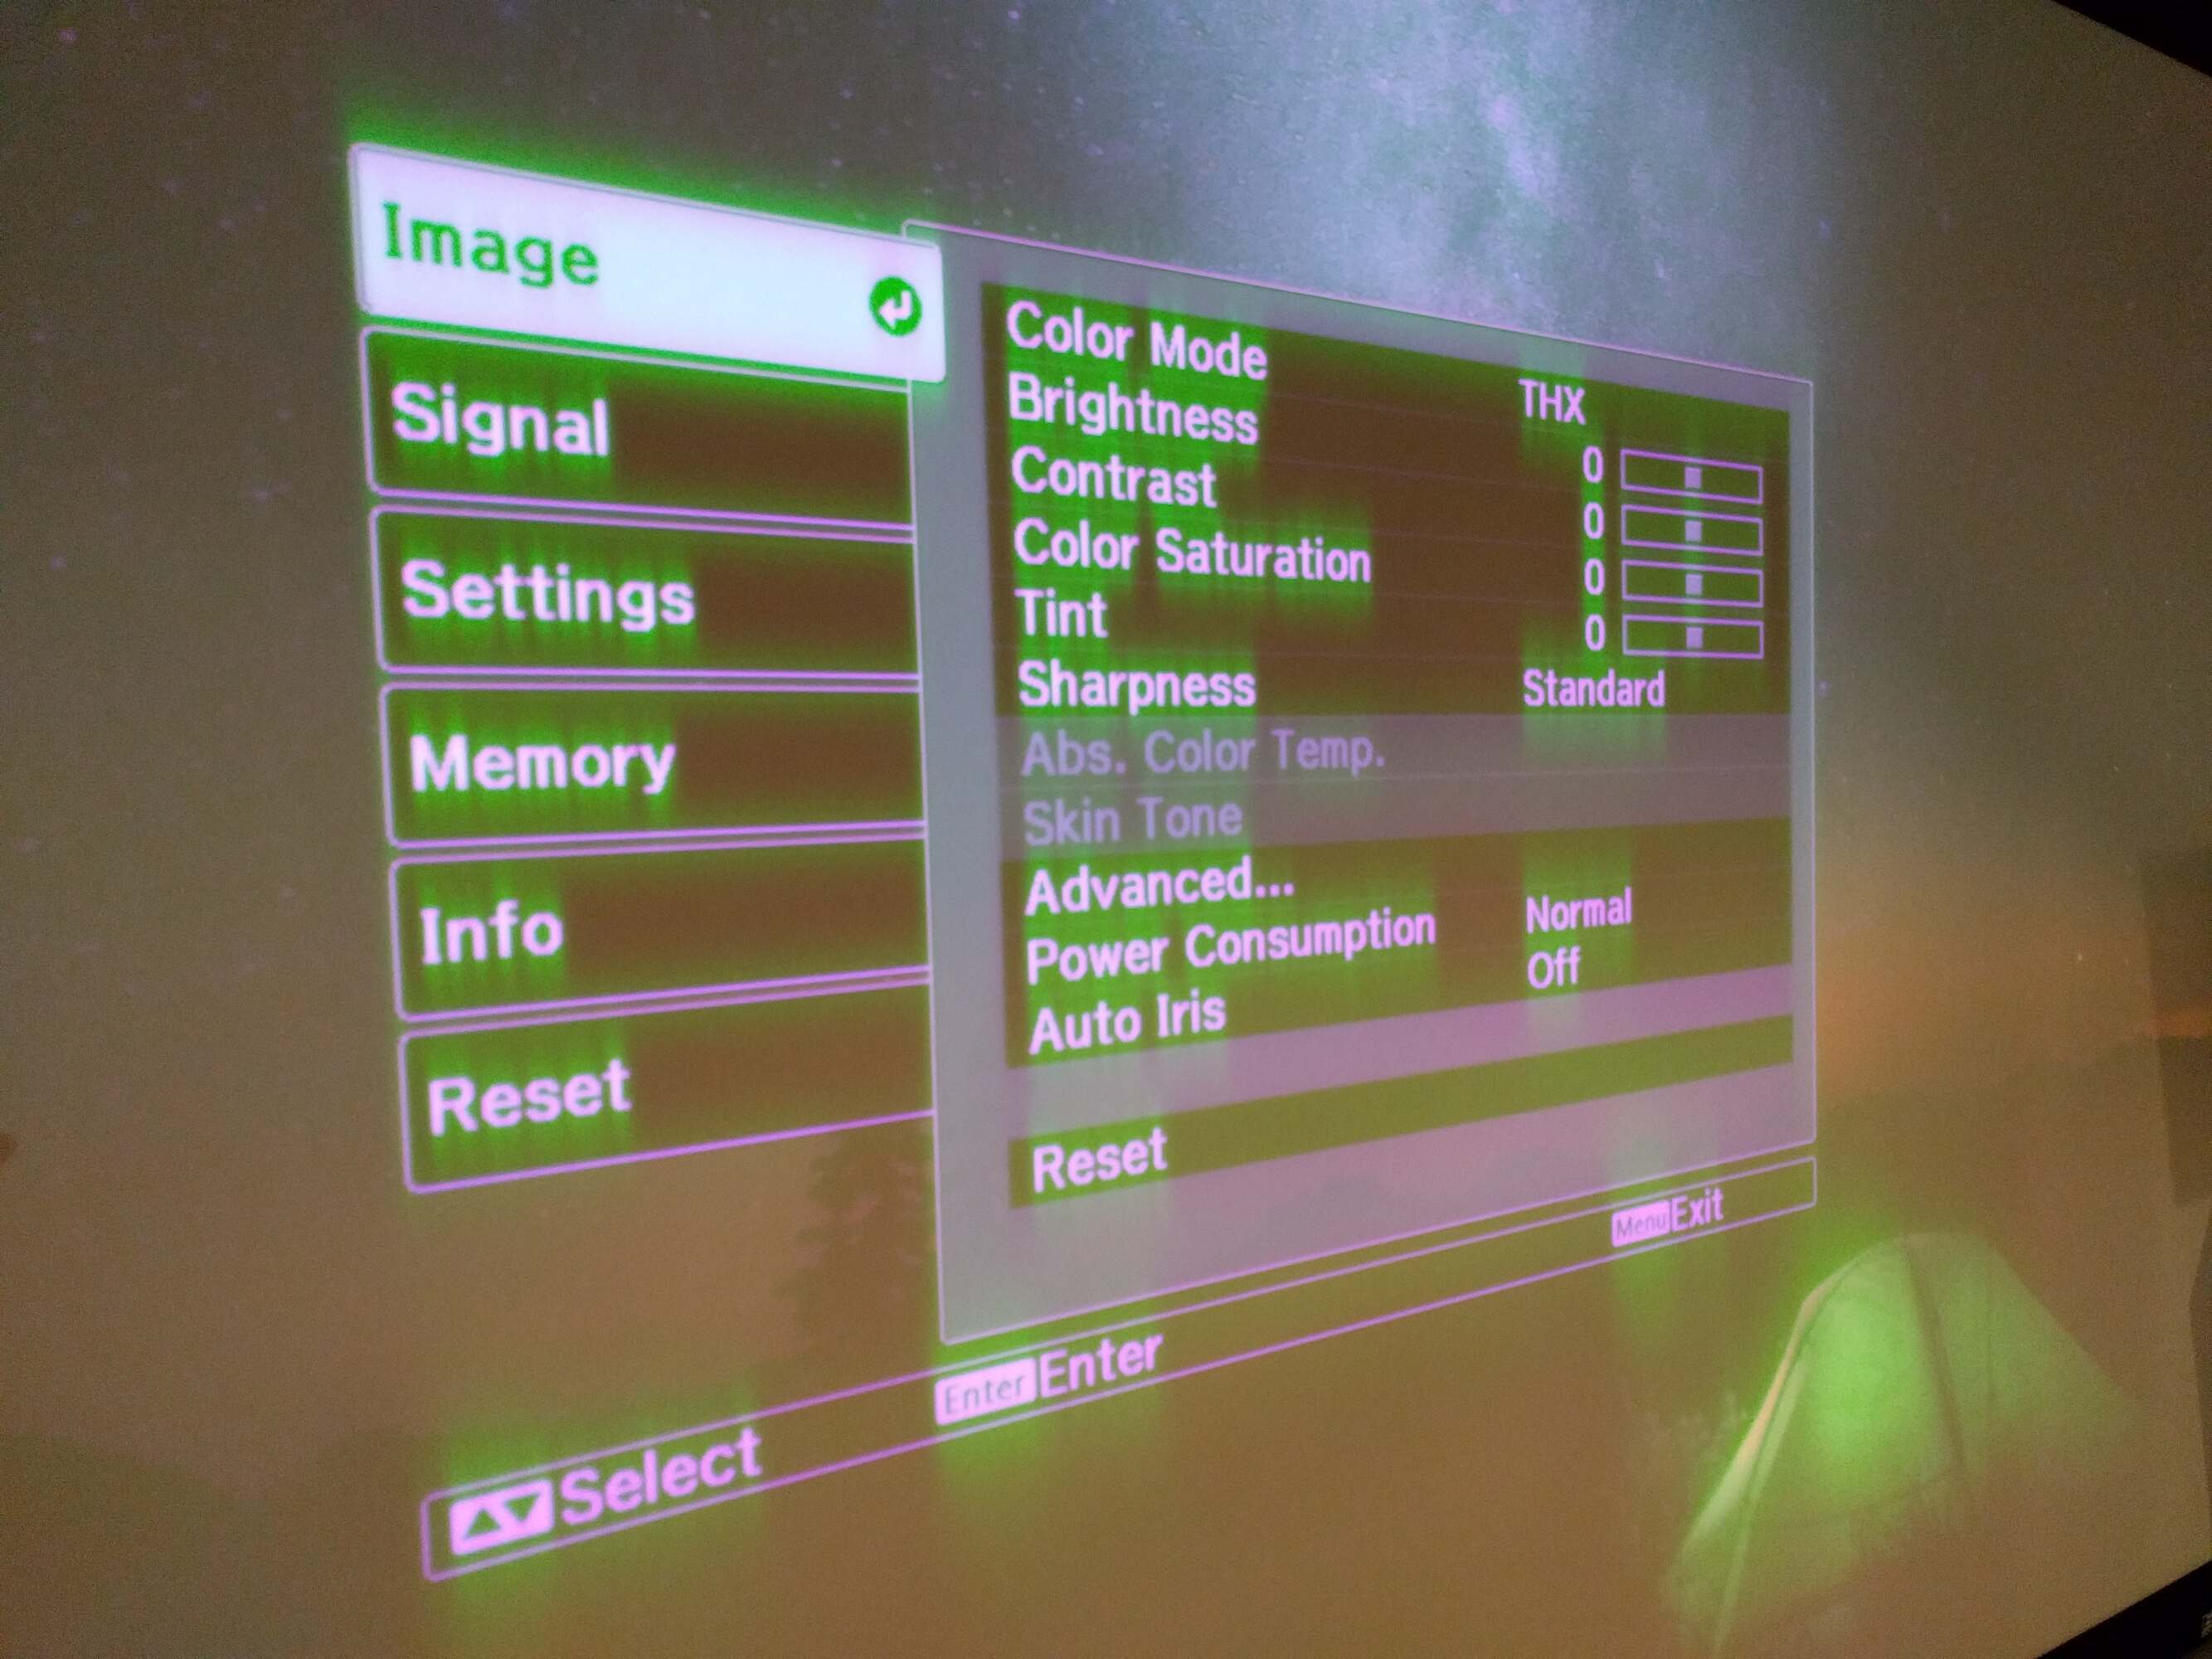
Optimizing the Projector Settings
Optimizing the settings on your projector is essential in achieving the best possible image quality. Incorrect settings such as brightness, contrast, or display mode can contribute to a blurry projection. By tweaking and fine-tuning these settings, you can enhance the clarity, sharpness, and overall visual performance of your projector.
Follow these steps to optimize the projector settings:
- Access the menu or settings on your projector. The exact method of accessing the settings may vary depending on the model, so refer to the user manual for guidance.
- Adjust the brightness and contrast settings. Increase the brightness if the image appears dim, but be cautious not to set it too high, as it can result in image washout. Adjust the contrast to balance the dark and light areas of the projected image.
- Experiment with different display modes, such as cinema, presentation, or standard, to find the mode that best suits your content and viewing environment. Each mode may have predefined settings optimized for specific scenarios.
- Explore additional settings, such as color temperature, sharpness, and gamma, to further refine the image quality. These settings may help adjust the color accuracy, edge definition, and overall visual appearance.
- Make small adjustments to each setting at a time and observe the changes in the projected image. Take note of the settings that yield the sharpest and clearest results.
- Consider saving your preferred settings as a user preset for easy access in the future.
It is worth mentioning that optimal projector settings can vary depending on factors such as the viewing environment, room lighting, and personal preference. Take the time to experiment and find the settings that suit your specific needs and preferences.
By fine-tuning and optimizing the projector settings, you can significantly enhance the image quality, reduce blurriness, and enjoy a more immersive and engaging projection experience.
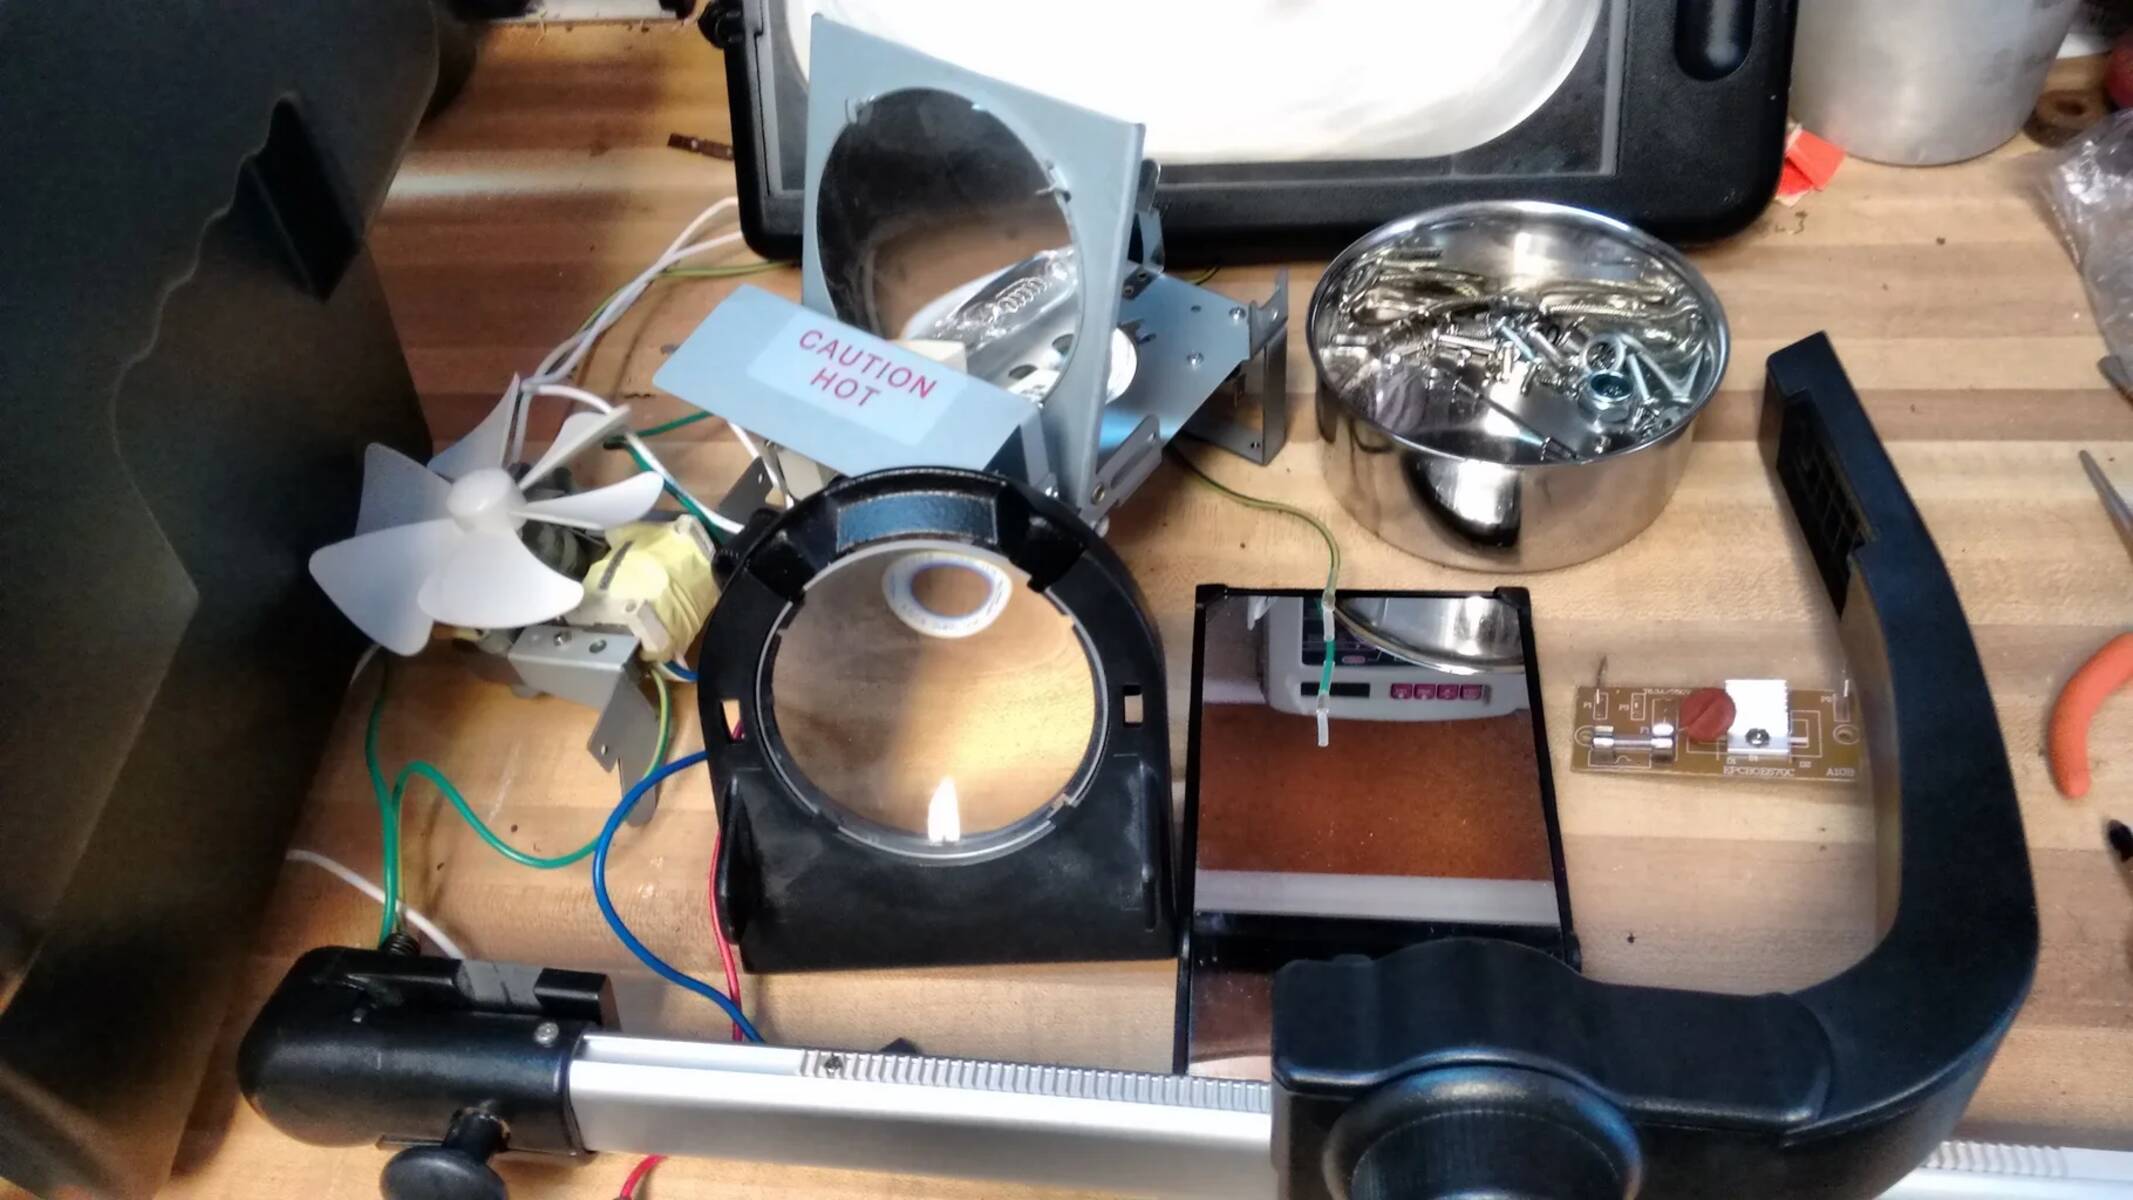
Replacing the Lamp
The projector lamp plays a crucial role in producing bright and sharp images. Over time, the lamp’s brightness decreases, resulting in a dim or blurry projection. If you have tried all the previous troubleshooting steps and are still experiencing blurriness, it may be time to replace the lamp.
Here are the steps to replace the lamp in your projector:
- Consult the projector’s user manual or specifications to find the compatible lamp model for your specific projector.
- Ensure that the projector is turned off and has been allowed to cool down for a sufficient amount of time.
- Locate the lamp compartment on the projector. This is usually accessible by removing a panel or cover.
- Using a screwdriver or other appropriate tool, carefully remove any screws or fasteners securing the lamp compartment.
- Take note of the position and orientation of the lamp within the compartment before gently removing it. Some projectors may have a safety mechanism to prevent accidental lamp removal, so follow the instructions provided.
- Insert the new lamp into the compartment, ensuring it is correctly aligned and seated securely.
- Reinstall any screws or fasteners to secure the lamp compartment.
- Close the lamp compartment panel or cover, ensuring it is properly secured.
- Turn on the projector and test the projection. Check if the blurriness has been resolved and if the image appears brighter and sharper.
It’s important to note that projector lamps have a limited lifespan and will eventually require replacement. Refer to the manufacturer’s recommendations for lamp replacement intervals, as the lamp life can vary depending on usage and other factors.
By replacing the lamp, you can restore the projector’s brightness and eliminate blurriness, ensuring optimal image quality for your viewing or presentation needs.
Verifying the Source Quality
While we often focus on troubleshooting the projector itself, it’s important to consider the quality of the source material you are projecting. Sometimes, the blurriness may be a result of low-resolution videos or images, rather than an issue with the projector. Verifying the source quality can help determine if the blurriness is originating from the content itself.
Here are the steps to verify the source quality:
- Double-check the resolution of the source material. Ensure that videos, images, or presentations are in a suitable resolution for the projector and screen you are using. Higher resolutions result in sharper and more detailed projections.
- Check the format and compression of the source files. Some video formats or compression methods can impact the image quality when projected. Consider converting the files to a compatible format or using less compressed versions for optimal results.
- Test the source material on a different display device, such as a computer monitor or HDTV, and compare the image quality. If the blur persists on other devices, it is likely a problem with the source material itself.
- Try using a different source or content to see if the blurriness persists. This can help identify whether the issue is specific to a particular source or applies across all sources.
- Ensure that the source device’s output settings are correctly configured. Incorrect output settings, such as mismatched resolution or aspect ratio, can cause a blurry projection.
By verifying the quality of the source material, you can determine if the blurriness is originating from the projector or if it is related to the content being projected. If the source material itself is the cause of the blurriness, consider obtaining higher-quality versions or adjusting the output settings of the source device.
It’s important to note that even with a high-quality source, poor projector settings or other factors can still impact the clarity of the projection. Ensure that you have gone through all the previous troubleshooting steps to optimize the projector’s performance.
Conclusion
Dealing with a blurry projector can be frustrating, but by following the troubleshooting tips outlined in this article, you can resolve the issue and enjoy sharp and clear projections once again. By identifying the common causes of blurriness, such as incorrect focus, dirty lens, improper projection distance, screen size and aspect ratio mismatch, suboptimal settings, worn-out lamp, or poor source quality, you can take the necessary steps to rectify the problem.
Start by adjusting the focus ring to ensure the projected image is properly focused. Then, clean the lens to remove any dust or smudges that may be obstructing the light. Check and adjust the projection distance to achieve the optimal distance between the projector and screen. Make sure the screen size and aspect ratio match your projector’s capabilities and the content being displayed. Fine-tune the projector settings, including brightness, contrast, and display mode, to enhance image quality. If necessary, consider replacing the lamp if it’s near the end of its lifespan or damaged. Lastly, verify the quality of the source material to rule out any issues with the content itself.
By going through these steps and troubleshooting each potential cause, you can restore your projector’s performance and eliminate blurriness, allowing you to enjoy crystal-clear projections for your home theater, presentations, or any other projection needs.
Remember to consult your projector’s user manual or contact the manufacturer for specific guidance and recommendations tailored to your projector model. With a little patience and attention to detail, you can successfully fix a blurry projector and ensure a visually captivating experience every time.