Introduction
Welcome to the world of Samsung Smart TVs, where you can access a multitude of entertainment options at your fingertips. Whether you’re streaming your favorite shows, gaming, or browsing the internet, it’s important to ensure a seamless and uninterrupted connection. One crucial aspect of maintaining a reliable connection is identifying and configuring your DNS (Domain Name System) server.
The DNS server plays a vital role in translating domain names into IP addresses, allowing your Smart TV to connect to websites and online services. By default, your Samsung Smart TV will automatically obtain the DNS server information from your Internet Service Provider (ISP). However, there may be instances where you want to manually configure or troubleshoot the DNS settings.
In this article, we will explore various methods to find the DNS server on your Samsung Smart TV. Whether you prefer using the network settings or navigating through the menu options, we’ve got you covered. Additionally, we will discuss alternative approaches and troubleshooting tips to help you overcome any DNS server issues that may arise.
So, if you’re ready to dive into the world of DNS servers and unleash the full potential of your Samsung Smart TV, let’s get started! Let’s demystify the process and empower you to take control of your network settings.
Why is it important to find DNS server on Samsung Smart TV?
Understanding the importance of finding the DNS server on your Samsung Smart TV is essential for maximizing your viewing and browsing experience. Here are a few key reasons why it is important to be aware of your DNS server configuration:
- Improved Connection Speed: By manually setting a DNS server on your Samsung Smart TV, you can potentially enhance your internet connection speed. Some DNS servers are optimized for faster response times, resulting in quicker page loading and smoother streaming experience.
- Unblocking Geo-Restricted Content: Many online platforms and streaming services use geo-restrictions to limit access to certain content based on your location. However, by changing your DNS server to one that supports geo-unblocking, you can bypass these restrictions and access a wider range of content.
- Enhanced Privacy and Security: The DNS server you use can impact your privacy and security while browsing the internet. Some DNS servers offer additional security features, such as blocking malware and phishing attempts, which can help protect your Smart TV from online threats.
- Troubleshooting Network Issues: In some cases, network connectivity issues on your Samsung Smart TV may be related to DNS server problems. By finding and verifying the DNS server settings, you can determine if it is the root cause of the issue and take appropriate measures to resolve it.
By being able to find and configure the DNS server on your Samsung Smart TV, you have more control over your internet connection. Whether you’re looking to optimize speed, access blocked content, or bolster security, understanding and managing your DNS server settings is a valuable skill.
In the next section, we will explore different methods that you can use to find the DNS server on your Samsung Smart TV. Let’s dive in and take control of your network settings to enhance your viewing and browsing experience.
How to Find DNS Server Using the Network Settings on Samsung Smart TV
Finding the DNS server on your Samsung Smart TV can be accomplished by accessing the network settings. Here’s a step-by-step guide on how to do it:
- Access the Settings Menu: Start by turning on your Samsung Smart TV and navigate to the “Settings” menu. You can typically find this option by pressing the “Home” or “Menu” button on your remote and selecting the gear icon for settings.
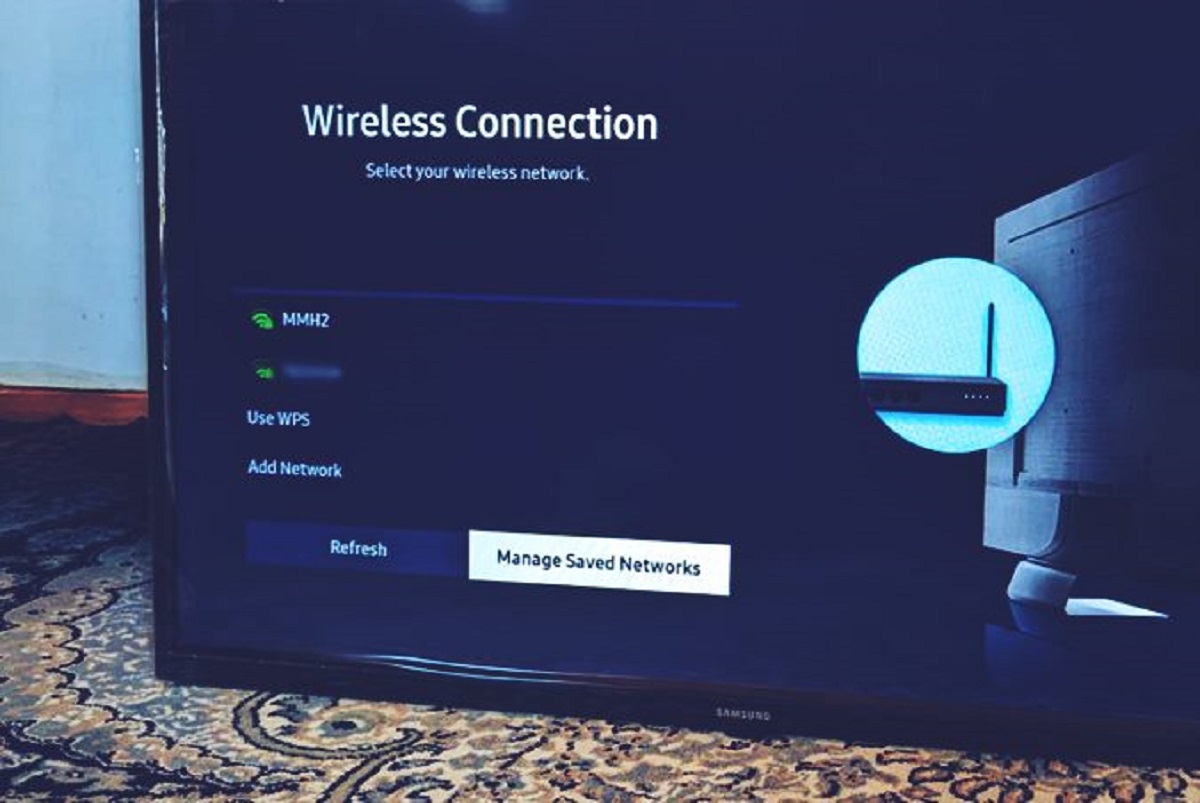
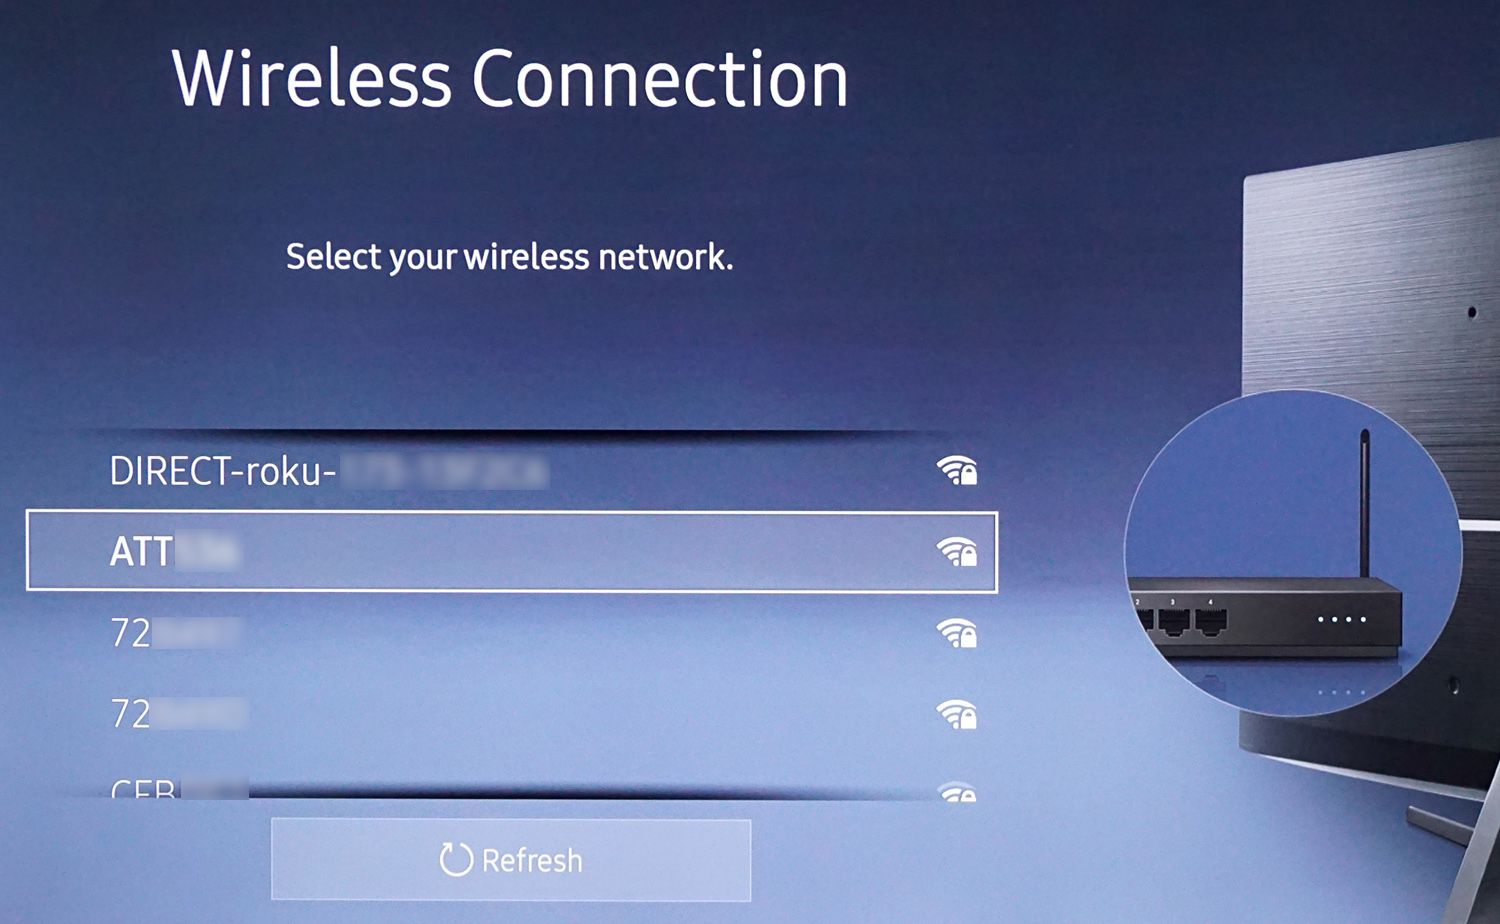
- Connect to the Internet: Ensure that your Smart TV is connected to the internet. If you haven’t already connected, go to the “Network” or “Network Settings” option in the settings menu and follow the on-screen instructions to connect to your Wi-Fi network.
- Access the Network Settings: Once connected, locate the “Network Settings” or “Network Status” option in the settings menu. This option may be listed under a sub-menu, such as “General” or “Advanced Settings.”
- View the Network Information: Within the network settings, you should see an option to view detailed information about your network connection. Select this option to access the network information screen.
- Find the DNS Server: On the network information screen, look for the DNS server information. It may be labeled as “DNS Server” or “Primary DNS.” The IP address shown is the DNS server address currently being used by your Samsung Smart TV.
- Make Note of the DNS Server: Write down or take note of the DNS server address displayed on the screen. This information will be useful if you need to troubleshoot or manually configure the DNS settings in the future.
By following these steps, you can easily find the DNS server being used by your Samsung Smart TV. Knowing this information allows you to make any necessary changes or adjustments to optimize your network connection.
But what if you prefer to find the DNS server using menu options directly on your Smart TV? We’ll explore that next.
How to Find DNS Server Using Menu Options on Samsung Smart TV
If you prefer to find the DNS server on your Samsung Smart TV using menu options, follow these simple steps:
- Access the Settings Menu: Turn on your Samsung Smart TV and navigate to the “Settings” menu. You can usually find this option by pressing the “Home” or “Menu” button on your remote and selecting the gear or settings icon.
- Navigate to the Network Settings: Within the settings menu, locate and select the “Network” or “Network Settings” option. This will open up the network configuration menu on your Smart TV.
- Choose the Network Connection Type: Depending on your Smart TV model, you may see options such as “Wired” or “Wireless.” Select the appropriate connection type based on your network setup.
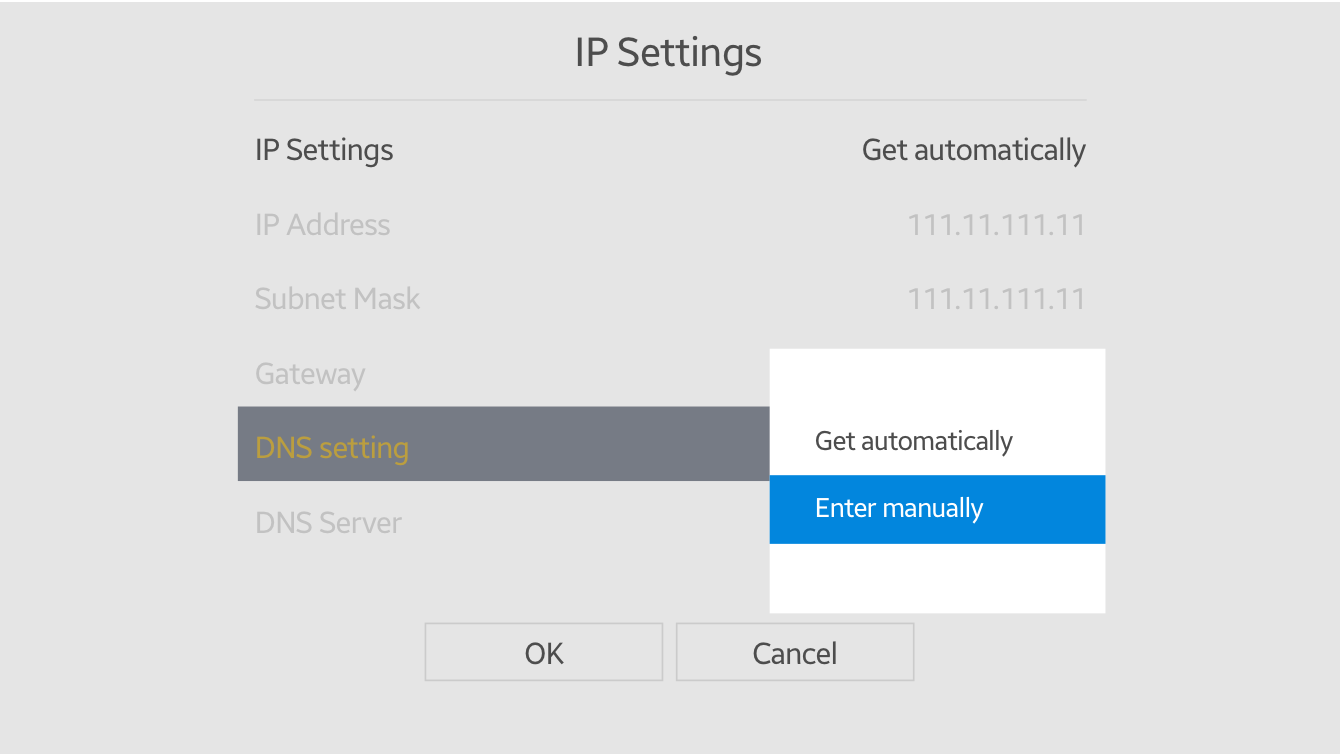
- Select DNS Settings: Once you’ve chosen the network connection type, you will see an option for “DNS Settings.” Select this option to access the DNS configuration screen.
- Choose the Preferred DNS Configuration: On the DNS settings screen, you will see options for automatic or manual DNS configuration. To find the DNS server address, select the “Manual” configuration option.
- View the DNS Server Address: After selecting the manual configuration, the DNS server address fields will become available. The primary and secondary DNS server fields will display the IP addresses of the DNS servers currently used by your Samsung Smart TV.
- Make Note of the DNS Server: Take note of the primary and secondary DNS server addresses displayed on the screen. This information is important if you need to troubleshoot or manually configure the DNS settings in the future.
By following these steps, you can find the DNS server being used by your Samsung Smart TV using menu options. This method provides an alternative approach for accessing and configuring DNS settings, giving you more control over your network connection.
However, what if you are unable to find the DNS server using the above methods or if you prefer an alternative way? We will discuss additional methods in the next section.
Alternative Methods to Find DNS Server on Samsung Smart TV
If you’re unable to find the DNS server on your Samsung Smart TV using the network settings or menu options, don’t worry. There are alternative methods you can try to discover the DNS server being used. Here are a few options:
- Router Configuration: One alternative method is to access your router’s settings. Most routers provide a web-based interface that allows you to view and configure various network settings, including the DNS server. Consult your router’s manual or manufacturer’s website for instructions on accessing the router’s settings and locating the DNS server information.
- Third-Party DNS Lookup Tools: There are online tools available that allow you to perform DNS lookups. Simply visit a DNS lookup website on your computer or smartphone and enter your Samsung Smart TV’s IP address. The tool will provide the corresponding DNS server information associated with that IP address.
- Contact Your Internet Service Provider (ISP): If you’re still having trouble finding the DNS server, reach out to your ISP’s customer support. They should be able to provide you with the DNS server address used by your network connection. Make sure to mention that you are trying to find the DNS server information specifically for your Samsung Smart TV.
These alternative methods can be helpful if the previous methods do not yield the desired results. Remember to document the DNS server information you obtain from these methods for future reference or troubleshooting purposes.
Having explored various methods to find the DNS server on your Samsung Smart TV, let’s now move on to some troubleshooting tips for DNS server issues that you may encounter.
Troubleshooting Tips for DNS Server Issues on Samsung Smart TV
Sometimes, you may encounter DNS server issues with your Samsung Smart TV that can cause connectivity problems. If you experience any difficulties accessing websites or streaming content, here are some troubleshooting tips to help you resolve DNS server-related issues:
- Restart Your Samsung Smart TV: Begin by restarting your Smart TV. This simple action can often resolve temporary connection issues and allow the TV to refresh its network settings, including DNS server information.
- Power Cycle Your Network Equipment: If restarting your Smart TV does not solve the problem, power off your modem, router, and Smart TV. Wait for a few minutes, then power them back on. This process, known as power cycling, can help reset network connections and resolve DNS-related issues.
- Check DNS Server Configuration: Review the DNS server settings on your Samsung Smart TV. Ensure that you have entered the correct IP addresses for the primary and secondary DNS servers, if you are manually configuring them. Make any necessary corrections and test the connection again.
- Try Google Public DNS: Consider changing your DNS server to a public DNS service like Google Public DNS (8.8.8.8 and 8.8.4.4). This can sometimes help overcome DNS-related issues and improve connection stability.
- Reset Network Settings: If all else fails, you can reset your Smart TV’s network settings to their default values. This will erase any manually configured DNS server settings and restore them to automatic. Refer to your Smart TV’s user manual or the manufacturer’s website for instructions on how to reset network settings.
Remember to test your internet connection after each troubleshooting step to check if the issue has been resolved. If the problem persists, it may be necessary to contact your ISP for additional support or consult with a professional technician.
With these troubleshooting tips, you should be able to diagnose and resolve common DNS server problems on your Samsung Smart TV. Now, let’s wrap up our discussion.
Conclusion
In conclusion, finding the DNS server on your Samsung Smart TV can greatly enhance your viewing and browsing experience. By understanding how to access the network settings or menu options on your Smart TV, you can easily locate the DNS server information. Whether you choose to configure it manually or troubleshoot any issues that may arise, having control over your DNS server settings allows for improved connectivity, faster internet speeds, and access to geo-restricted content.
We explored different methods to find the DNS server, including using network settings, menu options, router configurations, and third-party DNS lookup tools. If you encounter any issues with your DNS server, the troubleshooting tips provided can help you resolve them efficiently.
Remember, finding and managing the DNS server on your Samsung Smart TV gives you the power to optimize your network connection, enhance privacy and security, and overcome various network-related challenges. By taking control of your DNS settings, you can unlock the full potential of your Smart TV and enjoy seamless streaming and browsing experiences.
We hope this guide has been helpful in assisting you in finding the DNS server on your Samsung Smart TV. If you have any further questions or need additional assistance, don’t hesitate to reach out to your Internet Service Provider (ISP) or Samsung customer support for further guidance.
Take control of your network settings, and enjoy a seamless and extraordinary entertainment experience on your Samsung Smart TV!