Introduction
Welcome to our guide on how to change DNS settings on your Samsung Smart TV. The Domain Name System (DNS) is like the phonebook of the internet, translating domain names into IP addresses so that your devices can connect to websites and online services. By default, your Smart TV uses the DNS provided by your Internet Service Provider (ISP). However, there are several reasons why you might want to change these settings.
Changing your Smart TV’s DNS settings can significantly impact your internet experience. It can improve network performance, enhance security and privacy, and even grant you access to geo-restricted content. Whether you want to bypass regional restrictions or simply ensure a faster and more reliable internet connection, changing DNS settings on your Samsung Smart TV can be a valuable solution.
In this guide, we will walk you through different methods to change DNS settings on your Samsung Smart TV. We’ll cover the steps to do it directly via your TV’s network settings, through the Smart Hub, and even by adjusting your router settings. By the end, you’ll have all the knowledge you need to tweak your Smart TV’s DNS configuration to suit your needs.
Before we begin, it’s important to note that these instructions are specifically for Samsung Smart TVs. The steps may vary slightly for other TV brands, so make sure you consult your TV’s user manual or reach out to the manufacturer’s support if you need assistance. Now, let’s dive into the world of DNS and reveal how you can take control of your Samsung Smart TV’s DNS settings!
Understanding DNS
Before we delve into changing DNS settings on your Samsung Smart TV, let’s take a moment to understand what DNS is and how it works. The Domain Name System (DNS) is like a digital directory that translates human-friendly domain names, like www.example.com, into the corresponding IP addresses, such as 192.168.1.1. Essentially, it acts as a bridge between domain names and the actual servers hosting the websites or online services you want to access.
When you enter a website’s URL in your browser, your device sends a DNS query to a DNS resolver, requesting the IP address associated with that domain name. The resolver then looks up its database or forwards the request to higher-level DNS servers until it finds the IP address for the requested domain. Once the IP address is obtained, your device uses it to establish a connection and load the webpage.
By default, your Smart TV relies on the DNS servers provided by your Internet Service Provider (ISP) to perform these queries. However, you have the option to change these settings and use different DNS servers of your choice. This can have a range of benefits, including:
- Improved Performance: By using DNS servers that are geographically closer to your location or have faster response times, you can potentially experience faster loading speeds and reduced latency, resulting in a smoother browsing experience.
- Enhanced Security: Some DNS servers offer additional security measures to protect your browsing activities, such as filtering out malicious websites, blocking phishing attempts, and preventing access to known malware-hosting domains.
- Access to Geo-Restricted Content: Changing your DNS settings can allow you to bypass location-based restrictions imposed by streaming services or websites, granting you access to a wider range of content that may be otherwise unavailable in your region.
It’s important to note that changing your Smart TV’s DNS settings only affects the DNS lookup process performed by your TV. It does not affect your internet speed, download/upload speeds, or overall network performance. Instead, it influences how your device resolves domain names into IP addresses, potentially optimizing your browsing experience and expanding your access to online content.
Why Change DNS Settings on Samsung Smart TV?
You might be wondering why you should bother changing the DNS settings on your Samsung Smart TV. Well, there are several compelling reasons why you should consider tweaking these settings to enhance your viewing experience. Let’s dive into some of the key benefits:
1. Access Geo-Restricted Content
One of the primary reasons to change DNS settings on your Samsung Smart TV is to gain access to geo-restricted content. Many streaming services and websites impose regional restrictions on their content, limiting what you can watch based on your location. By using DNS servers located in a different country or region, you can bypass these restrictions and unlock a wider range of movies, TV shows, and other content from around the world.
2. Improve Network Speed and Performance
Your ISP’s default DNS servers may not always provide optimal performance. By switching to faster and more reliable DNS servers, you can potentially reduce latency, speed up website loading times, and improve overall network performance. This can be particularly useful for streaming content, online gaming, and other data-intensive activities that require a stable and speedy internet connection.
3. Enhance Privacy and Security
Another benefit of changing DNS settings on your Samsung Smart TV is the potential for increased privacy and security. Some DNS services offer additional features, such as built-in privacy protections, ad-blocking, and malware filtering. By using these services, you can keep your online activities more secure and reduce the risk of encountering malicious websites or being tracked by third parties.
4. Customization and Control
Changing DNS settings allows you to have more control over your internet experience. You can choose DNS servers that align with your preferences and specific needs. Whether you prioritize speed, security, or access to specific content, adjusting the DNS settings gives you the freedom to tailor your Smart TV’s Internet connection to your liking.
With these benefits in mind, it’s clear that changing DNS settings on your Samsung Smart TV can unlock a whole new world of possibilities. From accessing international content to improving performance and enhancing privacy, the ability to customize your DNS settings offers a range of advantages that can greatly enhance your online experience.
Step-by-Step Guide to Changing DNS Settings on Samsung Smart TV
Now that you understand the importance of changing DNS settings on your Samsung Smart TV, let’s walk through the step-by-step process to help you get started. Below, we’ll outline three different methods you can use to change the DNS settings on your Smart TV. Follow the instructions below to select the method that suits you best:
Method 1: Changing DNS Settings via Network Settings
1. Turn on your Samsung Smart TV and press the Menu button on your remote control.
2. Navigate to the Network Settings option and select it.
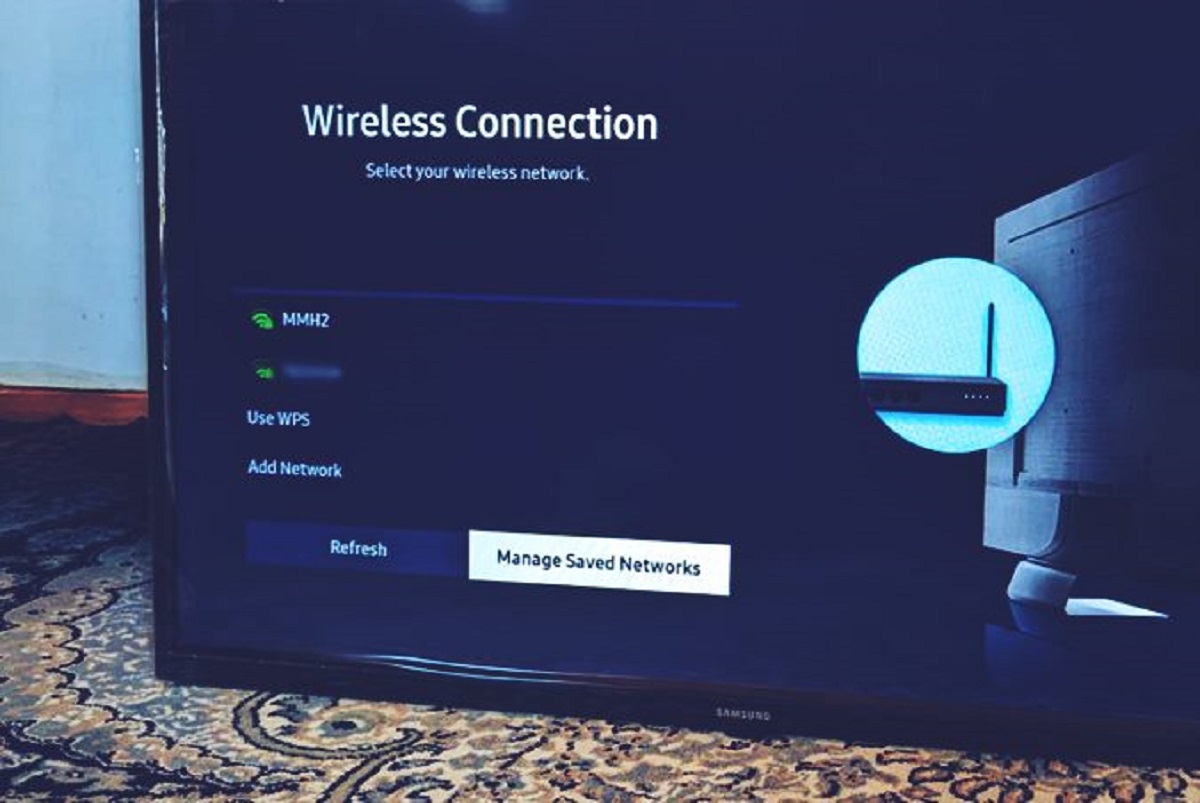
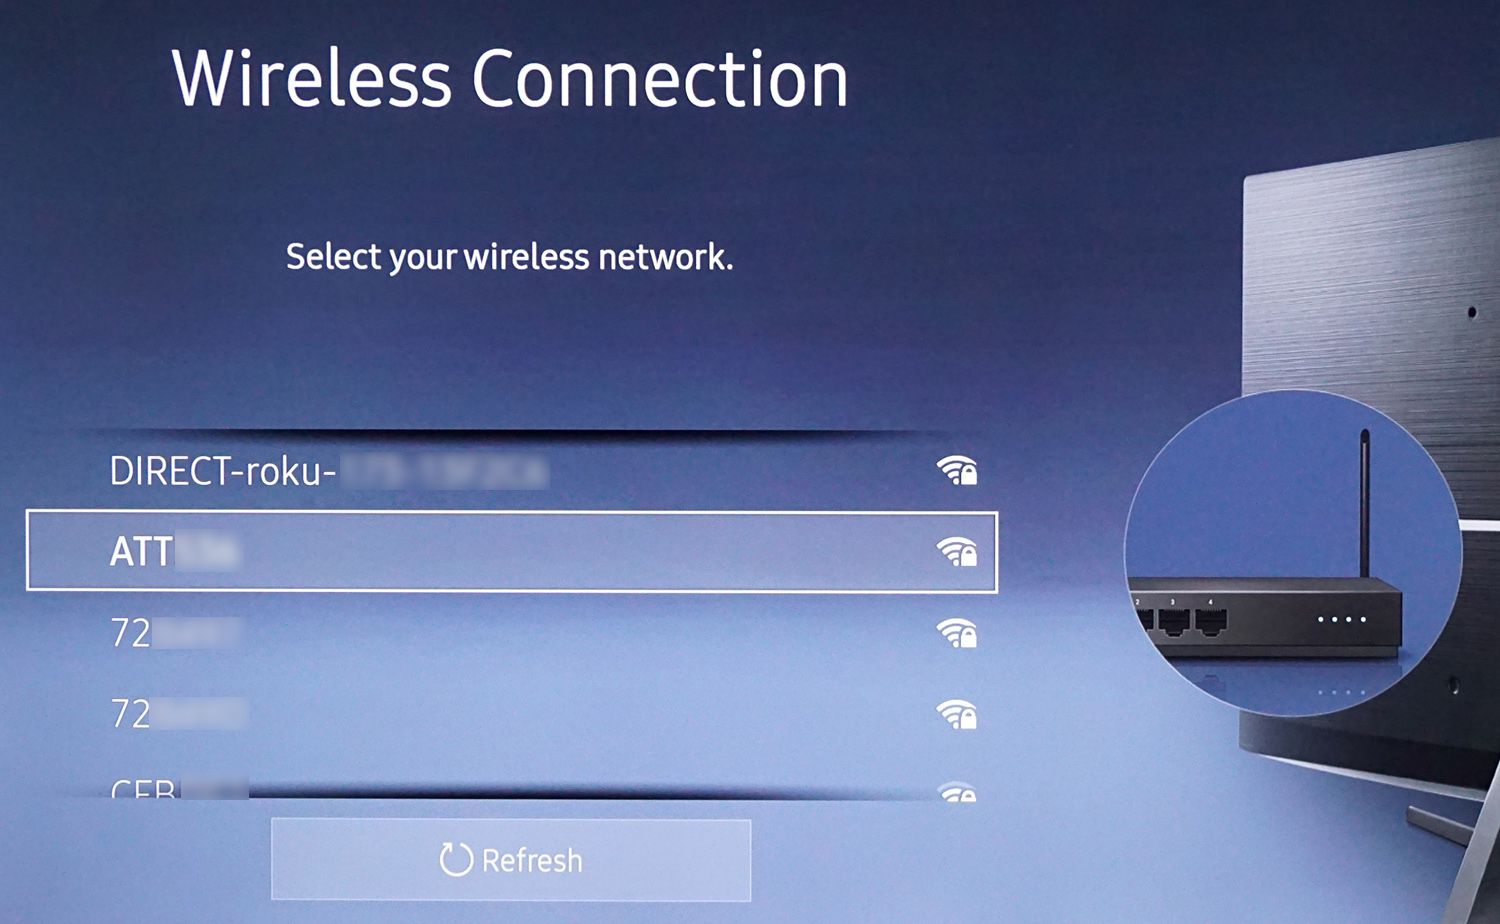
3. Choose your network connection type (Wi-Fi or Ethernet) and select it. If you’re using Wi-Fi, ensure that you’re connected to your home network.
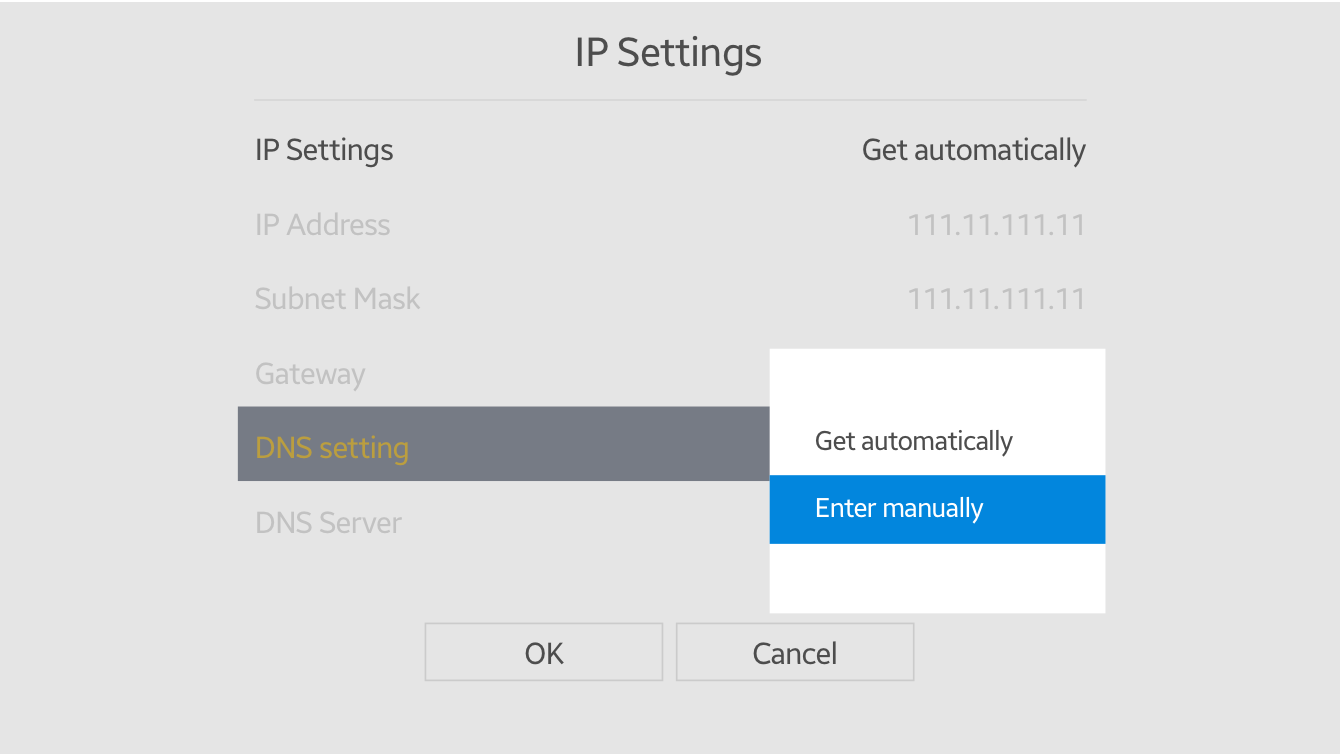
4. Select the IP Settings option and choose “DNS Settings” or “Change DNS”.
5. Enter the new DNS server addresses. You can use a public DNS service like Google DNS (8.8.8.8 and 8.8.4.4) or Cloudflare DNS (1.1.1.1 and 1.0.0.1).
6. Save the changes and exit the settings menu. Your Samsung Smart TV will use the new DNS servers for all future internet connections.
Method 2: Changing DNS Settings via Smart Hub
1. Turn on your Samsung Smart TV and launch the Smart Hub by pressing the Smart Hub button on your remote.
2. Navigate to the Settings tab and select it.
3. Scroll down to the Network section and choose Network Status.
4. Select IP Settings and choose “DNS Settings” or “Change DNS”.
5. Enter the new DNS server addresses using the on-screen keyboard.
6. Save the changes and exit the settings menu. Your Samsung Smart TV will now use the new DNS servers for all internet connections made through Smart Hub.
Method 3: Changing DNS Settings via Router
Note: This method changes the DNS settings for all devices connected to your router, not just your Samsung Smart TV.
1. Access your router’s settings by typing its IP address into a web browser. The default IP address is typically “192.168.1.1” or “192.168.0.1”, but it may vary depending on your router model.
2. Log in to the router using your admin credentials. If you’re unsure, consult your router’s documentation or contact your internet service provider.
3. Look for the DNS settings in your router’s configuration options. The location and terminology may vary depending on your router’s firmware.
4. Replace the existing DNS server addresses with the new ones you want to use. You can choose public DNS services or specify custom DNS servers.
5. Save the changes and restart your router. All devices, including your Samsung Smart TV, connected to the router will now use the new DNS servers.
By following one of these methods, you can easily change the DNS settings on your Samsung Smart TV and take control of your internet experience. Remember to save the changes and test your internet connection to ensure that the new DNS servers are working correctly.
Method 1: Changing DNS Settings via Network Settings
This method allows you to change the DNS settings on your Samsung Smart TV directly through the network settings menu. Follow the step-by-step instructions below:
1. Turn on your Samsung Smart TV and grab your remote control.
2. Press the Menu button on your remote to access the TV’s menu options.
3. Navigate to the Network Settings option and select it using the arrow keys on your remote control.
4. Choose your network connection type – Wi-Fi or Ethernet – and select it. If you’re using Wi-Fi, ensure that you’re connected to your home network.
5. Once you’re in the network settings, select the IP Settings option. Depending on your TV model, this may be labeled as “Advanced Settings” or “Manual IP Setup”.
6. Look for the option labeled “DNS Settings” or “Change DNS” and select it.
7. You will now be prompted to enter the new DNS server addresses. You can use public DNS services like Google DNS (8.8.8.8 and 8.8.4.4) or Cloudflare DNS (1.1.1.1 and 1.0.0.1).
8. Using the numerical keypad on your remote, enter the primary and secondary DNS server addresses.
9. Once you have entered the new DNS addresses, double-check to ensure they are correct.
10. Finally, save the changes and exit the network settings menu. Your Samsung Smart TV will now use the new DNS servers for all future internet connections.
Changing the DNS settings through the network settings menu allows you to have granular control over your Smart TV’s DNS configuration. It enables you to optimize your internet connection, improve network performance, and bypass geo-restrictions to access a wider range of content.
Remember, if you encounter any issues or if the new DNS servers aren’t working as expected, you can always revert to the default settings or try a different set of DNS servers that better suit your needs.
Method 2: Changing DNS Settings via Smart Hub
If you prefer to access and modify the DNS settings on your Samsung Smart TV through the Smart Hub, this method is for you. Follow the step-by-step instructions below:
1. Turn on your Samsung Smart TV and grab your remote control.
2. Press the Smart Hub button on your remote to launch the Smart Hub menu.
3. Navigate to the Settings tab using the arrow keys on your remote and select it.
4. Scroll down to the Network section and choose Network Status.
5. Inside the Network Status menu, select IP Settings and then choose “DNS Settings” or “Change DNS”.
6. You should now see the option to enter the new DNS server addresses. Use the on-screen keyboard to input the primary and secondary DNS server addresses.
7. Double-check the entered DNS addresses to ensure they are correct.
8. After verifying the DNS server addresses, save the changes and exit the settings menu. Your Samsung Smart TV will now use the new DNS servers for all internet connections made through the Smart Hub.
Using the Smart Hub to change DNS settings provides a convenient way to access and modify network-related configurations on your Samsung Smart TV. It allows you to harness the benefits of different DNS servers, such as increased security, faster internet browsing, and the ability to access geo-restricted content.
If you encounter any issues after changing the DNS settings, you can always revert to the default settings or try using different DNS server addresses to see which configuration works best for your needs.
Method 3: Changing DNS Settings via Router
If you want to change the DNS settings not only for your Samsung Smart TV but for all devices connected to your router, you can do so by modifying the DNS settings on your router. Follow the step-by-step instructions below:
Note: The exact steps may vary depending on the router model and firmware. Consult your router’s documentation for specific instructions.
1. Open a web browser on your computer or mobile device that is connected to the same network as your Samsung Smart TV.
2. Type in the default IP address of your router in the browser’s address bar. The default IP address is typically “192.168.1.1” or “192.168.0.1”.
3. Enter your router’s admin credentials to log in. If you’re unsure, consult your router’s documentation or contact your internet service provider.
4. Look for the DNS settings in your router’s configuration options. The location and terminology may vary depending on your router’s firmware, but it is usually found under the “Network”, “Internet”, or “Advanced” settings.
5. Replace the existing DNS server addresses with the new ones you want to use. You can choose public DNS services like Google DNS (8.8.8.8 and 8.8.4.4) or Cloudflare DNS (1.1.1.1 and 1.0.0.1).
6. Save the changes and restart your router to apply the new DNS settings. All devices connected to the router, including your Samsung Smart TV, will now use the newly configured DNS servers.
Changing DNS settings on your router provides a centralized solution to modify the DNS configuration for all devices connected to your network. This method allows you to streamline the DNS settings and ensure consistent DNS resolution across all devices, including your Samsung Smart TV.
Remember that modifying the DNS settings on your router affects all devices connected to it. If you prefer to have different DNS settings for specific devices, it is recommended to use the individual methods outlined in this guide for each respective device.
Always test your internet connection after changing the DNS settings to verify that the new DNS servers are functioning correctly. If you encounter any issues, you can revert to the default settings or consult your router’s documentation for further assistance.
Troubleshooting DNS Settings on Samsung Smart TV
While changing DNS settings on your Samsung Smart TV can bring several benefits, it’s possible to encounter issues along the way. Here are some common troubleshooting steps you can take to resolve DNS-related problems:
1. Verify DNS Server Addresses
Double-check the DNS server addresses you entered. Ensure that you have entered them correctly and that there are no typos or mistakes. Incorrect DNS server addresses can prevent proper connectivity.
2. Restart Your Samsung Smart TV
Perform a simple restart of your Samsung Smart TV. Power it off, unplug it from the power source, wait for a few minutes, and then plug it back in and turn it on again. Restarting the TV can help resolve any temporary issues or glitches.
3. Reconnect to the Network
If you are using a Wi-Fi connection, try disconnecting and reconnecting to your home network. Go to the network settings of your Samsung Smart TV, choose the Wi-Fi network, and select “Disconnect” or “Forget”. Then reconnect to the network and check if the DNS settings are working as intended.
4. Use Different DNS Server Addresses
If the DNS server addresses you initially used are not providing satisfactory results, try using different DNS server addresses. Experiment with popular public DNS services like Google DNS (8.8.8.8 and 8.8.4.4) or Cloudflare DNS (1.1.1.1 and 1.0.0.1) to see if they improve your internet connection.
5. Reset DNS Settings to Default
If you are experiencing issues even after changing the DNS settings, you can reset them back to the default settings. Go to the DNS settings on your Samsung Smart TV and select the option to automatically obtain DNS server addresses. This will revert the settings to the default configuration provided by your Internet Service Provider (ISP).
6. Contact Your Internet Service Provider (ISP)
If you have exhausted all troubleshooting steps and continue to experience problems, it may be helpful to contact your Internet Service Provider (ISP) for assistance. They can verify if there are any issues affecting DNS resolution or provide guidance on how to properly configure DNS settings for your specific network.
By following these troubleshooting steps, you can tackle common DNS-related issues on your Samsung Smart TV. Remember, the exact steps and options may vary depending on your TV model and firmware version. If the problems persist or if you encounter any specific error messages, consult the Samsung support website or reach out to their customer support for further assistance.
Frequently Asked Questions (FAQs)
Here are some frequently asked questions about changing DNS settings on Samsung Smart TV:
1. Can changing DNS settings on my Samsung Smart TV improve streaming quality?
Yes, changing DNS settings can potentially improve streaming quality by optimizing your internet connection and reducing buffering. By using faster and more reliable DNS servers, you can experience smoother playback and faster loading times for streaming services.
2. Will changing DNS settings on my Samsung Smart TV affect my internet speed?
Changing DNS settings alone will not directly affect your internet speed. However, using faster and more responsive DNS servers can result in quicker DNS resolution, which can contribute to faster browsing and streaming experiences.
3. Can I use any DNS server addresses for my Samsung Smart TV?
Yes, you can use any DNS server addresses for your Samsung Smart TV as long as the servers are reliable and properly maintained. It is recommended to use reputable public DNS services, such as Google DNS or Cloudflare DNS, to ensure reliability and security.
4. Do I need technical knowledge to change DNS settings on my Samsung Smart TV?
No, changing DNS settings on your Samsung Smart TV does not require advanced technical knowledge. The provided methods in this guide offer step-by-step instructions that can be easily followed, even by users with limited technical expertise.
5. Will changing DNS settings on my router affect my Samsung Smart TV?
If you change the DNS settings on your router, it will affect all devices connected to that router, including your Samsung Smart TV. This can be a convenient way to modify DNS settings for multiple devices at once.
6. Can I revert back to the default DNS settings on my Samsung Smart TV?
Yes, you can revert back to the default DNS settings on your Samsung Smart TV. Simply go to the DNS settings menu and choose the option to automatically obtain DNS server addresses. This will reset the settings to the default configuration provided by your ISP.
If you have any additional questions or encounter specific issues while changing DNS settings on your Samsung Smart TV, it is recommended to consult the TV’s user manual or reach out to Samsung’s customer support for further assistance.
Conclusion
Changing DNS settings on your Samsung Smart TV can offer a range of benefits, including improved performance, enhanced security, access to geo-restricted content, and customization of your internet experience. By following the step-by-step methods outlined in this guide, you can easily modify your TV’s DNS settings to suit your preferences and needs.
Whether you choose to change the DNS settings directly via the network settings menu, through the Smart Hub, or by adjusting the settings on your router, it’s important to understand the potential impact and benefits of making these changes. Properly configuring your DNS settings can optimize your internet connection, enhance your streaming experience, and open up a world of content that may otherwise be restricted to your region.
Remember to double-check the DNS server addresses you enter, restart your Samsung Smart TV, and troubleshoot any issues that may arise. If you encounter any difficulties or have specific questions, consult the user manual for your TV or reach out to Samsung’s customer support for further assistance.
Take control of your Samsung Smart TV’s DNS settings and unlock a faster, more secure, and customizable internet experience. Enjoy seamless streaming, improved browsing, and the ability to access a world of online content right from the comfort of your living room.