Introduction
Editing videos has become an essential part of our daily lives. Whether you are a content creator, a vlogger, or simply want to enhance your home videos, having the ability to edit videos on Windows can be incredibly beneficial. With the right tools and techniques, you can transform raw footage into a polished and professional-looking video.
In this article, we will explore the various steps and features involved in editing a video on Windows. From importing video files to applying transitions, effects, and text, we will guide you through the entire editing process. We will also cover techniques for adjusting brightness, contrast, and color, adding music or audio, removing background noise, and even adding subtitles or closed captions to your video. By the end of this article, you will have the knowledge and skills necessary to create captivating and visually appealing videos.
Whether you are a beginner or have some experience in video editing, this guide will provide you with valuable insights and tips to enhance your editing workflow on Windows. Get ready to unleash your creativity and turn your ordinary videos into extraordinary works of art!
Getting Started
Before diving into the world of video editing on Windows, it’s important to ensure that you have the necessary tools and software. Here are the essential steps to get started:
1. Choose the Right Video Editing Software: There are several options available for video editing on Windows, ranging from basic to advanced editing software. Popular choices include Adobe Premiere Pro, Final Cut Pro, and Windows Movie Maker. Research different software options and choose one that suits your skill level and editing needs.
2. Prepare Your Workspace: Set up a comfortable and distraction-free space to work on your video editing projects. Make sure you have a reliable internet connection, sufficient storage space for your video files, and a computer with adequate processing power to handle the editing tasks.
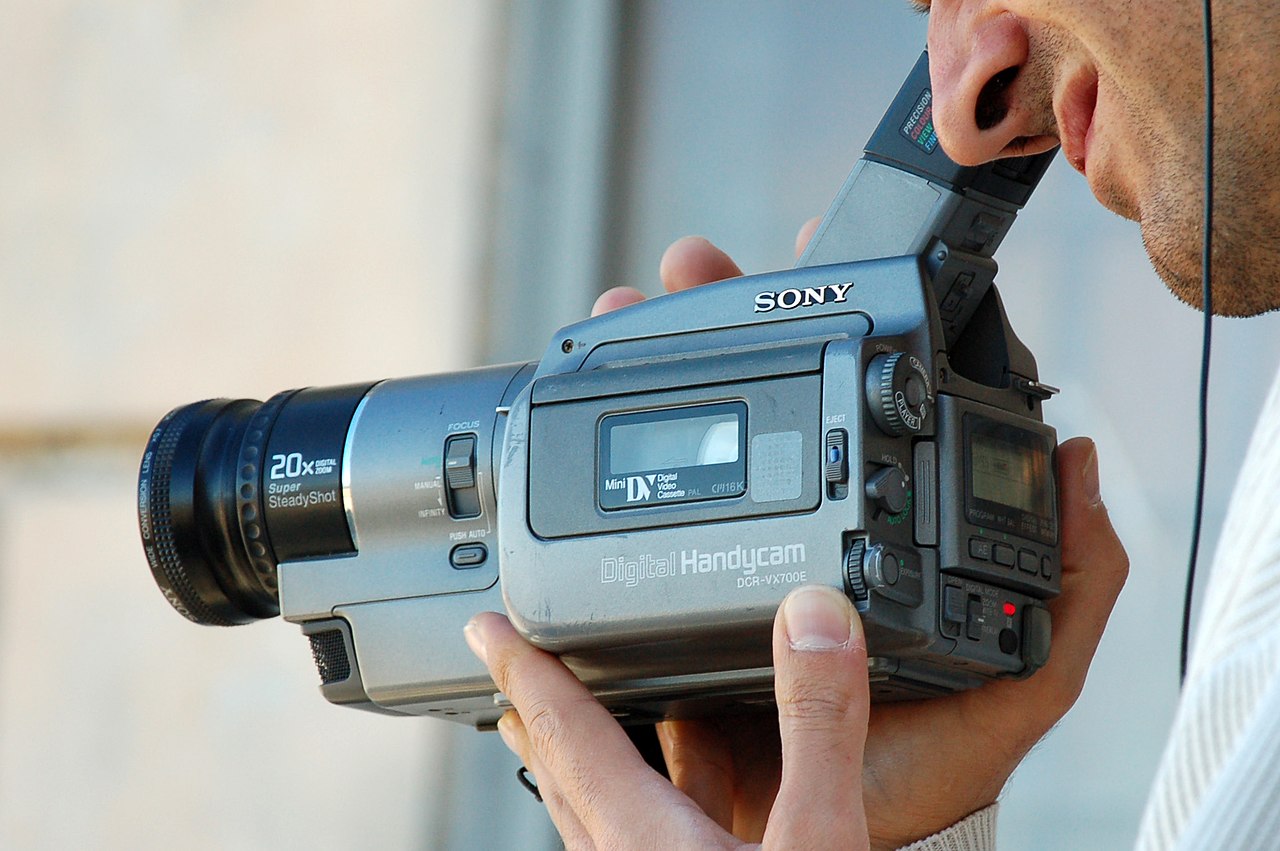
3. Gather Your Video Files: Locate and gather all the video files you want to edit. These can be videos recorded on your mobile device, camera footage, or downloaded clips from the internet. Organize them in a dedicated folder for easy access during the editing process.
4. Understand the Basics: Familiarize yourself with the basic concepts of video editing, such as timelines, tracks, cuts, and transitions. This will give you a foundation to build upon and help you navigate the editing software more efficiently.
5. Backup Your Files: Before you begin editing, it’s crucial to create a backup of your original video files. This ensures that you have a copy of the raw footage in case any errors or issues arise during the editing process.
Once you’ve completed these initial steps, you are ready to start your video editing journey on Windows. In the following sections, we will delve deeper into the specific editing techniques and features available to you. Let’s take your videos to the next level!
Importing Video Files
Once you have set up your workspace and chosen the video editing software, the next step is to import your video files into the editing program. Here’s how you can do it:
1. Launch the Editing Software: Open the video editing software on your Windows computer. Depending on the software you have chosen, you may need to create a new project or select an existing project to continue.
2. Create a New Project: If you are starting from scratch, create a new project by giving it a name and selecting the desired settings, such as resolution, frame rate, and aspect ratio. These settings should match the specifications of your video files.
3. Locate the Video Files: Using the file explorer, navigate to the folder where you have stored your video files. Select the files you want to import and drag them into the editing software’s media library or directly onto the timeline.
4. Organize the Files: Once imported, you can organize your video files into bins, folders, or categories within the software. This will make it easier to find and access specific clips during the editing process.
5. Preview the Files: Take some time to preview the imported video files in the media library or on the timeline. This will give you a sense of the content and help you plan the editing sequence.
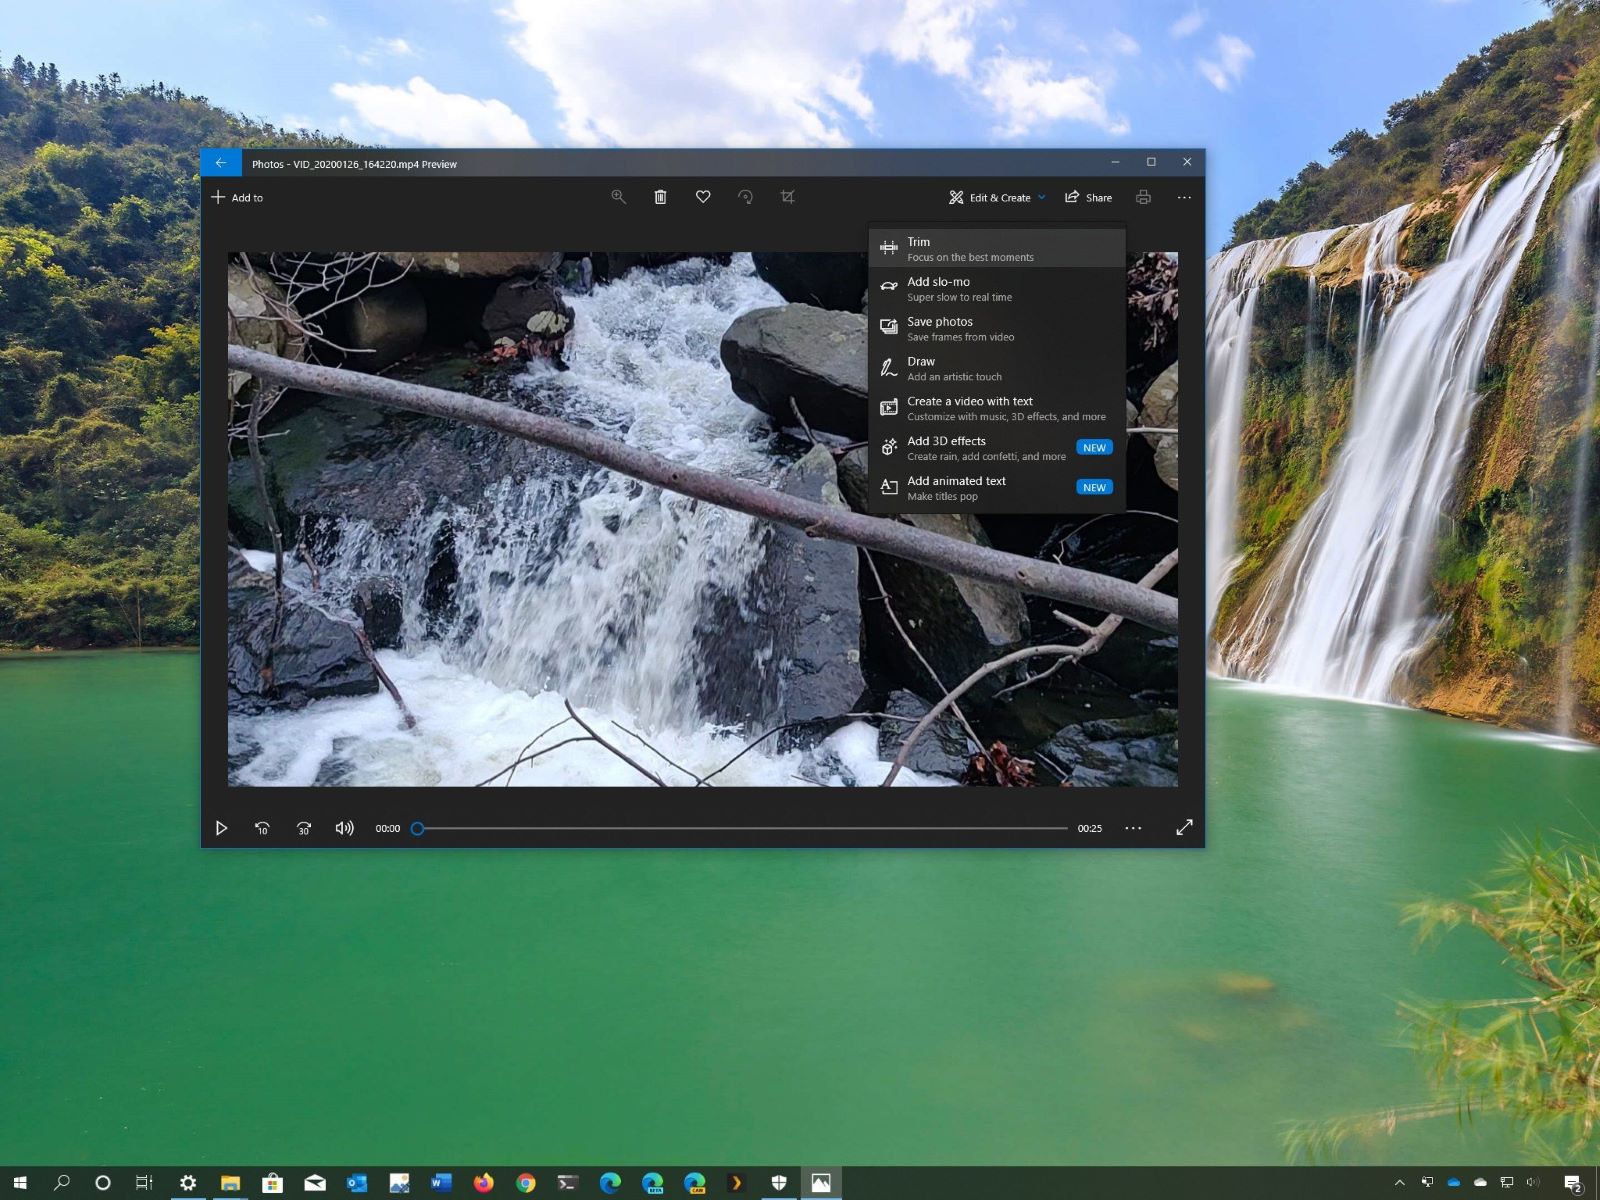
6. Trim Unwanted Footage: If there are portions of a video clip that you don’t want to include in your final edited video, you can trim them directly in the editing software. This allows you to focus on the essential parts and remove any unnecessary content.
It’s important to note that the process of importing video files may vary slightly depending on the software you are using. However, most professional and consumer video editing software follow similar steps. Consult the software’s documentation or online tutorials for specific instructions.
Now that you have successfully imported your video files, you can move on to the next steps of the editing process, such as trimming and splitting clips, adding transitions, and applying effects. These techniques will be covered in the upcoming sections.
Trimming and Splitting Clips
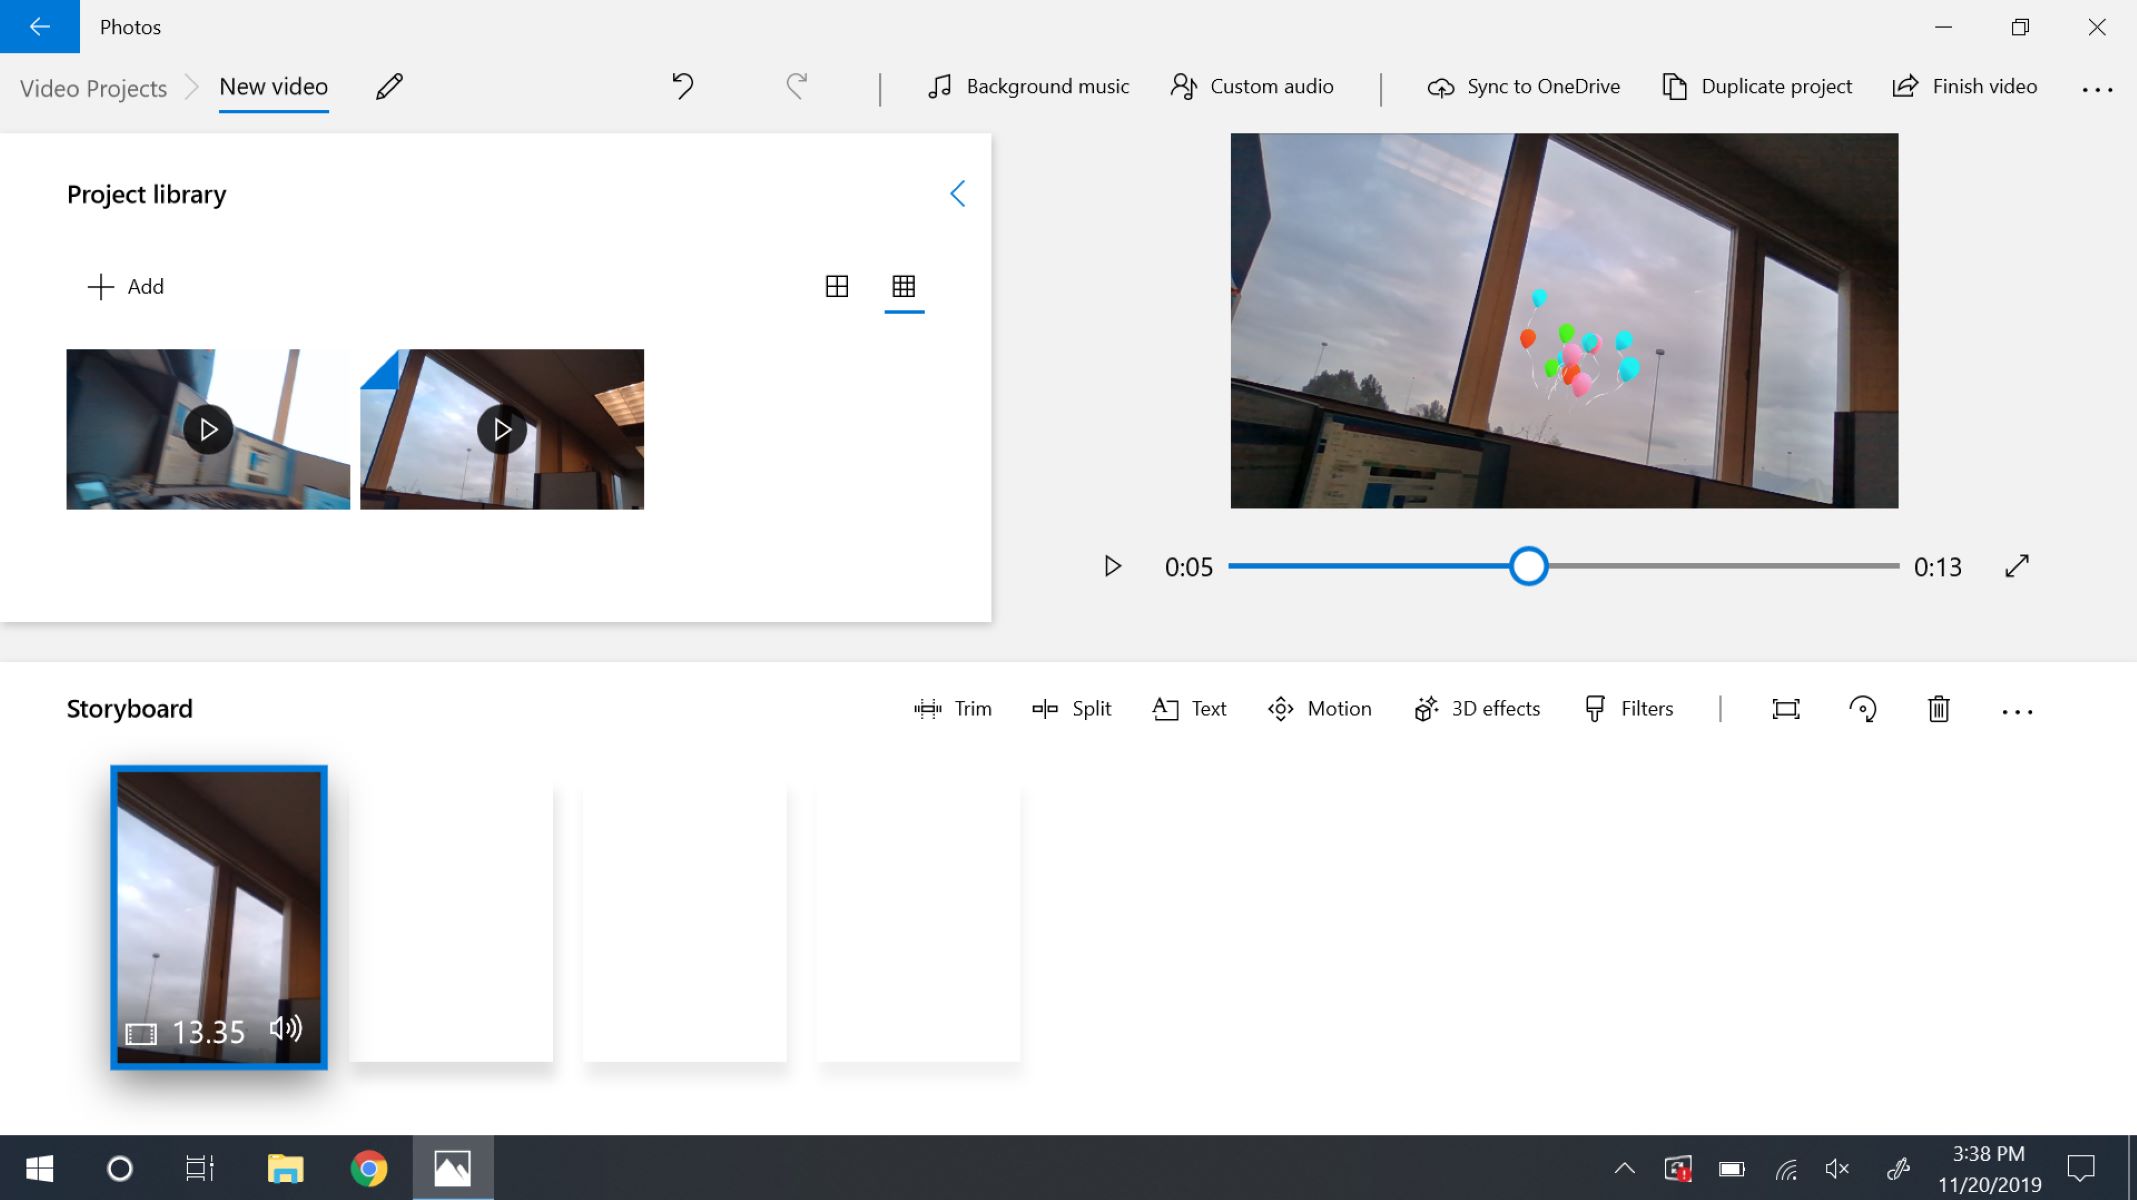
Trimming and splitting clips is a fundamental aspect of video editing that allows you to remove unwanted sections and create precise cuts in your footage. Here’s how you can trim and split clips in your video editing software:
1. Select the Clip: Identify the video clip on the timeline that you want to trim or split. You can click on the clip or use the timeline cursor to navigate to the desired section.
2. Trimming: To trim a clip, find the start and end points that you want to keep. Drag the edges of the clip inward to remove the unwanted portions. Most video editing software provides visual indicators or a preview window to help you make accurate trims.
3. Splitting: Splitting a clip allows you to create separate segments within a single video clip. This is useful for removing or rearranging specific sections of the footage. Place the timeline cursor at the point where you want to split the clip, then use the appropriate tool or shortcut to perform the split. Repeat this process for any additional splits.
4. Deleting Unwanted Sections: After splitting a clip, you can easily delete the unwanted sections by selecting them and pressing the delete key or using the delete functionality provided in the editing software.
5. Refine the Edits: Review the trimmed and split clips on the timeline to ensure that the edits are seamless and the transitions between the clips are smooth. Make any necessary adjustments to achieve the desired flow and pacing in your video.
6. Undo and Redo: If you make a mistake while trimming or splitting clips, most video editing software provides an undo and redo function. This allows you to revert the changes or redo them if needed.
By mastering the art of trimming and splitting clips, you can precisely control the content and duration of your videos. It allows you to eliminate any unnecessary footage and create a cohesive story within your edited video.
Now that you’ve trimmed and split your clips, it’s time to enhance your video with transitions and effects. In the next section, we will explore how to seamlessly transition between clips and apply creative effects to add visual interest to your video.
Adding Transitions
Transitions are essential elements in video editing that help create smooth and seamless transitions between clips. They enhance the flow of the video, add visual interest, and convey a sense of professionalism. Here’s how you can add transitions to your video:
1. Select the Transition Point: Identify the point where you want the transition to occur on the timeline. This can be the end of one clip and the beginning of another, or within a single clip when using a creative transition effect.
2. Choose a Transition: Most video editing software provides a library of transition effects to choose from. Common options include fades, dissolves, wipes, slides, and flips. Explore the available transitions and select the one that best suits the mood and style of your video.
3. Apply the Transition: Once you have selected a transition, simply drag and drop it onto the desired transition point on the timeline. The transition will be applied to the clips, blending them together smoothly.
4. Adjust the Duration: Depending on the software, you may have the option to adjust the duration of the transition. This allows you to control the speed at which the transition occurs. If desired, you can also add keyframes to the transition to create custom effects.
5. Preview the Transition: After applying the transition, preview it to ensure it flows seamlessly between the clips. Make any necessary adjustments to the duration or transition type if it doesn’t meet your expectations.
6. Explore Advanced Transitions: Some video editing software offers more advanced transition features, such as 3D transitions, animated effects, or custom transitions. Take the time to explore these options and experiment with different transitions to add a creative touch to your videos.
Adding transitions can elevate the overall quality of your video and improve the viewer’s experience. However, it’s important to use transitions sparingly and purposefully, ensuring they enhance the storytelling rather than distract from it.
Now that you’ve seamlessly transitioned between clips, let’s explore the next step in editing: applying video effects. In the following section, we’ll cover various effects that can transform the look and feel of your video.
Applying Video Effects
Video effects allow you to enhance the visual appearance of your footage and add creative elements to your videos. They can help set the mood, convey emotions, and make your videos more visually appealing. Here’s how you can apply video effects in your editing software:
1. Select the Clip: Choose the video clip that you want to apply effects to on the timeline. This can be a single clip or multiple clips that you want to apply the same effect to.
2. Access the Effects Library: Most video editing software have a built-in library of effects. Locate the effects panel or tab, and browse through the available options. Common video effects include color grading, filters, overlays, transitions, and motion effects.
3. Preview and Apply the Effect: Preview the effect by hovering over it in the library or applying it temporarily to the clip. Once you are satisfied with the effect, click or drag it onto the desired clip or section of the timeline. The effect will be applied to the selected clip(s).
4. Adjust the Effect Parameters: Depending on the effect you applied, your editing software may offer parameters to adjust, such as intensity, speed, opacity, or color values. Explore these parameters to fine-tune the effect to your liking.
5. Experiment with Multiple Effects: Don’t limit yourself to a single effect. Feel free to apply multiple effects to a clip or use different effects on different clips to create a unique and visually interesting video. Just be mindful not to overdo it, as too many effects can be overwhelming.
6. Save Presets: If you create a combination of effects that you like, some editing software allow you to save those settings as a preset. This makes it easier to apply the same effect combination to other clips in your project.
By applying video effects, you can transform the look and feel of your footage, enhance the storytelling, and create a visually captivating video. Experiment with different effects and let your creativity shine as you bring your vision to life.
Now that you’ve applied video effects, let’s explore the next step in editing: adjusting brightness, contrast, and color. In the following section, we’ll cover techniques to enhance the overall visual quality of your video.
Adjusting Brightness, Contrast, and Color
Correctly adjusting the brightness, contrast, and color in your video can significantly enhance its visual quality, create a cohesive look, and convey the desired mood and atmosphere. Here’s how you can make these adjustments in your video editing software:
1. Select the Clip: Choose the video clip on the timeline that you want to adjust. You can select a single clip or multiple clips if you want to apply the same adjustments.
2. Access the Color Correction Tools: Most video editing software provides color correction tools to adjust brightness, contrast, and color. These tools may be located in a dedicated panel or within the effects library.
3. Adjust Brightness: Use the brightness slider or parameter to increase or decrease the overall brightness of the selected clip(s). Adjust the brightness until it appears visually pleasing without being too dark or too bright. Take into consideration the tone and mood you want to convey in your video.
4. Control Contrast: The contrast of a video determines the difference between the dark and light areas. Increase the contrast to create a more vibrant and dynamic look, or decrease it for a softer, more muted appearance. Balance the contrast to ensure that details are not lost in overly dark or bright areas.
5. Manage Color Saturation: Adjusting the color saturation allows you to control the intensity of colors in your video. Increase saturation to make colors more vivid and vibrant, or decrease it for a more subdued and desaturated look. Find the right balance that enhances the visual impact of your video.
6. Correct White Balance: White balance ensures that the colors in your video appear natural and accurate. Adjust the white balance using the software’s tools or by selecting a specific white area in the footage. This helps eliminate any color casts and creates a more realistic representation of the scenes.
7. Apply Filters or Presets: Some video editing software offer pre-made filters or color presets that you can apply to your clips. These can be useful for achieving specific looks or styles with a single click. Experiment with different filters and presets to find the one that best fits your video.
By adjusting the brightness, contrast, and color in your video, you can transform its visual appearance, make it more engaging, and ensure consistency throughout your project. Take the time to fine-tune these settings for each clip to achieve the desired aesthetic and mood.
Now that you’ve adjusted the brightness, contrast, and color of your video, it’s time to explore the next step in editing: adding text and captions. In the following section, we’ll cover how to overlay text and captions on your footage.
Adding Text and Captions
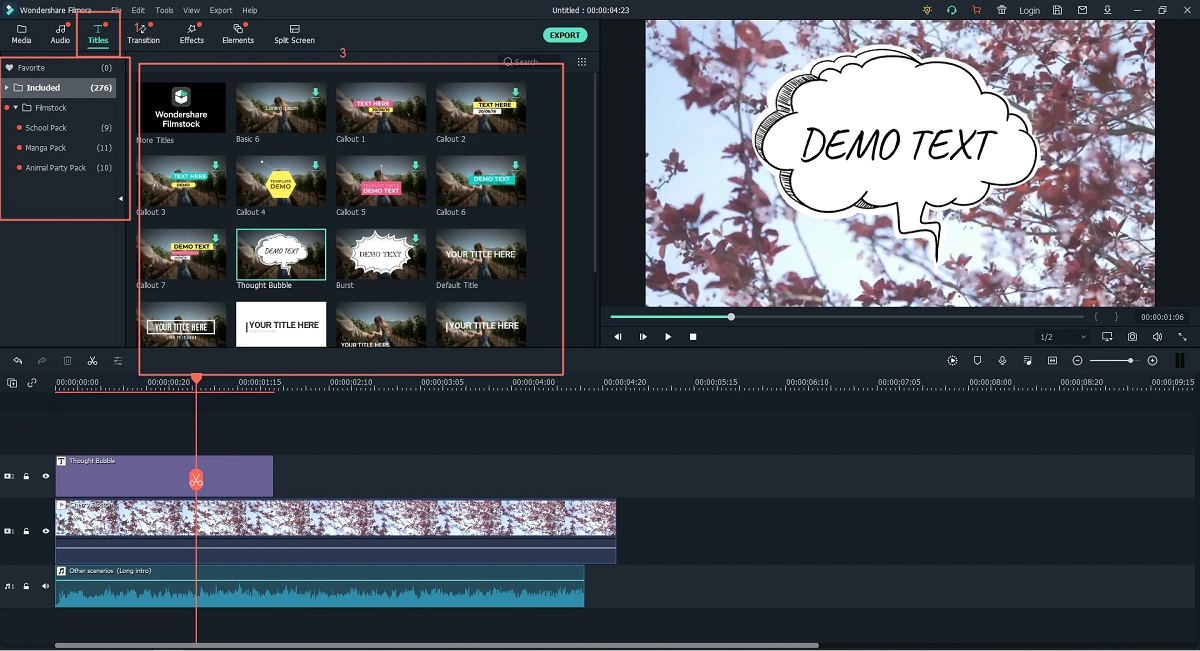
Adding text and captions to your videos can provide additional context, enhance storytelling, and improve overall viewer engagement. Whether you want to include titles, subtitles, or captions, here are the steps to add text to your video using editing software:
1. Select the Clip: Choose the video clip on the timeline where you want to overlay the text. This could be a specific section or the entire duration of the clip.
2. Access the Text Tool: Most video editing software offer a text tool or text overlay option. Locate this feature, either in the toolbar or within the effects library of the software.
3. Create the Text Layer: Click on the text tool and position the cursor on the timeline where you want to start the text. Then, click and drag to create a text layer. Alternatively, you may have the option to click directly on the preview window to position the text overlay.
4. Enter the Text: Once the text layer is created, a text box or editor will open. Enter the desired text, such as titles, subtitles, or captions. Customize the font, size, color, and style to align with the aesthetics of your video.
5. Adjust the Text Position and Duration: Use the editing software’s tools or parameters to position the text layer on the video frame and adjust its duration. You can drag and resize the text box, as well as set the start and end points of the text overlay.
6. Animate the Text: To add more dynamism to the text, some video editing software offer text animation features. Explore the available options to animate the text, such as fades, scrolls, or transitions.
7. Consider Closed Captions or Subtitles: If you’re creating videos for accessibility or international audiences, you may want to include closed captions or subtitles. Some editing software offer features or plugins that streamline the process of adding captions to your video.
Remember to use appropriate fonts, sizes, and colors to ensure legibility, especially if the text will be displayed on moving or complex backgrounds. Aim for a balance between readability and visual appeal.
By adding text and captions to your video, you can provide valuable information, clarify dialogue, and engage viewers on multiple levels. Experiment with different text styles and placements to find the perfect fit for your video project.
Now that you’ve added text and captions, it’s time to explore the next step in editing: incorporating music or audio. In the following section, we’ll cover how to add audio to your video to enhance the viewing experience.
Adding Music or Audio
Adding music or audio to your video can greatly enhance the overall viewing experience, set the tone, and evoke emotional responses from your audience. Here’s how you can incorporate music or audio into your video editing process:
1. Select the Clip: Choose the video clip or section on the timeline where you want to add the music or audio. Consider the mood and storyline of your video to determine the most suitable placement.
2. Import or Find Audio: Locate the desired music or audio file that you want to add to your video. You can import a song from your own library or browse royalty-free music websites, ensuring that you have the necessary permissions for use.
3. Import Audio Into Editing Software: Use the software’s import function to bring the audio file into your editing program. Some software allows you to drag and drop the audio file directly onto the timeline.
4. Trim and Adjust Audio: Once your audio file is on the timeline, you can trim it to the desired length and adjust the volume levels to fit your video. Most video editing software provide volume controls and options for fading in or out the audio.
5. Sync Audio with Video: Align the audio with the visuals on the timeline to ensure perfect synchronization. You can use visual cues or audio waveforms to help you match key sounds or beats with specific points in the video.
6. Add Multiple Audio Tracks: If you want to layer multiple audio tracks, such as background music, dialogue, or sound effects, your software may allow you to add additional audio tracks. This enables you to control each audio element separately and perfect the audio balance.
7. Consider Sound Effects: In addition to music, you may want to include sound effects to enhance specific moments in your video. These can be footsteps, ambient noises, or other relevant audio elements that enrich the viewer’s experience. Import and position sound effects on the timeline accordingly.
By incorporating music or audio into your video, you can captivate your audience and create an immersive experience. Select the right audio that complements your video content and aligns with the desired emotional response.
Now that you’ve added music or audio to your video, let’s explore the next step in editing: removing background noise. In the following section, we’ll cover how to clean up the audio and eliminate unwanted noises.
Removing Background Noise
Background noise can be a common issue in video recordings, often distracting viewers from the main audio content. Fortunately, there are techniques available to remove or reduce background noise in your video. Here’s how you can tackle this problem:
1. Identify the Problematic Areas: Listen to your video carefully and identify the sections where the background noise is most noticeable. These may include noises like hums, hisses, air conditioning, or traffic sounds.
2. Utilize Noise Reduction Tools: Most video editing software provide noise reduction tools that can help minimize or eliminate background noise. These tools use algorithms to analyze the audio and reduce the unwanted sound frequencies.
3. Apply Noise Reduction Filter: Apply the noise reduction filter to the specific sections of your video that have the most prominent background noise. Adjust the filter settings such as strength, threshold, and sensitivity to achieve the desired reduction without affecting the quality of the main audio.
4. Preview and Fine-Tune: After applying the noise reduction filter, listen to the affected sections and make sure the background noise has been adequately reduced. Fine-tune the filter settings if necessary to achieve the best results.
5. Consider Manual Editing: In some cases, when the noise reduction filter is not enough, you may need to resort to manual editing techniques. This involves carefully selecting and removing the unwanted background noise using editing software’s audio editing tools such as the noise reduction or audio masking features.
6. Record Clean Audio: To prevent background noise issues in the future, consider recording audio separately using dedicated microphones or capturing the clean audio in controlled environments. This provides a cleaner source file that can be used in your video editing process.
By removing or reducing background noise in your video, you can ensure that your audience can focus on the essential audio content without distractions. However, it’s important to strike a balance between noise reduction and preserving the natural sound quality of the audio.
Now that you’ve removed background noise, it’s time to explore the next step in editing: speeding up or slowing down video. In the following section, we’ll cover how to adjust the playback speed for creative effects or better storytelling.
Speeding Up or Slowing Down Video
Adjusting the playback speed of your video can add a dynamic element to your storytelling, create dramatic effects, or emphasize specific moments. Whether you want to speed up or slow down your video, here’s how you can achieve it in your video editing software:
1. Select the Clip: Identify the video clip or section on the timeline that you want to adjust the playback speed. It can be a single clip or multiple clips, depending on your creative intent.
2. Access the Speed Controls: Most video editing software provides speed or time manipulation controls. Locate these controls, usually found in the video effects panel or in the properties of the selected clip.
3. Increase Speed: If you want to speed up your video, adjust the speed controls to a higher value. This will make the video play faster, creating a quick-paced effect. Experiment with different speed percentages to find the desired result.
4. Decrease Speed: To slow down your video, lower the speed value. This will make the video play at a slower pace, emphasizing details, actions, or adding a dramatic effect. Again, try different speed percentages to achieve the desired impact.
5. Smooth Transitions: When speeding up or slowing down clips, consider the transitions between normal speed and the altered speed sections. Use transition techniques such as crossfades or time ramping to create smooth and seamless transitions.
6. Adjusting Audio: When speeding up or slowing down videos, it’s essential to consider the impact on the audio. Some video editing software automatically adjusts the audio pitch to match the altered speed, but you may need to manually adjust the audio pitch for optimal results.
7. Apply Keyframes: In some cases, you may want to vary the speed within a single clip. Utilize keyframes to adjust the speed dynamically over time, allowing for more intricate and creative effects.
By manipulating the speed of your video clips, you can create engaging montages, highlight action sequences, or add a unique touch to your storytelling. Experiment with different speed variations to find the perfect balance for your video project.
Now that you’ve adjusted the speed of your video, let’s explore the next step in editing: adding subtitles or closed captions. In the following section, we’ll cover how to include text overlays for improved accessibility and comprehension.
Adding Subtitles or Closed Captions
Adding subtitles or closed captions to your video is a beneficial practice that improves accessibility, comprehension, and engagement for a wider range of viewers. Here’s how you can include subtitles or closed captions in your video editing process:
1. Create or Obtain the Subtitle File: Subtitles can be created manually or obtained from external sources. You can use dedicated subtitle editing software to create a subtitle file (.srt or .vtt) that contains the timing and text for each subtitle. Alternatively, you can find pre-made subtitle files for your video on reputable websites.
2. Import the Subtitle File: Once you have the subtitle file ready, import it into your video editing software. Many editing tools allow you to import subtitle files directly onto the timeline or associate them with the video clip.
3. Sync Subtitles with the Video: Ensure that the subtitles align with the corresponding audio or dialogue. Adjust the timing of each subtitle by dragging them on the timeline or using the subtitle syncing tool provided by the software.
4. Customize the Subtitles: Customize the appearance of the subtitles to suit your video’s style and design. You can adjust the font, size, color, position, and background opacity of the subtitles to ensure they are legible and visually appealing.
5. Review and Fine-Tune: Preview the video with the subtitles to ensure they appear at the right moments and accurately convey the spoken words. Make any necessary adjustments or corrections to ensure the subtitles are error-free.
6. Consider Closed Captions: If your video requires closed captions, which include not only the dialogue but also important sound effects and contextual information, follow the same steps as above. Closed captions are particularly useful for viewers with hearing impairments or when watching videos in noise-prone environments.
7. Multiple Languages: If your video has an international audience, consider creating subtitle files in different languages. Provide options for viewers to select their preferred language to enhance inclusivity and reach a wider audience.
By adding subtitles or closed captions to your video, you ensure that your content is accessible to a broader range of viewers and can be easily understood even without audio. This greatly improves engagement and inclusivity.
Now that you’ve added subtitles or closed captions, let’s explore the next step in editing: cropping and resizing the video. In the following section, we’ll cover how to adjust the frame and aspect ratio for better visual composition.
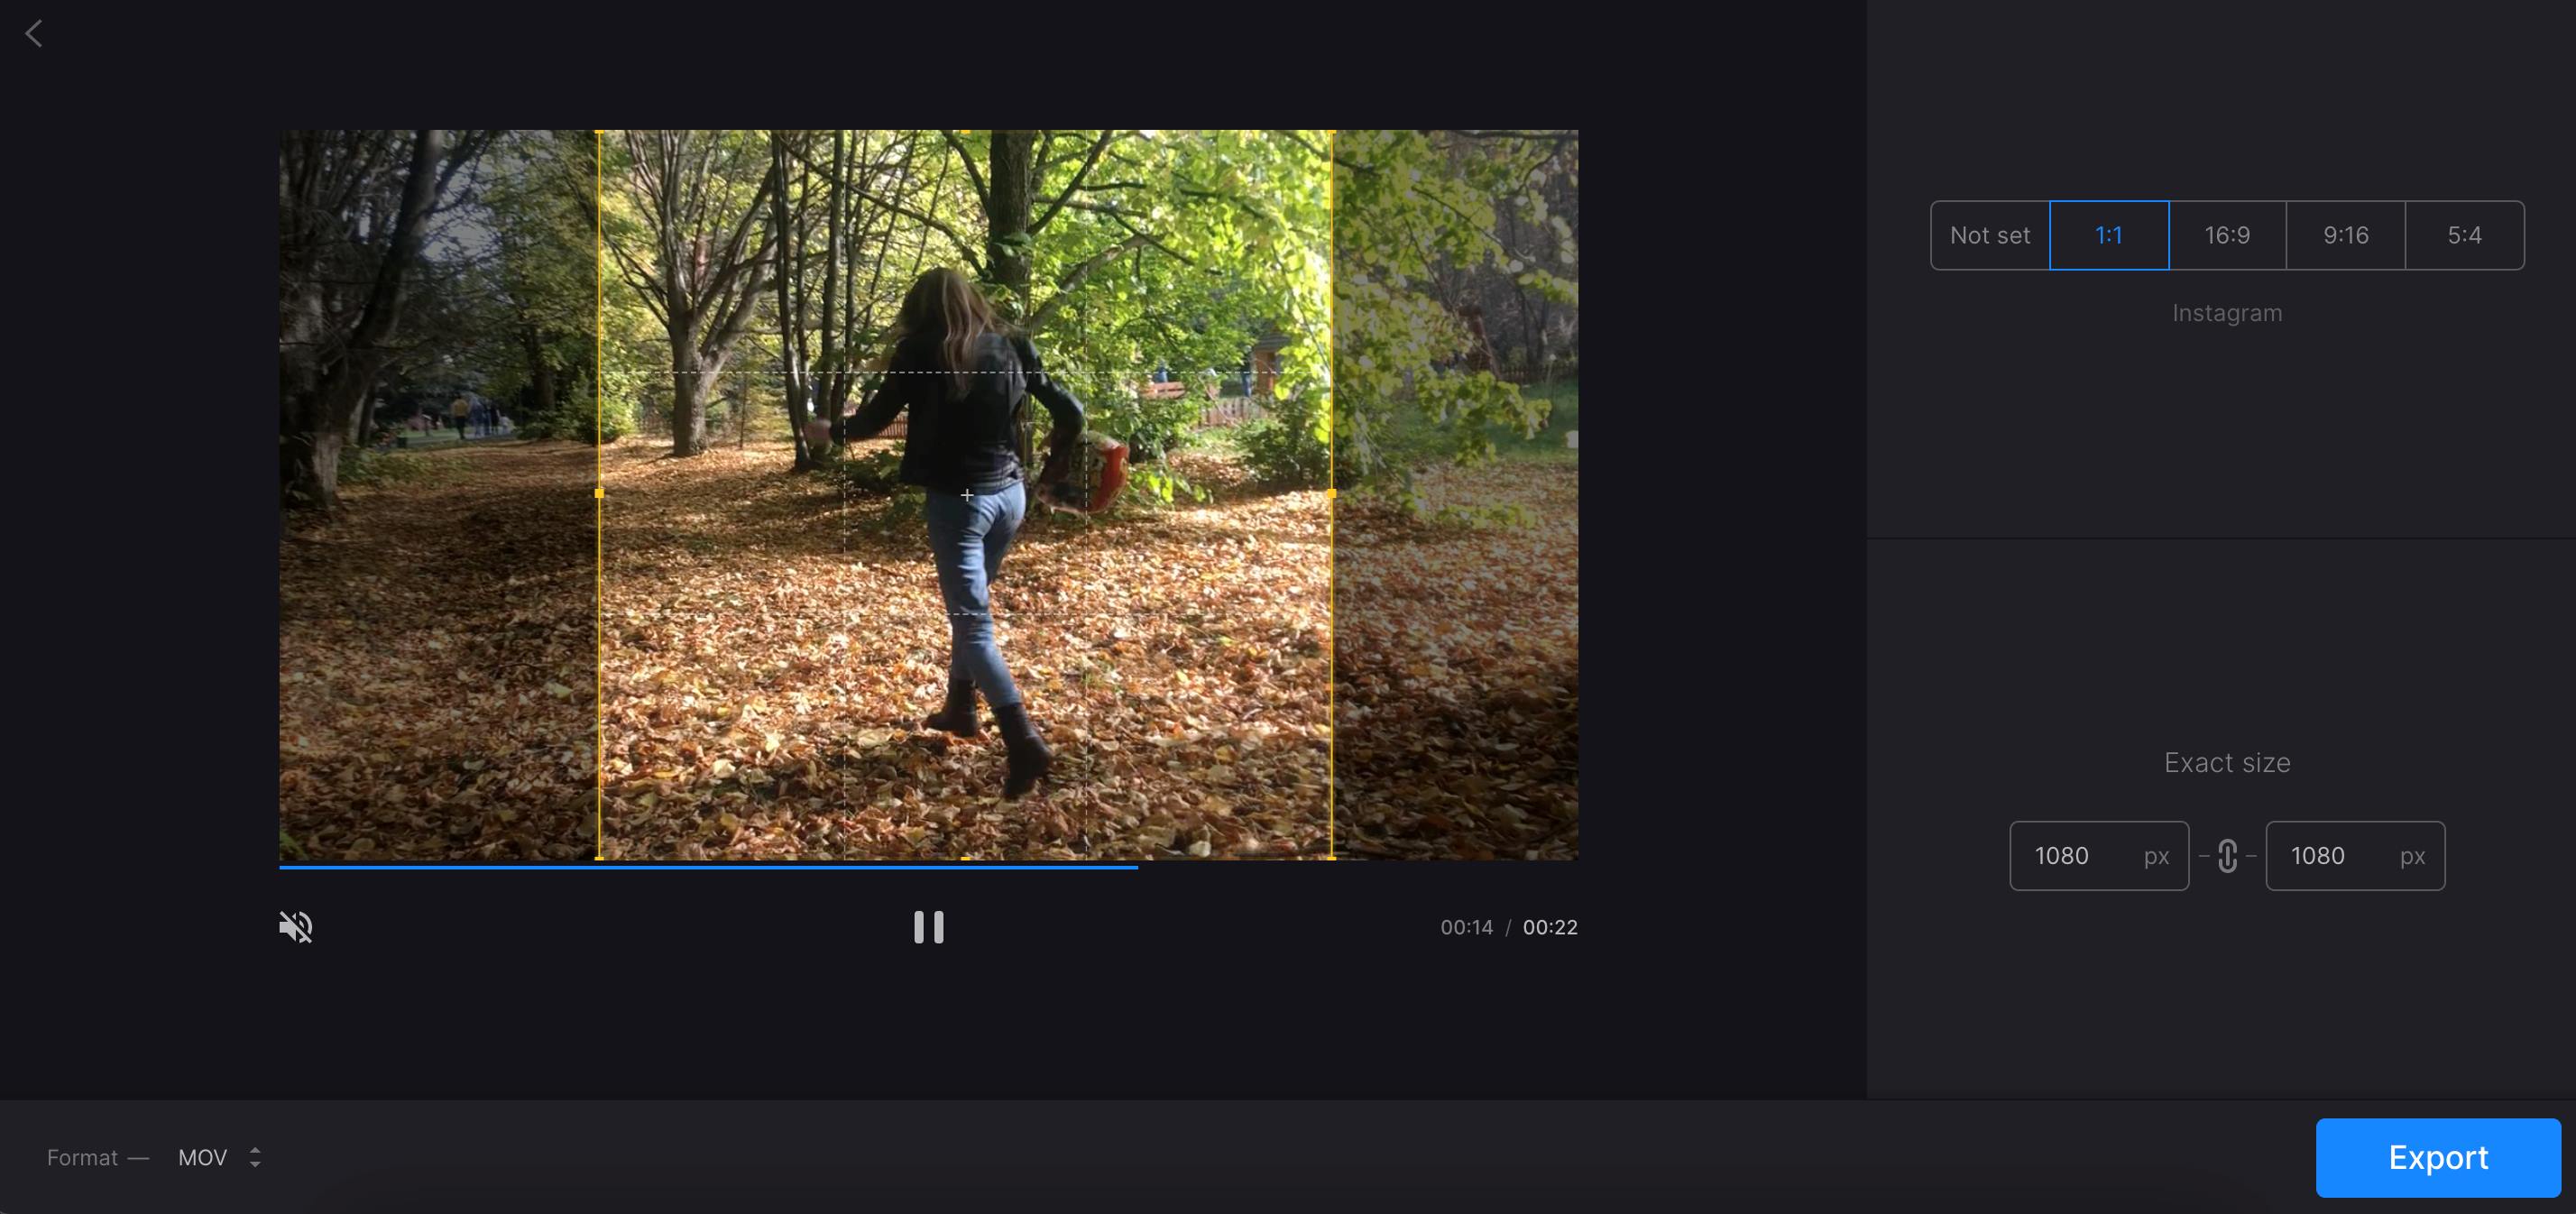
Cropping and Resizing Video
Cropping and resizing video allows you to adjust the frame and aspect ratio, improving visual composition and ensuring optimal viewing experience across different platforms. Here’s how you can crop and resize your video in the editing process:
1. Select the Clip: Identify the video clip on the timeline that you want to crop or resize. Determine the areas you want to keep or remove from the frame.
2. Access the Crop/Resize Tools: Most video editing software provide crop and resize tools in the video effects or transformation panel. Locate these tools to make adjustments to the frame.
3. Cropping: To crop the video, adjust the crop tool handles on the video preview or parameters in the software. Drag the handles inward to remove unwanted areas and create a tighter frame. Ensure that the focus of the video remains intact while eliminating any distractions or unnecessary elements.
4. Resizing: If you need to resize the video, use the resize tool or properties in the software. Input the desired dimensions or select from preset aspect ratios to fit your needs. Be mindful of maintaining the video’s original proportions to avoid distortion or stretching.
5. Preview and Refine: After cropping or resizing the video, preview it to ensure that the composition is visually appealing and aligned with your vision. Make any necessary adjustments to achieve the desired result.
6. Consider Multiple Outputs: Depending on the platforms where your video will be published, you may need to create multiple versions with different aspect ratios or resolutions. This ensures optimal viewing experiences across various platforms, such as social media, websites, or mobile devices.
By cropping and resizing your video, you can enhance the visual composition, eliminate distractions, and ensure that your video fits the desired frame or platform requirements. Take the time to carefully consider the composition and aim for a visually pleasing result.
Now that you have cropped and resized your video, it’s time to explore the final step in editing: exporting the final edited video. In the next section, we’ll cover how to export your video in the desired format and quality.
Exporting the Final Edited Video
After you have completed the editing process and are satisfied with the final result, it’s time to export your video in a format that is compatible with your intended use. Here’s how you can export your final edited video from your video editing software:
1. Choose the Export Option: Look for the export or render option in your video editing software. This may be located in the file menu or toolbar of the software.
2. Select the Export Settings: When exporting, you’ll be prompted to choose the specific settings for your exported video. This includes the file format, resolution, frame rate, and other parameters. Consider the platform or device where your video will be viewed to optimize the settings accordingly.
3. Choose the Output Format: Select an appropriate file format for your video. Common formats include MP4, MOV, AVI, or WMV. Make sure the chosen format is compatible with the intended platform or player.
4. Adjust Video Quality and Size: Depending on your video editing software, you may have the option to adjust the quality and size of the exported video. Find the appropriate settings to balance file size and video quality according to your requirements.
5. Consider Encoding Options: Some video editing software offers advanced encoding options for exporting. These options include codec selection, bit rate control, and audio encoding parameters. Experiment with these options to achieve the desired balance between file size and video quality.
6. Specify Output Location: Choose a destination folder or directory where you want the exported video file to be saved. Make sure you have enough storage space available to accommodate the file size of the final video.
7. Start the Export Process: Click on the “Export” or “Render” button to initiate the export process. The software will process your video based on the chosen settings and generate the final edited video file.
8. Review the Exported Video: After the export process is complete, take the time to review the exported video to ensure that it matches your expectations. Check for any issues or discrepancies and make any necessary adjustments before sharing or publishing the video.
By exporting the final edited video, you are ready to share your creation with the world. Ensure that the video is in the appropriate format and meets the requirements of your desired platform or audience.
Congratulations on completing the editing process and exporting your final video! Now you can share your video confidently and showcase your creativity and storytelling skills to the world.
Conclusion
Editing a video on Windows can be a rewarding and creative process. With the right tools and techniques, you can transform raw footage into a visually captivating and engaging video. Throughout this article, we explored the various steps involved in editing a video, from importing video files to adjusting brightness, adding text, and exporting the final edited video.
We began by discussing the importance of choosing the right video editing software and setting up a comfortable workspace. Then, we delved into the specific editing techniques, such as trimming and splitting clips, adding transitions and video effects, adjusting brightness, contrast, and color, incorporating text and captions, and including music or audio to enhance the viewing experience.
We also explored the significance of removing background noise, manipulating the speed of the video for creative effects, cropping and resizing for improved visual composition, and adding subtitles or closed captions to make your videos more accessible. Finally, we covered the essential step of exporting the final edited video in the desired format and quality.
By following these steps and utilizing the features and tools available in video editing software, you can elevate your video projects and create professional-looking videos with ease. Remember to be creative, experiment with different techniques, and tailor your edits to suit your unique style and vision.
So, whether you are a content creator, a vlogger, or simply someone looking to enhance your home videos, dive into the world of video editing on Windows and let your creativity shine. Take your videos to the next level and captivate your audience with visually stunning and engaging content.
Now, armed with the knowledge and skills to edit videos on Windows, it’s time to unleash your creativity and create videos that leave a lasting impact on your viewers. Happy editing!