Introduction
Screen recording has become an essential tool for various purposes, such as creating tutorials, sharing gameplay highlights, delivering presentations, and capturing important moments on your computer screen. Whether you’re a student, a professional, or an avid gamer, knowing how to record your screen on PC can greatly enhance your productivity and communication.
In this article, we will walk you through the process of screen recording on your PC, providing you with different options and step-by-step guides. Whether you prefer using the built-in Windows screen recorder or third-party software, we have got you covered. Additionally, we will compare popular screen recording software, offer tips for successful screen recording, and troubleshoot common issues you may encounter.
Before we dive into the specifics, let’s first gain a better understanding of what screen recording actually entails. Screen recording involves capturing everything that happens on your computer screen, whether it’s the movement of your mouse, the opening and closing of applications, or the typing of your keystrokes. This recorded footage can then be saved as a video file that you can edit, share, or use for various purposes.
Screen recording has become increasingly popular due to its versatility and convenience. It allows you to create engaging video content, demonstrate complex processes, provide remote support, and much more. Whether you’re a content creator, a teacher, a software developer, or an entrepreneur, the ability to effectively record your screen can greatly enhance your workflow and communication.
In the following sections, we’ll explore different options for screen recording on your PC and provide you with detailed guides to help you get started. No matter your level of experience, by the end of this article, you’ll have the knowledge and tools to record your screen like a pro.
Understanding Screen Recording
Before we delve into the technicalities of screen recording, let’s take a moment to understand its significance and applications. Screen recording is the process of capturing the activities on your computer screen in real-time and saving them as a video file. It is a powerful tool that enables you to create informative tutorials, share gameplay, deliver presentations, or document important processes.
Screen recording is widely used across various industries and for diverse purposes. For educators and trainers, it offers a convenient way to create instructional videos, walkthroughs, and online courses. Instead of relying solely on text or static images, screen recording brings concepts to life, making it easier for learners to understand complex ideas.
For professionals, screen recording is a valuable asset for creating product demos, showcasing software features, or presenting project updates. It allows you to visually communicate your message, providing a comprehensive view of your work.
Another popular use of screen recording is in the gaming community. Gamers often utilize screen recording software to capture their gameplay and share their achievements with friends or a wider audience on platforms like YouTube and Twitch. This not only allows gamers to showcase their skills but also enables others to learn from their strategies and tactics.
Screen recording can also be utilized for troubleshooting and technical support. By recording your screen, you can provide step-by-step instructions, visually identify issues, and offer effective solutions. This is especially useful for remote collaborations or when seeking assistance from experts.
Understanding screen recording can also help you stay ahead in the workplace. As more companies transition to remote or hybrid work environments, effective communication and collaboration are crucial. Screen recording offers an efficient way to demonstrate software bugs, suggest improvements, or share progress updates during project discussions.
Now that we have a better grasp of the importance and applications of screen recording, let’s explore the different methods and tools available for recording your screen on a PC.
Preparing your PC for Screen Recording
Before you begin screen recording on your PC, it’s important to ensure that your computer is properly set up to achieve the best recording quality and performance. Here are a few key steps to follow:
- Check your hardware: Make sure your computer meets the minimum system requirements for screen recording. This includes having sufficient RAM, a capable processor, and adequate storage space for saving your recordings.
- Close unnecessary applications: Close any unnecessary programs running in the background. This will free up system resources and minimize potential interruptions or lags during the recording process.
- Free up disk space: Ensure that you have enough free disk space to save your recorded videos. Screen recordings can quickly consume storage, especially if you plan on recording lengthy sessions at high resolutions.
- Update your software: Keep your operating system, screen recording software, and drivers up to date. This ensures compatibility, stability, and access to the latest features and improvements.
- Configure audio settings: Determine how you want to handle audio during screen recording. If you plan on providing commentary or capturing system sounds, ensure that your microphone is properly connected and configured, and audio levels are set appropriately.
- Select the desired screen or application: Decide whether you want to record your entire screen or just a specific application window. This choice will depend on the nature of your recording and what you want to highlight.
- Disable notifications: To avoid interruptions during your recording, consider disabling notifications or setting your computer to “Do Not Disturb” mode.
By following these preparation steps, you can optimize your PC for screen recording and minimize any potential issues that may arise during the process. Taking the time to set up your computer properly will ensure smoother recordings and better overall performance.
Option 1: Using Built-in Windows Screen Recorder
If you’re using a Windows PC, you have the advantage of having a built-in screen recording tool called the ‘Game Bar’. This tool is primarily designed for capturing gameplay footage but can also be used for general screen recording. Here’s how you can use the built-in Windows screen recorder:
- Open the Game Bar: To access the Game Bar, press the “Windows key + G” on your keyboard. This will open the Game Bar overlay on top of your screen.
- Verify the Game Bar settings: Before you start recording, make sure the Game Bar is properly configured. You can do this by clicking on the “Settings” icon in the Game Bar overlay and adjusting options such as audio recording, recording quality, and keyboard shortcuts.
- Start recording: Once you’ve adjusted the settings, you can begin recording by clicking on the red “Record” button or by using the keyboard shortcut “Windows key + Alt + R”. The recording will start after a brief countdown.
- Control the recording: While recording, you can access various controls from the Game Bar overlay. This includes pausing and resuming the recording, capturing screenshots, and controlling audio settings.
- Finish and save the recording: When you’re done with the recording, click on the square “Stop” button in the Game Bar overlay or use the keyboard shortcut “Windows key + Alt + R” once again. The recording will be saved to your designated folder.
The built-in Windows screen recorder provides a convenient and straightforward way to capture your screen on a Windows PC. However, it’s worth noting that the features and functionality are relatively basic compared to dedicated third-party screen recording software. If you require more advanced options like video editing, annotations, or specific output formats, you may want to consider alternative screen recording tools.
In the next section, we’ll explore option 2: using third-party screen recording software. These tools often offer more advanced features and customization options to meet your specific recording needs.
Option 2: Using Third-Party Screen Recording Software
While the built-in Windows screen recorder offers basic functionality, using third-party screen recording software can provide additional features and customization options. There are numerous options available, both free and paid, that cater to different recording needs. Here’s how you can use third-party screen recording software:
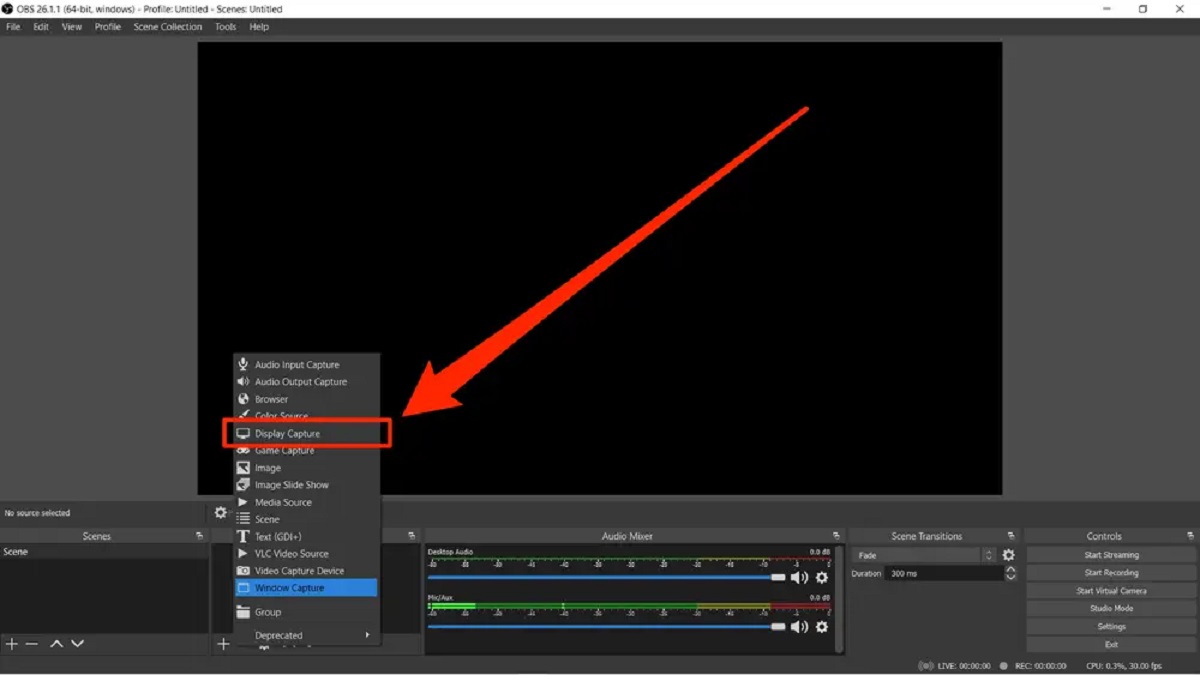
- Choose a screen recording software: Research and select a screen recording software that suits your requirements. Some popular options include OBS Studio, Camtasia, Bandicam, and Snagit. Consider factors such as recording features, ease of use, editing capabilities, and supported output formats.
- Download and install the software: Once you’ve chosen the software, download it from the official website and follow the installation instructions. Make sure to download from a trusted source to avoid malware or security risks.
- Launch the software: Open the screen recording software on your PC. Familiarize yourself with the user interface and the available recording options.
- Adjust recording settings: Before you start recording, configure the settings based on your preferences. This may include selecting the desired recording area, setting the audio input source, adjusting video quality settings, and choosing hotkeys for starting and stopping the recording.
- Start recording: When you’re ready, click on the “Record” button or use the designated hotkey to begin screen recording. Some software may allow you to select a specific area or window to record.
- Control the recording: While recording, keep an eye on the controls provided by the software. You may have options to pause and resume the recording, capture screenshots, enable webcam overlay, or include system sounds alongside the screen capture.
- Finish and save the recording: When you’re done recording, click on the “Stop” button or use the designated hotkey to end the recording session. The software will prompt you to save the recording to a specific location on your computer.
Third-party screen recording software often offers advanced features like video editing, real-time annotations, custom watermarking, and the ability to add audio narration. These tools can greatly enhance your screen recording experience, allowing you to create professional-looking videos for a variety of purposes.
Before selecting a third-party software, it’s recommended to try out different options and compare their features to find the one that best suits your needs and preferences. Consider reading user reviews, watching tutorial videos, and exploring the support documentation provided by the software developers.
In the next section, we’ll compare popular screen recording software to help you make an informed decision.
Comparing Popular Screen Recording Software
When it comes to choosing screen recording software, there are several options available in the market offering various features and functionalities. Let’s compare some of the popular screen recording software to help you make an informed decision:
- OBS Studio: OBS Studio (Open Broadcaster Software) is a free and open-source screen recording and streaming software. It offers a wide range of features, including customizable recording settings, scene transitions, audio mixing, and live streaming capabilities. OBS Studio is highly flexible and suitable for both beginners and advanced users.
- Camtasia: Camtasia is a comprehensive screen recording and video editing software. It provides an intuitive user interface, advanced editing tools, and a library of pre-built assets to enhance your recordings. Camtasia is renowned for its ease of use and is popular among content creators, educators, and professionals.
- Bandicam: Bandicam is a lightweight screen recording software that offers high-quality video capture and low system resource usage. It supports both screen recording and game recording, with features like real-time drawing, scheduled recording, and hardware-accelerated video encoding.
- Snagit: Snagit is a versatile screen capture and recording tool that provides a simple and intuitive interface. It offers various capture modes, including full-screen recording, region capture, scrolling capture, and webcam recording. Snagit also includes an array of editing tools to enhance your recordings.
These are just a few examples of popular screen recording software, each with its own unique strengths and features. When comparing software, consider factors such as ease of use, editing capabilities, supported output formats, system requirements, and your specific recording needs.
Additionally, it’s worth exploring the free trial versions or demo versions of these software options to ensure they meet your expectations before making a purchase decision. Reading user reviews, watching tutorial videos, and seeking recommendations from trusted sources can also provide valuable insights.
Remember that the “best” screen recording software ultimately depends on your individual requirements, preferences, and budget. Take the time to assess different options and choose the software that aligns with your specific needs.
Now that we’ve compared popular screen recording software, let’s move on to the step-by-step guides for recording your screen using the built-in Windows screen recorder and third-party software.
Step-by-Step Guide: Recording Your Screen with Built-in Windows Screen Recorder
If you’re using a Windows PC, you can take advantage of the built-in screen recording tool called the ‘Game Bar’ to capture your screen. Follow these steps to record your screen using the built-in Windows screen recorder:
- Open the Game Bar: Press the “Windows key + G” on your keyboard to open the Game Bar overlay on your screen.
- Verify Game Bar settings: Before you start recording, ensure that the Game Bar has the desired settings. Click on the “Settings” icon in the Game Bar overlay and adjust options like audio recording, recording quality, and keyboard shortcuts.
- Start recording: Click on the red “Record” button in the Game Bar overlay or use the keyboard shortcut “Windows key + Alt + R” to start the recording. There will be a brief countdown before the actual recording starts.
- Manage recording: While recording, you can access various controls through the Game Bar overlay. You can pause and resume the recording, take screenshots, control audio settings, and more.
- Finish and save the recording: Once you’re done recording, click on the square “Stop” button in the Game Bar overlay or use the keyboard shortcut “Windows key + Alt + R” again. The recording will be automatically saved to your designated folder.
The built-in Windows screen recorder provides a convenient and accessible way to capture your screen on a Windows PC. However, keep in mind that it offers limited features compared to dedicated screen recording software. If you need more advanced options like video editing or customization, you may want to explore third-party screen recording software.
Now that you know how to record your screen using the built-in Windows tool, let’s move on to the next section, which will guide you through step-by-step instructions for recording your screen with third-party software.
Step-by-Step Guide: Recording Your Screen with Third-Party Software
If you prefer more advanced features and customization options for your screen recording, using third-party software is a great option. Follow these steps to record your screen using third-party screen recording software:
- Choose and install screen recording software: Research and select the third-party screen recording software that best suits your needs. Download the software from the official website and follow the installation instructions provided.
- Launch the software: Open the screen recording software on your computer. Take a moment to familiarize yourself with the user interface and available recording options.
- Configure recording settings: Before you start recording, adjust the settings according to your preferences. This may include selecting the recording area, setting audio input sources, adjusting video quality settings, and choosing hotkeys for starting and stopping the recording.
- Start recording: When you’re ready, click on the “Record” button or use the designated hotkey to begin the screen recording. Some software may allow you to select a specific area or window to record.
- Manage recording options: While recording, keep an eye on the controls provided by the software. You may have options to pause and resume the recording, capture screenshots, enable webcam overlay, or include system sounds alongside the screen capture.
- Finish and save the recording: When you’ve completed the recording, click on the “Stop” button or use the designated hotkey to end the recording session. The software will prompt you to save the recording to a specific location on your computer.
Third-party screen recording software offers a wide range of features such as video editing, real-time annotations, and customization options. Take advantage of these additional features to enhance your screen recordings and create professional-quality videos.
Remember to explore the software’s documentation or user guides to familiarize yourself with advanced features and functionalities. This will help you make the most of the software and create engaging and high-quality screen recordings.
Now that you’ve learned how to record your screen with third-party software, you have the tools to capture your screen with advanced features and customization options. In the next section, we’ll provide you with some tips for successful screen recording.
Tips for Successful Screen Recording
To ensure your screen recording sessions are successful and yield high-quality results, consider the following tips:
- Plan your recording: Prepare an outline or script before you start recording. This will help you stay organized and deliver a clear and concise narration or explanation during the recording.
- Use a clean and clutter-free desktop: Close any unnecessary applications, files, or browser tabs on your desktop to keep the recording area clean and distraction-free. This will enhance the visual focus on the content you’re capturing.
- Optimize your recording area: If you’re recording a specific application, make sure it’s properly sized and positioned on your screen. This will ensure that the important elements are visible and easily understandable to viewers.
- Check your audio setup: Test your microphone and audio settings before starting the recording. Ensure that your voice is clear and audible, and adjust the microphone input levels if necessary.
- Consider using a headset or external microphone: To minimize background noise and improve audio quality, using a headset or an external microphone can greatly enhance your recordings.
- Take breaks during long recordings: If you’re planning to record for an extended period of time, take short breaks to avoid fatigue. This will help you maintain focus and deliver a consistent performance throughout the recording.
- Preview and edit your recordings: After completing a screen recording, review the footage and make necessary edits to remove any mistakes or unwanted sections. This will ensure that the final video is polished and delivers the intended message effectively.
- Save your recordings in a suitable format: Choose an appropriate file format and resolution for your recordings, considering factors such as the purpose of the recording and the compatibility with the intended audience or platform.
- Backup your recordings: It’s essential to regularly back up your screen recordings to avoid accidental loss or corruption of files. Consider saving a copy of the recordings to an external storage device or cloud storage for added security.
By following these tips, you can maximize the effectiveness and quality of your screen recordings. Remember that practice makes perfect, so don’t be discouraged if your initial recordings aren’t flawless. With each recording, you’ll gain more experience and improve your skills.
In the next section, we’ll discuss common screen recording issues and provide troubleshooting tips to help you overcome them.
Troubleshooting Common Screen Recording Issues
While screen recording can be a straightforward process, it’s not uncommon to encounter some technical challenges along the way. Here are some common screen recording issues and troubleshooting tips to help you overcome them:
- Low frame rate or choppy recording: If your screen recording appears laggy or choppy, try reducing the video quality settings or closing any resource-intensive applications running in the background. Updating your graphics drivers or using hardware acceleration options provided by your recording software may also help improve performance.
- No audio in the recording: If you’re not able to capture audio during the screen recording, ensure that your audio input device is properly connected and selected in the recording software settings. Additionally, check your computer’s audio settings to make sure nothing is muted or set to a very low volume.
- Inconsistent audio levels: If your screen recording has inconsistent audio levels, consider using a headset or an external microphone to ensure consistent audio quality. You can also adjust the microphone input levels in the recording software or use audio editing tools to normalize the audio levels during post-production.
- Recording area not capturing everything: If your recording area is not capturing the entire screen or specific elements, double-check that you have selected the correct recording area in your screen recording software. Some software tools may offer options to adjust the recording area or provide additional settings to capture specific windows or applications.
- File size too large: If your screen recordings are resulting in very large file sizes, try reducing the video quality settings or adjusting the output format. Many screen recording software tools allow you to specify the output format and compression settings to optimize the file size without compromising too much on the quality.
- Recording freezes or crashes: If your screen recording software freezes or crashes during the recording, make sure you’re running the latest version of the software and that your computer meets the minimum system requirements. Closing any unnecessary programs running in the background and freeing up system resources can also help prevent recording issues.
If you’re experiencing persistent issues with screen recording, it’s recommended to consult the documentation or support resources provided by your chosen screen recording software. Many software developers offer troubleshooting guides or have active user communities where you can seek assistance and find solutions to specific problems.
With a bit of patience and troubleshooting, you can overcome common screen recording issues and ensure smooth and successful recordings. In the final section of this article, we’ll conclude with a summary of the key points discussed.
Conclusion
Screen recording is a valuable tool that allows you to capture your computer screen’s activities for various purposes. Whether you’re creating tutorials, sharing gameplay highlights, delivering presentations, or documenting processes, screen recording can significantly enhance your productivity, communication, and content creation.
In this article, we discussed two main options for screen recording on a PC: using the built-in Windows screen recorder and utilizing third-party screen recording software. We provided step-by-step guides for each method and compared popular screen recording software options, highlighting their unique features and capabilities.
Additionally, we shared tips for successful screen recording, such as planning your recording, optimizing your setup, considering audio quality, and exploring different recording and editing options to achieve the best results.
We also addressed common screen recording issues and provided troubleshooting tips to help overcome challenges like low frame rates, audio problems, inconsistent recording areas, large file sizes, and recording freezes or crashes.
With the knowledge and tools gained from this article, you can confidently embark on your screen recording journey. Remember, practice and experimentation are key to mastering the art of screen recording. Whether you’re a beginner or a seasoned pro, continuous learning and improvement will enhance the quality and impact of your screen recordings.
So, go ahead and start capturing your screen, unleash your creativity, and share your knowledge and experiences with the world. Happy recording!