Introduction
Welcome to the world of overclocking! In this article, we will explore the concept of overclocking and discuss how to disable it. Overclocking has gained popularity among computer enthusiasts and gamers, as it can potentially boost the performance of the graphics processing unit (GPU).
Before we dive into the details of disabling overclocking, let’s first understand what overclocking actually means. In simple terms, overclocking refers to the practice of increasing the clock speed of a computer component beyond its default values. This is typically done in order to achieve higher performance levels and better gaming experiences.
However, like any other technological endeavor, overclocking has its pros and cons. On the positive side, overclocking can lead to significant performance improvements, allowing users to squeeze more power out of their GPUs. This can result in smoother gameplay, faster rendering times, and improved overall system responsiveness.
But before you rush to overclock your GPU, it’s important to consider the potential downsides as well. Overclocking can generate more heat, potentially leading to higher temperatures and increased power consumption. If not done correctly, it can also cause instability, crashes, or even permanent damage to your GPU.
There are various reasons why you may want to disable overclocking. Perhaps you have encountered stability issues or system crashes after overclocking your GPU. Maybe you’re experiencing excessive heat or power consumption, or you simply want to revert to the default clock speeds for peace of mind. Whatever the reason may be, we’ve got you covered.
In the following sections, we will explore how to disable overclocking on different operating systems, including Windows, Mac, and Linux. Whether you’re a casual user or an advanced tech enthusiast, these step-by-step instructions will help you safely disable overclocking and restore your GPU to its default settings.
Now that we’ve covered the basics, let’s dive into the details of how to disable overclocking on different platforms. Whether you’re a Windows user, Mac user, or Linux user, we’ve got step-by-step instructions to help you through the process. So, let’s get started!
What is Overclocking?
Overclocking is the process of increasing the clock speed of a computer component, such as a graphics processing unit (GPU), beyond its default values. The clock speed refers to the frequency at which a component operates, measured in Hertz (Hz).
In the context of overclocking a GPU, the clock speed refers to how quickly the GPU’s cores and memory can process and render graphics. By increasing the clock speed, users aim to achieve higher performance and faster processing times, leading to improved gaming experiences and smoother visuals.
Overclocking is particularly popular among computer enthusiasts and gamers who constantly seek maximum performance from their systems. By overclocking their GPUs, these users can push their hardware beyond the manufacturer’s specifications and unlock additional processing power.
However, it is important to note that overclocking is not without risks. When you increase the clock speed of a component, it generates more heat, leading to higher temperatures. This increased heat can cause stability issues, system crashes, or even permanent damage to the GPU if not managed carefully.
To successfully overclock a GPU, users often need to adjust various parameters, such as core voltage, core clock speed, and memory clock speed. These adjustments are typically made through software utilities provided by the GPU manufacturer or third-party overclocking tools.
While overclocking can yield significant performance improvements, it is crucial to strike a balance between the desired performance gains and the potential risks involved. Users need to carefully monitor the temperatures and stability of their GPUs to ensure that they do not exceed safe limits.
Overclocking is not limited to just GPUs; it can also be applied to other computer components such as CPUs (central processing units) and RAM (random access memory). However, in this article, we will focus specifically on GPU overclocking and how to disable it if necessary.
Now that you have a better understanding of what overclocking is all about, let’s move on to the next section, where we will explore the pros and cons of overclocking. Understanding these benefits and drawbacks will help you make an informed decision regarding whether to overclock your GPU or not.
The Pros and Cons of Overclocking
Overclocking your GPU can yield both advantages and disadvantages. It is important to weigh the pros and cons before deciding whether to overclock your GPU or stick with the default settings. Let’s explore the benefits and drawbacks of overclocking:
Pros of Overclocking:
- Increased Performance: One of the main reasons people overclock their GPUs is to achieve higher performance levels. By increasing the clock speed, you can potentially experience faster rendering times, smoother gameplay, and improved overall system responsiveness.
- Improved Gaming Experience: Overclocking can lead to a better gaming experience, allowing you to run graphics-intensive games at higher frame rates and with enhanced visual quality. This can make your gaming sessions more immersive and enjoyable.
- Cost-Effective Performance Boost: Overclocking can provide a performance boost without having to invest in new hardware. By pushing your GPU beyond its default settings, you can unlock additional processing power and get more out of your existing hardware.
- Customizability: Overclocking allows you to tweak the clock speeds and other parameters to tailor the performance of your GPU to your specific needs. This level of customization can be appealing to tech-savvy users who enjoy fine-tuning their systems.
- Competitive Advantage: For gamers who participate in eSports or competitive gaming, overclocking can give them an edge over their opponents. The increased performance and responsiveness can help them react faster and make precise movements, potentially leading to better gaming outcomes.
Cons of Overclocking:
- Increased Heat and Power Consumption: Overclocking generates more heat, which can lead to higher GPU temperatures. This can result in increased power consumption and potentially cause stability issues or system crashes if not managed properly.
- Reduced GPU Lifespan: Overclocking puts additional stress on your GPU, which may lead to a shortened lifespan. Exposing your GPU to higher temperatures and voltages can contribute to degradation over time, reducing its overall longevity.
- Potential Instability: Overclocking can cause system instability, resulting in crashes or freezes. Achieving stable overclocks requires careful monitoring and adjustments, as pushing your hardware to its limit can sometimes result in unpredictable behavior.
- No Manufacturer Support: Overclocking your GPU typically voids the manufacturer’s warranty, as it involves operating the component outside its recommended specifications. This means you may not be eligible for support or replacement in case of hardware failures.
- Compatibility and Compatibility: Not all GPUs are created equal, and not all GPUs can be overclocked to the same extent. Some GPUs simply may not be capable of achieving stable overclocks, and attempting to do so could lead to undesirable results or even damage the GPU.
By considering these pros and cons, you can make an informed decision about whether overclocking is the right choice for you. If you have chosen to disable overclocking or need to for any reason, continue reading to learn how to effectively disable overclocking on your specific operating system.
Reasons to Disable Overclocking
While overclocking can offer performance benefits, there are several situations where you may want to disable overclocking and revert your GPU to its default settings. Let’s explore some of the reasons why you might choose to disable overclocking:
1. Stability Issues:
One common reason to disable overclocking is if you are experiencing stability issues with your system. Overclocking can put additional stress on your GPU and other components, which may lead to crashes, freezes, or unexpected system shut downs. If you are encountering frequent stability issues after overclocking, it is advisable to disable overclocking and revert to the default settings to restore stability.
2. Excessive Heat and Power Consumption:
Overclocking increases the clock speed of your GPU, which in turn generates more heat. The increased heat can lead to higher GPU temperatures, potentially causing thermal throttling and compromising system performance. Additionally, overclocking can also increase power consumption, resulting in higher energy bills. If you find that your GPU is running too hot or consuming excessive power, disabling overclocking can help alleviate these issues.
3. Compatibility and Incompatibility:
Not all GPUs are created equal, and not all GPUs are capable of achieving stable overclocks. Some GPUs may have limitations due to their design, power delivery, or silicon quality. If you are unable to achieve stable overclocking results or are experiencing artifacts, graphical glitches, or system instability, it may be necessary to disable overclocking and return to the default settings.
4. Warranty Considerations:
Overclocking your GPU usually voids the manufacturer’s warranty, as it involves operating the component beyond its recommended specifications. If your GPU develops a hardware issue and you need to seek warranty support or replacement, you may be denied service if it is determined that overclocking caused the problem. Disabling overclocking ensures that your GPU remains within the manufacturer’s specifications and maintains your eligibility for warranty support.
5. Personal Preference:
Finally, some users may choose to disable overclocking simply due to personal preference or peace of mind. Overclocking can introduce additional complexities and risks, and some users prefer to keep their systems running at the default settings to minimize any potential issues. If you fall into this category and have decided overclocking is not for you, disabling overclocking will allow you to use your GPU without pushing it beyond its intended capabilities.
By considering these reasons, you can decide whether disabling overclocking is the right choice for you. If you have identified a need to disable overclocking on your GPU, the next sections will guide you through the step-by-step process on various operating systems, including Windows, Mac, and Linux.
How to Disable Overclocking on Windows
If you have overclocked your GPU on a Windows operating system and would like to disable the overclocking settings, follow these steps:
Step 1: Open the Graphics Control Panel
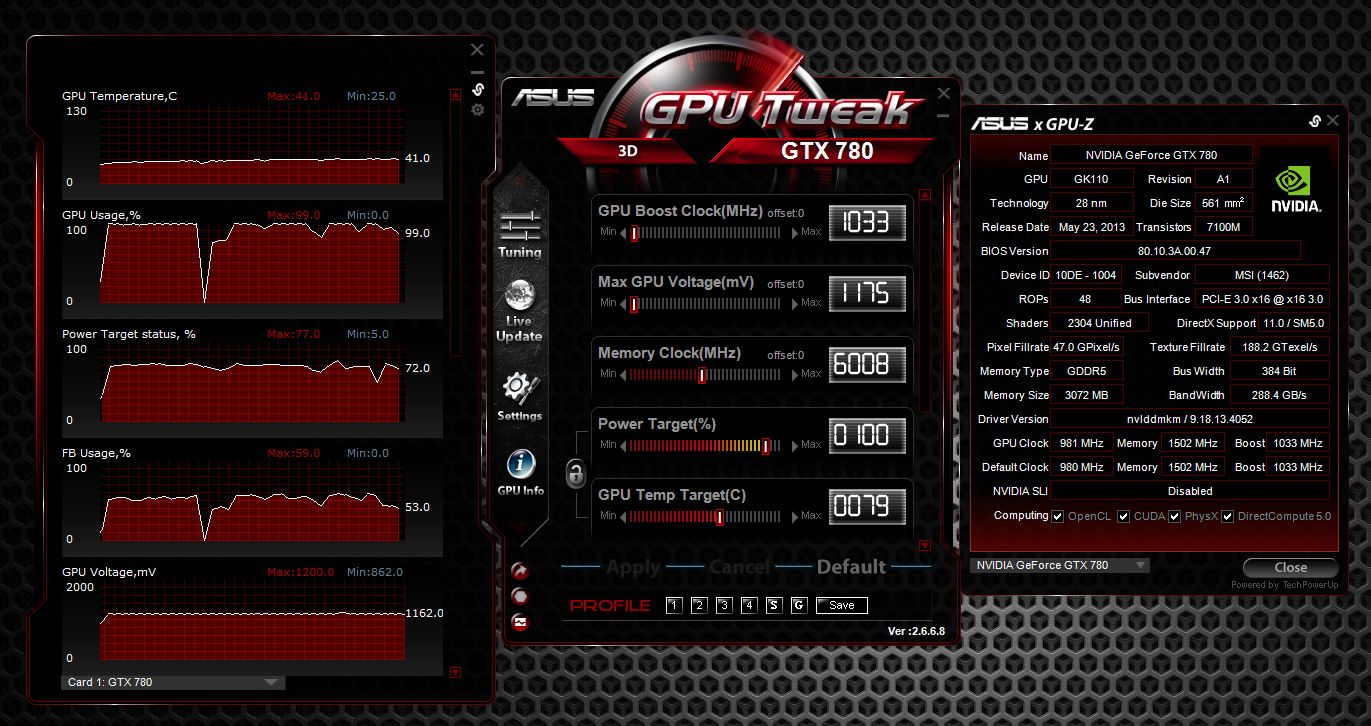
On Windows, you can access the graphics control panel through the GPU manufacturer’s software. It may be Nvidia Control Panel for Nvidia GPUs or AMD Radeon Settings for AMD GPUs. Right-click on your desktop and select the appropriate option to open the graphics control panel.
Step 2: Navigate to the Overclocking Settings
Once you have opened the graphics control panel, navigate to the overclocking settings. These settings may be located under Performance, Power, or a similar category. Look for options related to GPU overclocking, such as core clock speed or voltage adjustments.
Step 3: Reset or Disable the Overclocking Settings
In the overclocking settings, you will find options to reset or disable the overclocking settings. Choose the option that restores your GPU to its default settings and disables any active overclocking. This action will revert your GPU to its original clock speeds and voltage values.
Step 4: Apply the Changes and Restart
After resetting or disabling the overclocking settings, apply the changes and restart your computer. This ensures that the changes take effect and your GPU is operating at its default clock speeds.
Step 5: Verify the Disabling of Overclocking
To ensure that the overclocking has been successfully disabled, you can use monitoring tools or benchmarking software to check the clock speeds and temperatures of your GPU. These tools will display the current operating frequencies, and you should see that they have reverted to the manufacturer’s default values.
By following these steps, you can effectively disable overclocking on your Windows system and restore your GPU to its default settings. If you are unsure about any of these steps or encounter any issues, refer to the documentation provided with your GPU or seek assistance from the GPU manufacturer’s support resources.
How to Disable Overclocking on Mac
If you have overclocked your GPU on a Mac and want to disable the overclocking settings, follow the steps below:
Step 1: Open the Graphics Control Panel
On a Mac, you can access the graphics control panel through the System Preferences. Click on the Apple menu in the top left corner of your screen and select “System Preferences” from the dropdown menu. In the System Preferences window, click on “Displays” or “Graphics” to access the graphics control panel.
Step 2: Access the Graphics Settings
Once you have opened the graphics control panel, navigate to the settings related to your GPU. Look for options that allow you to adjust the GPU clock speed or voltage. This may be under the Display, Graphics, or Energy Saver sections, depending on your specific Mac model and operating system version.
Step 3: Disable the Overclocking Settings
In the graphics settings, you will need to disable the overclocking settings. Look for checkboxes, sliders, or toggle switches that control the GPU clock speed or voltage. Turn off or set these settings to their default values to disable the overclocking.
Step 4: Apply the Changes
After disabling the overclocking settings, apply the changes by clicking on the “Apply” or “OK” button in the graphics control panel. This will save the new settings and ensure that your GPU is operating at its default clock speed.
Step 5: Restart Your Mac
To ensure that the changes take effect, restart your Mac. This will ensure that the GPU settings are updated and your GPU is running at its default clock speed and voltage.
Step 6: Verify the Disabling of Overclocking
You can verify the successful disabling of overclocking by using monitoring tools or benchmarking software. Such tools will display the current GPU clock speeds and temperatures. Confirm that the clock speeds have reverted to the default values specified by the GPU manufacturer.
By following these steps, you can effectively disable overclocking on your Mac and restore your GPU to its default settings. If you encounter any difficulties or have questions specific to your Mac model, refer to the documentation provided by Apple or seek assistance from Apple Support resources.
How to Disable Overclocking on Linux
If you have overclocked your GPU on a Linux system and want to disable the overclocking settings, follow the steps below:
Step 1: Open the Terminal
To disable overclocking on Linux, you will need to use various command-line tools. Open the terminal on your Linux system by searching for “Terminal” in the applications menu or by using the keyboard shortcut Ctrl+Alt+T.
Step 2: Install and Configure the Graphics Control Software
Depending on your Linux distribution and GPU manufacturer, you will need to install and configure the appropriate graphics control software. This software may be specific to Nvidia, AMD, or Intel GPUs. Consult the documentation provided by your GPU manufacturer or refer to community resources to identify the appropriate software and installation instructions for your system.
Step 3: Access the GPU Control Settings
Once the graphics control software is installed and configured, you can access the GPU control settings through the terminal. Use the appropriate command or utility provided by the software to access the GPU settings.
Step 4: Disable Overclocking
In the GPU control settings, look for options that allow you to adjust the GPU clock speed or voltage. Disable these options or set them to their default values to disable the overclocking. The specific commands or steps required to do this will depend on the GPU control software you are using.
Step 5: Apply the Changes
After disabling the overclocking settings, apply the changes using the appropriate command or option provided by the GPU control software. This will save the new settings and ensure that your GPU is operating at its default clock speed.
Step 6: Restart Your System
To ensure that the changes take effect, restart your Linux system. This will ensure that the GPU settings are updated, and your GPU is running at its default clock speed and voltage.
Step 7: Verify the Disabling of Overclocking
To verify the successful disabling of overclocking, you can use monitoring tools or benchmarking software specific to Linux. These tools will display the current GPU clock speeds and temperatures. Confirm that the clock speeds have reverted to the default values specified by the GPU manufacturer.
By following these steps, you can effectively disable overclocking on your Linux system and restore your GPU to its default settings. If you encounter any difficulties or have questions specific to your Linux distribution or GPU model, refer to the documentation provided by your GPU manufacturer or seek assistance from the Linux community resources.
Ensuring Stable Performance without Overclocking
Overclocking can provide a significant performance boost, but it comes with potential risks. If you choose not to overclock your GPU, there are several measures you can take to ensure stable performance without overclocking. Let’s explore these measures:
1. Keep Your System Cool:
Maintaining proper cooling is crucial to ensure stable performance. Make sure your computer case has adequate airflow, and consider installing additional case fans or using liquid cooling solutions if necessary. Clean your GPU and CPU heatsinks regularly to prevent dust buildup, which can hinder heat dissipation and lead to overheating. Additionally, monitor your system temperatures using software utilities or BIOS settings and take necessary actions if temperatures exceed recommended limits.
2. Optimize Your GPU Settings:
While overclocking can provide performance gains, optimizing your GPU settings within the manufacturer’s recommended limits can also enhance performance. Use software utilities provided by the GPU manufacturer to adjust settings such as fan speed, power limits, and GPU boost clocks. This allows you to maximize performance without overclocking beyond the manufacturer’s specifications.
3. Update Your GPU Drivers:
Regularly updating your GPU drivers is vital to ensure stable performance. GPU driver updates often include bug fixes, stability improvements, and optimizations for the latest games and applications. Visit the website of your GPU manufacturer to download and install the latest drivers compatible with your operating system. Keeping your drivers up to date can help resolve compatibility issues and ensure your GPU operates smoothly and reliably.
4. Optimize In-Game Settings:
Adjusting in-game settings can significantly impact performance without resorting to overclocking. Experiment with different settings, such as resolution, texture quality, anti-aliasing, and shadows, to find a balance between visual quality and performance. Lowering these settings can improve frame rates and overall stability, ensuring smooth gameplay without the need for overclocking.
5. Clean Up Your System:
Regularly clean up your system to remove unnecessary files, programs, and background processes that may consume system resources. Use disk cleanup utilities to free up storage space, uninstall unused applications, and disable unnecessary startup programs. This optimization can improve performance by reducing the load on your system’s resources.
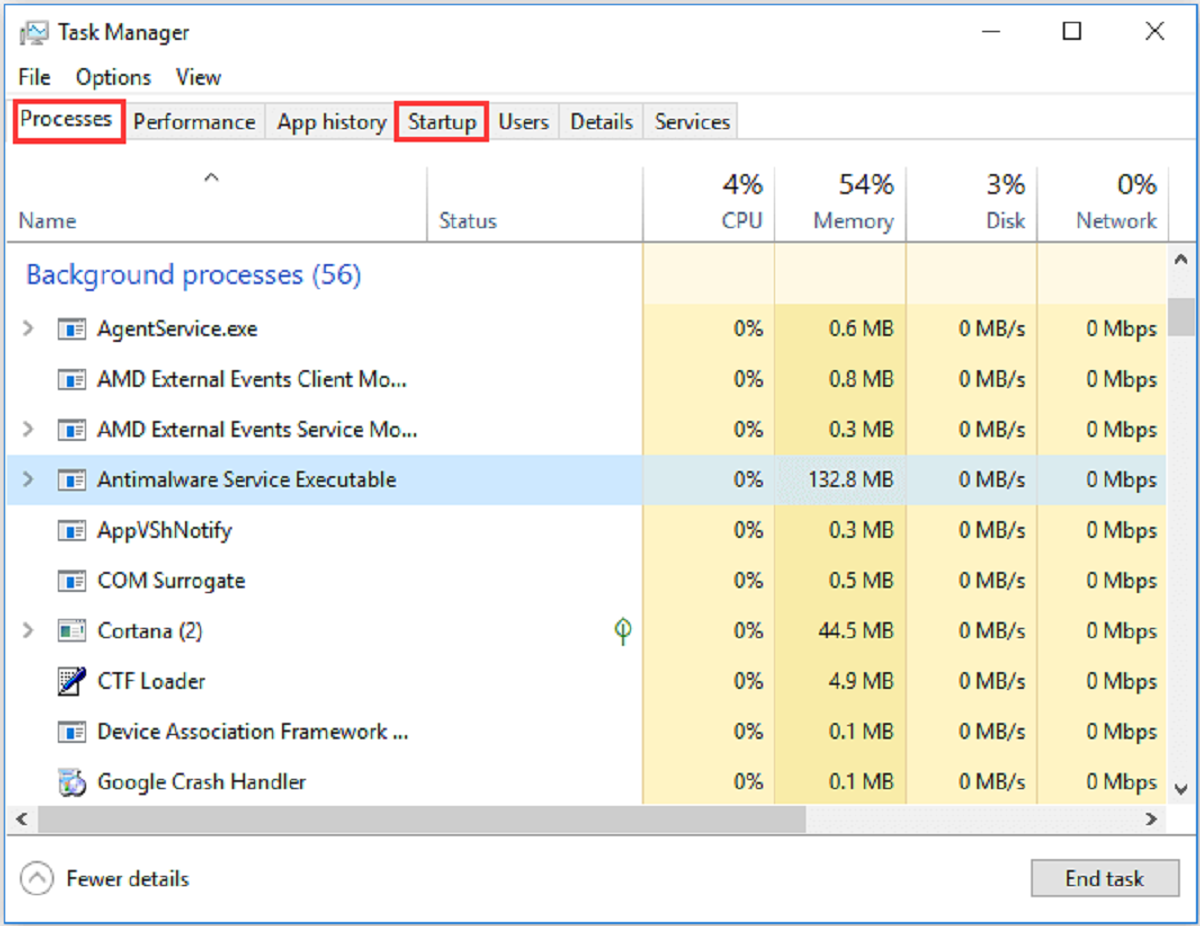
6. Monitor and Manage Resource Usage:
Use task manager or system monitoring tools to monitor resource usage, including CPU, memory, and GPU utilization. Identify and close any unnecessary programs or processes consuming system resources. By effectively managing resource allocation, you can ensure that your GPU is not being overloaded and can operate at optimal performance levels without the need for overclocking.
By implementing these measures, you can maintain stable performance on your system without resorting to overclocking. Remember, stability and reliability are crucial for an optimal computing experience, and it’s essential to prioritize these factors when considering performance enhancements.
Conclusion
Overclocking can be an enticing option for boosting the performance of your GPU, but it also comes with risks such as instability, increased heat, and potential hardware damage. Therefore, it is essential to weigh the pros and cons before deciding whether to overclock or not.
In this article, we discussed the concept of overclocking and explored the reasons why you might want to disable it. We also provided step-by-step instructions on how to disable overclocking on different operating systems, including Windows, Mac, and Linux.
Disabling overclocking can be necessary if you are experiencing stability issues, excessive heat or power consumption, compatibility problems, or if you simply prefer to run your GPU at its default settings. By following the instructions specific to your operating system, you can effectively disable overclocking and restore stability to your system.
If you choose not to overclock your GPU, there are alternative measures you can take to ensure stable performance. These include maintaining proper cooling, optimizing GPU settings, keeping drivers updated, optimizing in-game settings, cleaning up your system, and monitoring resource usage.
Ultimately, the decision to overclock or disable overclocking depends on your specific needs and preferences. It is important to always prioritize stability and reliability when making performance-enhancing choices for your GPU.
Remember to consult the documentation provided by your GPU manufacturer and utilize support resources if you encounter any difficulties or have questions specific to your hardware or operating system.
By considering the information provided in this article and making informed decisions, you can ensure the optimal performance of your GPU while keeping your system stable and reliable.