Introduction
Are you looking to crop a video on your Android device? Whether you want to remove unwanted borders, resize the video, or focus on a particular area, cropping can help you achieve your desired result. Fortunately, there are multiple options available to crop videos on Android.
In this article, we will explore two methods to crop a video on Android. The first option is using the inbuilt video editor that comes with some Android devices. This option is convenient and does not require any additional downloads. The second option is using a third-party video editing app, which may offer more advanced features and customization options.
Cropping a video can be useful in various situations. Maybe you want to remove unnecessary parts from a video you recorded, or you want to create a social media post with a specific aspect ratio. Whatever your reason is, let’s dive into the methods and learn how to crop a video on Android.
Option 1: Using the Inbuilt Video Editor
The first option to crop a video on Android is to use the inbuilt video editor that comes pre-installed on some Android devices. This option is convenient as you don’t need to download any additional apps or tools. Here’s how you can use the inbuilt video editor to crop your video:
- Open the Gallery or Photos app on your Android device and locate the video you want to crop.
- Tap on the video to open it, and you should see various editing options available at the bottom of the screen.
- Look for the editing option that allows you to trim or crop the video. The icon may vary depending on your device and its software version.
- Once you find the cropping option, select it, and you will be presented with a frame or box that represents the area to be cropped.
- Drag the edges of the box to adjust the size and position according to your preference. You can also pinch or zoom in/out to get a closer look at the video while cropping.
- After making the desired adjustments, save the cropped video. The inbuilt editor will create a new version of the video with the cropped changes, while keeping the original video intact.
Please note that the availability and functionality of the inbuilt video editor may vary depending on your device’s brand, model, and software version. Some devices may have a more comprehensive video editing tool, offering additional features like filters, transitions, and text overlay. Explore the options available on your device’s video editor to make the most out of the cropping feature.
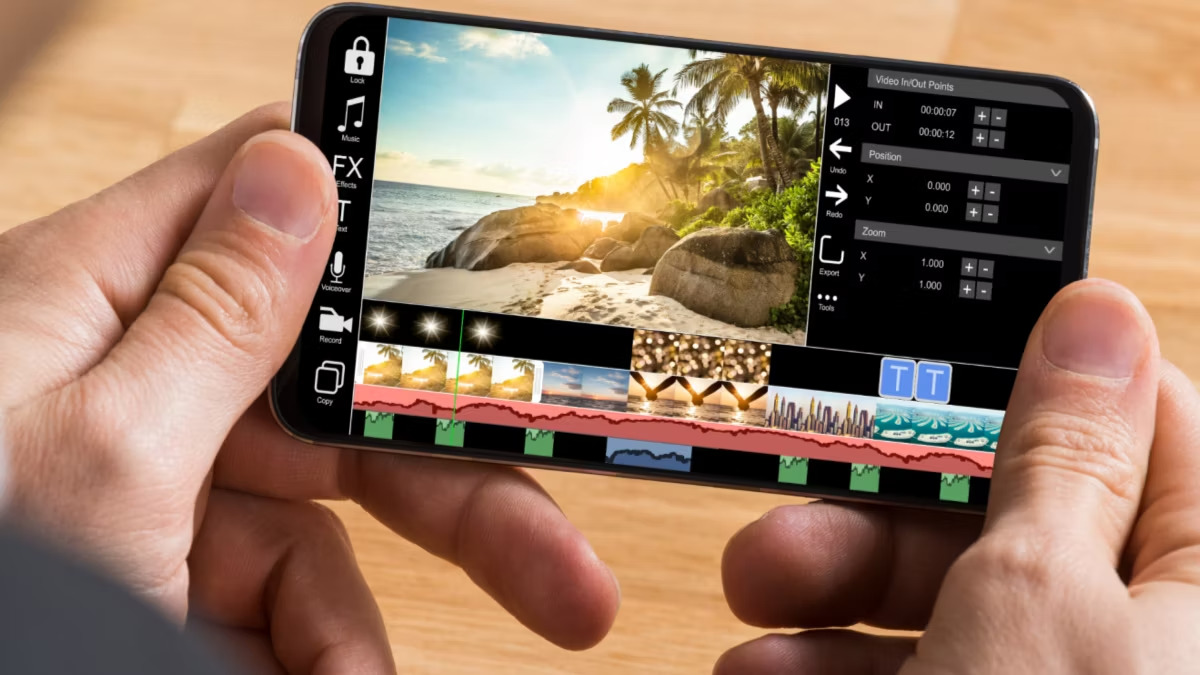
Option 2: Using a Third-Party Video Editing App
If your Android device does not come with an inbuilt video editor or if you’re looking for more advanced features and customization options, using a third-party video editing app is a great alternative. There are several video editing apps available on the Google Play Store that offer powerful editing capabilities, including the ability to crop videos. Here’s how you can use a third-party video editing app to crop your video on Android:
- Open the Google Play Store on your Android device and search for a video editing app that suits your needs. Some popular options include Adobe Premiere Rush, FilmoraGo, and PowerDirector.
- Install the chosen app on your device and launch it.
- Once inside the app, select the option to create a new project or import an existing video.
- Locate and import the video that you want to crop.
- Look for the crop tool or option within the video editing app’s interface. It is usually represented by a square or rectangle icon.
- Tap on the crop tool to enter the cropping mode. A bounding box or frame will appear on the video, indicating the area to be cropped.
- Adjust the size and position of the bounding box by dragging the edges or corners. You can also use pinch or zoom gestures to get a precise crop.
- Once you are satisfied with the cropping, save or export the video with the desired changes. The app will process the video and create a new version with the cropped area.
Using a third-party video editing app gives you more flexibility in terms of editing options, effects, transitions, and overall creative control. You can experiment with different filters, add text or music, and apply various enhancements to make your video truly stand out.
Remember to explore the features and tools offered by the chosen video editing app to take full advantage of its capabilities. Each app may have its unique interface and workflow, so take your time to familiarize yourself with the app’s options and unleash your creativity.
Step 1: Install a Video Editing App
To begin cropping a video on your Android device, you need to install a video editing app from the Google Play Store. There is a wide range of video editing apps available, each with its unique set of features and capabilities. Follow these steps to install a video editing app on your Android device:
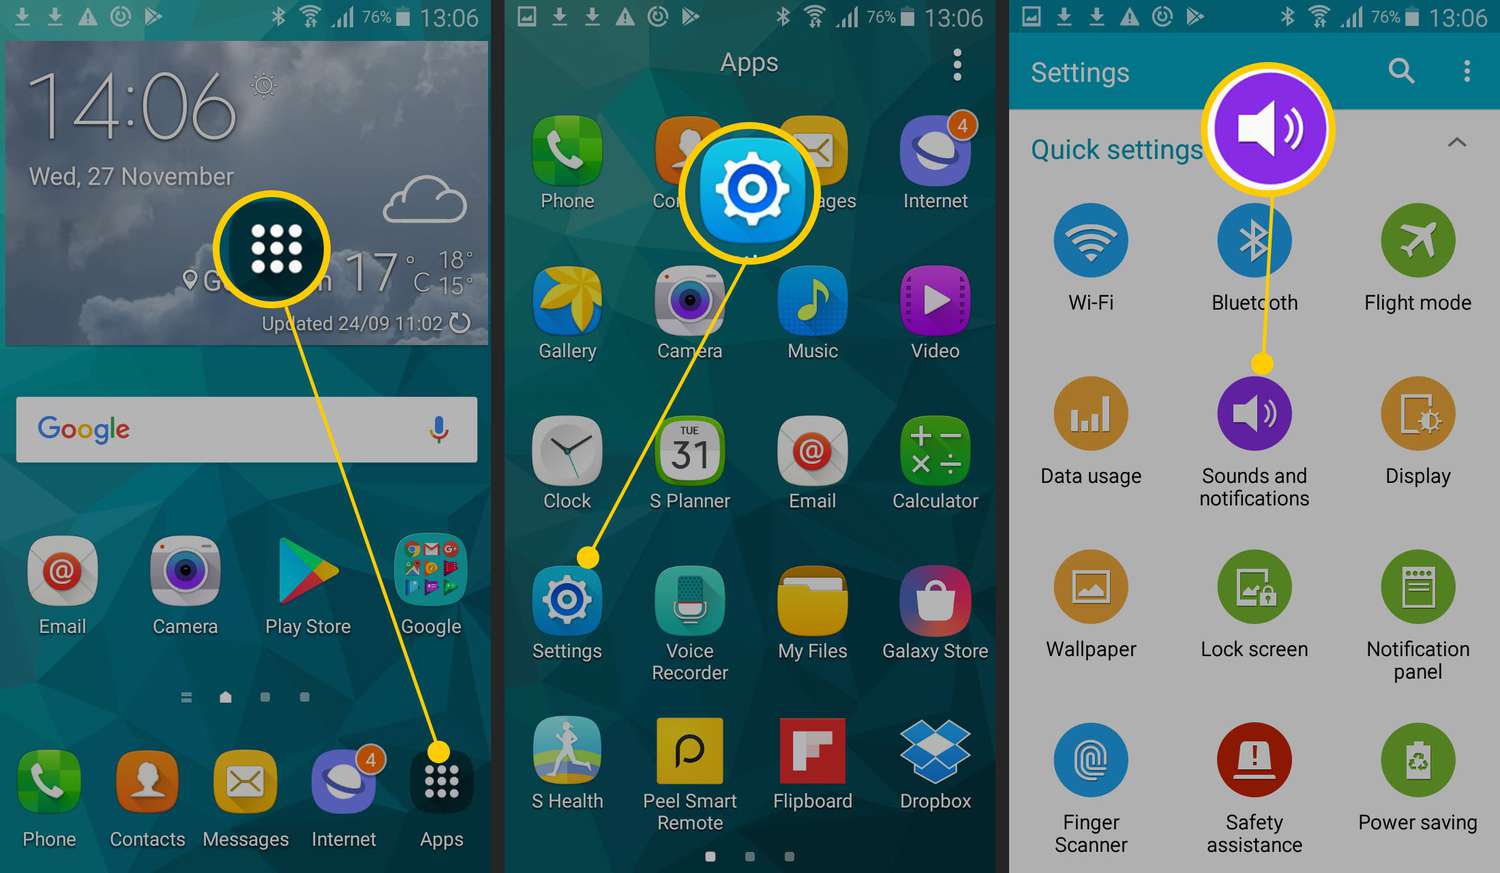
- Open the Google Play Store on your Android device by tapping on its icon in the app drawer or home screen.
- Once inside the Google Play Store, you can either search for a video editing app by typing its name in the search bar or browse through the “Video Players & Editors” category to discover popular video editing apps.
- Look for apps that have high ratings and positive reviews, as this indicates their reliability and user satisfaction.
- Tap on the app you want to install to open its dedicated page on the Google Play Store.
- On the app’s page, review the app’s description, screenshots, and user reviews to get a better understanding of its features and performance.
- If you are satisfied with the app’s information, tap on the “Install” button to start the installation process.
- Wait for the installation to complete. The app will be downloaded and installed on your Android device.
- Once the installation is finished, you can open the video editing app from your app drawer or home screen.
It’s important to choose a video editing app that suits your needs and preferences. Consider factors such as the app’s user interface, editing capabilities, ease of use, and compatibility with your Android device. Selecting the right video editing app will contribute to a smooth and efficient video cropping process.
Remember to keep your Android device updated to the latest software version to ensure compatibility with the latest video editing apps available on the Google Play Store. This will help you take advantage of the newest features and improvements provided by the video editing app developers.
Step 2: Import the Video
After installing a video editing app on your Android device, the next step is to import the video you want to crop. The process may vary slightly depending on the specific video editing app you chose, but here is a general guide to help you import your video:
- Open the video editing app on your Android device by tapping on its icon in the app drawer or home screen.
- Once inside the app, look for an option that allows you to create a new project or import an existing video. This option is usually located on the app’s home screen or main menu.
- Tap on the “Import” or “Add” button to browse for the video you want to crop. You may be prompted to grant the app permission to access your device’s storage or media files.
- Navigate to the location where your video is stored. This could be in your device’s internal storage, SD card, or any other connected storage device.
- Select the video file and tap on the “Import” or “Add” button to begin importing the video into the video editing app.
- Depending on the size of the video and your device’s performance, it may take a few moments for the app to import the video. Be patient and let the app complete the import process.
- Once the video is successfully imported, you should see a thumbnail or preview of the video within the video editing app. This indicates that the video is ready for editing, including the cropping process.
By importing the video into the video editing app, you now have access to all the editing tools and features provided by the app. The next step is to select the appropriate crop tool and make the necessary adjustments to achieve the desired cropping effect on your video.
It is worth mentioning that some video editing apps may allow you to import multiple videos at once and create a montage or sequence. This can be useful if you want to edit multiple videos together or apply global editing changes to multiple videos simultaneously.
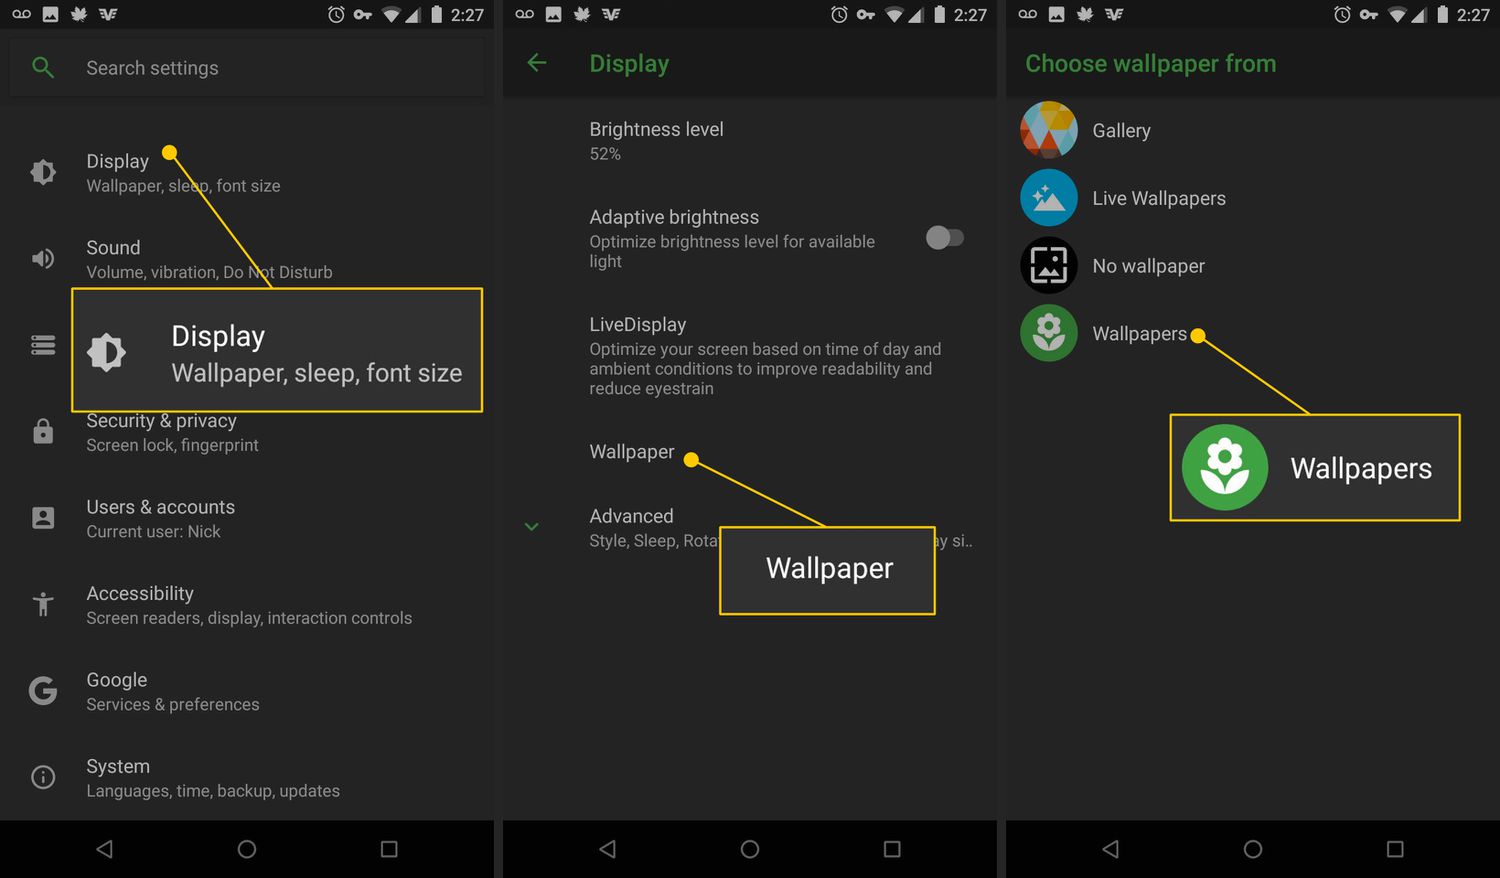
Step 3: Select the Crop Tool
Once you have imported the video into your chosen video editing app on your Android device, the next step is to select the crop tool. The crop tool allows you to define the specific area of the video that you want to keep and remove the rest. Here’s how you can select the crop tool in most video editing apps:
- Open the video editing app on your Android device by tapping on its icon in the app drawer or home screen.
- Locate the imported video within the app’s interface. It is usually displayed as a thumbnail or list item.
- Tap on the video to select it, or look for an option that allows you to enter the editing mode for the selected video.
- Once you are in the editing mode, look for a toolbox or toolbar containing various editing options and tools.
- Scan the toolbar for a crop tool icon. It is commonly represented by a square or rectangle shape.
- Tap on the crop tool icon to select it and activate the crop mode for your video.
The process of selecting the crop tool may differ slightly depending on the specific video editing app you are using. Some apps may have a dedicated “Crop” or “Edit” button that you can tap to access the crop tool directly. Others may require you to navigate through menus or editing options to find the crop tool.
As you select the crop tool, the video editing app will display a bounding box or frame on the video preview, indicating the area that will be retained after the cropping process. This allows you to see the impact of the crop in real-time and make further adjustments if needed.
Now that you have selected the crop tool, you are ready to define the specific area of the video that you want to keep. In the next step, we will discuss how to adjust the crop box to achieve the desired cropping effect on your video.
Step 4: Adjust the Crop Box
Once you have selected the crop tool in your chosen video editing app on your Android device, the next step is to adjust the crop box to define the specific area of the video that you want to keep. Here’s how you can adjust the crop box in most video editing apps:
- Look for handles or edges on the crop box. These handles allow you to resize and reposition the box to match your desired cropping area.
- To resize the crop box, tap and drag one of the handles inward or outward. Depending on the app, you may need to drag the corner handles to maintain the aspect ratio of the video while resizing.
- To reposition the crop box, tap and drag it to the desired location on the video. You can drag the box in any direction to adjust the area you want to keep.
- Some video editing apps may provide additional options to rotate the crop box or adjust the rotation of the video within the box. Look for rotation icons or options within the crop tool or toolbar.
- As you make adjustments to the crop box, the video editing app will reflect the changes in real-time. This allows you to visually evaluate the cropping effect and ensure it aligns with your desired outcome.
- Take your time to fine-tune the adjustment of the crop box. Preview the cropped video and make any necessary modifications until you are satisfied with the cropping effect.
It’s important to note that the location and functionality of the crop box adjustment handles may vary depending on the specific video editing app you are using. Some apps may provide additional customization options, such as the ability to set specific aspect ratios or apply predefined crop presets. Explore the app’s interface and settings to make the most of its crop tool features.
With the crop box properly adjusted, you have successfully defined the specific area of the video that you want to retain. In the next step, we will discuss how to crop and save the video with the desired changes.
Step 5: Crop and Save the Video
After adjusting the crop box to define the specific area of the video that you want to keep, the final step is to crop and save the video with the desired changes. Follow these steps to crop and save the video in most video editing apps on your Android device:
- Locate the option to apply the crop and save the video. This can vary depending on the video editing app you are using, but it is typically represented by a checkmark or tick icon.
- Tap on the apply or save option to initiate the cropping process. The video editing app will process the video and create a new version with the cropped area.
- Depending on the length and complexity of the video, the cropping process may take a few seconds or longer to complete. Be patient and allow the app to finish the task.
- Once the video has been successfully cropped, you will typically be prompted to choose a location to save the cropped video. You can select your device’s internal storage, an external SD card, or any other connected storage device.
- Tap on the save or export button to save the cropped video. The video editing app will process the video and save it to your specified location.
- After the video has been saved, you can usually access it from the app’s saved or exported video library. You can also find it in your device’s gallery or file manager app.
Once the video has been cropped and saved successfully, you can now use it for playback, sharing, or further editing purposes. The cropped video will only contain the specific area you defined within the crop box, removing any unnecessary parts of the original video.
Remember to review the video after cropping to ensure that the desired area is retained. If you are unsatisfied with the cropping result, you can always go back to the video editing app, reselect the video, and make further adjustments to the crop box.
Congratulations! You have successfully cropped a video on your Android device using a video editing app. Feel free to explore other editing features and unleash your creativity in transforming your videos into stunning visual creations.
Conclusion
Cropping a video on your Android device is a simple and effective way to remove unwanted borders, resize the video, or focus on a particular area. Whether you choose to use the inbuilt video editor or a third-party video editing app, the process is accessible to anyone with an Android device.
In this article, we explored two methods to crop a video on Android. The first option, using the inbuilt video editor, is a convenient choice that doesn’t require any additional downloads. The second option, using a third-party video editing app, provides more advanced features and customization options. Whichever option you choose, the steps involved are relatively straightforward and can be easily accomplished.
Remember to install a video editing app that suits your needs and preferences from the Google Play Store. Explore the features and tools offered by the app to make the most out of the cropping process. Select the appropriate crop tool and adjust the crop box to define the specific area of the video that you want to keep. Finally, crop and save the video with your desired changes.
By employing these methods and following the step-by-step instructions provided, you can successfully crop a video on your Android device. Whether you’re creating content for social media, removing unwanted portions from a home video, or enhancing the visuals of your video projects, cropping can help you achieve your desired result.
Start exploring the cropping options on your Android device today and unlock the potential to transform your videos into captivating, tailored creations. Let your creativity soar and enjoy the process of cropping videos to your precise specifications, allowing you to showcase your unique vision and make a lasting impact with your video content.