Introduction
Have you ever come across a captivating story on TikTok and wished you could save it for later? Whether it’s a funny skit, a heartwarming moment, or an inspiring message, TikTok stories often leave a lasting impression. While TikTok doesn’t offer a built-in feature to download stories directly, there are still methods to save them to your device.
In this article, we will guide you through the steps to download TikTok stories easily and conveniently. From taking screenshots to utilizing video editing apps, we’ll provide you with all the necessary information to ensure you can save your favorite TikTok stories and revisit them whenever you want.
Please note that it’s important to respect the privacy and ownership rights of others when downloading TikTok stories. Make sure you have permission from the content creator or only download stories that are available for public viewing.
Are you ready to become a pro at saving TikTok stories? Let’s dive into the process and discover how you can download and save these engaging moments!
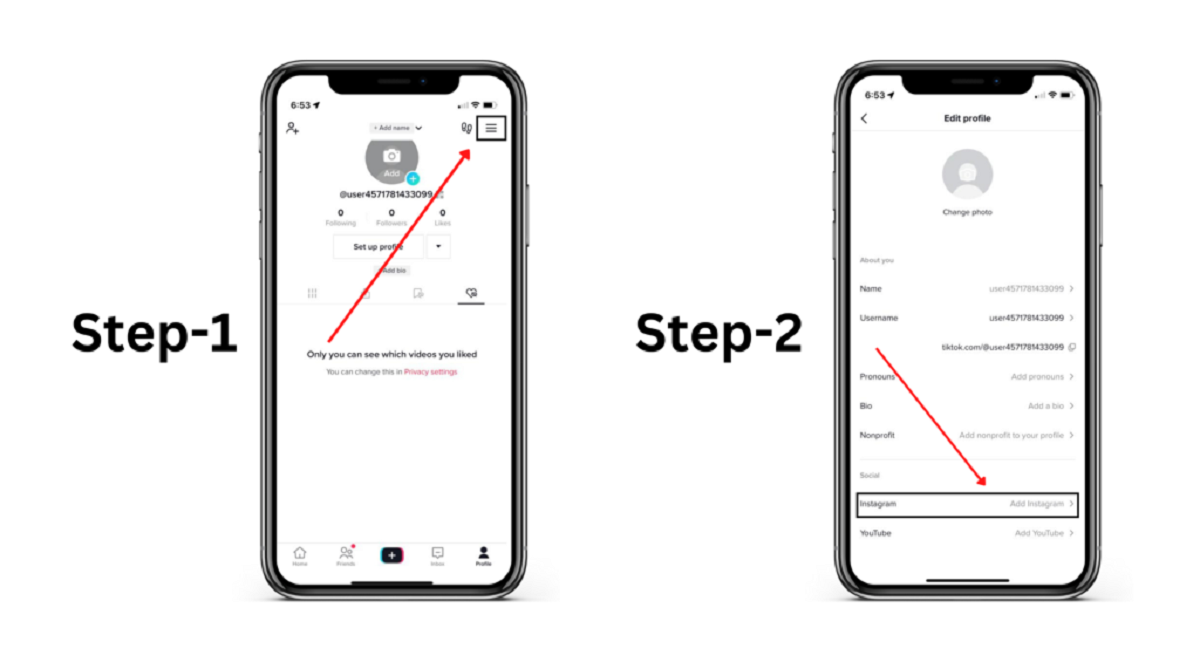
Step 1: Open the TikTok app
The first step in downloading TikTok stories is to open the TikTok app on your mobile device. Make sure you have the latest version of the app installed to access all the features and updates.
If you don’t have the TikTok app yet, you can easily download it from your device’s app store. Simply search for “TikTok” and download the official TikTok app developed by TikTok Inc.
Once you have the app installed, locate the TikTok icon on your home screen or app drawer and tap on it to open the app.
If you are prompted to log in, enter your TikTok account credentials or sign up for a new account if you don’t have one yet. Creating a TikTok account is quick and easy, requiring just a few basic details.
After successfully logging in, you will be directed to the TikTok home screen, where you can explore an endless array of entertaining videos. From viral challenges to trending dances, the TikTok app offers a wealth of content to discover and enjoy.
Now that you have the TikTok app open on your device, let’s move on to the next step and find the story that you want to download.
Step 2: Find the story you want to download
Once you have opened the TikTok app, it’s time to find the story that you wish to download. TikTok stories are typically located on the “For You” page, where you can discover popular and trending content. Here’s how you can find the story you want:
- Scroll through the “For You” page: Swipe up or down on your device’s screen to scroll through an endless stream of TikTok videos. As you explore, keep an eye out for the story you want to download.
- Enter specific keywords in the search bar: If you have a particular story in mind, you can use the search bar at the top of the app to enter relevant keywords. This will filter the content and help you find stories related to your search.
- Follow specific accounts: If you have a favorite TikTok creator whose stories you want to download, consider following their account. By doing so, their stories will be easier to find in your feed.
- Engage with the TikTok community: TikTok has an active and vibrant community of users. By liking, commenting, and interacting with videos, you can discover more content and increase the chances of finding the story you desire.
Remember that TikTok stories are ephemeral, meaning they are temporary and may disappear after a certain period. To improve your chances of finding the story you want to download, it’s best to act swiftly and regularly check for new stories on the app.
Once you’ve located the story you wish to download, it’s time to move on to the next step: opening the story and taking a screenshot.
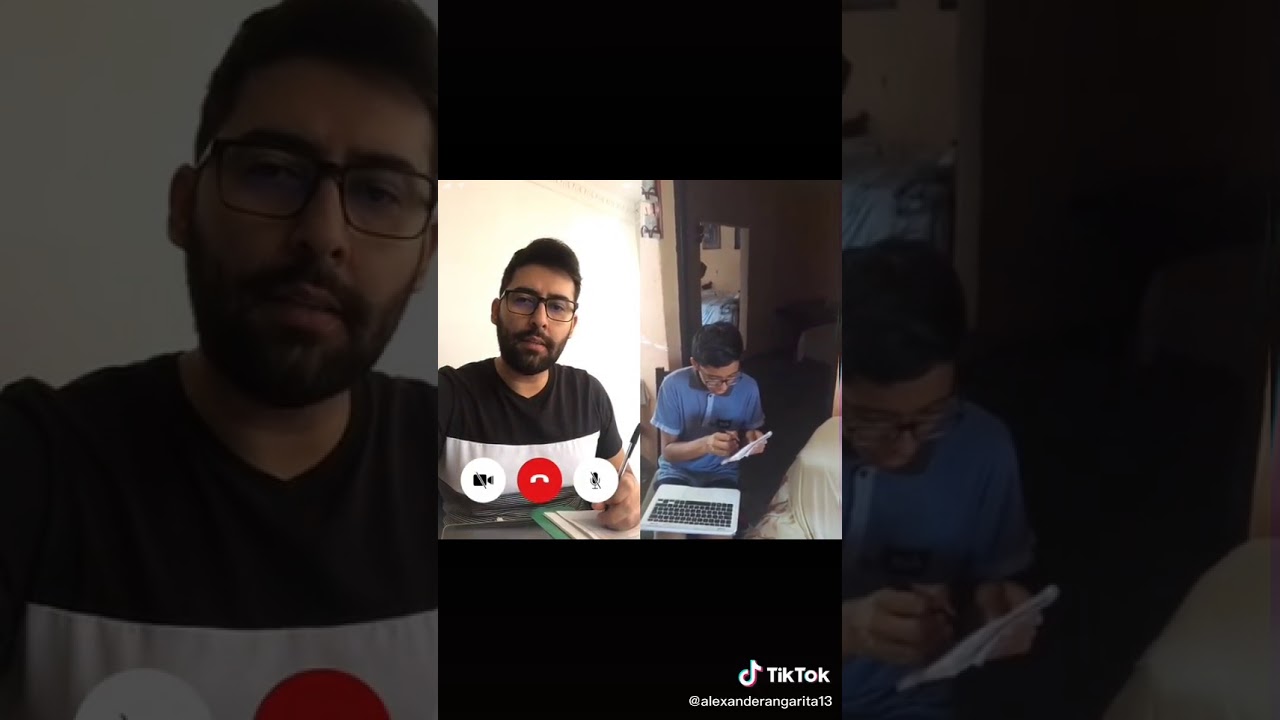
Step 3: Open the story and take a screenshot
After finding the story you want to download on TikTok, the next step is to open the story and take a screenshot. Remember, TikTok does not provide a direct download option for stories, so taking a screenshot is one of the simplest ways to save the content. Here’s how you can do it:
- Tap on the story: Once you have identified the story you want to download, tap on it to open and view the full content. Stories on TikTok are typically short videos that play automatically when you tap on them.
- Take a screenshot: To capture the content of the story, you will need to take a screenshot on your device. The process may vary depending on your device model and operating system. Here are general instructions for popular devices:
For iOS devices:
- On iPhones with Face ID (iPhone X and later models): Simultaneously press and hold the Side button (formerly known as the Sleep/Wake or Power button) and the Volume Up button. The screen will flash, indicating that a screenshot has been taken.
- On iPhones with a Home button (iPhone 8 and earlier models): Simultaneously press and hold the Home button and the Side button. The screen will flash, indicating that a screenshot has been taken.
For Android devices:
- There are several methods to take a screenshot on Android devices, depending on the manufacturer and version of the operating system. Some common methods include pressing the Volume Down and Power buttons simultaneously or swiping from the top of the screen and tapping the screenshot icon in the quick settings panel.
- If you’re unsure which method works for your device, a quick internet search with your device model and “how to take a screenshot” should provide specific instructions.
Once you have successfully taken a screenshot of the TikTok story, you can proceed to the next step, where we’ll explore how to edit the screenshot before saving it.
Step 4: Use a screenshot editor
Now that you have captured a screenshot of the TikTok story, you might want to make some edits or enhancements before saving it. This is where a screenshot editor comes in handy. A screenshot editor allows you to crop, annotate, add filters, and make other adjustments to the screenshot. Here’s how you can use a screenshot editor:
- Select a screenshot editor: There are numerous screenshot editing apps available for both iOS and Android devices. You can search for popular options in your device’s app store, such as Snapseed, Adobe Photoshop Express, Canva, or any other app that suits your needs.
- Install and open the screenshot editor: Once you have chosen a screenshot editor, follow the on-screen instructions to download and install it on your device. After installation, open the app to begin editing the screenshot.
- Edit the screenshot: Use the tools provided by the screenshot editor to enhance your TikTok story screenshot. Some common editing options include cropping the image to remove unwanted elements, adding text or stickers to convey a message or express your creativity, adjusting brightness and contrast, and applying filters to enhance the overall visual appeal.
- Save the edited screenshot: After you are satisfied with the edits, save the edited screenshot to your device. Most screenshot editors provide a “Save” or “Export” option that allows you to save the edited image to your device’s photo gallery or a specified folder.
Using a screenshot editor gives you the freedom to customize the TikTok story screenshot according to your preferences. Whether you want to highlight a particular aspect, add a personal touch, or make the screenshot more visually appealing, a screenshot editor provides you with the necessary tools to achieve your desired result.
Once you have saved the edited screenshot, you can move on to the next step, where we’ll explore how to crop the screenshot if needed.
Step 5: Save the edited screenshot
After you have finished editing the TikTok story screenshot, it’s time to save the edited image to your device. Saving the edited screenshot ensures that you can easily access it whenever you want, even if the original story disappears from TikTok. Here’s how you can save the edited screenshot:
- Find the “Save” or “Export” option: In your chosen screenshot editing app, look for a button or option that allows you to save or export the edited screenshot. This option is typically represented by an icon that resembles a floppy disk or an arrow pointing downwards.
- Choose a destination: Once you have selected the “Save” or “Export” option, you may be prompted to choose a destination for the edited screenshot. Select the desired folder or location where you want to save the image. This could be your device’s photo gallery, a specific album, or a designated folder.
- Confirm and save: After selecting the destination, confirm your choice and save the edited screenshot. The app will process the image and save it to the specified location on your device.
By saving the edited screenshot, you ensure that your hard work in enhancing and customizing the TikTok story is preserved. This also allows you to easily access the edited image whenever you want to view or share it.
Now that you have successfully saved the edited screenshot, you can proceed to the next step, where we’ll explore how to crop the screenshot if needed.
Step 6: Crop the screenshot (if needed)
After saving the edited screenshot, you may find that there are certain elements or areas in the image that you want to remove or trim. This is where cropping comes in handy. Cropping allows you to select a specific portion of the image and remove the rest, ensuring that the final result focuses on the most important part of the TikTok story screenshot. Here’s how you can crop the screenshot:
- Open the saved edited screenshot: Locate the saved edited screenshot on your device. This could be in your photo gallery, a specific album, or a designated folder.
- Select the cropping tool: Most photo gallery apps and editing apps feature a cropping tool that allows you to crop images. Look for an icon or option that represents a cropping tool, often resembling a square or rectangle.
- Adjust the crop area: Once you have selected the cropping tool, you can adjust the crop area by dragging the edges or corners of the selection. Position the selection over the area of the image that you want to keep, ensuring that any unwanted portions are outside the selection.
- Finalize the crop: Once you are satisfied with the crop, tap on the “Crop” or “Apply” button to finalize the crop. The photo gallery or editing app will process the image and save the cropped version.
Cropping the screenshot allows you to focus on the most relevant part of the TikTok story, removing any distractions or unnecessary elements. It allows you to create a visually appealing and concise screenshot that effectively captures the essence of the original story.
Now that you have successfully cropped the screenshot, you can move on to the next step, where we’ll explore how to use a video editing app or tool to create a video using the screenshot.
Step 7: Use a video editing app or tool
Now that you have your edited and cropped screenshot, you may want to take it a step further and turn it into a video. This is where a video editing app or tool comes in handy. By using a video editing app, you can add dynamic effects, transitions, music, and other elements to create an engaging video using your TikTok story screenshot. Here’s how you can use a video editing app or tool:
- Select a video editing app: There are numerous video editing apps available for both iOS and Android devices. You can explore popular apps like iMovie, Adobe Premiere Rush, Kinemaster, or InShot. Consider your editing needs and choose an app that suits your preferences and skill level.
- Install and open the video editing app: Once you have chosen a video editing app, follow the instructions to download and install it on your device. After installation, open the app to begin the editing process.
- Import the cropped screenshot: Most video editing apps allow you to import images, including the cropped screenshot. Look for an option to import media or add media to your project. Select the cropped screenshot from your device’s photo gallery or the location where you saved it.
- Arrange the screenshot on the timeline: Drag and drop the cropped screenshot onto the timeline of the video editing app. This will be the foundation of your video.
- Add effects, transitions, and music: Enhance your video by adding effects, transitions, and music. Explore the features and tools of the video editing app to customize the visual and auditory elements of your video. You can add text, stickers, filters, or even overlay multiple images or videos.
- Edit and fine-tune: Adjust the timing, duration, and placement of the cropped screenshot and other elements to create a seamless and visually appealing video. Experiment with different editing techniques to bring your TikTok story screenshot to life.
Using a video editing app or tool allows you to transform your TikTok story screenshot into a captivating video that can be easily shared and enjoyed. You have the freedom to add your creative touch and elevate the visual impact of the story.
Once you have finished editing and fine-tuning your video, you can proceed to the next step, where we’ll explore how to download the video to your device.
Step 8: Add the screenshot to the video editing app
After selecting a video editing app and opening it on your device, the next step is to add the edited and cropped screenshot to the app’s project timeline. This will serve as the foundation for creating your video using the screenshot. Here’s how you can add the screenshot to the video editing app:
- Locate the media import option: In the video editing app, look for an option to import media or add media to your project. This option may be represented by an icon that resembles a plus sign or an option in the app’s menu.
- Select the cropped screenshot: Tap on the import media option and browse through your device’s storage to locate the folder or location where you saved the edited and cropped screenshot. Once you find it, select the screenshot and import it into the app’s media library or project.
- Add the screenshot to the timeline: Once the screenshot is imported, drag and drop it onto the project timeline of the video editing app. This will add the screenshot to the sequence of clips or images that make up your video.
- Adjust the duration and position: On the timeline, you can adjust the duration of the screenshot by stretching or shrinking its duration in relation to the other elements in the video. You can also position the screenshot at the desired point within the video timeline.
By adding the cropped screenshot to the video editing app, you have now incorporated it into your project and can further enhance it by adding other video clips, transitions, effects, or audio elements to create a dynamic and engaging video.
Now that you have successfully added the screenshot to the video editing app, you can move on to the next step, where we’ll explore how to create a video using the screenshot.
Step 9: Create a video using the screenshot
Now that you have added the screenshot to the video editing app and positioned it on the project timeline, it’s time to create a video using the screenshot as the centerpiece. This step involves adding other elements, applying effects, and fine-tuning the video to create an engaging final product. Here’s how you can create a video using the screenshot:
- Add other video clips or images: To enhance the video, consider adding other video clips or images that complement the screenshot. You can import additional media files into the video editing app and arrange them on the timeline to create a seamless flow.
- Apply transitions and effects: Add visual interest and smooth transitions between different elements of the video. Explore the effects options in the video editing app to apply filters, overlays, or animations that enhance the overall visual appeal.
- Add audio elements: Enhance the video further by adding background music, sound effects, or voiceovers. Most video editing apps offer options to import audio files or record audio directly within the app. Adjust the audio levels to ensure a balanced mix with the video elements.
- Edit and fine-tune the video: Review the video on the timeline and make any necessary adjustments. Trim video clips, adjust the timing of transitions, and fine-tune the overall pacing of the video. Experiment with different editing techniques to create a video that captivates viewers.
Creating a video using the screenshot allows you to transform a static image into a dynamic and engaging visual experience. It gives you the opportunity to convey a story or message using a combination of visuals, audio, and effects.
Once you are satisfied with the video you have created using the screenshot, you can proceed to the final step, where we’ll explore how to download the video to your device.
Step 10: Download the video to your device
After creating and fine-tuning the video using the screenshot in the video editing app, the final step is to download the completed video to your device. This allows you to easily access and share the video wherever you desire. Here’s how you can download the video:
- Locate the export or download option: In the video editing app, look for an option to export or download your completed video. This option is typically represented by an icon that resembles an arrow pointing downwards or an option in the app’s menu.
- Select the desired video format and quality: When prompted, choose the video format and quality settings that suit your needs. The options may vary depending on the video editing app you are using. Common formats include MP4, MOV, or WMV, and quality options may range from standard definition to high definition.
- Initiate the download process: Once you have selected the desired format and quality settings, initiate the download process. The video editing app will convert and export the video according to your specifications.
- Save the video to your device: After the video has been exported, you will be prompted to choose a location to save the video on your device. Select the appropriate folder or location where you want to store the video for easy access.
- Wait for the download to complete: Depending on the length and complexity of the video, the download process may take a few seconds to several minutes. Be patient and wait for the app to complete the download.
- Access and share the downloaded video: Once the download is complete, you can access the downloaded video in the location where you saved it. You can now view, share, or upload the video to your preferred platforms, such as social media, messaging apps, or video hosting sites.
Downloading the video to your device ensures that you have a copy of your completed creation that can be easily accessed and shared. Whether you want to enjoy the video offline or showcase it to others, having the downloaded file provides you with the necessary convenience.
Congratulations! You have successfully downloaded the video to your device, completing the process of downloading and saving the TikTok story that inspired you.
Conclusion
Downloading TikTok stories may not be a built-in feature of the app, but with the right tools and techniques, you can save and preserve your favorite moments. By following the steps outlined in this guide, you now possess the knowledge to download TikTok stories and transform them into personalized videos.
Starting from opening the TikTok app and finding the story you want to download, to taking a screenshot and utilizing a screenshot editor for enhancements, each step in the process plays a crucial role. By using a video editing app, you can create a captivating video using the screenshot, and finally, download the video to your device for easy access and sharing.
Remember to respect the privacy and ownership rights of others when downloading TikTok stories. Make sure you have the necessary permissions or only download public stories.
Get creative and experiment with different editing techniques and effects to make your videos stand out. Unleash your imagination and turn TikTok stories into unique visual experiences that resonate with you and others.
Now that you have mastered the art of downloading TikTok stories, get ready to save and treasure those special moments. So, go ahead, start exploring TikTok, and begin your journey of creating and preserving memories with the power of downloading TikTok stories!