Learning how to make Reels on Instagram is crucial to sharing your most poignant moments on the platform, as well as growing your following. Strikingly similar to TikTok, this new feature allows you to create, customize, and share short videos. The software then allows you to share these videos over various channels on Instagram as well as other social media.
In this article, we’ll cover all the basics about the new feature and guide you on how to make Instagram Reels.

What Is Instagram Reels?
Instagram Reels is a new feature on Instagram that allows users to film short videos or otherwise upload pre-recorded videos on Instagram. Instagram created the feature in response to the increasing popularity of TikTok and Snapchat, which popularized the instant video format. Prior to releasing Stories and Reels, Instagram was focused on photo-based content with features such as its own photo editor.
Much like TikTok, Instagram Reels is a one-stop shop for creating short videos. The program offers a wide selection of tools and a special interface for editing videos quickly and easily. These tools allow you to clip and delete videos and add text, music, music captions, filters, or stickers to them.
Instagram offers three avenues for uploading these short videos on the platform. You can upload your Reels through the dedicated Reels feature, Instagram Feed, or through Stories. The reels may be visible to only your followers or to the whole Instagram community, depending on your privacy settings. Meanwhile, reels uploaded to Stories are ephemeral and disappear after 24 hours.
There is no download or installation required to get Instagram Reels; it’s automatically available on the app. Instagram released the feature in mid-2020, and it’s currently accessible in about a third of all countries around the globe. The list of countries includes the U.S., India, France, Germany, Japan, Australia, and the U.K.
How to Make Reels on Instagram

Learning to create Reels on Instagram can be a little complicated, but anyone can do it with a little practice and application of intuition. But before you can create reels, you will have to decide where your reels will appear. Subsequently, there are three avenues for uploading Reels, and they can be accessed through different methods. Here are the steps for each method:
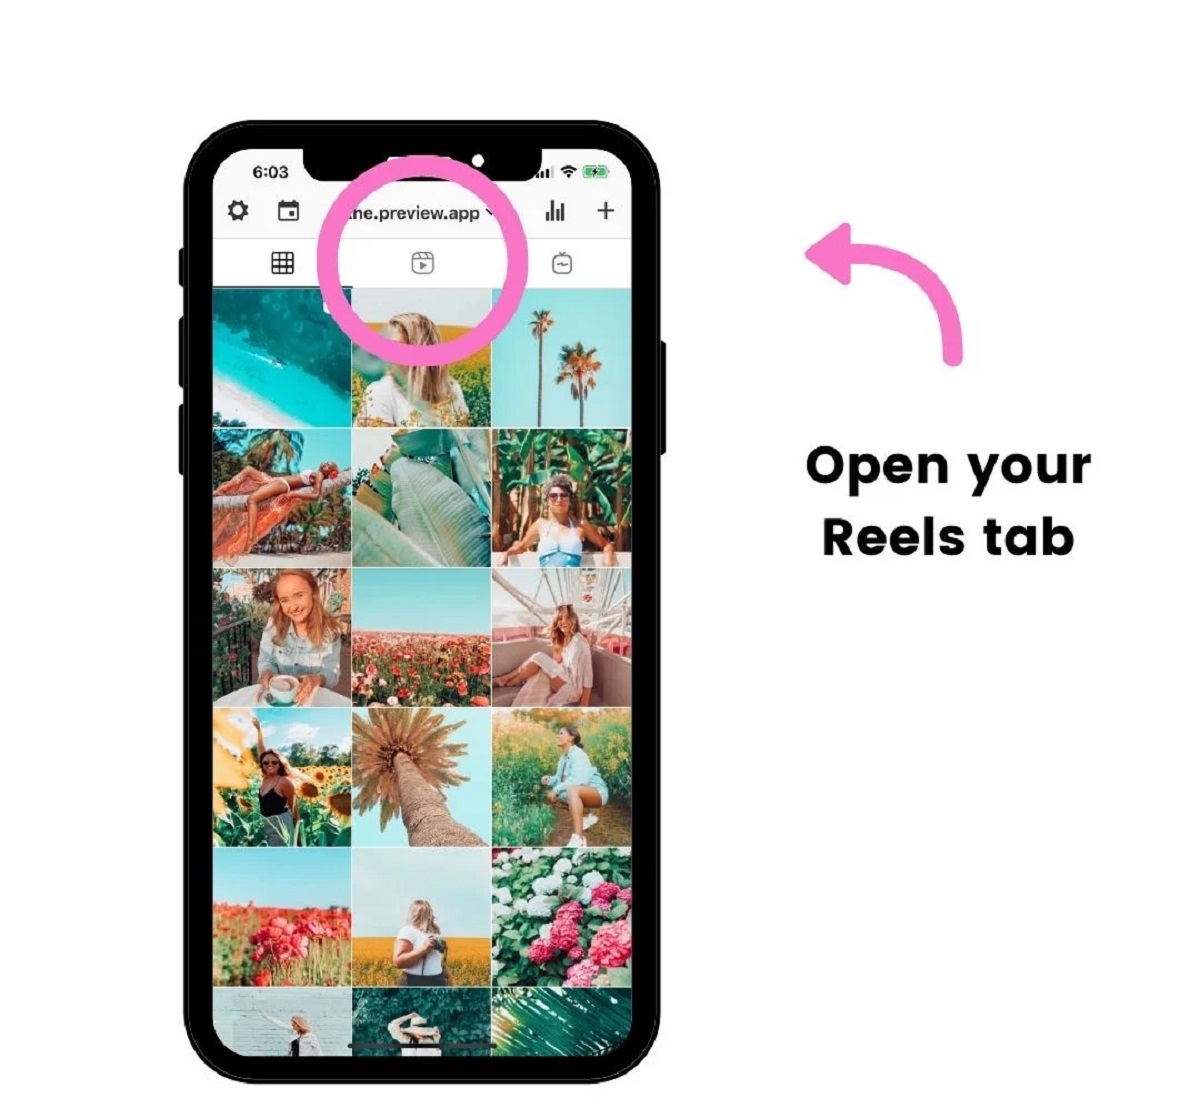
Reels Tab
- Open your Instagram app.
- Click on the Camera icon from the top-right corner.
- To add music to your Reel, tap on the Music icon on the left panel, then select a clip. Use the drag and drop method to select the portion of the song that you want to use.
- Click on the Special Effects icon (the one that looks like a face) to select the special effects that you want to apply.
- Click on the Timer icon (the one that looks like a clock) to set the time limit for your video (min. 5 seconds and max. 60 seconds).
- Click on the Record button at the bottom of the screen to start recording. The timer will form a red circle around the record button as you record to indicate how much time you have left.
Instagram Home Screen:
- Open your Instagram app.
- Look for the “Add” (+) symbol in the top-right corner of the page and select it. Look for the Reels option from the bottom panel (between Story and Live) and select it.
- You can already add special effects or music to your video from this screen.
- You will also need to set a timer for your video. To do this, click on the Timer icon and toggle the timer between 5 to 60 seconds.
- Click on the Record button at the bottom of the screen to start recording. The timer will form a red circle around the record button as you record to indicate how much time you have left.
Instagram Stories:
- Open the Instagram app.
- From the home page, click on the “Add” (+) symbol from the top corner of the page. Look for the Story tab at the bottom of the screen and select it. The Story camera should open.
- At the right-hand side of the camera are a set of tools that you can use to customize your Reel. The options include Create, Boomerang, Layout, Mini-Capture, Level, Photo Booth, Superzoom, and Hands-Free.
- Once you have applied the filters that you want, click on the circular Record button at the bottom of the screen. Take note that Stories only accepts videos that are 15 seconds or less, and the timer will not let you adjust this duration.
How to Edit Instagram Reels

There are various ways that you can edit reels that you have taken on uploaded through the app. You can trim a reel to keep only the sections you need and compile multiple sections from different reels into a single reel. Afterward, you can also add songs, clips, text, stickers, filters, subtitles, and captions to your clips.
Trimming Raw Video
While it’s perfectly acceptable to upload raw clips on Instagram, raw clips often contain unnecessary or distracting elements. They lengthen your clips without adding value, and most people have very limited attention spans. As such, you may want to trim your clips to show only the most essential parts. Here’s how:
- From your profile page, click on the “+” sign at the top-right corner of the page—select Reels from the pool of options.
- Once the Reel interface opens, click on the Gallery option at the bottom-left corner of the page.
- Tap on any particular clip that you want to edit. The clip should then expand into an elongated panel containing multiple frames.
- Drag the slider to match the portion of the clip that you want to get. Note that the highlighted portion of the clip will be the one to be retained.
Combining Multiple Reels
There are times when combining multiple reels into a single reel is a good idea. It’s a good way to illustrate content based on time progression, which can include anything from adventures to weight loss. In addition, it would also be a great way to showcase different products, hairstyles, food, or clothing within a single clip. That being said, here are the steps for combining multiple clips into a single reel:
- Open Reels, and select any clip that you want to add to a separate reel from the Gallery. Take note that the app will arrange your clips following the order you selected them.
- From the top-right corner of the page, locate and click on the “Add” button.
- Select the “Align” button from the list of options on the left-hand corner of the Reel interface.
- Select another video from the Gallery that you want to add. Click on the “Add” button from the top-right corner. Repeat Steps 3 and 4 until all clips have been added to your Reel.
- To check the results, click on the white Preview button at the bottom-left corner of the interface. This should send you to the editing interface, where you can add music or special effects.
- Once you’re ready to upload the Reel, click on the “Send To” button at the bottom-right corner of the page.
Adding Music

Music makes short videos a lot more interesting and memorable. Thankfully, Instagram has a special feature that lets you overlay music to your videos without having to rely on an external application. You can add the music before recording the video or after the fact. Here is how you can add music to your reels:
- Open Reels and select any clip that you want to add music to from the Gallery.
- Tap on the Music icon (it’s the singular beam note with two stems) from the icon tray on the left-hand side of the screen. This should open up a search box as well as a list of songs that you have on your phone or device.
- Select any song by scrolling through the list or manually searching for a song through the search box.
- Use the drag and drop method to select the section of the song that you want to use. The app will play a sample of the section that you want to use.
- Select Done to embed the song into your video recording. It’s important to note that due to copyright laws when you save a Reel to your camera roll, it will not save with the music you added to it. In addition, you can only save your own Reel and not someone else’s.
Adding Special Effects

Instagram Reels features a wide selection of creative tools to enhance your video’s aesthetics. These tools can be set up before or after recording. Here is how you can add special effects to your videos:
- Open the Reel that you want to add special effects to from the Gallery.
- Tap on the Special Effects icon (it’s the round face with a sparkle) from the icon tray on the left-hand corner of the screen.
- Select any filter from the horizontal panel of filters. Note: The filters that appear on this panel are the ones that you have saved from Stories.
- If you are not satisfied with the effects on your tray, you can scroll to the extreme right of the effects panel and select the “Browse Effects” option. From there, you can choose from a selection of categories, including Mood, World AR, Games, Appearance, Funny, and Selfies.
- Select an effect followed by the “Use” button.
Adding Captions
Most people scroll through Instagram without headphones on, which can make it difficult to hear reels with voiceovers or dialogue. Adding subtitles or closed captions is a great way to make sure that your audience knows what is being said regardless of whether they are wearing headphones or not. It’s also a considerate move for people who are hearing-impaired. Here are the steps for adding a caption to your Reels:
- Open Reels and select any particular video that you want to add captions to from the Gallery.
- Open the sticker tray select the new “Captions” sticker near the bottom of the tray. The feature will automatically convert your speech to text.
- Click on the Preview option from the bottom-right section of the Reels interface, and then select “Send To.”
Adding In-Video Text

Providing context for your Reel is essential, and one of the best ways to go about this is by adding text to your Reel. Take note that the standard size for Instagram Reels is 9:16, but they appear in the ratio of 4:5. Having said this, you may want to place your text in the middle to prevent distortion in the final video. In any case, here are the steps for adding text to your Reels:
- Open Reels, and select any particular reel that you want to add text to from the Gallery.
- Select the “Aa” tab from the upper-right corner of the page.
- You should see various font samples at the bottom of the page. Click on any font that you want and it will automatically apply to the text.
- Once you’re done typing in the text, you can use the drag and drop method to move the text to any other location on your screen. Again, we highly recommend that you keep the text in the middle.
- Tap Done to finalize the text. To add multiple texts to a single reel, just repeat Steps 2 to
How to Do Finishing Touches (Pre-Upload)

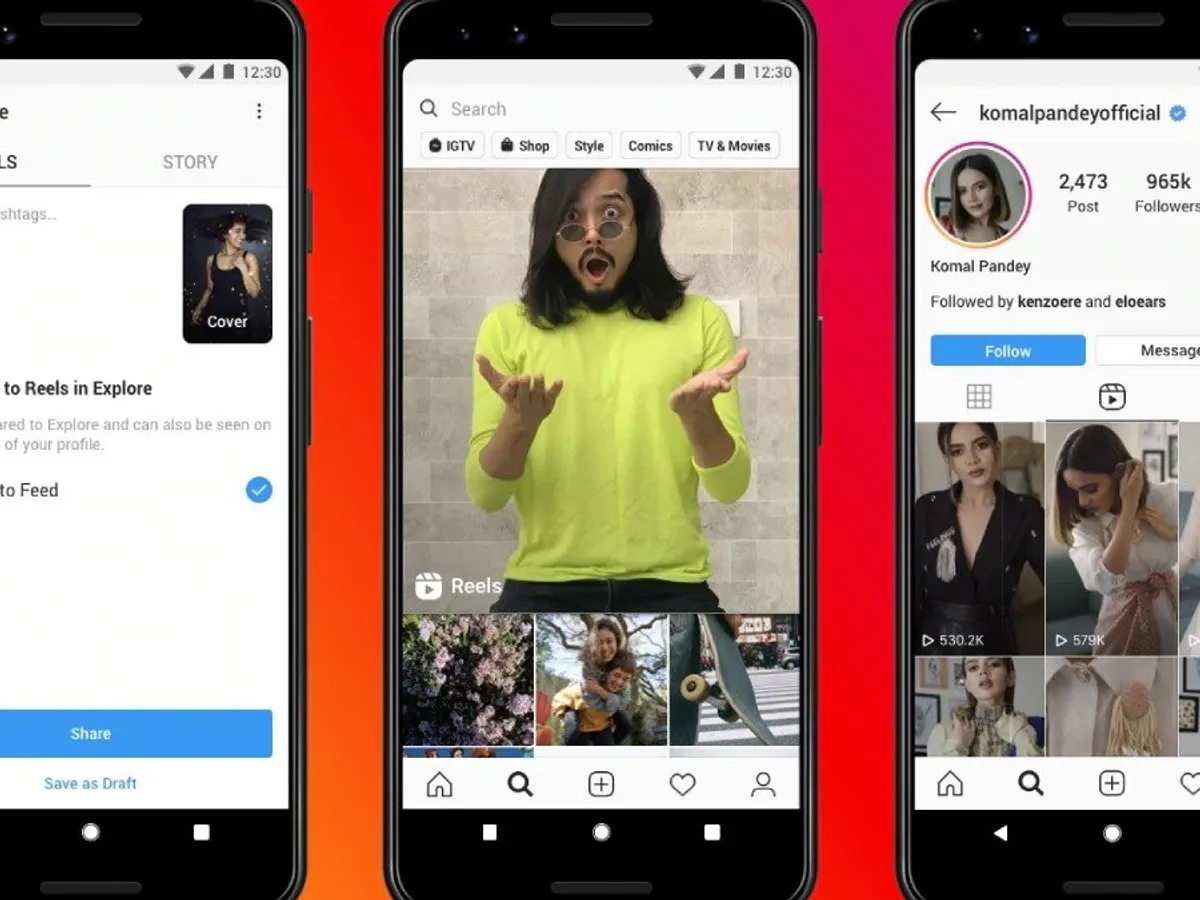
Once you’re done with editing your Reel, the next part involves adding a caption for your Reel and selecting a cover photo. Here’s how:
- Make sure that the Reel you want to upload is open in editing mode. Look for the button containing a right-facing arrow. It should be at the bottom right corner of the interface, next to the frame panel. You will be taken to a landing page with options to capture a cover photo and add a caption for your Reel.
- Type in your caption on the space provided. Take note that you can type up to 2,200 characters, which is more than enough space for you to provide additional context regarding your post. You can also add hashtags to have your reel show up on searches or tag your friends to have them watch your Reel. Also, take note that you can leave the caption blank if you wish.
- After typing in your caption, you can click on the image next to the caption to select a cover photo for your video. The cover photo can be a frame from your video or a photo from your camera roll. Also take note that if you don’t choose a cover photo, the app will automatically choose a frame for you.
How to Upload Your Reel to Instagram

Once you’ve selected a cover photo, it’s time to upload the reel to your Instagram. Now, it must be pointed out that the availability of your Reels will depend largely on your privacy settings. If your profile is set to public, other Instagram users may be able to see and download your Reels much like they can download other videos on Instagram. On the other hand, if your account is set to private, then only your followers will be able to see and download your posts.
With this in mind, you may want to check your privacy settings before uploading any Reels. Here are the steps for finally uploading your content online:
- Look for the “Share to Feed” option. This option is automatically enabled. But you can disable it if you want your post to be visible only to your followers. as the option to add a cover photo or caption. Also take note that the “Share to Feed” option is on the same page as the options to add a cover photo or caption.
- Once you’re ready to share the final clip, click on the Share button at the bottom of the page. If you want to save the video for a later time, you can click on the Save as a Draft button instead. Also take note that it’s also possible to have a social media automation tool like Later post your Reels for you at a specific, pre-determined time.
Final Thoughts on How to Make Reels on Instagram

Instagram and TikTok certainly have a lot of similarities, from the overall concept to their video editing interface and tools. For starters, Instagram used to impose a 30-second limit on Reels, but they have since then adjusted their time limit to match that of TikTok. The algorithm for both apps is also similar in that they recommend and rank content based on what’s popular.
However, one key difference is that Instagram prohibits business profiles from accessing the music feature on Reels. Meanwhile, TikTok allows all of its users access to their sound library. In addition, Instagram Reels also offers a limited number of filters and editing tools, at least compared to TikTok.
Nonetheless, it’s clear that Instagram really pushed their app hard, and the new feature itself is impressive in its own right. Ultimately, while the feature could certainly use some improvements, it certainly nails the concept of instant videos.