Introduction
Welcome to the world of project management in the digital age! With the abundance of tasks, projects, and deadlines, it’s essential to have a streamlined workflow that keeps your team organized and productive. That’s where Asana comes in.
Asana is a powerful project management tool that allows teams to collaborate, assign tasks, set deadlines, and track progress all in one place. It offers a wide range of features and integrations that make it a go-to choice for businesses of all sizes.
In this article, we’ll guide you through the process of creating a workflow in Asana. Whether you’re a project manager looking to optimize your team’s efficiency or an individual seeking a better way to organize your personal projects, this step-by-step guide will help you make the most of this versatile tool.
By the end of this article, you’ll have a clear understanding of how to use Asana to set up a workflow that keeps your team focused, accountable, and on track to meet your goals.
So, let’s dive in and explore the world of Asana project management!
What is Asana?
Asana is a web-based project management tool that allows teams to collaborate, organize tasks, and keep projects on track. Founded by former Facebook executives Dustin Moskovitz and Justin Rosenstein in 2008, Asana has quickly gained popularity and established itself as a leading solution for project management.
At its core, Asana is designed to help teams work more efficiently and effectively. With its intuitive interface and user-friendly features, it enables seamless communication and collaboration within organizations, irrespective of their size or industry.
Asana offers a wide range of features that cater to the diverse needs of different teams. From small startups to multinational corporations, Asana provides the tools and flexibility to manage projects of any scale. Some of its key features include:
- Task Management: Asana allows users to create tasks, assign them to team members, and set due dates. This helps ensure that every individual knows exactly what needs to be done and by when.
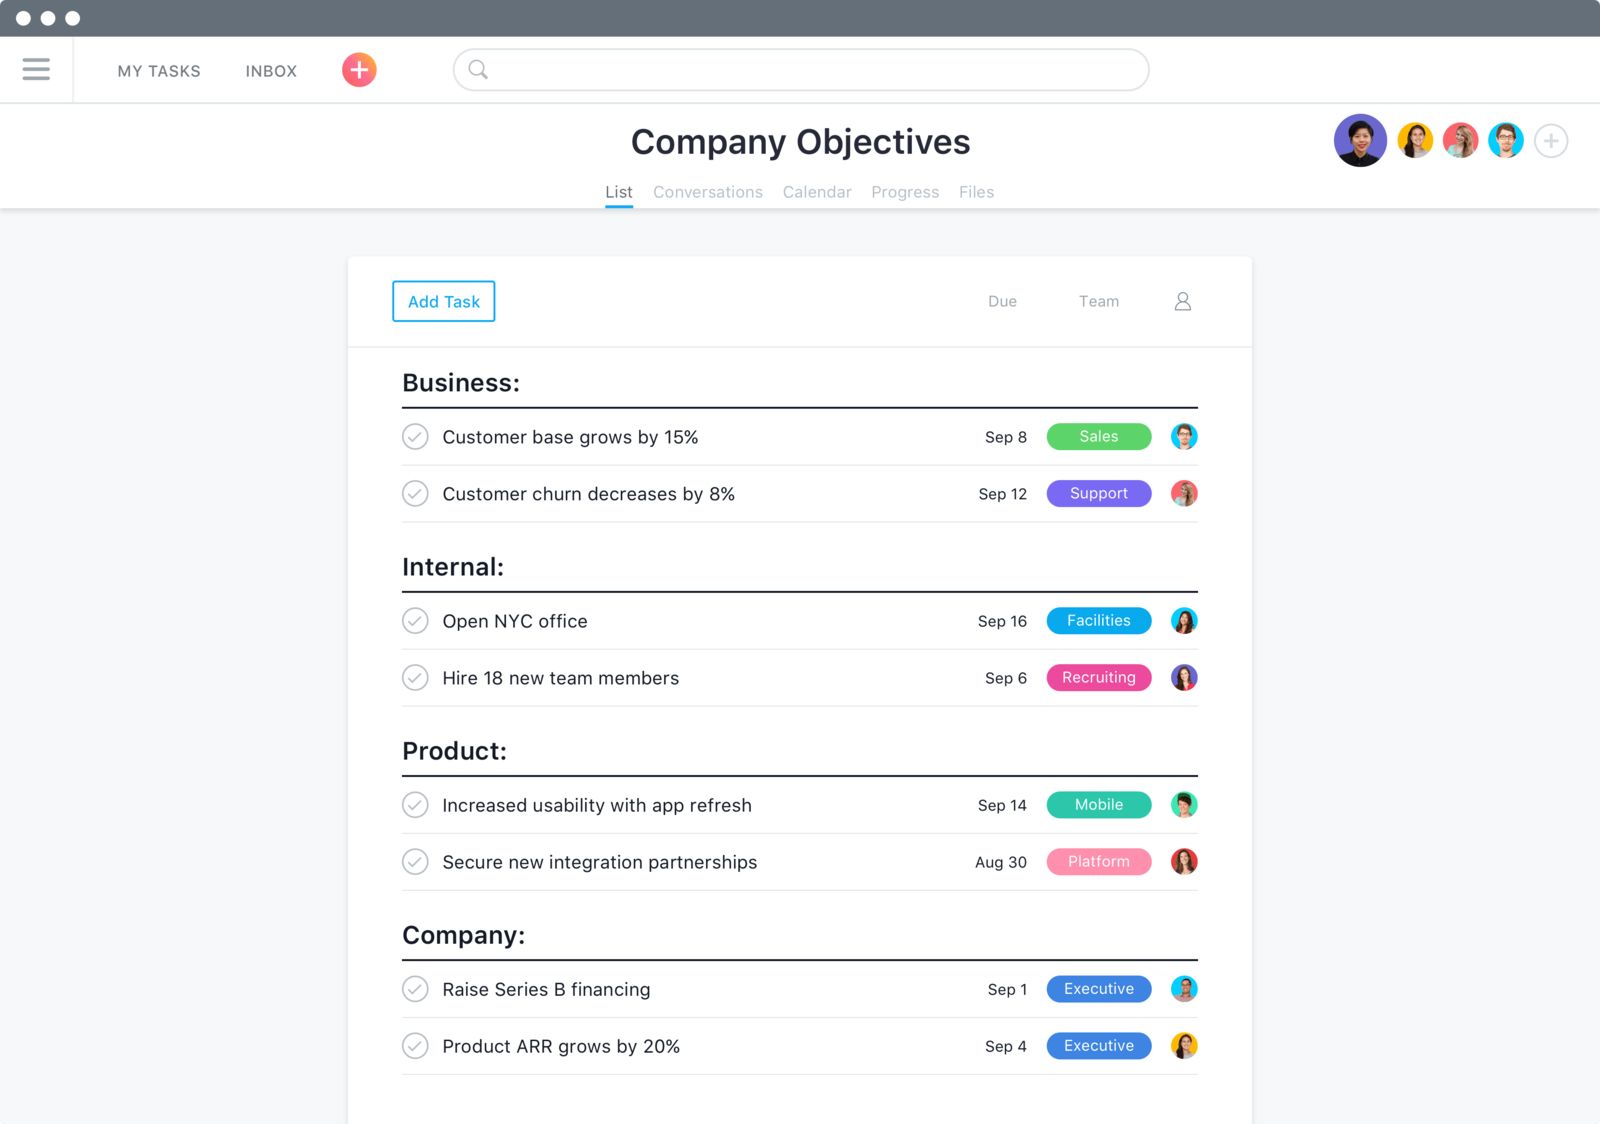
- Project Organization: Users can create projects in Asana and organize tasks within them. This hierarchical structure provides a clear overview of the project’s progress and lets team members easily navigate through different tasks.
- Collaboration Tools: Asana allows team members to comment on tasks, share files, and communicate with each other in real-time. This fosters collaboration and keeps everyone in the loop, eliminating the need for back-and-forth emails or messages.
- Deadline Management: With Asana, it’s easy to set due dates for tasks, prioritize them, and visualize project timelines. Users can also receive reminders and notifications to ensure that deadlines are not missed.
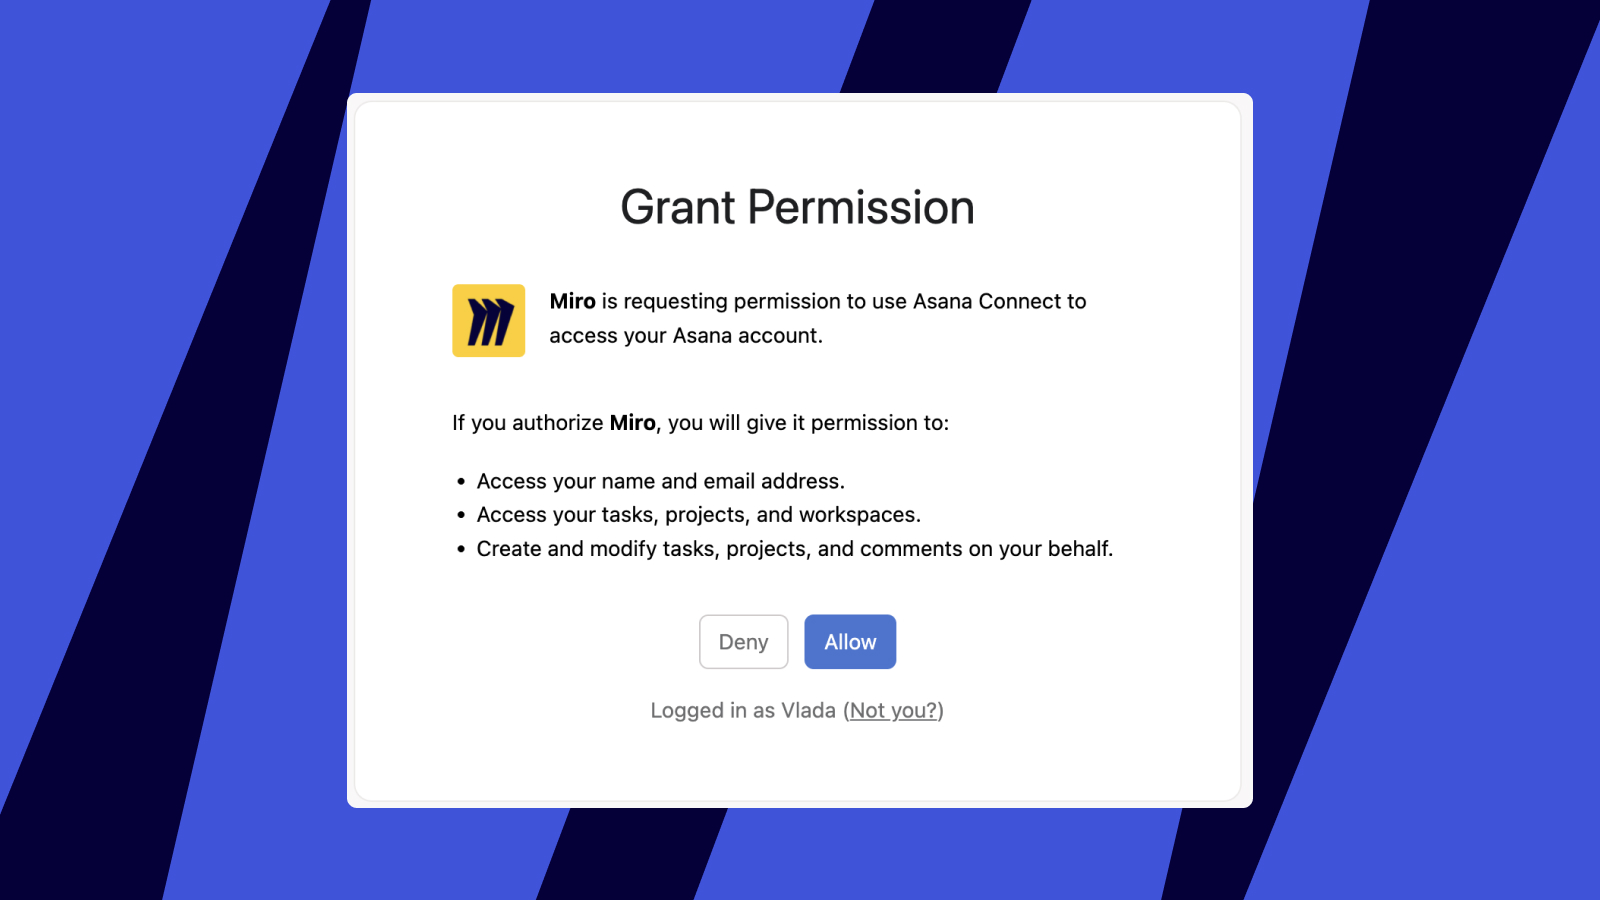
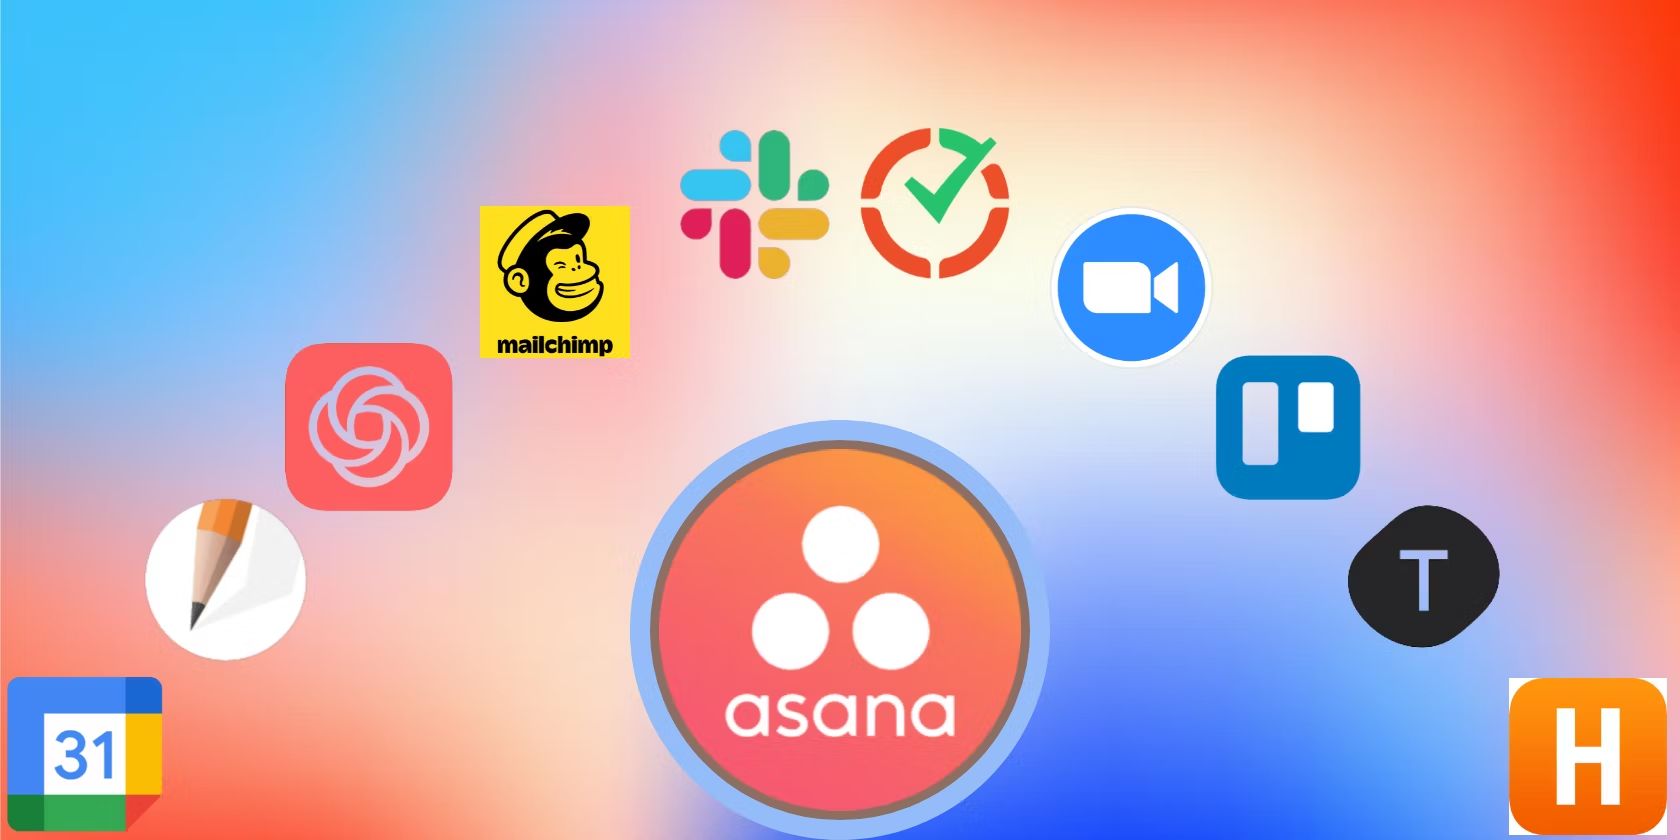
- Integration Capabilities: Asana integrates with a wide range of other productivity tools, such as Google Drive, Dropbox, Slack, and more. This allows users to streamline their workflow and centralize their work in one place.
Overall, Asana provides a comprehensive solution for project management, empowering teams to collaborate effectively and achieve their goals. Its intuitive interface, robust features, and flexibility make it a valuable tool for any organization looking to enhance productivity and project success.
Why create a workflow in Asana?
In today’s fast-paced and interconnected world, having a well-defined workflow is crucial for managing projects and tasks efficiently. Asana provides a powerful platform that enables teams to create and optimize workflows, bringing numerous benefits to individuals and organizations alike.
Here are some compelling reasons why you should create a workflow in Asana:
- Improved Organization: Asana helps you bring order to chaos by providing a centralized space for all your tasks, projects, and related information. With a well-defined workflow, you can categorize tasks, set clear priorities, and ensure that everyone is on the same page.
- Increased Efficiency: By creating a standardized workflow in Asana, you can streamline your processes and eliminate redundancies. With tasks assigned to specific team members, deadlines set, and dependencies established, you can ensure that work progresses smoothly, without unnecessary delays or bottlenecks.
- Better Time Management: Asana allows you to set due dates for tasks and visualize project timelines, helping you prioritize your work and allocate your time effectively. By having a clear overview of project deadlines and milestones, you can avoid procrastination and stay focused on delivering results.
- Enhanced Collaboration: Creating a workflow in Asana encourages collaboration and communication among team members. With the ability to comment on tasks, share files, and receive real-time updates, everyone stays informed and can actively contribute to the success of the project.
- Improved Accountability: Asana provides transparency and accountability by tracking progress and assigning ownership to specific tasks. With a clear workflow, it’s easy to identify bottlenecks, address issues, and ensure that tasks are completed as expected.
- Flexibility and Scalability: Asana’s flexible platform allows you to adapt your workflow as your needs evolve. Whether you’re managing a small team or a large-scale project, Asana can accommodate different processes and grow with your organization.
By creating a workflow in Asana, you can harness the full potential of the platform and optimize your team’s productivity. The ability to effectively manage tasks, collaborate with team members, and track progress allows you to deliver projects on time and with exceptional quality. So, take the initiative and build a workflow that aligns with your goals and maximizes your team’s potential.
Step 1: Identify your team’s goals and tasks
In order to create an effective workflow in Asana, the first step is to clearly identify your team’s goals and tasks. Having a clear understanding of what needs to be accomplished is essential for setting up a structured and organized workflow.
Here are some key steps to consider during this initial phase:
- Define project objectives: Start by clearly defining the objectives of your project. What is it that you aim to achieve? What are the desired outcomes? Having a well-defined objective serves as a guiding principle throughout the project.
- Break down goals into tasks: Once you have established your project objectives, break them down into smaller, actionable tasks. These tasks should be specific, measurable, attainable, relevant, and time-bound (SMART). By breaking down the goals into smaller tasks, you make them more manageable and easier to assign to team members.
- Assign responsibilities: Identify the team members who will be responsible for each task. Consider their strengths, expertise, and availability when assigning responsibilities. This helps ensure that tasks are distributed evenly, and there is clarity about who is accountable for each task.
- Set priorities: Determine the order in which tasks need to be completed. Assigning priorities ensures that important tasks are addressed first, preventing unnecessary delays or bottlenecks in the workflow.
- Consider dependencies: Identify any dependencies between tasks. Some tasks may be dependent on the completion of others. Understanding these dependencies allows you to schedule tasks in the most logical and efficient order.
By going through these steps, you will have a clear overview of your team’s goals and tasks. This information will serve as the foundation for creating your workflow in Asana.
Once you have identified the goals and tasks, you can move on to the next step of creating a project in Asana and setting up your tasks and subtasks.
Step 2: Create a project
Now that you have identified your team’s goals and tasks, the next step in creating a workflow in Asana is to create a project. A project serves as a container for all the related tasks and provides a centralized space for collaboration and organization.
Follow these steps to create a project in Asana:
- Click on the ‘+’ sign: In the sidebar of your Asana workspace, click on the ‘+’ sign to create a new project.
- Choose a project name: Give your project a descriptive and meaningful name that reflects its purpose. This will make it easier for team members to identify and understand the project.
- Select a project type: Asana offers different types of projects, such as list or board view, depending on your preference and the nature of your project. Choose the one that best suits your needs.
- Set project permissions: Determine who should have access to the project. You can choose to make it private to a specific team or organization, or you can make it public for everyone in the workspace to see.
- Add project description and details: Provide a brief description of the project to give team members an overview of its purpose and objectives. You can also add additional details, such as project guidelines or resources, to provide more context.
- Invite project members: Add team members to the project by entering their email addresses. This ensures that they have access to the project and can collaborate effectively.
- Set project start and end dates: If your project has specific start and end dates, set them in the project settings. This helps team members understand the project timeline and stay on track.
Once you have created the project, it will appear in your Asana workspace, ready for you to start adding tasks and organizing your workflow.
A well-structured project in Asana provides a clear framework for your team’s tasks and ensures that everyone is aligned and working towards the same goals. It acts as a central hub for collaboration, communication, and progress tracking.
In the next step, we will explore how to set up and organize tasks within your Asana project.
Step 3: Set up tasks and subtasks
Now that you have created a project in Asana, it’s time to set up tasks and subtasks within the project. Tasks represent individual actions that need to be completed to accomplish your project goals, while subtasks break down larger tasks into more manageable steps.
Here’s how you can set up tasks and subtasks in Asana:
- Navigate to your project: Open your project in Asana by clicking on the project name in your workspace.
- Create a task: Click on the “+” button within the project and enter a task name. Tasks should be specific, actionable, and measurable.
- Create subtasks: To further break down a task into smaller steps, click on the task and then click on the “+” button within the task details panel to create subtasks. Subtasks allow you to divide complex tasks into more manageable parts.
- Add task details: Provide additional details for each task, such as due dates, descriptions, attachments, and assignees. This ensures that team members have all the necessary information to complete their tasks effectively.
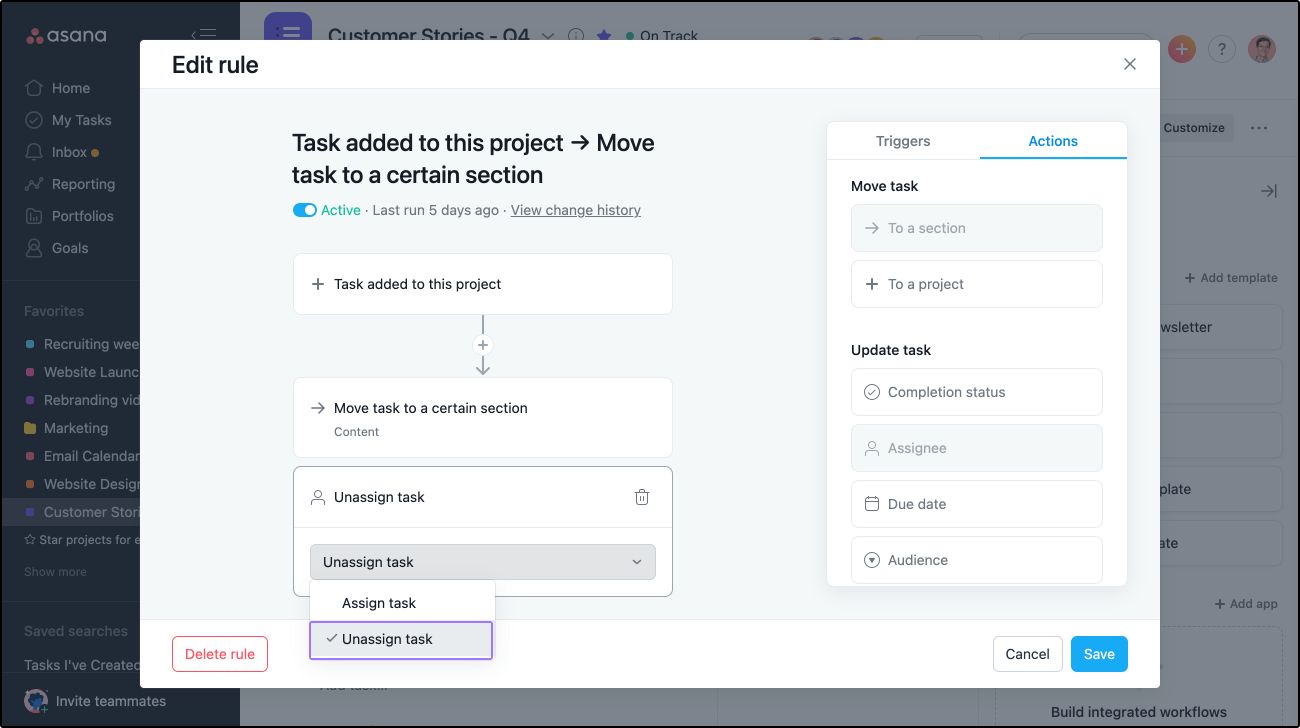
- Assign tasks and subtasks: Assign tasks and subtasks to the appropriate team members by selecting their names from the assignee field. This helps to clarify responsibilities and accountability within the project.
- Set task dependencies: If there are tasks that are dependent on the completion of other tasks, you can set up task dependencies. This ensures that tasks can only start once their dependencies are completed, optimizing the project workflow.
- Organize tasks: Arrange tasks in the order they need to be completed by dragging and dropping them within the project. You can also use sections to group related tasks together for better organization and clarity.
By setting up tasks and subtasks in Asana, you create a structured framework for your project’s workflow. Each task represents a specific action that needs to be completed, and subtasks break down complex tasks into manageable steps.
Organizing tasks in Asana improves clarity and ensures that everyone is aligned on the project’s progress. It provides a shared understanding of the work that needs to be done and allows team members to prioritize and track their individual tasks effectively.
Now that you have set up your tasks and subtasks, we will move on to the next step: assigning and prioritizing these tasks in Asana.
Step 4: Assign and prioritize tasks
Once you have set up tasks and subtasks in your Asana project, the next step is to assign and prioritize these tasks. Assigning tasks ensures that team members know exactly what they are responsible for, while prioritizing tasks helps to focus efforts on the most important and time-sensitive actions.
Follow these steps to assign and prioritize tasks in Asana:
- Open the task: Click on a task to open it in your Asana project.
- Assign the task: In the assignee field, select the team member who is responsible for completing the task. This ensures that there is clarity about who is accountable for each action.
- Set due dates: Specify the deadline for task completion by selecting a date in the due date field. Setting due dates helps to manage time effectively and ensures that tasks are completed on schedule.
- Use task comments: Encourage collaboration and communication by utilizing the task comments section. Team members can ask questions, provide updates, and provide feedback, fostering effective teamwork and coordination.
- Prioritize tasks: To prioritize tasks within your project, you can use custom fields, tags, or simply arrange them in order of importance. This allows team members to focus their efforts on the most critical tasks first.
- Reassign tasks if needed: As projects evolve, task assignments may need to change. If a task needs to be reassigned, you can easily update the assignee field to reflect the new team member responsible for completing the task.
Assigning and prioritizing tasks in Asana promotes efficiency and accountability within your project workflow. Clear task assignments ensure that every team member knows their responsibilities and can focus on their assigned work. Prioritizing tasks ensures that efforts are directed towards the most important and time-sensitive actions, aligning with the overall project goals.
By effectively assigning and prioritizing tasks in Asana, you create a structured approach to project management, keeping your team on track and ensuring timely completion of deliverables.
Next, we will explore the importance of adding due dates and dependencies to your tasks in Asana.
Step 5: Add due dates and dependencies
In order to effectively manage your project timeline and ensure smooth workflow, it’s important to add due dates and dependencies to your tasks in Asana. Due dates provide a clear timeline for task completion, while dependencies establish the order in which tasks need to be completed.
Here’s how you can add due dates and dependencies to your tasks in Asana:
- Open the task: Click on a task to open it in your Asana project.
- Add a due date: In the due date field, select the date by which the task needs to be completed. This establishes a deadline for the task and helps team members manage their time effectively.
- Set task dependencies: If a task is dependent on the completion of another task, you can set up task dependencies. In the task details panel, click on the “Dependencies” tab and select the task(s) upon which the current task depends. This ensures that tasks are completed in the proper sequence.
- Manage dependencies: Asana allows you to view task dependencies on a visual timeline, making it easy to see the flow and order of tasks. This helps team members understand the dependencies and plan their work accordingly.
- Adjust due dates and dependencies: If the due date or task dependencies need to be modified, you can easily update them in the task details. As projects evolve and circumstances change, it’s important to keep these details up to date.
Adding due dates and dependencies in Asana enhances project planning and execution. Due dates provide a sense of urgency and ensure timely completion of tasks, while dependencies ensure that tasks are completed in the proper order, preventing delays or roadblocks.
By effectively managing due dates and task dependencies, you establish a clear project timeline and promote a smooth workflow. This allows your team to stay on track and ensures that tasks are completed in a logical and efficient sequence.
Next, we will explore how to make use of Asana’s features and integrations to enhance your workflow.
Step 6: Make use of Asana’s features and integrations
Asana offers a wide range of features and integrations that can enhance your workflow and productivity. By leveraging these tools, you can streamline your project management processes and collaborate more effectively with your team.
Here are some key features and integrations that you can make use of in Asana:
- Custom Fields: Customize your tasks and projects by adding custom fields. This allows you to capture specific information relevant to your workflow and project requirements.
- Tags: Use tags to categorize tasks and make it easier to search and filter specific tasks based on predefined keywords or labels.
- Templates: Asana provides pre-built project templates for various use cases, such as event planning, marketing campaigns, and product launches. These templates save time and provide a starting point for your project setup.
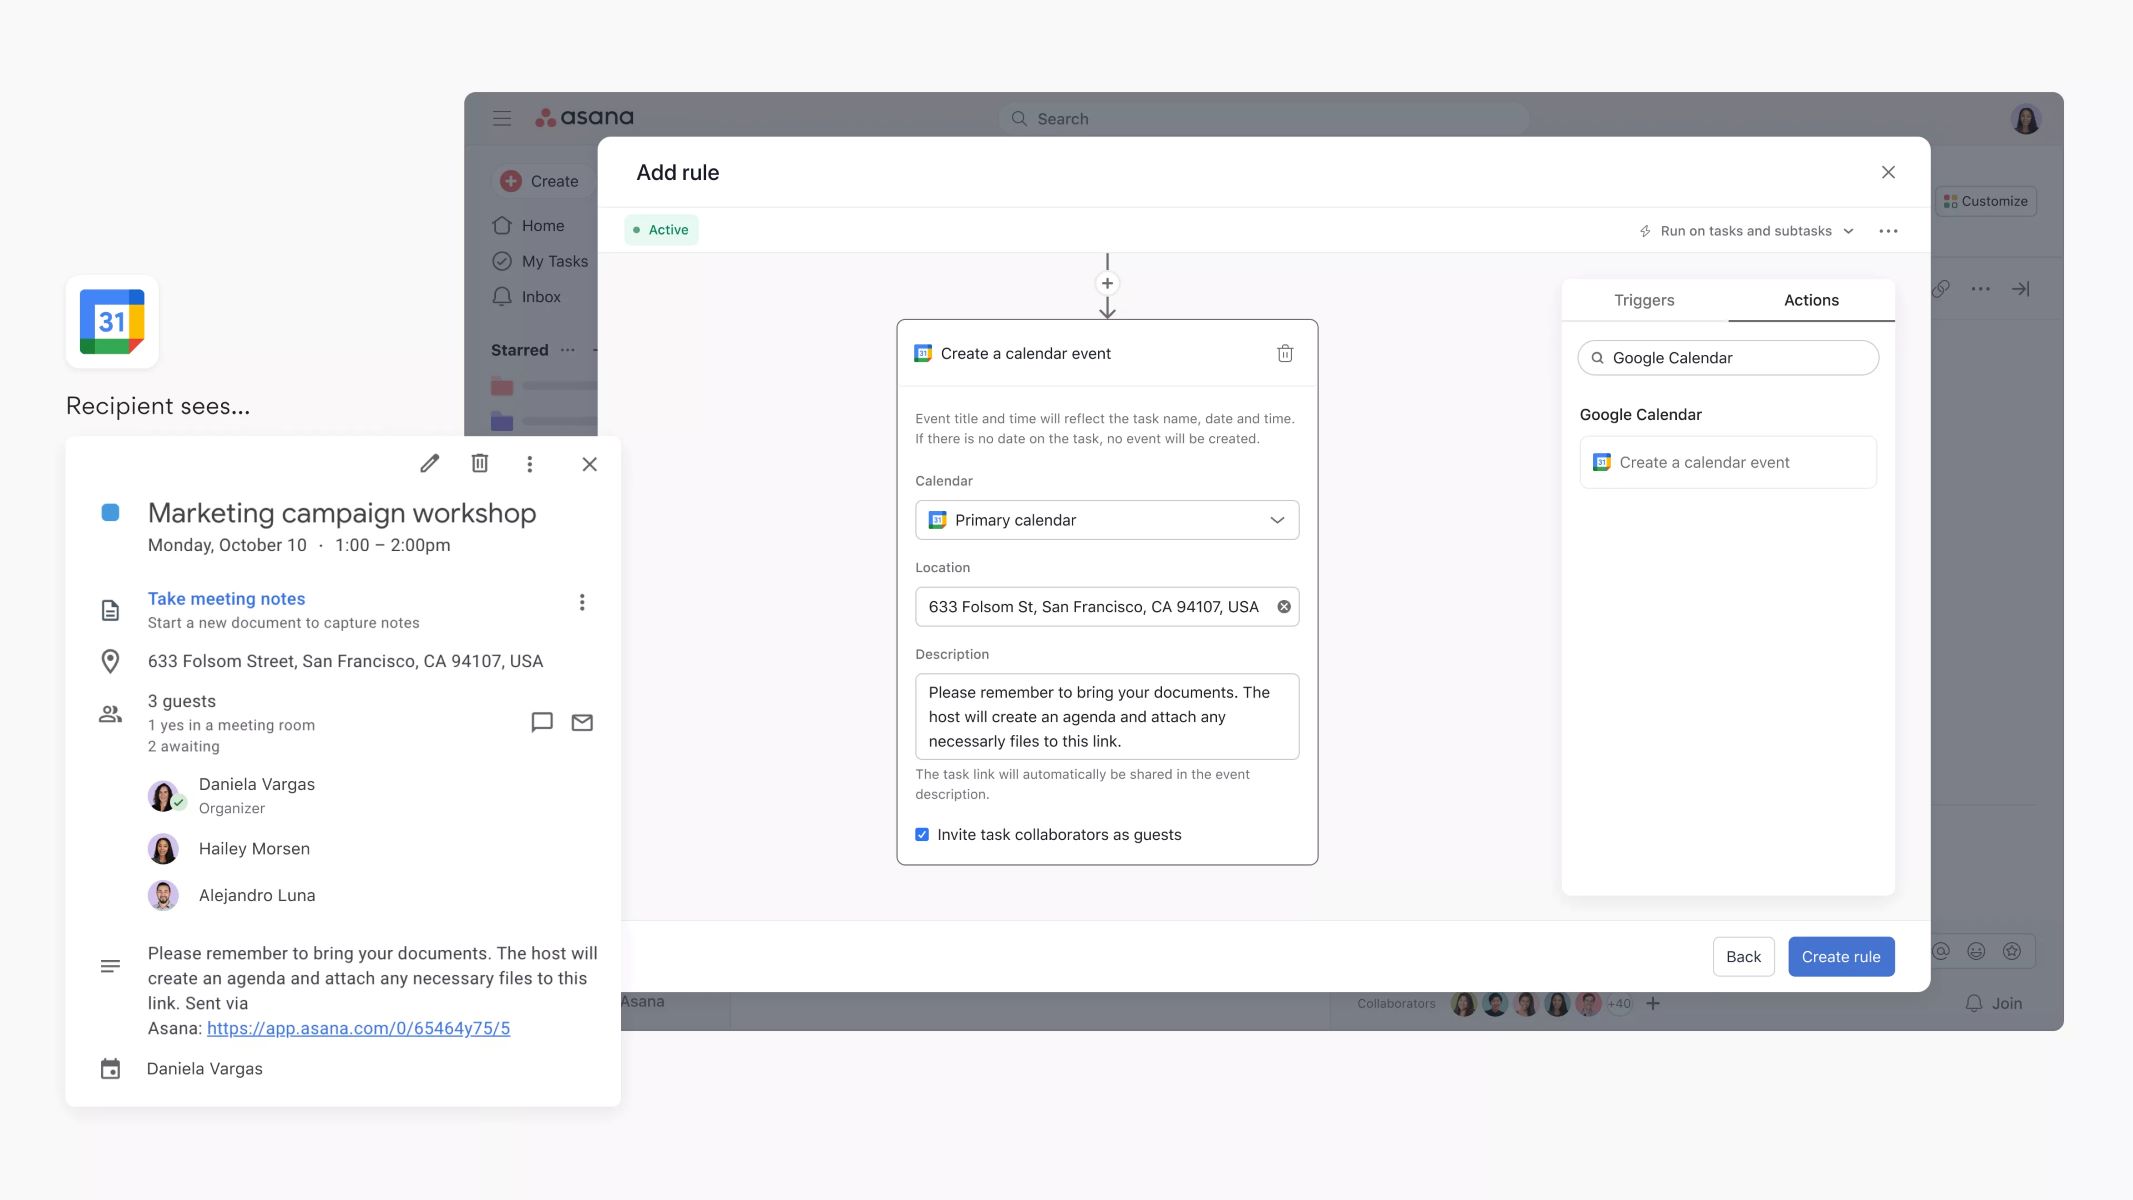
- Integrations: Asana integrates with popular productivity tools such as Google Drive, Slack, and Microsoft Teams, allowing you to centralize your work and collaborate seamlessly across different platforms.
- Asana Portfolios: Portfolios in Asana provide a high-level view of multiple projects and their progress, allowing you to track and manage multiple projects simultaneously.
- Calendar View: Use the calendar view in Asana to visualize tasks and due dates in a calendar format. This helps to manage timelines and ensure that tasks are scheduled appropriately.
- Notifications and Reminders: Asana sends notifications and reminders to keep you updated on task assignments, due dates, and other relevant activities. This ensures that you never miss an important deadline or task update.
- Search and Filters: Asana provides advanced search and filtering options, allowing you to quickly find specific tasks, projects, or comments within your workspace.
By making use of these features and integrations, you can customize Asana to fit your specific workflow and leverage additional tools to boost your team’s productivity and collaboration.
Remember, the key is to use features and integrations that align with your project needs and enhance your team’s ability to work efficiently and effectively. Explore the various options available in Asana, experiment with different features, and find the ones that best suit your project management requirements.
In the next step, we will discuss how to communicate and collaborate within Asana, making it a central hub for your team’s project-related discussions.
Step 7: Communicate and collaborate within Asana
One of the key advantages of using Asana is its ability to centralize communication and collaboration within your project. By leveraging Asana’s features, you can streamline team communication, keep discussions organized, and collaborate seamlessly with your team members.
Here are some steps to effectively communicate and collaborate within Asana:
- Task Comments: Utilize the task comments section to have project-related discussions. Team members can ask questions, provide updates, or share important information directly within the context of the task.
- Attachments and File Sharing: Share relevant files, documents, or resources by attaching them to tasks or comments. This ensures that team members have easy access to the necessary files and reduces the need for external file-sharing platforms.
- Mention Team Members: Use @mentions to notify specific team members and bring their attention to a task or comment. This ensures that important information doesn’t go unnoticed and facilitates targeted communication.
- Notifications and Inbox: Stay updated with project activities and discussions by monitoring notifications and checking your Asana inbox regularly. This helps you stay informed about task assignments, comments, or any changes that require your attention.
- Conversation View: Use Asana’s Conversation view to have team-wide discussions or provide project updates. This allows for more extensive conversations that go beyond individual tasks and keeps everything organized in one place.
- Follow Tasks and Projects: Stay in the loop by following tasks and projects that are relevant to you. This ensures that you receive notifications and updates on the progress and discussions related to those tasks or projects.
- Asana Inbox: Use the Asana Inbox to filter and manage your project-related notifications, comments, and tasks. This helps you stay organized and ensures that you don’t miss any important updates or actions.
By effectively communicating and collaborating within Asana, you bring together all project-related discussions and information into one centralized location. This eliminates the need for scattered emails, messages, or external communication tools, streamlining collaboration and keeping everyone on the same page.
Remember, clear and consistent communication is vital for project success. Encourage your team members to actively participate in discussions, ask questions, and share updates within Asana to foster a culture of collaboration and transparency.
In the next step, we will discuss how to track progress and make adjustments in your Asana workflow.
Step 8: Track progress and make adjustments
Once your workflow is set up in Asana and tasks are in motion, it’s crucial to track progress and make adjustments along the way. Tracking progress helps you understand the status of tasks and projects, while making adjustments ensures that you stay on track to achieve your goals.
Here are some steps to effectively track progress and make adjustments in your Asana workflow:
- Use Progress Status: Asana allows you to set progress statuses for tasks, such as “Not Started,” “In Progress,” or “Completed.” Updating and monitoring progress statuses helps you track the completion of tasks and evaluate overall project progress.
- Visualize Progress with Dashboards: Leverage Asana’s dashboard feature to get a visual overview of project progress. Dashboards provide charts, graphs, and progress bars that allow you to monitor overall progress and identify potential bottlenecks or areas that require attention.
- Track Time: Utilize Asana’s time tracking features or integrate with time tracking tools to monitor the time spent on tasks. Tracking time helps you understand resource allocation, identify inefficiencies, and make informed decisions for future projects.
- Regular Check-ins: Schedule regular check-in meetings or asynchronous updates to discuss progress, address challenges, and make any necessary adjustments. These check-ins allow you to keep the team aligned, address any concerns, and reallocate resources if needed.
- Review Metrics and Analytics: Asana provides analytics and reporting features that allow you to analyze project data, track team performance, and identify areas of improvement. Use these insights to make data-driven decisions and optimize your workflow.
- Adapt to Changes: Projects are dynamic, and changes are inevitable. Be open to adjusting your workflow as needed. This might include revising task priorities, updating deadlines, or realigning resources to address emerging challenges or changing project requirements.
- Regularly Evaluate and Improve: Continuously assess your workflow and solicit feedback from your team. Identify areas for improvement and implement changes to enhance efficiency, collaboration, and overall project success.
Tracking progress and making adjustments in Asana allows you to proactively manage your projects. By staying on top of progress, addressing challenges, and making necessary adjustments, you can ensure that your team remains focused, tasks are completed on time, and the project stays on track.
Remember, regular evaluation and improvement are essential for ongoing success. Keep a pulse on your project, continuously monitor progress, and adjust your workflow as necessary to optimize productivity and achieve your desired outcomes.
With these steps, you have completed the process of creating a workflow in Asana. By following these guidelines and utilizing the features and functionalities offered by Asana, you can effectively manage your projects, collaborate with your team, and achieve greater productivity and success.
Conclusion
Creating a workflow in Asana is a strategic and impactful way to manage projects, collaborate with your team, and maximize productivity. By following the step-by-step guide outlined in this article, you can effectively set up and optimize your workflow to achieve your project goals.
Throughout the process, we discussed the importance of identifying your team’s goals and tasks in Step 1. This foundational step ensures that everyone is aligned and working towards the same objectives. In Step 2, we explored how to create a project in Asana, providing a centralized space for organization and collaboration.
Setting up tasks and subtasks in Step 3 allows for a clear breakdown of work, making it more manageable for your team to tackle. Assigning and prioritizing tasks in Step 4 establishes accountability and focuses efforts on the most important actions.
Adding due dates and dependencies in Step 5 helps manage project timelines and ensures tasks are completed in the proper order. Step 6 highlights the various features and integrations offered by Asana, enabling you to customize and enhance your workflow.
In Step 7, we emphasized the importance of communication and collaboration within Asana, providing a central hub for discussions and document sharing. Lastly, Step 8 emphasized the need to track progress, make adjustments, and strive for continuous improvement.
By following these steps and leveraging the capabilities of Asana, you can create a well-structured workflow that optimizes productivity, enhances collaboration, and helps you achieve project success. Remember to adapt the workflow to your specific project requirements and continuously evaluate and adjust as needed to ensure efficiency and effectiveness.
So, take the first step now and start creating your workflow in Asana. Experience the benefits of streamlined project management, improved communication, and enhanced collaboration. Your team and projects will thank you for it!