Introduction
Welcome to this tutorial on how to create task templates in Asana. Asana is a popular project management tool that allows teams to collaborate and stay organized. Task templates in Asana save you time and effort by providing a pre-defined structure for commonly repeated tasks or projects. By using task templates, you can quickly set up the necessary tasks, assign responsibilities, and establish due dates, ensuring consistency and efficiency across your projects.
Whether you’re managing a small team or working on a complex project, task templates can help streamline your workflow and ensure that tasks are completed consistently, following a standardized process. In this tutorial, we will guide you through the process of creating task templates in Asana, step by step.
By the end of this tutorial, you will be able to:
- Access task templates in Asana
- Create new task templates
- Add task details and subtasks
- Customize task template options
- Save and use task templates
With these skills in your toolkit, you’ll be able to save time and effort by leveraging task templates in Asana to quickly set up projects and tasks with ease. So, let’s get started on creating task templates in Asana!
Step 1: Accessing Asana Task Templates
Before you can start creating task templates in Asana, you need to access the task template feature. Here’s how:
1. Log in to your Asana account. If you don’t have an account yet, you can sign up for free on the Asana website.
2. Once you’re logged in, navigate to your Asana workspace. This is where you’ll be creating and managing your tasks.
3. In the left-hand sidebar, locate and click on the “Templates” tab. If you don’t see this tab, click on the “More” option to expand the menu and reveal the “Templates” tab.
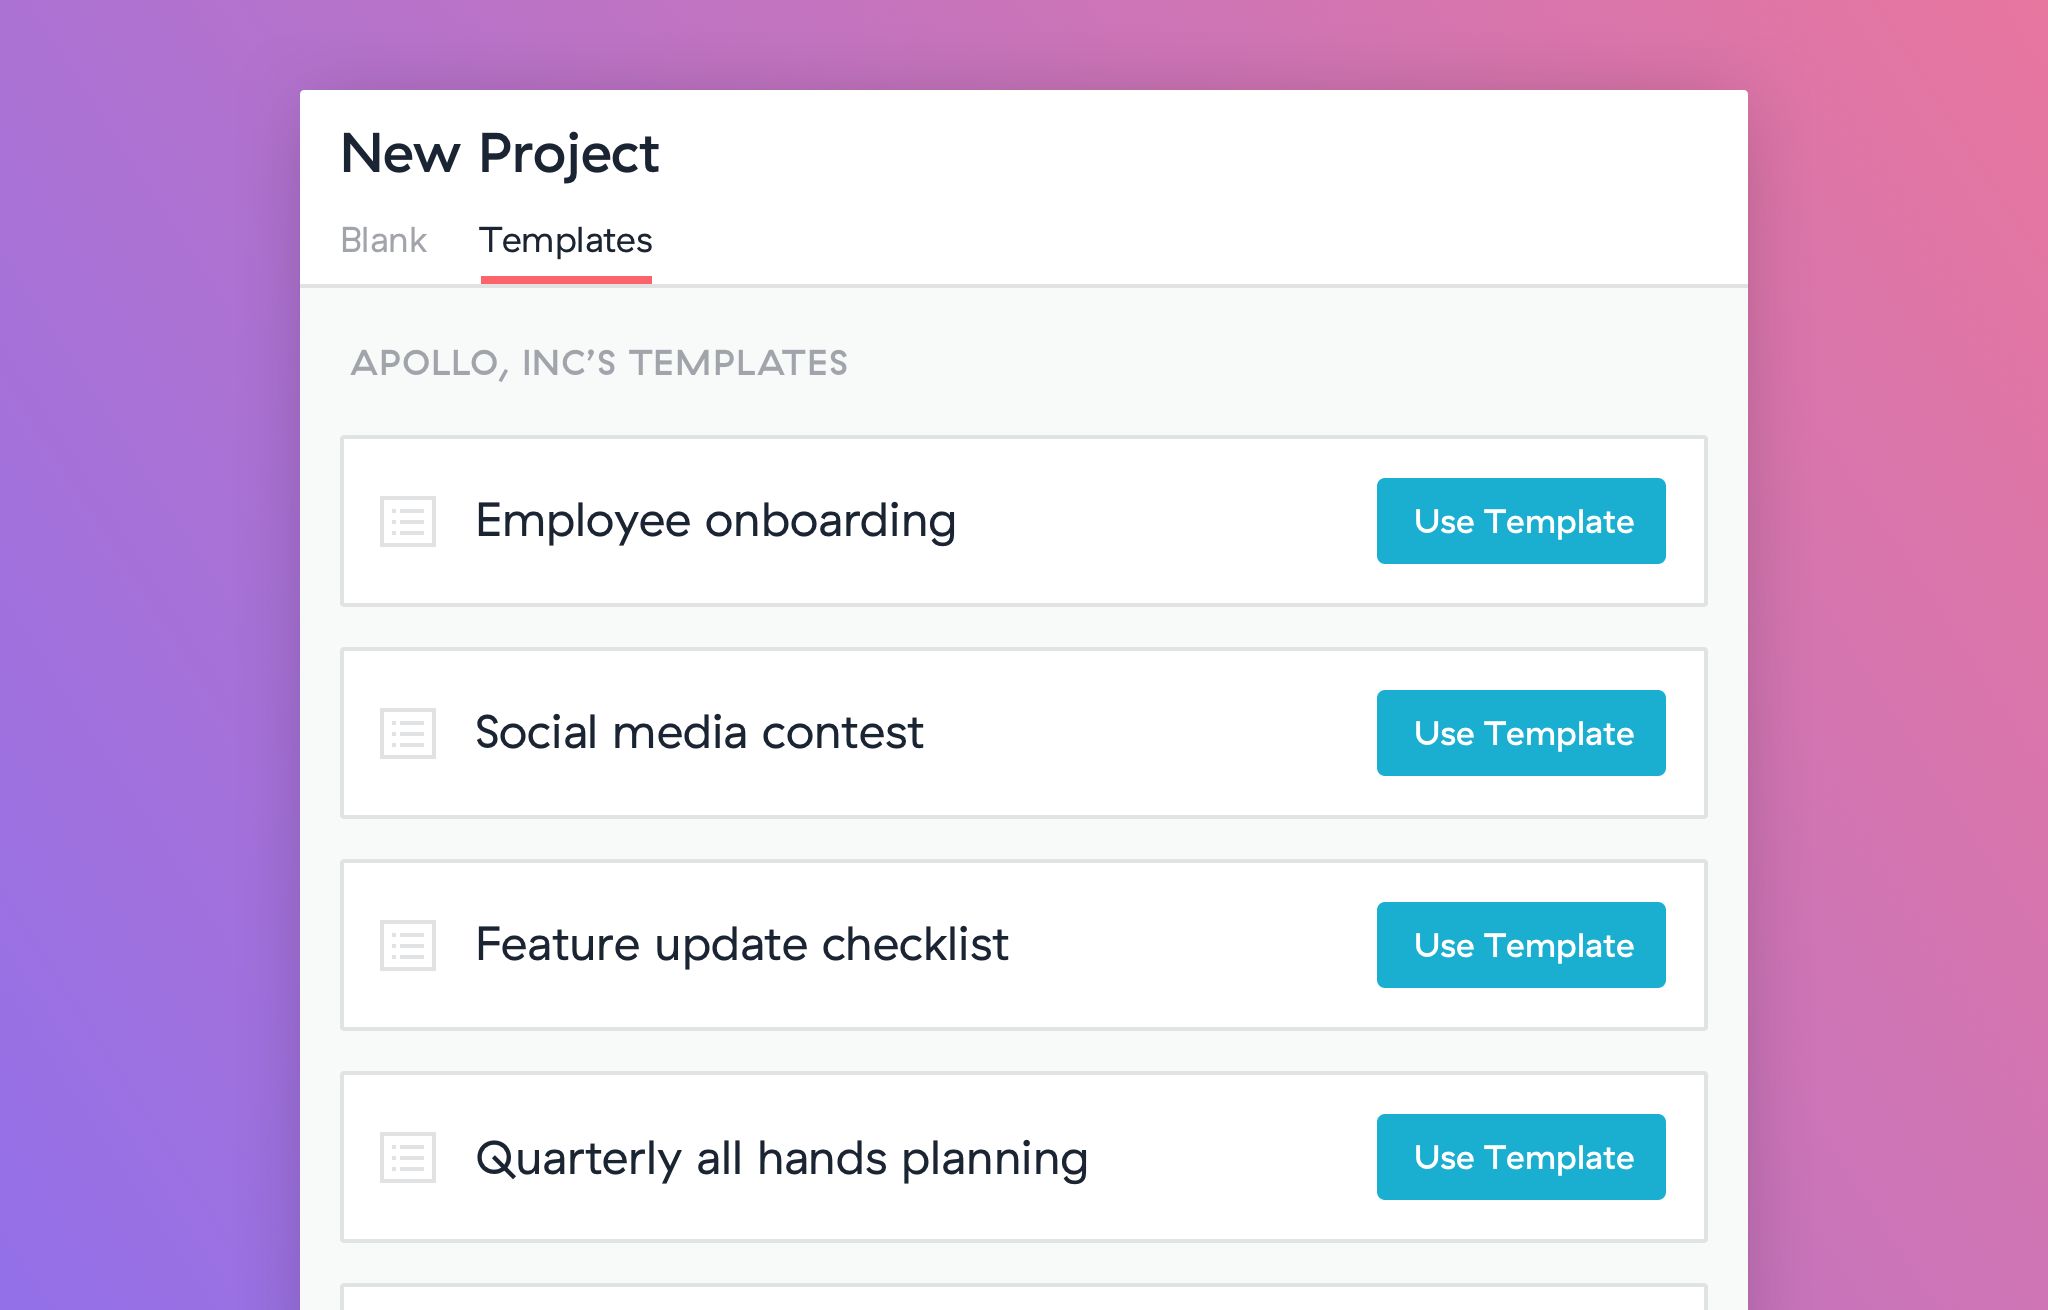
4. After clicking on the “Templates” tab, you’ll be taken to the task templates section. Here, you can see a list of any existing templates you have or access the template library if you want to explore available templates created by Asana or the Asana community.
5. To view and use your task templates, simply click on the desired template from the list. This will open the template, showing you the task details and subtasks associated with it.
Now that you know how to access Asana task templates, you’re ready to create your own templates or customize existing ones to match your specific project needs. In the next steps, we’ll show you how to create a new task template and configure it based on your requirements.
Step 2: Creating a New Task Template
Creating a new task template in Asana is straightforward. Follow these steps to get started:
1. In the task templates section, click on the “+ New Template” button. This will open a new template creation window.
2. Give your template a descriptive name. This name should clearly indicate what the template is for, making it easier for you and your team to identify and use it.
3. Optionally, you can add a brief description to provide more context about the template’s purpose and any specific instructions or requirements that should be followed when using it.
4. Now it’s time to add sections to your template. Sections help you organize and structure your tasks within the template. Click on the “+ Section” button to create a new section. Give each section a meaningful name that reflects the type of tasks that will be included under it.
5. Once you’ve added the sections, you can start adding tasks to each section. To add a task, click on the “+ Task” button within the desired section. Enter a title for the task and press Enter. Repeat this step to add more tasks to the section.
6. You can reorder tasks and sections by dragging and dropping them into the desired position. This allows you to arrange them in a logical order that suits your workflow.
7. If you want to further customize your template, you can add subtasks to any task. Subtasks are smaller tasks that are associated with a main task. To add a subtask, hover over a task, and click on the “+ Subtask” button. Enter the title of the subtask and press Enter. Continue adding subtasks as needed.
8. Repeat steps 4 to 7 to add more sections, tasks, and subtasks until your template is complete.
Once you’ve finished creating your task template with all the necessary sections and tasks, you’re ready to move on to the next step: adding task details and subtasks to make your template more robust and comprehensive.
Step 3: Adding Task Details and Subtasks
Once you have created the basic structure of your task template, it’s time to add more details and subtasks to each task. This step ensures that the template provides all the necessary information for completing each task efficiently. Follow these steps to add task details and subtasks:
1. Open the template you want to edit in the task template section of Asana.
2. Click on a task to open the task details panel on the right side of the screen.
3. In the task details panel, you can add a description that provides additional context and instructions for the task. This is particularly useful when you need to provide more information or clarify specific requirements for completing the task.
4. To add subtasks to a task, scroll to the bottom of the task details panel and click on the “Add Subtask” button. Enter the title of the subtask and press Enter. You can add as many subtasks as needed to break down the main task into smaller, more manageable steps.
5. You can also assign the task to a specific team member by clicking on the “Assignee” field in the task details panel. Start typing the name of the team member and select their name from the dropdown menu. Assigning tasks helps to clarify responsibilities and ensures that everyone knows who is responsible for completing each task.
6. Additionally, you can set due dates for tasks by selecting a date from the “Due Date” field. This helps to establish clear deadlines and keep track of progress. You can also add dependencies between tasks by using the “Dependent on” field, which allows you to specify that a task should only start after another task is completed.
7. Repeat steps 2 to 6 for each task in your template, adding task details, subtasks, assignees, due dates, and dependencies as necessary.
By adding task details and subtasks, you enhance the clarity and completeness of your task template. This ensures that anyone using the template has all the necessary information and instructions to complete the tasks effectively. In the next step, we’ll explore how to customize template options to further tailor your task templates to your specific project needs.
Step 4: Customizing Task Template Options
Asana provides several options for customizing your task templates to meet your specific project requirements. Customization allows you to further enhance the functionality and flexibility of your templates. Follow these steps to customize task template options:
1. Open the task template you want to customize in the task template section of Asana.
2. In the template view, click on the three-dot menu icon located at the top right corner of the template window. This will open a dropdown menu with various customization options.
3. From the dropdown menu, you can choose to duplicate the template if you want to create a copy that you can modify without affecting the original template.
4. You can also choose to export the template as a CSV file by selecting the “Export to CSV” option. This can be helpful if you want to share the template with team members or import it into another project management tool.
5. To edit the template name or description, select the “Edit details” option from the dropdown menu. This allows you to update the name and description to provide more accurate and up-to-date information about the template.
6. If you want to delete the template, click on the “Delete” option from the dropdown menu. Please note that deleting a template is permanent and cannot be undone, so make sure you have a backup or no longer need the template before proceeding with deletion.
7. Another option available is to convert the template into a project. This enables you to turn the template into a fully fledged project with tasks and subtasks. To convert the template, select the “Convert to project” option from the dropdown menu.
8. Lastly, you can choose to add the template to your favorites list for easy access. Simply click on the “Add to favorites” option from the dropdown menu, and the template will be added to your favorites section.
By customizing task template options, you have the flexibility to adapt and modify your templates based on your evolving project needs. Next, we’ll proceed to step 5, where we’ll cover how to save and use your task templates in Asana.
Step 5: Saving and Using Task Templates
Once you have created and customized your task template, it’s time to save it and start using it for your projects. Follow these steps to save and use your task templates in Asana:
1. After you have finished creating or customizing a template, click on the “Save template” button. This will save the template and make it available for future use.
2. To use a template for a new project or task, navigate to the task template section in Asana.
3. Find the template you want to use and click on it to open it.
4. Once the template is open, click on the “Use template” button. This will create a new project or task based on the template.
5. Customize the project or task as needed by adjusting due dates, assigning team members, and modifying any other relevant details. This allows you to tailor the template to the specific requirements of your current project.
6. Save the project or task, and it will now follow the structure and details set by the template.
7. If you need to make any modifications to the project or task, you can do so without affecting the original template. Any changes made to a project or task created from a template are specific to that instance and do not reflect back on the template itself.
8. You can reuse templates as many times as you need, allowing you to streamline your workflow and maintain consistency across multiple projects.
By saving and using task templates, you can quickly set up projects and tasks with predefined structures and details, saving time and effort in the process. Templates provide a foundation for efficient project management and promote consistency among team members.
Congratulations! You have now successfully created, customized, and started using task templates in Asana. Leverage the power of templates to enhance your productivity and keep your projects on track.
Conclusion
Task templates in Asana are a valuable tool for streamlining your project management process and ensuring consistency across your projects. By following the steps outlined in this tutorial, you have learned how to create, customize, and use task templates effectively.
Accessing task templates in Asana is as simple as navigating to the Templates tab in your workspace. From there, you can create new templates and customize them to meet the specific requirements of your projects.
Adding task details and subtasks helps provide clarity and guidance for each task within a template. By assigning responsible team members and setting due dates, you can ensure that everyone knows their role and project timelines are met.
Furthermore, customizing task template options gives you the flexibility to adapt and modify templates as your project needs evolve. Whether you want to duplicate, export, edit, or even convert a template into a project, Asana provides these options to enhance usability.
Finally, saving and using your task templates allows you to quickly create projects or tasks with predefined structures and details. Reusing templates promotes efficiency and consistency, ultimately helping you stay organized and on top of your tasks.
By incorporating task templates into your project management workflow, you can save time, reduce errors, and ensure that all necessary steps are followed for successful project completion.
Now that you have a comprehensive understanding of how to create, customize, and utilize task templates in Asana, you can maximize your productivity and effectively manage your projects. So, go ahead and start implementing task templates in Asana to streamline your workflow and achieve greater success!