Introduction
Creating a simple photo gallery in PHP is a great way to showcase your images and share them with others. Whether you want to display a collection of personal photos or showcase your photography portfolio, a photo gallery can add visual appeal to your website.
With PHP, you can easily build a dynamic and interactive photo gallery that allows users to browse through images, upload new photos, and even add descriptions or tags to each image. In this tutorial, we will walk you through the step-by-step process of creating a simple photo gallery using PHP.
By the end of this tutorial, you will have a fully functional photo gallery that can be easily customized and integrated into your existing website or used as a standalone gallery. Whether you are a beginner or an experienced PHP developer, this tutorial will provide you with the necessary knowledge and skills to create your own photo gallery.
Before we begin, let’s take a look at the prerequisites to ensure you have everything you need:
Prerequisites
Before you start creating your own photo gallery in PHP, there are a few prerequisites that you should have in place:
- A basic understanding of HTML, CSS, and PHP.
- A web server with PHP installed. You can use popular web servers like Apache or Nginx.
- A MySQL database to store the image information. Make sure you have the necessary privileges to create databases and tables.
If you are new to PHP or web development in general, it’s a good idea to familiarize yourself with these concepts before proceeding with the tutorial. You can find numerous online resources and tutorials that will help you learn the basics of HTML, CSS, and PHP.
In addition, it’s recommended to have a code editor installed on your computer. Popular options include Visual Studio Code, Sublime Text, or Atom. These code editors provide a user-friendly interface with syntax highlighting and other useful features to enhance your development experience.
Lastly, ensure that you have a working internet connection to download any necessary libraries or dependencies that we may use in the tutorial.
Now that you have the necessary prerequisites in place, let’s move on to setting up the project.
Step 1: Setting Up the Project
Before we can start building our photo gallery, we need to set up the project environment. Follow these steps:
- Create a new folder on your computer, preferably in a location accessible by your web server.
- In this folder, create a new file named
index.php– this will be our main PHP file. - Open
index.phpin your preferred code editor. - Inside the
index.phpfile, add the following basic HTML structure:
html
Simple Photo Gallery
At this point, we have created a basic HTML structure for our photo gallery. We will build upon this structure as we progress through the tutorial.
Next, we need to configure our web server to point to the project folder. If you are using Apache, you can do this by creating a virtual host. Open your Apache configuration file (usually located at /etc/apache2/apache2.conf or /etc/httpd/httpd.conf) and add the following lines:
apache
DocumentRoot “/path/to/your/project-folder”
ServerName localhost
Replace /path/to/your/project-folder with the actual path to your project folder.
Save the configuration file and restart your Apache server to apply the changes.
Now, if you access http://localhost in your web browser, you should see the “Simple Photo Gallery” heading. This confirms that our project setup is successful.
In the next step, we will create the database required to store our image information.
Step 2: Creating the Database
Now that our project environment is set up, we need to create a database to store the information about our images. Follow these steps:
- Open your preferred MySQL management tool, such as phpMyAdmin or MySQL Workbench.
- Create a new database. You can name it anything you like; for example, “photo_gallery”.
- Inside the newly created database, create a table named “images”. This table will store the image information and metadata.
- Add the following columns to the “images” table:
sql
CREATE TABLE images (
id INT(11) AUTO_INCREMENT,
filename VARCHAR(255),
description VARCHAR(255),
upload_date TIMESTAMP,
PRIMARY KEY (id)
);
This SQL code creates a table named “images” with columns for the image’s ID, filename, description, and upload date. The ID column is set as the primary key, ensuring each image has a unique identifier.
Once the table is created, you have successfully set up the database structure for your photo gallery. In the next step, we will create the necessary file structure for handling image uploads and displaying the gallery.
Step 3: Creating the File Structure
Now that we have the database set up, let’s create the necessary file structure for handling image uploads and displaying the photo gallery. Follow these steps:
- Inside your project folder, create a new folder named “uploads”. This folder will be used to store the uploaded images.
- Create another folder named “includes” inside your project folder. This folder will contain reusable PHP code that we will include in our main files.
- Inside the “includes” folder, create a new file named “config.php. This file will contain the configuration settings for our photo gallery.
- In “config.php”, add the following code:
php
In this code, replace your_username and your_password with your actual MySQL credentials. Also, modify the BASE_URL to match the URL of your local development environment.
Our file structure is now set up. In the next step, we will learn how to upload images to our photo gallery.
Step 4: Uploading Images
Now that we have the necessary file structure in place, let’s proceed with implementing the image upload functionality. Follow these steps:
- Create a new file named
upload.phpinside your project folder. - Open
upload.phpin your code editor and add the following code:
php
500000) {
$uploadOk = 0;
echo “File size too large.”;
}
// Allow certain file formats
$allowedExtensions = array(“jpg”, “jpeg”, “png”, “gif”);
if (!in_array($imageFileType, $allowedExtensions)) {
$uploadOk = 0;
echo “Unsupported file format.”;
}
// If everything is ok, try to upload file
if ($uploadOk == 1) {
if (move_uploaded_file($_FILES[“image”][“tmp_name”], $targetFilePath)) {
// Save image details to database
$conn = new mysqli(DB_HOST, DB_USERNAME, DB_PASSWORD, DB_NAME);
$sql = “INSERT INTO images (filename) VALUES (‘$fileName’)”;
if ($conn->query($sql) === true) {
echo “Image uploaded successfully.”;
} else {
echo “Error: ” . $sql . “
” . $conn->error;
}
$conn->close();
} else {
echo “Error uploading image.”;
}
}
}
?>
This code handles the image upload process. It checks for various conditions such as whether the uploaded file is a valid image, if the file already exists, and the file size limit. If all conditions are met, the image is saved to the “uploads” folder and the image details are inserted into the database table.
To test the image upload functionality, save the upload.php file and access it via your web browser. You should see a file upload form. Choose an image file from your computer and click the “Upload” button. If successful, you will see a message indicating that the image has been uploaded.
In the next step, we will learn how to display the uploaded images in our photo gallery.
Step 5: Displaying the Images
Now that we have uploaded images to our gallery, let’s proceed with displaying them on a webpage. Follow these steps:
- Update the
index.phpfile in your project folder. - Remove the existing
<h1>Simple Photo Gallery</h1>heading and add the following code:
php
query($sql);
if ($result->num_rows > 0) {
while ($row = $result->fetch_assoc()) {
$filename = $row[“filename”];
$filePath = UPLOAD_PATH . $filename;
echo ““;
}
} else {
echo “No images found.”;
}
$conn->close();
?>
This code retrieves the image details from the database table and displays each image on the webpage using the <img> tag. The images are ordered by the upload date in descending order, ensuring that the latest uploads appear first.
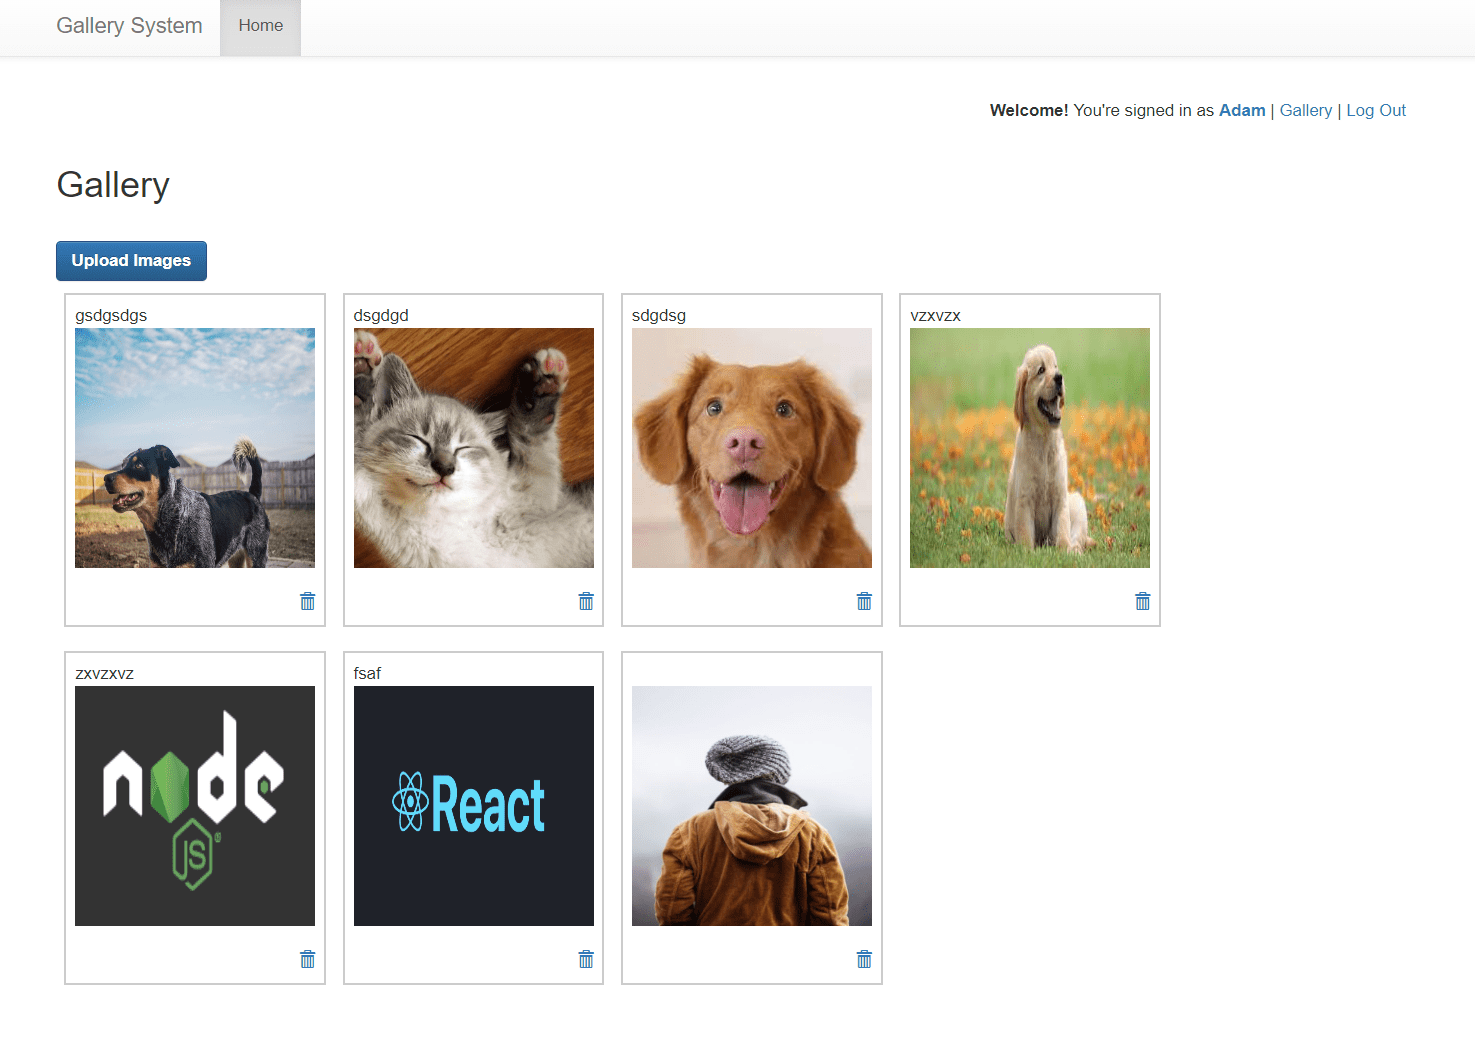
Save the changes to index.php and access it via your web browser. You should now see the uploaded images displayed on the page as thumbnails. Clicking on a thumbnail should open the full-size image.
With the images now being displayed, let’s move on to implementing pagination to handle a large number of images in the gallery.
Step 6: Adding Pagination
As our photo gallery grows with more images, it becomes essential to implement pagination to handle large numbers of images efficiently. Follow these steps to add pagination:
- Update the
index.phpfile in your project folder. - Add the following code above the image display loop:
php
query($countSql);
$totalImages = $countResult->fetch_assoc()[‘totalCount’];
$totalPages = ceil($totalImages / $imagesPerPage);
$sql = “SELECT * FROM images ORDER BY upload_date DESC LIMIT $start, $imagesPerPage”;
$result = $conn->query($sql);
if ($result->num_rows > 0) {
while ($row = $result->fetch_assoc()) {
$filename = $row[“filename”];
$filePath = UPLOAD_PATH . $filename;
echo ““;
}
} else {
echo “No images found.”;
}
$conn->close();
?>
This code adds pagination functionality to the photo gallery. It calculates the total number of images available, determines the total number of pages required, and retrieves images based on the current page. The number of images displayed per page is set to 9 in the $imagesPerPage variable, but you can adjust this value according to your preference.
To test the pagination, save the changes to index.php and access it via your web browser. You should see the image thumbnails displayed with pagination links at the bottom. Clicking on the page links should navigate to the corresponding set of images.
Congratulations! You have successfully created a simple photo gallery in PHP with pagination. You can further enhance the functionality by adding features such as image descriptions, tags, search functionality, or image filtering based on categories.
Feel free to customize and expand upon this photo gallery to suit your specific needs. Happy coding!
Conclusion
Congratulations on completing the tutorial on creating a simple photo gallery in PHP! By following the step-by-step instructions, you have learned how to set up the project environment, create the necessary database, implement file structure, upload images, display them on a webpage, and add pagination for efficient navigation.
Throughout this tutorial, you have gained valuable knowledge and skills in PHP programming, working with databases, handling file uploads, and designing a user-friendly gallery interface. This photo gallery can be easily customized and integrated into your website to showcase your images or create a platform for others to share their photographs.
Remember that this tutorial provides a foundation for building more advanced features. You can explore additional functionalities such as image editing, user authentication, social sharing, and more to enhance the usability and functionality of your photo gallery.
Continue practicing and expanding your PHP skills, and don’t forget to consider security measures, such as sanitizing user inputs and protecting your database and file uploads from unauthorized access.
Thank you for following along with this tutorial. We hope you found it informative and helpful in creating your own photo gallery in PHP. Good luck with your future PHP projects!