Introduction
Welcome to this article on how to display an image in PHP! If you’re interested in web development and have been working with PHP, you may have found yourself in a situation where you need to display an image on your website dynamically. This could be a profile picture, product image, or any other visual element that needs to be fetched from a database or generated on the fly.
In this tutorial, we will explore different ways to display images using PHP. We’ll cover the basics of installing PHP, creating a basic PHP script, and then dive into the various methods you can use to display images on your web page.
By the end of this tutorial, you will have a clear understanding of how to use HTML and PHP to showcase images on your website effectively. Whether you’re a beginner or an experienced web developer, this guide will provide you with the knowledge and tools you need to get started.
So, let’s jump right in and see how you can add dynamic and eye-catching images to your PHP web application!
Installing PHP
Before you can start displaying images in PHP, you need to have PHP installed on your system. PHP is a server-side scripting language that is widely used for web development. Here are the steps to install PHP:
1. Download PHP: The first step is to download PHP from the official website, which you can find at www.php.net. Choose the version that is compatible with your operating system (Windows, Mac, or Linux).
2. Install PHP: Once the download is complete, follow the installation instructions provided by the PHP installer. Make sure to set the installation directory and enable the necessary extensions based on your requirements.
3. Configure PHP: After the installation, you’ll need to configure PHP to work properly. This involves editing the php.ini file to configure settings such as file upload limits, error reporting levels, and database connections. The php.ini file is usually located in the PHP installation directory.
4. Test PHP: To check if PHP is installed and working correctly, create a new PHP file with the .php extension and add the following code:
Save the file and open it in your web browser. If PHP is installed properly, you should see a page displaying detailed information about the PHP configuration. This indicates that PHP is successfully installed on your system.
Once you have PHP up and running, you’re ready to start writing PHP scripts to display images on your web pages. In the next section, we will create a basic PHP script to get you started.
Creating a Basic PHP Script
Now that you have PHP installed, let’s create a basic PHP script to lay the foundation for displaying images. This script will serve as a starting point for the different methods we will explore later.
To begin, open your favorite text editor and create a new file. You can name the file “index.php” or any other name of your choice, as long as it has the .php extension.
In the PHP script, we start by adding the opening PHP tag . This tells the server that the code within these tags should be interpreted as PHP code.
Next, let’s add some HTML code to create a basic webpage structure. Here’s an example:
My Image Gallery
Welcome to My Image Gallery
In this example, we have a simple HTML structure with a title, a heading, and a footer. We will add the image display code in the designated comment area later.
Now that we have our basic PHP script set up, we can move on to exploring the different methods to display an image using PHP. In the following sections, we will cover both HTML-based and PHP-based approaches to showcase images dynamically on your web pages.
Displaying an Image with HTML
One of the simplest ways to display an image on a web page is by using the <img> tag in HTML. This approach is useful when you have a static image that does not need to be fetched dynamically from a database or generated on the fly.
To display an image using HTML, you first need to have the image file available in the appropriate directory on your web server. Let’s assume you have an image named “my-image.jpg” located in the “images” folder of your project directory.
To include the image on your webpage, you can use the following HTML code:
<img src="images/my-image.jpg" alt="My Image">
In this code, the src attribute specifies the path to the image file relative to your HTML file. In our example, the image is located in the “images” folder, so we provide the path images/my-image.jpg. The alt attribute is used to provide alternative text for the image, which is displayed if the image fails to load or for accessibility purposes.
You can further enhance the <img> tag by adding additional attributes. For example, you can specify the width and height of the image using the width and height attributes, respectively. You can also add a title to the image using the title attribute.
<img src="images/my-image.jpg" alt="My Image" width="300" height="200" title="My Image">
By utilizing the <img> tag along with its attributes, you can easily display images on your webpage using HTML. However, if you need to dynamically generate the image source or manipulate the images using PHP, we will explore different approaches in the following sections.
Displaying an Image with PHP
While HTML is great for displaying static images, PHP allows you to dynamically generate and manipulate images on the fly, opening up a whole new set of possibilities. In this section, we’ll explore different methods to display an image using PHP.
One way to display an image with PHP is by using the echo statement along with HTML. This approach allows you to generate the image source dynamically using PHP variables or functions.
Here’s an example of how you can display an image using PHP:
<h2>Displaying an Image with PHP</h2>

<?php
    $imageName = "my-image.jpg";
    $imagePath = "images/" . $imageName;

    echo '<img src="' . $imagePath . '" alt="My Image">';
?>
In this code, we first declare the variables $imageName and $imagePath. The $imageName variable holds the name of the image file, while the $imagePath variable stores the path to the image file. In this example, we assume that the image is located in the “images” folder of your project directory.
Next, we use the echo statement to generate the HTML code for displaying the image. The src attribute of the <img> tag is set to the value of the $imagePath variable, which dynamically generates the image source.
By using PHP, you have the flexibility to dynamically change the image path based on certain conditions or retrieve it from a database. This allows you to display different images based on user input, session data, or any other dynamic factors.
In addition to the echo method, PHP provides other functions and extensions for manipulating and displaying images. For example, with the GD library extension, you can create thumbnails, resize images, apply filters, and perform various image manipulation tasks with PHP.
Now that you know how to display an image using PHP, let’s explore further methods and techniques to enhance image display in the upcoming sections.
Using the <img> Tag
The <img> tag in HTML is a powerful tool for displaying images on a web page. It provides various attributes that allow you to control the appearance and behavior of the image. In this section, we will explore some useful attributes that you can use with the <img> tag to enhance the image display.
One of the commonly used attributes is the alt attribute, which specifies the alternative text for the image. This text is displayed when the image cannot be loaded or for users who have visual impairments. It is important to provide meaningful and descriptive alternative text to ensure accessibility and improve search engine optimization.
<img src="image.jpg" alt="Description of the image">
Another attribute is the width attribute, which specifies the width of the image in pixels. This attribute allows you to control the size of the displayed image and maintain the aspect ratio.
<img src="image.jpg" alt="Description of the image" width="500">
Similarly, the height attribute can be used to specify the height of the image in pixels. It works in conjunction with the width attribute to control the visual size of the image.
<img src="image.jpg" alt="Description of the image" width="500" height="300">
The title attribute is another handy attribute that can be used to provide additional information about the image when the user hovers over it. This attribute displays a tooltip containing the specified text.
<img src="image.jpg" alt="Description of the image" title="Additional information">
Furthermore, you can use the class and id attributes to apply CSS styles or manipulate the image with JavaScript. These attributes allow you to target specific images or groups of images using selectors or JavaScript methods.
<img src="image.jpg" alt="Description of the image" class="image" id="main-image">
By leveraging the various attributes of the <img> tag, you can customize the appearance and behavior of your images, making them more visually appealing and interactive on your web page.
In the next section, we will explore another method to display images using PHP, involving the use of the header() function.
Using the header() Function
In addition to using the <img> tag in HTML, you can also display images using the header() function in PHP. This method allows you to send specific headers to the browser, including the MIME type of the image, which tells the browser how to interpret and display the image.
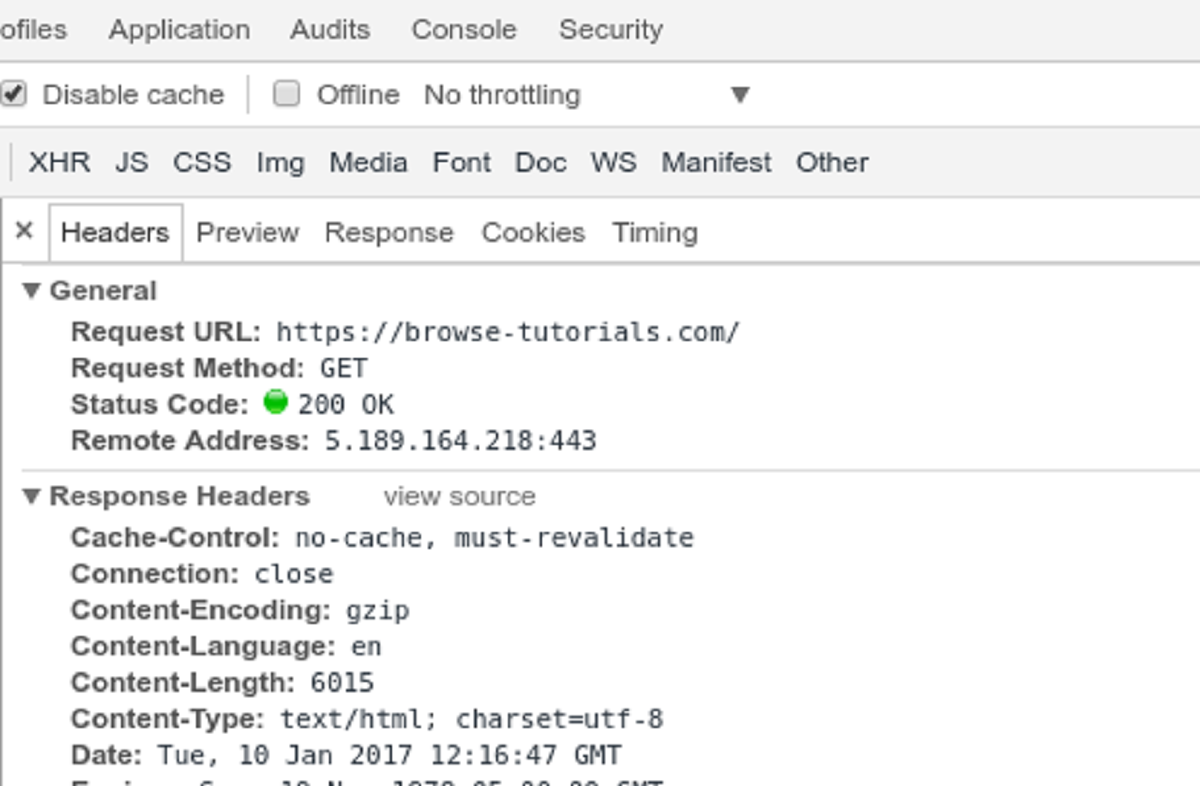
To display an image using the header() function, you need to set the appropriate MIME type, along with other headers, such as the content length and cache control. Here’s an example:
<?php
    $imagePath = "images/my-image.jpg";

    header("Content-Type: image/jpeg");
    header("Content-Length: " . filesize($imagePath));
    header("Cache-Control: no-store, no-cache, must-revalidate, max-age=0");
    header("Expires: " . gmdate("D, d M Y H:i:s", time()));

    readfile($imagePath);
    exit;
?>
In this example, we first set the Content-Type header to “image/jpeg” using the header() function. This informs the browser that the following content will be an image in JPEG format.
Next, we set the Content-Length header to the size of the image file using the filesize() function. This helps the browser determine the total size of the image.
We also set the Cache-Control header to specify how the browser should handle caching of the image. In this example, we set it to “no-store, no-cache, must-revalidate, max-age=0” to ensure that the image is always fetched from the server and not cached by the browser.
Finally, we set the Expires header to the current date and time to indicate that the image should not be served from cache.
After setting the necessary headers, we use the readfile() function to output the contents of the image file. This function reads the file and sends its contents to the browser for rendering.
By using the header() function along with the appropriate headers, you can directly send image data to the browser and display the image dynamically using PHP.
In the next section, we will explore a different technique to display images – showcasing a random image from a collection.
Displaying a Random Image
Displaying a random image on your web page can add an element of variety and surprise for your visitors. PHP allows you to easily implement this functionality by leveraging arrays and random number generators. Let’s see how you can display a random image from a collection using PHP.
First, you need to create an array that holds the paths of your desired images. For example, let’s say you have a folder named “random_images” that contains multiple images.
<?php
    $imageFolder = "random_images";
    $imageFiles = array_diff(scandir($imageFolder), array("..", "."));

    $randomIndex = array_rand($imageFiles);
    $randomImage = $imageFolder . "/" . $imageFiles[$randomIndex];
?>
In the code snippet above, we use the scandir() function to fetch the names of all files in the specified folder. We then use array_diff() to remove the “..” and “.” elements from the array. This ensures that only the actual image files are included in the array.
Next, we use the array_rand() function to generate a random index from the array of image files. This index corresponds to the randomly selected image that we want to display. We concatenate the folder name with the randomly selected image file to form the full path.
To display the random image on your web page, you can use the <img> tag and the PHP variable we created.
<img src="<?php echo $randomImage; ?>" alt="Random Image">
By refreshing the page or executing the PHP script multiple times, the displayed image will change randomly, providing an engaging and dynamic element to your web page.
Using this technique, you can easily showcase different images to your visitors each time they access your web page, creating a visually appealing and unique experience with every visit.
Now that you have learned how to display a random image, you can further customize and expand this functionality by incorporating user preferences or additional filtering options.
Conclusion
In this article, we have explored various methods to display images in PHP. We started by learning how to install PHP on your system, followed by creating a basic PHP script as a starting point for image display. We then explored different approaches to showcase images, including using the <img> tag in HTML and utilizing the header() function in PHP.
By using the <img> tag in HTML, you can easily display static images on your web pages. You can customize the appearance and behavior of the image by using attributes such as alt, width, height, and title. This method is suitable for situations where you have pre-defined images that don’t require dynamic generation.
The header() function in PHP allows you to send specific headers to the browser and dynamically generate and display images. You can set the appropriate MIME type and other headers to control how the image is displayed. This method is useful when you need to manipulate and generate images on the fly based on user input or other dynamic factors.
We also explored how to display a random image from a collection using PHP. By leveraging arrays and random number generators, you can create a dynamic and engaging experience for your visitors. Each time the page is refreshed, a different image will be displayed, adding an element of surprise and variety.
With these different methods at your disposal, you can effectively showcase images on your PHP web pages. Whether you have static images or need dynamic image generation, PHP provides the flexibility and tools required to meet your image display needs.
Remember to consider the size and resolution of your images to optimize page load times and ensure a smooth user experience. Additionally, always make sure you have the necessary rights or permissions to use the images you display on your web pages.
Now that you have a solid understanding of displaying images in PHP, feel free to explore further and experiment with different image manipulation libraries and techniques. Happy coding!