Introduction
Creating a PHP contact form is an essential step in building an interactive and user-friendly website. Whether you’re running a business or a personal blog, having a contact form allows your visitors to get in touch with you easily and efficiently.
In this tutorial, we will guide you through the process of creating a PHP contact form from scratch. You don’t need to be an expert in PHP programming, as we will explain each step in detail. By the end of this tutorial, you will have a fully functional contact form that can collect user input and send it to your email address.
To accomplish this, we will be using HTML, CSS, and PHP. HTML will be used to create the form structure and design, CSS will be used to enhance the visual presentation, and PHP will be used to validate the form data and send the email.
Throughout this tutorial, we will be following best practices for web development and security. We will ensure that user input is properly sanitized and validated to prevent any malicious attacks. Additionally, we will be using a popular PHP library called PHPMailer to handle the email sending process, which provides a secure and reliable method for sending emails with attachments.
So, if you’re ready to take your website to the next level and provide a convenient way for your visitors to contact you, let’s get started with creating your own PHP contact form!
Step 1: Set up your development environment
Before we begin creating the PHP contact form, we need to ensure that our development environment is properly set up. Here are the steps to follow:
- Install a local web server: To run PHP scripts on your computer, you will need a local web server. You can choose from popular options like XAMPP, WAMP, or MAMP, depending on your operating system.
- Configure the web server: Once the local web server is installed, you need to configure it to recognize PHP files. This involves updating the server’s configuration files, such as httpd.conf or php.ini, to enable PHP support.
- Create a project folder: Create a new folder on your computer where you will store all the files related to your PHP contact form project. You can name it something like “contact-form”.
- Set up a text editor: Choose a text editor or an Integrated Development Environment (IDE) that you are comfortable with. Popular options include Visual Studio Code, Sublime Text, or PHPStorm.
Once your development environment is set up, you are ready to move on to the next step. Having a well-configured environment will ensure that you can test and debug your PHP contact form without any issues.
In this tutorial, we will assume that you have a basic understanding of HTML, CSS, and PHP. However, we will explain the code snippets in detail, making it accessible for beginners as well. So, don’t worry if you’re new to PHP development – we’ve got you covered!
Now that your development environment is ready, let’s dive into the exciting process of creating a PHP contact form!
Step 2: Create the HTML form
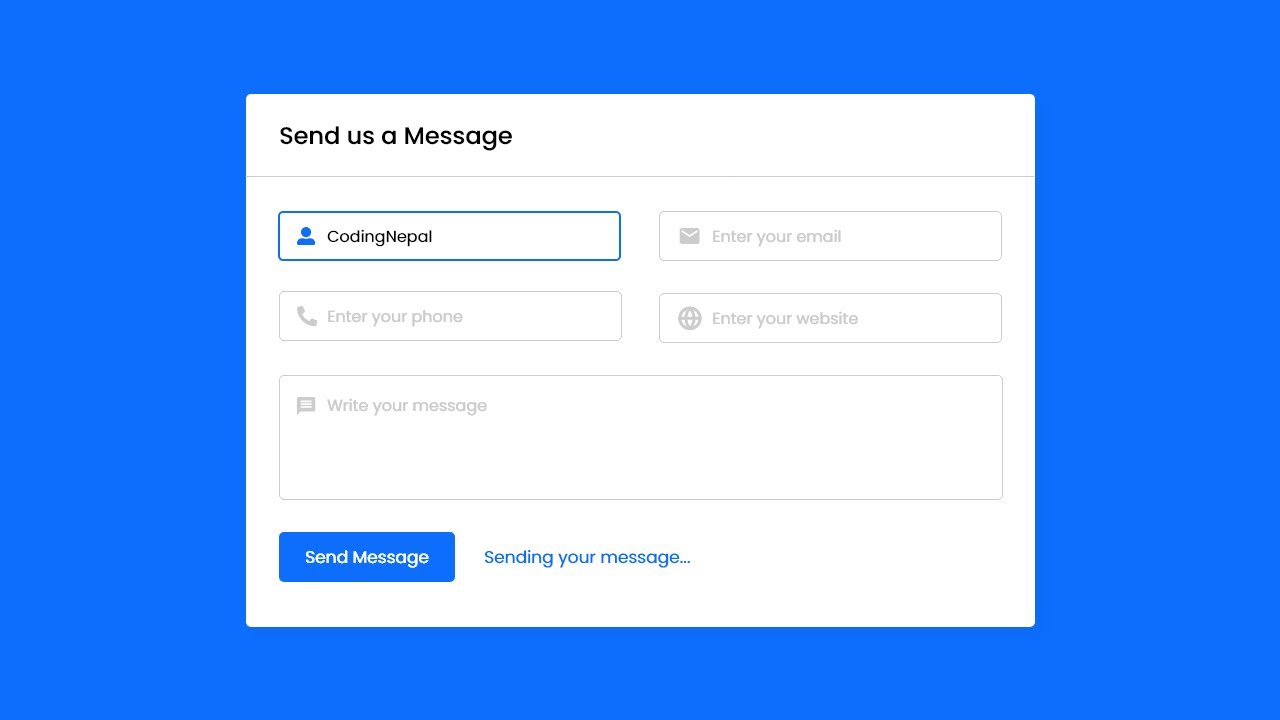
Now that our development environment is set up, it’s time to create the HTML form for our PHP contact form. The HTML form will serve as the user interface that visitors will interact with to input their information and send you a message. Follow these steps to create the HTML form:
- Create a new HTML file: In your project folder, create a new file called “contact.html”. This file will contain the HTML code for our contact form.
- Start with the form tag: Inside the “contact.html” file, start by adding the form tag. Specify the method attribute as “POST” to send the form data securely to the server.
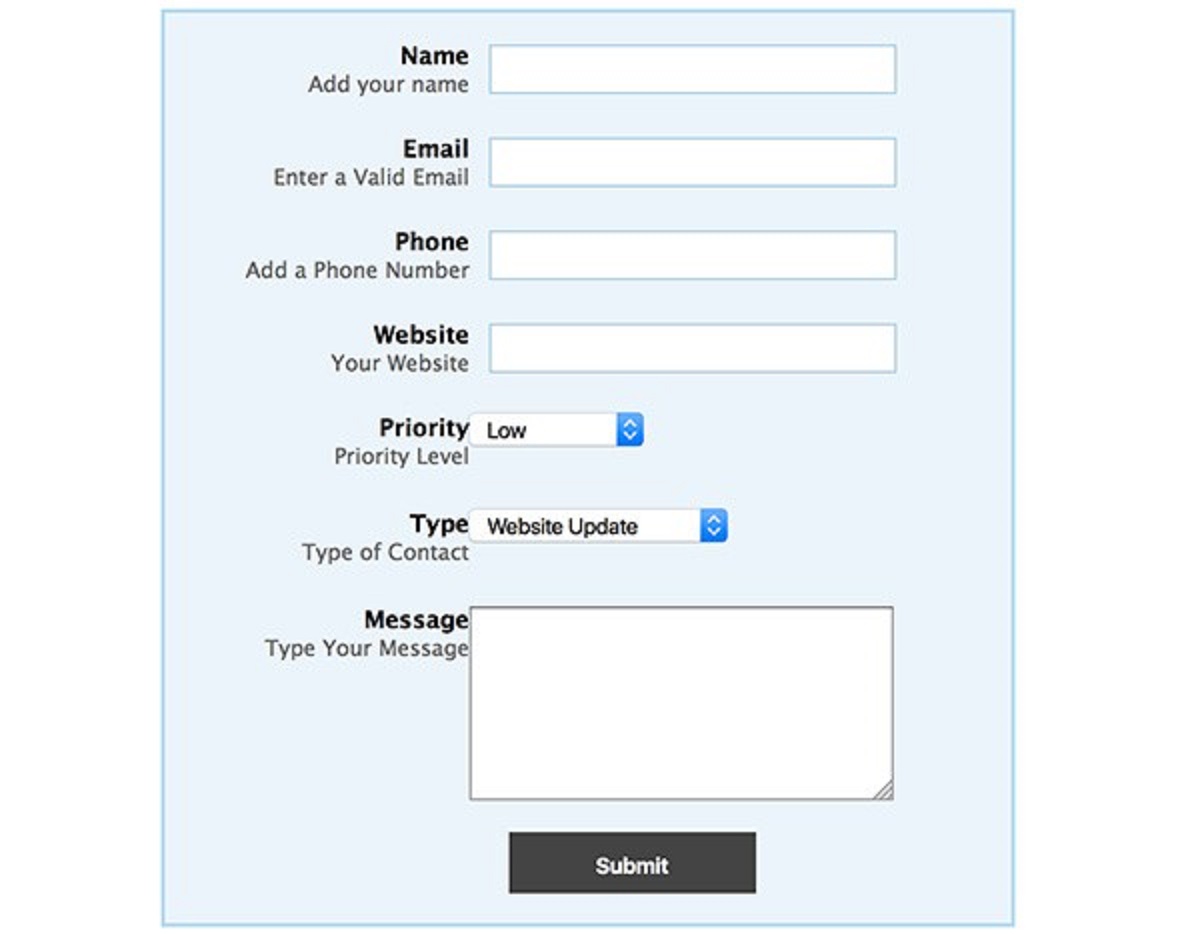
- Add form fields: Within the form tag, add input fields for the necessary information you want to collect from the user. Common fields include name, email address, subject, and message. Use appropriate input types such as text for name and email for email address.
- Include a submit button: Add a submit button to the form so that users can submit their information. Use the input type “submit” and provide a descriptive label, such as “Send”, for the button.
Here is a basic example of what the HTML form code might look like:
html
In this example, we have added input fields for name, email, subject, and message. Each field has a corresponding label for better accessibility. The required attribute ensures that users must fill in these fields before submitting the form.
Feel free to customize the HTML form as per your requirements and design preferences. You can add additional fields, modify the styling with CSS, or include any other elements you feel are necessary.
Once you have created the HTML form, save the “contact.html” file and move on to the next step of validating user input with PHP.
Step 3: Validate user input
Now that we have created the HTML form, we need to validate the user input to ensure that the data submitted is valid and complete. This step is crucial for maintaining data integrity and preventing any potential errors or security vulnerabilities. Follow these steps to implement input validation using PHP:
- Create a new PHP file: In your project folder, create a new file called “validate.php”. This file will contain the PHP code for validating the form data.
- Retrieve form data: Inside the “validate.php” file, use the $_POST superglobal to retrieve the form data submitted by the user. Assign the form data to separate variables for each input field.
- Implement validation rules: Apply the necessary validation rules to each input field. For example, you can check if the name field is not empty, if the email field is a valid email address, or if the message field has a minimum character limit.
- Display error messages: If any validation rule fails, display an appropriate error message to the user. You can do this by setting an error variable for each input field and displaying the error message within the HTML form.
Here is a basic example of what the PHP validation code might look like:
php
In this example, we retrieve the form data using $_POST and apply validation rules to each input field. If any validation rule fails, we assign an error message to the corresponding error variable. These error messages can be displayed within the HTML form to inform the user about the specific validation errors.
Remember to customize the validation rules according to your specific requirements. You may have additional validation rules based on the complexity of your form and the data you need to collect.
Once you have implemented the input validation in the “validate.php” file, you can proceed to the next step of creating a PHP script to process the form data and send an email.
Step 4: Create a PHP script to process the form data
After validating the user input, the next step is to create a PHP script that will process the form data and perform the necessary actions. This script will be responsible for sending the email with the form content to your designated email address. Follow these steps to create the PHP script:
- Create a new PHP file: In your project folder, create a new file called “process.php”. This file will contain the PHP code to process the form data.
- Configure email settings: Inside the “process.php” file, configure the necessary email settings. This includes specifying the email address you want the form data to be sent to, setting the subject line for the email, and optionally adding any additional headers or settings.
- Compose the email message: Use the form data submitted by the user to compose the email message. You can format the message content using HTML or plain text, depending on your preference.
- Send the email: Use the PHP mail() function or a third-party library like PHPMailer to send the email. This function requires the recipient’s email address, the email subject, the message content, and any additional headers you may have set.
Here is a basic example of what the PHP script might look like:
php
You have received a new contact form submission:
“;
$message .= “
Name: ” . $_POST[‘name’] . “
“;
$message .= “
Email: ” . $_POST[’email’] . “
“;
$message .= “
Subject: ” . $_POST[‘subject’] . “
“;
$message .= “
Message: ” . $_POST[‘message’] . “
“;
// Send the email
if (mail($to, $subject, $message, $headers)) {
echo “Thank you for submitting the form!”;
} else {
echo “Oops! There was an error sending the form. Please try again later.”;
}
?>
In this example, we configure the email settings by specifying the recipient’s email address, setting the subject line to identify a new form submission, and adding the necessary headers for the email. We compose the email message using the form data submitted by the user, and then use the mail() function to send the email. Finally, we display an appropriate success or error message based on the status of the email sending process.
Feel free to customize the email settings and the email message content according to your specific requirements. Once you have created the “process.php” file, save it and proceed to the next step of connecting and sending email using a library like PHPMailer.
Step 5: Connect and send email using PHPMailer
To enhance the functionality and security of sending emails in PHP, we will use the PHPMailer library. PHPMailer provides a simple and reliable way to connect with a mail server and send emails securely. Follow these steps to connect and send email using PHPMailer:
- Download and include PHPMailer: Download the PHPMailer library from the official website (https://github.com/PHPMailer/PHPMailer) and include it in your project folder. Then, include the PHPMailerAutoload.php file in your “process.php” file using the require_once statement.
- Configure email settings: Inside the “process.php” file, update the email settings to use PHPMailer. This includes specifying the SMTP server address, port number, authentication details, and any other necessary settings.
- Configure email content: Use PHPMailer methods to set the email subject, recipient, sender, and message content. You can customize the formatting and structure of the email using HTML or plain text, depending on your preferences.
- Send the email: Use the send() method of PHPMailer to send the email. This method will handle the connection with the mail server and the sending of the email using the configured settings.
Here is an example of what the updated PHP script using PHPMailer might look like:
php
isSMTP();
$mail->Host = ‘smtp.example.com’;
$mail->Port = 587;
$mail->SMTPAuth = true;
$mail->Username = ‘your-email@example.com’;
$mail->Password = ‘your-password’;
// Configure email content
$mail->Subject = “New contact form submission”;
$mail->SetFrom($_POST[’email’], $_POST[‘name’]);
$mail->addAddress(‘your-email@example.com’);
$mail->isHTML(true);
$mail->Body = “
You have received a new contact form submission:
Name: ” . $_POST[‘name’] . “
Email: ” . $_POST[’email’] . “
Subject: ” . $_POST[‘subject’] . “
Message: ” . $_POST[‘message’] . “
“;
// Send the email
if ($mail->send()) {
echo “Thank you for submitting the form!”;
} else {
echo “Oops! There was an error sending the form. Please try again later.”;
}
?>
In this example, we first include the PHPMailer library using the require_once statement. We then create a new instance of PHPMailer and configure the necessary email settings, such as the SMTP server information and authentication details. We set the email subject, sender, recipient, and message content using the appropriate PHPMailer methods. Finally, we use the send() method to send the email and display an appropriate success or error message.
Remember to update the SMTP server information, credentials, and any other necessary settings according to the email provider you are using. Once you have completed the PHPMailer configuration, save the “process.php” file, and move on to the next step of adding success and error messages.
Step 6: Add success and error messages
To provide feedback to the user after submitting the contact form, it’s essential to include success and error messages. These messages will inform users whether their form submission was successful or if there were any issues during the process. Follow these steps to add success and error messages to your PHP contact form:
- Decide on the method of displaying messages: Determine how you want to display the messages to the user. This can be done by redirecting the user to a thank you page after successful form submission, or by displaying the messages directly on the contact form page.
- Include success and error variables: Inside the “process.php” file, create success and error variables. These variables will store the respective success and error messages that will be displayed to the user.
- Set the success and error messages: Depending on the outcome of the email sending process, set the appropriate success or error message using conditional statements or switches.
- Display the messages: If you are displaying messages directly on the contact form page, insert PHP code within the HTML form to display the success or error message. Alternatively, if you are redirecting to a thank you page, pass the success or error message as a query parameter to the thank you page URL.
Here is an example of how you can implement success and error messages directly on the contact form page:
php
send()) {
echo “
“;
} else {
echo “
“;
}
?>
In this example, we have created successMessage and errorMessage variables to store the respective messages. Depending on the result of the email sending process, we use conditional statements to display the appropriate message within the HTML form. You can customize the CSS classes and styling as needed to make the messages visually appealing.
If you prefer to redirect to a thank you page after successful form submission, you can pass the success message as a query parameter in the URL. On the thank you page, retrieve the success message and display it accordingly.
With the inclusion of success and error messages, users will have a clear understanding of the outcome of their form submission and any errors that occurred. This will enhance the overall user experience and provide feedback in a concise and informative manner.
Step 7: Test your contact form
Testing your contact form is crucial to ensure that it functions correctly and delivers the intended results. By thoroughly testing your contact form, you can identify and fix any issues or errors that may arise. Follow these steps to test your contact form:
- Fill in the form with valid data: Test your contact form by filling in each field with valid information. Ensure that all required fields are completed correctly.
- Submit the form: Click the submit button and verify that the form submits successfully without any errors.
- Receive the email: Check the email address you specified in your PHP script or PHPMailer configuration. Confirm that you receive the email containing the form information.
- Check email formatting: Verify that the email received preserves the formatting, such as HTML tags, line breaks, and special characters.
- Test error handling: Submit the form with invalid or missing information in certain fields. Ensure that the appropriate error messages are displayed to the user and that the form does not submit until all errors are resolved.
- Test edge cases: Test your contact form with extreme or unexpected inputs to ensure that it handles them appropriately. Experiment with long strings, special characters, or unusual email addresses.
- Test on different devices and browsers: Test your contact form on various devices, browsers, and operating systems to ensure cross-compatibility and consistent functionality.
By following these testing steps, you can identify and address any issues or errors that may occur. Testing also allows you to fine-tune the user experience and make any necessary improvements to the form’s usability and functionality.
If you encounter any problems during the testing phase, go back to the respective step and review your code for any potential mistakes. Ensure that all variables, form fields, and email settings are properly configured and functioning as expected.
Remember to conduct periodic testing of your contact form, especially after making any updates or modifications. This will help maintain its functionality and ensure that you are receiving important messages from your website visitors.
Conclusion
Congratulations! You have successfully created a PHP contact form from scratch. By following the steps outlined in this tutorial, you have learned how to set up your development environment, create an HTML form, validate user input, process the form data, connect and send email using PHPMailer, and add success and error messages. By testing your contact form thoroughly, you can ensure that it functions correctly and delivers the intended results.
Remember, a well-designed and properly functioning contact form is a crucial component of any website. It allows your visitors to get in touch with you easily and efficiently. By incorporating best practices, such as input validation, secure email sending, and informative error messages, you can provide a seamless user experience and protect against potential security risks.
Don’t stop here! Take your contact form to the next level by customizing it to fit your specific needs. You can add additional fields, implement CAPTCHA verification, integrate with a database to store form submissions, or enhance the styling using CSS. The possibilities are endless, and it’s up to you to explore and experiment with different features and functionalities.
Lastly, always stay up to date with the latest web development practices and security recommendations. Regularly check for any updates or security vulnerabilities related to PHP, HTML, CSS, and the libraries you use. By keeping your contact form and website in top shape, you can ensure a smooth user experience and maintain the trust of your visitors.
Now it’s time to put your newly acquired knowledge into action. Start implementing your PHP contact form and enjoy the convenience of seamless communication with your website visitors. Good luck!