Introduction
Controlling the CPU fan speed is crucial for maintaining optimal performance and preventing overheating of your computer. When the CPU works hard, it generates heat, which needs to be dissipated effectively to avoid any potential damage. That’s where MSI Afterburner comes in.
MSI Afterburner is a powerful graphics card overclocking utility that also includes features for controlling the fan speed of your CPU. It allows you to adjust fan speeds based on the temperature of your CPU, ensuring efficient cooling and preventing the system from getting too hot.
Whether you are an avid gamer, a content creator, or just a regular computer user, being able to control the CPU fan speed with MSI Afterburner can significantly improve the overall performance and lifespan of your system.
In this article, we will guide you through the process of installing MSI Afterburner, launching the program, adjusting the fan speed curve, monitoring CPU temperatures, fine-tuning the fan speed curve, and applying the changes. By the end of this article, you will have a better understanding of how to effectively control the CPU fan speed using MSI Afterburner.
So, let’s dive in and learn how to keep your CPU cool and your system running smoothly with MSI Afterburner!
Why do you need to control CPU fan speed?
Controlling the CPU fan speed is essential for several reasons. Here are a few key reasons why you need to pay attention to the fan speed of your CPU:
- Temperature regulation: The CPU generates heat as it processes tasks. If the heat is not effectively dissipated, it can lead to overheating, which can cause system instability, crashes, and even permanent damage to the CPU or other components. By controlling the fan speed, you can regulate the temperature and prevent overheating.
- Improved performance: Excessive heat can lead to thermal throttling, a process in which the CPU reduces its clock speed to cool down. This results in decreased performance and slower processing speeds. By maintaining optimal temperatures through fan speed control, you can prevent thermal throttling and ensure maximum performance.
- Extended lifespan: Overheating can significantly shorten the lifespan of your CPU and other components. By keeping the CPU temperature in check, you can prolong the lifespan of your hardware and avoid costly replacements or repairs.
While many modern motherboards have built-in fan control mechanisms, they may not always be as effective or customizable as third-party software like MSI Afterburner. MSI Afterburner offers more advanced control options, allowing you to fine-tune the fan speed based on your specific needs and system requirements.
Overall, controlling the CPU fan speed is vital for maintaining the stability, performance, and longevity of your system. With MSI Afterburner, you can easily take control of your CPU fan speed and ensure that your computer remains cool, efficient, and reliable.
What is MSI Afterburner?
MSI Afterburner is a comprehensive graphics card overclocking utility that provides users with advanced control over their GPU settings. Developed by MSI, a well-known manufacturer of gaming hardware, Afterburner has gained popularity among enthusiasts and gamers for its robust features and user-friendly interface.
While MSI Afterburner is primarily known for its GPU overclocking capabilities, it also includes features for controlling the fan speed of your CPU. This allows you to fine-tune the cooling performance of your system and maintain optimal temperatures.
One of the standout features of MSI Afterburner is its ability to create and adjust fan speed curves. The fan speed curve represents the relationship between the CPU temperature and the corresponding fan speed. Using this curve, you can customize the fan speed at different temperature thresholds, ensuring that the fan operates at an appropriate speed according to the system’s needs.
In addition to fan speed control, MSI Afterburner also provides real-time monitoring of various system parameters such as temperature, clock speed, voltage, and usage percentages. This allows you to keep a close eye on the performance of your CPU and GPU and make informed decisions regarding overclocking or adjusting fan speed.
MSI Afterburner is compatible with most graphics cards, not just those manufactured by MSI. This makes it a versatile tool that can be used with a wide range of systems and configurations.
Furthermore, MSI Afterburner is constantly updated by the developers, ensuring compatibility with the latest hardware and software platforms. This commitment to ongoing improvements and support means that users can rely on MSI Afterburner for their CPU fan speed control needs now and in the future.
In summary, MSI Afterburner is an all-in-one utility that offers advanced GPU overclocking capabilities and CPU fan speed control. It provides users with the tools they need to optimize their system’s cooling performance and maximize the potential of their graphics card and CPU.
Install MSI Afterburner
Installing MSI Afterburner is a straightforward process. Follow the steps below to get started:
- Visit the official MSI Afterburner website or the website of your graphics card manufacturer that provides the MSI Afterburner software.
- Download the latest version of MSI Afterburner that is compatible with your operating system.
- Once the download is complete, locate the setup file and double-click on it to start the installation process.
- Follow the on-screen instructions provided by the installer. You may be prompted to agree to the terms and conditions and choose the installation location for the program.
- During the installation, you might encounter an option to install additional software or drivers. Carefully review these options and choose the ones that are relevant to your system. It is recommended to only install the necessary components to avoid any potential conflicts.
- Allow the installation process to complete. This may take a few moments, depending on your system’s speed and resources.
- Once the installation is finished, you can optionally launch MSI Afterburner directly from the installer, or you can navigate to the start menu or desktop shortcut to access the program.
- When launching MSI Afterburner for the first time, you might see a prompt to install the necessary drivers for your graphics card. Follow the prompts to install these drivers, as they are essential for the proper functioning of the program.
That’s it! You have successfully installed MSI Afterburner on your system. Now you can move on to the next section to learn how to launch and configure the program.
Launch MSI Afterburner
After successfully installing MSI Afterburner, you can launch the program and start configuring the fan speed of your CPU. Here are the steps to follow:
- Locate the MSI Afterburner shortcut on your desktop or navigate to the program through the Start menu.
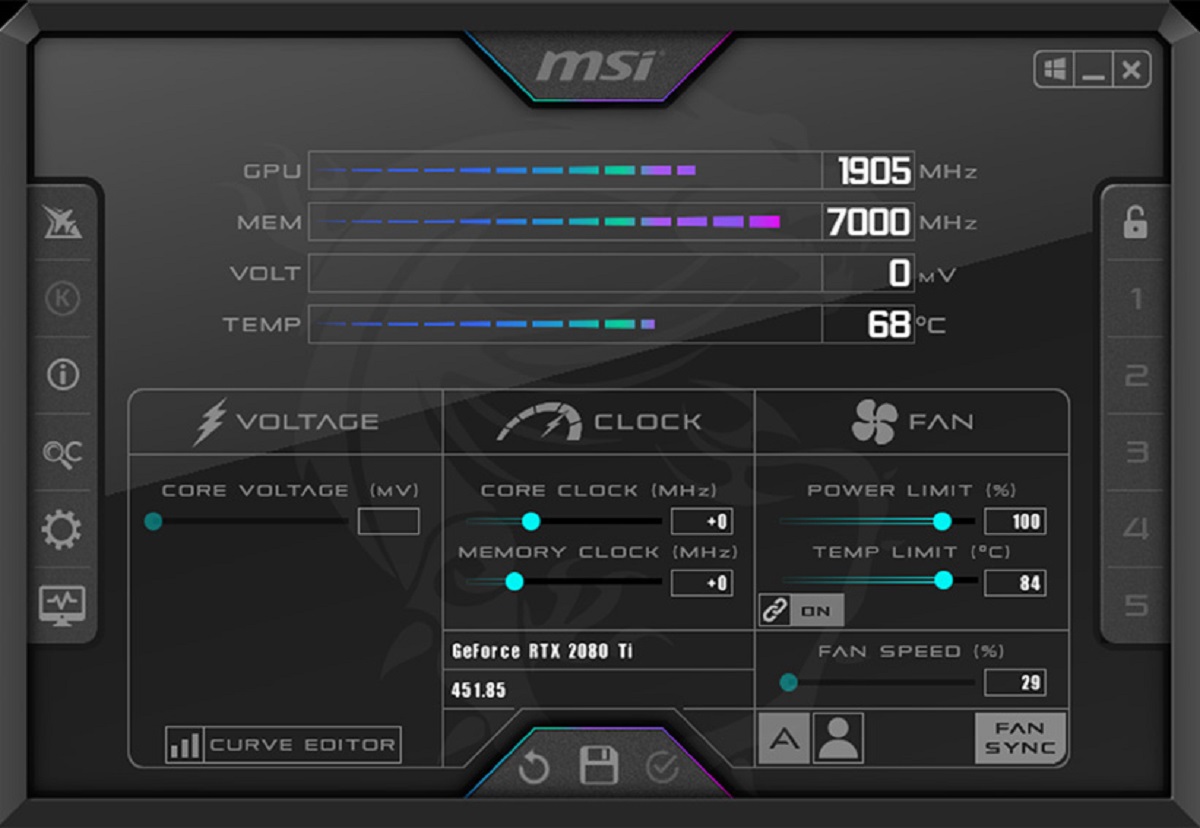
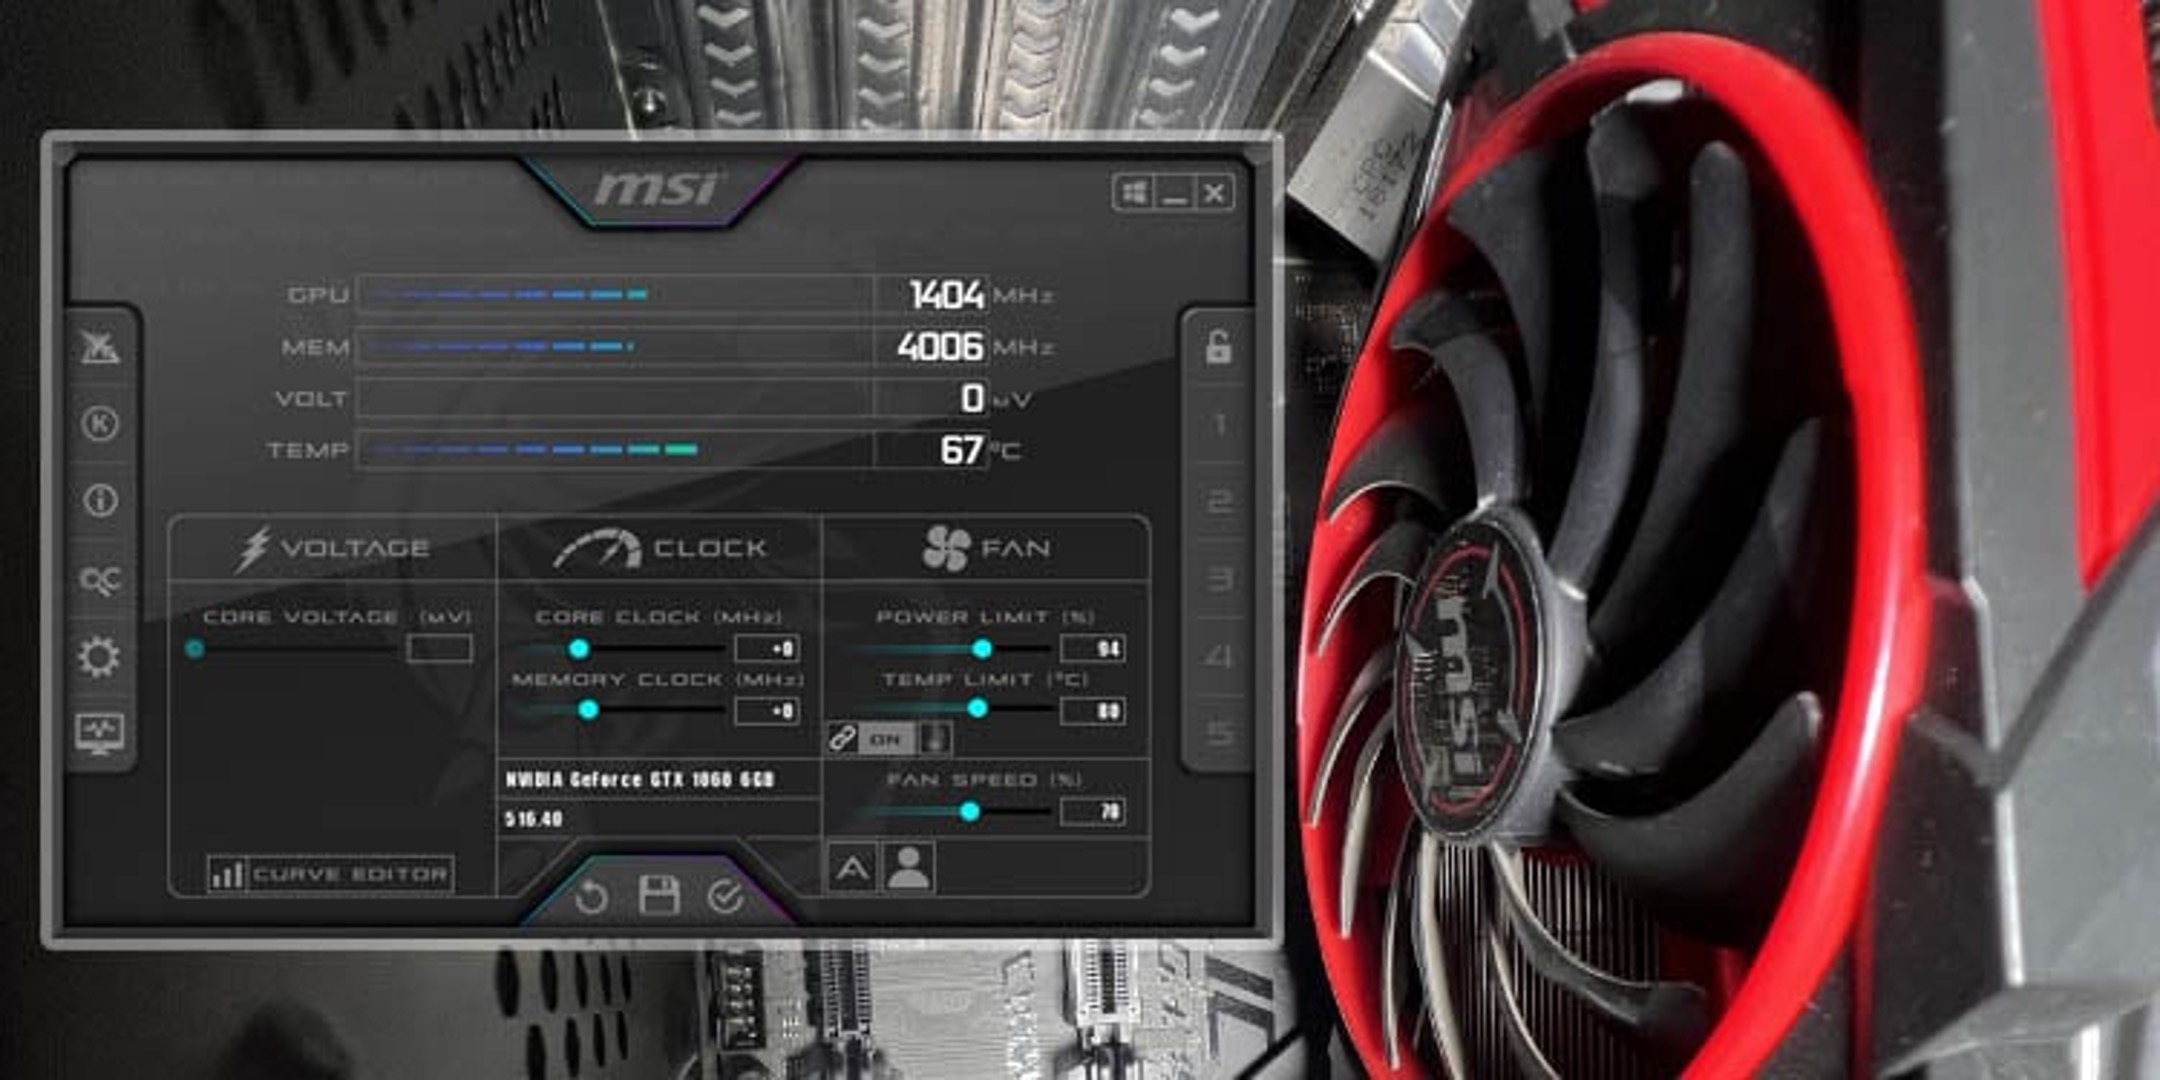
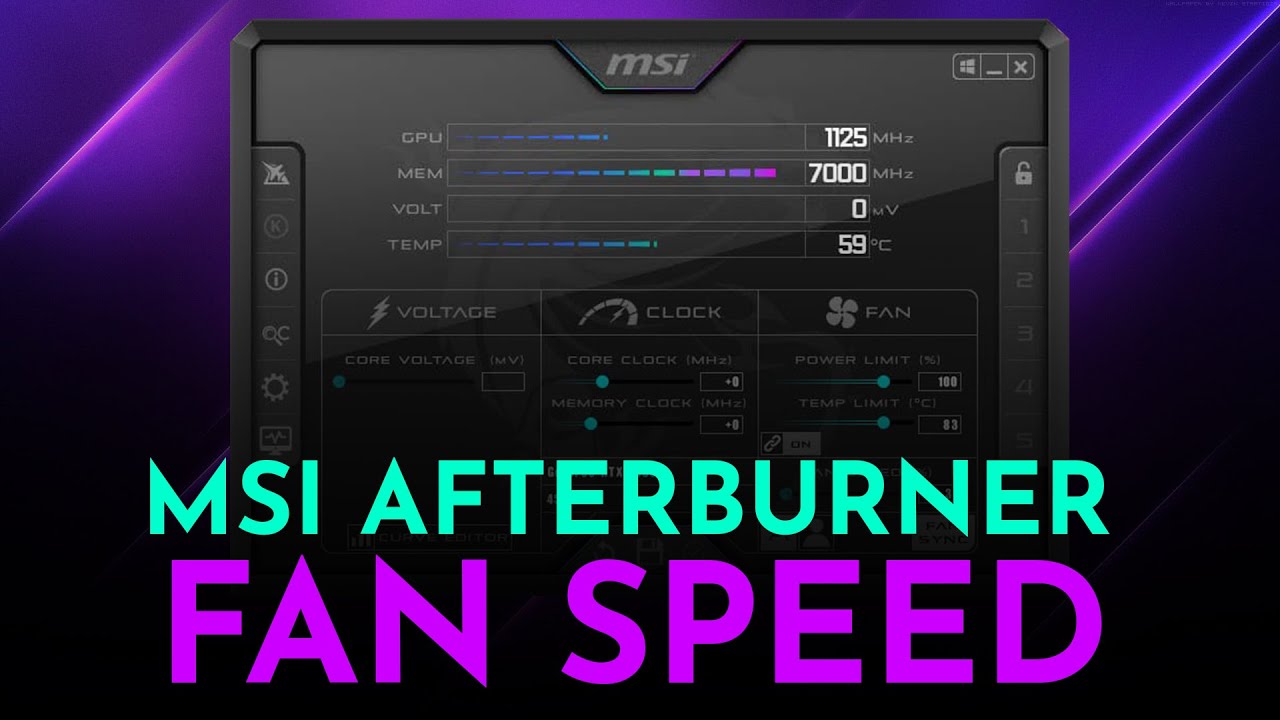
- Double-click on the MSI Afterburner icon to open the program. A window will appear, displaying various settings and sliders.
- Before adjusting the fan speed, it is essential to ensure that MSI Afterburner recognizes and supports the GPU and CPU on your system. To check this, look for the GPU and CPU information in the top-left corner of the program window. If the information is displayed correctly, proceed to the next step. If not, make sure your graphics card drivers are up to date and that your GPU and CPU are compatible with MSI Afterburner.
- Take a moment to familiarize yourself with the interface of MSI Afterburner. You will see sliders for adjusting core clock speed, memory clock speed, voltage, and fan speed.
- Pay attention to the fan speed slider. This is the setting you will adjust to control the CPU fan speed. By default, it might be set to ‘Auto’ or ‘User Defined’.
- If the fan speed slider is set to ‘Auto’, the program will manage the fan speed automatically based on the CPU temperature. If you prefer manual control, switch the slider to ‘User Defined’.
- Now you are ready to configure the fan speed curve and monitor CPU temperatures. Continue to the next sections of this article for detailed instructions on adjusting the fan speed curve and monitoring temperatures.
That’s it! You have successfully launched MSI Afterburner and are ready to customize the CPU fan speed. In the following sections, we will delve into adjusting the fan speed curve, monitoring temperatures, and fine-tuning the settings for optimal CPU cooling.
Adjusting the fan speed curve
One of the main features of MSI Afterburner is the ability to adjust the fan speed curve. This allows you to customize the fan speed based on the CPU temperature. Follow the steps below to adjust the fan speed curve:
- In the MSI Afterburner program window, locate the fan speed slider. It is usually labeled as ‘Fan Speed%’ or ‘Fan Speed (RPM)’.
- Click and drag the slider to increase or decrease the fan speed. As you adjust the slider, you will notice the corresponding changes in the fan speed displayed on the screen.
- To customize the fan speed curve, click on the small gear icon next to the fan speed slider. This will open the fan speed curve editor window.
- In the fan speed curve editor window, you will see a graph that represents the relationship between the CPU temperature and the fan speed. By default, the curve might be set to a linear or gradual increase in fan speed as the CPU temperature rises.
- To adjust the curve, click and drag the points on the graph. You can add or remove points by right-clicking on the line and selecting the appropriate option from the context menu.
- Customize the curve according to your preferences. For example, you might want the fan speed to increase more aggressively as the CPU temperature rises or prefer a more gradual increase. Experiment with different curves to find the optimal settings for your system.
- Once you are satisfied with the adjustments, click ‘Apply’ or ‘OK’ to save the changes and exit the fan speed curve editor window.
By adjusting the fan speed curve in MSI Afterburner, you can ensure that the CPU fan operates at the desired speed based on the CPU temperature. This allows for efficient cooling and prevents overheating.
In the next section, we will explore how to monitor your CPU temperature using MSI Afterburner.
Monitoring your CPU temperature
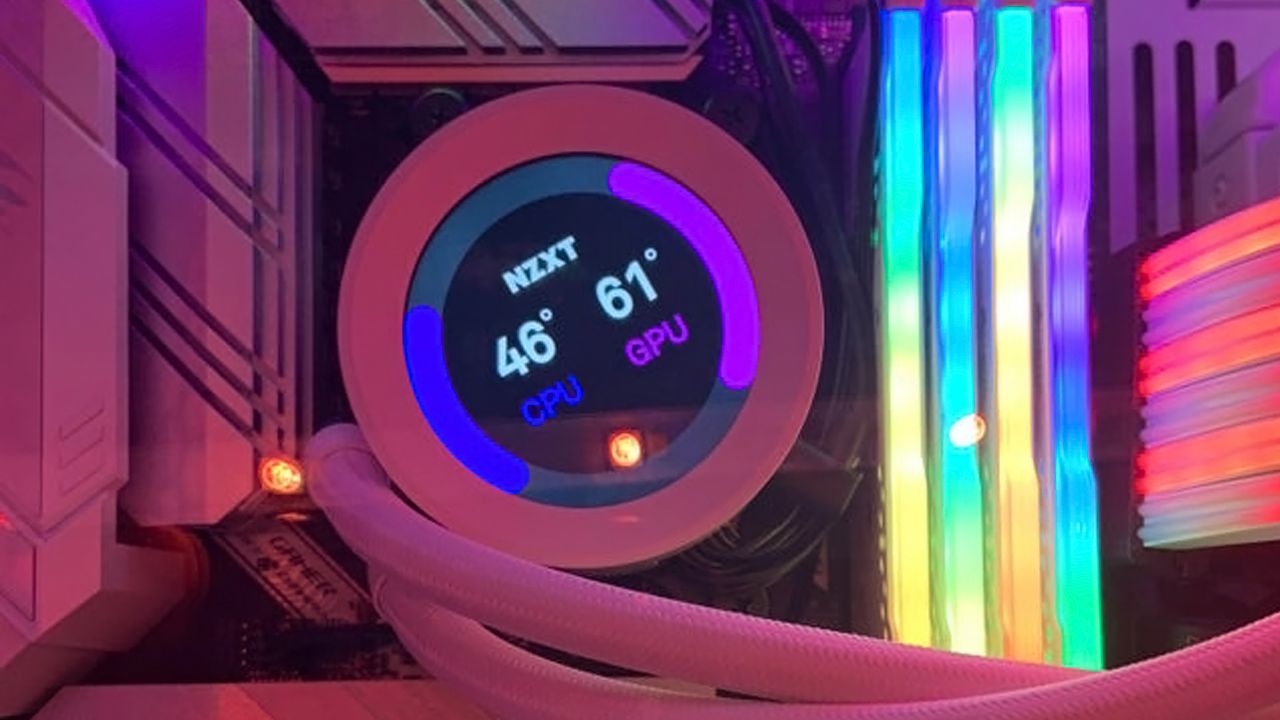
Monitoring your CPU temperature is crucial to keep track of its performance and ensure it stays within safe limits. With MSI Afterburner, you can easily monitor your CPU temperature in real-time. Here’s how:
- In the MSI Afterburner program window, you will see various monitoring options and graphs. Look for the ‘Temperature’ section, which usually displays the current CPU temperature.
- If the CPU temperature is not displayed, you can add it to the monitoring list by clicking on the small plus (+) icon located near the monitoring options. This will open a window with a list of available parameters to monitor.
- Scroll through the list and locate the CPU temperature parameter, which is often labeled as ‘CPU Temperature’ or ‘Core Temperature’.
- Check the box next to CPU temperature to enable it for monitoring. You can also select additional parameters if desired.
- Once the CPU temperature is enabled for monitoring, it will be displayed in the main program window alongside other monitoring parameters. The value will update in real-time as the CPU temperature changes.
- Observe the CPU temperature reading and ensure that it stays within a safe range. The safe operating temperature varies depending on the specific CPU model but generally falls below 80-85 degrees Celsius.
- If you notice that the CPU temperature is consistently reaching high levels or nearing the maximum recommended threshold, you may need to adjust the fan speed curve in MSI Afterburner to increase cooling efficiency.
- Continue monitoring the CPU temperature during different tasks and loads to assess the effectiveness of the fan speed settings and make any necessary adjustments.
By keeping a close eye on the CPU temperature using MSI Afterburner, you can ensure that your system is running within safe limits and take proactive measures to prevent overheating and potential damage to your CPU.
In the next section, we will explore how to fine-tune your fan speed curve for optimal CPU cooling.
Fine-tuning your fan speed curve
Once you have adjusted the fan speed curve in MSI Afterburner, you may find it necessary to fine-tune the settings for optimal CPU cooling. Fine-tuning allows you to make precise adjustments to the fan speed curve based on your specific needs and system requirements. Follow these steps to fine-tune your fan speed curve:
- Open MSI Afterburner and navigate to the fan speed curve editor window by clicking on the gear icon next to the fan speed slider.
- Take a look at your current fan speed curve and observe how it responds to changes in CPU temperature. Pay attention to any areas where the curve may be too aggressive or too conservative.
- To make adjustments, click and drag the points on the fan speed curve. For example, you can increase the fan speed earlier in the curve to provide better cooling at lower temperatures, or decrease the fan speed to reduce noise when the CPU is running cooler.
- As you make adjustments, keep an eye on the CPU temperature readings in the monitoring section. Aim to find a balance between effective cooling and acceptable noise levels.
- Experiment with different curve shapes and point placements to find the optimal settings for your system. Fine-tuning may require some trial and error to achieve the desired balance.
- Consider the specific tasks and workloads your CPU will handle. For example, if you engage in demanding tasks like gaming or video editing, you may want a more aggressive fan speed curve to ensure optimal cooling during extended periods of high CPU usage.
- Make incremental adjustments rather than drastic changes to avoid potential instability in the system.
- Once you have fine-tuned the fan speed curve to your satisfaction, click ‘Apply’ or ‘OK’ to save the changes and exit the fan speed curve editor window.
By fine-tuning the fan speed curve in MSI Afterburner, you can optimize CPU cooling based on your specific needs. This allows for efficient cooling and helps maintain a balance between temperature control and noise levels.
In the next section, we will cover the final step of applying the changes made to the fan speed curve.
Applying the changes
After adjusting and fine-tuning the fan speed curve in MSI Afterburner, it is important to apply the changes to ensure that your CPU fan operates according to the desired settings. Here’s how you can apply the changes:
- In the main program window of MSI Afterburner, review your fan speed curve and confirm that it reflects the adjustments you made.
- If you are satisfied with the modifications, click on the ‘Apply’ button or select the appropriate option to save and implement the changes.
- MSI Afterburner will update the fan speed curve settings, and the fan speed will adjust accordingly based on the CPU temperature. You can observe these changes in real-time as you monitor the CPU temperature.
- Continue to monitor the CPU temperature and make sure it stays within safe limits while the adjusted fan speed curve is in effect.
- If you encounter any issues or notice unexpected behavior, you can always revisit the fan speed curve editor to further refine or revert your changes.
- Remember that the effectiveness of your fan speed curve settings may vary depending on factors such as ambient temperature, CPU workload, and overall system cooling.
- Regularly monitor the CPU temperature and observe how it responds to different tasks and workloads. This will allow you to validate the effectiveness of your adjusted fan speed curve and make any necessary adjustments in the future.
By applying the changes made to the fan speed curve, you ensure that the CPU fan operates at the desired speed based on the CPU temperature. This promotes efficient cooling, prevents overheating, and helps maintain optimal system performance.
Now that you have successfully adjusted and applied the changes to your fan speed curve, you can enjoy the benefits of a well-regulated CPU fan and a cooler, more stable system.
Conclusion
Controlling the CPU fan speed is crucial for maintaining optimal performance, preventing overheating, and extending the lifespan of your system. With MSI Afterburner, you have the power to adjust and fine-tune the fan speed curve to meet your specific needs and keep your CPU cool.
In this article, we explored the importance of controlling CPU fan speed and how MSI Afterburner can help in achieving efficient cooling. We covered the installation process of MSI Afterburner, launching the program, adjusting the fan speed curve, monitoring CPU temperatures, and fine-tuning the settings for optimal cooling performance.
Remember, as you adjust the fan speed curve, it is crucial to find the right balance between temperature control and noise levels. Fine-tuning your fan speed curve allows you to tailor the cooling performance to your system’s requirements and specific use cases.
Regular monitoring of your CPU temperature is essential to ensure that it remains within safe limits. By paying close attention to the temperature readings and making necessary adjustments to the fan speed curve, you can prevent overheating and maintain optimal system stability and performance.
With MSI Afterburner, you have a powerful tool at your disposal for controlling the CPU fan speed and maximizing the efficiency of your system’s cooling capabilities. So, take advantage of this software and enjoy a cooler and more reliable computing experience.
We hope this article has provided you with the necessary guidance to effectively control the CPU fan speed using MSI Afterburner. Take the knowledge you have gained and apply it to your system to ensure better temperature management and enhanced overall performance.
Now, it’s time to put your newfound skills into action and enjoy a cooler, more efficient computer!