Introduction
Welcome to the world of Chromecast, a small but powerful device that allows you to stream your favorite movies, TV shows, music, and more directly to your television. If you have recently purchased a Chromecast and are wondering how to connect it to your TV with an HDMI port, you have come to the right place.
In this guide, we will walk you through the step-by-step process of connecting your Chromecast to your TV, from checking the requirements to completing the setup. Whether you are a tech-savvy individual or a beginner, this guide will provide you with all the information you need to get started.
Chromecast is designed to be easy to set up and use, eliminating the need for complicated cables or multiple remote controls. With just a few simple steps, you can start enjoying your favorite content on the big screen.
Before we get started, it is important to note that Chromecast requires an HDMI port on your TV. If your TV does not have an HDMI port, unfortunately, you will not be able to connect Chromecast to it. Additionally, you will need a Wi-Fi network and a mobile device or computer to control Chromecast.
Now that you have a basic understanding of what Chromecast is and what you will need, let’s dive into the step-by-step instructions on how to connect Chromecast to your TV with an HDMI port. Get ready to unlock a world of entertainment right from the comfort of your own living room!
Step 1: Check the Requirements
Before you begin setting up your Chromecast, it is important to ensure that you have all the necessary requirements. Here’s what you’ll need:
- A Chromecast device: The first requirement is, of course, a Chromecast device itself. You can purchase the latest Chromecast model from a reputable retailer or the Google Store.
- A television with an HDMI port: Chromecast requires a television with an available HDMI port to connect and stream content. Make sure your TV has an HDMI port before proceeding.
- A stable Wi-Fi network: Chromecast relies on a Wi-Fi network to stream content from your mobile device or computer to your TV. Ensure that you have a stable Wi-Fi connection available.
- A mobile device or computer: To set up and control Chromecast, you will need a mobile device or computer with the Google Home app installed. The Google Home app is available for both iOS and Android devices and can be downloaded from the respective app stores.
- A power source: Chromecast requires power to function. It comes with a USB power cable and a power adapter. You will need a power source, such as a wall outlet or a USB port on your TV or a compatible device, to connect and power the Chromecast.
Once you have ensured that you have all the necessary requirements, you are ready to proceed to the next step of connecting your Chromecast to your TV.
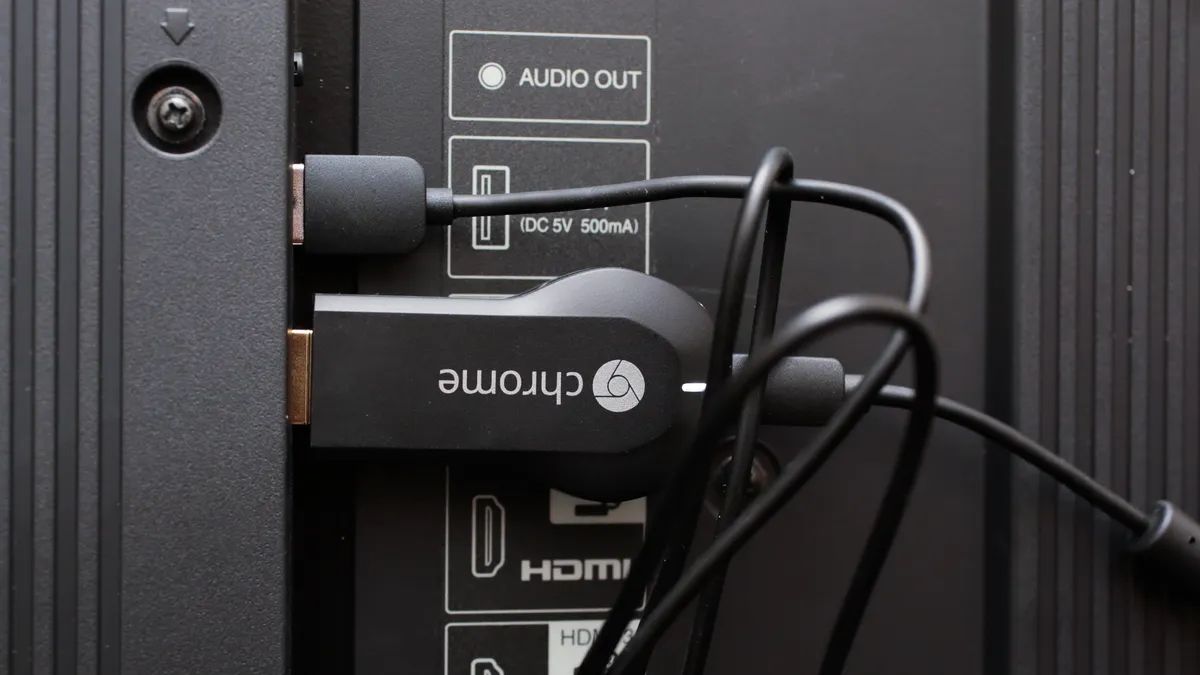
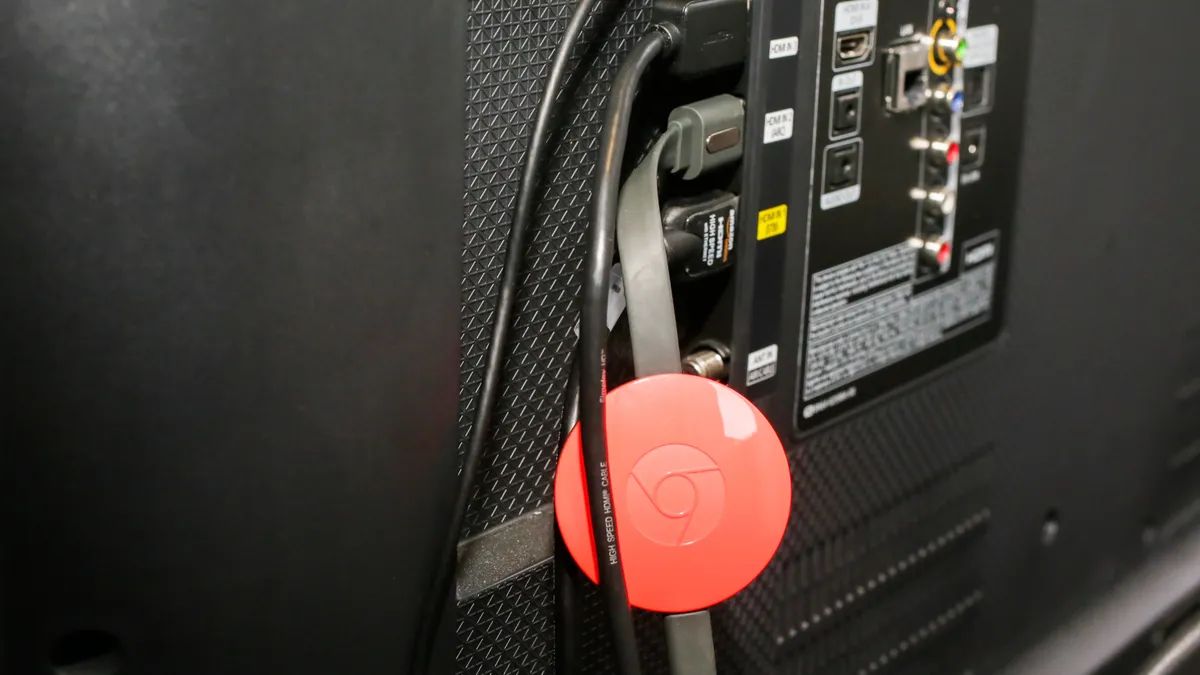
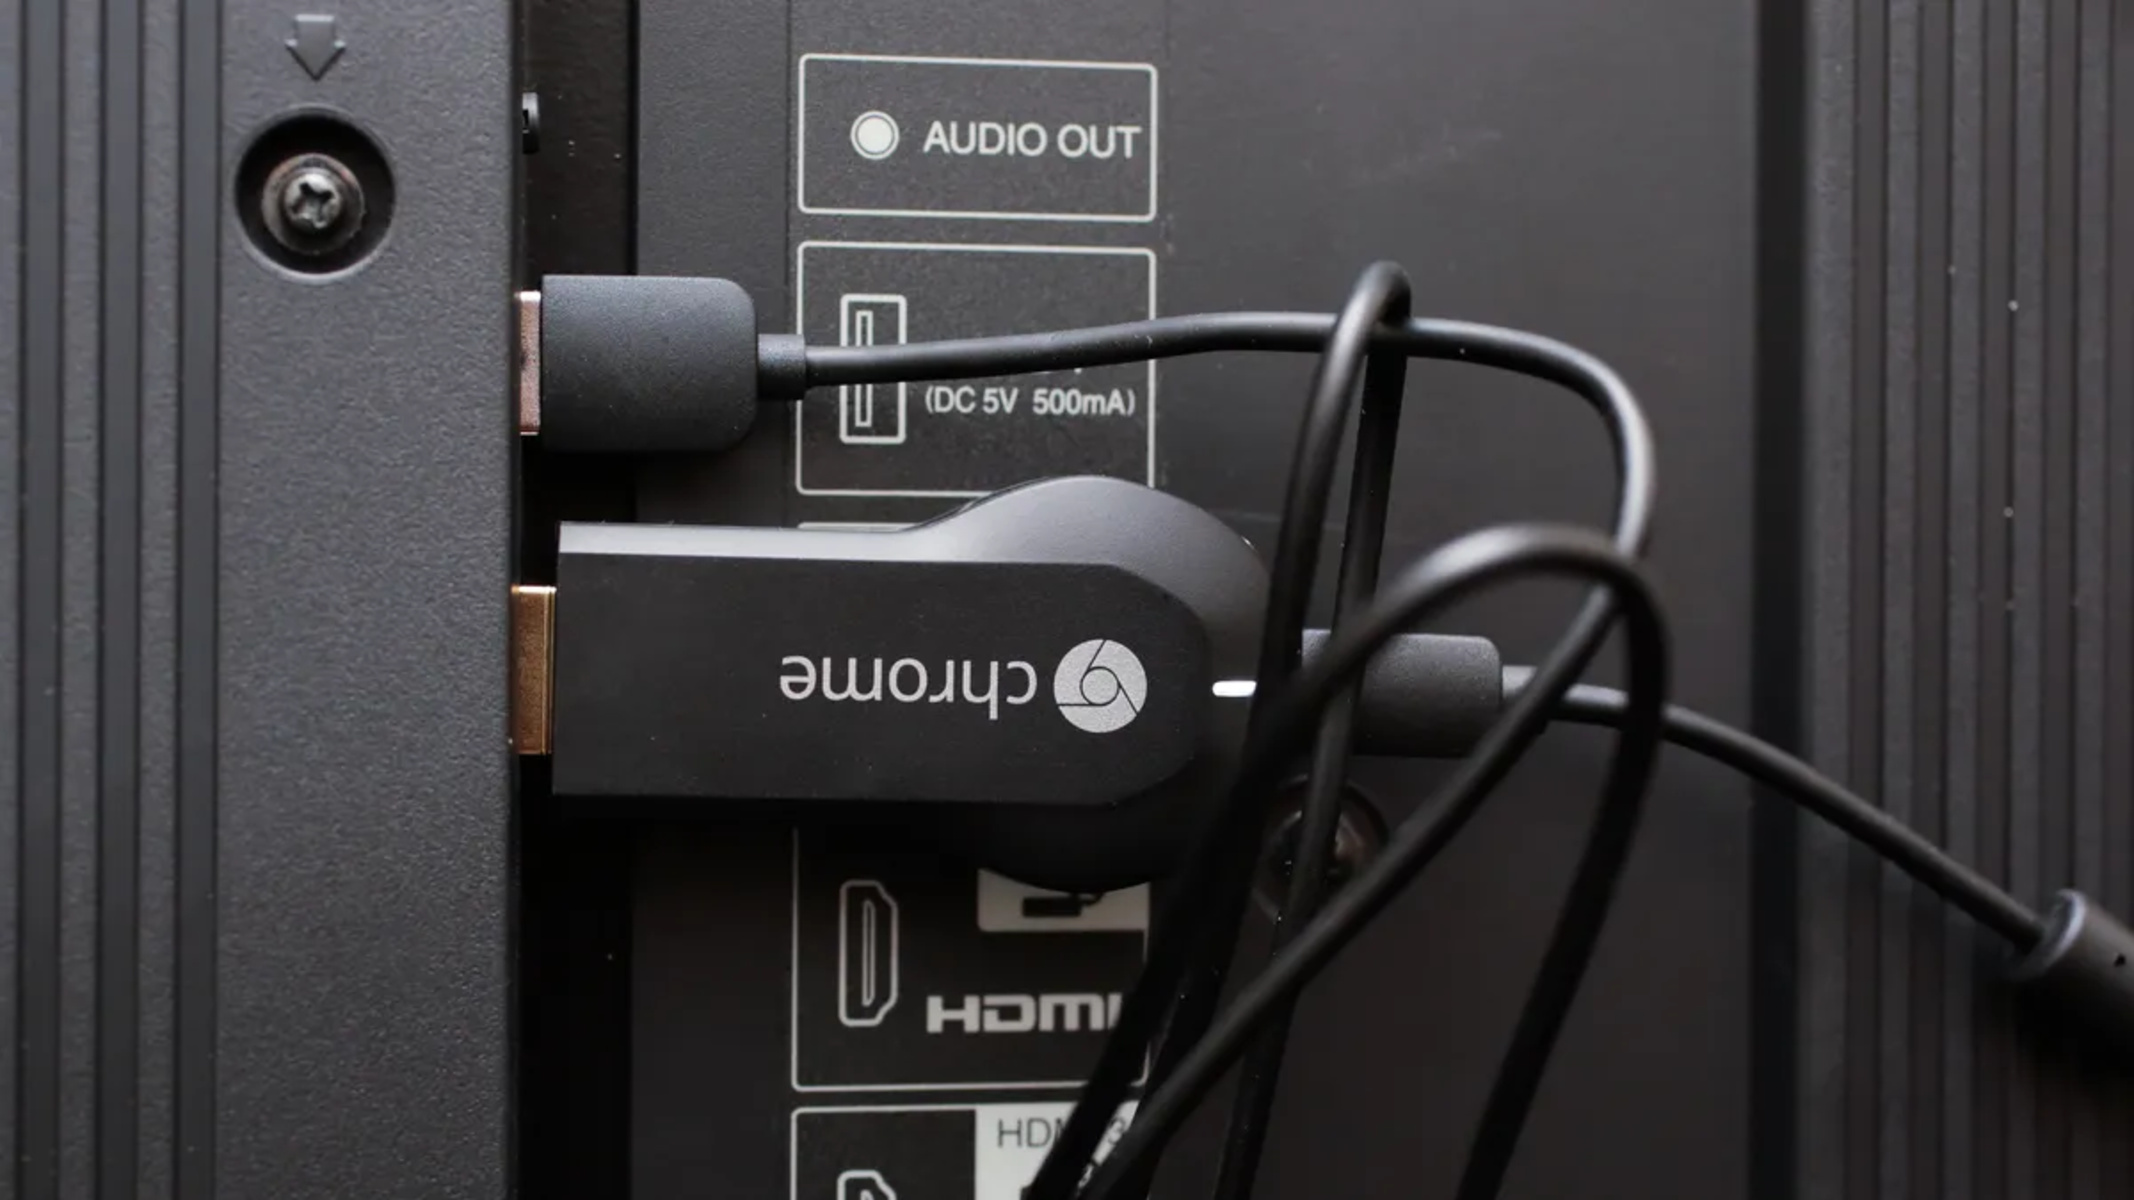
Step 2: Connect Chromecast to HDMI Port on TV
Now that you have gathered all the necessary requirements, it’s time to physically connect your Chromecast device to the HDMI port on your TV. Follow these simple steps:
- Locate the HDMI port on your TV: Examine the back or side of your TV to find the HDMI port. It is usually labeled as “HDMI” and may be accompanied by a number.
- Insert the Chromecast into the HDMI port: Take the Chromecast device and connect it to the HDMI port on your TV. The Chromecast has a small HDMI connector that can easily fit into the port.
- Power on the Chromecast: Connect the USB end of the Chromecast power cable to either a power adapter or a USB port on your TV or another compatible device. Plug the other end into the Chromecast device. Ensure that the Chromecast receives power.
- Switch your TV input to the corresponding HDMI port: Using your TV remote control, navigate to the input/source selection. Select the HDMI input that corresponds to the port where you connected the Chromecast.
Once you have completed these steps, your Chromecast should be physically connected to your TV, and you are ready to move on to the next step of setting up your Chromecast using the Google Home app.
Step 3: Powering Chromecast
With your Chromecast connected to the HDMI port on your TV, it’s time to power it up. Follow these steps to ensure that your Chromecast is properly powered:
- Connect the USB power cable: Take the USB end of the Chromecast power cable and connect it to a power adapter or a USB port on your TV or another compatible device. Ensure that it is securely inserted.
- Plug in the power adapter: If you are using a power adapter, plug it into a wall outlet or power strip. Make sure that the power source is easily accessible.
- Power on the Chromecast: Once you have connected the USB power cable and plugged in the power adapter, your Chromecast should start receiving power. Look for a solid LED light on the Chromecast device, indicating that it is powered and ready for setup.
It is important to note that if you have connected your Chromecast to a USB port on your TV, the power supply may vary depending on the TV’s settings. Some TVs may not provide sufficient power to keep the Chromecast running. In such cases, it is recommended to use the power adapter provided with the Chromecast.
By following these simple steps, you have successfully powered on your Chromecast device. Now, it’s time to proceed to the next step of switching the input on your TV to the Chromecast HDMI port.
Step 4: Switching Input on TV
Now that your Chromecast is connected and powered, it’s time to switch the input on your TV to the Chromecast HDMI port. Follow these steps to do so:
- Locate the input/source button on your TV remote: Look for a button labeled “Input,” “Source,” or a similar term on your TV remote control. It may be represented by an icon of a box with an arrow or a combination of buttons.
- Press the input/source button: Press the input/source button on your TV remote to bring up the input/source menu on your TV screen. This menu will display the available input options.
- Select the HDMI input with your Chromecast: Use the arrow keys or number buttons on your TV remote to scroll through the input options. Select the HDMI input that corresponds to the port where you connected your Chromecast.
- Confirm the selection: Press the enter or OK button on your TV remote to confirm the selection. Your TV screen should now display the content from your Chromecast.
Depending on your TV model, the input/source selection menu may vary. Refer to your TV’s user manual if you are having trouble locating or accessing the input/source menu.
Once you have successfully switched the input on your TV to the Chromecast HDMI port, you are ready to proceed with the setup process using the Google Home app. In the next step, we will guide you through installing the Google Home app on your mobile device or computer.
Step 5: Installing the Google Home App
In order to set up and control your Chromecast, you will need to install the Google Home app on your mobile device or computer. Follow these steps to install the app:
- Open the app store on your mobile device or computer: Whether you are using an iOS device or an Android device, navigate to the respective app store on your device. For iOS devices, open the App Store, and for Android devices, open the Google Play Store.
- Search for the Google Home app: In the app store’s search bar, type “Google Home” and press enter or tap the search icon. Look for the official Google Home app, which is developed by Google LLC.
- Select and download the app: Once you have located the Google Home app in the search results, tap/select it to view the app’s details. Then, tap on the “Install” or “Get” button to initiate the download and installation process. Wait for the app to download and install on your device.
- Open the Google Home app: After the installation is complete, locate the Google Home app on your device. Tap/select the app icon to open it. Make sure you are connected to the same Wi-Fi network that you will be using for your Chromecast setup.
Congratulations! You have successfully installed the Google Home app on your mobile device or computer. In the next step, we will guide you through the process of setting up your Chromecast using the Google Home app.
Step 6: Set up Chromecast with Google Home App
Now that you have the Google Home app installed on your mobile device or computer, it’s time to set up your Chromecast. Follow these steps to complete the setup process:
- Open the Google Home app: Locate the Google Home app on your device and tap/select the app icon to open it.
- Sign in to your Google account: If you are not already signed in, the app will prompt you to sign in with your Google account. Enter your credentials and sign in.
- Tap on the ‘+’ button: Look for the “Add” or “Set up device” button in the app’s main screen. It is usually represented by a ‘+’ symbol. Tap on this button to begin the setup process.
- Select “Set up device”: From the list of available options, tap/select “Set up device” or a similar option related to setting up a new device.
- Follow the on-screen instructions: The Google Home app will guide you through the setup process step-by-step. Follow the on-screen instructions, such as accepting terms and conditions, allowing location access, and enabling notifications.
- Wait for the app to discover your Chromecast: The app will search for available Chromecast devices in your vicinity. Wait for the app to discover your Chromecast, and when it appears on the screen, tap/select it to proceed.
- Verify the code: The app will display a code on your device screen. Check if the code matches the one displayed on your TV screen. If they match, tap/select “Yes” to continue.
- Choose a name for your Chromecast: Select a name for your Chromecast that will help you identify it easily. You can choose a default name or set a custom name.
After completing these steps, your Chromecast will be set up and ready to connect to your Wi-Fi network. Follow the next step to connect your Chromecast to Wi-Fi and complete the setup process.
Step 7: Connecting Chromecast to Wi-Fi
With your Chromecast set up using the Google Home app, the next step is to connect it to your Wi-Fi network. Follow these steps to complete the Wi-Fi setup:
- Tap/select “Connect to Wi-Fi”: In the Google Home app, you will be prompted to connect your Chromecast to your Wi-Fi network. Tap/select the “Connect to Wi-Fi” button to continue.
- Select your Wi-Fi network: The app will display a list of available Wi-Fi networks in your vicinity. Select your desired Wi-Fi network from the list.
- Enter your Wi-Fi network password: If your Wi-Fi network is password-protected, the app will prompt you to enter the password. Use the on-screen keyboard to type in your Wi-Fi password. Make sure to double-check the password for accuracy.
- Wait for Chromecast to connect: After entering the Wi-Fi password, your Chromecast will attempt to connect to the selected Wi-Fi network. Wait for a few moments while the connection is established.
- Connection successful: Once your Chromecast successfully connects to your Wi-Fi network, you will see a confirmation message on the Google Home app.
With your Chromecast connected to Wi-Fi, you are all set to start enjoying your favorite content on the big screen. In the next step, we will guide you through how to cast from your mobile devices or computers to your Chromecast.
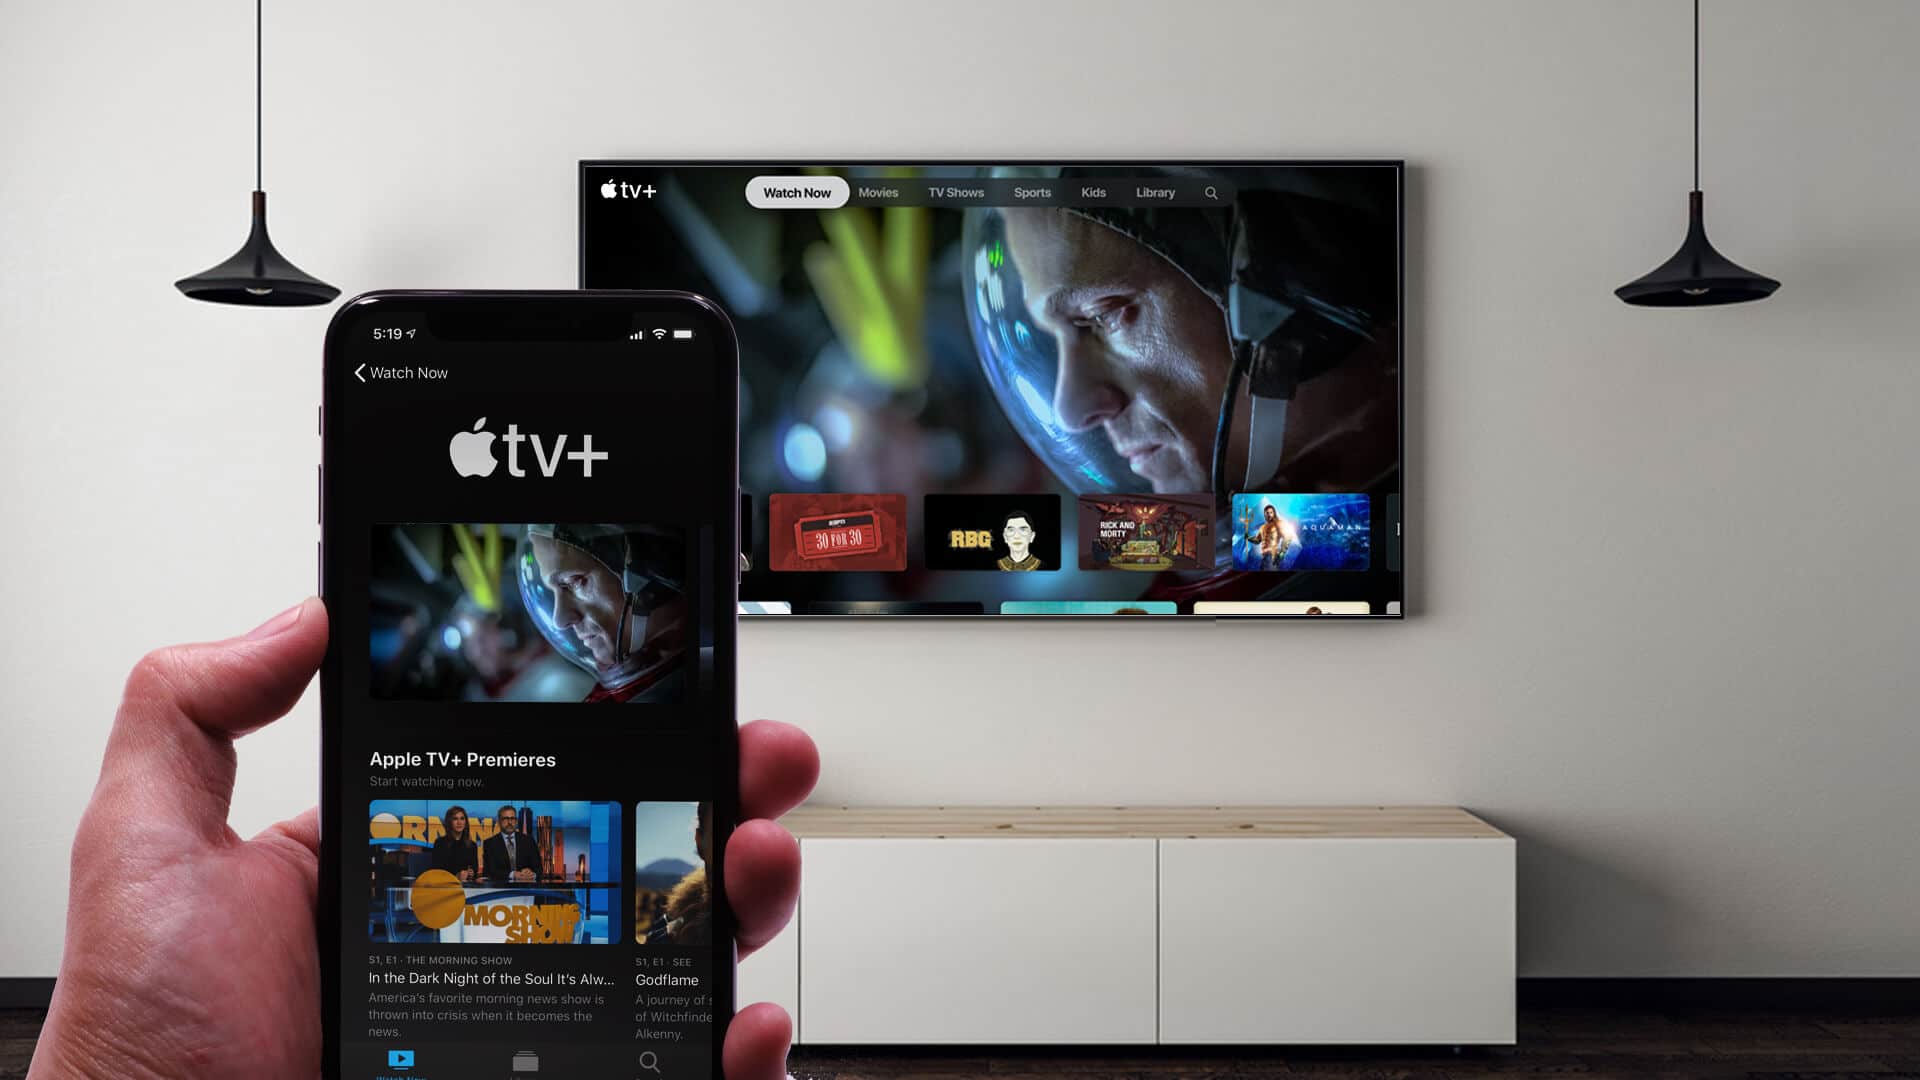
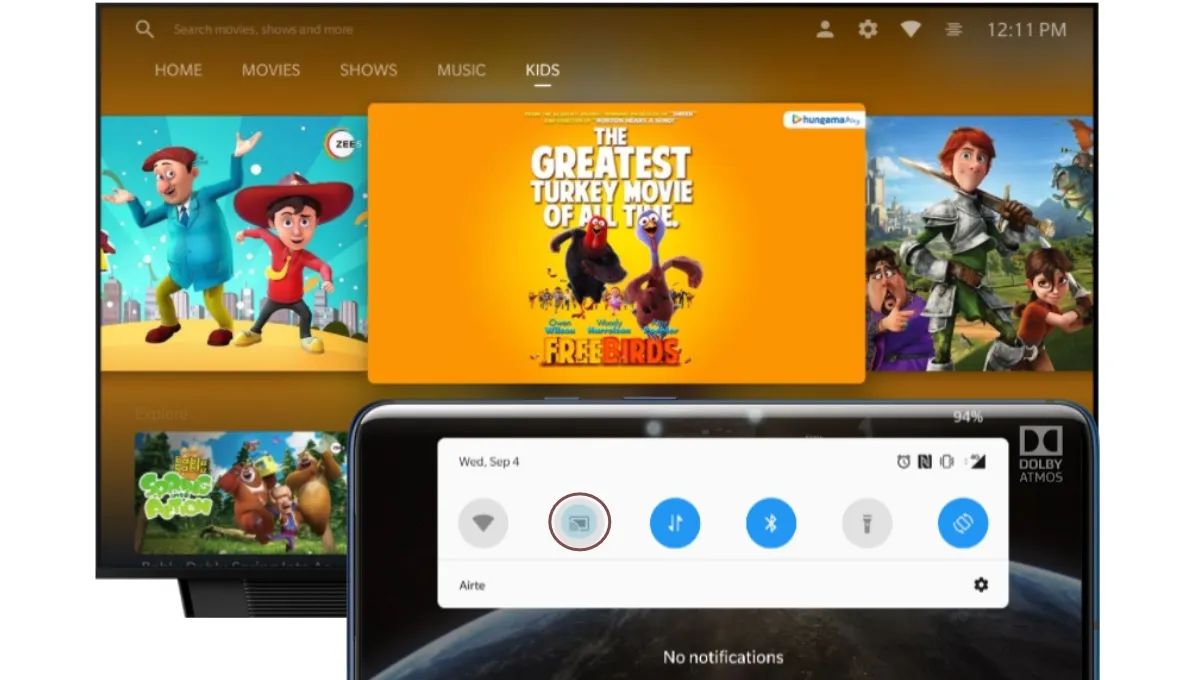
Step 8: Casting from Mobile Devices or Computers
Now that your Chromecast is connected to your Wi-Fi network, you can easily cast content from your mobile devices or computers to your TV. Follow these steps to start casting:
- Ensure that your mobile device or computer is connected to the same Wi-Fi network as your Chromecast.
- Open a supported app: Open a supported app on your mobile device or computer that is compatible with Chromecast. Some popular apps include YouTube, Netflix, Spotify, and Google Chrome.
- Look for the Cast icon: Within the supported app, look for the Cast icon. It is usually represented by a rectangle with a Wi-Fi signal at the bottom-left corner.
- Tap/select the Cast icon: Tap/select the Cast icon to display a list of available devices. Select your Chromecast device from the list.
- Select the content you want to cast: Choose the content you want to cast to your TV, such as a video, a song, or a website. Start playing the content on your mobile device or computer.
- Enjoy on your TV: The content should now start playing on your TV screen through your Chromecast. You can control playback using the app on your mobile device or computer.
Keep in mind that not all apps or websites support casting. Look for the Cast icon within the app or website to determine if it is compatible with Chromecast.
With casting enabled, you can now enjoy a seamless streaming experience and watch your favorite content directly on your TV screen.
Step 9: Chromecast Setup Complete
Congratulations! You have successfully completed the setup process for your Chromecast. By now, you should have your Chromecast connected to your TV, powered on, connected to Wi-Fi, and ready to cast your favorite content.
With Chromecast, you can now enjoy a wide range of entertainment options, including streaming movies, TV shows, music, and even mirroring your device’s screen onto the TV. The possibilities are endless.
Remember, whenever you want to cast content from your mobile device or computer, make sure that both your device and Chromecast are connected to the same Wi-Fi network. Also, keep in mind that not all apps or websites support casting, so be sure to look for the Cast icon within the app or website to determine compatibility.
If you ever need to make changes to your Chromecast settings, you can access them through the Google Home app. Simply open the app, select your Chromecast device, and explore the various options available.
Now that your Chromecast setup is complete, sit back, relax, and enjoy a whole new level of entertainment. Happy casting!
Conclusion
Setting up and connecting your Chromecast to your TV with an HDMI port is a straightforward process that allows you to unlock a world of entertainment right from your living room. By following the step-by-step instructions outlined in this guide, you have successfully completed the setup process and can now start enjoying your favorite content on the big screen.
From checking the requirements to powering on your Chromecast, switching the input on your TV, installing the Google Home app, setting up Chromecast, connecting it to Wi-Fi, and learning how to cast from your mobile devices or computers, each step has brought you closer to an enhanced streaming experience.
Remember to ensure that your Chromecast and casting device are connected to the same Wi-Fi network for seamless casting. Additionally, explore the various supported apps and websites to expand your entertainment options. Whether you want to stream movies, binge-watch TV shows, listen to music, or even mirror your device’s screen, Chromecast offers a versatile and user-friendly platform.
If you ever need to adjust your Chromecast settings, simply access the Google Home app, where you can fine-tune your preferences and personalize your streaming experience.
Now that you have completed the setup process, it’s time to sit back, relax, and enjoy the convenience and quality of Chromecast streaming. Get ready to immerse yourself in a world of entertainment from the comfort of your own home!