Introduction
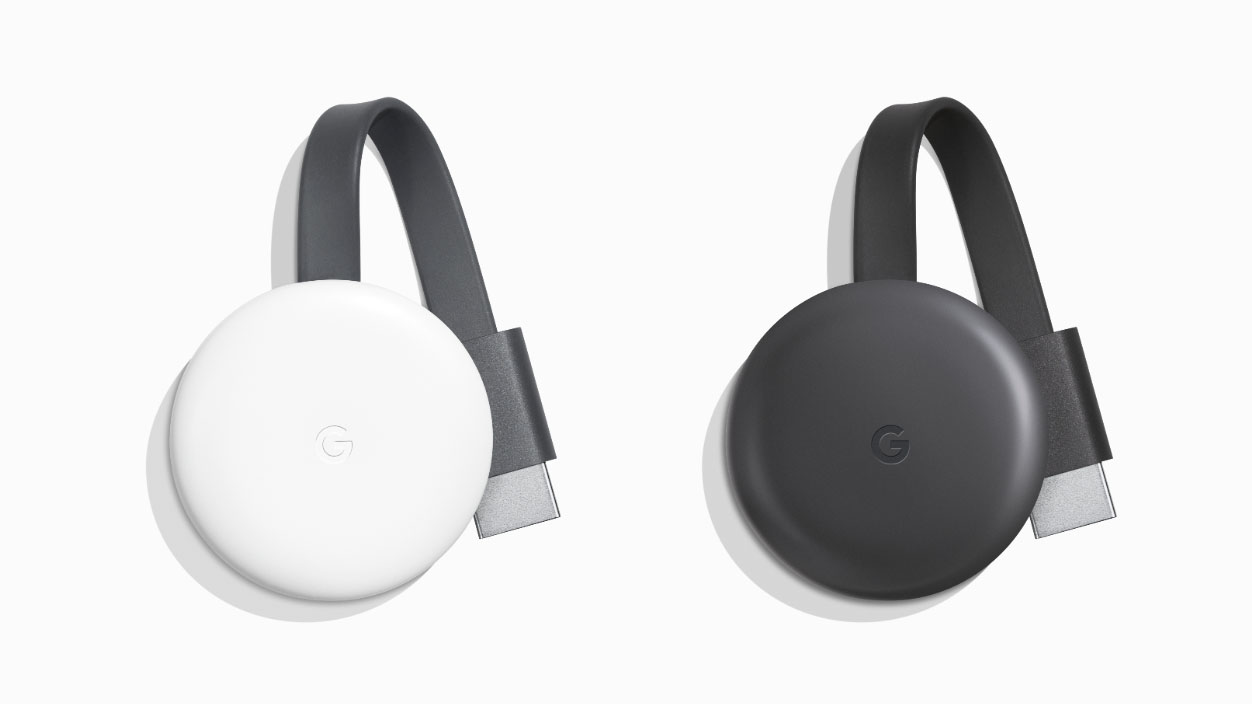
Chromecast, a popular media streaming device developed by Google, allows you to effortlessly stream your favorite movies, TV shows, music, and more directly to your television. With its easy plug-and-play setup and user-friendly interface, controlling your Chromecast is a breeze.
Whether you’re new to Chromecast or simply looking to explore its features further, this guide will provide you with step-by-step instructions on how to control your Chromecast effectively. From connecting to your Wi-Fi network to utilizing advanced features, we’ll cover it all.
By following these simple steps, you’ll be able to unlock the full potential of your Chromecast and enjoy seamless streaming on the big screen. So, let’s dive in and discover how you can take control of your Chromecast!
Before we begin, make sure you have your Chromecast device, a compatible television or monitor, and a smartphone or tablet handy. With these essentials at hand, you’re ready to embark on your Chromecast journey.
Connecting Your Chromecast
Before you can start streaming, you’ll need to set up and connect your Chromecast to your Wi-Fi network. Follow these steps to get your device up and running:
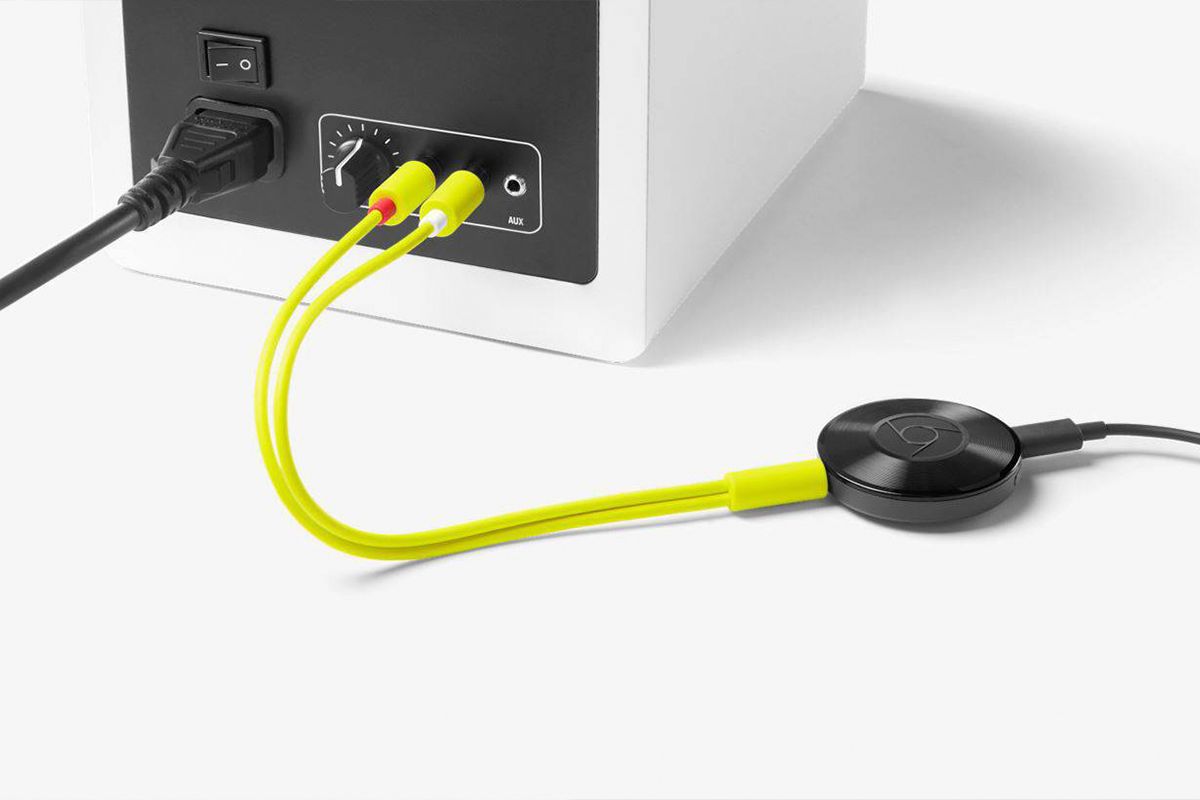
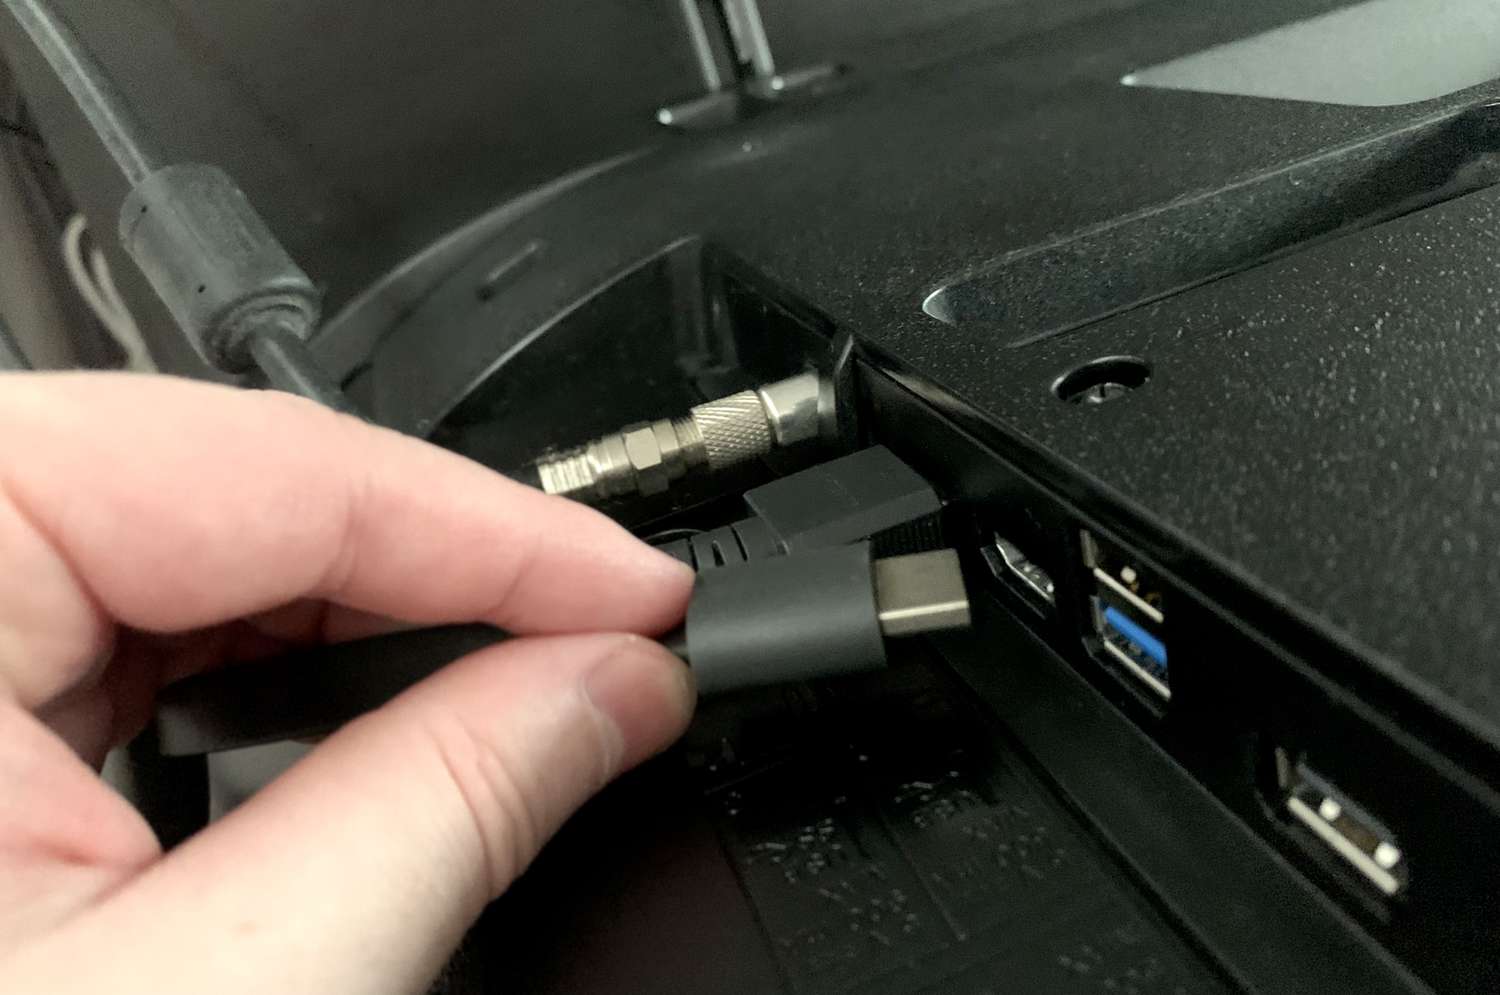
1. Setting up your Chromecast: Plug your Chromecast into an available HDMI port on your TV or monitor. Connect the USB power cable to your Chromecast and a power source, either through a USB port on your TV or using the provided power adapter. Once connected, your Chromecast should power on and display the setup screen on your TV.
2. Connecting to Wi-Fi: On your smartphone or tablet, download and open the Google Home app from the App Store or Google Play Store. Tap the ‘+’ icon to add a new device, and select “Set up device” > “New devices.” The app will search for available devices and detect your Chromecast. Confirm that the code displayed on your TV matches the one shown in the app, and tap “Yes” to continue. Next, choose the Wi-Fi network you want to connect your Chromecast to, enter the network password if prompted, and wait for the connection to be established.
3. Installing the Google Home app: If you haven’t already installed the Google Home app, you can find it on the App Store or Google Play Store. This app allows you to control your Chromecast, set up guest mode, customize your screen saver, and more. Once installed, open the app and sign in with your Google account to get started.
With these steps completed, your Chromecast is now connected to your Wi-Fi network and ready to be controlled. The next section will guide you through the various methods you can use to control your Chromecast and start streaming your favorite content.
Setting up Your Chromecast
Setting up your Chromecast is a straightforward process that only requires a few simple steps. Follow the instructions below to get your Chromecast up and running:
1. Plug in your Chromecast: Start by plugging your Chromecast into an available HDMI port on your TV or monitor. Ensure that both ends of the HDMI cable are securely connected.
2. Connect the power cable: Once your Chromecast is plugged in, connect the USB power cable to your Chromecast and to a power source. You can either plug it into a USB port on your TV or use the provided power adapter and plug it into a power outlet.
3. Switch to the correct input: On your TV or monitor, switch to the input/source where you connected your Chromecast. This will typically be labeled as HDMI 1, HDMI 2, etc.
4. Set up your Chromecast using your smartphone or tablet: Download and open the Google Home app on your smartphone or tablet. If you haven’t already installed it, you can find the app on the App Store or Google Play Store. Sign in to the app using your Google account.
5. Follow the on-screen instructions: The Google Home app will automatically detect your Chromecast device. Simply follow the on-screen instructions to complete the setup process. This may include confirming the code displayed on your TV, choosing your Wi-Fi network, and connecting your Chromecast to it.
Once you’ve completed these steps, your Chromecast will be successfully set up and ready to use. It’s important to keep your Chromecast and the device you’re using to control it connected to the same Wi-Fi network for seamless streaming.
Now that your Chromecast is set up, let’s move on to the next section to learn how to connect your Chromecast to your Wi-Fi network.
Connecting to Wi-Fi
Connecting your Chromecast to Wi-Fi is an essential step in the setup process. Follow the steps below to ensure a successful connection:
1. Open the Google Home app: On your smartphone or tablet, open the Google Home app. If you haven’t already installed it, you can download it from the App Store or Google Play Store.
2. Add your Chromecast: Tap the ‘+’ icon in the top left corner of the app to add a new device. The app will search for available devices. Select “Set up device” > “New devices.”
3. Confirm the matching code: The Google Home app will display a code on your TV screen. Ensure that the code shown in the app matches the one on your TV. Tap “Yes” to continue.
4. Select your Wi-Fi network: The app will present a list of available Wi-Fi networks. Choose the network you want to connect your Chromecast to. If the network is protected by a password, enter it when prompted.
5. Wait for the connection: The Google Home app will connect your Chromecast to the selected Wi-Fi network. This may take a few moments. Once connected, you will see a confirmation screen.
Now that your Chromecast is connected to Wi-Fi, it will be able to access the internet and stream content from supported applications. It’s important to ensure that your Chromecast and the device you’re using to control it are connected to the same Wi-Fi network for seamless communication.
If you ever need to change the Wi-Fi network your Chromecast is connected to, you can do so by going to the device settings in the Google Home app and selecting “Wi-Fi” or “Network.” Follow the prompts to reconnect to a different network.
With the Wi-Fi connection established, you’re ready to move on to the next section, which will guide you through installing the Google Home app to control your Chromecast.
Installing the Google Home app
To control your Chromecast with ease, you’ll need to have the Google Home app installed on your smartphone or tablet. Follow the steps below to install the app:
1. App Store or Google Play Store: Open the App Store (for iOS) or Google Play Store (for Android) on your device.
2. Search for Google Home: In the search bar, type “Google Home” and tap on the search result that corresponds to the official Google Home app.
3. Download and install: Tap the “Install” or “Get” button to download and install the app. The installation process may take a few moments, depending on your device and internet speed.
4. Open the app: Once the app is installed, tap on the “Open” button or locate and open the Google Home app from your device’s app drawer.
5. Sign in: Upon opening the app, you will be prompted to sign in with your Google account. Enter your credentials and sign in.
The Google Home app allows you to control and manage your Chromecast, including setting up new devices, adjusting settings, and casting media from your smartphone or tablet. It serves as a central hub for all your Chromecast-related activities.
Once you have installed the Google Home app and signed in, you will be able to easily control your Chromecast and access additional features and settings. Make sure your Chromecast and the device you’re using to control it are connected to the same Wi-Fi network for seamless communication.
With the installation of the Google Home app complete, you’re now ready to explore various methods of controlling your Chromecast and streaming your favorite content. The following section will guide you through these methods in detail.
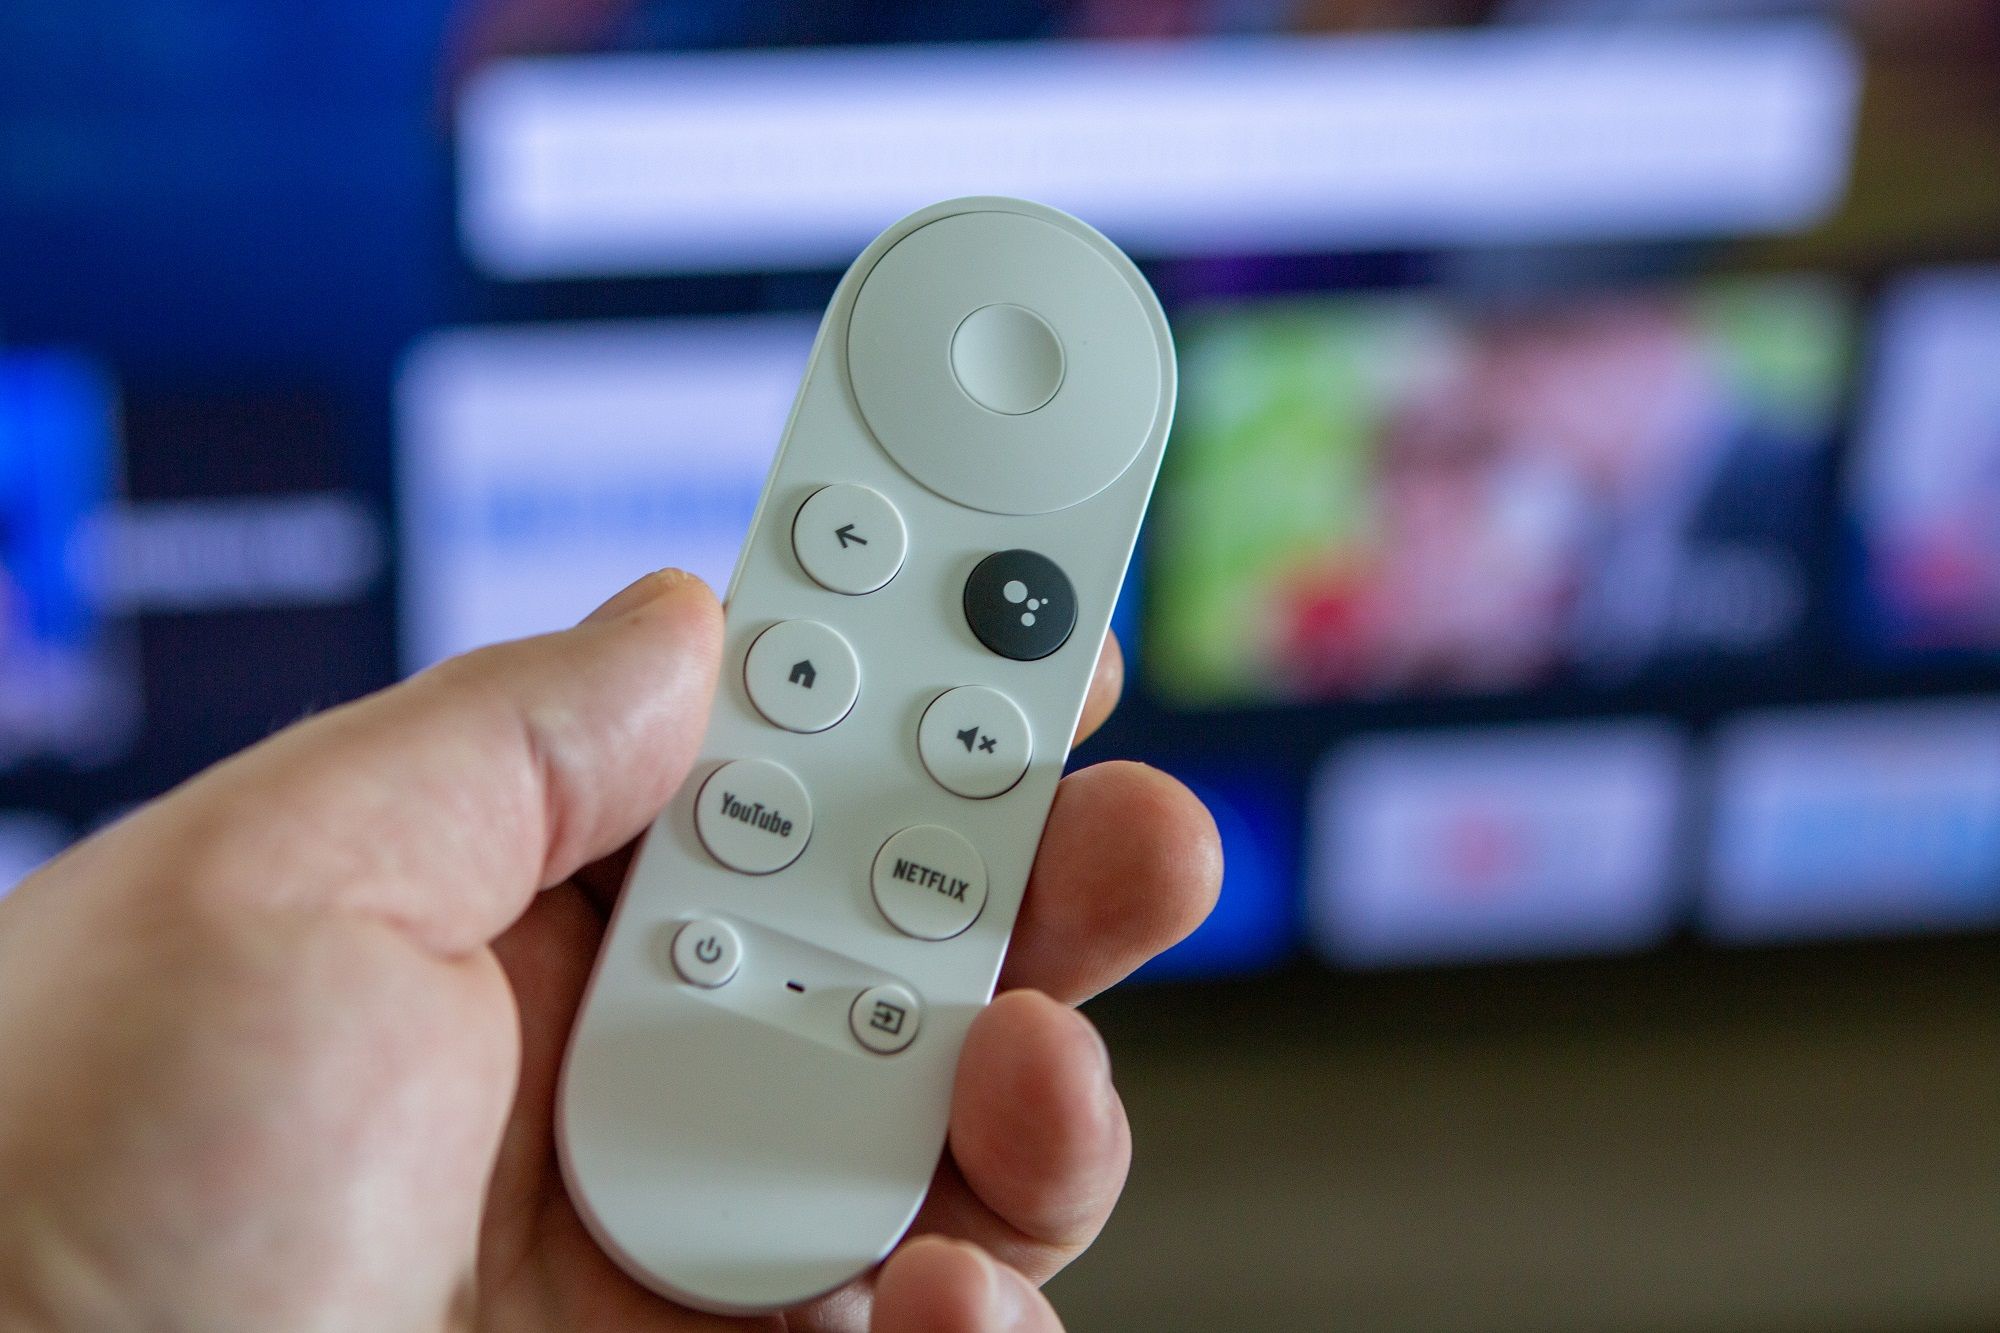
Controlling Your Chromecast
Controlling your Chromecast is a simple and intuitive process. There are several methods you can use to navigate and stream content on your Chromecast. Let’s explore them:
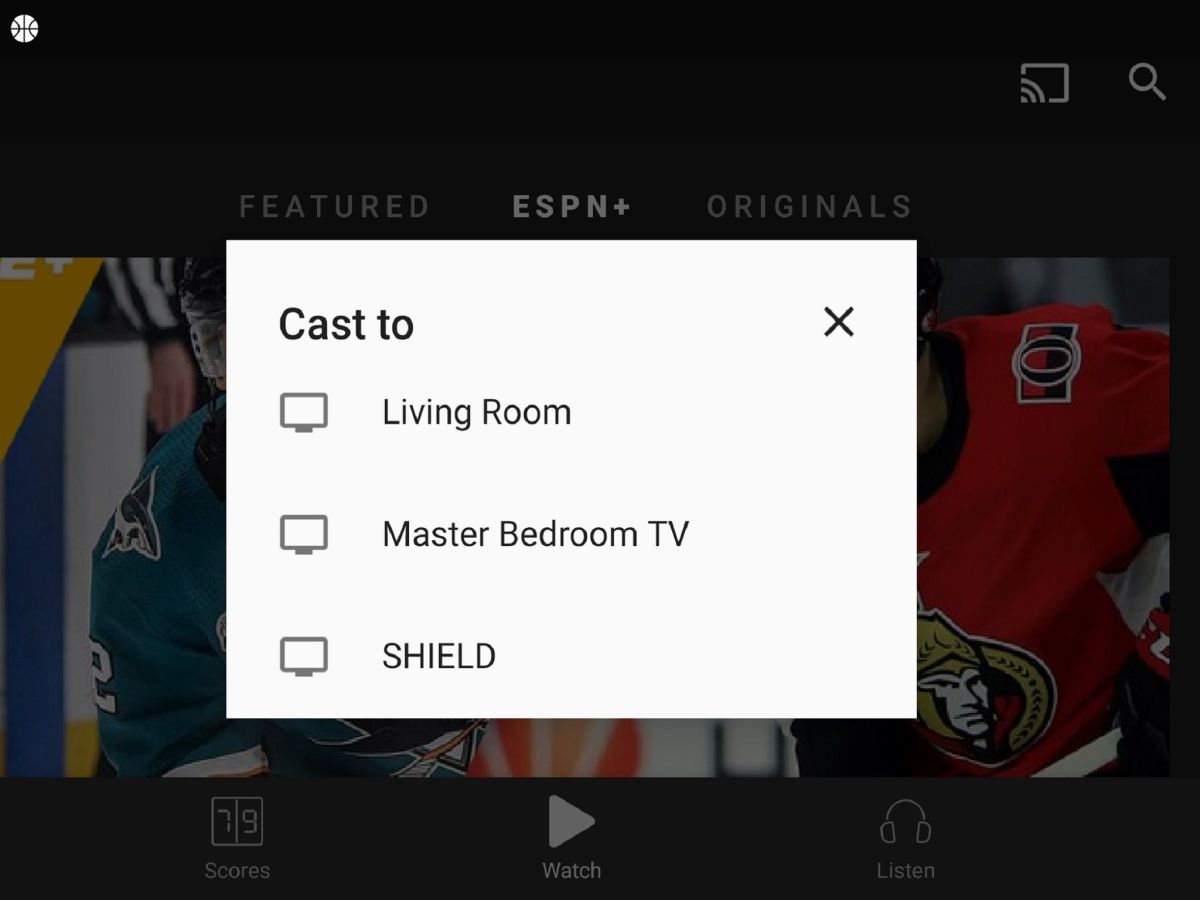
1. Using your smartphone as a remote: Once your Chromecast is set up and connected, you can use your smartphone or tablet as a remote control. Open a compatible app, such as Netflix or YouTube, and look for the Cast icon. Tap the icon, select your Chromecast device, and choose the content you want to stream. You can pause, play, adjust the volume, and even control playback using the app on your phone.
2. Casting from compatible apps: Many popular apps, including Netflix, YouTube, Spotify, and more, have built-in Chromecast support. Look for the Cast icon within the app and tap it to connect to your Chromecast. Once connected, you can browse and select content within the app and enjoy streaming directly on your TV. You can continue using your phone while the content plays on the TV.
3. Playing media from your phone or tablet: In addition to casting from supported apps, you can also cast media that is stored locally on your smartphone or tablet. Open the Google Home app, tap the Cast icon, and select “Cast Screen/Audio.” Choose your Chromecast device, and your screen will be mirrored on the TV. Open a media player app on your device and play the desired content. It will be mirrored and played on the TV in real-time.
4. Adjusting volume and playback controls: While streaming content on your Chromecast, you can easily adjust the volume using the volume buttons on your smartphone or tablet. You can also use the playback controls within the casting app to pause, play, skip, or rewind the content. If you need to answer a call or use another app on your phone, the content will continue playing on the TV and you can control it using the Google Home app or the remote control of your TV.
These methods provide you with a variety of ways to control and stream content on your Chromecast. Feel free to explore different apps and discover new media to enjoy on the big screen. The next section will cover some advanced features and troubleshooting tips to enhance your Chromecast experience.
Using Your Smartphone as a Remote
One of the most convenient ways to control your Chromecast is by using your smartphone or tablet as a remote. By following these simple steps, you can easily navigate and play your favorite content on the big screen:
1. Select a compatible app: Ensure that you have a compatible app installed on your device, such as Netflix, YouTube, Spotify, or any other app that supports Chromecast. Launch the app on your phone or tablet.
2. Look for the Cast icon: Within the app, look for the Cast icon. It is usually displayed in the top right corner of the screen. Tap on the Cast icon to initiate the connection.
3. Select your Chromecast device: After tapping the Cast icon, a list of available Chromecast devices will appear. Choose the device you want to stream to from the list.
4. Select the content you want to stream: Once you’ve selected your Chromecast device, you can browse through the app and choose the specific content you want to stream on your TV. This could include movies, TV shows, music, or any other supported media.
5. Control playback and volume: Once the content starts playing on your TV, you can use your smartphone or tablet as a remote control. Pause, play, skip, rewind, or adjust the volume directly from the app on your device. You can also use the lock screen controls or the notification shade to access playback controls without opening the app.
Using your smartphone as a remote gives you the convenience of controlling your Chromecast from the comfort of your couch. You can easily navigate through different apps, search for content, and enjoy seamless streaming on your TV.
It’s important to note that while your smartphone is being used as a remote, it’s free for you to use for other purposes. You can answer calls, reply to messages, or even use other applications on your device without interrupting the content playing on your Chromecast.
Now that you know how to use your smartphone as a remote, let’s explore the next method – casting from compatible apps – in the following section.
Casting from Compatible Apps
An excellent feature of Chromecast is its compatibility with a wide range of apps. Many popular apps have integrated Chromecast support, allowing you to easily cast content from your smartphone or tablet to your TV. Let’s explore how to cast from compatible apps:
1. Ensure compatibility: Make sure you have a compatible app installed on your device. Check the app store to see if the app you want to use supports Chromecast. Some popular apps with Chromecast support include Netflix, YouTube, Spotify, Hulu, and many more.
2. Open the app: Launch the compatible app on your smartphone or tablet. Sign in to your account if required.
3. Find the Cast icon: Look for the Cast icon within the app. It can usually be found in the top-right or bottom-right corner of the interface. The Cast icon looks like a rectangular screen with a Wi-Fi symbol at the bottom-left corner.
4. Start casting: Tap the Cast icon to bring up a list of available Chromecast devices. Select the Chromecast device you want to cast to.
5. Select your content: Once you’ve chosen the Chromecast device, you can browse through the app and select the content you wish to cast. This could be a movie, TV show, music playlist, or any other supported media.
6. Control playback: After casting the content to your Chromecast, you can control playback directly from the app on your smartphone or tablet. Pause, play, skip, or adjust the volume using the app’s playback controls. You can even use the volume buttons on your device to control the volume while casting.
Casting from compatible apps provides a seamless and efficient way to enjoy your favorite content on the big screen. You can easily explore a wide range of apps and discover new media while taking advantage of the powerful streaming capabilities of Chromecast.
Remember, while the content is playing on your TV through Chromecast, you can continue using your smartphone or tablet for other purposes without interrupting the playback. You can browse the web, check emails, or even play games while the content streams on your TV.
Now that you know how to cast from compatible apps, let’s move on to the next method – playing media from your phone or tablet – in the following section.
Playing Media from Your Phone or Tablet
In addition to casting content from supported apps, you can also play media directly from your smartphone or tablet on your Chromecast. This feature allows you to stream personal videos, photos, and even music stored locally on your device. Here’s how you can do it:
1. Open the Google Home app: Launch the Google Home app on your smartphone or tablet. Make sure that your Chromecast device and your device are connected to the same Wi-Fi network.
2. Tap the Cast icon: Locate the Cast icon within the Google Home app and tap it. This will initiate the casting process.
3. Select “Cast Screen/Audio”: From the list of casting options, choose “Cast Screen/Audio.” This will mirror your device’s screen onto your TV through the Chromecast.
4. Navigate to the media you want to play: Open the media player app on your device and browse to the specific video, photo album, or music playlist you want to play on your TV.
5. Play the media: Once you’ve selected the media, tap the play button or choose the desired option within the media player app. The media will be streamed from your device to your Chromecast and played on your TV screen.
Playing media from your phone or tablet allows you to share personal memories, videos, and music with friends and family on the big screen. Whether it’s watching your favorite home videos or browsing through a collection of photos, the ability to play content directly from your device provides a personalized streaming experience.
During the playback, you can use the controls within the media player app on your device to pause, play, skip, or adjust the volume of the media. You can also use the volume buttons on your device to control the audio output on your Chromecast.
Keep in mind that playing media directly from your device may consume more battery power compared to casting from compatible apps. Ensure that your device is adequately charged or connected to a power source to avoid interruptions during playback.
Now that you’re familiar with playing media from your phone or tablet, let’s move on to the next section, which will cover adjusting volume and playback controls for a seamless streaming experience.
Adjusting Volume and Playback Controls
Controlling the volume and playback of your content is an essential part of the Chromecast experience. Whether you’re watching a movie, enjoying music, or streaming a TV show, here’s how you can easily adjust the volume and playback controls:
1. Volume control: When casting content to your Chromecast, you can adjust the volume using the volume buttons on your smartphone or tablet. Simply press the volume up or down buttons, and the volume on your Chromecast will adjust accordingly. Alternatively, you can use the volume control slider within the compatible app or media player app on your device.
2. Playback controls: To control the playback of your content, open the compatible app or media player app on your device. Tap the playback controls within the app to pause, play, skip, or rewind the content. These controls are usually displayed onscreen and are similar to the standard playback controls you’d find on a media player. You can also use lock screen controls or the notification shade on your device to access playback controls without opening the app.
3. Remote control: If you prefer a more traditional method of controlling volume and playback, you can use the remote control of your TV. Most TVs have built-in support to control Chromecast-connected devices. Use the volume buttons on your TV remote to adjust the volume while casting. Some TVs may also have dedicated playback controls, such as play, pause, stop, or fast-forward, which you can use for controlling the playback of content.
By having control over the volume and playback, you can ensure an optimal viewing or listening experience while streaming content through Chromecast. Whether you want to adjust the volume to the perfect level or pause and resume playback as needed, these controls give you the flexibility and convenience you need.
Keep in mind that while controlling the volume and playback, compatibility can vary depending on the app being used and the capabilities of your TV. Ensure that both your device and the app you’re using are updated to the latest versions to access all the available features.
Now that you know how to adjust volume and playback controls, you’re ready to explore some advanced features and troubleshoot common issues in the next section.
Advanced Features and Troubleshooting
Besides the basic functionality of streaming content, Chromecast offers a range of advanced features that can enhance your streaming experience. Let’s explore these features along with troubleshooting tips to address common issues you may encounter:
1. Customizing your TV screensaver: With Chromecast, you can customize your TV screensaver to display your personal photos or artwork. Open the Google Home app, select your Chromecast device, tap “Settings,” then “Backdrop,” and choose your preferred option for the screensaver. You can select your Google Photos albums, famous artwork, or even news headlines.
2. Enabling guest mode: If you have guests who want to cast content to your Chromecast without connecting to your Wi-Fi network, you can enable guest mode. Open the Google Home app, tap the device you want to enable guest mode for, select “Settings,” then “Guest mode.” Enable the guest mode and share the four-digit PIN with your guests. They can then cast to your Chromecast without connecting to your Wi-Fi.
3. Troubleshooting common issues: If you encounter any issues with your Chromecast, here are a few troubleshooting tips:
– Ensure that your Chromecast and the device you’re using to control it are connected to the same Wi-Fi network.
– Restart your Chromecast by unplugging it from the power source, waiting for a few seconds, and plugging it back in.
– Check for updates for the Google Home app and the firmware of your Chromecast device.
– Restart your smartphone or tablet to refresh the connection.
– If you’re experiencing buffering or playback issues, try reducing the quality of the content being streamed or check your internet connection speed.
4. Contacting support: If you’re still facing issues with your Chromecast, you can reach out to Google support for further assistance. Visit the support website or contact them through their official channels for troubleshooting help and guidance.
Exploring the advanced features of Chromecast and troubleshooting common issues can help you make the most of your streaming device. From personalizing your screensaver to enabling guest mode, these features add convenience and versatility to your streaming experience.
By following the troubleshooting tips, you can quickly resolve common issues and ensure a smooth and uninterrupted streaming session.
With this knowledge of advanced features and troubleshooting, you’re now equipped to handle any challenges that may arise and make the most of your Chromecast experience.
Customizing Your TV Screensaver
One of the fantastic features offered by Chromecast is the ability to customize your TV screensaver. Instead of a blank screen, you can personalize it with your favorite photos, artwork, or even news headlines. Follow these steps to customize your TV screensaver:
1. Open the Google Home app: Launch the Google Home app on your smartphone or tablet. Ensure that your Chromecast device and your device are connected to the same Wi-Fi network.
2. Select your Chromecast device: Tap on the Chromecast device you want to customize the screensaver for. It will take you to the device settings.
3. Access the screensaver settings: Within the device settings, look for the “Settings” option. Tap on it, and then select “Backdrop.” Note that the screensaver settings may be located in different places depending on the version of the Google Home app.
4. Choose your desired sources: In the Backdrop settings, you’ll see various sources for your screensaver. You can choose to display your Google Photos albums, famous artwork from museums, trending images, or even news headlines. Tap on the source you prefer.
5. Select specific settings: Depending on the chosen source, you may have additional customization options. For example, if you select Google Photos, you can choose specific albums or even add captions to the photos.
6. Preview and save your settings: After adjusting the screensaver settings and selecting your desired sources, you can preview the changes before saving them. Tap on the “Preview” button to see how your customized screensaver will appear on your TV. If you’re satisfied, tap “Save” to apply the changes.
Customizing your TV screensaver adds a personal touch to your Chromecast experience. Whether you want to reminisce over your favorite memories from your photo albums, enjoy breathtaking artwork, or stay updated with the latest news headlines, the customized screensaver can transform your TV into a dynamic display.
Don’t forget to explore the various sources available and experiment with different settings to find the perfect combination that suits your preferences.
Now that you know how to customize your TV screensaver, let’s move on to the next section, which will cover another advanced feature – enabling guest mode.
Enabling Guest Mode
If you have guests who want to cast content to your Chromecast without connecting to your Wi-Fi network, you can easily enable guest mode. This feature allows others to use your Chromecast temporarily without requiring them to join your Wi-Fi network. Here’s how to enable guest mode:
1. Open the Google Home app: Launch the Google Home app on your smartphone or tablet. Ensure that your Chromecast device and your device are connected to the same Wi-Fi network.
2. Select your Chromecast device: Tap on the Chromecast device for which you want to enable guest mode. It will take you to the device settings.
3. Access the guest mode settings: Within the device settings, look for the “Settings” option. Tap on it, and then select “Guest mode.” Note that the guest mode settings may be located in different places depending on the version of the Google Home app.
4. Enable guest mode: In the guest mode settings, toggle the switch to enable guest mode. You will see a four-digit PIN displayed on the screen.
5. Share the PIN: Share the four-digit PIN with your guests. They can use this PIN to cast content to your Chromecast without connecting to your Wi-Fi network.
Enabling guest mode provides a convenient way for your friends or family to cast content to your Chromecast without the need for them to enter your Wi-Fi password or connect to your network. It’s a useful feature for parties, gatherings, or any situation where you want to share the joy of streaming with others.
Guest mode is temporary and will automatically disable itself after a set duration to ensure the security and privacy of your Wi-Fi network. If you want to disable guest mode, simply go back to the guest mode settings in the Google Home app and toggle the switch to turn it off.
Now that you know how to enable guest mode, you can easily provide your guests with a hassle-free streaming experience on your Chromecast.
Next, in the following section, we’ll explore some troubleshooting tips to help you resolve common issues that may arise.
Troubleshooting Common Issues
While Chromecast offers a seamless streaming experience, you may encounter occasional issues that can be easily resolved with some troubleshooting. Here are some common issues and troubleshooting tips to help you get back to enjoying your Chromecast:
1. No connection or device not found:
– Ensure that your Chromecast and the device you’re using to control it are connected to the same Wi-Fi network.
– Check that your Chromecast is properly plugged into the HDMI port of your TV or monitor.
– Restart your Chromecast by unplugging it from the power source, waiting for a few seconds, and plugging it back in.
2. Buffering or playback issues:
– Check your internet connection speed to ensure a stable connection. Slow internet speeds can lead to buffering and interruptions.
– Reduce the quality of the content being streamed if your internet connection is slow or unstable. Many apps allow you to adjust the quality from within their settings.
– Close any unnecessary apps running in the background on your smartphone or tablet to free up resources for smoother streaming.
3. App-specific issues:
– Make sure that the app you’re using with Chromecast is up-to-date. Check for available updates in the app store.
– Restart the app and try casting again. Sometimes, a simple app restart can resolve connectivity issues.
– Clear the cache and data of the app if you’re experiencing persistent issues. Go to your device’s settings, find the app in the app settings, and clear the cache and data.
4. Audio/video out of sync:
– Check for updates for both the Google Home app and the firmware of your Chromecast device.
– Adjust the audio sync settings within the app or media player you’re using to cast content. Look for audio delay or sync options in the app’s settings.
– Restart your Chromecast and the device you’re casting from. This can help to refresh the connection and resolve any syncing issues.
If you’re still experiencing issues, you can visit the official Chromecast Help Center website for further troubleshooting guidance. Additionally, you can contact Google support for personalized assistance and recommendations specific to your situation.
Troubleshooting common issues can help you overcome obstacles and ensure a smooth and enjoyable streaming experience with your Chromecast.
With these troubleshooting tips in mind, you’re well-equipped to address any challenges that may arise and continue to enhance your Chromecast experience.
Conclusion
Controlling your Chromecast and enjoying seamless streaming on your TV is a breeze with the right knowledge and techniques. By following the steps outlined in this guide, you can easily set up your Chromecast, connect it to your Wi-Fi network, and start streaming your favorite content in no time.
Using your smartphone or tablet as a remote, casting from compatible apps, and playing media from your device are all convenient ways to control and enjoy your Chromecast. Adjusting the volume and playback controls ensures a personalized streaming experience, while advanced features like customizing your TV screensaver and enabling guest mode add flexibility and personalization to your Chromecast setup.
When troubleshooting common issues, remember to check your Wi-Fi connection, update your apps and firmware, and try simple fixes like restarting your Chromecast or device. If the problem persists, consult the Chromecast Help Center or contact Google support for further assistance.
With the knowledge gained from this guide, you can fully unlock the potential of your Chromecast and make the most of its incredible streaming capabilities. Sit back, relax, and enjoy streaming your favorite movies, shows, music, and more on the big screen with Chromecast.
Happy streaming!