Introduction
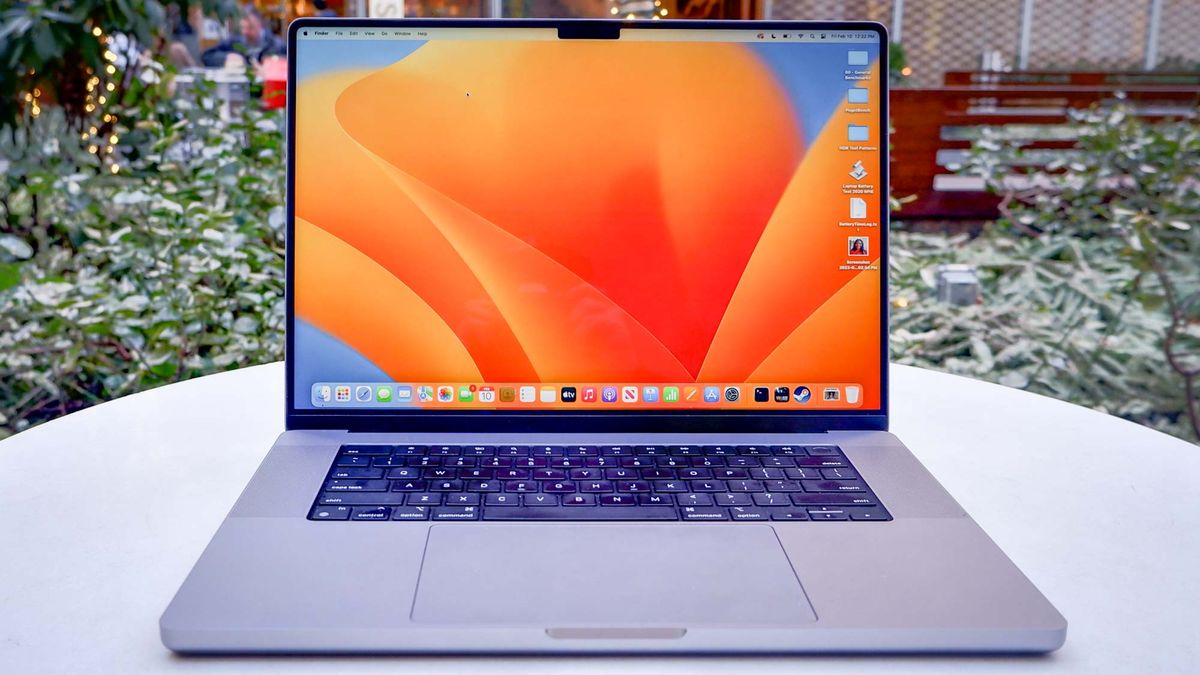
Welcome to our guide on how to clean up your MacBook Pro! Over time, your MacBook Pro may accumulate unnecessary files, applications, and clutter that can slow down its performance. By following the steps outlined in this article, you can optimize your MacBook Pro’s performance and regain valuable storage space.
Having a clean and organized MacBook Pro not only improves its speed and efficiency but also enhances your overall user experience. Whether you’re a student, professional, or casual user, maintaining a clutter-free system is vital for smooth operations and productivity. In the following sections, we will walk you through various techniques and best practices to effectively clean up your MacBook Pro.
Before proceeding with any cleaning procedures, it’s important to note that you should always back up your data. While the steps outlined here are generally safe to follow, it’s always better to be safe than sorry. Creating a backup ensures that your important files and documents are protected in case something goes wrong during the cleaning process.
Ready to give your MacBook Pro a well-deserved clean-up? Let’s dive in!
Creating a Backup
The first step before cleaning up your MacBook Pro is to create a backup of all your important files and data. This ensures that in the event of any accidental data loss or unforeseen issues during the cleaning process, you have a copy of your files to restore from.
There are several ways you can create a backup of your MacBook Pro, depending on your preferences and available resources:
- Time Machine: If you have an external hard drive, you can use Apple’s built-in Time Machine feature to automatically back up your MacBook Pro. Simply connect the external hard drive, follow the onscreen prompts to set up Time Machine, and let it create a full backup of your system.
- iCloud: If you have sufficient iCloud storage space, you can choose to back up your important files and data to the cloud. iCloud allows you to sync and backup various files, including documents, photos, and more. You can enable iCloud backup by going to System Preferences, clicking on Apple ID, and selecting iCloud.
- External Storage: Another option is to manually copy your important files and folders to an external storage device, such as a USB flash drive or an external hard drive. Simply select the files you want to back up, right-click, and choose “Copy” or “Duplicate” to transfer them to the external storage device.
Remember to ensure that your backup is up to date by periodically updating it. It’s always better to be safe than sorry when it comes to protecting your valuable data.
Removing Unnecessary Files
One of the key factors contributing to a cluttered MacBook Pro is the accumulation of unnecessary files. These files can take up a significant amount of storage space and impact the performance of your device. By removing these unneeded files, you can free up storage and improve the overall speed and responsiveness of your MacBook Pro.
Here are some types of unnecessary files that you should consider removing:
- Temporary Files: Temporary files are generated by apps and processes on your MacBook Pro. While they serve a purpose during their execution, they are no longer needed once the task is completed. You can use the built-in macOS utility called “Disk Utility” to scan and remove unnecessary temporary files.
- Cache Files: Cached files are copies of web pages, images, and other content that your Mac stores to improve loading times. However, over time, these cache files can become outdated or excessive, taking up valuable storage space. You can clear cache files by going to your browser’s settings and selecting the option to clear browsing data.
- Downloads Folder: The Downloads folder is often a repository for a variety of files, ranging from installation packages to documents and media files. It’s easy for this folder to become cluttered with files you no longer need. Take some time to go through your Downloads folder and delete any files that are no longer necessary.
- Trash Bin: Emptying your Trash Bin regularly is a simple but effective way to free up storage space. Deleted files are not permanently removed from your MacBook Pro until you empty the Trash Bin. To do this, right-click on the Trash Bin icon in the dock and select “Empty Trash.”
It’s important to exercise caution when deleting files, especially if you’re unsure of their purpose or if they might be important. Always double-check before deleting any file, and if you’re unsure, consider moving it to an external hard drive or consulting with a professional.
By removing unnecessary files, your MacBook Pro will have more storage space available, leading to improved performance and a smoother user experience.
Uninstalling Unused Applications
Over time, it’s not uncommon for your MacBook Pro to accumulate a collection of unused applications that are taking up valuable space on your hard drive. Uninstalling these unused applications is a great way to declutter your system and free up storage space.
Here’s how you can uninstall unused applications from your MacBook Pro:
- Launchpad: Open Launchpad by clicking on its icon in the dock or by using the keyboard shortcut (F4). Look for the application you want to uninstall and click and hold on its icon until it starts jiggling. A small “X” will appear on the top-left corner of the icon. Click the “X” and select “Delete” to remove the application.
- Applications Folder: Go to the Finder and open the “Applications” folder. Locate the application you want to uninstall and either drag it to the Trash Bin or right-click on it and select “Move to Trash.”
- Uninstaller: Some applications come with their dedicated uninstaller. Check the application’s documentation or official website for specific uninstallation instructions. Running the uninstaller will ensure that all associated files and folders are removed completely from your MacBook Pro.
It’s worth noting that some applications may leave behind residual files even after uninstallation. To ensure a thorough uninstallation, you can use third-party uninstaller applications like AppCleaner or CleanMyMac, which can scan for and remove any leftover files related to the uninstalled applications.
Regularly reviewing and uninstalling unused applications not only frees up storage space but can also improve system performance by reducing the load on your MacBook Pro’s resources.
Cleaning Up Startup Programs
When you start up your MacBook Pro, there may be several applications that automatically launch and run in the background. These startup programs can slow down your system’s boot time and consume valuable system resources. Cleaning up the list of startup programs can help improve the overall performance of your MacBook Pro.
To manage startup programs on your MacBook Pro, follow these steps:
- System Preferences: Click on the Apple menu in the top-left corner of the screen and select “System Preferences.” In the System Preferences window, click on “Users & Groups.”
- Login Items: In the Users & Groups window, click on your username on the left-hand side and then navigate to the “Login Items” tab. This tab will show you a list of applications that launch automatically when you log in to your MacBook Pro.
- Remove Unnecessary Programs: Review the list of startup programs and identify any applications that you don’t need to launch automatically. Select the application and click on the “-” (minus) button at the bottom to remove it from the list.
- Disable Hidden Startup Programs: Some applications may have hidden startup components that don’t appear in the Login Items list. To explore and disable these hidden startup programs, you can use third-party tools like “CleanMyMac” or navigate to the following folders: “/Library/LaunchAgents,” “/Library/LaunchDaemons,” and “~/Library/LaunchAgents.”
By cleaning up the list of startup programs, you can reduce the time it takes for your MacBook Pro to boot up and improve system performance. Only keep the essential applications that you need to launch automatically, such as antivirus software or cloud storage applications.
Remember that some applications may require certain components to run at startup to provide specific functionality or services. It’s important to exercise caution when removing startup programs and ensure that you’re not disabling any critical processes.
Organizing Desktop and Downloads Folder
The Desktop and Downloads folder are often the default locations for storing files on your MacBook Pro. However, if left unchecked, these folders can quickly become cluttered and disorganized, making it difficult to locate files when you need them. Taking the time to organize your Desktop and Downloads folder can greatly improve your productivity and make it easier to find and manage your files.
Here are some tips for organizing your Desktop and Downloads folder:
- Create Folders: Start by creating folders to categorize your files. You can create folders based on topics, projects, or file types. For example, you can have folders for work-related documents, personal files, photos, or applications.
- Sort and Move Files: Go through the files on your Desktop and in your Downloads folder and sort them into the appropriate folders you’ve created. Consider the relevance and importance of each file and determine whether it should be kept, deleted, or moved to another designated folder.
- Delete Unnecessary Files: Take the time to delete any files that you no longer need. This includes duplicate files, outdated documents, or files that are no longer relevant to your work or personal life. Be sure to empty the Trash Bin after deleting files to free up storage space on your MacBook Pro.
- Maintain Cleanliness: As new files are added to your Desktop or Downloads folder, make it a habit to organize them immediately. This will prevent the accumulation of clutter and help you stay organized in the long run. Regularly review and clean up files to ensure that your organizational system remains effective.
By organizing your Desktop and Downloads folder, you will have a clearer and more efficient workspace on your MacBook Pro. Finding files will become easier, and you’ll be able to maintain a more streamlined workflow in your daily tasks.
Remember, organizing your files is an ongoing process. Set aside time regularly to clean up and reorganize your folders to ensure they remain well-maintained and clutter-free.
Clearing Cache and Temporary Files
Cache and temporary files are generated by various applications and processes on your MacBook Pro. While these files serve a purpose in speeding up certain tasks, they can accumulate over time and take up a significant amount of storage space. Clearing cache and temporary files not only helps free up storage but can also improve the overall performance of your MacBook Pro.
Here’s how you can clear cache and temporary files on your MacBook Pro:
- Browser Cache: Your web browser stores temporary data to improve page loading times. Each browser has its own method of clearing the cache, but you can usually find this option in the browser’s settings or preferences. Clearing the cache will remove stored website data and images.
- Application Caches: Various applications on your MacBook Pro may generate cache files. These files can include thumbnails, temporary downloads, or other temporary data. You can clear app caches by going to the “Preferences” or “Settings” within each application and searching for an option to clear cache or temporary files.
- System Caches: macOS itself creates system cache files to speed up certain operations. To clear system caches, you can use the built-in macOS utility called “Disk Utility.” Launch Disk Utility, select your startup disk, navigate to the “First Aid” tab, and click on “Repair Disk Permissions” and “Repair Disk” to clean up system caches and disk permissions.
- Temporary Files: There can be various temporary files scattered throughout your MacBook Pro. You can use the utility app “CleanMyMac” or similar applications to scan for and remove these temporary files.
Clearing cache and temporary files can help optimize your MacBook Pro’s performance and create more available storage space. However, it’s important to note that clearing cache files may cause certain applications to load slower initially, as they will need to rebuild their cache. This is a normal process and should not cause any long-term issues.
Regularly clearing cache and temporary files is a good practice to maintain a clean and efficient system. Consider including this task in your routine maintenance activities to keep your MacBook Pro running smoothly.
Managing Mailbox and Attachments
Your mailbox can quickly become cluttered with a plethora of emails, attachments, and spam messages. Managing your mailbox and attachments is essential for maintaining an organized and efficient email system on your MacBook Pro. By implementing some simple strategies and practices, you can keep your mailbox streamlined and improve your productivity.
Here are some tips to help you manage your mailbox and attachments:
- Organize Folders: Create folders within your email client to categorize and organize your emails. You can create folders based on different projects, clients, or topics. Moving emails to relevant folders can help you quickly locate and retrieve important information.
- Unsubscribe and Filter: Unsubscribe from mailing lists and newsletters that you no longer find useful. Additionally, set up filters or rules within your email client to automatically sort incoming emails into specific folders based on criteria such as sender, subject, or keywords.
- Delete Unnecessary Emails: Regularly review your inbox and delete any unnecessary emails. This includes spam messages, outdated information, or emails with large attachments that you no longer need. Deleting unnecessary emails not only frees up storage space but also reduces clutter and makes it easier to find important messages.
- Use Cloud Storage for Attachments: Instead of keeping large attachments in your email inbox, consider using cloud storage services such as Dropbox or Google Drive. Save important attachments to the cloud and include download links in your emails instead. This helps free up valuable mailbox storage and ensures that you can access the attachments from any device.
- Regularly Archive Emails: If you need to keep a record of certain emails but don’t need them cluttering your inbox, consider archiving them. Archiving emails moves them out of the inbox while still keeping them accessible if needed. Most email clients have built-in archive features that allow you to easily manage and retrieve archived emails.
By implementing these mailbox and attachment management strategies, you can significantly reduce clutter and make your email workflow smoother and more efficient. Keeping an organized mailbox will help you stay focused, locate important information quickly, and improve overall productivity.
Updating macOS and Applications
Keeping your macOS and applications up to date is critical for maintaining the security and performance of your MacBook Pro. Apple regularly releases updates for macOS that include important bug fixes, performance enhancements, and security patches. Similarly, updating your applications ensures that you have access to the latest features and improvements.
Here’s how you can update macOS and applications on your MacBook Pro:
- macOS Updates: Apple provides macOS updates through the Mac App Store. You will receive a notification when a new update is available. To update your macOS, click on the Apple menu in the top-left corner of the screen, select “System Preferences,” and click on “Software Update.” Follow the prompts to install the latest macOS version.
- App Store Updates: Many applications can be updated directly through the App Store. Launch the App Store app on your MacBook Pro, click on the “Updates” tab, and you will see a list of available updates for your installed applications. Click on the “Update” button next to each application to install the latest version.
- Third-Party Updates: Some applications, particularly those obtained outside of the App Store, may have their own update mechanisms. Check the application’s website or documentation for instructions on how to update these applications.
- Automatic Updates: You can enable automatic updates for both macOS and App Store applications. To do this, go to “System Preferences,” select “Software Update,” and enable the “Automatically keep my Mac up to date” option. This ensures that your MacBook Pro stays up to date without manual intervention.
Updating your macOS and applications ensures that you have access to the latest features, performance enhancements, and security updates. It’s important to regularly check for updates and install them as they become available to keep your MacBook Pro running smoothly and securely.
By staying on top of updates, you can take advantage of new features and improvements while also addressing any vulnerabilities or issues that have been resolved in the latest versions of macOS and applications.
Running Disk Utility
Disk Utility is a built-in utility tool in macOS that helps you manage, repair, and optimize your hard drive. Running Disk Utility can help improve the performance and reliability of your MacBook Pro by detecting and fixing disk-related issues.
Here’s how you can run Disk Utility on your MacBook Pro:
- Open Disk Utility: Go to “Finder” and navigate to “Applications” > “Utilities” > “Disk Utility.”
- Select Your Startup Disk: In Disk Utility, you will see a list of connected drives and volumes. Select your startup disk (usually named “Macintosh HD” or a custom name you have assigned).
- First Aid: Click on the “First Aid” tab in the top toolbar. Then, click on the “Run” button next to “First Aid.” Disk Utility will scan your disk for errors and repair any issues it finds.
- Verify Disk: If no errors are found, you can also choose to click on the “Verify Disk” button to check the overall health and integrity of your disk.
- Additional Options: Disk Utility provides additional options such as erasing volumes, partitioning disks, and restoring from a disk image. These can be useful in certain situations, but exercise caution as these actions may result in data loss.
Running Disk Utility regularly helps ensure the health and stability of your hard drive. It can fix disk errors, repair permissions, and improve disk performance. It’s a good practice to run Disk Utility after major system updates or if you suspect any issues with your MacBook Pro’s storage.
Remember to always maintain a backup of your important files before performing any disk operations. While Disk Utility is generally safe to use, there’s always a small possibility of data loss or unforeseen issues.
By utilizing the powerful tools provided by Disk Utility, you can take proactive measures to keep your MacBook Pro’s hard drive in good condition and optimize its performance.
Resetting PRAM and SMC
The PRAM (Parameter Random Access Memory) and SMC (System Management Controller) are responsible for storing and managing specific settings on your MacBook Pro. Resetting PRAM and SMC can be an effective troubleshooting step if you are experiencing certain hardware or system-related issues. It can help resolve problems such as abnormal behavior, performance issues, or connectivity problems.
Here’s how you can reset PRAM and SMC on your MacBook Pro:
- Resetting PRAM:
- Shut down your MacBook Pro.
- Press the power button and immediately press and hold the Option, Command, P, and R keys simultaneously.
- Continue holding the keys until you hear the startup sound for the second time or see the Apple logo appear and disappear twice.
- Release the keys and allow your MacBook Pro to boot up normally.
- Resetting SMC:
- Shut down your MacBook Pro.
- Make sure the power adapter is plugged into your MacBook Pro.
- Press and hold the left Shift, Control, and Option keys, along with the power button, for 10 seconds. Then, release all the keys.
- Turn on your MacBook Pro by pressing the power button.
Resetting PRAM and SMC should only be performed when necessary as it resets various settings to their default values. It’s important to note that after resetting PRAM and SMC, you may need to reconfigure some settings, such as time zone, startup disk selection, screen resolution, and keyboard preferences.
If you continue to experience issues after resetting PRAM and SMC, it may be necessary to seek further assistance from an Apple authorized service provider or contact Apple Support.
Resetting PRAM and SMC can be a useful troubleshooting step to resolve various hardware or system-related issues on your MacBook Pro. However, it should be used judiciously and only as a last resort when other troubleshooting methods have failed.
Conclusion
Cleaning up your MacBook Pro is an essential task to maintain its performance, improve productivity, and maximize available storage space. By following the steps outlined in this guide, you can effectively organize your files, optimize system settings, and ensure that your MacBook Pro runs smoothly.
Creating a backup of your important files before starting the cleaning process is crucial to prevent any potential data loss. Removing unnecessary files, uninstalling unused applications, and cleaning up startup programs help declutter your system, freeing up valuable storage space and enhancing performance.
Organizing your Desktop and Downloads folder ensures that you can easily find and access files when needed. Clearing cache and temporary files helps keep your system running smoothly and efficiently. Managing your mailbox and attachments helps streamline your email workflow, while updating macOS and applications ensures you have the latest features, security fixes, and performance enhancements.
Running Disk Utility and periodically resetting PRAM and SMC are additional steps you can take to maintain the health and stability of your MacBook Pro.
By incorporating these practices into your routine maintenance, you can ensure that your MacBook Pro stays in optimal condition, providing you with a reliable, efficient, and enjoyable user experience.


