Introduction
Cleaning your computer monitor regularly is essential to maintain its clarity and extend its longevity. Over time, dust, fingerprints, and smudges can accumulate on the screen, affecting its visibility and overall performance. By following a few simple steps, you can keep your computer monitor looking crystal clear and functioning optimally.
Cleaning a computer monitor may seem like a daunting task, but with the right materials and techniques, it can be a quick and effortless process. This guide will provide you with step-by-step instructions on how to clean your computer monitor effectively. Whether you have a desktop monitor or a laptop screen, these tips will help you achieve a streak-free and dust-free display.
Before you begin cleaning your computer monitor, it’s important to gather the necessary materials. This will ensure that you have everything you need to clean your monitor without causing any damage. Taking a few minutes to prepare beforehand will save you time and potential frustration later on.
Materials Needed
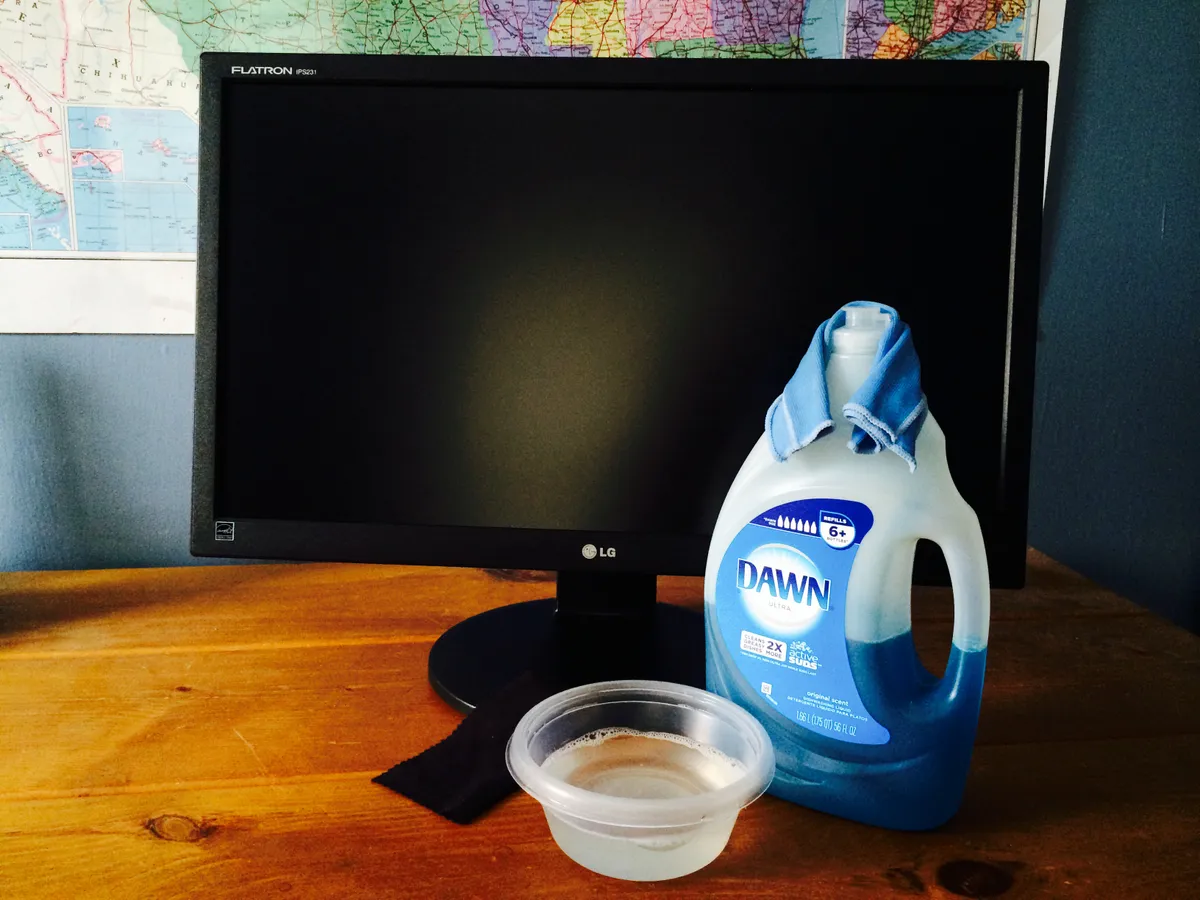
Before you start cleaning your computer monitor, gather the following materials:
- A microfiber cloth: This soft, lint-free cloth is ideal for cleaning delicate surfaces such as a computer monitor. Avoid using paper towels or rough fabrics as they can scratch the screen.
- Isopropyl alcohol: Dilute a small amount of isopropyl alcohol with distilled water to create an effective cleaning solution. Isopropyl alcohol helps remove stubborn stains and disinfects the screen.
- Distilled water: Ensure that you use distilled water instead of tap water, as tap water may contain minerals that can leave streaks or residue on the monitor.
- A spray bottle: Use a clean, empty spray bottle to dispense the cleaning solution onto the microfiber cloth. This allows you to control the amount of solution applied to the screen.
- Cotton swabs: These are useful for cleaning hard-to-reach areas around the monitor, such as the edges and corners.
By having these materials ready, you’ll be well equipped to effectively clean your computer monitor without causing any damage.
Step 1: Turning off the Monitor
Before you begin cleaning your computer monitor, it’s crucial to turn it off and unplug it from the power source. This step ensures your safety and prevents any accidental damage to the monitor or yourself during the cleaning process. Turning off the monitor also allows you to see the dust and smudges more clearly, making it easier to clean.
To turn off the monitor, locate the power button typically located either on the front or side of the screen. Press and hold the power button until the monitor shuts down completely. Once the screen is off, unplug the power cord from the electrical outlet or the back of the monitor.
By following this important step, you minimize the risk of electric shock and ensure that you can clean your computer monitor without any interference from the power supply. Proceed to the next step only after you have successfully turned off the monitor and unplugged it from the power source.
Step 2: Dusting the Monitor
Once you have turned off and unplugged your computer monitor, the next step is to remove the dust from the surface. Dust particles can accumulate on the screen, affecting its visibility and overall performance. Dusting the monitor regularly will help maintain its clarity and ensure optimal viewing.
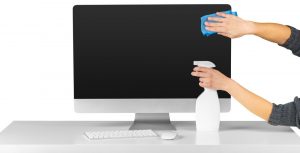
To dust the monitor, start by using a clean microfiber cloth. Gently wipe the cloth over the screen in a circular motion, applying light pressure. Make sure to cover the entire surface area of the screen. Avoid using excessive force or scrubbing, as this may damage the screen or leave scratches.
Pay special attention to the corners and edges of the monitor, as dust tends to accumulate in these areas. If you notice any stubborn dust particles, use a cotton swab to carefully remove them. Be cautious not to apply too much pressure or push the dust further into the screen.
It’s important to note that dusting should be done regularly to prevent excessive build-up. Aim to dust your computer monitor at least once a week or more frequently if you live in a particularly dusty environment.
Step 3: Choosing the Right Cleaning Solution
Selecting the appropriate cleaning solution for your computer monitor is crucial to ensure effective and safe cleaning. Using the wrong cleaning agents can damage the screen or leave residue and streaks. To avoid such issues, follow these guidelines when choosing a cleaning solution.
Firstly, avoid using harsh chemicals such as ammonia, bleach, or window cleaners. These substances can harm the screen’s protective coating and cause discoloration or even permanent damage. Instead, opt for a gentle cleaning solution that is specifically designed for electronic devices.
The most common and effective cleaning solution for computer monitors is a mixture of isopropyl alcohol and distilled water. Mix one part isopropyl alcohol with three parts distilled water in a clean spray bottle. This solution helps to remove fingerprints, smudges, and other stubborn stains effectively. The alcohol also has disinfectant properties, ensuring that your monitor remains germ-free.
Remember to never spray the cleaning solution directly onto the monitor screen. Instead, lightly mist the solution onto a clean microfiber cloth. This prevents any excess liquid from dripping into the monitor or seeping into the edges. The microfiber cloth helps distribute the solution evenly and minimize the risk of scratching the screen.
If you prefer to use pre-moistened cleaning wipes, ensure they are specifically designed for electronic screens. These wipes are convenient and come pre-soaked in a gentle cleaning solution, making them a convenient option for quick cleaning.
By choosing the right cleaning solution, you can effectively remove dirt, smudges, and bacteria from your computer monitor without causing any damage. Remember to always follow the instructions provided by the manufacturer and test the solution on a small inconspicuous area of the screen before proceeding with the cleaning process.
Step 4: Cleaning the Monitor Screen
Now that you have chosen the appropriate cleaning solution, it’s time to clean the monitor screen. Follow these steps carefully to ensure a thorough and safe cleaning process.
Start by taking the microfiber cloth that has been lightly misted with the cleaning solution. Gently wipe the cloth across the screen in a horizontal or vertical motion, applying even pressure. Avoid pressing too hard, as this could damage the screen or leave streaks.
Focus on areas that have noticeable smudges, fingerprints, or stains. Use a gentle circular motion with the cloth to target these spots. Take your time to ensure all marks are removed, but remember not to apply excessive force.
If there are any stubborn stains that are not easily removed, dampen a cotton swab with a small amount of the cleaning solution. Gently rub the stubborn area until the stain lifts. Be cautious not to press too hard or use excessive solution, as this may damage the screen.
Avoid using excessive moisture on the screen, as this can seep into the edges and internal components of the monitor. Excess moisture can also leave streaks or water marks on the screen. Remember that it’s better to use less liquid and make multiple passes until the screen is clean.
Once you have cleaned the entire screen, take a clean, dry microfiber cloth and gently wipe any excess moisture from the surface. Ensure that the screen is completely dry before proceeding to the next step.
By following these steps, you can effectively clean your monitor screen, removing smudges, fingerprints, and other marks to maintain optimal visibility and clarity.
Step 5: Cleaning the Monitor Frame
While cleaning the monitor screen is essential, don’t forget about the monitor frame. Dust, dirt, and fingerprints can accumulate on the frame, affecting the overall appearance of your monitor. Follow these steps to effectively clean the monitor frame.
Start by using a clean, dry microfiber cloth to wipe away any dust or loose dirt from the monitor frame. Use gentle strokes and ensure that you cover all areas, including the sides and corners of the frame.
For stubborn stains or smudges on the frame, lightly dampen a cloth with the cleaning solution you used for the monitor screen. Gently wipe the affected area, applying gentle pressure until the stain is lifted. Take care not to use excessive moisture, as this can damage the frame or leave watermarks.
If the monitor frame has crevices or tight spaces that are difficult to reach with a cloth, use a cotton swab dipped in the cleaning solution to clean these areas. Be gentle and precise, so as not to damage any delicate parts of the monitor.
Once you have cleaned the frame, take a dry microfiber cloth and gently wipe away any residual moisture or cleaning solution. Ensure that the frame is completely dry before turning the monitor back on.
Cleaning the monitor frame not only keeps your monitor looking pristine, but it also helps prevent dust or dirt from settling around the screen, which can affect its performance. By following these steps, you can effectively clean the monitor frame, enhancing both the appearance and functionality of your computer monitor.
Step 6: Drying the Monitor
After cleaning the monitor screen and frame, it’s crucial to ensure that the monitor is properly dried before turning it back on. Excess moisture can lead to streaks, watermarks, or even damage to the internal components. Follow these steps to ensure a thorough drying process.
First, using a clean, dry microfiber cloth, gently wipe the entire surface of the monitor screen to remove any remaining moisture. Pay attention to the corners and edges, as these areas tend to gather more moisture.
If there are any difficult-to-reach areas where moisture may have accumulated, use a cotton swab or a corner of the microfiber cloth to carefully dry them.
Allow the monitor to air dry for a few additional minutes to ensure that all remaining moisture evaporates. Avoid rushing this step, as it is crucial to ensure a completely dry surface.
Lastly, visually inspect the monitor screen for any signs of moisture or streaks. If you notice any, use a dry microfiber cloth to gently buff away the streaks until the screen is clear and free of any residue.
By thoroughly drying the monitor, you prevent streaks, smudges, or watermarks from marring your screen. This step ensures a crystal-clear display when you turn the monitor back on.
Step 7: Turning on the Monitor
After cleaning and drying the monitor, it’s time to turn it back on and enjoy a clear, pristine display. Follow these simple steps to safely and effectively power up your monitor.
First, double-check that the monitor is completely dry. Make sure there are no visible moisture or streaks on the screen or frame.
Once you have confirmed that the monitor is dry, reconnect the power cord to the monitor and plug it back into the electrical outlet. Ensure that the connection is secure.
Press the power button on the monitor to turn it on. Wait a moment for the monitor to initialize and display an image on the screen. You should see a crisp and vibrant image indicating that your monitor is ready for use.
While turning on the monitor, also pay attention to any unusual sounds or visuals. If you notice anything out of the ordinary, such as flickering, distorted images, or strange noises, immediately turn off the monitor and seek professional assistance. These signs could indicate a potential issue that requires further attention.
Once the monitor is turned on and functioning correctly, take a moment to enjoy the clear and smudge-free display that you have achieved through the cleaning process. This will enhance your overall computing experience and ensure optimal visibility.
Remember to regularly clean your computer monitor to maintain its clarity and prolong its lifespan. By incorporating this cleaning routine into your regular maintenance, you can enjoy a pristine display for years to come.
Conclusion
Cleaning your computer monitor is a simple yet essential task that can significantly improve your viewing experience. By following the steps outlined in this guide, you can effectively remove dust, smudges, and stains, ensuring a clear and crisp display.
Remember to gather the necessary materials, including a microfiber cloth, isopropyl alcohol, distilled water, a spray bottle, and cotton swabs, before starting the cleaning process. Turning off the monitor and unplugging it from the power source is crucial for your safety and to avoid any accidental damage.
Dusting the monitor regularly helps to maintain its clarity. Choosing the right cleaning solution, such as a mixture of isopropyl alcohol and distilled water, ensures that you safely and effectively remove smudges and fingerprints from the screen.
Cleaning both the monitor screen and frame thoroughly, while being cautious not to use excessive moisture, keeps your monitor looking pristine and prevents dust accumulation. Remember to dry the monitor completely before turning it back on to avoid streaks or water damage.
Finally, by following the steps and turning on the monitor, you can enjoy a clear and vibrant display as you continue your work or entertainment.
Incorporating regular cleaning into your monitor maintenance routine will not only enhance your viewing experience but also extend the lifespan of your computer monitor. So, take the time to keep your monitor clean and enjoy a visually appealing and optimal computing experience.