Introduction
Welcome to this helpful guide on how to check the available space on your external hard drive on a Mac. Whether you use your external hard drive for backing up important files, storing multimedia content, or simply expanding your storage capacity, it’s essential to keep track of the available space on your device.
Knowing the available space on your external hard drive can help you make informed decisions about how to manage your files, such as determining if you need to delete any unnecessary files, transfer data to another storage device, or invest in additional storage capacity. Fortunately, checking the available space on your external hard drive is a straightforward process on a Mac.
In this article, we will explore three different methods you can use to check the available space on your external hard drive on a Mac: using Finder, using Disk Utility, and using Terminal. Each method has its advantages, so you can choose the one that suits your preference and needs. Let’s dive in!
Method 1: Using Finder
One of the easiest ways to check the available space on your external hard drive on a Mac is by using Finder, the default file management tool. Here’s how you can do it:
- Connect your external hard drive to your Mac using the appropriate cables.
- Open a Finder window by clicking on the Finder icon in the Dock or selecting “New Finder Window” from the File menu.
- In the sidebar of the Finder window, you should see a section labeled “Devices” or “External.” Click on the name of your external hard drive.
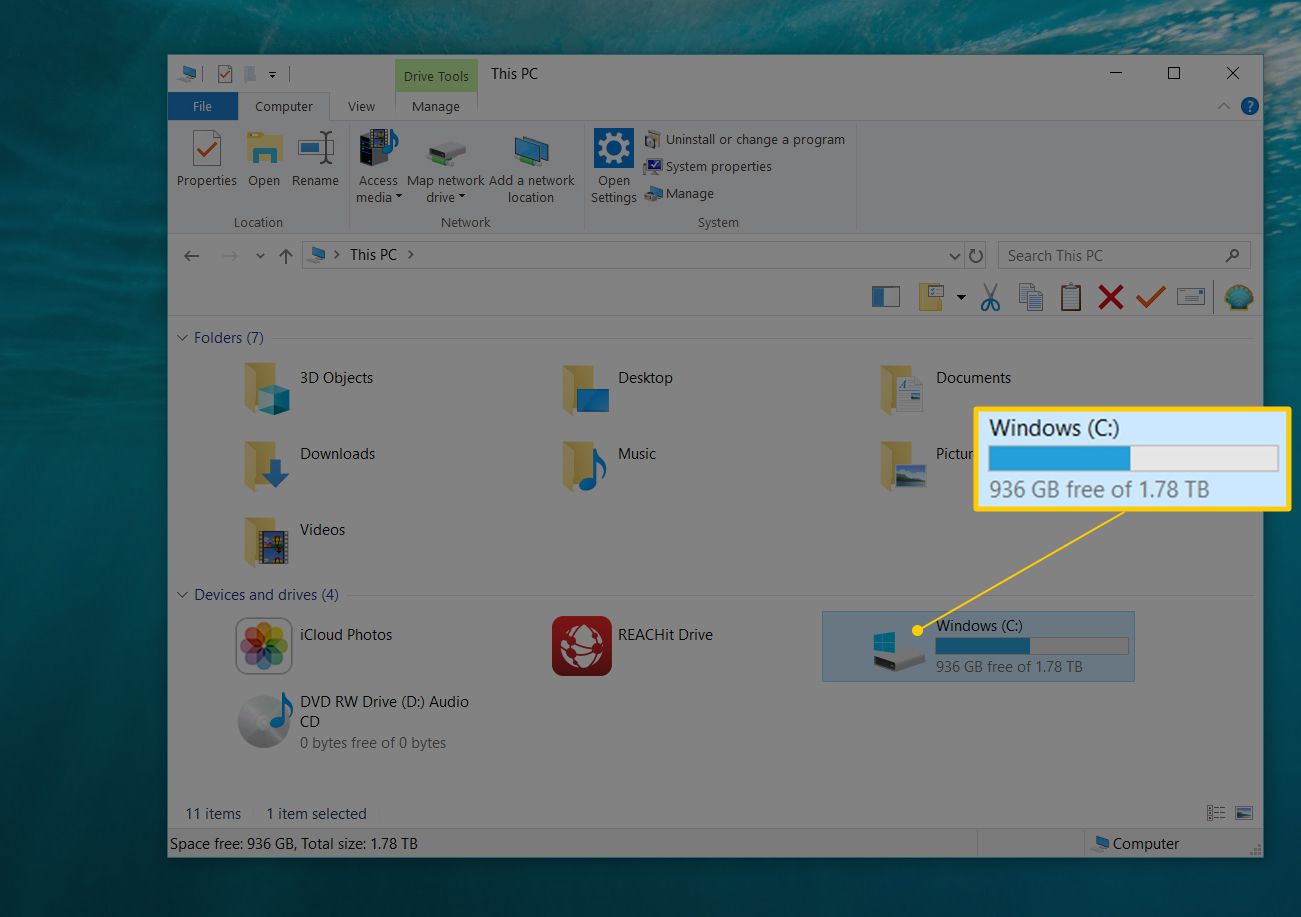
- The Finder window will now display the contents of your external hard drive. At the bottom of the window, you will see a bar that provides information about the available space on your drive. The bar is divided into sections, with the blue section representing the data already stored on your drive and the gray section representing the available space.
- To see more detailed information about the available space, you can go to the “View” menu in the menu bar and select “Show Status Bar.” This will display the number of items, total capacity, and available space at the bottom of the Finder window.
Using Finder to check the available space on your external hard drive is quick and convenient. It provides you with a visual representation of your drive’s storage capacity and makes it easy to navigate through your files and folders. However, if you prefer a more precise and detailed view of your drive’s space allocation, you might want to try using Disk Utility, as described in the next section.
Method 2: Using Disk Utility
If you’re looking for a more detailed and comprehensive analysis of the available space on your external hard drive, using Disk Utility is the way to go. Here’s how you can check the available space using Disk Utility:
- Connect your external hard drive to your Mac using the appropriate cables, if it’s not already connected.
- Open the Finder by clicking on the Finder icon in the Dock.
- Click on “Applications” in the sidebar and then choose “Utilities.”
- In the Utilities folder, locate and open “Disk Utility.”
- In the Disk Utility window, you will see a sidebar on the left side displaying all the different storage devices connected to your Mac. Select your external hard drive from the list.
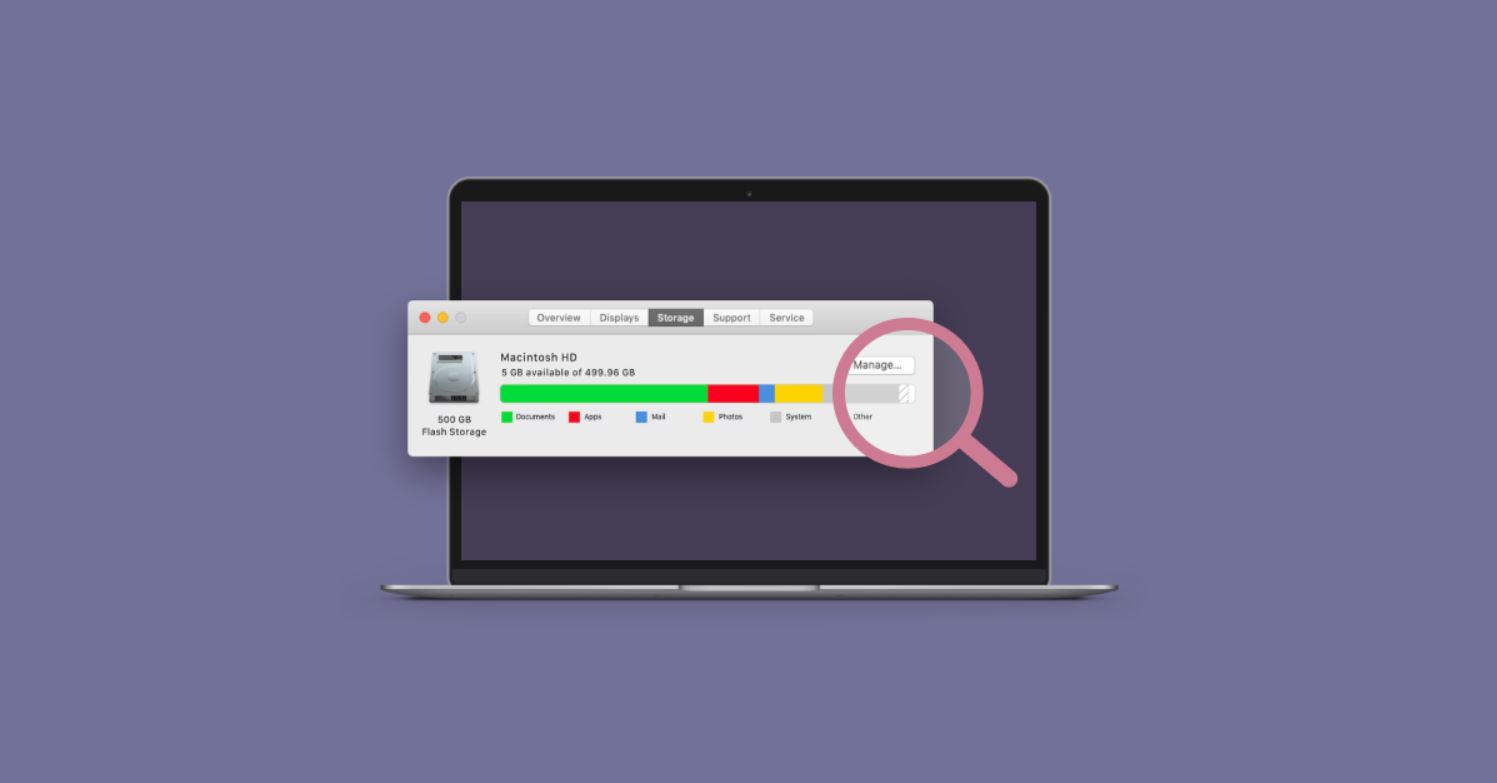
- In the main window, you will see detailed information about your external hard drive, including its capacity, available space, and used space. The available space is displayed as “Available” and is represented in both gigabytes (GB) and percentage.
- If you want to view a detailed breakdown of how your external hard drive’s space is allocated, click on the “View” button in the toolbar and select “Show All Devices.” This will reveal a hierarchical view of your drive, showing the individual partitions and their respective usage.
Using Disk Utility gives you a comprehensive and detailed overview of your external hard drive’s space allocation. It allows you to explore additional information and manage partitions if needed. However, if you prefer a more technical approach and have some familiarity with the command line, you can also use Terminal to check the available space, as described in the next section.
Method 3: Using Terminal
If you’re comfortable using the command line interface and prefer a more technical approach, you can check the available space on your external hard drive using Terminal. Here’s how you can do it:
- Connect your external hard drive to your Mac using the appropriate cables, if it’s not already connected.
- Open the Finder by clicking on the Finder icon in the Dock.
- Click on “Applications” in the sidebar and then choose “Utilities.”
- In the Utilities folder, locate and open “Terminal.”
- In the Terminal window, type the command
df -hand press Enter. - You will see a list of mounted devices and their respective capacities, used space, and available space. Look for the name of your external hard drive in the list.
- The available space on your external hard drive will be displayed under the “Available” column.
Using Terminal gives you a precise and detailed view of the available space on your external hard drive directly through the command line. It can be especially useful if you prefer a text-based interface or if you need to incorporate this information into a script or automation process.
Now that you know the various methods to check the available space on your external hard drive on a Mac – using Finder, Disk Utility, and Terminal – you can choose the method that best suits your needs and preferences. Keeping track of your external hard drive’s available space is crucial for efficient file management and ensuring that you have enough storage capacity for your needs.
Conclusion
Checking the available space on your external hard drive on a Mac is essential for effective storage management. By keeping track of your drive’s available space, you can make informed decisions on organizing your files, transferring data, or investing in additional storage capacity.
In this article, we explored three different methods to check the available space on your external hard drive: using Finder, Disk Utility, and Terminal. Each method offers its own advantages and gives you a different level of detail and control over your drive’s space allocation.
If you prefer a simple and visual approach, using Finder provides a quick and convenient way to see the available space at a glance. Disk Utility, on the other hand, offers a more comprehensive analysis, allowing you to dive into the details and manage partitions if necessary.
For those comfortable with the command line interface, Terminal provides a precise and text-based view of the available space, making it a suitable choice for more technical users or automation processes.
No matter which method you choose, regularly checking the available space on your external hard drive is crucial to avoid running out of storage and to keep your files organized. By utilizing the methods provided in this guide, you can easily stay on top of your external hard drive’s capacity and ensure effective file management for all your storage needs.