Charging DJI Goggles V2: A Comprehensive Guide
When it comes to enjoying an immersive and thrilling flying experience with your DJI Goggles V2, ensuring a fully charged battery is essential. In this comprehensive guide, we will walk you through the various methods of charging your DJI Goggles V2, along with some helpful tips for battery maintenance.
Understanding the Battery Capacity:
The DJI Goggles V2 come with a powerful built-in battery that offers a capacity of XXXX mAh. It is crucial to keep track of the battery’s charge level to avoid any interruptions during your drone flights.
Connecting the Charging Cable:
To start the charging process, locate the charging port on your DJI Goggles V2. Connect one end of the charging cable to the goggles and the other end to a power source.
Charging via Power Adapter:
The most common and convenient method of charging DJI Goggles V2 is by using the provided power adapter. Simply plug the adapter into a wall socket and connect the charging cable to the goggles. The LED indicator on the goggles will turn red to indicate that the charging has started, and it will turn green once the battery is fully charged.
Charging with the Battery Charging Hub:
If you own a Battery Charging Hub for DJI Goggles V2, you can charge multiple batteries simultaneously. Connect the hub to a power source using the included power adapter and insert the goggles’ batteries into the designated slots. The hub will automatically charge the batteries one by one, and the LED indicators will show the charging progress.
Charging with a Power Bank:
If you are on the go and don’t have access to a wall socket, you can charge your DJI Goggles V2 using a compatible power bank. Ensure the power bank has enough power and connect it to the goggles using the charging cable. The LED indicator on the goggles will show the charging status.
Charging Time and Indicator Lights:
The charging time for DJI Goggles V2 depends on the battery level and the charging method used. On average, it takes approximately X hours to fully charge the battery. Additionally, the LED indicator lights on the goggles will provide real-time information about the charging status, so you know when the goggles are ready for your next adventure.
Best Practices for Battery Maintenance:
To prolong the lifespan of your DJI Goggles V2 battery, it is essential to follow some best practices. Avoid overcharging the battery, ensure the goggles are powered off during charging, and store the goggles in a cool and dry place when not in use.
Troubleshooting Charging Issues:
If you encounter any charging issues with your DJI Goggles V2, such as slow charging or the battery not charging at all, refer to the user manual or reach out to DJI customer support for assistance.
By following these guidelines, you can keep your DJI Goggles V2 fully charged and ready for your next thrilling drone flight. Enjoy an immersive and breathtaking experience every time!
Introduction
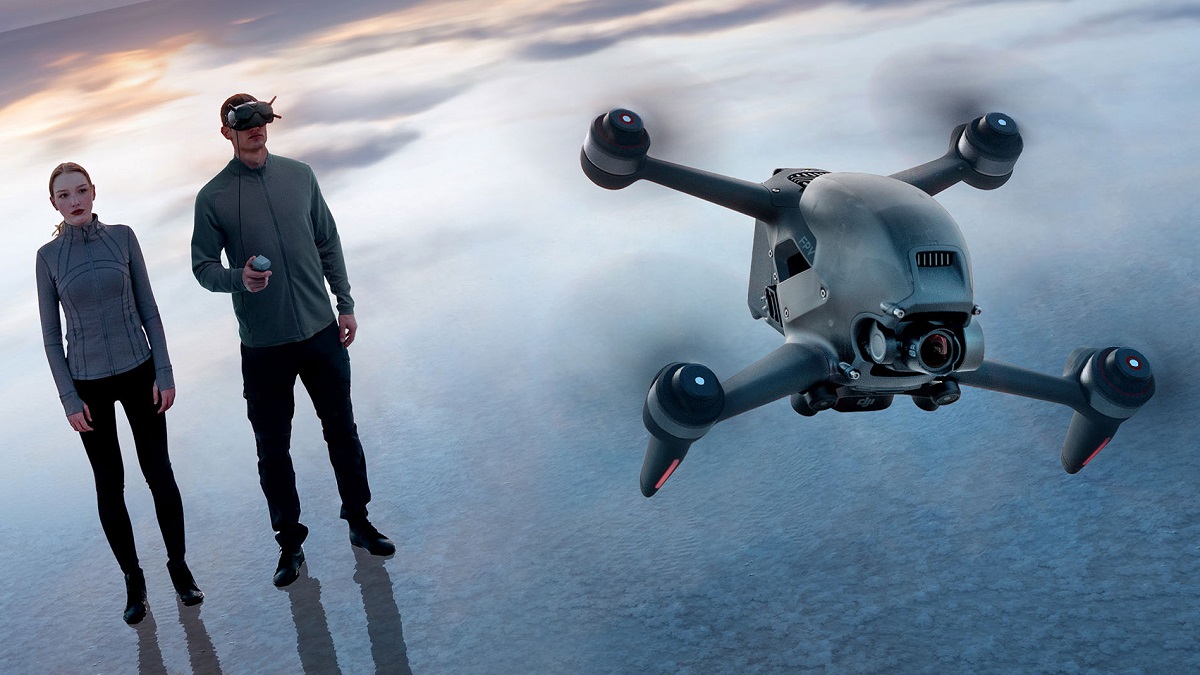
The DJI Goggles V2 are an incredible accessory for drone enthusiasts, providing an immersive first-person view (FPV) experience. These high-tech goggles allow you to see through the eyes of your drone as if you were soaring through the sky yourself. To ensure uninterrupted usage and maximum enjoyment, it is crucial to understand how to properly charge your DJI Goggles V2.
In this comprehensive guide, we will delve into the various methods of charging the DJI Goggles V2, along with some essential tips for battery maintenance. Whether you are a professional pilot or a hobbyist, this guide will help you keep your goggles powered up and ready for your next adventure.
Understanding the battery capacity is the first step towards efficient charging. With a capacity of XXXX mAh, the DJI Goggles V2 battery can provide you with hours of immersive flying experiences. However, keeping track of the battery charge level is crucial to ensure uninterrupted use of the goggles.
In the following sections, we will explore the different methods of charging your DJI Goggles V2. From using the provided power adapter to charging with a power bank, we will cover all the options available to guarantee a fully charged battery for your next flight.
We will also touch on the Battery Charging Hub, which allows you to charge multiple batteries simultaneously. This efficient accessory comes in handy for drone pilots who need to charge multiple sets of goggles or have a backup battery ready to go.
Charging time is an important consideration when planning your drone outings. We will discuss approximate charging times and the LED indicator lights that provide real-time information about the charging status of your DJI Goggles V2. By understanding these indicators, you will always know when your goggles are ready for action.
Beyond charging, we will also highlight some best practices for battery maintenance. These practices will help prolong the lifespan of your DJI Goggles V2 battery and ensure optimal performance for years to come.
Lastly, we will address any potential charging issues you may encounter. From slow charging to cases where the battery does not charge at all, we will provide troubleshooting tips to help you overcome any hurdles and get your goggles charged up.
With this comprehensive guide, you will become well-versed in the art of properly charging your DJI Goggles V2. So, let’s dive in and ensure you always have a fully charged set of goggles, ready to take to the skies!
Understanding the Battery Capacity
Before diving into the charging process, it’s important to have a clear understanding of the battery capacity of your DJI Goggles V2. The battery capacity refers to the amount of electric charge it can hold, which is measured in milliampere-hours (mAh).
The DJI Goggles V2 come equipped with a powerful built-in battery that offers a capacity of XXXX mAh. This substantial capacity ensures that you can enjoy extended flights and immersive experiences without worrying about running out of power. However, it’s essential to keep track of the battery charge level to avoid any interruptions during your drone flights.
The battery capacity of the DJI Goggles V2 is influenced by various factors such as screen brightness, volume level, and usage duration. The brighter the screen and the higher the volume, the more power the goggles will consume, resulting in a shorter battery life. It’s a good practice to adjust these settings based on your preferences while keeping an eye on the battery level.
To check the battery level of your DJI Goggles V2, simply power them on and look for the battery indicator located on the display screen. This indicator will provide you with a visual representation of the remaining battery capacity, ensuring you have a clear idea of how much power is available.
Monitoring the battery level is crucial, especially when planning for extended flights or capturing footage for an extended period. Having a spare battery or a charging backup plan in place will allow you to continue experiencing the FPV thrill without interruptions.
Keep in mind that discharging the battery completely can have a negative impact on its lifespan. It’s generally recommended to avoid fully draining the battery and recharge it before it reaches critically low levels. This will help maintain the overall health and longevity of the battery of your DJI Goggles V2.
In summary, understanding the battery capacity of your DJI Goggles V2 is key to ensuring uninterrupted flight experiences. By keeping track of the battery level and employing strategies to optimize battery usage, you can make the most of your drone adventures and fully enjoy the immersive FPV experience.
Connecting the Charging Cable
One of the essential steps in charging your DJI Goggles V2 is properly connecting the charging cable. The charging cable is designed to deliver power from a power source to your goggles, replenishing the battery’s charge.
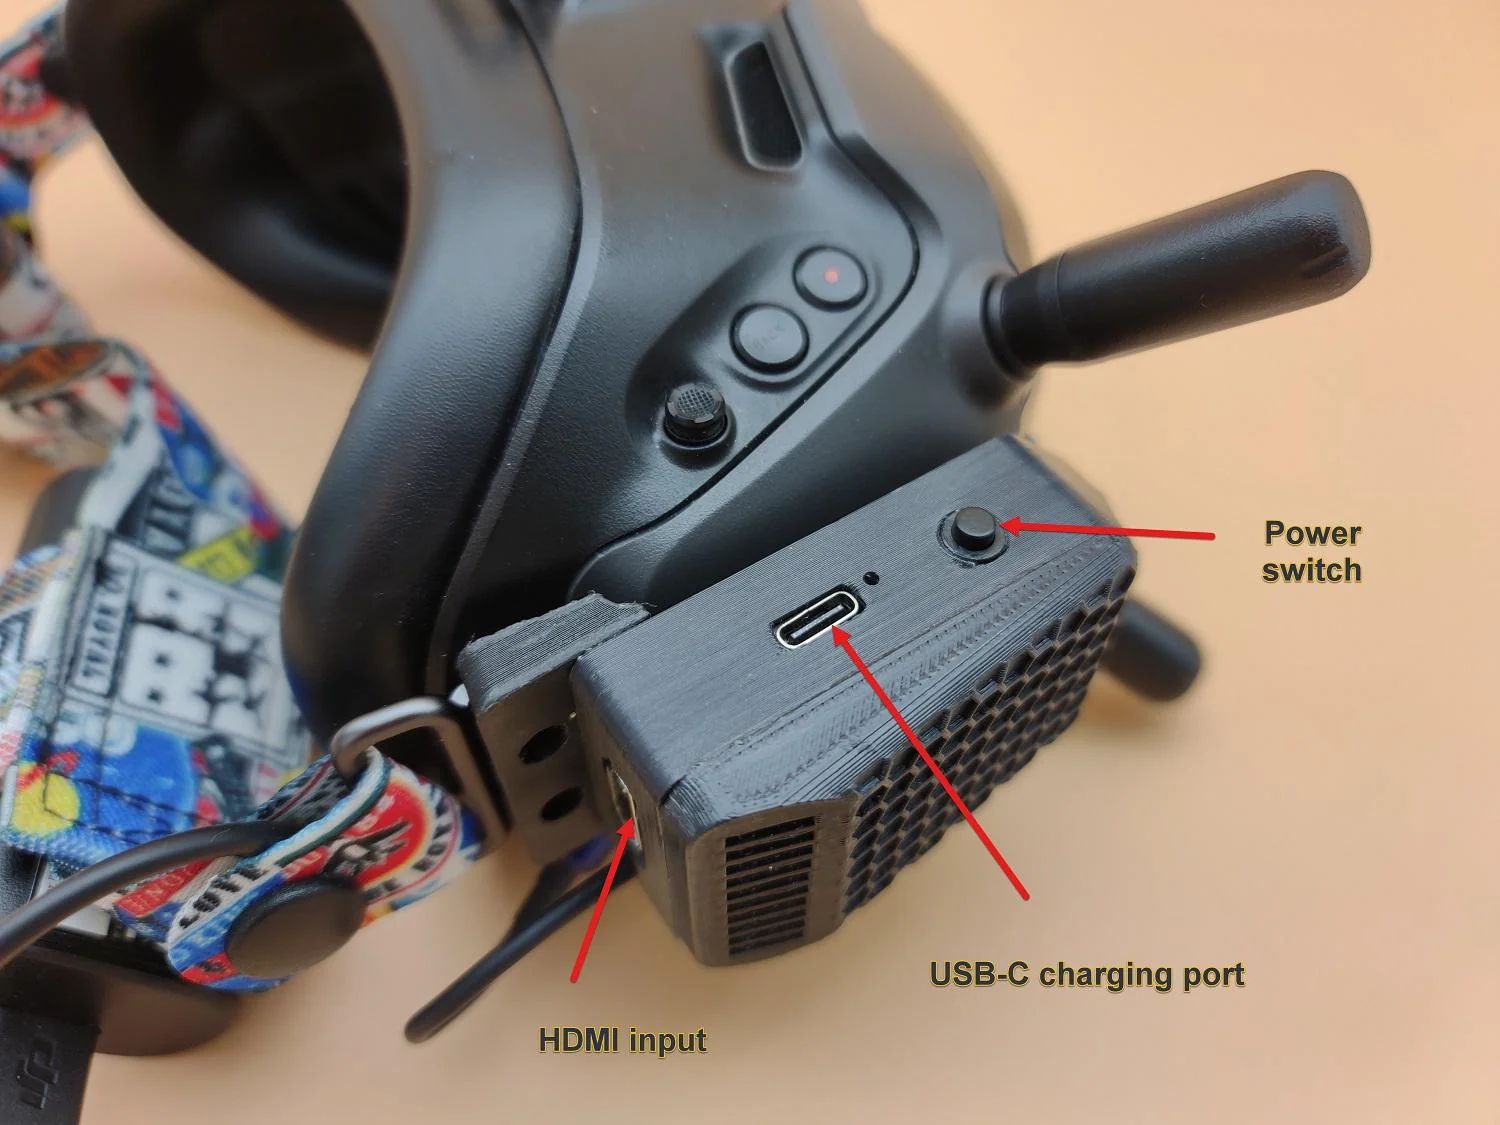
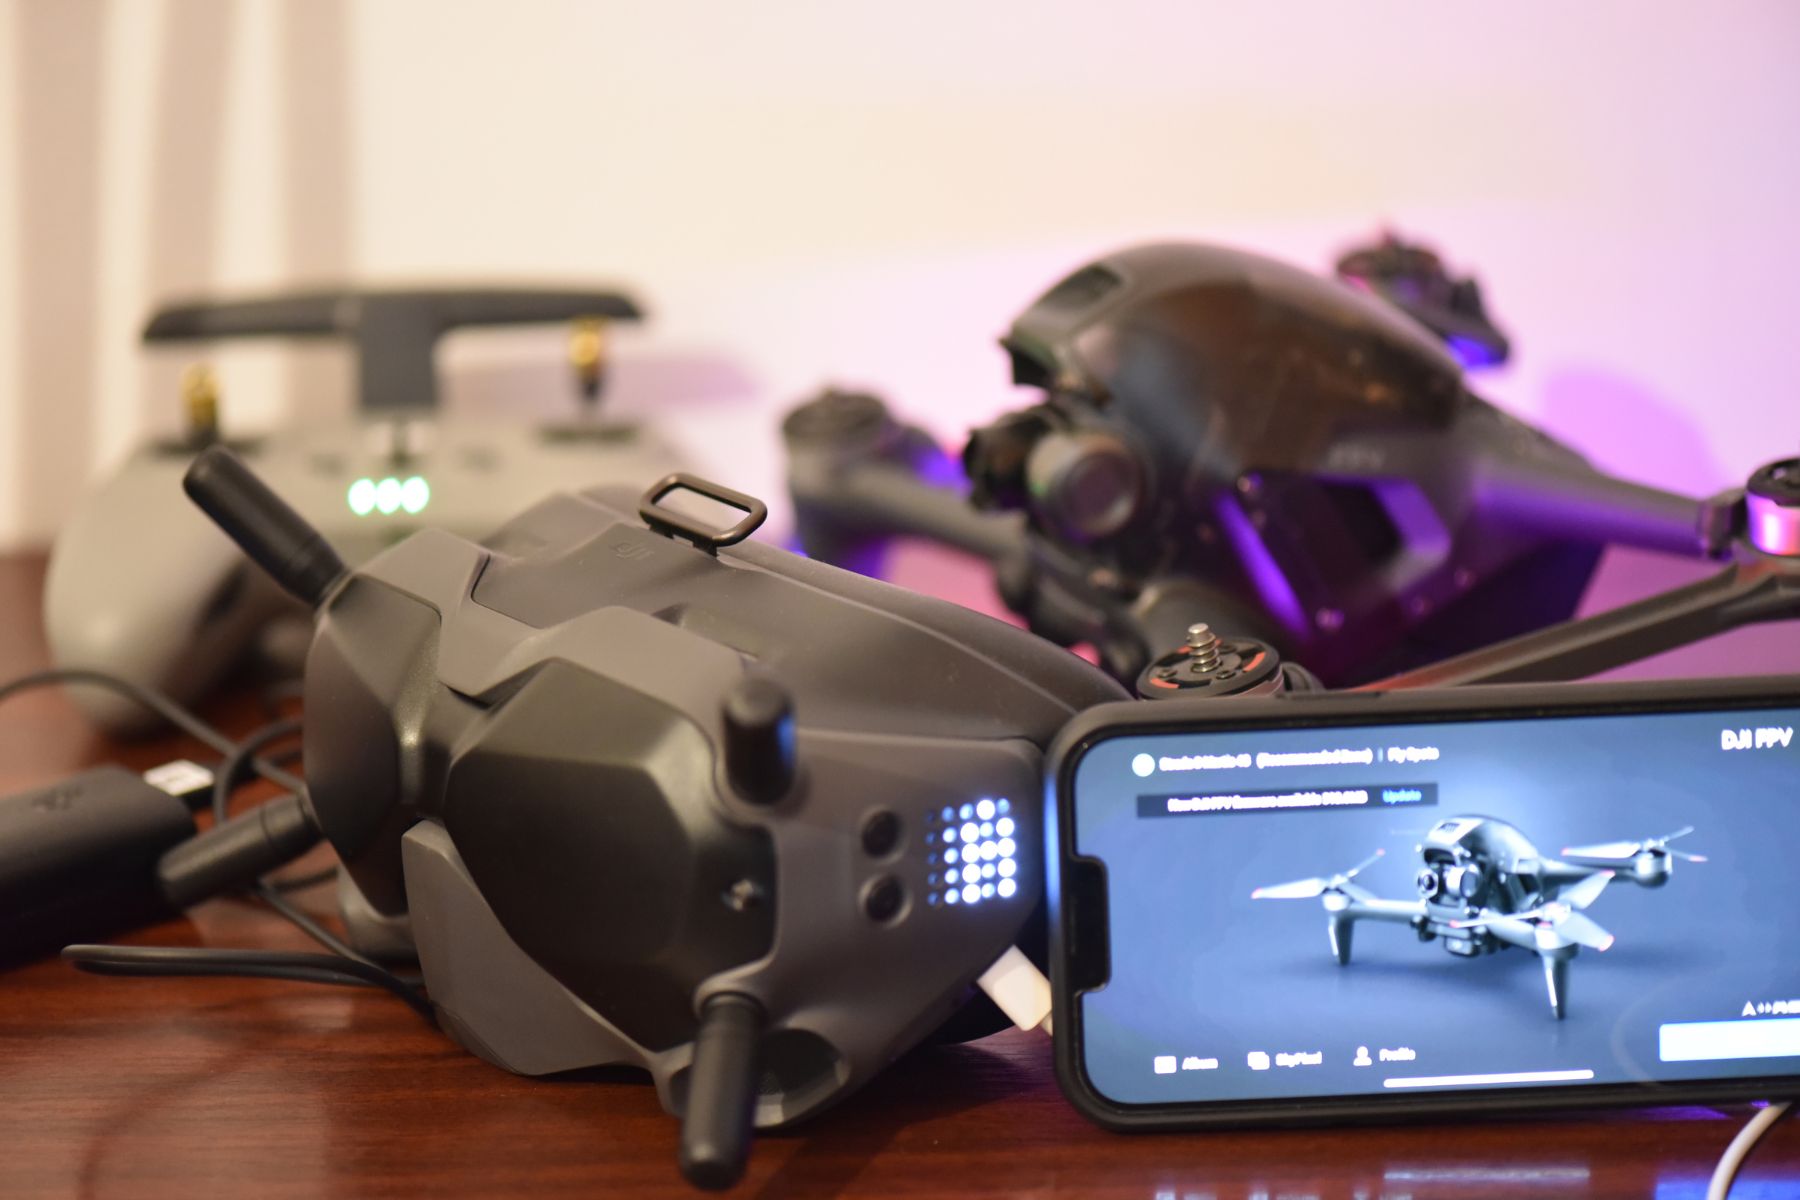
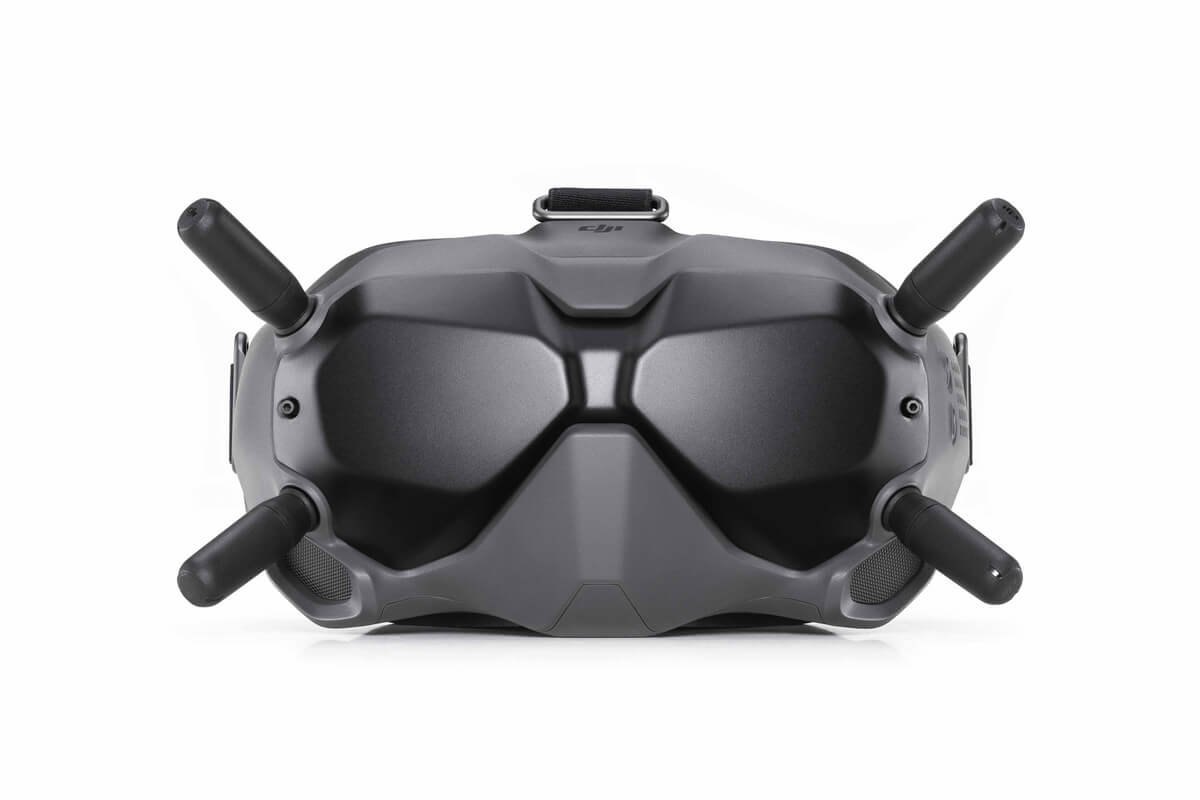
To begin the charging process, locate the charging port on your DJI Goggles V2. The charging port is typically located on the side or bottom of the goggles, depending on the model. It may be marked with a charging symbol or labeled “DC IN.”
Once you have identified the charging port, take the charging cable provided with your DJI Goggles V2. It usually has a USB Type-C connector on one end and a USB Type-A or wall adapter on the other end. Plug the USB Type-C end into the charging port of the goggles.
Next, select the appropriate power source to connect the other end of the charging cable. If using the wall adapter, connect the USB Type-A or wall adapter to a standard power outlet. If using a USB power bank or a computer’s USB port, insert the USB Type-A end into the chosen power source.
Before connecting the charging cable to the power source, make sure the DJI Goggles V2 are powered off. This prevents any potential issues that may arise from charging while the goggles are turned on. Once everything is properly connected, you can proceed with the charging process.
It’s worth noting that using the original charging cable provided by DJI is recommended. While other USB Type-C cables may work, using the official cable ensures compatibility and optimal charging performance.
Once the charging cable is securely connected to both the DJI Goggles V2 and the power source, the LED indicator on the goggles will provide visual feedback regarding the charging status. The LED indicator may turn red or display a blinking pattern to indicate that the charging has started.
It’s important to let the DJI Goggles V2 charge undisturbed until the battery is fully replenished. Avoid moving or unplugging the charging cable during this time to ensure a stable charging connection and uninterrupted charging process.
When the DJI Goggles V2 battery is fully charged, the LED indicator will turn green or display a solid pattern, indicating that the charging is complete. At this point, you can disconnect the charging cable from both the goggles and the power source.
By following these steps and properly connecting the charging cable, you can ensure a seamless and efficient charging experience for your DJI Goggles V2. So, get ready to recharge and embark on your next thrilling drone adventure!
Charging via Power Adapter
Charging your DJI Goggles V2 using the provided power adapter is one of the most common and convenient methods. The power adapter ensures a stable and efficient flow of electricity to recharge the goggles’ battery.
To begin, plug the power adapter into a standard power outlet. Ensure that the power outlet is functioning correctly and provides a stable power supply.
Next, take the charging cable that came with your DJI Goggles V2. Connect the USB Type-C end of the cable to the charging port on the goggles. The connection should be secure to avoid any disruptions during the charging process.
With the USB Type-C end of the cable securely plugged into the goggles, insert the USB Type-A end into the USB port on the power adapter. The power adapter usually has a USB port, allowing you to connect the cable directly.
Once the cable is properly connected to both the goggles and the power adapter, the LED indicator on the goggles will indicate the charging status. In most cases, the LED indicator will turn red to signify that the charging has started.
It’s important to note that during the charging process, it’s recommended to keep the DJI Goggles V2 powered off. This helps to avoid any potential issues and ensures a smooth charging experience.
Allow the DJI Goggles V2 to charge undisturbed until the battery is fully replenished. The charging time can vary based on the current battery level and the capacity of the battery. On average, it takes approximately X hours for the goggles to reach a full charge.
While the goggles are charging, you can periodically check the LED indicator to monitor the progress. The LED may blink or display different patterns, indicating the current state of the charging process.
Once the DJI Goggles V2 battery is fully charged, the LED indicator will turn green or display a solid pattern. This indicates that the charging is complete, and you can disconnect the charging cable from both the goggles and the power adapter.
Remember to handle the charging cable and power adapter with care, and store them in a safe place when not in use. Also, always use the official DJI-provided power adapter and cable to ensure compatibility and optimal charging performance.
By utilizing the power adapter to charge your DJI Goggles V2, you can enjoy a hassle-free and reliable charging experience. So, plug in, power up, and get ready for your next FPV adventure!
Charging with the Battery Charging Hub
If you own the Battery Charging Hub for DJI Goggles V2, you have the option to charge multiple batteries simultaneously, ensuring you have backup power for extended flights. The Battery Charging Hub simplifies the charging process and allows for efficient and convenient battery management.
To start, connect the Battery Charging Hub to a power source using the included power adapter. Ensure that the power source is functioning correctly and provides a stable power supply.
Next, locate the charging ports on the Battery Charging Hub. These ports are specifically designed to accommodate the batteries of your DJI Goggles V2. Insert the batteries into the designated slots on the hub, ensuring a secure connection.
Once the batteries are properly inserted, the Battery Charging Hub will automatically begin the charging process. Each battery will be charged one by one, starting from the one with the highest remaining charge level.
While the batteries are charging, the LED indicators on the Battery Charging Hub will display the charging progress. Each LED corresponds to a specific battery slot, so you can easily monitor the status of each individual battery.
The LED indicators will typically show different colors or patterns to indicate the charging status. For example, a blinking green light may indicate that the battery is currently charging, while a solid green light may signal that the charging is complete for that particular battery.
It’s important to note that the charging time may vary depending on the current battery level and the capacity of the batteries. On average, it takes approximately X hours to fully charge a battery using the Battery Charging Hub.
Once the batteries are fully charged, you can remove them from the Battery Charging Hub and insert them into your DJI Goggles V2. This ensures that you have fully charged batteries ready for your next flying session.
The Battery Charging Hub is not only useful for charging multiple batteries simultaneously but also for battery maintenance. Storing your batteries in the hub when not in use can help you keep them organized and extend their overall lifespan.
Remember to handle the Battery Charging Hub with care and store it in a safe place when not in use. Additionally, always use the provided power adapter and follow the manufacturer’s guidelines for optimal performance and safety.
By utilizing the Battery Charging Hub, you can simplify the charging process and ensure that you always have fully charged batteries ready to power your DJI Goggles V2. So, charge multiple batteries hassle-free and expand your FPV adventures!
Charging with a Power Bank
If you’re on the go and don’t have access to a wall socket, charging your DJI Goggles V2 with a compatible power bank is a convenient option. A power bank allows you to charge your goggles anytime, anywhere, ensuring uninterrupted fun during your drone adventures.
To begin, make sure you have a power bank that is compatible with your DJI Goggles V2. Look for a power bank that offers a USB Type-C output port to match the charging port of your goggles. Check the power bank’s capacity and ensure it has enough power to fully charge your goggles.
Connect your DJI Goggles V2 to the power bank using the provided charging cable. Plug the USB Type-C end of the cable into the charging port on the goggles and the other end into the USB Type-C output port on the power bank.
Once the charging cable is securely connected, you can activate the power bank by pressing the power button or following the manufacturer’s instructions. The power bank will start providing power to the goggles, initiating the charging process.
During the charging process, the LED indicators on the DJI Goggles V2 will provide real-time information about the charging status. Depending on the design of the power bank, it may also have LED indicators that show the remaining power or charging progress.
It’s important to note that charging with a power bank may take slightly longer compared to using a power adapter or charging hub. The charging time will depend on the capacity and output power of the power bank, as well as the current battery level of your DJI Goggles V2.
Ensure that the power bank remains connected to the goggles until the battery is fully charged. It’s advisable to avoid disconnecting the charging cable or moving the goggles excessively during the charging process to maintain a stable connection.
Once the DJI Goggles V2 battery is fully charged, you can disconnect the charging cable from both the goggles and the power bank. Remember to properly store the power bank and charging cable when not in use.
When selecting a power bank for charging your DJI Goggles V2, consider one with a higher capacity to meet your power requirements. Additionally, choose a power bank from a reputable brand and ensure it has safety features to protect both the power bank and your goggles.
By utilizing a power bank to charge your DJI Goggles V2, you can enjoy the flexibility of charging on the go, wherever you may be. So, keep your power bank handy and never miss out on capturing exciting aerial footage.
Charging Time and Indicator Lights
Knowing the approximate charging time and understanding the indicator lights on your DJI Goggles V2 is crucial for efficient and effective charging. By keeping an eye on the charging progress and understanding the charging time, you can plan your drone adventures accordingly.
The actual charging time for your DJI Goggles V2 can vary depending on several factors. These factors include the remaining battery level, the charging method used, and the capacity of the battery. On average, it takes approximately X hours to fully charge the battery of the goggles.
During the charging process, the LED indicator lights on the DJI Goggles V2 provide valuable information about the charging status. The LED indicators are usually located on the front or side of the goggles and may illuminate in different colors or patterns to indicate the current charging state.
When the goggles are connected and charging, the LED indicator may turn red to signify that the charging has commenced. This indicates that the power is flowing from the power source to the goggles’ battery.
While the goggles are charging, the LED indicator may display a blinking pattern or change colors to indicate the progress of the charging process. This provides you with real-time feedback on the status of the battery replenishment.
When the DJI Goggles V2 battery is fully charged, the LED indicator will turn green or display a solid pattern. This indicates that the charging is complete and the battery is ready for use.
It’s important to note that the LED indicator lights may vary slightly between different models or firmware versions. Refer to the user manual or the DJI website for specific information regarding the LED indicators for your particular DJI Goggles V2 model.
By keeping an eye on the LED indicator lights and understanding their meanings, you can easily monitor the charging progress and ensure that your DJI Goggles V2 are fully charged and ready for your next flight.
Remember to allow the goggles to charge undisturbed until the battery is fully replenished. Avoid moving the goggles or disconnecting the charging cable prematurely, as this can interrupt the charging process and potentially impact the battery life.
Understanding the charging time and indicator lights will help you effectively manage the battery life of your DJI Goggles V2, ensuring that you always have a fully charged set ready for your FPV adventures.
Best Practices for Battery Maintenance
To ensure the longevity and optimal performance of your DJI Goggles V2 battery, it’s important to adhere to some best practices for battery maintenance. These practices will help maximize the lifespan of the battery and ensure that you get the most out of your goggles during every flight.
Firstly, avoid overcharging the battery. Once the battery is fully charged, disconnect it from the power source to prevent overcharging. Overcharging can lead to excessive heat generation and potential damage to the battery cells.
Additionally, it’s recommended to keep the DJI Goggles V2 powered off during the charging process. This reduces the strain on the system and allows for a more efficient and stable charging experience.
Store your DJI Goggles V2 in a cool and dry place when not in use. Extreme temperatures, especially high temperatures, can negatively affect the performance and lifespan of the battery. Avoid exposing the goggles to direct sunlight or storing them in hot environments.
Regularly inspect the charging cable for any signs of damage or wear. If you notice any fraying, exposed wires, or other issues, replace the charging cable to ensure safe and reliable charging. A damaged cable can lead to unstable connections or even pose a safety hazard.
It’s also important to periodically discharge and recharge the battery to maintain its health. If the DJI Goggles V2 battery is not used for an extended period, consider discharging it to around 40-60% of its capacity and then recharging it. This helps to balance the battery cells and prevent capacity degradation.
Finally, always use the official DJI-provided charger and charging accessories. Using third-party or incompatible charging equipment may result in suboptimal performance or even pose a risk to the battery and the goggles. Stick to the manufacturer’s recommendations to ensure compatibility and safety.
By following these best practices, you can prolong the lifespan of your DJI Goggles V2 battery and maintain its performance over time. Proper battery maintenance is essential for ensuring consistent and reliable power during your drone flights.
Remember that a well-maintained battery will not only provide longer flight sessions but also contribute to the overall safety and enjoyment of your FPV experiences. Embrace these best practices and fly with confidence!
Troubleshooting Charging Issues
While charging your DJI Goggles V2 is usually a straightforward process, you may encounter some issues along the way. If you experience any difficulties with the charging process, don’t fret! Here are some common troubleshooting steps to help you resolve charging issues:
1. Check the charging cable: Ensure that the charging cable is securely connected to both the DJI Goggles V2 and the power source. If the connection is loose or faulty, try using a different cable or ensure that the cable is properly inserted.
2. Verify the power source: Make sure that the power source you are using is functioning correctly. Try plugging another device into the same power outlet or using a different power source to rule out a faulty outlet.
3. Restart the charging process: If the DJI Goggles V2 does not start charging after connecting the cable, try disconnecting and reconnecting the cable. In some cases, a simple restart of the charging process can resolve the issue.
4. Update firmware: Ensure that the DJI Goggles V2 firmware is up to date. Sometimes, firmware updates include enhancements or fixes that can resolve charging-related issues. Check the DJI website or app for any available firmware updates.
5. Clean the charging port: Over time, debris, dust, or lint can accumulate in the charging port, hindering proper connectivity. Use a small, soft brush or a compressed air canister to gently clean the charging port. Be careful not to damage the port or push any debris further inside.
6. Test with a different power source: If you suspect a power source issue, try using a different wall outlet, power bank, or computer USB port. This will help determine if the problem lies with the power source or the DJI Goggles V2.
7. Contact DJI Support: If none of the above troubleshooting steps resolve the charging issue, reach out to DJI customer support for further assistance. They have experts available who can guide you through the process or provide recommendations based on your specific situation.
Remember, troubleshooting charging issues requires patience and careful examination of potential causes. By following these steps and reaching out to the appropriate support channels when needed, you can overcome any charging challenges and ensure your DJI Goggles V2 are always ready for action.
Conclusion
Charging your DJI Goggles V2 properly is essential for uninterrupted and exhilarating drone flights. By understanding the battery capacity, connecting the charging cable correctly, utilizing the available charging methods effectively, and following best practices for battery maintenance, you can ensure that your goggles are always powered up and ready for action.
Understanding the battery capacity and keeping track of the battery level is crucial to avoid interruptions during your flights. Whether you’re using a power adapter, a battery charging hub, or a power bank, make sure to connect the charging cable securely to ensure a stable charging connection.
By knowing the approximate charging time and paying attention to the LED indicator lights, you can monitor the charging progress and plan your drone adventures accordingly. Following best practices for battery maintenance, such as avoiding overcharging, keeping the goggles powered off during charging, and storing them in a cool and dry place, will help maximize the lifespan of your battery.
If you encounter any charging issues, troubleshooting steps like checking the charging cable, verifying the power source, and cleaning the charging port can help resolve the problem. And if all else fails, don’t hesitate to contact the DJI customer support for guidance and assistance.
With this comprehensive guide, you now have the knowledge and tools to charge your DJI Goggles V2 the right way. So, power up, take flight, and experience the thrill of FPV flying with your fully charged DJI Goggles V2!