Introduction
Welcome to this guide on how to change your email on Amazon! Your email address is an important aspect of your Amazon account, as it is used for communication, order updates, and account notifications. Whether you’re switching to a new email provider, updating your contact information, or simply want to use a different email address for your Amazon account, this tutorial will walk you through the process step-by-step.
Changing your email on Amazon is a relatively straightforward procedure that can be completed within minutes. By following the instructions provided in this guide, you’ll be able to update your email address and continue accessing all the features and benefits of your Amazon account.
Before we delve into the steps involved, it’s important to note that you’ll need to have access to both your current and new email addresses throughout the process. This is necessary to ensure a smooth transition and to confirm the change of email address.
Now, let’s get started with the first step – logging into your Amazon account.
Step 1: Log into your Amazon account
The first step in changing your email on Amazon is to log into your Amazon account. You can do this by visiting the Amazon website and clicking on the “Sign In” button located at the top right-hand corner of the homepage.
Once you click on “Sign In,” a login page will appear. Here, you’ll need to enter the email address and password associated with your Amazon account. If you have trouble remembering your password, you can click on the “Forgot your password?” link to reset it.
After entering your login credentials, click on the “Sign In” button to proceed to your Amazon account dashboard.
If you have enabled two-factor authentication for your Amazon account, you may be prompted to enter a verification code sent to your registered mobile number or email address. Simply follow the instructions provided to authenticate your account.
Once you have successfully logged into your Amazon account, you are ready to proceed to the next step – accessing your account settings.
Step 2: Go to Your Account settings
After logging into your Amazon account, you’ll need to navigate to the “Your Account” section where you can make changes to your account settings.
To do this, locate the “Your Account” button near the top right-hand corner of the Amazon homepage. It is typically represented by an icon of a person’s silhouette or by your account name.
Clicking on the “Your Account” button will open a drop-down menu with various options. Look for and click on the “Your Account” link to access your account settings.
Once you’ve clicked on the “Your Account” link, you will be directed to your Amazon account dashboard. Here, you’ll find a list of different settings and options that you can modify to customize your Amazon experience.
Now that you’ve successfully reached your account settings, you are ready to proceed to the next step – locating and clicking on the “Login & Security” option.
Step 3: Locate and click on the “Login & Security” option
Once you are on your Amazon account dashboard, it’s time to locate and click on the “Login & Security” option. This section contains essential settings related to your login credentials and account security.
Scroll down the page until you come across a list of different settings categories. Look for the section titled “Settings” or “Account Settings”. Within this section, you should find the “Login & Security” option. It may be displayed as a link or a button, depending on the design of the page.
Click on the “Login & Security” option to access the settings related to your account’s login information and security features. This section allows you to modify various aspects of your account, including your email address.
By clicking on “Login & Security,” you will be taken to a new page where you can view and adjust your account settings. This page contains information related to password, two-factor authentication, and other security measures to protect your Amazon account.
Congratulations! You have successfully navigated to the “Login & Security” section. Now, let’s move on to the next step – editing your email address.
Step 4: Choose the “Edit” option next to your current email address
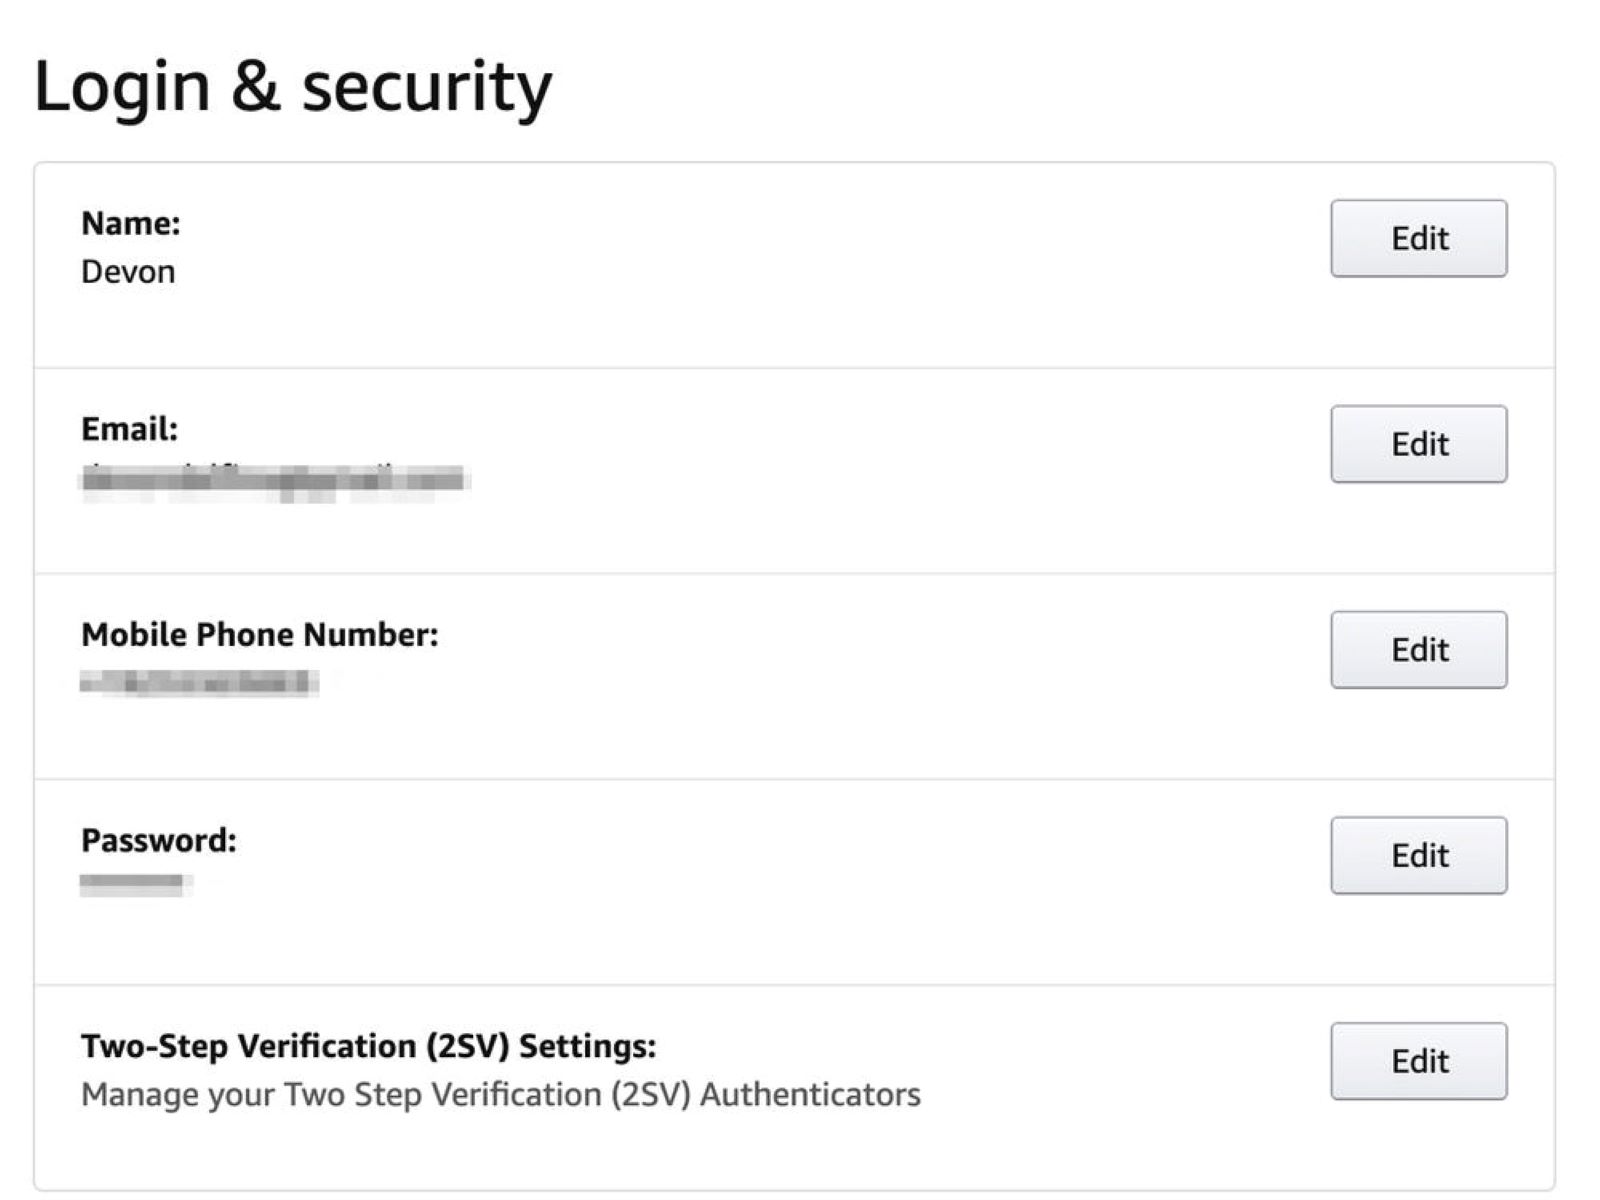
Once you are on the “Login & Security” page, locate the section that displays your current email address. This section is usually labeled as “Email” or “Email Address.”
Next to your current email address, you should see an “Edit” option. Clicking on this option will enable you to modify your email address and update it with a new one.
After clicking on “Edit,” a new window or form will appear, allowing you to enter your new email address. Some platforms may prompt you to re-enter your account password as an additional security measure.
Take a moment to double-check and ensure that you have entered the correct email address. Making a mistake at this stage could result in communication issues with your Amazon account.
Once you have entered the new email address, click on the “Save” or “Update” button to proceed. This will initiate the process of changing your email address on Amazon.
Keep in mind that you may be required to go through a verification process to confirm that the new email address belongs to you. This is done to ensure the security of your Amazon account and prevent unauthorized changes.
Now that you have successfully chosen the “Edit” option and entered your new email address, it is time to move on to the next step – verifying your new email address.
Step 5: Enter your new email address
Now that you have chosen the “Edit” option next to your current email address, it’s time to enter your new email address. This step is crucial as it ensures that your account information is updated with the correct contact information.
In the provided field or textbox, enter the new email address that you want to use for your Amazon account. Make sure to double-check the email address for any typing errors or misspellings.
Choosing an email address that is professional and easy to remember is recommended. Additionally, consider using an email address that you have access to and actively use to avoid any communication issues or missed notifications.
Once you have entered your new email address, verify that it is correct. You may want to copy and paste it from a separate document to ensure accuracy.
After confirming that the entered email address is accurate, proceed to the next step – verifying your new email address.
Note: It is essential to keep your email address up to date as Amazon relies on it for various purposes like order updates, account notifications, and important communication.
Congratulations! You have successfully entered your new email address. Let’s move on to the next step – verifying your new email address.
Step 6: Verify your new email address
After entering your new email address in the previous step, it’s time to verify that the email belongs to you. Verification is an essential security measure that ensures the integrity of your Amazon account and protects your personal information.
Amazon may send a verification email to the new email address you provided. Check your inbox for an email from Amazon with the subject line containing instructions on how to verify your email address.
Open the email and follow the instructions provided. Typically, you’ll be asked to click on a verification link or enter a verification code in the email to confirm your email address.
If you don’t see the verification email in your inbox, check your spam or junk folder. Sometimes, legitimate emails may end up in these folders.
Once you have completed the verification process, your new email address will be considered verified, and you can proceed to the final step – confirming the email change.
It’s essential to note that failing to verify your new email address within a certain timeframe may result in the cancellation of the email change process. Therefore, it’s vital to act promptly upon receiving the verification email from Amazon.
Congratulations! You have successfully verified your new email address. Let’s move on to the final step – confirming the email change.
Step 7: Confirm the email change
After verifying your new email address, it’s time to confirm the email change on Amazon. This step ensures that the updated email address is officially associated with your Amazon account.
To confirm the email change, return to your Amazon account settings. Follow the same steps mentioned in Step 2 to navigate back to the “Login & Security” section.
Once you are on the “Login & Security” page, locate the section that displays your email address. Now, you should see your new email address displayed instead of your previous one.
Take a moment to review the changes and make sure that your new email address is indeed the one you entered and verified in the previous steps.
If everything looks correct, scroll down the page until you find the option to save or update your account settings. Click on the appropriate button to save the changes and confirm the email change.
Amazon may prompt you to re-enter your account password as an additional security measure before confirming the changes.
Once you have confirmed the email change, your Amazon account will be updated with the new email address. You will start receiving notifications, order updates, and account communication at the newly verified email address.
Congratulations! You have successfully completed the process of changing your email on Amazon. Make sure to check your new email address regularly for any important messages from Amazon.
Remember, maintaining an accurate and up-to-date email address is crucial for smooth communication and staying updated with changes related to your Amazon account.
Thank you for following this step-by-step guide. If you have any further questions or need assistance, Amazon’s customer support team is available to help you.
Conclusion
Changing your email on Amazon is a simple process that can be completed in just a few steps. By following this guide, you have learned how to update your email address to ensure accurate communication and stay updated with your Amazon account notifications.
Throughout this guide, we covered the necessary steps to change your email on Amazon:
- Logging into your Amazon account
- Accessing your account settings
- Locating and clicking on the “Login & Security” option
- Choosing the “Edit” option next to your current email address
- Entering your new email address
- Verifying your new email address
- Confirming the email change
Remember, it’s important to have access to both your current and new email addresses throughout the process to ensure a smooth transition and to confirm the change of email address. Additionally, keep in mind the importance of verifying your new email address to finalize the change.
By maintaining an up-to-date email address on Amazon, you can continue to enjoy all the features and benefits of your account without any interruptions in communication or missing out on important updates.
If you encounter any difficulties or have further questions, don’t hesitate to reach out to Amazon’s customer support for assistance. They will be able to provide you with personalized guidance and help address any concerns you may have.
Thank you for following this step-by-step guide, and we hope it has been helpful in changing your email on Amazon. Happy shopping and continued success with your Amazon account!