Introduction
A mini PC with Ethernet is becoming an increasingly popular choice for tech enthusiasts and gamers alike. Unlike traditional desktop computers, mini PCs offer a compact and space-saving design without compromising on performance. With the availability of powerful processors, graphics cards, and other components, building a mini PC with Ethernet has never been easier.
But why choose a mini PC over a traditional PC? In this article, we will explore the benefits of building a mini PC and guide you through the process of selecting the right parts for your gaming setup.
Gone are the days of large, bulky desktop computers taking up valuable desk space. Mini PCs are small enough to fit conveniently on your desk or even be mounted behind your monitor, making them perfect for those with limited space. These compact machines pack a punch, boasting impressive performance capabilities that rival their larger counterparts.
When it comes to gaming, a mini PC with Ethernet has its advantages. Having an Ethernet port ensures a stable and reliable internet connection, crucial for online gaming where every millisecond counts. Additionally, mini PCs are highly portable, allowing you to easily transport your gaming rig for LAN parties or gaming sessions with friends.
Building your own mini PC allows for customization and future upgrades, ensuring that your system can keep up with the latest games and technologies. It also gives you the opportunity to select components that meet your specific requirements and budget, resulting in a tailored gaming experience.
In the following sections, we will delve into the essential components required to build a mini PC, including the processor, motherboard, graphics card, RAM, storage, power supply, cooling system, and case. We will also discuss important considerations for the Ethernet port and other key components. By the end of this article, you will have a comprehensive understanding of how to build your own mini PC with Ethernet for an optimal gaming experience.
Mini PC vs. Traditional PC
When it comes to choosing between a mini PC and a traditional PC, there are several factors to consider. While both options have their merits, understanding the key differences can help you make an informed decision based on your specific needs.
Size and form factor are the most apparent distinctions between the two. Traditional PCs typically come in large tower or desktop cases, taking up a significant amount of space. On the other hand, mini PCs have a compact form factor and are designed to be much smaller, allowing them to fit in tight spaces or be mounted on the back of a monitor.
Despite their smaller size, mini PCs can offer comparable performance to traditional PCs. Advances in technology have led to the development of powerful processors, graphics cards, and other components that can handle demanding tasks, including gaming and multimedia. While some mini PCs may not offer the same level of upgradability as traditional PCs, they can still pack a punch and provide an immersive gaming experience.
Another advantage of mini PCs is their energy efficiency. Due to their compact size, they generally require less power than traditional PCs, resulting in lower energy consumption. This not only helps to reduce electricity bills but also contributes to a more eco-friendly computing setup.
Portability is another aspect where mini PCs shine. Traditional PCs can be cumbersome to move due to their size and weight. Mini PCs, on the other hand, are lightweight and portable, making them ideal for those who frequently travel or attend LAN parties. You can easily carry your mini PC in a backpack or small bag without compromising on performance.
Cost is a factor that can vary depending on your specific requirements. While mini PCs are generally more affordable compared to high-end traditional PCs, the cost can vary depending on the specifications and brand. It’s important to consider your budget and the intended use of the PC to determine which option offers the best value for your money.
Ultimately, the choice between a mini PC and a traditional PC comes down to your specific needs and preferences. If you have limited space, require portability, and do not anticipate the need for extensive upgrades, a mini PC may be the perfect choice for you. However, if upgradability and customization are priorities, and space is not a concern, a traditional PC might be the better option.
In the next section, we will explore the benefits of building your own mini PC and delve into the essential components required for an optimal gaming setup.
Benefits of Building a Mini PC
Building a mini PC offers several advantages that make it an appealing choice for gamers and tech enthusiasts. Here are some key benefits to consider:
1. Space-Saving Design: The compact size of a mini PC ensures that it takes up minimal space on your desk or entertainment center. This is especially beneficial if you have a small workspace or if you prefer a clutter-free environment.
2. Portability: Mini PCs are highly portable, allowing you to easily move them around or bring them to gaming events. Their lightweight and compact form factor make them convenient for gamers who frequently travel or attend LAN parties.
3. Customizability: Building your own mini PC gives you the freedom to choose the components that best suit your needs and preferences. You can select the processor, graphics card, RAM, and storage capacity that align with your specific requirements, ensuring optimal performance for gaming or other tasks.
4. Cost-Effective: In many cases, building a mini PC can be more cost-effective compared to purchasing a pre-built gaming system. You have the flexibility to selectively invest in the components that are important to you, potentially saving money by avoiding unnecessary features or high-end components that you may not need.
5. Efficient Cooling: Mini PCs often come with adequate cooling systems that efficiently manage heat. With careful component selection and proper airflow management in the compact case, you can ensure that your mini PC remains cool and performs optimally, even during intense gaming sessions.
6. Upgradability: Although mini PCs are generally more limited in terms of upgradability compared to traditional desktops, they still offer some flexibility for future upgrades. You can easily swap out components such as RAM or storage drives to keep up with advancing technologies and enhance the performance of your mini PC.
7. Environmental Friendliness: Mini PCs are typically more energy-efficient compared to larger desktop systems. They consume less power, resulting in reduced electricity bills and a smaller carbon footprint. Choosing a mini PC contributes to a greener and more sustainable computing environment.
Building a mini PC allows you to create a personalized and powerful system that meets your exact needs while saving space, providing portability, and offering cost-effective options. In the following sections, we will guide you through the process of selecting the right parts to build your own mini PC with Ethernet for a seamless gaming experience.
Choosing the Right Parts
When it comes to building a mini PC, selecting the right parts is crucial to ensure optimal performance and compatibility. Here are the key components you need to consider:
- Processor: The processor, also known as the CPU, is the brain of your mini PC. It determines the performance capabilities of your system. Look for a processor that offers a good balance between power and energy efficiency, such as an Intel Core i5 or AMD Ryzen 5. Consider factors like clock speed, number of cores, and cache size for smooth multitasking and gaming performance.
- Motherboard: The motherboard acts as the central hub that connects all the components in your mini PC. Ensure that the motherboard is compatible with your chosen processor and has the necessary features you require, such as sufficient RAM and expansion slots for future upgrades.
- Graphics Card: A dedicated graphics card is essential for gaming, as it renders high-quality graphics and improves overall gaming performance. Look for a graphics card from reputable brands like NVIDIA or AMD, such as the GeForce RTX series or Radeon RX series, that offers the necessary horsepower for your gaming needs.
- RAM: Random Access Memory (RAM) is responsible for storing temporary data that the processor needs to access quickly. Aim for at least 8GB of RAM for smooth multitasking and gaming performance. Consider higher capacity options, such as 16GB or even 32GB, if you plan to run resource-intensive applications or future-proof your system.
- Storage: Consider the type of storage that best suits your needs. Solid State Drives (SSDs) offer faster boot times and application loading speeds, while Hard Disk Drives (HDDs) provide larger storage capacities at a lower cost. For optimal performance, consider a combination of both, using an SSD as the primary boot drive and HDD for additional storage.
- Power Supply: The power supply unit (PSU) provides the necessary power to all components in your mini PC. Choose a PSU that has sufficient wattage to support your components and offers reliable performance. Look for reputable brands that offer efficiency certifications like 80 Plus Bronze, Silver, or Gold, ensuring stable power delivery with minimal energy waste.
- Cooling System: Ensure adequate cooling to prevent overheating and maintain system stability. Look for compact CPU coolers and case fans that provide efficient air circulation within the confines of a mini PC case. Alternatively, consider all-in-one liquid cooling solutions for enhanced heat dissipation.
- Case: Select a mini PC case that can accommodate your chosen components and has proper ventilation. Consider factors like cable management options, dust filters, and ease of accessibility for future upgrades. Choose a case that fits your aesthetic preferences while meeting your functional needs.
- Ethernet Port Considerations: When building a mini PC with Ethernet, ensure that the motherboard has a built-in Ethernet port or supports an Ethernet adapter. Look for an Ethernet port that offers Gigabit speeds for a stable and reliable internet connection during online gaming sessions.
- Other Essential Components: Don’t forget to include other peripherals such as a keyboard, mouse, monitor, and gaming headset, depending on your preferences and gaming needs.
By carefully considering the specifications and compatibility of each component, you can ensure that your mini PC performs optimally and provides an immersive gaming experience. In the next section, we will guide you through the process of assembling your mini PC.
Processor
The processor, also known as the central processing unit (CPU), is one of the most important components to consider when building a mini PC. It acts as the brain of the computer, executing instructions and performing calculations that drive the overall performance of your system.
When choosing a processor for your mini PC, you need to consider several factors:
- Performance: Look for a processor that provides a good balance between performance and power consumption. The speed of the processor, measured in GHz (gigahertz), determines how fast it can execute instructions. Consider processors with higher clock speeds for smoother multitasking and faster application response times.
- Cores and Threads: Processors can have multiple cores, which allow for parallel processing, and threads, which handle individual tasks within cores. More cores and threads generally result in better multitasking and improved performance in applications optimized to utilize them, such as video editing or 3D rendering software.
- Cache Size: CPU cache stores frequently accessed data for faster retrieval. Processors with larger cache sizes can handle data-intensive tasks more efficiently, resulting in improved overall performance. Look for processors with larger cache sizes, categorized as L1, L2, and L3 cache.
- Brands: Two popular processor brands are Intel and AMD. Intel processors, such as the Core i5 and Core i7 series, are known for their strong single-threaded performance, making them suitable for gaming and general computing tasks. AMD processors, such as the Ryzen series, offer more cores and threads at competitive prices, making them ideal for multitasking and content creation.
- Socket Compatibility: Ensure that the processor you choose is compatible with the motherboard’s socket. Different processors and motherboards use specific socket types, such as Intel’s LGA or AMD’s AM4. Consult the motherboard’s specifications to verify compatibility.
For gaming purposes, a processor with at least four cores, a clock speed of 3.0 GHz or higher, and a decent amount of cache memory should be sufficient. However, consider your specific needs and budget when selecting a processor. It’s also important to note that some high-performance processors may require a more robust cooling solution to manage heat effectively.
Overall, the processor is the cornerstone of your mini PC, so choose one that aligns with your performance requirements, budget, and the other components of your build. By selecting a suitable processor, you can ensure that your mini PC delivers the performance and responsiveness you desire.
Motherboard
The motherboard is a crucial component in your mini PC build as it serves as the foundation that connects all the other components together. When choosing a motherboard, there are several key factors to consider:
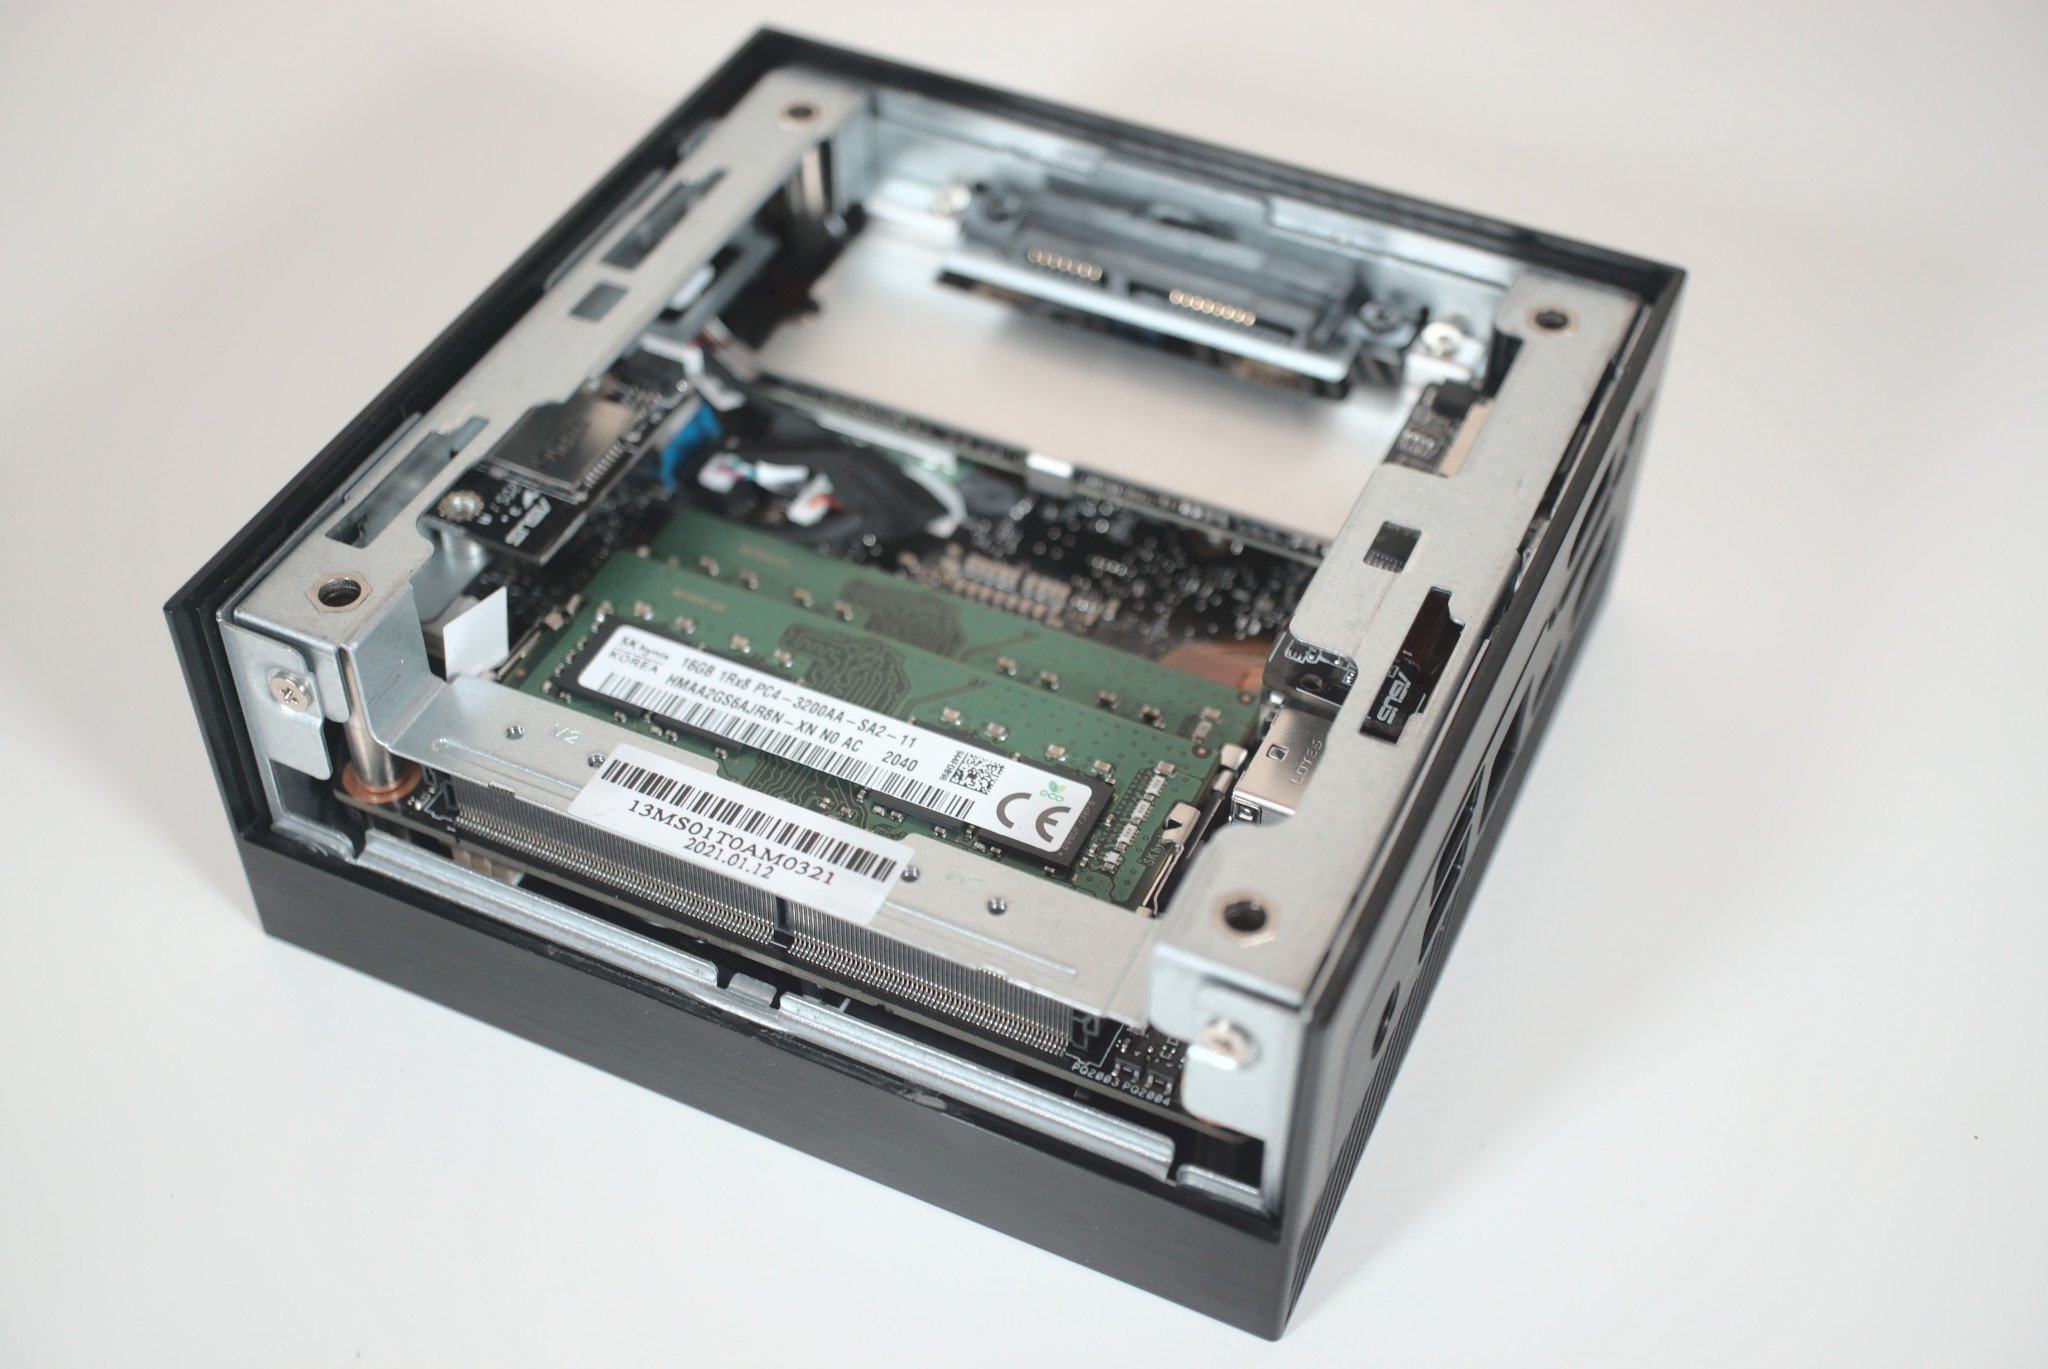
- Form Factor: Mini PCs typically require a smaller form factor motherboard to fit within the compact case. Common form factors for mini PCs include Mini-ITX and Micro-ATX. Ensure that the motherboard you choose matches the form factor of your case for a proper fit.
- Socket Compatibility: Make sure that the motherboard’s socket is compatible with your chosen processor. Different processors and motherboards use specific socket types, such as Intel’s LGA or AMD’s AM4. Check the specifications of both the processor and motherboard to ensure they are compatible.
- Expansion Slots: Consider the number and type of expansion slots the motherboard offers. This will determine your ability to add additional components in the future, such as a dedicated graphics card, additional storage drives, or expansion cards for Wi-Fi or sound capabilities.
- RAM Slots: Check the number of RAM slots available on the motherboard. This will dictate the maximum amount of memory you can install in your mini PC. Consider future memory upgrades and make sure the motherboard offers sufficient slots to meet your needs.
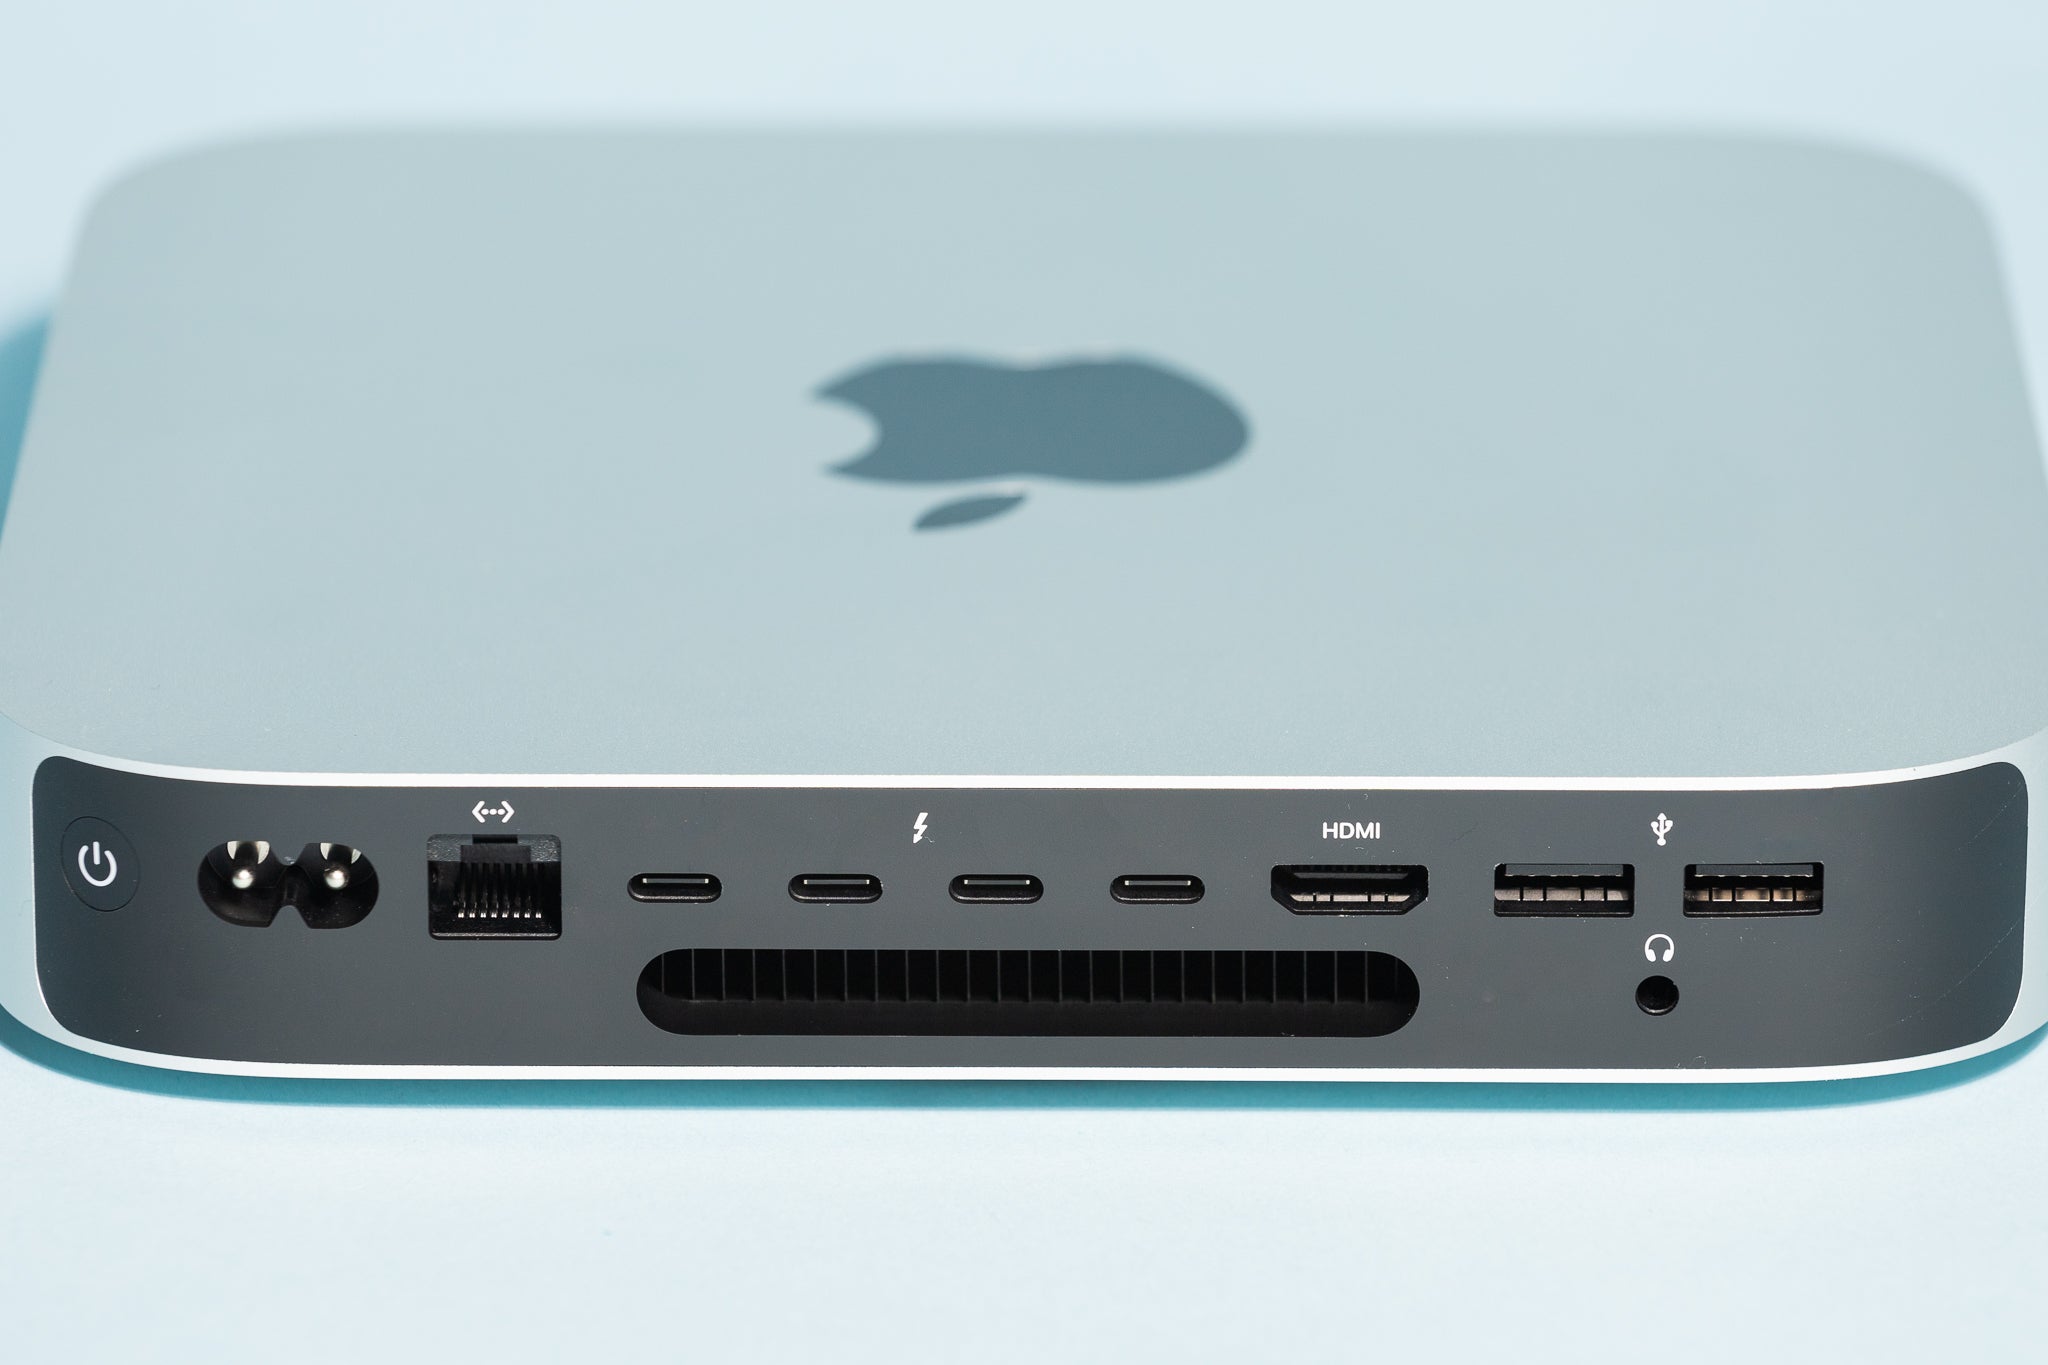
- Connectivity: Ensure that the motherboard provides the necessary ports and connectors for your peripherals and devices. This includes USB ports, audio jacks, Ethernet port, HDMI or DisplayPort for video output, and any additional connectivity options you might require.
- BIOS Compatibility: Verify that the motherboard supports the necessary BIOS version for your chosen processor. In some cases, a motherboard may require a BIOS update to be compatible with newer processors. Check the manufacturer’s website for information on BIOS updates and compatibility.
- Additional Features: Consider any additional features or technologies offered by the motherboard, such as built-in Wi-Fi, Bluetooth support, RAID configurations, or overclocking capabilities. These features can enhance the functionality and performance of your mini PC.
It’s also essential to select a motherboard from a reputable manufacturer known for quality and reliability. Research user reviews and check for any additional warranty or support services offered by the manufacturer. This can provide peace of mind and ensure long-term satisfaction with your mini PC build.
By carefully considering these factors and aligning them with your needs and budget, you can choose a motherboard that serves as a solid foundation for your mini PC build. A well-selected motherboard will ensure compatibility with your chosen components and provide the necessary connectivity and expansion options for an optimal gaming experience.
Graphics Card
The graphics card, also known as the GPU (Graphics Processing Unit), is a crucial component for gaming or any other graphics-intensive tasks in your mini PC. When selecting a graphics card, there are several factors to consider:
- Performance: Look for a graphics card that can handle the types of games or applications you plan to use. Consider the card’s base clock speed, number of CUDA cores (for NVIDIA cards), or stream processors (for AMD cards), as these factors contribute to its overall performance capabilities.
- Memory: Graphics cards come with dedicated video memory known as VRAM. The amount of VRAM affects the card’s ability to handle higher resolution textures and complex graphical effects. Aim for at least 4GB or 6GB of VRAM for smooth gaming at 1080p resolution, while higher resolutions or VR gaming may require more VRAM.
- Compatibility: Ensure that the graphics card you choose is compatible with your motherboard, both in terms of the physical space available in your mini PC case and the required PCIe slots. Check the specifications of both the motherboard and graphics card to verify compatibility.
- Power Consumption: Consider the power requirements of the graphics card and ensure that your power supply unit (PSU) can handle the card’s power demands. Some high-end graphics cards may require additional power connectors, so be sure to check if your PSU can accommodate them.
- Brands: Two popular brands in the graphics card market are NVIDIA and AMD. NVIDIA’s GeForce series and AMD’s Radeon series are known for their gaming performance. Research the latest models from both brands to find the best option within your budget.
- Connectivity: Consider the display connectors available on the graphics card and ensure they match the type of display you will be using. Common connectors include HDMI, DisplayPort, and DVI. Additionally, if you plan to use multiple monitors or a high refresh rate display, make sure the graphics card supports these configurations.
- Cooling: Graphics cards generate a significant amount of heat during operation. Look for cards that feature quality cooling solutions, such as dual or triple-fan designs and robust heat sinks, to maintain optimal operating temperatures and ensure longevity.
When it comes to gaming, the graphics card plays a crucial role in delivering high-resolution graphics, smooth frame rates, and immersive experiences. Consider your gaming preferences, desired resolution, and budget when choosing a graphics card for your mini PC. You can find a wide range of options available at various price points, ensuring that you can find one that suits your needs.
Lastly, keep in mind that the graphics card market is constantly evolving, with new models being released regularly. Stay updated with the latest releases and reviews to make an informed decision based on the most recent technology advancements and gaming demands.
RAM
RAM, or Random Access Memory, is an essential component in your mini PC that plays a crucial role in determining its overall performance and multitasking capabilities. When selecting RAM for your mini PC, consider the following factors:
- Capacity: The capacity of RAM determines how much data your mini PC can store and access quickly. Aim for a minimum of 8GB of RAM for smooth multitasking and gaming performance. If you plan to run resource-intensive applications or future-proof your system, consider higher capacity options, such as 16GB or even 32GB.
- Speed: RAM speed, often referred to as clock speed, is measured in megahertz (MHz) and determines how quickly data can be read and written by the RAM module. Higher clock speeds generally result in faster data transfer rates and improved overall system performance.
- Timing: RAM timing refers to a series of numbers such as 16-18-18-36, which represent the various latency timings. Lower timings generally indicate faster performance, but the real-world impact may not be noticeable in most applications. Consider balancing timing with capacity and cost when selecting RAM modules.
- Type: DDR4 is currently the most common and recommended type of RAM for modern mini PC builds. Ensure that your motherboard supports DDR4 RAM modules, as compatibility is crucial for proper functioning.
- Channels: Depending on your motherboard and CPU, you may have options for single-channel, dual-channel, or even quad-channel RAM configurations. Dual-channel configurations, utilizing two RAM modules, offer improved memory performance compared to single-channel setups.
When it comes to gaming, having sufficient RAM is essential for smooth gameplay, as it allows your mini PC to store and quickly access game data. It not only affects the loading times but also influences the ability to run multiple applications simultaneously without performance degradation.
Consider the requirements of the games and applications you plan to use on your mini PC when choosing the capacity and speed of your RAM. Keep in mind that higher RAM capacity and faster speeds can provide a performance advantage, especially when running demanding games or resource-intensive software.
Lastly, ensure that the RAM you choose is compatible with your motherboard and other components. Check the motherboard’s specifications for supported RAM speeds and capacity limits, and consider purchasing RAM modules from reputable manufacturers to ensure reliability and compatibility.
Storage
When building a mini PC, selecting the right storage solution is crucial to ensure fast boot times, quick application loading, and ample space for your games and files. There are two main types of storage options to consider:
- Solid State Drive (SSD): SSDs use flash memory to store data, offering significant speed improvements compared to traditional hard disk drives (HDDs). SSDs provide faster boot times, quick application launching, and reduced file transfer times. Consider an SSD as your primary storage for improved performance. Look for SSDs with sufficient capacity to store your operating system, frequently used applications, and games.
- Hard Disk Drive (HDD): HDDs use spinning magnetic platters to store data, offering larger storage capacities at a more affordable price. While HDDs are slower than SSDs, they are still a viable option for storing large files, media libraries, and less frequently accessed data. Consider adding an HDD alongside an SSD for additional storage capacity.
It’s common to use a combination of both SSD and HDD storage in a mini PC build. This approach allows you to benefit from the speed and responsiveness of an SSD while still having ample space for data storage with an HDD.
When selecting storage solutions for your mini PC, consider the following factors:
- Capacity: Determine how much storage space you require based on your needs. SSDs usually come in capacities ranging from 120GB to 2TB or more, while HDDs can offer even larger storage capacities at more affordable prices.
- Form Factor: Ensure that the storage drives you choose are compatible with your mini PC case and motherboard. Most modern mini PCs support both 2.5-inch and M.2 form factors for SSDs, and 3.5-inch for HDDs.
- Performance: Consider the read and write speeds of the SSDs you are considering. Higher speeds offer faster data transfer rates and quicker access times. Look for SSDs with technologies like NVMe or SATA III for optimal performance.
- Reliability: Choose storage drives from reputable manufacturers known for their reliability and durability. This ensures that your data remains safe and the drives have a longer lifespan.
By carefully selecting the right storage solution for your mini PC, you can achieve fast and efficient data storage and access. Having a combination of SSD and HDD provides the best of both worlds with improved performance and ample storage space for all your files, games, and applications.
Power Supply
The power supply unit (PSU) is a vital component in your mini PC build, responsible for providing the necessary power to all the other components. Choosing the right power supply is crucial to ensure stable and reliable operation. When selecting a power supply for your mini PC, consider the following factors:
- Wattage: Determine the power requirements of your components and choose a power supply with sufficient wattage to handle the load. The total power consumption of your mini PC depends on factors such as the processor, graphics card, storage drives, and other peripherals. Consider using online power supply calculators to estimate the wattage needed for your specific build.
- Efficiency: Look for power supplies with high energy efficiency ratings. The 80 Plus certification is an industry standard that rates the efficiency of power supplies. Higher-rated certifications like 80 Plus Bronze, Silver, Gold, or even Platinum indicate better energy efficiency and less wasted power, resulting in lower electricity bills and reduced environmental impact.
- Modularity: Modular power supplies feature detachable cables, allowing you to connect only the cables you need for your specific build. This helps to keep your mini PC case clean and organized, improving airflow and cable management.
- Connectors: Ensure that the power supply has the necessary connectors to support all your components. Check that it has enough SATA power connectors for your storage drives, PCIe connectors for your graphics card, and additional connectors for any other peripherals you plan to connect.
- Brand and Quality: Opt for reputable power supply brands known for their reliability and build quality. This ensures stable power delivery, improved component longevity, and protection against electrical failures. Look for power supplies from brands like Corsair, Seasonic, EVGA, or Thermaltake.
- Additional Features: Consider any additional features that the power supply may offer, such as Over Voltage Protection (OVP), Over Current Protection (OCP), or Short Circuit Protection (SCP). These features provide an extra layer of safety and help protect your components from power-related issues.
Ensure that your chosen power supply meets the specific requirements of your mini PC build. A well-sized, efficient, and reliable power supply is essential for the stable operation and longevity of your components.
Lastly, it’s important to note that power supply requirements may vary depending on the components and their power demands. It is always wise to leave some headroom when selecting a power supply to accommodate for future upgrades or additions to your mini PC build.
Cooling System
The cooling system is a crucial component in your mini PC build to ensure that your components operate within safe temperature limits and maintain optimal performance. When selecting a cooling system for your mini PC, consider the following factors:
- CPU Cooler: The CPU cooler is responsible for dissipating heat generated by the processor. For mini PCs, low-profile air coolers or all-in-one liquid coolers are popular choices due to their compact designs. Ensure that the CPU cooler is compatible with your processor and fits within the constraints of the mini PC case.
- Case Fans: Case fans facilitate proper airflow within the mini PC case, expelling hot air and drawing cool air in. Consider the size and number of case fan slots available in your case and choose quiet and efficient fans that provide adequate airflow for optimal cooling performance.
- Airflow Management: Pay attention to proper airflow management within the mini PC case. Ensure that there are no obstructions to the front-to-back or bottom-to-top airflow paths. Proper cable management and the strategic placement of case fans can contribute to improved airflow and cooling efficiency.
- Thermal Paste: When installing the CPU cooler, it is essential to apply thermal paste between the cooler and the processor. Thermal paste helps to create a better thermal interface, improving heat transfer and cooling efficiency.
- Noise Level: Consider the noise level produced by the cooling system components. Look for quieter cooling solutions, such as fans with low noise ratings, to maintain a pleasant and quiet gaming or computing experience.
- Component Temps Monitoring: Consider adding software or hardware-based temperature monitoring tools to keep an eye on the temperatures of critical components. This allows you to identify potential cooling issues or overheating problems in real-time.
Properly cooling your mini PC is essential to prevent thermal throttling, system instability, and potential damage to your components. By investing in an efficient and effective cooling system, you can ensure the longevity and optimal performance of your mini PC.
Additionally, regular cleaning and maintenance of your cooling system, including removing dust buildup on fans and heatsinks, will help maintain consistent cooling performance over time. Keep your mini PC in a well-ventilated area and consider additional measures like using filters to minimize dust accumulation.
Remember, inadequate cooling can adversely affect system performance and lifespan, so it’s crucial to choose the right cooling system components and employ good airflow management practices in your mini PC build.
Case
The case is an important component of your mini PC build as it houses and protects all the other hardware components. When selecting a case for your mini PC, consider the following factors:
- Form Factor: Choose a case that is compatible with the form factor of your motherboard. Common mini PC form factors include Mini-ITX and Micro-ATX. Ensure that the case provides sufficient space and mounting options for your chosen components.
- Size and Dimensions: Mini PC cases come in a variety of sizes, ranging from ultra-compact to slightly larger options. Consider the available space and dimensions of the case to ensure that it fits in your desired location without compromising airflow or cable management.
- Expansion Slots: Check the number and type of expansion slots available in the case. Ensure that there is enough room for additional components such as graphics cards, Wi-Fi cards, or other expansion cards you plan to install.
- Cable Management: Look for a case that offers sufficient space and routing options for cable management. Well-organized cables not only improve airflow but also make future upgrades or maintenance much easier.
- Airflow and Cooling: Consider the airflow options and cooling capabilities of the case. Look for cases with mesh panels, vents, or included case fans that allow for optimal airflow and heat dissipation. Additionally, check if the case supports the installation of additional fans or liquid cooling solutions if required.
- Drive Bays: Evaluate the number and types of drive bays available in the case. This includes 2.5-inch and 3.5-inch drive bays for SSDs and HDDs, respectively. Ensure that the case has enough drive bays to accommodate your storage needs.
- Design and Aesthetics: Consider the design and aesthetics of the case to suit your personal preferences and the overall theme of your mini PC build. Look for features like tempered glass side panels or customizable RGB lighting options if you value visual appeal.
- Portability: If portability is important to you, choose a case that is lightweight and easy to transport. Some mini PC cases offer handles or compact designs that make them ideal for LAN parties or gaming on the go.
By carefully considering these factors, you can choose a mini PC case that meets your specific needs in terms of compatibility, airflow, cable management, and aesthetics. Additionally, ensure that the case provides ample room for future upgrades or additional components to support the longevity of your mini PC build.
Remember to refer to the specifications and dimensions of the case, along with the compatibility of your chosen components, to ensure a seamless fit and optimal performance in your mini PC build.
Ethernet Port Considerations
When building a mini PC with Ethernet connectivity, it’s important to consider the Ethernet port and its related considerations. Here are some factors to keep in mind:
- Built-in Ethernet Port: Ensure that the motherboard you choose for your mini PC has a built-in Ethernet port. Most modern motherboards come equipped with a Gigabit Ethernet port, which offers high-speed and reliable wired network connectivity.
- Ethernet Adapter: If your chosen motherboard does not have a built-in Ethernet port, or if you require additional Ethernet ports, consider purchasing an Ethernet adapter. These adapters connect to the motherboard via PCIe slots, offering Gigabit Ethernet connectivity for your mini PC.
- Ethernet Speed: Determine the speed of the Ethernet port(s) you require for your mini PC. Most current motherboards and Ethernet adapters support Gigabit Ethernet, which offers data transfer rates up to 1 Gbps. However, if you have access to faster internet speeds or require even higher local network throughput, consider looking for motherboards or adapters that support 2.5 Gigabit Ethernet or even 10 Gigabit Ethernet.
- Network Infrastructure: Consider the capabilities of your network infrastructure when choosing the Ethernet port for your mini PC. Ensure that your router or modem also supports the desired Ethernet speed to take full advantage of the available bandwidth and maintain a stable and reliable internet connection.
- Wired vs. Wireless: While Wi-Fi connectivity might be convenient, a wired Ethernet connection is generally preferred for gaming and other bandwidth-intensive activities. Wired connections offer lower latency, reduced network interference, and more stable network performance compared to wireless connections.
Having a stable and reliable Ethernet connection is essential for online gaming, high-speed file transfers, and other network-intensive tasks. It ensures minimal latency and consistent network performance, providing a smoother gaming experience and faster data transfers.
When selecting the Ethernet port for your mini PC, evaluate your networking needs and consider future requirements. Choosing a Gigabit Ethernet port or higher speeds can ensure that your mini PC remains compatible with the latest network technologies and offers optimal performance for years to come.
Remember to install the necessary Ethernet drivers for your motherboard or adapter to ensure proper functionality. These drivers can usually be downloaded from the manufacturer’s website or included in the motherboard’s driver disc.
Other Essential Components
In addition to the main components mentioned earlier, there are a few other essential components to consider for your mini PC build:
- Keyboard and Mouse: Choose a keyboard and mouse that suit your gaming or computing preferences. Consider factors such as comfort, key switch type, programmable keys, and any additional features that enhance your gaming or productivity experience.
- Monitor: Select a monitor that meets your visual needs and desired specifications for gaming or other tasks. Consider factors such as resolution, refresh rate, response time, and display panel technology (e.g., IPS or TN) to ensure a smooth and immersive visual experience.
- Audio: If high-quality audio is important to you, consider investing in a good set of speakers or headphones. Look for audio solutions that offer clear sound reproduction, noise cancellation, and other features that enhance the gaming or multimedia experience.
- Power Protection: To safeguard your mini PC and components from power surges and fluctuations, consider using a surge protector or uninterruptible power supply (UPS). These devices offer protection against electrical spikes and provide backup power during outages, ensuring the safety and longevity of your equipment.
- Peripheral Cables: Ensure that you have the necessary cables to connect your mini PC to peripherals like monitors, speakers, and USB devices. HDMI cables, DisplayPort cables, USB cables, and audio cables are commonly used for connectivity.
- Operating System: Depending on your preference, choose an operating system that best suits your needs. Windows, macOS, and Linux are popular options. Ensure that your chosen hardware components are compatible with your desired operating system.
Choose these components based on your personal preferences, budget, and specific needs. They play a vital role in providing a complete and functional mini PC experience. Remember to research and select reputable brands for reliability and performance.
Add-ons and accessories like gaming controllers, webcams, or Wi-Fi adapters may also be worth considering, depending on your specific requirements. Customize your mini PC setup to create a gaming or computing environment tailored to your preferences and needs.
Ensure that you have all the necessary cables, software, and peripherals before assembling your mini PC to ensure a smooth setup process and a seamless user experience.
Putting it All Together
Now that you understand the essential components and considerations for building a mini PC with Ethernet, it’s time to put your knowledge into practice. Here’s a step-by-step guide to help you assemble your mini PC:
- Prepare your workspace: Clear a clean and well-lit area to work on your mini PC assembly. Gather all the necessary tools and components for easy access.
- Install the CPU: Carefully lift the CPU socket lever on the motherboard and align the notches on the CPU with the socket. Gently place the CPU into the socket and secure it by lowering the lever.
- Install the CPU cooler: Depending on your chosen CPU cooler type, follow the manufacturer’s instructions to securely mount it onto the CPU. Apply a small amount of thermal paste to the CPU before attaching the cooler.
- Install RAM: Identify the RAM slots on the motherboard and release the clips on each slot. Align the notch on the RAM module with the key on the slot and firmly press it in until the clips lock the RAM into place.
- Install storage drives: Mount your SSD or HDD onto the designated drive bays in the case. Connect the necessary SATA or M.2 cables from the storage drives to the corresponding ports on the motherboard.
- Install the motherboard: Carefully place the motherboard into the case, aligning the ports on the back panel with the corresponding openings in the case. Secure the motherboard using screws provided with the case.
- Connect power supply: Connect the necessary power cables from the power supply to the motherboard and other components, such as the CPU power connector, GPU power connectors, and SATA power connectors for storage drives.
- Install case fans: Depending on your case and cooling needs, mount the case fans in the designated fan slots. Connect the fan cables to the corresponding fan headers on the motherboard.
- Connect front panel connectors: Connect the power switch, reset switch, LED lights, USB ports, and any other front panel connectors from the case to the corresponding pins on the motherboard, following the motherboard’s manual for guidance.
- Connect peripherals: Connect your keyboard, mouse, monitor, speakers, and other peripherals to their respective ports on the back of the case.
- Check connections and cables: Double-check all the connections and cables to ensure they are secure and properly connected. Organize and route the cables for optimal airflow and aesthetics.
- Power on and test: Connect the power cord to the power supply and the wall outlet. Press the power button to turn on your mini PC. Check if all components are functioning correctly and go through the necessary BIOS and operating system configurations.
Congratulations! You have successfully assembled your mini PC with Ethernet. Take some time to install your preferred operating system, download the latest drivers for your components, and customize settings according to your preferences.
Remember, building a mini PC is an exciting experience that allows you to create a tailored setup that suits your gaming or computing needs. Enjoy the benefits of your mini PC, such as its compact size, powerful performance, and reliable Ethernet connectivity.
Conclusion
Building a mini PC with Ethernet offers a space-saving, customizable, and powerful solution for gamers and tech enthusiasts. By carefully selecting the right components, such as the processor, motherboard, graphics card, RAM, storage, power supply, cooling system, case, and ensuring the presence of an Ethernet port, you can create a mini PC that meets your specific needs and provides a seamless gaming experience.
Mini PCs offer numerous benefits, including compact size, portability, customization options, cost-effectiveness, efficient cooling, and upgradability. These advantages, coupled with the stable and reliable wired connectivity provided by the Ethernet port, make mini PCs an excellent choice for online gaming and other network-intensive tasks.
Remember to choose components from reputable brands, ensure compatibility between parts, and prioritize factors such as performance, capacity, speed, and power efficiency when selecting your components. Additionally, pay attention to cable management, cooling solutions, and the overall aesthetics of your mini PC build.
Assembling a mini PC can be an exciting and rewarding experience, allowing you to create a personalized computing environment that suits your preferences and needs. With proper care and maintenance, your mini PC with Ethernet will provide you with a powerful and efficient gaming platform.
Now that you have a comprehensive understanding of how to build a mini PC with Ethernet, it’s time to put your knowledge into practice and enjoy the benefits of a compact and capable gaming setup. Get ready to immerse yourself in the world of gaming with your newly built mini PC!


