Introduction
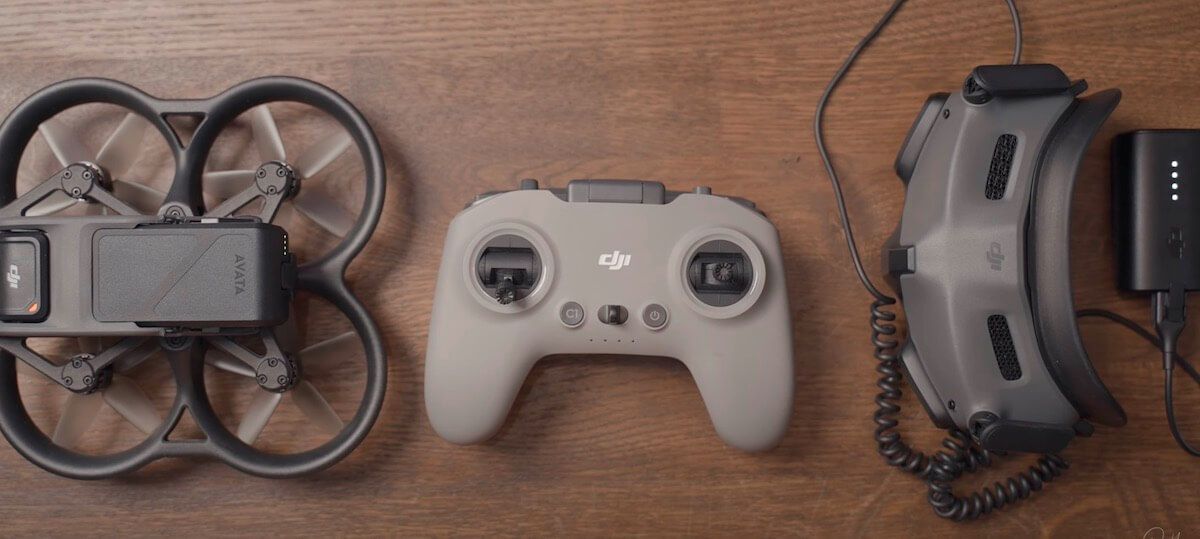
Welcome to the world of FPV (First-Person View) drone flying! If you’re a proud owner of the DJI FPV Drone and the DJI FPV Controller, you’re in for an immersive and thrilling flying experience. However, before you can take flight, you need to bind your FPV Controller to your drone. Binding is a crucial process that establishes a secure connection between the two devices, allowing you to control your drone effortlessly.
In this guide, we will walk you through the step-by-step process of binding your DJI FPV Controller with the DJI FPV Drone. Whether you’re a beginner or an experienced pilot, this guide will help you ensure a seamless binding experience.
Before we dive into the technicalities, let’s highlight some of the advantages of binding your DJI FPV Controller. First and foremost, once your controller is bound to your drone, you will have complete control over its movements, including throttle, yaw, pitch, and roll. This allows you to maneuver your drone with precision, making it ideal for aerial photography, videography, or just for the sheer joy of flying.
Additionally, binding your FPV Controller enables you to access a range of intelligent flight modes and features offered by DJI. From ActiveTrack and TapFly to Return to Home and Gesture Control, these features add an extra layer of convenience and creativity to your flying experience.
Now that we understand the importance and advantages of binding, let’s go through the step-by-step process to help you get your DJI FPV Controller bound to your drone. So grab your controller, power it up, and let’s get started!
Getting Started
Before we begin the binding process, there are a few things you need to ensure to have a smooth and successful experience. Let’s walk through the initial steps to get started:
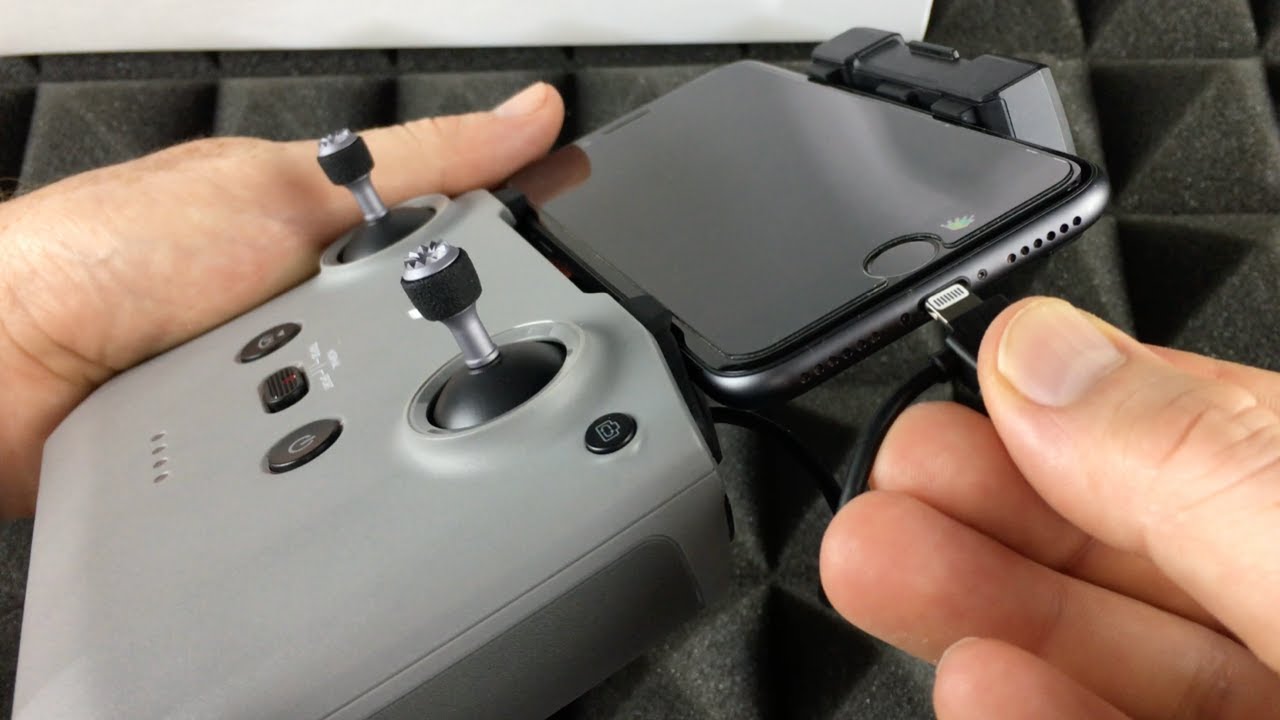
- Charge your DJI FPV Controller: Make sure your controller has sufficient battery power. Connect the provided USB-C cable to the charging port on the controller and plug it into a power source. It’s essential to have a fully charged controller to complete the binding process without interruptions.
- Prepare your DJI FPV Drone: Ensure that your DJI FPV Drone is turned off and the battery is fully charged. This will prevent any power-related issues and provide a stable connection during the binding process.
- Create a safe flying environment: Find an open space outdoors, away from obstacles, people, and electromagnetic interference. This will provide a clear line of sight between the drone and the controller, ensuring a strong and reliable radio connection.
- Read the user manual: Familiarize yourself with the instruction manual provided by DJI for both the DJI FPV Controller and the DJI FPV Drone. It contains essential information about their functions, buttons, and settings, which will come in handy during the binding process.
By following these preliminary steps, you can ensure a trouble-free binding process. Once you have completed these preparations, you’re ready to power on your FPV Controller and move on to the next steps.
Step 1: Powering on the FPV Controller
The first step in the binding process is to power on your DJI FPV Controller. Here’s how to do it:
- Locate the power button: On the top right side of the controller, you will find a circular power button. This button serves to turn the controller on and off.
- Press and hold the power button: Place your finger on the power button and press it gently, then hold it down for a few seconds until the controller’s display screen lights up. You will see the DJI logo and a loading icon indicating that the controller is powering on.
- Wait for the controller to initialize: Once the display screen is lit, the controller will initiate its startup sequence. This process may take a few seconds, so be patient and allow it to complete.
- Check the battery level: After the startup sequence, the controller’s screen will display the battery level. Ensure that the battery is adequately charged to guarantee uninterrupted operation during the binding process.
Once the DJI FPV Controller is powered on and the battery level is verified, you’re ready to proceed to the next step – entering binding mode. Keep the controller powered on throughout the entire binding process to maintain a stable connection with your drone.
Step 2: Entering Binding Mode
Now that your DJI FPV Controller is powered on, it’s time to enter the binding mode. This mode allows the controller to search for and connect to your DJI FPV Drone. Follow these steps to enter binding mode:
- Access the controller settings: Locate the gear icon on the right side of the controller’s display screen. Tap on it to access the settings menu.
- Navigate to the binding settings: Within the settings menu, scroll down until you find the “Binding” option. Tap on it to access the binding settings.
- Enter binding mode: In the binding settings, you will see an option to “Enter Binding Mode.” Tap on this option to activate the binding mode on your controller.
- Confirm the binding mode: A confirmation message will appear on the screen, indicating that the controller is now in binding mode and actively searching for the DJI FPV Drone.
Entering the binding mode allows your DJI FPV Controller to establish a direct connection with the drone. The controller will now search for the drone’s signal and prepare for the binding process. It’s important to ensure that your drone is also ready for binding at this stage.
In the next step, we will guide you on how to bind your DJI FPV Controller with the DJI FPV Drone. Stay tuned!
Step 3: Binding with DJI FPV Drone
With your DJI FPV Controller in binding mode, it’s time to initiate the binding process with your DJI FPV Drone. Follow these steps to establish a secure connection:
- Power on your DJI FPV Drone: Ensure that your DJI FPV Drone is powered off. Press and hold the power button on the drone until the LED lights on the aircraft start to flash. This indicates that the drone is ready to be bound.
- Place the drone near the controller: Keep the drone close to the controller, ideally within one meter, to establish a strong and stable connection. Positioning them in close proximity will ensure a successful binding process.
- Initiate the binding process: On the DJI FPV Controller, tap on the “Start Binding” option that appears on the screen. This will prompt the controller to start searching for the drone’s signal.
- Wait for the drone to be detected: Give the controller a few seconds to detect and establish a connection with your DJI FPV Drone. You will see a confirmation message on the controller’s screen when the connection is established successfully.
During the binding process, it’s crucial to keep the drone and controller still. Any movement during this stage can disrupt the connection and potentially lead to a failed binding attempt. Maintain a stable position until the binding process is complete.
Once the binding process is successful, you’re one step closer to experiencing the excitement of FPV flight with your DJI FPV Drone!
Step 4: Confirming Successful Binding
After completing the binding process between your DJI FPV Controller and DJI FPV Drone, it’s important to confirm that the binding was successful. Here’s how to ensure a proper connection:
- Check the controller’s status: On the DJI FPV Controller’s screen, you should see the drone’s live camera feed or a home screen indicating a successful binding. This confirms that the controller and drone are connected and ready for flight.
- Verify control inputs: Move the control sticks on your DJI FPV Controller in different directions and observe if the drone’s motors respond accordingly. Check if the throttle, yaw, pitch, and roll inputs are accurately translated into the drone’s movement. This will help you ensure that the binding was successful and the control signals are properly transmitted between the devices.
- Test additional features: Explore the various flight modes and features available on your DJI FPV Drone and confirm that they can be accessed and controlled through the DJI FPV Controller. Test features like ActiveTrack, QuickShots, and obstacle sensing to ensure all functions are functioning as expected after the binding process.
- Perform a pre-flight check: Before you take off, it’s essential to conduct a pre-flight check to ensure everything is in working order. Verify the battery levels of both the controller and the drone, as well as the GPS signal strength, if applicable. This will help you identify any potential issues and address them before launching your drone.
If you encounter any issues or unexpected behavior during this confirmation process, consult the DJI FPV Drone manual or seek assistance from DJI support. They can provide additional guidance to troubleshoot any problems that may arise.
By confirming the successful binding, you can have peace of mind knowing that your DJI FPV Controller and drone are securely connected and ready for a thrilling FPV flight.
Step 5: Finalizing the Binding Process
Once you have confirmed a successful binding between your DJI FPV Controller and DJI FPV Drone, it is crucial to finalize the process and ensure that the connection remains stable for future flights.
- Save the binding settings: In the DJI FPV Controller’s settings, look for an option to save or confirm the binding settings. This step ensures that the controller remembers the binding details for future use. Follow the on-screen instructions to save the settings.
- Power cycle both devices: To further solidify the binding connection, power off both the DJI FPV Controller and the drone. After a few seconds, power them back on. This power cycling helps reset any temporary glitches and establishes a fresh connection between the devices.
- Perform a range test: Once the devices are powered on, move a few meters away from the drone while keeping visual contact. Test the control inputs on the DJI FPV Controller to ensure that the commands are correctly received and executed by the drone. This range test allows you to gauge the signal strength between the controller and the drone.
- Check for firmware updates: Regularly check for firmware updates on both the DJI FPV Controller and the drone. Firmware updates often provide performance enhancements and bug fixes, ensuring a smoother flying experience. Follow the instructions provided by DJI to update the firmware on both devices, if necessary.
By finalizing the binding process and taking these additional steps, you can maintain a strong and reliable connection between your DJI FPV Controller and DJI FPV Drone. This will ensure optimal performance and allow you to fully enjoy the exhilarating experience of FPV flying.
Troubleshooting Tips
While the binding process between your DJI FPV Controller and DJI FPV Drone is usually smooth, you may encounter some challenges along the way. Here are a few troubleshooting tips to help overcome common issues:
- Check the compatibility: Ensure that your DJI FPV Controller and DJI FPV Drone are compatible with each other. Refer to the user manuals or DJI’s official website to verify compatibility and ensure you have the correct models.
- Reboot the devices: If you encounter connection issues or inconsistent signals between the controller and the drone, try rebooting both devices. Power them off and on again to reset any temporary glitches that might be causing the problem.
- Verify firmware versions: Make sure that both the DJI FPV Controller and the drone have the latest firmware versions installed. Firmware updates often address bugs and improve overall performance. If there are any available updates, follow the instructions provided by DJI to ensure you have the latest firmware.
- Reset the controller and drone: If all else fails, perform a factory reset on both the DJI FPV Controller and the drone. This will restore the devices to their default settings and may resolve any underlying issues. However, note that a factory reset will delete any customized settings or profiles you have saved.
- Check for physical obstructions: Ensure that there are no physical obstructions or interference between the controller and the drone. Avoid metal objects or structures that may disrupt the signal between the devices. Fly in open spaces away from dense urban areas or crowded locations.
If you continue to experience issues with the binding process or encounter other problems with your DJI FPV system, it is recommended to contact DJI support. They have dedicated customer service representatives who can provide further assistance and guide you through troubleshooting specific to your situation.
Remember, patience and persistence are key when troubleshooting. Take the time to go through these troubleshooting tips and don’t hesitate to reach out for help if needed.
Conclusion
Congratulations! You have successfully learned how to bind your DJI FPV Controller with your DJI FPV Drone. This crucial process establishes a secure connection between the two devices, allowing you to take control and experience the thrill of FPV flying.
Throughout this guide, we covered the step-by-step process, starting from powering on the FPV Controller to finalizing the binding process. We also discussed troubleshooting tips to help you overcome any challenges you may encounter along the way.
Keep in mind that binding is not a one-time process. If you purchase additional DJI FPV Drones or Controllers in the future, you will need to repeat this process to establish a connection between the new devices.
Now that you have successfully bound your DJI FPV Controller and Drone, it’s time to familiarize yourself with the controls, experiment with different flight modes and features, and enjoy the incredible flying experience that awaits you. Fly responsibly, follow local regulations, and always prioritize safety while navigating the skies.
If you have any further questions or need additional assistance, refer to the user manuals provided by DJI or reach out to their customer support. Happy flying!


