Introduction
Welcome to our guide on how to program the DJI Naza flight controller. Whether you’re a professional drone pilot or a hobbyist, the DJI Naza offers advanced flight control features and customization options that can enhance your flying experience. In this article, we will walk you through the process of setting up and programming the DJI Naza, ensuring that you have full control over your aircraft’s flight characteristics.
The DJI Naza is a popular flight controller used in a wide range of drones, from smaller quadcopters to larger aerial photography platforms. It offers a combination of stability, reliability, and advanced features that make it a top choice for many pilots. With the ability to adjust settings such as flight modes, GPS functionality, and failsafe options, you can tailor the Naza to suit your specific requirements.
Before you start programming the DJI Naza, it’s important to have a basic understanding of its functionality and key components. The Naza flight controller is responsible for controlling the flight dynamics of your drone, including stability, navigation, and autopilot features. It works in conjunction with other hardware components such as ESCs (Electronic Speed Controllers), motors, and a GPS module to provide a complete flight control system.
Programming the DJI Naza involves configuring various settings and parameters to ensure that your drone performs optimally. These settings can range from basic flight configurations to more advanced features like autonomous flight modes and camera stabilization. By customizing these settings, you can fine-tune your drone’s performance and unlock its full potential.
In this guide, we will take you through a step-by-step process to program the DJI Naza, starting from the installation of the DJI Assistant software to the final calibration of the flight controller. We will cover basic setup procedures, such as connecting the flight controller and attaching the GPS module, as well as advanced programming options for adjusting flight parameters and configuring failsafe modes.
By the end of this guide, you will have a thorough understanding of how to program the DJI Naza and unlock its full capabilities. So let’s get started with the first step – installing the DJI Assistant software!
What is DJI Naza?
The DJI Naza is a flight controller developed by DJI, one of the leading companies in the drone industry. It is designed to provide precise control and stability for aerial vehicles, making it a popular choice among drone enthusiasts and professional pilots. The Naza flight controller offers a wide range of advanced features and customizable options, allowing pilots to optimize their drones’ performance and flight characteristics.
At its core, the DJI Naza is a sophisticated electronic device that acts as the brain of the drone. It receives input from various sensors and translates them into appropriate commands to control the motors, ensuring stable flight and accurate maneuverability. The Naza flight controller is capable of handling complex flight control functions, including GPS positioning, altitude hold, and automatic stabilization.
One of the standout features of the DJI Naza is its ease of use. It is designed with a user-friendly interface that simplifies the programming and configuration process. With the help of the DJI Assistant software, pilots can easily access and adjust various flight parameters, flight modes, and advanced settings to suit their specific needs.
The DJI Naza supports multiple flight modes, including manual mode, attitude mode, GPS mode, and return-to-home mode. In manual mode, the pilot has full control over the drone’s movement, while attitude mode provides stabilization and automatic leveling. GPS mode enables precise positioning and navigation using satellite signals, and return-to-home mode allows the drone to autonomously return to its take-off location.
In addition to its flight control capabilities, the DJI Naza can be programmed to perform advanced functions and tasks. It supports intelligent flight modes, such as waypoints and follow-me mode, which enable autonomous and precise flight paths. The Naza flight controller is also compatible with additional accessories, such as gimbals and camera controls, allowing pilots to capture smooth and stable aerial footage.
Overall, the DJI Naza is a versatile and powerful flight controller that provides advanced control and stability for drones of various sizes and applications. Whether you’re a professional aerial photographer or an enthusiast looking to explore the capabilities of your drone, the DJI Naza is an excellent choice that offers a wide range of features and customization options to enhance your flying experience.
Getting Started with DJI Naza
Before diving into the programming and configuration of the DJI Naza flight controller, it’s essential to have a solid foundation of the initial setup process. In this section, we will guide you through the steps required to get started with the DJI Naza and ensure that everything is properly connected and ready for programming.
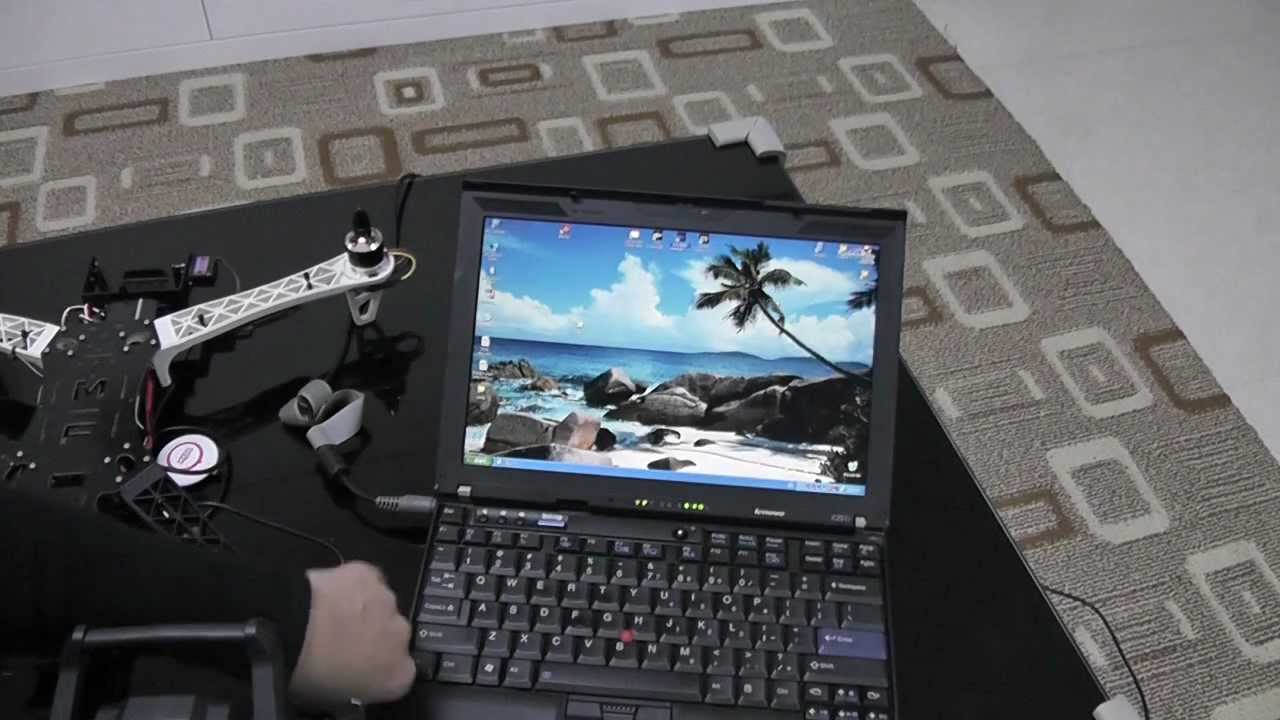
The first step in getting started with DJI Naza is to install the DJI Assistant software on your computer. The DJI Assistant is a powerful tool that allows you to configure and customize various settings of the Naza flight controller. You can download the software from the DJI website, and it supports both Windows and Mac operating systems.
Once you have installed the DJI Assistant software, the next step is to connect the DJI Naza flight controller to your computer. Use a micro USB cable to establish the connection between the flight controller and your computer. Ensure that the Naza flight controller is powered on before connecting it.
After establishing the connection, launch the DJI Assistant software. It will automatically detect the connected Naza flight controller and display the device information on the screen. This confirms that the communication between the computer and the flight controller is successful.
Next, it’s time to configure the basic settings of the DJI Naza. Within the DJI Assistant software, you will find various tabs and menus that allow you to adjust parameters such as flight mode, control sensitivity, and motor configurations. Take your time to familiarize yourself with these settings and make adjustments according to your preferences and flight requirements.
To enhance your drone’s navigation capabilities, you may want to attach a GPS module to the DJI Naza flight controller. The GPS module provides accurate positioning information, enabling features such as return-to-home and intelligent flight modes. Follow the manufacturer’s instructions to properly attach the GPS module to the flight controller and ensure a secure connection.
Once you have set up the basic configurations and attached the GPS module, it’s important to properly configure your RC transmitter (radio controller) to communicate with the DJI Naza flight controller. This allows you to control your drone’s flight movements using the transmitter sticks. Consult the user manual of your RC transmitter to understand the process of binding and calibrating it with the DJI Naza.
Before taking your drone for its maiden flight, it’s crucial to calibrate the Electronic Speed Controllers (ESCs) to ensure proper motor synchronization and responsiveness. The DJI Naza flight controller provides a straightforward process for ESC calibration, which usually involves following a sequence of throttle and stick movements.
Lastly, it’s essential to test and calibrate the motors of your drone to ensure that they run smoothly and evenly. Use the DJI Assistant software to access the motor testing and calibration features, which will help you identify any issues with the motor performance and make necessary adjustments.
With these initial setup steps completed, you are now ready to dive into the world of programming and configuring the DJI Naza flight controller. In the following sections, we will guide you through the process of fine-tuning flight controller parameters, configuring failsafe modes, and exploring advanced features and programming options to further enhance your drone’s performance and capabilities.
Step 1: Installing DJI Assistant Software
Installing the DJI Assistant software is the first step in setting up and programming the DJI Naza flight controller. The DJI Assistant software is a powerful tool that allows you to configure and customize various settings of the Naza flight controller, ensuring optimal performance and functionality.
To begin, visit the DJI website and navigate to the Downloads section. Look for the DJI Assistant software compatible with your computer’s operating system (Windows or Mac) and download it. Make sure to download the latest version of the software to access the most up-to-date features and improvements.
Once the DJI Assistant software is downloaded, locate the installation file and run it. Follow the on-screen prompts to install the software on your computer. The installation process is generally straightforward and should not take much time.
After the installation is complete, launch the DJI Assistant software. You may need to connect your computer to the internet for the software to function properly, as it may require certain updates or access to online resources.
If you haven’t done so already, connect the DJI Naza flight controller to your computer using a micro USB cable. Ensure that the flight controller is powered on before establishing the connection.
Once the DJI Naza flight controller is connected, the DJI Assistant software will automatically detect the device and display relevant information on the screen. You should see details such as the model name, firmware version, and serial number of the Naza flight controller.
At this point, you have successfully installed and connected the DJI Assistant software to the DJI Naza flight controller. You are now ready to explore the various settings and options available for programming and customizing your drone’s flight characteristics.
Take some time to familiarize yourself with the different tabs and menus within the DJI Assistant software. You will find options to adjust flight modes, control sensitivity, motor configurations, and more. It’s important to understand the purpose and impact of each setting before making any changes to ensure that you achieve the desired flight behavior.
Remember, the DJI Assistant software is a powerful tool that gives you full control over the programming and configuration of your DJI Naza flight controller. It’s recommended to refer to the Naza user manual or online resources provided by DJI for detailed information on each setting and its optimal values.
Now that you have successfully installed the DJI Assistant software and established a connection with the Naza flight controller, you are ready to proceed to the next steps of configuring basic settings, attaching a GPS module, and setting up your RC transmitter. These steps will further enhance the functionality and performance of your drone, putting you one step closer to achieving a fully customized and optimized flying experience.
Step 2: Connecting Naza Flight Controller
After installing the DJI Assistant software, the next step in setting up the DJI Naza flight controller is to establish a connection between the flight controller and your computer. This connection allows you to communicate with the Naza and access its settings and configurations through the DJI Assistant software. Follow these steps to connect the Naza flight controller:
- Locate the USB port on the Naza flight controller. Depending on the model, it may have a micro USB or mini USB port. Choose the appropriate USB cable (micro USB or mini USB) to connect the flight controller to your computer. Make sure the Naza flight controller is powered off before connecting it.
- Plug one end of the USB cable into the corresponding port on the Naza flight controller. Ensure a secure connection.
- Plug the other end of the USB cable into an available USB port on your computer.
- Power on the Naza flight controller. You can do this by connecting a fully charged battery or power source to the drone. It’s important to note that some flight controllers may require a separate power source, so refer to the user manual or product instructions to ensure the correct power setup.
- Launch the DJI Assistant software on your computer. It should automatically detect the connected Naza flight controller and display the device information on the screen.
Once the connection is established, you can proceed to configure the various settings and parameters of the DJI Naza flight controller. The DJI Assistant software provides an intuitive user interface that simplifies the process of accessing and adjusting these settings.
It’s important to ensure a stable connection between the Naza flight controller and your computer throughout the configuration process. Any disruptions or disconnections during programming may result in incomplete or incorrect configurations. If you experience any connectivity issues, try using a different USB cable or USB port on your computer.
Remember that the DJI Naza flight controller is a delicate electronic device, so handle it with care when connecting and disconnecting cables. Avoid bending or applying excessive force to the USB ports to prevent damage.
By establishing a successful connection between the Naza flight controller and your computer, you now have the ability to program and customize the flight controller to suit your specific needs. In the following steps, you will learn how to configure basic settings, attach a GPS module, set up your RC transmitter, and fine-tune the flight controller parameters to achieve optimal flight performance.
Step 3: Configuring Basic Settings
Configuring the basic settings of the DJI Naza flight controller is an important step in customizing your drone’s flight behavior and optimizing its performance. These settings include flight modes, control sensitivity, motor configurations, and more. Follow these steps to configure the basic settings:
- Launch the DJI Assistant software and ensure that the Naza flight controller is properly connected to your computer.
- Within the software, navigate to the “Basic” or “Configuration” tab, where you will find various sub-menus and options related to the Naza’s basic settings.
- Start by selecting the appropriate flight mode for your drone. The DJI Naza offers different flight modes such as manual mode, attitude mode, GPS mode, and return-to-home mode. Each mode has its specific characteristics, so choose the one that best suits your flying style and requirements. It’s recommended to understand the differences between these modes before making a selection.
- Adjust control sensitivity settings to fine-tune your drone’s responsiveness to your input commands. These settings allow you to control how quickly the drone reacts to changes in the control inputs. You can usually adjust sensitivity for pitch, roll, yaw, and throttle individually. Experiment with different sensitivity levels to find the optimal balance between maneuverability and stability.
- Configure the motor settings to ensure proper synchronization and performance. You may have the option to select the type of motor control (e.g., PWM or Oneshot), set motor idle speed, and calibrate motor throttle range. Follow the manufacturer’s instructions or consult the user manual for your specific motor and ESC setup.
- Explore other basic settings, such as stick calibration, LED indicators, and system parameters. Stick calibration ensures that the control inputs from your RC transmitter are accurately interpreted by the Naza flight controller. LED indicators allow you to customize the LED lights on the drone for visual feedback. System parameters may include settings related to the flight controller’s internal behavior and stability.
- Make adjustments to the settings based on your preferences and flight requirements. Take note of the default values before making any changes, as you can always revert to the default settings if needed.
It’s important to take the time to understand each setting and its impact on your drone’s flight characteristics. Experiment with different configurations and settings to find the setup that best suits your flying style and needs. Keep in mind that every drone and pilot is unique, so there is no one-size-fits-all configuration.
By configuring the basic settings of the DJI Naza flight controller, you are laying the foundation for a customized and optimized flying experience. In the following steps, you will learn how to attach a GPS module, set up your RC transmitter, calibrate ESCs and motors, and explore advanced programming options and features to further enhance your drone’s performance and capabilities.
Step 4: Attaching GPS Module
Attaching a GPS module to the DJI Naza flight controller can significantly enhance your drone’s navigation capabilities and unlock advanced features such as GPS positioning, return-to-home function, and intelligent flight modes. Follow these steps to properly attach a GPS module to your drone:
- Start by locating the GPS port on the DJI Naza flight controller. The GPS port is usually labeled and can be identified by its unique shape and connector type. Make sure the flight controller is powered off before proceeding.
- Take the GPS module and align the connector pins with the GPS port on the flight controller. Ensure that the pins are lined up correctly and that the connector is facing the correct direction.
- Gently insert the connector into the GPS port, applying slight pressure until it is securely connected. Avoid using excessive force, as this may damage the connector or the flight controller.
- Double-check the connection to ensure that it is firm and secure. A loose connection can cause intermittent GPS signal loss and affect the performance of the flight controller.
- If your GPS module has an additional mounting bracket or foam pad, attach it to the drone’s frame or designated mounting location. This will help to stabilize the GPS module and reduce vibrations that could affect its accuracy.
- Take note of any additional instructions provided by the GPS module manufacturer. Some GPS modules may require specific configuration steps or settings adjustments within the DJI Assistant software to ensure proper functionality.
Once the GPS module is securely attached, you can access the relevant settings within the DJI Assistant software to enable and configure the GPS functionality. This typically includes setting the home point, adjusting GPS signal parameters, and activating features such as return-to-home and intelligent flight modes.
The GPS module provides your drone with precise positioning information, enabling features such as automated return-to-home in case of signal loss or low battery, accurate waypoint navigation, and advanced flight modes that rely on GPS coordinates. It’s a valuable addition that enhances the safety and versatility of your drone.
It’s important to note that for optimal GPS functionality, you should attach the GPS module in an area on the drone that ensures a clear view of the sky. This allows the GPS module to receive signals from multiple satellites, improving accuracy and reliability.
By attaching a GPS module to your DJI Naza flight controller, you have expanded your drone’s capabilities and opened up new possibilities for precise navigation and autonomous flight. In the following steps, you will learn how to set up your RC transmitter, calibrate ESCs and motors, fine-tune flight controller parameters, and explore advanced programming options to further optimize your drone’s performance and control.
Step 5: Setting Up RC Transmitter
Setting up your RC transmitter (radio controller) properly is crucial for effectively controlling your drone and ensuring a smooth flying experience. The DJI Naza flight controller requires a compatible RC transmitter to communicate with the drone. Follow these steps to set up your RC transmitter:
- Ensure that your RC transmitter is compatible with the DJI Naza flight controller. Refer to the Naza user manual or DJI’s specifications to confirm compatibility. Popular RC transmitter brands such as Futaba, Spektrum, and FrSky often work well with the Naza.
- Start by powering off both the RC transmitter and the drone. This ensures safety and prevents any accidental inputs during the setup process.
- Connect the RC receiver to the Naza flight controller using the appropriate cables and connectors. Follow the specific instructions provided by the manufacturer of your RC receiver and flight controller.
- Turn on your RC transmitter first before powering on the drone. This sequence ensures that the flight controller recognizes the transmitter’s signal during the initialization process.
- Once the RC transmitter is powered on, check if the sticks and switches on the transmitter are properly calibrated and centered. This ensures that the signals transmitted to the flight controller are accurate.
- On the DJI Assistant software, navigate to the “RC” or “Radio” tab to access the RC transmitter settings. Here, you can configure the control channels, assign channels to specific functions, and adjust various parameters related to the RC transmitter.
- Follow the instructions provided in the DJI Assistant software or refer to your RC transmitter’s user manual to bind and calibrate the RC transmitter with the flight controller. This process may involve pressing buttons or manipulating sticks on the transmitter in specific sequences.
- Once the binding and calibration process is complete, verify the responsiveness and functionality of the controls on your RC transmitter. Pay close attention to throttle, pitch, roll, and yaw controls to ensure that they correspond accurately to the corresponding movements of the drone.
Setting up your RC transmitter correctly is crucial for ensuring precise control and maneuverability of your drone. It’s important to take the time to understand your specific RC transmitter’s setup process and consult the user manual or manufacturer’s instructions for any specific steps or requirements.
Having successfully set up your RC transmitter, you are now ready to fly your drone, but before that, it’s important to calibrate the Electronic Speed Controllers (ESCs) and test the motors. This will ensure smooth and synchronized motor performance, as well as accurate throttle response. In the next step, we will guide you through the process of calibrating ESCs and testing motors to complete the necessary setup before your first flight.
Step 6: Calibrating ESCs
Calibrating the Electronic Speed Controllers (ESCs) is a crucial step in ensuring proper motor performance and synchronization on your drone. ESC calibration ensures that each motor responds accurately to throttle inputs, providing smooth and consistent power output. Follow these steps to calibrate your ESCs:
- Power on your drone and connect the battery or power source. Ensure that the drone is on a stable surface and that the propellers are removed for safety.
- Access the “Motor” or “ESC” settings within the DJI Assistant software. This is where you will find the options to calibrate the ESCs.
- Put your RC transmitter throttle stick to the maximum position (full throttle).
- Within the DJI Assistant software, initiate the ESC calibration process. This usually involves activating a specific command or clicking a button to start the calibration.
- Follow the on-screen instructions provided by the DJI Assistant software. The process usually requires you to lower the throttle stick to the minimum position (zero throttle) and wait for the ESCs to emit a series of beeps or indicate that calibration is complete.
- Once ESC calibration is complete, move the throttle stick to ensure that the motors respond accurately to throttle inputs. Test each motor individually to ensure they are spinning at the same speed and synchronized properly.
It’s important to note that ESC calibration may vary depending on the specific drone and flight controller setup you have. Always refer to the manufacturer’s instructions or the documentation provided with your drone to ensure you follow the correct calibration procedure.
Calibrating the ESCs is a vital step to achieve smooth and precise motor control, which directly impacts your drone’s stability and flight performance. A properly calibrated ESC ensures that your drone responds accurately to throttle inputs and helps prevent any unexpected behavior during flight.
Having successfully calibrated the ESCs, your drone is now ready for further testing and fine-tuning. In the next step, we will guide you through the process of testing and calibrating the motors to ensure they are running smoothly and evenly, further enhancing the overall performance and stability of your drone.
Step 7: Testing and Calibrating Motors
Testing and calibrating the motors on your drone is a crucial step to ensure that they are running smoothly, evenly, and synchronously. Properly calibrated motors contribute to better flight performance, stability, and control. Follow these steps to test and calibrate the motors on your drone:
- Make sure that your drone is on a stable surface and remove any propellers for safety.
- Power on your drone and connect the battery or power source.
- Access the “Motor Test” or “Motor Calibration” function within the DJI Assistant software.
- Ensure that all motors are visible and labeled correctly on the software interface.
- Initiate the motor test mode, which will allow you to individually control the speed of each motor.
- Slowly increase the throttle for each motor one by one and observe their response. Check for any abnormal vibrations, unusual noises, or inconsistencies in motor speed.
- If any motor seems to be significantly slower or faster than the others, you may need to make adjustments. Refer to the user manual or documentation provided with your drone to determine the appropriate method for calibrating the motor speed.
- For motor calibration, the DJI Assistant software may provide an option to adjust the motor output manually in a step-by-step process. Follow the instructions provided by the software to calibrate each motor until they are running smoothly and evenly.
- After calibrating the motors, conduct another test to ensure that all motors are spinning at the same speed and responding accurately to throttle inputs. This will help ensure balanced power distribution and stable flight performance.
Motor testing and calibration are important to ensure that your drone operates smoothly and achieves the desired flight characteristics. It’s crucial to follow the correct procedures and consult the documentation provided with your specific drone model to ensure proper motor testing and calibration.
By testing and calibrating the motors, you can address any inconsistencies and ensure that all motors are running smoothly and synchronously. This step helps in achieving better overall flight performance and stability, allowing for more precise control of your drone.
With the motors now successfully tested and calibrated, your drone is ready for the next step – fine-tuning the flight controller parameters. In the upcoming step, we will guide you through the process of adjusting flight controller settings to further optimize your drone’s performance and control.
Step 8: Fine-tuning Flight Controller Parameters
Fine-tuning the flight controller parameters is an important step in optimizing your drone’s performance and responsiveness. By adjusting the flight controller settings, you can tailor the flight characteristics to your preferences and fly your drone with precision and control. Follow these steps to fine-tune the flight controller parameters:
- Launch the DJI Assistant software and ensure that the Naza flight controller is properly connected to your computer.
- Access the “Advanced” or “Flight Parameters” tab within the DJI Assistant software. This is where you will find options to adjust specific flight controller settings.
- Review the different flight parameters available, such as gains, control rates, expo, and filter settings.
- Start with the gains – these are the proportional, integral, and derivative (PID) values that determine how the flight controller responds to different inputs. Adjusting the gains can impact stability, response time, and overall flight performance. Experiment with incremental changes to find the optimal gain values for your drone.
- Next, consider adjusting the control rates – these settings determine how quickly the drone responds to stick movements. By increasing or decreasing the control rates, you can enhance or reduce the drone’s agility and responsiveness. Find the balance that suits your flying style and the specific maneuverability you desire.
- Expo settings allow you to fine-tune the stick sensitivity around the center position, providing gradual or sharper response to stick movements. This can help you achieve smoother control during precise maneuvers or adjust for your personal preferences.
- Consider adjusting the filter settings to reduce vibrations and noise in the flight controller’s sensor readings. Filters can help improve stability and reduce the impact of external factors such as wind gusts or sudden movements.
- Make small incremental changes to each parameter and test your drone’s flight performance after each adjustment. Take note of the changes you make and the resulting impact on flight behavior.
- Continue iterating and fine-tuning the flight controller parameters until you achieve the desired flight performance and responsiveness for your drone.
It’s important to note that each drone and pilot preference may vary, so take your time to experiment and find the optimal settings for your specific drone and flying style. Keep in mind that changes to flight controller parameters may affect stability and flight behavior, so proceed with caution and make gradual adjustments.
By fine-tuning the flight controller parameters, you can customize your drone’s flight characteristics, responsiveness, and stability to your liking. This step ensures that your drone performs optimally, allowing you to achieve precise control and fly with confidence.
With the flight controller parameters now fine-tuned, your drone is almost ready for flight. In the next step, we will guide you through the process of configuring failsafe modes to ensure added safety and reliability during your flights.
Step 9: Configuring Failsafe Mode
Configuring failsafe mode is a crucial step to ensure the safety and reliability of your drone in case of signal loss or other critical situations. Failsafe mode allows your drone to respond in a predetermined manner to protect against potential accidents or loss of control. Follow these steps to configure failsafe mode:
- Launch the DJI Assistant software and ensure that the Naza flight controller is properly connected to your computer.
- Access the “Failsafe” or “Safety” tab within the DJI Assistant software. This is where you will find options to configure the failsafe mode.
- Review the available failsafe settings and understand their implications. Common failsafe options include return-to-home, hover, and landing.
- Select the failsafe action that you deem appropriate for your drone in case of signal loss or other critical events. Return-to-home is often a popular choice as it directs the drone to autonomously fly back to the takeoff location. Hover mode maintains the drone’s current position and altitude, while landing mode commands the drone to land softly.
- Adjust the failsafe settings to specify the desired altitude, descent speed, or hovering time for a particular failsafe action. Consider the environment in which you are flying and any potential obstacles or hazards when configuring these values.
- Ensure that the GPS module is properly attached and functioning, as it plays a crucial role in accurate failsafe operations.
- Test the failsafe mode by simulating a signal loss or critical event. Observe how your drone responds and verify that it behaves according to the configured failsafe action.
- Make any necessary adjustments to the failsafe mode based on the results of the test. Repeat the test if needed until you are satisfied with the performance of the failsafe mechanism.
Properly configuring failsafe mode on your drone provides an extra layer of safety and ensures that your drone can autonomously respond in critical situations. It reduces the risk of accidents or loss of control, giving you peace of mind during your flights.
Remember to periodically review and update your failsafe settings as needed based on changes in flying conditions or equipment. It’s essential to maintain a well-functioning failsafe mechanism to ensure the safety and integrity of your drone.
Now that you have properly configured failsafe mode, your drone is equipped with an added layer of safety and reliability. In the final step, we will explore advanced features and programming options that can enhance your drone’s capabilities and unlock new possibilities in your flights.
Step 10: Advanced Features and Programming Options
In the final step of programming the DJI Naza flight controller, we will explore advanced features and programming options that can take your drone flying experience to the next level. These advanced features allow you to unlock new capabilities and customize your drone’s functionalities. Follow these steps to explore advanced features and programming options:
- Launch the DJI Assistant software and ensure that the Naza flight controller is properly connected to your computer.
- Access the “Advanced” or “Programming” tab within the DJI Assistant software. This is where you will discover various advanced features and programming options.
- Explore the intelligent flight modes available for your drone. These modes enable autonomous flight and precise waypoint navigation. You may have options for features such as waypoint navigation, follow-me mode, and orbit mode. Activate and configure these modes according to your specific requirements and creative vision.
- Consider exploring advanced camera control options if your drone is equipped with a compatible camera or gimbal. These options allow you to remotely control camera angles, focus, and other parameters to capture stunning aerial footage.
- Investigate the programming capabilities of the Naza flight controller. This may involve writing custom scripts or programming functions using the DJI Software Development Kit (SDK). With programming knowledge and skills, you can extend the functionality of your drone by implementing unique features and behaviors.
- Consult the DJI forums, online tutorials, or user communities for inspiration and guidance on advanced programming options. There is a wealth of knowledge and resources available to help you explore and utilize the full potential of your DJI Naza flight controller.
- Experiment with different settings, modes, and programming options gradually. Start with small adjustments and familiarize yourself with their effects. Take note of any changes you make and their impact on your drone’s performance and behavior.
- Test and refine these advanced features and programming options in controlled environments before implementing them in real-world scenarios. This allows you to ensure their reliability and safety during flights.
Exploring advanced features and programming options opens up a world of possibilities for your drone. By utilizing these features, you can take your drone flying experience to new heights and unleash your creativity. Remember to approach advanced programming options with caution and always prioritize flight safety.
With the advanced features and programming options now explored and understood, you have successfully completed the process of programming the DJI Naza flight controller. Congrats! Now it’s time to take your drone for a flight and enjoy the exciting capabilities you have unlocked.
Conclusion
Congratulations on completing the process of programming the DJI Naza flight controller! By following the steps outlined in this guide, you have gained the knowledge and skills to configure and customize your drone to suit your specific needs and preferences. From installing the DJI Assistant software to fine-tuning flight controller parameters, you have taken the necessary steps to optimize your drone’s performance and enhance your flying experience.
The DJI Naza flight controller offers a wide range of advanced features, customizable options, and programming capabilities that allow you to unlock the full potential of your drone. Whether you’re a professional aerial photographer or a hobbyist looking to explore the capabilities of your drone, the DJI Naza provides stability, reliability, and advanced flight control features that elevate your flying experience.
Throughout the programming process, you learned how to install the DJI Assistant software, connect the Naza flight controller, configure basic settings, attach a GPS module, set up your RC transmitter, calibrate ESCs, test and calibrate motors, fine-tune flight controller parameters, configure failsafe mode, and explore advanced features and programming options. These steps have equipped you with the necessary skills to optimize your drone’s performance and control.
Remember, as you continue to fly your drone, it’s important to prioritize safety. Always abide by local regulations and guidelines, fly in designated areas, and maintain visual contact with your drone at all times. Regularly check for software updates for your drone and flight controller to ensure you have access to the latest features and improvements.
Keep exploring and experimenting with your DJI Naza flight controller to discover new possibilities and effects. There are countless opportunities to push the boundaries of your drone’s capabilities, whether through advanced programming, aerial photography and videography, or creative flight maneuvers.
We hope this guide has provided you with valuable insights and guidance on programming the DJI Naza flight controller. Stay curious, continue to learn, and most importantly, have fun as you take your drone flying experience to new heights!


