Introduction
Adding translated subtitles to a video is a great way to enhance its accessibility and reach a wider audience. Whether you want to share your content with an international audience or cater to viewers who are non-native speakers, having accurate and well-timed subtitles can make a significant difference.
With the advancements in technology, the process of adding translated subtitles to a video has become easier and more accessible. You don’t need to be a professional video editor or have expensive software to achieve this. In this article, we will guide you through the process of adding translated subtitles to your video, step by step.
By providing translated subtitles, you can ensure that viewers understand the content, even if they are not proficient in the language spoken in the video. This opens up new opportunities for content creators, businesses, and organizations to engage with a global audience and break language barriers.
Moreover, with the increasing importance of video content in online marketing and social media, having translated subtitles can greatly improve the visibility and reach of your videos. It makes your content more inclusive and accessible to a diverse audience and can boost engagement and viewer retention.
In the following sections, we will walk you through the process of adding translated subtitles to your videos, from preparing your video file to exporting the final version with subtitles. By following these steps, you’ll be able to create professional-looking videos with accurate and synchronized translated subtitles, allowing you to effectively communicate with viewers from different language backgrounds.
Step 1: Prepare your video file
The first step in adding translated subtitles to your video is to ensure that your video file is properly prepared. Here are the key considerations:
- File format: Make sure your video file is in a widely supported format like MP4, AVI, or MOV. This will ensure compatibility with most video editing software and online platforms.
- Quality: Use a high-quality video file with clear audio and visuals. The better the quality of the original video, the better the final result will be.
- Length: Consider the length of your video and the time it will take to add subtitles. Longer videos may require more time and effort to subtitle accurately.
- Resolution: Determine the optimal resolution for your video. Higher resolutions are ideal for high-definition videos, but keep in mind that larger file sizes may affect upload and streaming speeds.
- Aspect ratio: Ensure that your video has the correct aspect ratio for the platform where it will be published. Common aspect ratios include 16:9 for widescreen and 4:3 for standard definition.
Once you have confirmed that your video file meets these requirements, you are ready to proceed to the next step.
Keep in mind that video editing software is often resource-intensive, so make sure your computer has enough processing power and memory to handle the editing process smoothly. If needed, consider closing any unnecessary programs or upgrading your hardware to ensure optimal performance.
Preparing your video file properly sets a strong foundation for the subtitle addition process. Taking the time to ensure that your video file meets the necessary criteria will help you achieve the best results and save time during the subtitle editing process.
Step 2: Choose a subtitle format
Choosing the right subtitle format is crucial for compatibility and ease of use when adding translated subtitles to your video. There are several subtitle formats to choose from, each with its own advantages and uses. Here are some popular subtitle formats:
- SubRip (.srt): This is one of the most commonly used subtitle formats. It is a simple text-based format that includes the timing information for each subtitle line. SRT files are widely supported by video players, editing software, and online platforms.
- WebVTT (.vtt): WebVTT is a modern subtitle format that supports more advanced features, such as styling and positioning of subtitles on the screen. It is widely supported by HTML5 video players and online streaming platforms.
- Advanced SubStation Alpha (.ass): This format allows for more complex styling and positioning options for subtitles. It supports features like different fonts, colors, and animation effects. However, not all video players and platforms support .ass files.
- SubStation Alpha (.ssa): SSA is similar to ASS in terms of features and styling options, but it is an older format. It is still widely supported by many video players and editing software.
When choosing a subtitle format, consider the requirements of the platform where you will be publishing your video. Some platforms may have specific format guidelines, so it’s important to check their documentation or support resources.
Additionally, consider the features and flexibility you need for your subtitles. If you simply need basic timing and text, a simple format like SRT may be sufficient. However, if you want to add more advanced styling and positioning, formats like WebVTT, ASS, or SSA offer more options.
Keep in mind that different subtitle editors and video editing software may support different subtitle formats. Ensure that the software you plan to use supports the format you choose.
By selecting the appropriate subtitle format, you’ll ensure compatibility, flexibility, and ease of use when adding translated subtitles to your video.
Step 3: Create the translated subtitles
Once you have chosen the subtitle format, it’s time to translate the subtitles into the desired language. Creating accurate translated subtitles requires careful attention to detail and a good understanding of both the source language and the target language. Here are some steps to create translated subtitles:
- Transcribe the original subtitles: Begin by transcribing the original subtitles in the source language. This involves listening to the dialogue in the video and accurately writing down the spoken words. This step ensures that you have a clear reference for the timing of the subtitles.
- Translate the transcriptions: Once you have transcribed the original subtitles, translate them into the desired language. It’s important to ensure the accuracy of the translation while also considering cultural nuances and idiomatic expressions. If you are not fluent in the target language, it’s advisable to work with a professional translator to ensure the quality and accuracy of the translated subtitles.
- Adjust timing and duration: As you translate the subtitles, keep in mind that the length of the translated text may differ from the original. Adjust the timing and duration of each subtitle line accordingly to maintain synchronization with the video. This step is crucial for a seamless viewing experience.
- Proofread and edit: After translating and adjusting the timing, carefully proofread and edit the translated subtitles. Check for spelling mistakes, grammatical errors, and any inconsistencies. It’s important to ensure the subtitles are clear, concise, and accurately convey the intended meaning.
Remember to maintain consistency in style and tone throughout the translated subtitles. Consistency in formatting, punctuation, and capitalization helps create a professional and cohesive viewing experience.
Once you have created the translated subtitles and have thoroughly reviewed them for accuracy and quality, you are ready to proceed to the next step of adding them to your video.
Step 4: Use a subtitle editor or software
To efficiently add translated subtitles to your video, it is recommended to use a subtitle editor or software. These tools provide a user-friendly interface and specialized features that streamline the subtitle addition process. Here’s how to use a subtitle editor or software:
- Choose a subtitle editor: There are various subtitle editors available, both free and paid. Some popular options include Aegisub, Subtitle Edit, and Subtitle Workshop. Research different editors and choose one that suits your needs, taking into consideration your operating system compatibility, user interface, and available features.
- Import the video: Open the subtitle editor and import your video file. Most subtitle editors allow you to drag and drop the video file into the editing interface. Alternatively, you can use the “File” or “Import” option within the software.
- Import the original subtitles: If your video already has existing subtitles in the source language, import the subtitle file into the editor. This will serve as the reference for where to place the translated subtitles.
- Load the translated subtitles: Load the translated subtitle file that you created in the previous step into the subtitle editor. The editor will display the subtitle text, timing, and other relevant information.
- Adjust timing and synchronization: Use the subtitle editor’s features to adjust the timing and synchronization of the translated subtitles. Align the translated subtitle lines with the corresponding sections of the video, ensuring that the text appears on-screen at the right moment.
- Edit and format the subtitles: Take advantage of the subtitle editor’s editing tools to make any necessary changes to the translated subtitles. You can adjust the font, size, color, and position of the subtitles to match your preferences or adhere to specific platform guidelines.
- Preview and fine-tune: Play the video within the subtitle editor to preview how the translated subtitles appear in sync with the audio. Make any additional adjustments as needed to ensure the accuracy and readability of the subtitles.
Using a dedicated subtitle editor or software simplifies the process of adding translated subtitles, provides a visual representation of the subtitles, and allows for precise control over their timing and appearance.
Remember to save your work regularly and backup the subtitle files to avoid any potential loss of progress. Once you are satisfied with the placement and formatting of the translated subtitles, you are ready to proceed to the next step of adding them to the video.
Step 5: Import the video and original subtitles
Now that you have the translated subtitles ready and have chosen a suitable subtitle editor or software, it’s time to import the video and the original subtitles. This step enables you to work with the existing subtitles as a reference while adding the translated subtitles to your video. Here’s how to import the video and original subtitles:
- Open the subtitle editor: Launch your chosen subtitle editor or software on your computer.
- Create a new project: If your subtitle editor allows it, create a new project for the video you’re working on. This helps keep your work organized and makes it easier to manage multiple projects.
- Import the video file: Within the subtitle editor, locate the option to import or open a video file. Use this option to import the video file into the editor’s workspace. You can usually do this by selecting “File” and then “Import” or “Open Video”.
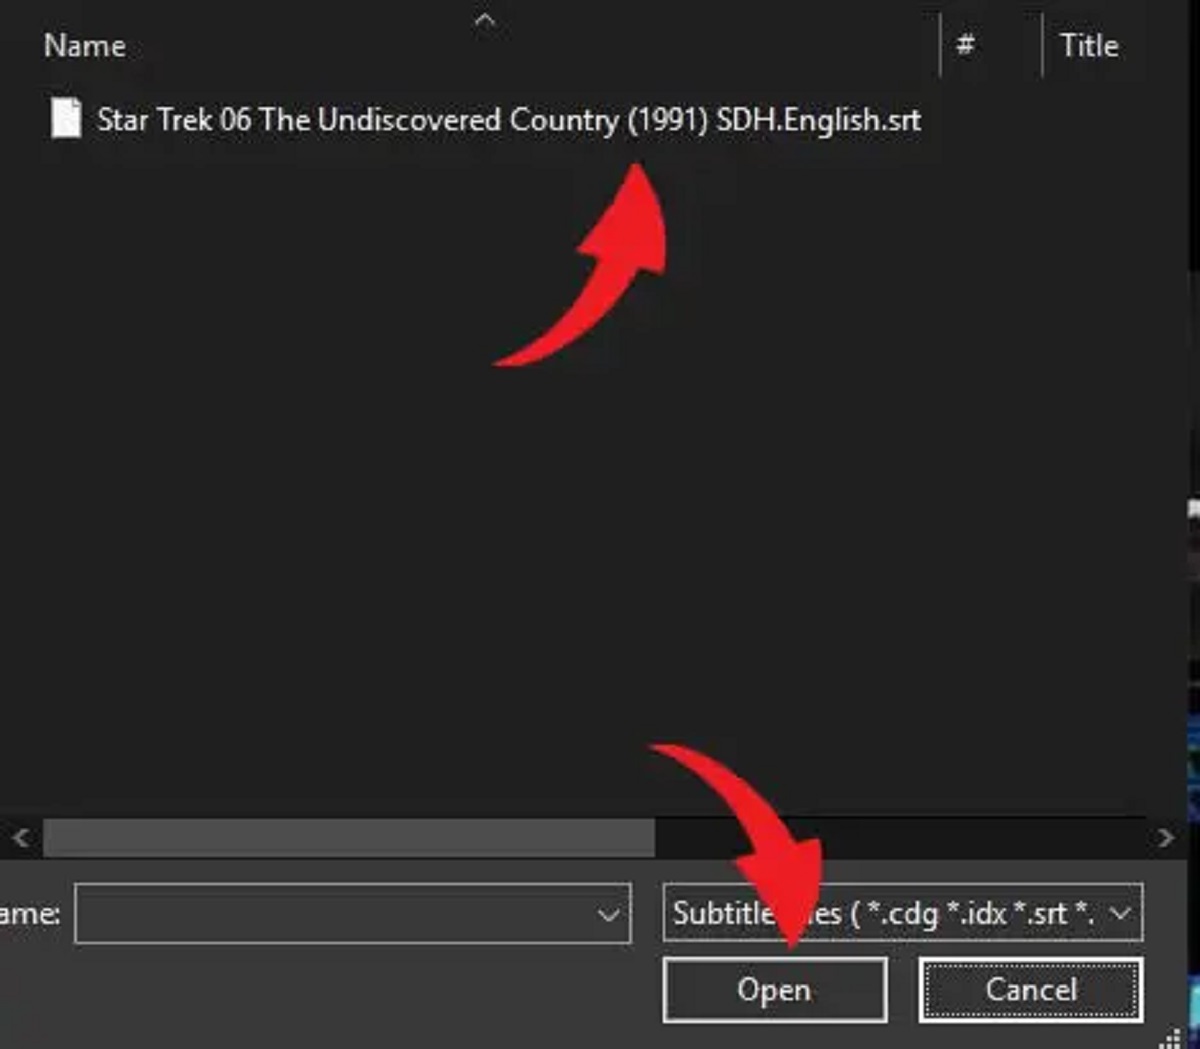
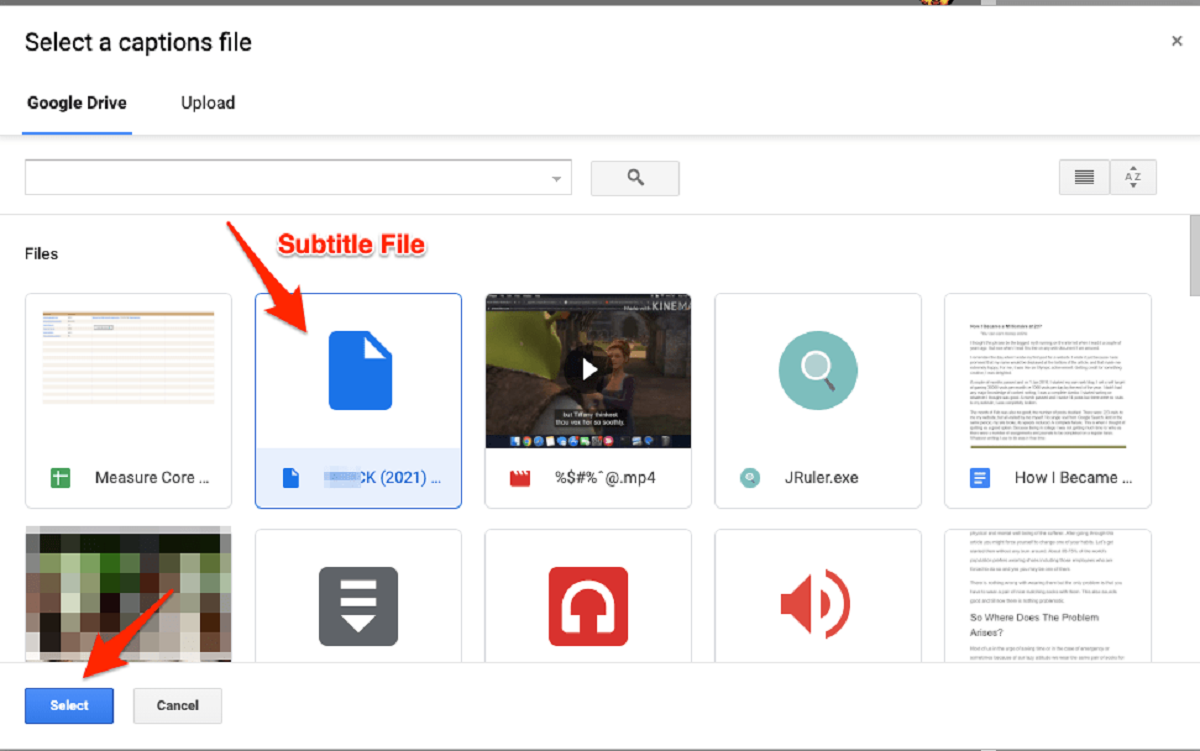
- Import the original subtitle file: If you have an existing subtitle file in the source language, import it into the subtitle editor. This can typically be done by selecting “File” and then “Import Subtitles”. Choose the file containing the original subtitles from your computer’s file system.
By importing the video and original subtitle files, you establish the foundation for adding the translated subtitles effectively. These files provide a reference for timing, synchronization, and positioning of the translated subtitles on the video timeline.
Make sure to save your project to avoid any potential loss of progress. Some subtitle editors may automatically create a project file that allows you to save and resume your work later. Check the software’s documentation or support resources for more information on how to save and manage your project files.
With the video and original subtitles imported into the subtitle editor, you are now ready to move on to the next step of actually adding the translated subtitles to your video.
Step 6: Add translated subtitles to the video
Now that you have imported the video and the original subtitles into the subtitle editor, it’s time to add the translated subtitles to your video. This step involves placing the translated subtitle lines at the appropriate timing points on the video timeline. Here’s how to add the translated subtitles:
- Select a subtitle line: Choose a translated subtitle line from your subtitle editor. This could be the first line of translation you want to add to the video.
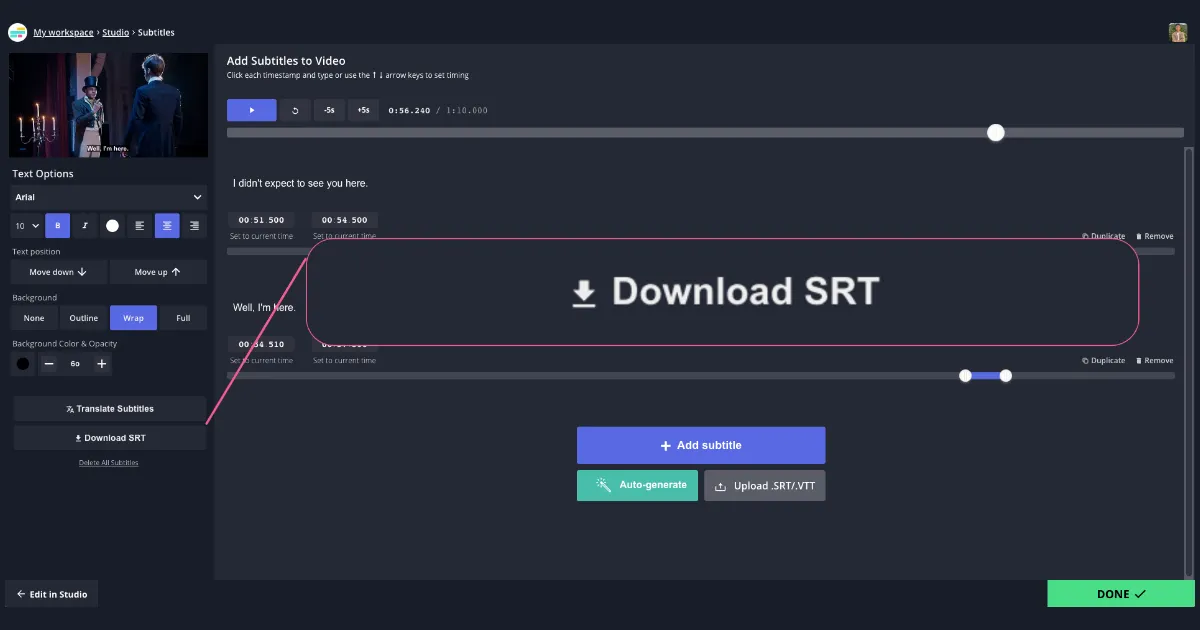
- Determine the display time: Decide when you want the subtitle line to appear on-screen and how long it should remain visible. Use the subtitle editor’s timeline function to set the start and end times for the selected subtitle line.
- Position the subtitle line: Determine the positioning of the translated subtitle line on the video. Most subtitle editors offer options to adjust the alignment, placement, and style of the subtitles. Position the line according to your preferences or platform guidelines.
- Repeat the process: Continue selecting subtitle lines, determining the display times, and positioning them on the video timeline until all of the translated subtitles are added.
The subtitle editor will provide you with a visual representation of the video and the added subtitles, allowing you to fine-tune the timing and placement for maximum clarity and readability.
Take your time to ensure that each subtitle line is accurately positioned and synchronized with the corresponding spoken dialogue in the video. Pay close attention to maintaining consistency in formatting and styling throughout the translated subtitles.
While adding the translated subtitles, it’s helpful to periodically preview the video to check the flow and coherence of the subtitles in relation to the audio and visuals. Make any necessary adjustments or refinements as needed to ensure a smooth viewing experience.
By following these steps, you’ll successfully add the translated subtitles to your video, enhancing its accessibility and making it easier for viewers to understand and engage with the content.
Step 7: Adjust the timing and duration
After adding the translated subtitles to your video, it’s important to ensure that the timing and duration of each subtitle line are accurate and synchronized with the audio. This step involves fine-tuning the timing of the subtitles to maintain coherence and readability. Here’s how to adjust the timing and duration of the subtitles:
- Review the subtitles: Play the video with the subtitles enabled and carefully review the timing of each subtitle line. Pay attention to whether the subtitles appear and disappear at the correct moments and align with the spoken dialogue.
- Make adjustments: Use the subtitle editor’s capabilities to adjust the timing and duration of the subtitle lines. This may involve moving the start or end times of a subtitle, extending or shortening the display duration, or splitting/merging subtitle lines to ensure optimal synchronization.
- Consider reading speed: Take into account the average reading speed of your target audience when adjusting the duration of subtitle lines. Ensure that the text remains on-screen long enough for viewers to comfortably read and comprehend it.
- Maintain natural flow: Aim for a smooth and natural flow of subtitles by aligning them with the natural pauses and breaks in the audio. Avoid overcrowding the screen with too much text at once, as it can overwhelm viewers and compromise readability.
It’s essential to strike a balance between displaying the subtitles for an adequate duration and maintaining an unobtrusive viewing experience. Adjust the timing and duration of the subtitles with the viewer’s experience in mind.
As you fine-tune the timing of the subtitles, remember to maintain consistency in the overall pacing. Subtitles that are too short or linger on the screen for too long can disrupt the viewer’s engagement with the video.
Regularly preview the video with the adjusted subtitles to ensure that they are now synchronized and properly aligned with the audio. Make any necessary tweaks or refinements to achieve the best timing and duration for each subtitle line.
By carefully adjusting the timing and duration of the subtitles, you enhance the viewers’ understanding and enjoyment of the video, ensuring that the translated content is delivered in a clear and coherent manner.
Step 8: Export the video with translated subtitles
Once you have finalized the timing and synchronization of the translated subtitles, it’s time to export the video with the added subtitles. This step allows you to save and share the final version of your video, ready to be published and enjoyed by your target audience. Here’s how to export the video with translated subtitles:
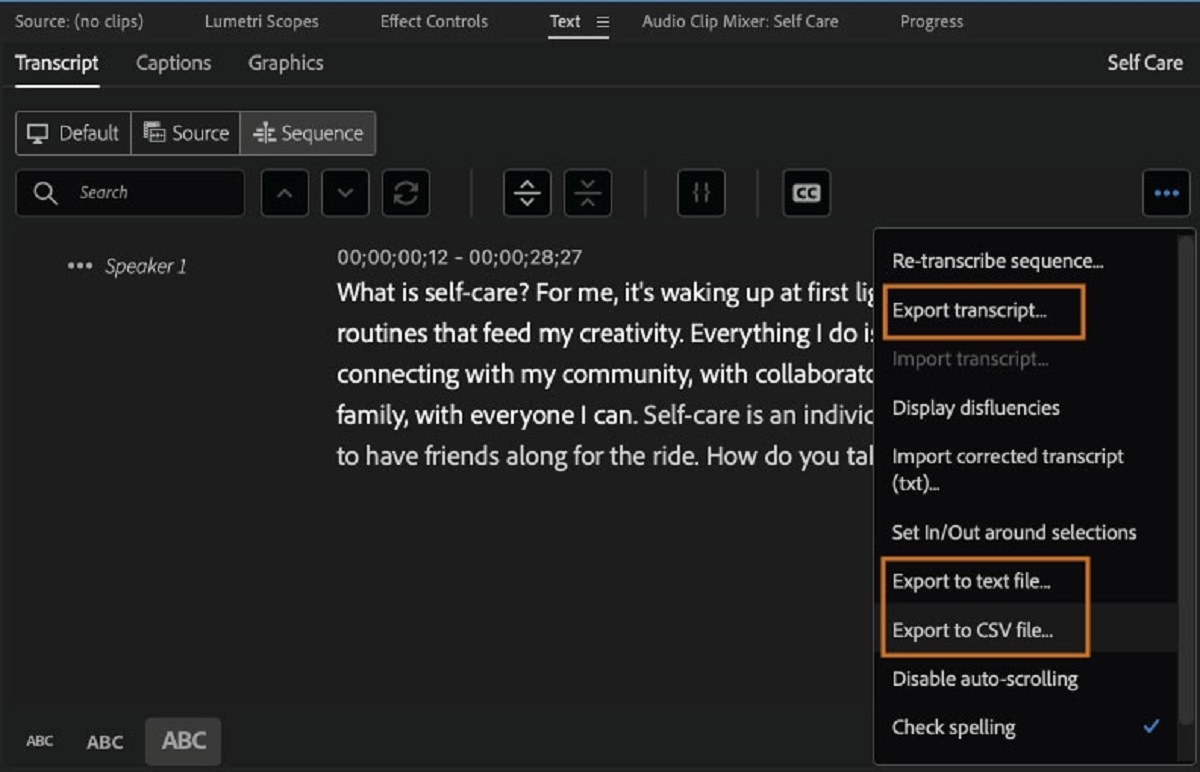
- Select the export option: In the subtitle editor or video editing software, locate the export or render option. This may be found under the “File” menu or in the toolbar of the software.
- Choose the export format: Select the desired video format for the exported file. Popular formats include MP4, MOV, and AVI. Ensure that the chosen format is compatible with the platforms or devices where you plan to distribute or share the video.
- Set the export settings: Configure the export settings according to your preferences or the requirements of the platform where the video will be published. These settings may include video resolution, bitrate, audio settings, and subtitle preferences.
- Select the subtitle options: Ensure that the “Include Subtitles” or similar option is selected to embed the translated subtitles into the final video file. This ensures that the subtitles will be displayed automatically when the video is played.
- Choose the export location: Specify the folder or directory where you want to save the exported video file. Make sure you have enough storage space on your computer or external storage device.
- Start the export process: Click on the “Export” or “Start” button to begin the export process. Depending on the length and complexity of the video, this process may take some time, so be patient.
- Review the exported video: Once the export process is complete, play the exported video to ensure that the translated subtitles are accurately displayed and synchronized with the audio. Preview the video on different devices or platforms to confirm its compatibility.
By exporting the video with the translated subtitles, you create a standalone file that contains the merged subtitles. This makes it easier to share and distribute the video without the need for separate subtitle files.
Remember to save a backup of the exported video and subtitle files to ensure their future availability and to maintain a backup of your work.
Now, with the video exported and ready to be shared, you can confidently publish it on various platforms, knowing that your audience will be able to enjoy the content with accurate and synchronized translated subtitles.
Conclusion
Adding translated subtitles to a video is a valuable investment that can significantly enhance its accessibility and reach. It allows you to connect with a broader audience, both domestically and internationally, and break language barriers. By following the step-by-step process outlined in this guide, you can successfully add translated subtitles to your video and ensure a seamless viewing experience for viewers who speak different languages.
From preparing your video file to creating accurate translations, choosing the right subtitle format, and using a subtitle editor or software, each step plays a crucial role in delivering high-quality subtitles. Adjusting the timing and duration of the subtitles, and exporting the final video with the subtitles embedded ensures that your content is easy to understand and engage with.
Keep in mind that the quality and accuracy of the translations play a vital part in the success of your efforts. If you’re not proficient in the target language, considering collaborating with professional translators to ensure precise translations and maintain cultural nuances.
Remember to regularly review and refine your subtitle placement, formatting, and synchronization to deliver the best possible viewing experience. Pay attention to consistency in style, pacing, and readability to create subtitles that seamlessly integrate with the video’s content.
With translated subtitles, you can reach a wider audience, increase engagement, and improve the accessibility of your videos. Whether you’re a content creator, a business, or an organization, adding translated subtitles opens up new opportunities to connect with viewers from different language backgrounds and foster a global audience.
So, embrace the power of translated subtitles and make your videos more inclusive, impactful, and enjoyable for viewers across the globe.