Introduction
Welcome to the world of collaborative playlists on Spotify! If you are an avid music lover, you know that sharing and discovering new songs can be a thrilling experience. With Spotify’s collaborative playlist feature, you can invite friends, family, or even strangers to contribute to your playlist, creating a harmonious collection of tracks to enjoy together.
Collaborative playlists are a fantastic way to curate music for parties, road trips, or simply to explore different genres and discover hidden gems. Whether you’re looking to expand your musical horizons or strengthen connections with fellow music enthusiasts, the process of creating and managing a collaborative playlist on Spotify is seamless and enjoyable.
In this article, we will guide you through the steps of creating a collaborative playlist, adding songs to it, inviting others to contribute, and managing collaborators. By the end, you’ll be equipped with the knowledge to curate a playlist that encompasses a diverse range of musical tastes and preferences.
So, let’s dive in and explore the world of collaborative playlists on Spotify!
Step 1: Creating a Collaborative Playlist
The first step in building a collaborative playlist on Spotify is to create the playlist itself. Follow these simple instructions to get started:
- Open the Spotify application on your device and navigate to the “Your Library” tab. Here, you will find the option to create a new playlist.
- Click on the “Create Playlist” button and give your playlist a catchy and descriptive name. This will help others understand the theme or purpose of the playlist.
- Once you’ve named your playlist, you have the option to add a custom cover image to make it visually appealing. You can choose an image from your device or select one from Spotify’s library.
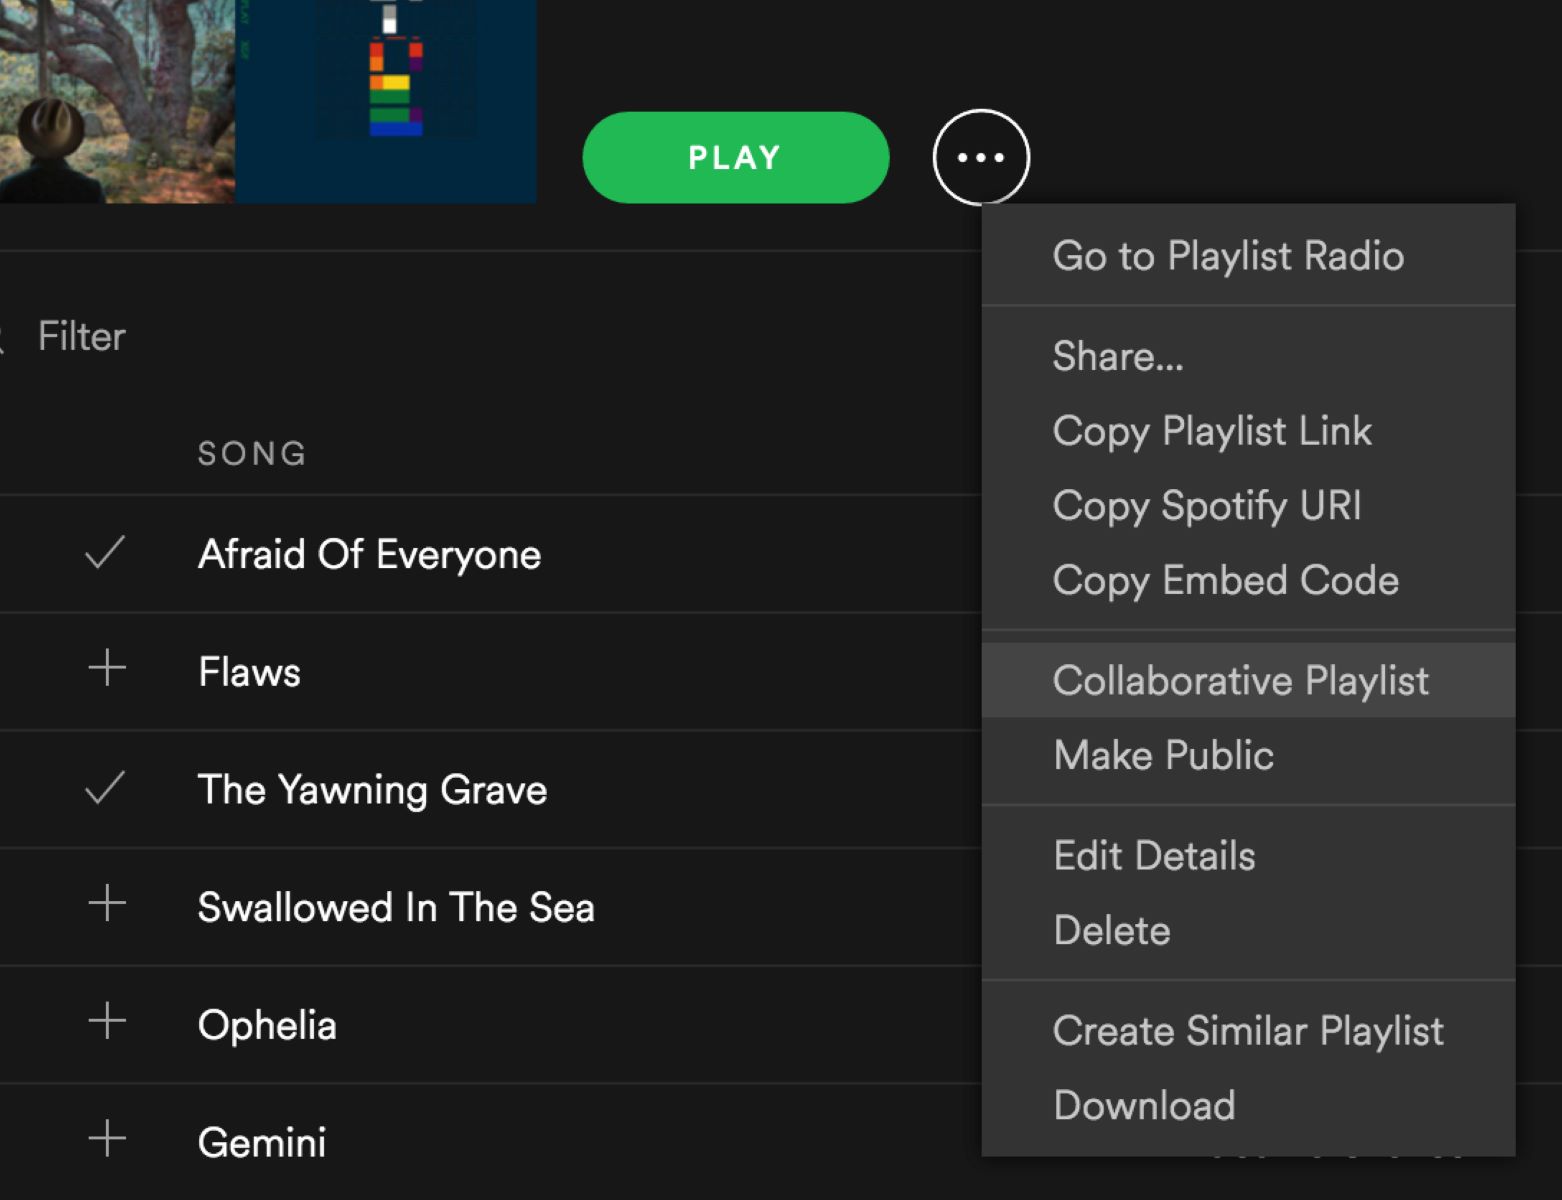
- Now, the crucial step is to make the playlist collaborative. To do this, simply click on the three dots (…) next to the playlist’s name, and select the “Collaborative Playlist” option.
And that’s it! Congratulations, you’ve successfully created your collaborative playlist on Spotify. It’s now time to add some amazing songs to it.
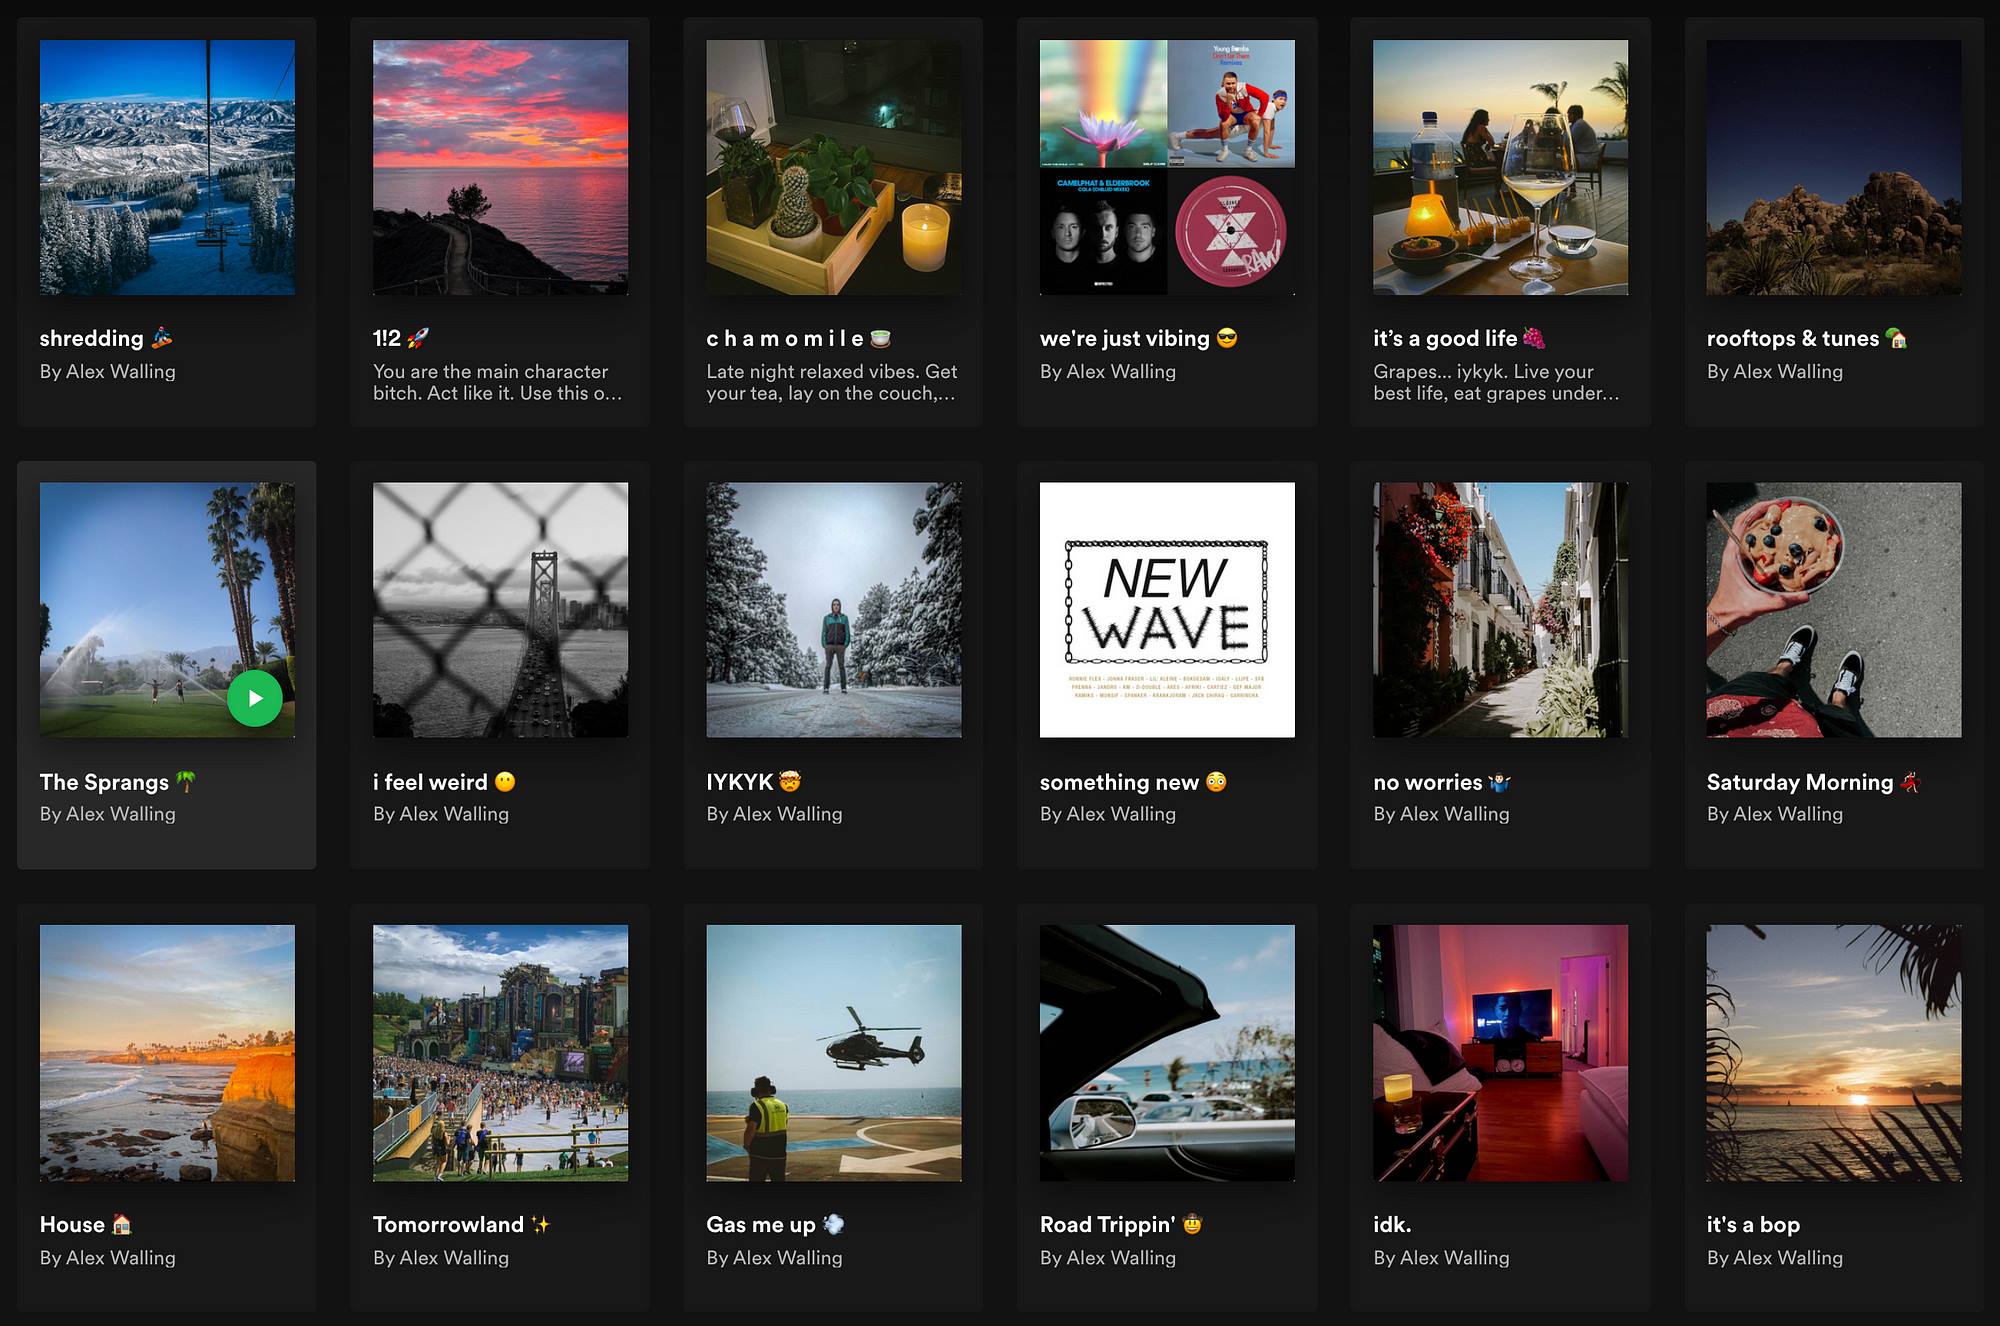
Remember, the playlist’s name and cover image play a significant role in attracting collaborators, so make sure to choose them wisely. A captivating name and eye-catching cover image will entice others to join in and contribute to the playlist.
Step 2: Adding Songs to the Collaborative Playlist
Now that you have your collaborative playlist, it’s time to add some incredible songs to it. Here’s how you can do it:
- Navigate to the playlist you created previously by selecting it from the “Your Library” tab.
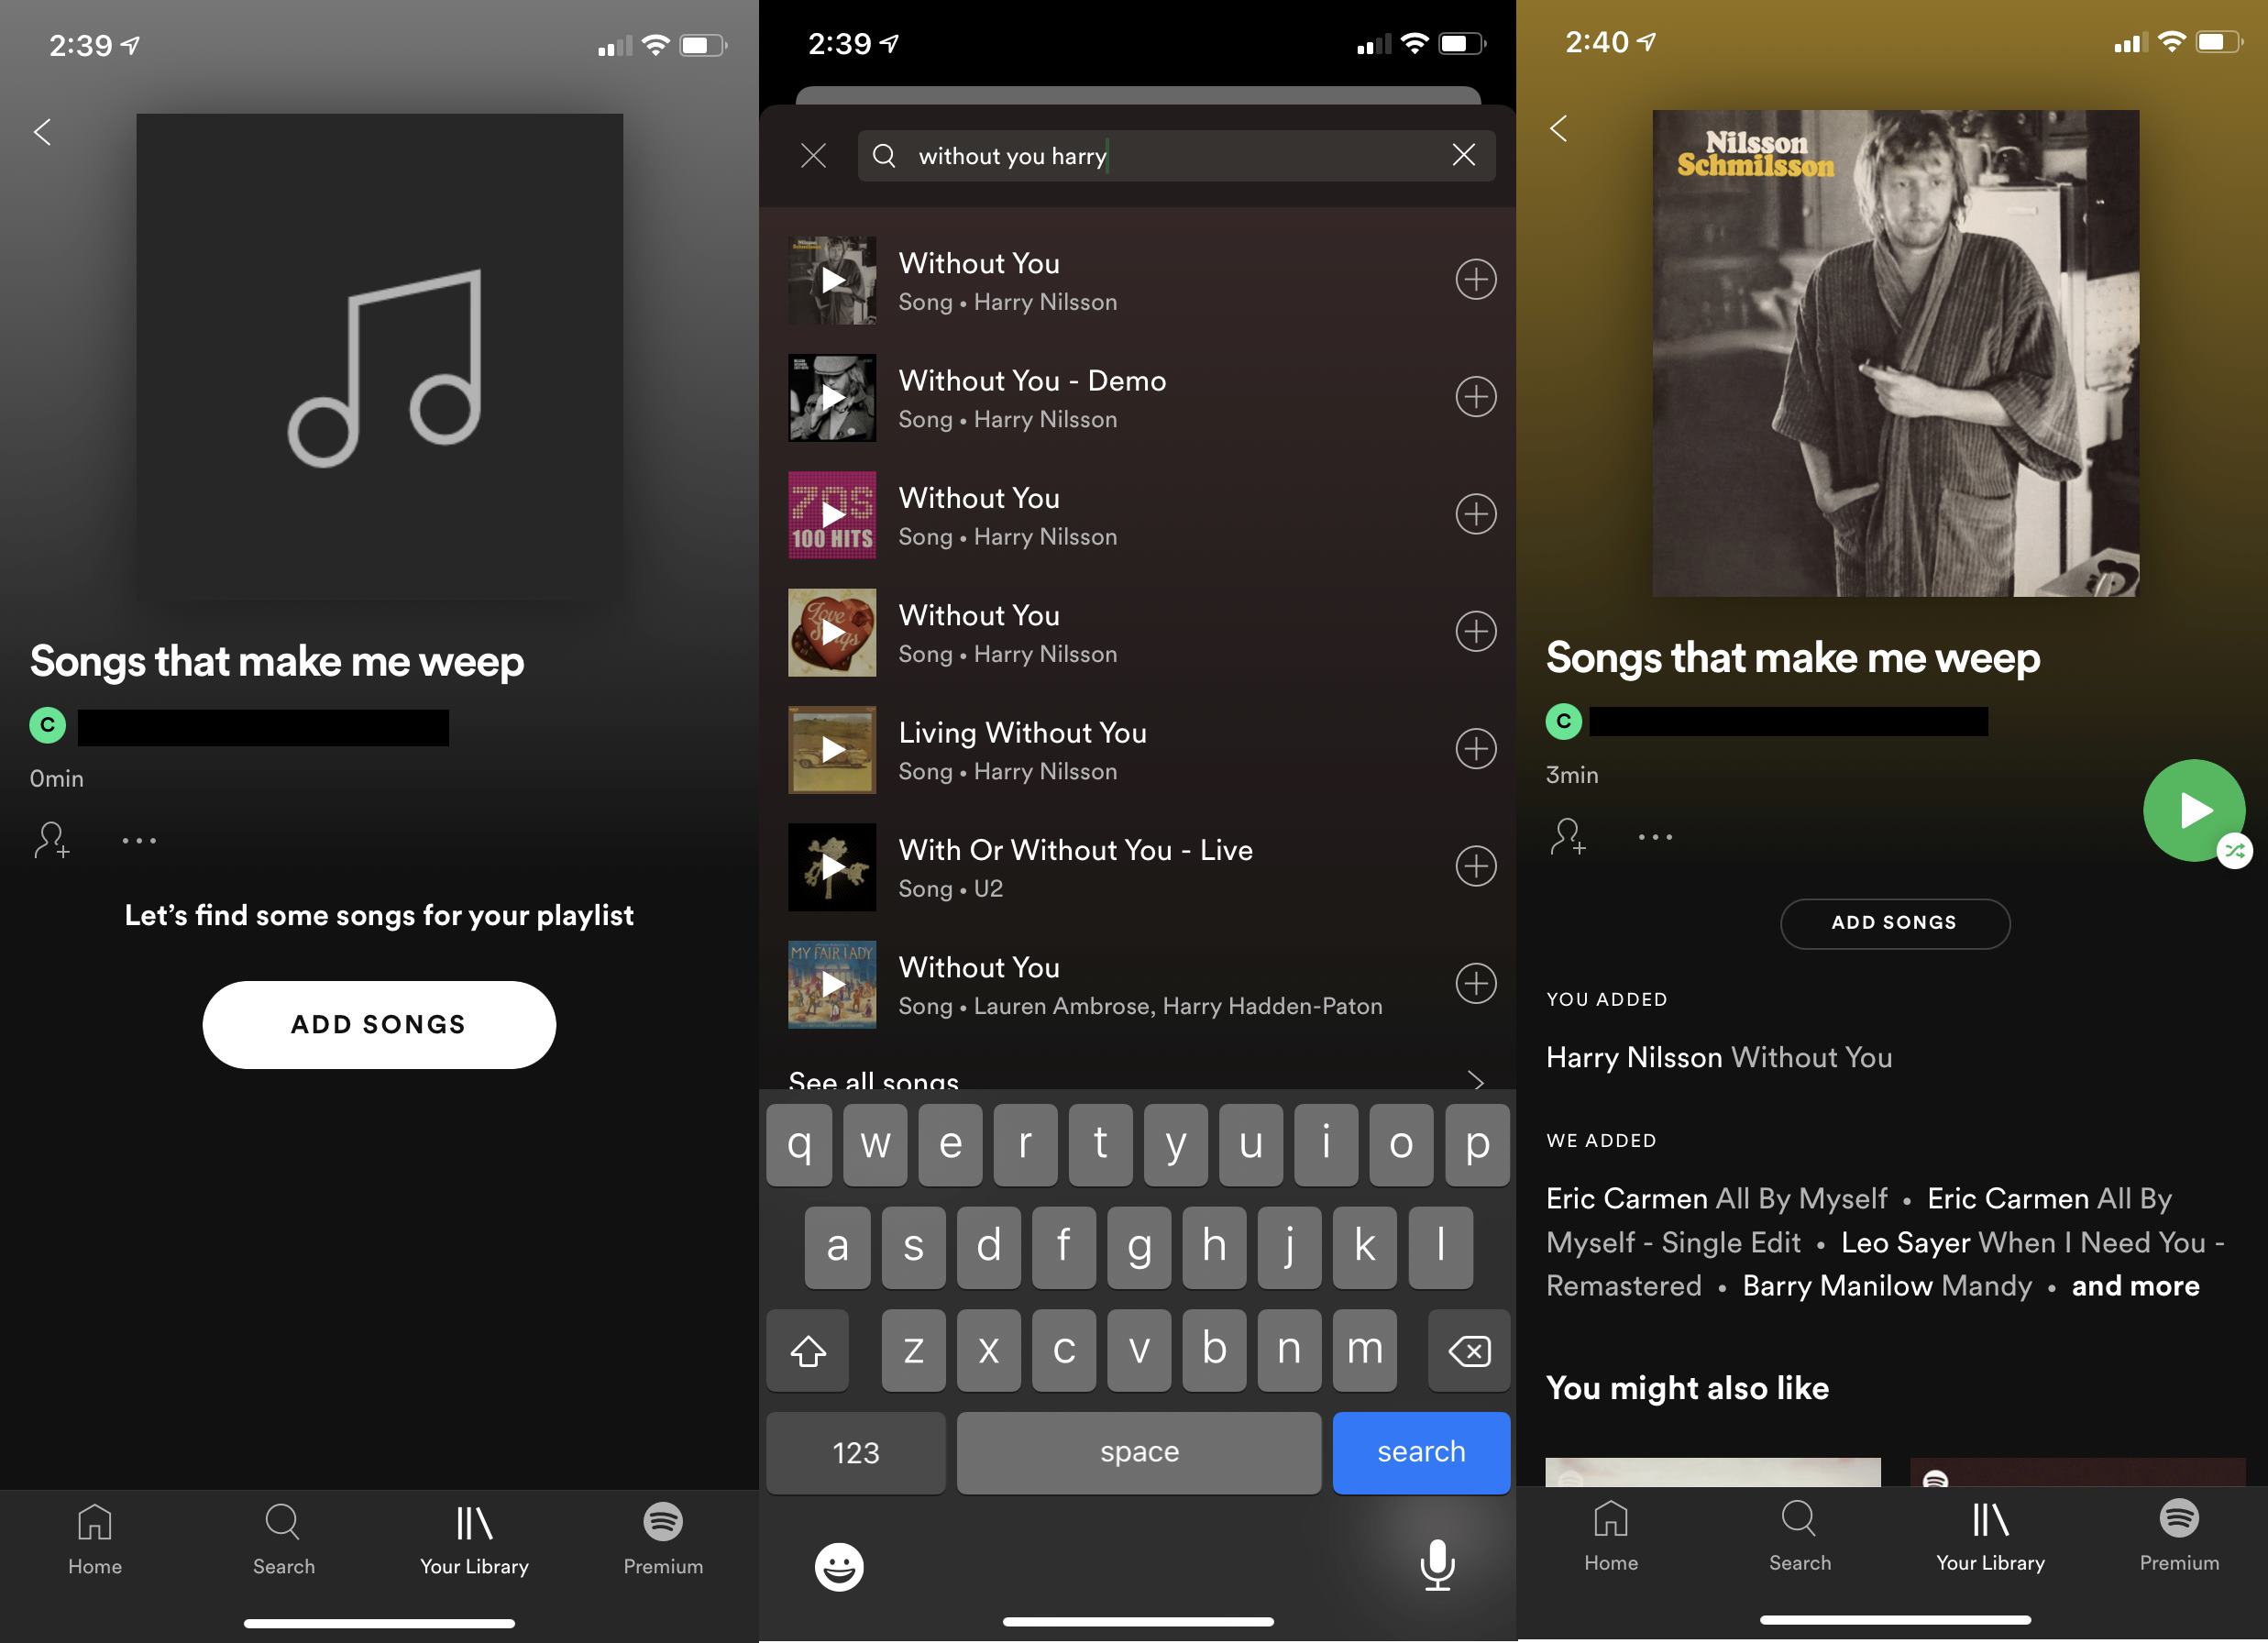
- Once you’re on the playlist page, you can start adding songs by searching for them in the Spotify search bar. You can search for specific songs, artists, albums, or even genres.
- When you find a song you want to add, simply click on the “Add” button next to it, and it will be instantly added to your collaborative playlist.
- You can continue searching and adding songs one by one, or you can save time by adding entire albums or curated playlists to your collaborative playlist.
- If you have already created playlists in your Spotify library, you can also add songs from those existing playlists to your collaborative playlist. Just click on the three dots (…) next to the respective playlist and select “Add to Playlist.”
By adding a diverse range of songs to your collaborative playlist, you create a rich and engaging musical experience for everyone involved. Encourage collaborators to add their favorite tracks and explore different genres, allowing the playlist to evolve and grow over time.
Remember, the success of a collaborative playlist lies in its variety and inclusivity. So, be open to different music tastes and let the playlist become a melting pot of musical discovery.
Step 3: Inviting Others to Contribute
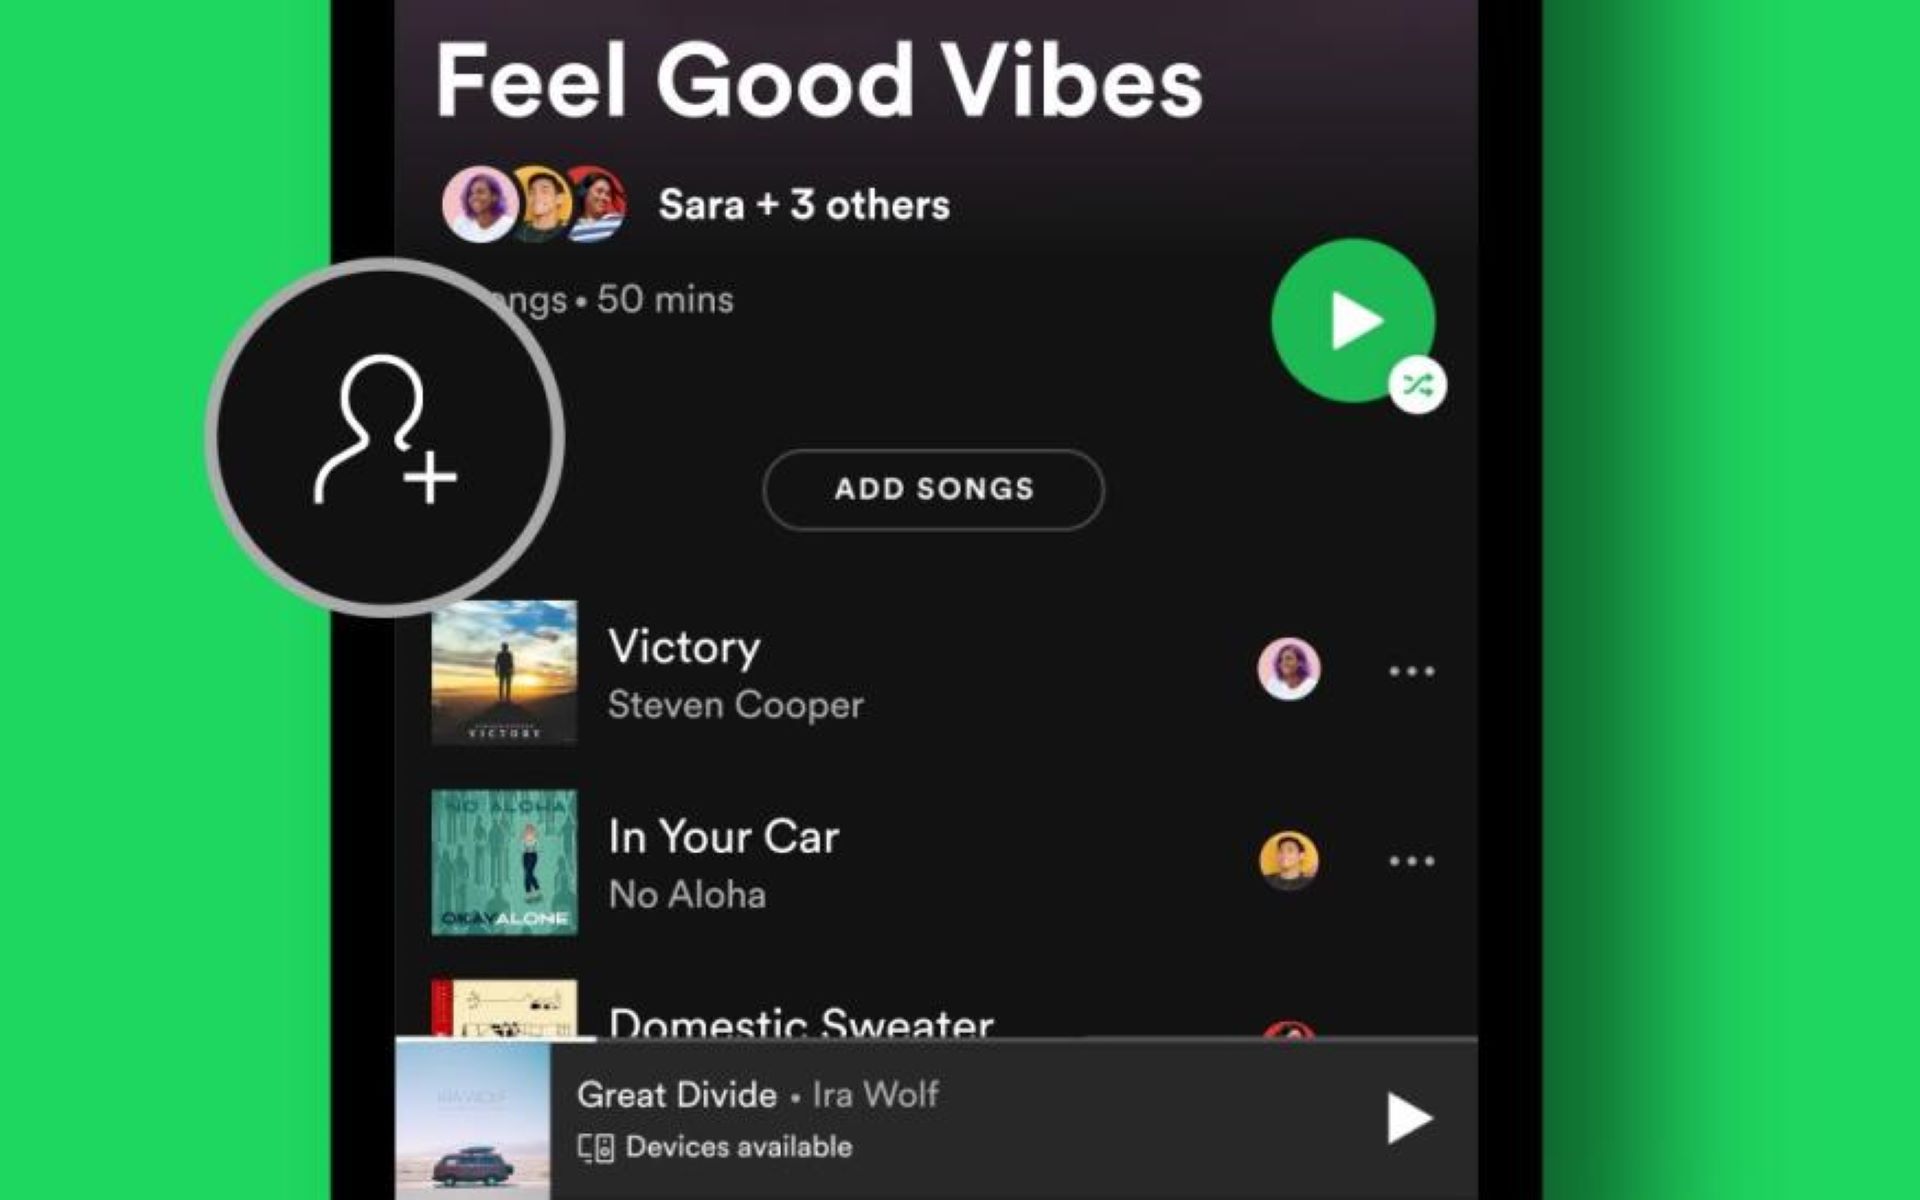
One of the exciting aspects of a collaborative playlist is the ability to invite others to contribute and add their favorite songs. Here are the steps to invite others to your collaborative playlist:
- Go to the collaborative playlist page on Spotify by selecting it from the “Your Library” tab.
- Below the playlist’s cover image, you will see an option that says “Share.” Click on it.
- A pop-up menu will appear with various sharing options. You can choose to share the playlist via social media, messaging apps, or even generate a unique playlist link to share with friends directly.
- Select the sharing method of your choice and follow the prompts to send the invitation to others.
When inviting others to contribute, it’s essential to communicate the purpose and guidelines of the playlist. Let them know what kind of songs they can add and any specific themes or genres you would like to include.
Additionally, you can leverage social media platforms, music forums, or online communities to reach out to others who share similar music interests. By spreading the word about your collaborative playlist, you can attract music enthusiasts from around the world and create a truly global musical experience.
Remember, the more individuals you invite, the more diverse and exciting the playlist will become. Embrace the opportunity to connect with others through music and watch your playlist flourish with contributions from different corners of the world.
Step 4: Managing Collaborators
As your collaborative playlist gains popularity and more people join in, it’s important to manage the contributors to ensure the playlist maintains its quality and integrity. Here are some tips on effectively managing collaborators:
- Regularly review the songs added by collaborators. Take the time to listen to each song and make sure it aligns with the theme or guidelines of the playlist. If you come across a song that doesn’t fit, you can remove it from the playlist.
- Encourage active participation by reaching out to collaborators and asking for their input. Engage in conversations about the playlist, share your thoughts on the songs added, and create a sense of community around the collaborative playlist.
- If you come across any inappropriate or offensive content added by a collaborator, it’s important to address the issue promptly. Remove the content from the playlist and, if necessary, consider removing the collaborator from the playlist as well.
- Keep an eye out for duplicates. With multiple people contributing, there might be instances where the same song is added more than once. It’s a good practice to remove duplicates to maintain a streamlined and diverse playlist.
- Occasionally update the playlist’s description or guidelines to provide clarifications and ensure everyone is on the same page. This will help collaborators understand what kind of songs are encouraged to be added.
By actively managing and engaging with collaborators, you can foster a positive and vibrant community around your collaborative playlist. Remember, communication is key in maintaining the quality and cohesiveness of the playlist.
Be open to feedback and suggestions from collaborators. Embrace their diverse musical tastes and perspectives, and let the collaborative playlist evolve and reflect the collective creativity of its contributors.
Step 5: Removing Songs from the Collaborative Playlist
As the curator of a collaborative playlist, you have the power to maintain the quality and coherence of the playlist by removing songs that may not fit the theme or guidelines. Here’s how you can remove songs from your collaborative playlist:
- Access the collaborative playlist by selecting it from the “Your Library” tab on Spotify.
- Navigate to the song you wish to remove from the playlist.
- Click on the three dots (…) located on the right side of the song’s title.
- From the drop-down menu, select the “Remove from this Playlist” option.
By removing songs that don’t align with the playlist’s purpose, you maintain the overall quality and coherence of the musical collection. However, it’s important to exercise caution and fairness when removing songs. Make sure to consider different perspectives and consult with collaborators before making any drastic changes to the playlist.
Removing songs can be a subjective decision, so it’s crucial to communicate your reasons to the collaborators. Explain why you are removing a particular song and provide guidance on what kind of songs are encouraged to be added to the playlist.
Remember, the collaborative playlist is a product of collective creativity, and maintaining an open line of communication with the contributors helps in fostering a positive and collaborative environment.
By regularly reviewing and removing songs that don’t fit the playlist’s theme or guidelines, you ensure that the playlist remains a wonderful collection of handpicked tracks that everyone can enjoy.
Conclusion
Creating and curating a collaborative playlist on Spotify is an exciting way to connect with others and explore new music. By following the steps outlined in this guide, you can create a playlist that becomes a collaborative masterpiece, reflecting the diverse musical tastes of contributors from all around the world.
From creating the playlist and adding songs to inviting others to contribute and managing collaborators, each step plays a crucial role in crafting a dynamic and engaging playlist. Remember to communicate the purpose and guidelines of the playlist to collaborators, and actively engage with them to maintain the playlist’s quality and cohesiveness.
With a well-managed collaborative playlist, you’ll be able to enjoy a curated collection of songs that span various genres and styles. It’s a truly unique and immersive musical experience that allows for discovery and sharing among a community of music enthusiasts.
So, go ahead and start creating your own collaborative playlist on Spotify. Invite your friends, family, or even strangers who share your love for music. Embrace different perspectives, explore new genres, and unleash the power of collaboration in building a playlist that resonates with everyone involved.
Let the music bring people together and create a harmonious collection of songs that will leave a lasting impact on all who listen. Happy playlist curation!


