Introduction
Welcome to this helpful guide on how to add Grammarly on Word! If you are looking to enhance your writing skills, improve your grammar, and make your documents error-free, Grammarly is the perfect tool for you. Grammarly is a widely popular writing assistant that can help you write with confidence and clarity. By integrating Grammarly with Microsoft Word, you can easily access its powerful features directly within the Word application.
Whether you are a student, professional, or anyone who wants to level up their writing game, Grammarly ensures that your written content is free from grammatical errors, punctuation mistakes, and spelling errors. It also provides suggestions to enhance sentence structure, vocabulary usage, and overall readability.
In this step-by-step guide, we will walk you through the process of installing Grammarly for Word and enable its add-in to boost your writing productivity. We will also explore how to access Grammarly in Word and make use of its writing suggestions. Additionally, we’ll cover how to customize Grammarly’s settings in Word according to your preferences.
So, let’s jump right in and learn how to integrate the power of Grammarly into your Microsoft Word documents!
Step 1: Install Grammarly for Word
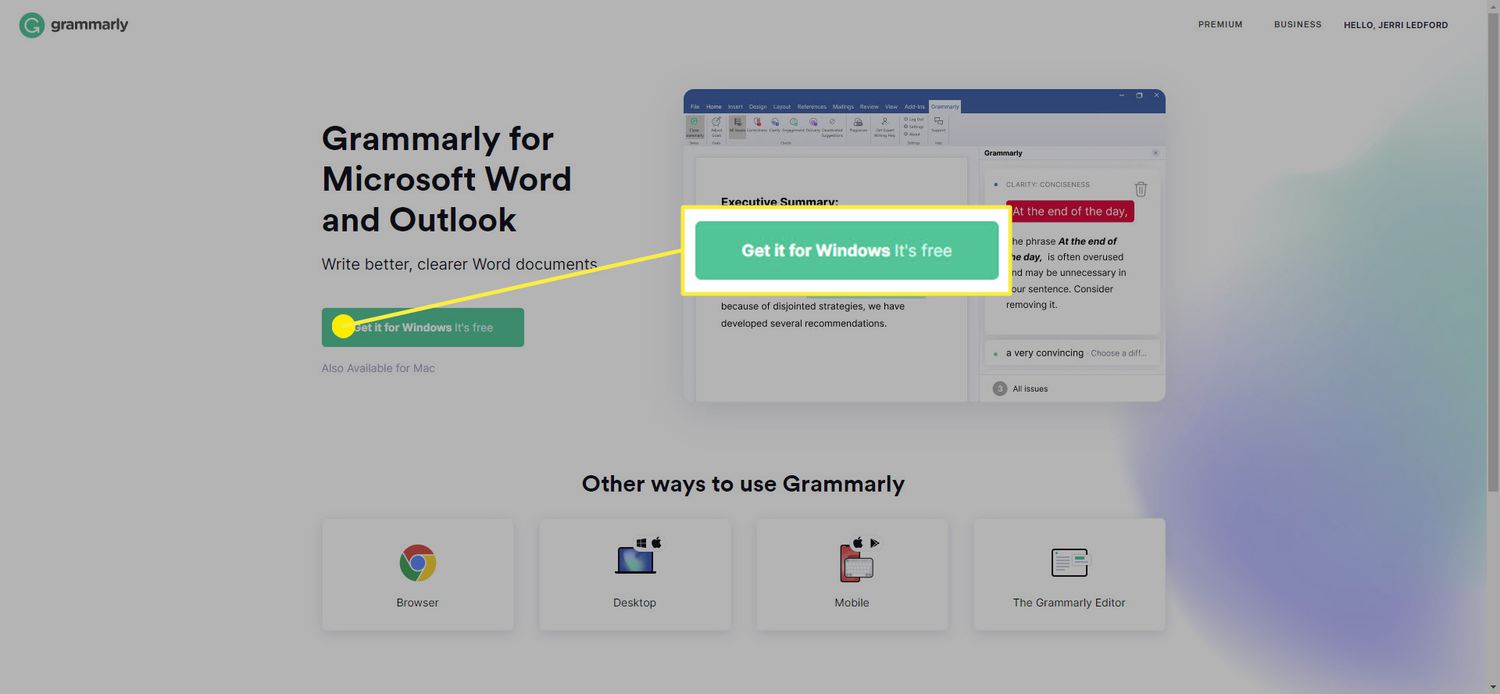
The first step towards adding Grammarly to Word is to install the Grammarly for Word application. Follow these simple instructions to get started:
- Visit the official Grammarly website at www.grammarly.com.
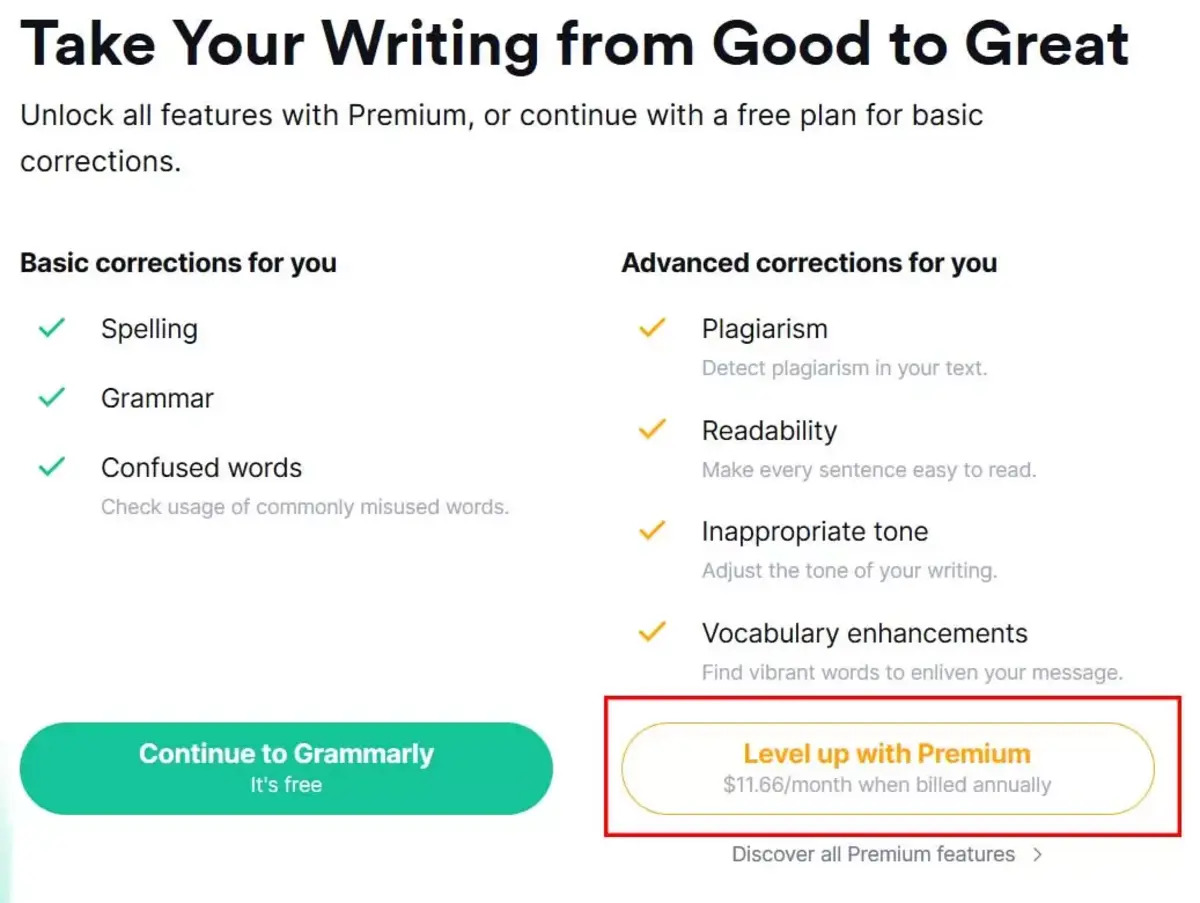
- Create a free Grammarly account if you don’t have one already. You can also choose to upgrade to a premium account for advanced features.
- Once you have signed up or logged in, navigate to the “Apps” section on the Grammarly website.
- Locate the “Grammarly for Microsoft Office” option and click on the “Install” button next to it.
- Follow the on-screen prompts to download the Grammarly for Word setup file.
- Once the download is complete, open the setup file and run the installation process.
- During the installation, you may be prompted to select the Microsoft Office applications you want to integrate Grammarly with. Ensure that Microsoft Word is selected.
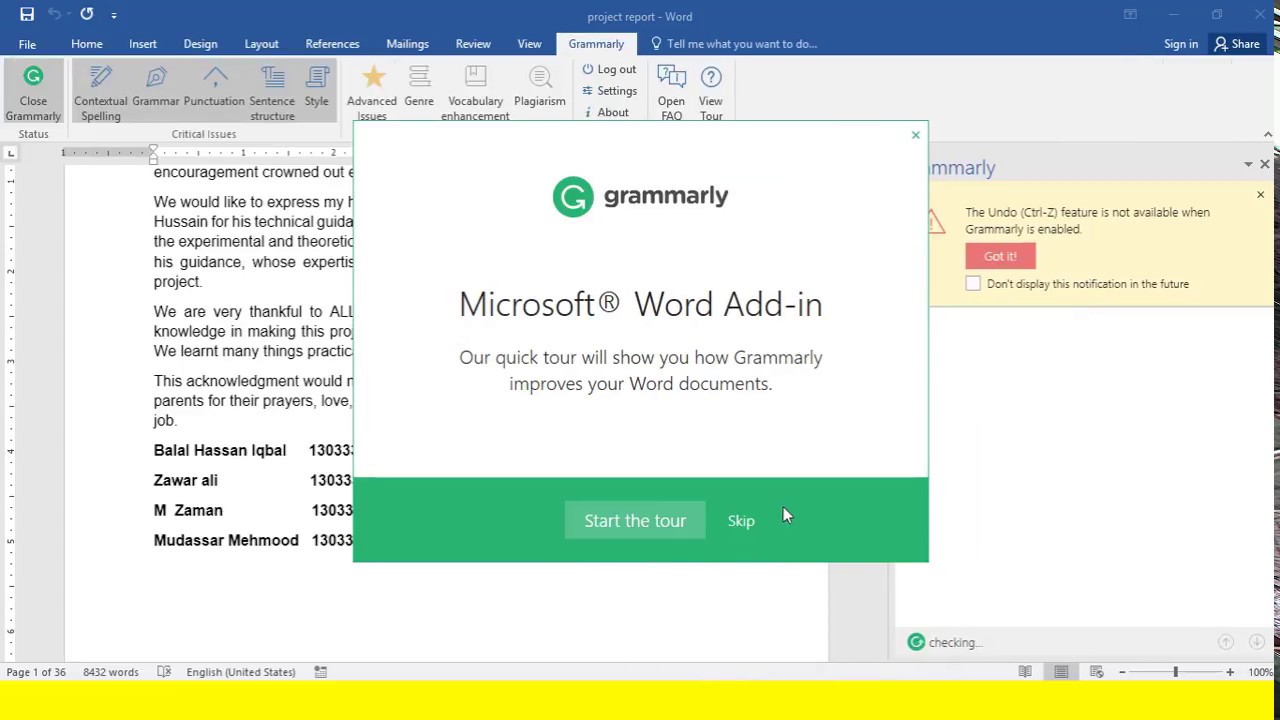
- Once the installation is complete, launch Microsoft Word.
Congratulations! You have successfully installed Grammarly for Word on your computer. Now let’s move on to the next step and enable the Grammarly add-in in Word.
Step 2: Enable Grammarly Add-in in Word
Now that you have installed Grammarly for Word, the next step is to enable the Grammarly add-in within Microsoft Word. Follow these instructions to enable the add-in:
- Open Microsoft Word on your computer.
- Click on the “File” tab in the top left corner of the Word window.
- Select “Options” from the drop-down menu.
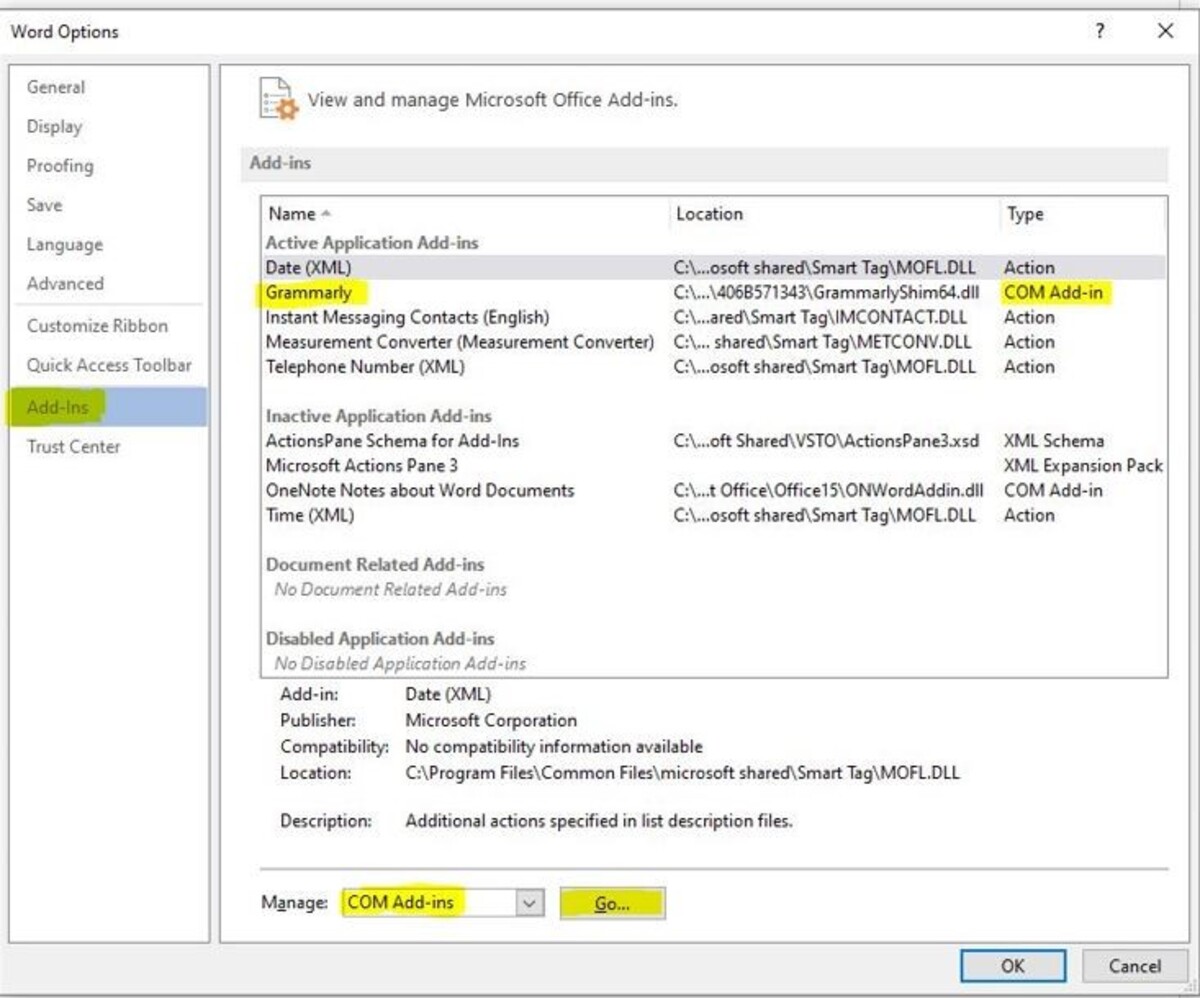
- In the Word Options window, click on the “Add-Ins” tab.
- Under the “Manage” drop-down menu, select “COM Add-ins” and click on the “Go” button.
- In the COM Add-Ins window, check the box next to “Grammarly for Microsoft Office” and click on the “OK” button.
- The Grammarly add-in is now enabled in Word.
- You will find the Grammarly toolbar or ribbon at the top of the Word window, depending on your version of Word.
- If you don’t see the Grammarly toolbar or ribbon, try restarting Word or your computer.
That’s it! You have successfully enabled the Grammarly add-in in Microsoft Word. Now you can access Grammarly’s powerful writing assistance features right within Word. Let’s move on to the next step and learn how to access Grammarly in Word.
Step 3: Access Grammarly in Word
Now that you have enabled the Grammarly add-in in Word, let’s explore how to access and use Grammarly’s writing assistance features within the application:
- Open Microsoft Word on your computer.
- Create a new document or open an existing one.
- The Grammarly toolbar or ribbon should be visible at the top of the Word window.
- Start typing or editing your document.
- Grammarly will automatically start analyzing your text for grammar, spelling, and punctuation errors.
- If Grammarly detects any issues, you will see underlined suggestions or corrections in your document.
- To view the specific writing suggestions, click on the underlined text.
- A popover will appear with Grammarly’s suggested corrections or enhancements.
- You can choose to accept or ignore the suggestion by clicking the corresponding button in the popover.
- In addition to basic grammar checks, Grammarly also provides advanced suggestions for clarity, engagement, and delivery.
- Pay attention to the explanation and reasoning behind each suggestion to improve your writing skills.
With Grammarly integrated into Word, you can catch and correct errors in real-time, eliminating the need for manual proofreading. It’s like having a personal writing coach right at your fingertips!
Now that you know how to access Grammarly in Word, let’s move on to the next step and learn how to make the best use of Grammarly’s writing suggestions.
Step 4: Use Grammarly Writing Suggestions
Grammarly provides valuable writing suggestions to help you improve the quality and clarity of your writing. Here’s how you can make the best use of Grammarly’s writing suggestions in Microsoft Word:
- As you type, Grammarly will underline errors and provide suggestions in real-time.
- Click on the underlined text to view the suggested correction or enhancement.
- Read the suggestion carefully and evaluate its relevance to your writing.
- If the suggestion makes sense, click on the suggestion to apply it to your text.
- If you disagree with the suggestion, you can choose to ignore it or tweak your text accordingly.
- Grammarly also offers explanations for the detected issues and suggestions. Take the time to understand and learn from these explanations to strengthen your writing skills.
- Take advantage of Grammarly’s additional writing insights, such as sentence structure, clarity, engagement, and delivery.
- Review the overall performance score provided by Grammarly, which reflects the quality of your writing. Aim for a higher score to improve your writing skills and produce better content.
- Make sure to save your document regularly to retain any changes made by Grammarly.
- Continue writing and editing your document with Grammarly’s assistance until you are satisfied with the final result.
By following Grammarly’s writing suggestions, you can enhance the clarity, correctness, and effectiveness of your writing. It’s like having an expert editor guiding you through the writing process!
Now that you are familiar with using Grammarly’s writing suggestions in Word, let’s move on to the final step and explore how to customize Grammarly’s settings according to your preferences.
Step 5: Customize Grammarly Settings in Word
Grammarly offers various customization options to tailor its writing assistance to your specific needs. Take the following steps to customize Grammarly’s settings in Microsoft Word:
- Open Microsoft Word and ensure that the Grammarly add-in is enabled and visible in the toolbar or ribbon.
- Click on the Grammarly icon in the toolbar or ribbon to open the Grammarly sidebar.
- In the Grammarly sidebar, click on the gear icon to access the settings.
- Review the available customization options, such as writing goals, tone detector, audience, and formality.
- Adjust the settings according to your preferences and the type of document you are working on.
- You can choose to set specific goals, select target audiences, and adjust the overall tone and formality of your writing.
- Take some time to explore the other available settings to further personalize your Grammarly experience.
- Once you have made the desired changes, close the Grammarly settings sidebar.
- Your custom settings will be saved and applied to future documents in Microsoft Word.
By customizing Grammarly’s settings, you can optimize its writing suggestions to align with your writing style, target audience, and specific document requirements. This level of customization ensures that Grammarly’s assistance is tailored to your unique needs.
Congratulations! You have successfully learned how to customize Grammarly’s settings in Microsoft Word. Now you can write with greater confidence and produce polished and error-free documents.
Now that you’ve completed all the necessary steps to add Grammarly to Word and customize its settings, you’re ready to take your writing to the next level. Enjoy the benefits of Grammarly’s powerful writing assistance as you create professional and engaging content!
Conclusion
Congratulations! You have successfully learned how to add Grammarly to Word and integrate its powerful writing assistance features into your Microsoft Word documents. With Grammarly, you can enhance your writing skills, improve grammar and punctuation, and produce error-free and polished content.
In this guide, we covered the step-by-step process of installing Grammarly for Word, enabling the Grammarly add-in, accessing Grammarly within Word, utilizing Grammarly’s writing suggestions, and customizing Grammarly’s settings to suit your preferences. By following these steps, you can optimize your writing workflow and create high-quality documents with ease.
Grammarly’s real-time feedback and advanced writing insights make it an invaluable tool for students, professionals, and writers of all kinds. The ability to catch and correct errors as you type saves time and ensures that your content is clear, concise, and professional.
Remember to regularly save your documents to retain any changes made by Grammarly and to review Grammarly’s performance score to track your writing improvement over time.
So, go ahead and add Grammarly to your Microsoft Word and unlock the potential to enhance your writing skills. Start writing with confidence, clarity, and precision today!