Introduction
Adding a second monitor to an All-In-One PC can greatly enhance your productivity, whether you’re working on complex projects, multitasking, or even just enjoying a more immersive gaming experience. All-In-One PCs are known for their sleek design and space-saving qualities, but with the addition of a second monitor, you can expand your screen real estate and have more flexibility in organizing your work or entertainment setup.
An All-In-One PC, as the name suggests, combines the power of a desktop computer and the convenience of a monitor in one compact unit. Unlike traditional desktop computers, where the monitor and the processing unit are separate entities, All-In-One PCs integrate these components into a single sleek unit, reducing clutter and saving valuable desk space.
There are several reasons why you might want to add a second monitor to your All-In-One PC. Firstly, it allows you to have a dual-screen setup, which can significantly increase your productivity. You can have multiple applications or windows open simultaneously, making it easier to switch between tasks and compare information side by side.
Additionally, a second monitor can provide a more immersive entertainment experience. Whether you’re watching movies, playing games, or editing videos, having a larger display area can enhance the visual quality and allow for a more comfortable viewing experience. It also enables you to have other content, like chats or music playlists, open on one screen while you focus on your main task on the other.
Before you begin the process of adding a second monitor to your All-In-One PC, it’s essential to check its compatibility. Some All-In-One PCs may not have the necessary ports or graphics card support to connect an additional monitor. It’s important to ensure that your All-In-One PC can accommodate a second monitor before investing in the necessary tools and cables.
In this guide, we’ll walk you through the process of adding a second monitor to an All-In-One PC, from checking compatibility to adjusting display settings. So let’s get started and expand the possibilities of your All-In-One PC with a second monitor!
What is an All-In-One PC?
An All-In-One PC is a computer that combines the monitor and the processing unit into a single integrated unit. Unlike traditional desktop computers, which require a separate tower or CPU unit, the All-In-One PC streamlines the design by housing all the components behind the screen, resulting in a sleek and space-saving device.
The All-In-One PC typically features a flat-panel display, similar to what you would find on a traditional monitor. However, the main difference is that the All-In-One PC has the computer’s hardware components, such as the motherboard, processor, memory, and storage, integrated behind the screen. This integration eliminates the need for multiple cables and takes up less desk space, making it a popular choice for those who want a clean and minimalist setup.
In addition to the compact design, All-In-One PCs often come with a range of features, including built-in speakers, webcams, and microphones. Some models even include touch-screen functionality, allowing users to interact with the computer through gestures and taps directly on the display.
All-In-One PCs are available in various screen sizes, ranging from 21 inches to 34 inches or larger, offering plenty of options to suit different needs and preferences. They also come with different specifications, such as different processors, RAM capacities, and storage options, allowing users to choose a configuration that meets their specific requirements.
One of the key advantages of an All-In-One PC is its simplicity and ease of use. Since all the components are integrated into a single unit, setting up an All-In-One PC is relatively straightforward. Users don’t have to worry about connecting separate components or dealing with a tangle of cables, simplifying the overall user experience.
While All-In-One PCs are often praised for their space-saving design and aesthetics, it’s important to note that they may have limitations in terms of upgradability compared to traditional desktop computers. Due to the integrated nature of the components, upgrading certain hardware components, such as the graphics card or processor, may be more challenging or even impossible in some models. However, for many users who prioritize simplicity and a clean workspace, the All-In-One PC offers an excellent balance between performance and design.
Why would you want to add a second monitor?
Adding a second monitor to your All-In-One PC can provide numerous benefits and significantly enhance your computing experience. Here are a few compelling reasons why you might want to consider adding a second monitor:
- Increased productivity: With a second monitor, you can expand your screen real estate, giving you more room to work with. This means you can have multiple applications or windows open side by side, making multitasking easier and more efficient. You can reference information from one screen while working on another, minimizing the need to constantly switch between tabs or windows.
- Better organization: A second monitor allows you to arrange your workspaces in a more organized manner. You can dedicate one screen for your primary work area, while the other screen can be used for reference materials, communication tools, or additional applications. This helps reduce clutter and improves workflow.
- Enhanced multitasking: Adding a second monitor enables you to multitask more effectively. For example, you can have your email client or chat application open on one screen while working on a project on the other. This allows you to stay connected and responsive without interrupting your main focus on the primary screen.
- Improved content creation and editing: If you’re involved in content creation, such as video editing, graphic design, or coding, a second monitor can greatly enhance your workflow. You can have the editing software or coding environment on one screen, while using the other screen to preview the content or reference additional resources. This makes it easier to make real-time adjustments and improves accuracy.
- Enhanced gaming and entertainment experience: For gamers and multimedia enthusiasts, a second monitor provides a more immersive experience. You can have the game or movie on the primary screen, while using the second screen for other tasks, such as monitoring chat messages, browsing the web, or viewing guides. This adds convenience and enhances your overall enjoyment.
Adding a second monitor to your All-In-One PC offers increased flexibility, improved organization, and enhanced multitasking capabilities. Whether you’re a professional, a student, or simply someone who wants to optimize their computer usage, a dual-monitor setup can be a game-changer.
Check your All-In-One PC’s Compatibility
Before adding a second monitor to your All-In-One PC, it’s important to ensure that your device is compatible with this setup. Here are some steps you can take to check the compatibility:
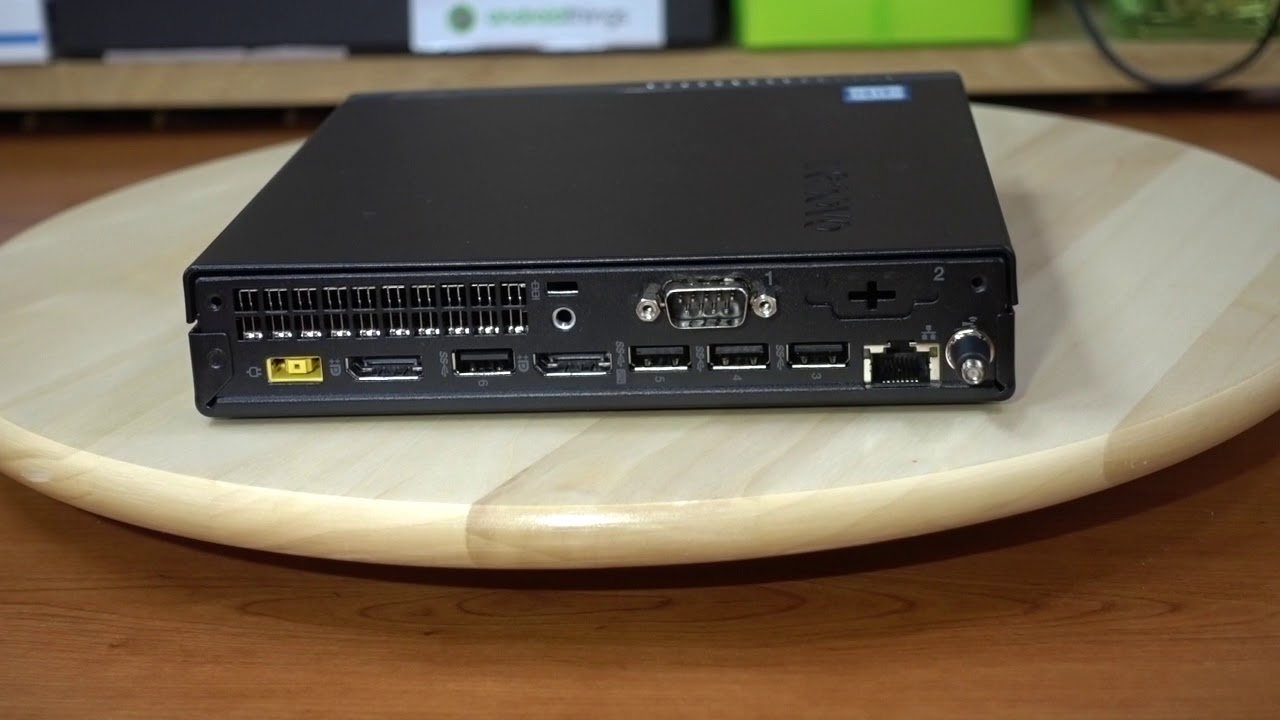
- Check the available ports: Take a look at the back or side of your All-In-One PC and identify the available ports. Most All-In-One PCs come with HDMI, DisplayPort, or VGA ports, which are commonly used to connect external displays. Ensure that the ports on your All-In-One PC match the ports on the second monitor you plan to connect.
- Check the graphics card: The graphics card in your All-In-One PC plays a crucial role in driving multiple displays. Verify whether your graphics card supports a dual-monitor setup. You can do this by checking the specifications of your All-In-One PC model on the manufacturer’s website or consulting the user manual.
- Check the operating system compatibility: Ensure that your operating system supports multiple displays. Most modern operating systems, such as Windows and macOS, allow for dual-monitor setups. However, it’s always a good idea to double-check the system requirements and compatibility for your specific operating system version.
- Consider the available desk space: Adding a second monitor to your All-In-One PC will require additional desk space. Make sure you have enough room to accommodate the second monitor comfortably without it obstructing your primary workspace or causing discomfort. Consider the dimensions of the second monitor and plan your desk setup accordingly.
If your All-In-One PC meets the requirements and has the necessary ports and graphics card support, then it is compatible with a second monitor. However, if your All-In-One PC lacks the required ports or does not have the graphics card capabilities for a dual-monitor setup, you may need to explore alternative solutions, such as using USB adapters or docking stations to connect additional displays.
It’s essential to check the compatibility and ensure your All-In-One PC can support a second monitor before proceeding with the setup. This will help avoid any unnecessary expenses or frustration during the installation process. Once you’ve determined the compatibility, you can move on to gathering the necessary tools and cables to connect the second monitor to your All-In-One PC.
Gather the necessary tools and cables
Before you can connect a second monitor to your All-In-One PC, it’s essential to gather the necessary tools and cables. Here’s a list of items you will need:
- Second monitor: Choose a monitor that suits your needs and preferences. Consider factors such as screen size, resolution, and connectivity options. Ensure that the monitor has ports compatible with the available ports on your All-In-One PC.
- Video cables: Depending on the available ports on your All-In-One PC and the second monitor, you will need the appropriate video cables to connect the two devices. Common cables include HDMI, DisplayPort, and VGA cables. Check the ports on both the All-In-One PC and the second monitor to determine which cables you need.
- Power cables and adapters: Make sure you have the necessary power cables for both your All-In-One PC and the second monitor. Some monitors may require an external power adapter, so be sure to check the monitor’s specifications and have the appropriate adapter if needed.
- If needed, USB adapters or docking stations: If your All-In-One PC lacks the necessary ports for connecting the second monitor, you may require USB adapters or docking stations. These devices allow you to connect additional displays via USB ports on your All-In-One PC. Research and purchase the appropriate adapters or docking stations based on your specific needs.
- Screwdriver (if necessary): Depending on the monitor’s stand or mounting mechanism, you might need a screwdriver to attach the stand or mount the monitor. Check the monitor’s packaging and instructions to determine if a screwdriver is needed.
Ensure that you have all the necessary tools and cables before proceeding with the setup. It’s better to check ahead of time to avoid any delays or interruptions during the installation process. Once you’ve gathered everything you need, you’re ready to connect the second monitor to your All-In-One PC.
Connect the second monitor to your All-In-One PC
Once you have gathered all the necessary tools and cables, it’s time to connect the second monitor to your All-In-One PC. Follow these steps to ensure a successful setup:
- Position the second monitor: Decide where you want to place the second monitor in relation to your All-In-One PC. Ensure that it is within reach of the video and power cables.
- Power off your All-In-One PC and second monitor: Before connecting any cables, it is important to power off both your All-In-One PC and the second monitor to avoid any electrical issues.
- Plug in the video cable: Connect one end of the video cable (HDMI, DisplayPort, or VGA) to the corresponding port on the back or side of your All-In-One PC. Then, connect the other end of the cable to the video input port on the second monitor.
- Plug in the power cables: Connect the power cable to your All-In-One PC and plug it into a power outlet. Similarly, connect the power cable to the second monitor and plug it into another power outlet or use the appropriate power adapter if required.
- Power on your All-In-One PC and second monitor: Turn on your All-In-One PC first and wait for it to fully boot up. Then, power on the second monitor. Both devices should detect each other automatically.
- Adjust display settings: Once the second monitor is connected and powered on, you may need to make some adjustments to the display settings on your All-In-One PC. Depending on your operating system, you can access the display settings by right-clicking on the desktop and selecting “Display Settings” or a similar option. From there, you can arrange the displays, adjust resolutions, and customize other display preferences according to your needs.
It’s important to note that the specific steps and options for connecting a second monitor may vary depending on your All-In-One PC model, operating system, and the second monitor you are using. Therefore, it’s always a good idea to consult the user manual or manufacturer’s instructions for detailed guidance specific to your devices.
Once you’ve successfully connected the second monitor and adjusted the display settings, you can start enjoying the benefits of a dual-monitor setup with your All-In-One PC. Take some time to familiarize yourself with the new setup and explore different ways to maximize your productivity or enhance your entertainment experience.
Adjust display settings
After connecting the second monitor to your All-In-One PC, you may need to make some adjustments to the display settings to optimize the dual-monitor setup. Follow these steps to adjust the display settings:
- Access display settings: Right-click on the desktop of your All-In-One PC and select “Display Settings” or a similar option from the context menu. This will open the display settings window where you can configure the display preferences.
- Identify the displays: In the display settings window, you will see a representation of both the primary display (the All-In-One PC’s screen) and the newly connected second monitor. To differentiate between the displays, they may be labeled as “1” and “2” or identified by their respective names.
- Arrange the displays: Arrange the displays in the order you prefer by clicking and dragging their representations in the display settings window. This allows you to position the screens according to their physical placement in your workspace. You can move the second monitor to the left, right, above, or below the primary display depending on your preference.
- Adjust resolution and orientation: Customize the resolution and orientation settings for each monitor. In the display settings window, you can select the desired resolution from the available options. Adjust the orientation to landscape or portrait mode, depending on how you want the content to be displayed on each screen.
- Set display mode: Choose the display mode that suits your needs. The primary display can be set as the main display, where most of your applications and windows will open by default. You can also set the displays to extend the desktop, allowing you to have different applications and windows open on each screen. Alternatively, you can mirror the displays, which duplicates the content on both screens.
- Adjust additional settings: Explore the advanced display settings options to further customize the dual-monitor setup. This includes adjusting the scaling, color calibration, and other visual settings to ensure a consistent and optimal viewing experience across both monitors.
It’s important to note that the options and features available in the display settings may vary depending on your operating system and graphics card. Refer to the user manual or online resources specific to your All-In-One PC and operating system for detailed instructions and guidance on adjusting display settings.
Take some time to fine-tune the display settings according to your preferences and workflow. Experiment with different arrangements, resolutions, and display modes to find the configuration that works best for you. Adjusting the display settings ensures a seamless and smooth dual-monitor experience on your All-In-One PC.
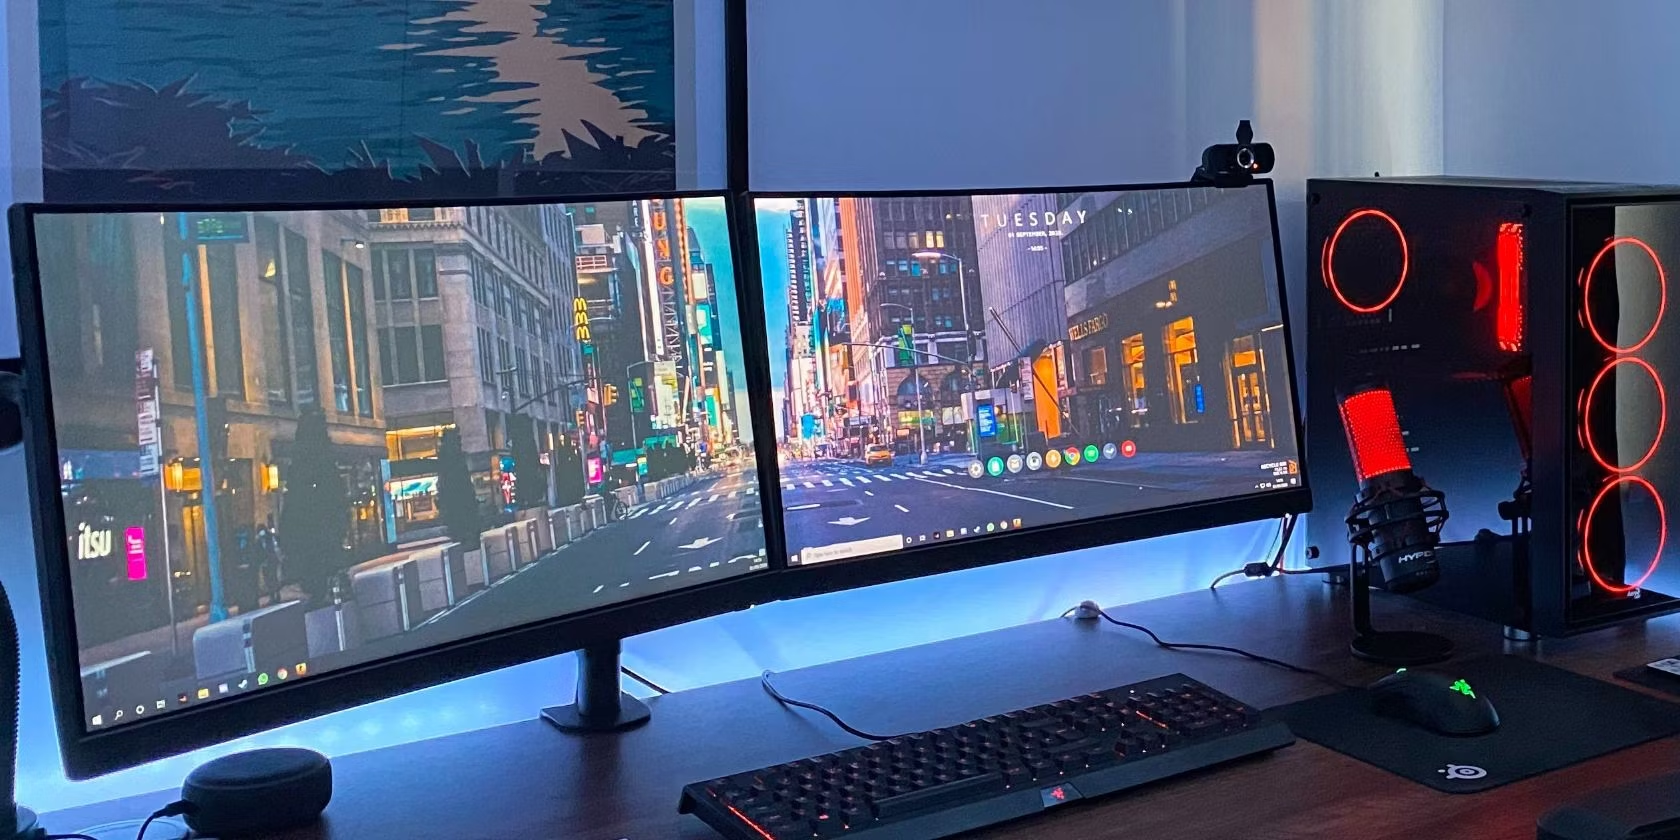
Arrange and customize your dual monitor setup
Now that you have connected and adjusted the display settings for your second monitor, it’s time to arrange and customize your dual monitor setup to suit your needs and preferences. Follow these tips to make the most out of your dual monitor configuration:
- Organize your workspace: Decide how you want to utilize the extended screen real estate. Consider allocating specific tasks to each screen to streamline your workflow. For example, you can designate one monitor for your main work area where you have your primary applications and windows, and reserve the other monitor for reference materials, communication tools, or auxiliary applications.
- Drag and drop between screens: Take advantage of the extended desktop by dragging windows and applications between the two monitors seamlessly. This feature allows you to easily move content from one screen to the other, making multitasking more efficient. For example, you can drag a web browser window with a reference article to the second monitor while keeping your main work area on the primary monitor.
- Maximize productivity: Use the dual monitor setup to enhance your productivity. For example, you can have your email client, calendar, or task management tool visible at all times on one screen, while dedicating the other screen for your primary work. This way, you can stay on top of important updates and notifications without interrupting your workflow.
- Customize window snapping: Take advantage of the window snapping feature in your operating system to easily arrange and resize windows on both screens. This can help you optimize screen real estate, making it easier to organize and view multiple applications simultaneously.
- Personalize background and screensaver: Customize the background wallpaper and screensaver settings separately for each monitor to add a touch of personalization. You can use different images or wallpapers on each screen to suit your preferences or choose a panoramic image that spans both screens for a cohesive look.
- Explore multi-monitor tools and software: Consider installing third-party multi-monitor tools and software that offer additional features and customization options. These tools can enhance your dual monitor experience by providing shortcuts, taskbars, virtual desktops, and other convenient functionalities that make managing multiple screens even more efficient.
Remember that arranging and customizing your dual monitor setup is a personal preference, and you should adjust it according to your workflow and preferences. Experiment with different configurations and settings to find the setup that works best for you.
A well-arranged and customized dual monitor setup can significantly boost productivity, improve multitasking capabilities, and enhance your overall computing experience on your All-In-One PC.
Troubleshooting common issues
While setting up a dual monitor configuration on your All-In-One PC can be a straightforward process, you may encounter some common issues along the way. Here are a few troubleshooting tips to help you address these issues:
- No display on the second monitor: If the second monitor is not displaying anything, ensure that all cables are securely connected. Double-check that the monitor is powered on and that the correct input source is selected on the monitor itself. If the issue persists, try restarting your All-In-One PC.
- Uneven or mismatched resolution: If the resolution on one monitor is different from the other or appears stretched or distorted, adjust the display settings in your operating system. Go to the display settings and ensure that the resolution is set appropriately for each monitor.
- Monitor not detected: If your All-In-One PC is not recognizing the second monitor, try the following steps:
- Check that the cables are properly connected to both the All-In-One PC and the second monitor.
- Verify that the second monitor is powered on and functioning properly.
- Restart your All-In-One PC to refresh the system and detect the monitor.
- Update your graphics card drivers to the latest version. Visit the manufacturer’s website or use a driver update utility to ensure you have the most up-to-date drivers installed.
- Cursor movement issues: If you experience cursor lag or the cursor does not move smoothly between the monitors, try adjusting the mouse settings in your operating system. Increase the pointer speed or adjust the sensitivity to improve cursor movement.
- Inconsistent monitor colors or brightness: If the colors or brightness level differs between the two monitors, you can adjust these settings individually through the monitor’s menu options. Each monitor may have different color profiles and settings, so calibrate them separately to achieve consistent visuals.
- Display alignment issues: In some cases, the displays may not align correctly, resulting in a mismatch between the physical position of the monitors and their representations in the display settings. To fix this, adjust the alignment by dragging the screen representations in the display settings to match the actual physical positioning of the monitors.
If you continue to experience issues with your dual monitor setup on your All-In-One PC, consult the user manual or visit the manufacturer’s support website for further troubleshooting guidance specific to your device.
Remember, patience and persistence are key when troubleshooting. With some troubleshooting steps and adjustments, you should be able to resolve most common issues and enjoy a seamless dual monitor experience on your All-In-One PC.
Conclusion
Adding a second monitor to your All-In-One PC can unlock numerous benefits, from increased productivity and better organization to an enhanced gaming and entertainment experience. By following the steps outlined in this guide, you can easily connect a second monitor to your All-In-One PC and optimize your computing setup.
Start by checking your All-In-One PC’s compatibility and ensuring you have the necessary tools and cables. Double-check that your All-In-One PC has the required ports and graphics card support, and gather the appropriate video cables, power cables, and adapters if needed.
Next, connect the second monitor to your All-In-One PC, making sure to power off both devices before plugging in the cables. Once connected, power on your All-In-One PC and the second monitor, and adjust the display settings to configure the dual-monitor setup to your liking. Take advantage of features like drag and drop, customize backgrounds, and explore multi-monitor tools to further optimize your dual monitor experience.
If you encounter any issues, refer to the troubleshooting section for common solutions. Double-check cable connections, check for power, update drivers, and adjust settings to resolve any display or connectivity problems that may arise.
With a well-planned and customized dual monitor setup, you can improve productivity, multitasking, and overall efficiency. Utilize the extended screen real estate to organize your workspace, drag and drop content between screens, and personalize your display settings to suit your unique needs.
Remember, the key to maximizing your dual monitor setup is to experiment, personalize, and find the configuration that works best for you. Enjoy the expanded possibilities and enhanced computing experience that a second monitor can bring to your All-In-One PC!