Introduction
Welcome to this comprehensive guide on how to check the RAM (Random Access Memory) on your Mac. RAM is a critical component of your computer that plays a crucial role in its overall performance. Whether you’re a casual user or a heavy multitasker, understanding your Mac’s RAM can help you identify any potential bottlenecks and determine if an upgrade is necessary.
RAM acts as a temporary storage area for data that your Mac needs to access quickly. It allows your computer to run multiple programs simultaneously, ensuring smooth and efficient performance. The more RAM your Mac has, the more it can handle without slowing down or freezing.
Knowing how much RAM is currently installed on your Mac can be useful in several scenarios. It can help you determine if your computer meets the minimum requirements for resource-intensive applications or if additional memory is needed to improve performance. Additionally, checking your Mac’s RAM can be beneficial when troubleshooting issues or optimizing your system.
In this guide, we will explore various methods to check the RAM on your Mac. We will also discuss how to interpret the RAM information and recommend the ideal amount of RAM for different types of tasks. Lastly, we will provide you with step-by-step instructions on upgrading your Mac’s RAM, should you find it necessary.
So, whether you’re a curious user or someone looking to boost their Mac’s performance, let’s dive into the world of RAM and learn how to check and understand the memory capabilities of your Mac.
Why is RAM important for your Mac?
RAM is a crucial component of your Mac’s performance and is essential for smooth and efficient operation. It plays a vital role in enabling your computer to handle multiple tasks simultaneously without slowing down or experiencing performance issues.
Here are a few reasons why RAM is important for your Mac:
- Multi-tasking: When you open multiple applications on your Mac, each program requires memory to run smoothly. RAM allows your computer to allocate sufficient memory to each application, ensuring seamless multitasking.
- Speed and Responsiveness: With more RAM, your Mac can store more data in its memory. This means that frequently used applications and files are readily accessible, resulting in faster load times and overall responsiveness.
- Enhanced Performance: RAM provides a dedicated space for your Mac to temporarily store data that it needs for processing. This allows your computer’s CPU (Central Processing Unit) to quickly retrieve and process information, leading to improved performance in tasks such as video editing, gaming, and running resource-intensive software.
- Virtual Machine Usage: If you use virtual machine software like Parallels or VMware Fusion to run multiple operating systems on your Mac, having sufficient RAM is essential. Each virtual machine requires its own allocated memory, and inadequate RAM can lead to slow performance or even system crashes.
- Future-Proofing: As software and applications continue to evolve and become more resource-intensive, having enough RAM is crucial to ensure that your Mac can handle the demands of the latest technology. Upgrading your RAM can help future-proof your Mac and extend its lifespan.
Overall, RAM is an integral component for optimal Mac performance. It allows your computer to juggle multiple tasks efficiently, improves speed and responsiveness, enhances overall performance, and prepares your Mac for future software advancements.
How to check the RAM on your Mac
Checking the amount of RAM installed on your Mac is a straightforward process that can be done using several methods. Here are the four most common ways to check the RAM on your Mac:
- Checking the RAM using the Apple Menu: Start by clicking on the Apple menu () located at the top-left corner of your screen. From the drop-down menu, select “About This Mac.” A window will appear displaying an overview of your Mac. Click on the “Memory” tab to view your Mac’s RAM details.
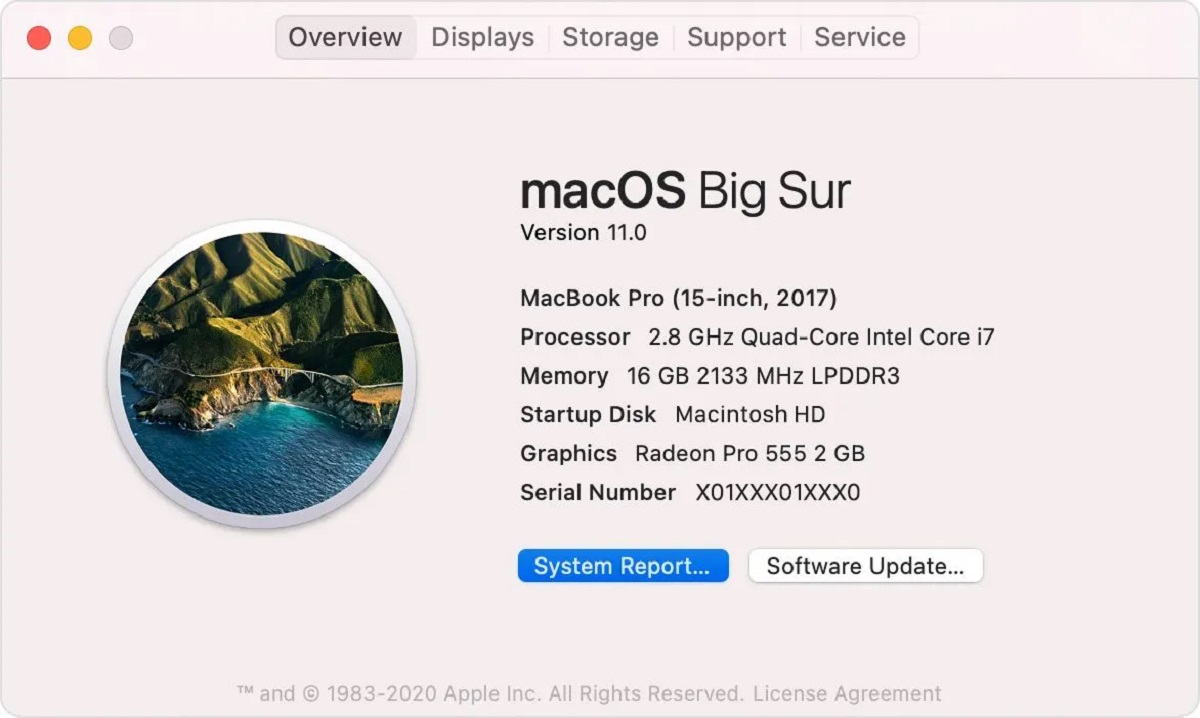
- Checking the RAM in the About This Mac Window: Another way to access the RAM information is through the “About This Mac” window. To open it, click on the Apple menu (), select “About This Mac,” and then click on the “Overview” tab. Here, you will find your Mac’s RAM capacity and other hardware details.
- Using the Activity Monitor to check your RAM: The Activity Monitor provides comprehensive information about your Mac’s performance, including RAM usage. To access it, go to the Applications folder, then navigate to Utilities and open Activity Monitor. Click on the “Memory” tab to view real-time data about your Mac’s memory usage.
- Using the System Information app to check your RAM: The System Information app provides detailed information about your Mac’s hardware, including RAM. To open it, go to the Applications folder, then navigate to Utilities and open System Information. In the side menu, click on “Memory” to view your Mac’s RAM capacity, type, and configuration.
By using any of these methods, you can easily check the amount of RAM installed on your Mac. It’s worth noting that the specific steps and navigation may vary slightly depending on the version of macOS you are using. The RAM information displayed will include details such as the total memory, used memory, available memory, and memory pressure.
Now that you know how to check your Mac’s RAM, let’s move on to the next section to understand how to interpret the RAM information and determine if an upgrade is necessary for optimized performance.
Checking the RAM using the Apple Menu
The Apple Menu provides a quick and convenient way to access essential information about your Mac, including the amount of RAM installed. Follow these simple steps to check your Mac’s RAM using the Apple Menu:
- Click on the Apple menu () located at the top-left corner of your screen. A drop-down menu will appear.
- Select “About This Mac” from the menu. A window will open, displaying an overview of your Mac’s specifications.
- Click on the “Memory” tab in the window. This will provide detailed information about your Mac’s RAM.
In the “Memory” tab, you will find important details about your Mac’s RAM, including the total capacity and type of memory installed. If your Mac has multiple RAM modules, they will be listed individually, showing the size of each module.
The “Memory” tab also displays other useful information such as the memory speed, the version of the RAM modules, and whether the memory is upgradable or soldered onto the logic board.
By checking the RAM using the Apple Menu, you can quickly determine the current memory configuration of your Mac and assess if it meets your requirements for running particular software or performing resource-intensive tasks.
It’s important to note that the steps to access the “About This Mac” window may vary slightly depending on the version of macOS you are using. However, the overall process remains quite similar across different versions.
Now that you know how to check your Mac’s RAM using the Apple Menu, let’s explore other methods to check RAM information, including using the “About This Mac” window and the Activity Monitor tool.
Checking the RAM in the About This Mac Window
The “About This Mac” window provides a detailed overview of your Mac’s hardware specifications, including information about the amount of RAM installed. Here’s how you can check the RAM in the About This Mac window:
- Click on the Apple menu () located at the top-left corner of your screen. A drop-down menu will appear.
- Select “About This Mac” from the menu. A window will open, displaying an overview of your Mac’s specifications.
- Click on the “Overview” tab in the “About This Mac” window.
- In the “Overview” tab, you will find essential information, including the processor, graphics, and memory.
- The “Memory” section of the “Overview” tab displays the total capacity of RAM installed on your Mac.
By checking the RAM in the About This Mac window, you can quickly see the total amount of memory available on your Mac. This information is useful for understanding your system’s capabilities and determining if it meets the requirements of certain software or tasks.
Additionally, the About This Mac window provides a high-level overview of your Mac’s specifications, making it a convenient place to gather essential hardware information in one place.
Please note that the layout and available options in the About This Mac window may vary slightly depending on the macOS version you are using. However, the overall process to access the RAM information remains consistent across different versions.
Now that you know how to check the RAM in the About This Mac window, let’s explore other methods to access RAM information, such as using the Activity Monitor tool and the System Information app.
Using the Activity Monitor to check your RAM
The Activity Monitor is a built-in utility on macOS that provides detailed information about various aspects of your Mac’s performance, including RAM usage. Here’s how you can use the Activity Monitor to check the RAM on your Mac:
- Go to the Applications folder, then navigate to Utilities, and open Activity Monitor.
- In the Activity Monitor window, click on the “Memory” tab at the top.
- You will see real-time data about your Mac’s memory usage, including the following values:
- Memory Pressure: This graph provides an overview of your system’s memory pressure. It indicates if your Mac has sufficient memory available or if it’s under strain due to heavy resource usage.
- Physical Memory: This section displays information about your Mac’s total, used, and free memory. The “Used” value represents the RAM currently occupied by active processes.
- Swap Used: Swap space is a portion of your Mac’s hard drive used as additional virtual memory when the RAM capacity is exceeded. This value shows the amount of swap space currently being utilized.
- Cached Files: Cached files are data stored in memory from recently used apps and files. This section shows the memory allocated to cached files.
- You can monitor the dynamic changes in your Mac’s memory usage by observing the values in the Activity Monitor’s Memory tab over time.
Using the Activity Monitor allows you to get real-time insights into how your Mac is utilizing its memory. It gives you a comprehensive overview of the memory pressure, physical memory usage, swap space utilization, and cached files.
This information can be helpful in identifying any memory-related performance issues on your Mac and determining if additional RAM is necessary.
Remember to regularly check the Activity Monitor to keep an eye on your Mac’s memory usage, especially during resource-intensive tasks or when experiencing system slowdowns. By doing so, you can make informed decisions about optimizing your Mac’s performance.
Now that you know how to check the RAM using the Activity Monitor, let’s explore another method to access RAM information on your Mac, using the System Information app.
Using the System Information app to check your RAM
The System Information app provides comprehensive details about the hardware and software configuration of your Mac, including information about the RAM. Here’s how you can use the System Information app to check your Mac’s RAM:
- Go to the Applications folder, then navigate to Utilities, and open the System Information app.
- In the System Information window, you will find a sidebar on the left side. Scroll down and click on the “Memory” option.
- The right-side pane will display detailed information about the RAM on your Mac, including the total capacity, type, and speed of the memory modules installed.
- You can also find additional details such as the number of memory slots available, the number of slots in use, and the configuration of the memory modules.
The System Information app provides a more in-depth look at your Mac’s RAM configuration, allowing you to understand the specifics of the memory modules installed. This can be beneficial if you are considering upgrading or replacing the RAM in the future.
Furthermore, the System Information app provides information about other hardware components, software versions, and system settings, making it a valuable resource for troubleshooting, system optimization, and compatibility checks.
Remember, the specific layout and menu options in the System Information app may vary depending on the version of macOS you are using. However, the general process of accessing RAM information remains consistent across different versions.
Now that you know how to check your Mac’s RAM using the System Information app, you have several methods to gather information about your Mac’s memory. Understanding your Mac’s RAM configuration is crucial in determining its performance capabilities and deciding if an upgrade is necessary.
Interpreting the RAM information
When checking the RAM on your Mac, it’s essential to understand the information provided and how it relates to your computer’s performance. Here are some key aspects to consider when interpreting the RAM information:
- Total Memory: This indicates the overall capacity of RAM installed on your Mac. It represents the maximum amount of memory available for your computer to use.
- Used Memory: This value represents the portion of RAM currently being used by active processes and applications. If the used memory is consistently near or at full capacity, it may indicate that your Mac is running low on memory and could benefit from an upgrade.
- Available Memory: Available memory refers to the RAM currently not in use by active processes. This space is ready to be allocated when needed and allows your Mac to handle additional tasks without sacrificing performance.
- Memory Pressure: The memory pressure graph provides a visual representation of how efficiently your Mac is managing memory resources. If the graph consistently shows high memory pressure, it suggests that your Mac’s RAM may be overburdened, potentially impacting performance.
Interpreting the RAM information is crucial for understanding your Mac’s current memory usage and determining if an upgrade is necessary. Here are a few scenarios to consider:
- If your Mac frequently utilizes the maximum available memory and the memory pressure graph consistently shows high pressure, it may indicate that your current RAM configuration is insufficient for your computing needs.
- If you observe frequent slowdowns, system freezes, or excessive disk activity, it could be a sign that your Mac is struggling with a shortage of available memory.
- On the other hand, if your Mac has a significant amount of available memory and the memory pressure graph consistently shows low pressure, it suggests that your current RAM configuration is adequate for your usage patterns.
Remember that the RAM requirements for specific tasks, such as video editing, running virtual machines, or image rendering, can vary. It’s crucial to consider both your current and future computing needs when interpreting the RAM information on your Mac.
By understanding the different aspects of the RAM information, you can make informed decisions about optimizing your system’s performance and determining if upgrading your Mac’s RAM is necessary.
Understanding the total memory
The “total memory” refers to the overall capacity of RAM installed on your Mac. It represents the maximum amount of memory available for your computer to use. Understanding the total memory is essential for assessing your Mac’s capabilities and determining if it meets your computing needs.
Here are some important points to consider when interpreting the total memory:
- Capacity: The total memory value indicates the exact amount of RAM installed on your Mac, typically measured in gigabytes (GB). This value represents the maximum amount of memory that your Mac can utilize to store and access data.
- Limits: The total memory sets a constraint on the number of tasks your Mac can handle simultaneously without experiencing performance issues. If the total memory becomes a limiting factor for your computing needs, upgrading the RAM can provide a significant boost in performance.
- System Requirements: Different software and applications have specific memory requirements. By understanding your Mac’s total memory, you can ensure that it meets the minimum requirements for running resource-intensive applications or performing demanding tasks.
- Future Considerations: As technology advances and new software becomes more resource-intensive, having a sufficient amount of total memory becomes crucial for future-proofing your Mac. Upgrading to a higher capacity can provide headroom for running the latest applications and ensuring optimal performance in the long run.
Keep in mind that the amount of total memory required for optimal performance depends on your computing needs. For basic tasks like web browsing, email, and word processing, a lower amount of total memory may be sufficient. However, if you engage in tasks such as video editing, graphic design, or running virtual machines, a larger amount of total memory becomes essential to ensure smooth and efficient performance.
Checking the total memory is the first step in assessing your Mac’s memory capabilities. By understanding the limitations and considering future requirements, you can make informed decisions about optimizing your Mac’s performance and determining if upgrading the total memory is necessary.
Analyzing the used memory
The “used memory” refers to the portion of RAM that is currently being utilized by active processes and applications on your Mac. Analyzing the used memory is important for understanding how your system is utilizing its memory resources and determining if an upgrade is necessary. Here are some key points to consider when interpreting the used memory:
- Performance Impact: The amount of used memory directly affects the performance of your Mac. When the used memory approaches or reaches its maximum capacity, your system may start to experience slowdowns, lag, or even crashes. If you consistently observe high levels of used memory during normal usage, it may indicate that your current memory configuration is insufficient for the tasks you perform.
- Memory Intensive Applications: Certain applications, such as video editing software, virtual machines, or graphic design tools, can consume a significant amount of memory. If you frequently use memory-intensive applications and consistently observe high levels of used memory, it may be an indication that you would benefit from upgrading your Mac’s memory capacity.
- Memory Leak: Sometimes, specific applications or processes may have memory leaks, which can cause the used memory to steadily increase over time. It is important to monitor the used memory and identify any applications or processes that might be causing memory leaks. Restarting your Mac or closing memory-intensive applications can help alleviate this issue temporarily.
- Optimization Opportunities: Analyzing the used memory can help you identify potential optimization opportunities. For example, if you notice that the used memory is consistently high even when performing relatively simple tasks, it may indicate that some applications or background processes are unnecessarily consuming memory. Optimizing your startup items, closing unnecessary applications, and clearing cached files can help free up memory resources and improve overall performance.
Remember that the amount of used memory can fluctuate depending on the tasks you perform on your Mac. It is normal for the used memory to increase temporarily as you open multiple applications or work on memory-intensive tasks. However, if the used memory remains consistently high during regular usage and impacts performance, upgrading your Mac’s memory capacity may be beneficial.
By analyzing the used memory, you can gain insights into how your Mac’s memory resources are allocated and determine if any adjustments or upgrades are necessary to optimize performance and ensure a smooth computing experience.
Identifying the available memory
The “available memory” represents the portion of RAM that is currently not in use by active processes and applications on your Mac. It is important to identify the available memory as it indicates how much memory is readily accessible for your system to allocate when needed. Here are key points to consider when interpreting the available memory:
- Memory Allocation: The available memory is crucial because it allows your Mac to handle additional tasks without sacrificing performance. When you open new applications or perform memory-intensive tasks, your Mac can quickly allocate memory from the available memory pool.
- Optimal Performance: Having a sufficient amount of available memory is essential for maintaining optimal performance. If your available memory is consistently low, it may indicate that your Mac is running near its memory capacity, which can impact overall system responsiveness and cause lag or slowdowns.
- Memory Management: Your Mac’s operating system is responsible for managing memory resources. It automatically allocates memory to active processes and applications as needed. By monitoring the available memory, you can ensure that your system has enough resources to handle additional tasks without encountering memory-related performance issues.
- Background Processes: It’s important to be aware that certain background processes, system services, and utilities may utilize a portion of your available memory. These processes are necessary for maintaining system functionality but can impact the amount of memory available for active tasks. Monitoring the available memory over time can help identify if any background processes are consuming excessive memory and optimize their resource usage.
It’s worth noting that the available memory value tends to fluctuate based on the tasks you perform and the number of applications open at any given time. It is normal for the available memory to decrease as you open more applications or work on memory-intensive tasks. However, if the available memory consistently remains low, it may indicate that your Mac’s memory capacity is insufficient for your computing needs.
By identifying the available memory, you can gauge your Mac’s capacity to handle new tasks and determine if an upgrade to your memory configuration is necessary to ensure optimal performance.
Examining the memory pressure
The “memory pressure” is a visual representation of how efficiently your Mac is managing memory resources at any given time. Examining the memory pressure can provide valuable insights into your system’s performance and help determine if additional memory is needed. Here are important points to consider when interpreting the memory pressure:
- Memory Pressure Graph: The memory pressure graph provides a visual representation of your Mac’s memory usage. It is displayed as a color-coded graph that indicates the level of memory pressure your system is experiencing. The graph consists of three colors:
- Green: Represents a low level of memory pressure, indicating that your Mac has sufficient memory resources available.
- Yellow: Indicates a moderate level of memory pressure, suggesting that your system is starting to utilize swap space to compensate for the limited available memory.
- Red: Represents a high level of memory pressure, suggesting that your system is under significant strain due to limited available memory. This can lead to performance issues, such as slowdowns, lag, or unresponsiveness.
- Memory Management: The memory pressure graph reflects how your Mac’s operating system manages memory resources. It dynamically adjusts memory allocation based on the demands of active processes and applications. Ideally, you want to see the memory pressure graph remain in the green or yellow range, indicating that your system has sufficient memory resources available.
- Resource-Intensive Tasks: If you frequently work with memory-intensive applications or perform tasks that require a significant amount of memory, it is normal to see occasional spikes in memory pressure. However, if your system consistently operates under high memory pressure during normal usage, it suggests that your current memory configuration may be insufficient for your needs.
- Upgrade Consideration: If you consistently experience high memory pressure, it may be an indication that upgrading your Mac’s memory configuration could improve performance. By increasing the available memory, you can alleviate memory pressure and provide your system with more headroom to handle resource-intensive tasks.
Monitoring the memory pressure allows you to assess how efficiently your Mac is managing its memory resources. If you frequently observe high memory pressure accompanied by performance issues, it may be worth considering an upgrade to your Mac’s memory capacity.
By examining the memory pressure and understanding its implications, you can make informed decisions about optimizing your system’s memory usage and ensuring smooth and efficient performance for your Mac.
Recommended RAM for different tasks
The amount of RAM you need for optimal performance depends on the type of tasks you typically perform on your Mac. Having the right amount of RAM ensures that your system can handle the demands of your workflow efficiently. Here are some general recommendations for different types of tasks:
- Recommended RAM for basic tasks: For everyday tasks like web browsing, email, word processing, and media consumption, a minimum of 4GB to 8GB of RAM is typically sufficient. This allows for smooth multitasking and ensures that your Mac can handle these tasks without performance issues.
- Recommended RAM for moderate tasks: If you frequently work with moderately intensive applications like photo editing software or run virtual machines, it is recommended to have at least 8GB to 16GB of RAM. This provides the necessary memory to handle these applications efficiently and ensures smooth performance.
- Recommended RAM for intensive tasks: For demanding tasks like video editing, 3D rendering, music production, or running resource-intensive software, it is advisable to have 16GB or more of RAM. These tasks require significant memory resources to handle large files and complex computations, ensuring smooth and efficient performance.
Remember that these recommendations are general guidelines and may vary depending on the specific software you use and your individual workflow. Certain applications and tasks may require even higher amounts of RAM for optimal performance.
Additionally, it is important to consider your future needs when determining the recommended RAM for your Mac. As software and technologies evolve, the demands on your system’s memory will likely increase. Investing in more RAM now can help future-proof your Mac and extend its usability.
Lastly, when considering upgrading your RAM, it is crucial to check your Mac’s compatibility and specifications. Different Mac models have specific RAM configurations and limitations, so ensure that the RAM you choose is compatible with your Mac.
By selecting the recommended amount of RAM for your specific tasks, you can ensure optimal performance and a smooth user experience on your Mac.
Recommended RAM for basic tasks
For users who primarily engage in basic tasks such as web browsing, email, word processing, and media consumption, a minimum of 4GB to 8GB of RAM is typically sufficient. Here’s why this amount of RAM is recommended for basic tasks:
Smooth Multitasking: With 4GB to 8GB of RAM, your Mac can efficiently handle everyday activities like browsing multiple tabs, checking emails, and running productivity applications simultaneously. This allows for smooth multitasking and ensures that your system is responsive while performing these tasks.
Efficient Performance: Basic tasks typically do not demand substantial memory resources. With the recommended RAM range, your Mac can quickly access and process the necessary data, ensuring smooth performance in web browsing, document editing, and media playback.
Operating System Requirements: The latest versions of macOS require a minimum of 4GB of RAM, ensuring that your Mac can comfortably run the operating system along with basic applications. By meeting the minimum operating system requirements, you can ensure a stable and responsive computing experience.
It’s important to note that while 4GB to 8GB of RAM is suitable for basic tasks, your specific usage patterns and the number of background processes can impact performance. If you frequently run additional applications or have multiple browser tabs open simultaneously, having 8GB of RAM can provide a more comfortable margin and enhance overall performance.
Additionally, keeping in mind future software advancements and increasing demands, opting for 8GB of RAM can help prolong the usability of your Mac and prevent potential performance bottlenecks as technology advances.
Remember to consider your individual needs and usage patterns when deciding on the recommended RAM for your Mac. By ensuring that you have adequate memory for basic tasks, you can enjoy a smooth and responsive computing experience without any performance limitations.
Recommended RAM for moderate tasks
For users who frequently engage in moderately intensive tasks such as photo editing, running virtual machines, or working with mid-level software applications, having a recommended range of 8GB to 16GB of RAM is advisable. Here’s why this amount of RAM is recommended for moderate tasks:
Handling Resource-Intensive Applications: Working with moderately intensive applications like Adobe Photoshop, Lightroom, or running virtual machines can consume a significant amount of memory. Having 8GB to 16GB of RAM allows your Mac to handle these applications efficiently, ensuring smooth performance and responsiveness.
Seamless Multitasking: With the recommended RAM range, your Mac can smoothly handle multiple applications simultaneously. This is particularly useful if you frequently work with multiple software applications or have several browser tabs open while running productivity tools. The additional RAM allows your system to allocate sufficient memory to each application, preventing slowdowns or system freezes.
Future-Proofing: Considering the evolving nature of software and increasing demands, having 16GB of RAM can help future-proof your Mac. As new versions of applications are released and technology advances, having a higher amount of RAM ensures that your system can handle the increasing memory requirements, allowing you to comfortably use moderately intensive software in the future.
Improved Performance: The additional RAM enables your Mac to store more data in memory, resulting in faster file access and processing. This is valuable when working with large image files, running multiple virtual machines, or working with complex projects that require substantial memory resources.
Keep in mind that the amount of RAM you need may depend on the specific applications and tasks you engage in. If you frequently work with advanced multimedia editing software or more demanding applications, opting for the higher end of the recommended RAM range (16GB) can offer a smoother and more efficient experience.
By having the recommended 8GB to 16GB of RAM for moderate tasks, you can effortlessly handle resource-intensive applications, seamlessly multitask, and ensure optimized performance for your Mac.
Recommended RAM for intensive tasks
For users who engage in intensive tasks such as video editing, 3D rendering, music production, or running resource-intensive software, it is recommended to have a minimum of 16GB of RAM. Here’s why this amount of RAM is advisable for intensive tasks:
Handling Resource-Intensive Applications: Intensive tasks often involve working with large files, complex computations, and memory-intensive applications. With a minimum of 16GB of RAM, your Mac can handle the demands of these applications efficiently, ensuring smooth performance and reducing the likelihood of slowdowns or freezing.
Seamless Multi-tasking: Resource-intensive tasks often require running multiple applications simultaneously. Having 16GB of RAM allows your Mac to smoothly handle the demands of these applications, ensuring that you can work on complex projects with minimal performance impact.
Large File Management: When working with extensive multimedia files, having ample memory is crucial for seamless file access and processing. With 16GB of RAM, your Mac can efficiently store and manipulate large media files, resulting in faster rendering times and improved overall workflow.
Future-Proofing: As technology advances and software becomes more resource-intensive, it is essential to consider future requirements. Having 16GB or more of RAM helps future-proof your Mac, allowing it to handle increasing memory demands and ensuring optimal performance for years to come.
Professional-Grade Applications: If you work with professional-grade applications such as Final Cut Pro, Adobe Creative Cloud suite, or AutoCAD, these programs often recommend or require a minimum of 16GB of RAM. Meeting the recommended RAM requirements ensures that your Mac can unleash the full potential of these applications, delivering superior performance and productivity.
It’s important to note that intensive tasks vary in terms of their memory requirements. Some tasks, such as complex video editing or 3D rendering, may benefit from even higher amounts of RAM, such as 32GB or more. Consider your specific workflow, the recommended system requirements of the software you use, and the complexity of your projects to determine if higher RAM configurations are necessary.
By having a minimum of 16GB of RAM for intensive tasks, you can tackle resource-intensive applications, seamlessly multitask, and ensure optimal performance and productivity for your Mac.
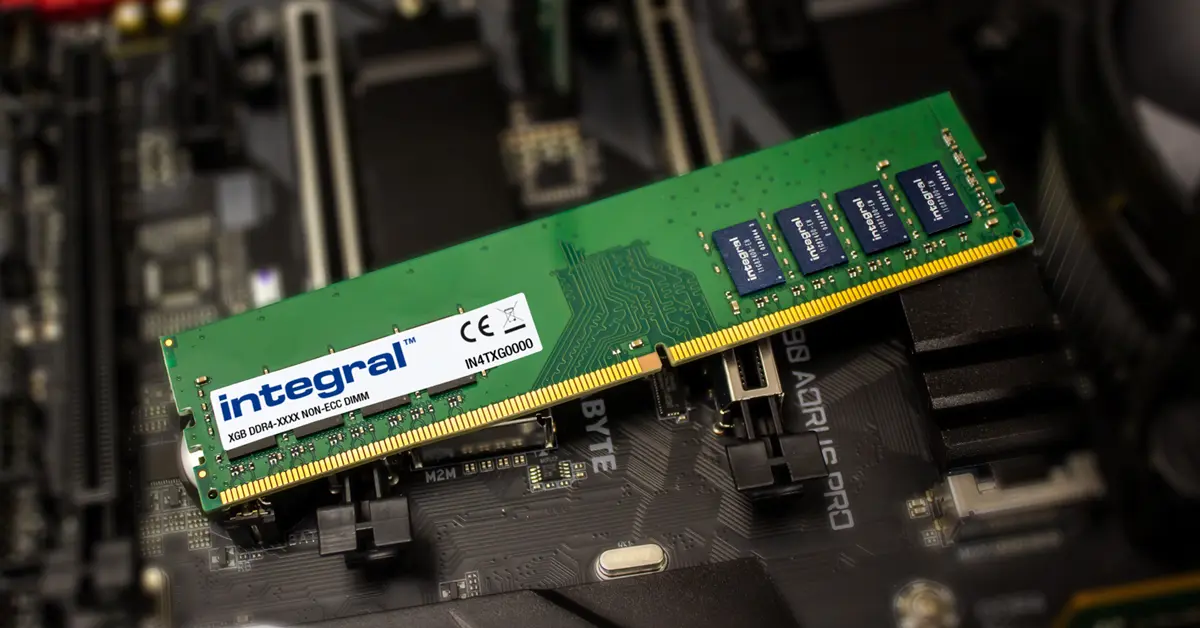
How to upgrade your Mac’s RAM
If you find that your Mac’s current RAM is insufficient for your needs, upgrading the RAM can significantly improve its performance. Here are the steps to upgrade your Mac’s RAM:
- Identify the type of RAM your Mac uses: Before purchasing new RAM, you need to determine the type of RAM that is compatible with your Mac. Check your Mac’s specifications or consult Apple’s support documentation to find the specific RAM requirements.
- Purchase the right RAM for your Mac: Once you know the type of RAM your Mac uses, purchase the appropriate RAM modules from a trusted supplier. Ensure that the RAM modules meet the specifications required by your Mac, such as speed and capacity.
- Prepare your Mac: Before installing the new RAM, shut down your Mac and unplug any peripheral devices. It’s also a good practice to back up your important data to ensure its safety during the upgrade process.
- Access the RAM slots: Depending on your Mac model, accessing the RAM slots may require removing the back panel, unscrewing specific compartments, or opening a memory access door. Refer to your Mac’s documentation or seek professional assistance if you are uncertain about the process.
- Replace the RAM modules: Carefully remove the existing RAM modules by gently pushing the side clips away from the module. Align the notches on the new RAM modules with the slots in your Mac and firmly press them into place. Ensure that the modules are securely seated and the clips snap back into place.
- Close and restart your Mac: Once you have installed the new RAM modules, carefully close any access panels or compartments. Plug in your Mac’s power cable, and power it on. Your Mac should automatically recognize the new RAM modules and adjust the memory settings accordingly.
- Verify the new RAM: After your Mac starts up, go to “About This Mac” or use the System Information app to confirm that your Mac now recognizes the upgraded RAM. The new total memory should reflect the capacity of the newly installed RAM modules.
It’s worth noting that upgrading your Mac’s RAM requires careful handling and consideration of your Mac’s specific model and requirements. If you are unsure about the process, it is recommended to consult Apple’s support or seek assistance from a professional technician.
By following these steps, you can successfully upgrade your Mac’s RAM and enjoy improved performance and responsiveness for your computing needs.
Identifying the type of RAM your Mac uses
Before upgrading the RAM on your Mac, it is crucial to identify the type of RAM that is compatible with your specific model. This ensures that the new RAM modules you purchase will work seamlessly with your Mac. Here’s how you can identify the type of RAM your Mac uses:
- Check the Mac’s documentation: Start by referring to the documentation that came with your Mac. Look for the model number or serial number, which you can use to search for the technical specifications on Apple’s support website. The specifications should include details about the type of RAM supported.
- Use Apple’s “About This Mac” feature: On your Mac, click on the Apple menu () in the top-left corner of your screen. From the drop-down menu, select “About This Mac”. In the window that appears, click on “Overview” and then on “System Report”. Look for the “Memory” tab. Here, you will find detailed information about your Mac’s current RAM configuration, including the type of RAM installed.
- Visit Apple’s support website: If you are unable to find the necessary information using the previous methods, visit Apple’s support website and search for your Mac model. The specifications page should outline the type of RAM that is compatible with your Mac.
- Consult a trusted source or professional: If you are still uncertain about the type of RAM your Mac uses, consider reaching out to trusted sources such as authorized Apple service providers, Apple support forums, or consult professionals who specialize in Mac hardware upgrades.
It’s important to note that different Mac models have specific RAM requirements and limitations. The type of RAM, such as DDR3, DDR4, or LPDDR3, may differ depending on the Mac model, year of manufacture, and chipset architecture. Additionally, the maximum supported RAM capacity may vary, so be sure to check the specific limitations for your Mac model.
Once you have identified the type of RAM your Mac uses, you can proceed with purchasing the appropriate RAM modules for your upgrade. It is essential to ensure compatibility to avoid any compatibility issues and ensure optimal performance when upgrading your Mac’s RAM.
By correctly identifying the type of RAM your Mac uses, you can confidently select the compatible RAM modules and proceed with the upgrade, enhancing the performance and capabilities of your Mac.
Purchasing the right RAM for your Mac
After identifying the type of RAM that is compatible with your Mac, the next step is to purchase the appropriate RAM modules. Here are some essential considerations when purchasing the right RAM for your Mac:
- Choose a reputable supplier: Select a trusted supplier known for providing high-quality computer components. This ensures that you are purchasing genuine RAM modules that meet the required specifications for your Mac.
- Match the type and speed: Ensure that the RAM modules you purchase match the type (DDR3, DDR4, LPDDR3, etc.) and speed specified for your Mac. The RAM modules should be identical or compatible with the requirements outlined in your Mac’s documentation or specifications.
- Consider the capacity and configuration: Determine the desired capacity of the RAM modules based on your computing needs. Consider whether you want to replace the existing RAM modules or add additional modules to increase the total memory capacity of your Mac.
- Check for compatibility: Verify that the RAM modules are compatible with your specific Mac model. Some Macs have specific requirements, such as a maximum supported RAM capacity or limitations on the number of RAM slots available.
- Research customer reviews: Before making a purchase, read customer reviews or check online forums to gather feedback about the RAM modules you are considering. This can provide valuable insights into the performance and reliability of the specific brand or model you are considering.
- Consider warranty and return policy: Check the warranty and return policy offered by the supplier. It is advisable to choose RAM modules that come with a warranty to protect your investment and ensure customer support in case of any issues.
It is important to note that Apple recommends using genuine Apple RAM or RAM modules from reputable third-party suppliers that meet their stringent requirements. While third-party RAM is more cost-effective, ensure that it is from a trusted source and meets the necessary specifications outlined for your Mac model.
Purchasing the right RAM for your Mac ensures that you obtain reliable, compatible, and high-quality components for your upgrade. Following these guidelines can help you make an informed decision and select RAM modules that will enhance the performance and stability of your Mac.
Installing the new RAM on your Mac
Once you have purchased the right RAM modules for your Mac, it’s time to install them. Here is a step-by-step guide on how to install the new RAM on your Mac:
- Prepare your Mac: Before installing the new RAM, shut down your Mac and disconnect any peripheral devices. This ensures the safety of your Mac and the RAM modules during the installation process.
- Access the RAM slots: Depending on your Mac model, accessing the RAM slots may involve removing the back panel, unscrewing specific compartments, or opening a memory access door. Consult your Mac’s documentation or seek professional assistance if you are unsure about the process.
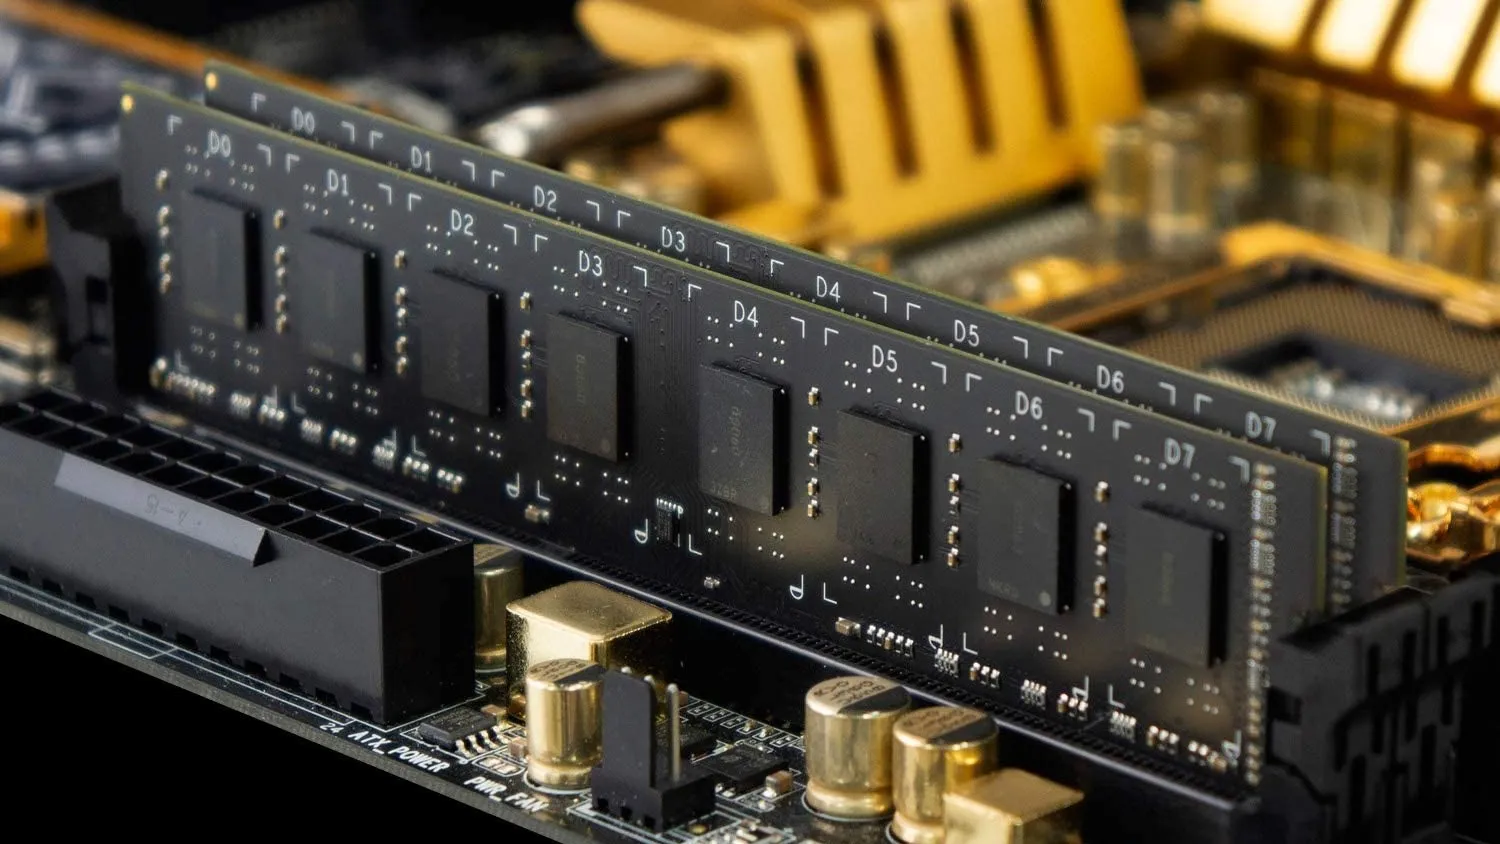
- Remove the existing RAM modules: Carefully push the side clips away from the existing RAM module(s) to release them. Gently pull the module(s) out of the slot(s). Handle the modules by their edges to avoid touching the gold pins and minimize the risk of static electricity damage.
- Insert the new RAM modules: Align the notch(es) on the new RAM module(s) with the slot(s) in your Mac. Angle the module(s) slightly and firmly press them into place. Ensure that the module(s) are seated correctly and the side clips lock into position, securing the RAM module(s) in place.
- Close and secure the Mac: Carefully close any access panels or compartments that were opened to access the RAM slots. Secure them in place according to your Mac’s instructions. Make sure all screws are tightened appropriately.
- Restart your Mac: Plug in your Mac’s power cable, connect any peripheral devices, and power on your Mac. It should automatically recognize the newly installed RAM and adjust the memory settings accordingly.
- Verify the new RAM: After your Mac starts up, go to “About This Mac” or use the System Information app to confirm that your Mac now recognizes the upgraded RAM. The total memory displayed should reflect the capacity of the newly installed RAM modules.
It’s crucial to follow proper handling procedures and be cautious when installing RAM to avoid damaging the components or interfering with other internal parts of your Mac.
If you encounter any difficulties during the installation process or are uncertain about any steps, consider seeking assistance from authorized Apple service providers or consult Apple’s support resources for further guidance.
By successfully installing the new RAM modules, you can experience improved performance and enhanced capabilities on your Mac.
Conclusion
Understanding and checking the RAM on your Mac is essential for optimizing its performance and ensuring a smooth computing experience. By knowing how much RAM is installed on your Mac, you can determine if an upgrade is necessary and make informed decisions about your computing needs.
In this guide, we explored various methods to check the RAM on your Mac, including using the Apple Menu, About This Mac window, Activity Monitor, and the System Information app. We also discussed how to interpret the RAM information and provided recommendations for the recommended amount of RAM for different types of tasks.
Additionally, we covered the process of upgrading your Mac’s RAM, including identifying the type of RAM, purchasing the right RAM modules, and installing them correctly. It is important to follow the specified guidelines, consult official documentation, and seek professional assistance if needed to ensure successful installation and compatibility.
Remember that the recommended amount of RAM for your Mac depends on the type of tasks you perform. For basic tasks, 4GB to 8GB of RAM is usually sufficient, while moderate tasks benefit from 8GB to 16GB of RAM. For intensive tasks, it is recommended to have at least 16GB of RAM, if not more.
By upgrading your Mac’s RAM and having the appropriate amount of memory, you can experience improved performance, smoother multitasking, and enhanced capabilities in resource-intensive applications.
Ensure to regularly check your Mac’s RAM usage, monitor memory pressure, and consider upgrading if you consistently encounter performance limitations or if your specific tasks require additional memory resources.
By following the guidelines and tips provided in this guide, you can confidently check, interpret, and upgrade the RAM on your Mac, maximizing its potential and enjoying a more efficient computing experience.