Why Should You Add More RAM to Your PC
RAM, or Random Access Memory, is an essential component in your computer that determines its overall performance and speed. If your computer is running sluggishly and struggling to handle multiple tasks simultaneously, adding more RAM can significantly improve its performance. Here are a few compelling reasons why you should consider upgrading your PC’s RAM:
- Improved multitasking: The more RAM you have, the better your computer can handle multiple applications and tasks simultaneously. With additional RAM, you can seamlessly switch between programs, open multiple tabs in your web browser without slowdowns, and perform resource-intensive tasks like video editing or gaming without lag.
- Faster loading times: RAM plays a crucial role in storing data that your computer needs to access frequently. With more RAM, your PC can quickly retrieve and access this data, resulting in faster loading times for applications, files, and websites. This means less waiting and more productivity.
- Smoother gaming experience: If you’re a gamer, adding more RAM can have a significant impact on your gaming experience. Games often require a substantial amount of memory to run smoothly. Insufficient RAM can lead to stuttering, frame rate drops, and slower load times. By increasing your RAM capacity, you can enjoy a smoother gaming experience with improved graphics and faster response times.
- Enhanced performance for demanding software: RAM is especially crucial for resource-intensive software like video editing applications, 3D modeling software, and virtual machines. These programs require a significant amount of memory to function optimally. By adding more RAM, you can provide your computer with the necessary resources to handle these demanding applications without slowdowns or crashes.
- Future-proofing your system: As technology advances, software applications become more resource-intensive. Adding more RAM to your PC ensures that it can keep up with the increasing demands of newer software and operating systems. By investing in RAM now, you can extend the lifespan of your computer and delay the need for a complete system upgrade.
Overall, adding more RAM to your PC can greatly enhance its performance, allowing you to work more efficiently, enjoy smoother gaming experiences, and tackle demanding tasks with ease. Whether you’re a casual user or a power user, upgrading your computer’s RAM is a cost-effective way to boost its speed and responsiveness. It’s a worthwhile investment that can breathe new life into your PC and improve your overall computing experience.
How Much RAM Do You Need
Determining the right amount of RAM for your PC depends on various factors, including your usage requirements, the type of applications you run, and your budget. Having the right amount of RAM ensures that your computer performs optimally without wasting resources or experiencing slowdowns. Here are some guidelines to help you determine how much RAM you need:
- Basic usage: If you primarily use your computer for web browsing, word processing, and light multitasking, 4GB to 8GB of RAM should suffice. This amount of RAM is suitable for casual users who don’t run resource-intensive applications or multitask heavily.
- Multitasking and productivity: If you need to run multiple applications simultaneously or work with resource-intensive software, such as video editing or graphic design tools, consider upgrading to a minimum of 8GB to 16GB of RAM. This amount of RAM allows for smoother multitasking and better performance with demanding applications.
- Gaming: Gamers, especially those who play modern AAA titles, should aim for at least 16GB of RAM. Games often require a significant amount of memory, and having more RAM ensures smoother gameplay, faster loading times, and eliminates potential bottlenecks.
- Professional use: If you’re a professional who relies on resource-heavy applications like 3D modeling or video rendering software, consider opting for 32GB or higher. This amount of RAM provides ample headroom for complex projects and ensures that your system doesn’t slow down when handling large files or running multiple intensive tasks simultaneously.
- Future-proofing: If you plan to keep your PC for several years or want to future-proof it against increasingly resource-intensive software, considering going for higher RAM capacities, such as 16GB or 32GB. This will ensure that your system remains capable of handling future updates and software advancements without the need for immediate upgrades.
Keep in mind that while having more RAM can improve performance, it’s essential to consider your CPU, graphics card, and storage components to ensure a well-rounded and balanced system. Additionally, check the specifications of your motherboard to determine the maximum RAM capacity it supports. This will help you avoid compatibility issues when adding more RAM to your PC.
An investment in the right amount of RAM can significantly enhance your computer’s performance and ensure a smooth and efficient computing experience. Consider your usage needs, the applications you run, and future requirements to determine the appropriate amount of RAM that best suits your needs and budget.
Checking Compatibility and Available Slots
Before purchasing RAM for your PC, it’s crucial to check compatibility to ensure a smooth installation process. Here are some steps to help you determine the compatibility of the RAM and the available slots in your computer:
- Operating System: Check the system requirements of your operating system. Ensure that the RAM you plan to purchase is compatible with your OS version. This information can typically be found on the official website of your operating system.
- Motherboard Compatibility: Verify your motherboard’s specifications to determine the type of RAM it supports. Look for documentation or check the manufacturer’s website for details on RAM compatibility. Pay attention to the supported RAM types (DDR, DDR2, DDR3, DDR4) and the maximum capacity supported by your motherboard.
- Available Slots: Check how many RAM slots are available on your motherboard. This will help you determine the number of modules you can install. Common configurations include two or four slots. If all slots are occupied, you will need to remove existing modules to make room for the new ones.
- Maximum RAM Capacity: Identify the maximum RAM capacity supported by your motherboard. This will dictate the maximum number of RAM modules and the total amount of RAM you can install. Keep in mind that some operating systems have limitations on how much RAM they can utilize.
- RAM Specifications: Note down the specifications of the RAM modules currently installed in your system, if any. This includes details such as module type, speed (MHz), and timings. When purchasing new RAM, try to match these specifications as closely as possible to ensure compatibility and optimal performance.
To check the available slots and RAM specifications, you can open your computer’s case and inspect the motherboard. Alternatively, you can utilize software tools or system utilities that provide detailed information about your hardware configuration.
Once you have gathered the necessary information, you can confidently proceed with purchasing RAM that is compatible with your computer. Ensuring compatibility ensures that the RAM modules will function properly and not cause any issues or conflicts with other components. It also ensures that you can take full advantage of the increased memory capacity provided by the new RAM.
Remember, when it comes to hardware installation, always follow proper safety precautions and consult your computer’s documentation or seek assistance if you are unsure about any step in the process. It’s better to be cautious and thorough to avoid potential issues or damage to your system.
Purchasing the Right Type of RAM
When it comes to purchasing RAM for your PC, it’s important to select the right type of RAM that is compatible with your motherboard and meets your system requirements. Here are some factors to consider when purchasing RAM:
- Type of RAM: Determine the specific type of RAM supported by your motherboard, such as DDR, DDR2, DDR3, or DDR4. This information can typically be found in the motherboard’s documentation or on the manufacturer’s website. Make sure to purchase RAM modules that match the supported type.
- Memory Capacity: Determine the amount of RAM you need based on your usage requirements. Consider the guidelines mentioned earlier to determine the appropriate capacity, such as 4GB, 8GB, 16GB, or higher. Keep in mind that the maximum capacity supported by your motherboard may also influence your decision.
- Frequency and Timings: RAM modules come with specific frequency ratings, usually measured in MHz. Consider the frequency compatibility with your motherboard and existing RAM modules (if any) to ensure optimal performance. Additionally, pay attention to the timings (e.g., CAS latency), as lower timings generally indicate faster performance.
- Quality and Brand: While there are numerous brands available in the market, it’s advisable to purchase RAM from reputable brands known for their quality and reliability. Opt for well-known manufacturers that have a track record of producing reliable RAM modules.
- Budget: Determine your budget for RAM and look for modules that offer the best combination of performance, compatibility, and value for money. Keep in mind that pricing may vary based on the brand, capacity, and capabilities of the RAM.
- Warranty: Check the warranty offered by the manufacturer. A longer warranty period provides you with peace of mind and assurance that the RAM has undergone quality testing and will be replaced in case of any defects or issues.
Consider conducting research and reading reviews from reliable sources to gather information about different RAM options. This will help you make an informed decision based on your specific requirements and budget.
Lastly, ensure that you purchase RAM modules from trusted retailers to avoid counterfeit or incompatible products. Stick to authorized sellers or well-known online platforms that have a reputation for selling genuine computer components.
By carefully considering the type of RAM, capacity, compatibility, quality, and budget, you can purchase the right RAM modules and ensure a seamless installation process while maximizing the performance of your computer.
Preparing Your PC for RAM Installation
Before installing new RAM in your PC, it’s important to take a few preparatory steps to ensure a smooth installation process. Here are some essential steps to follow:
- Shut Down and Unplug: Turn off your computer and unplug it from the power source. This ensures that you’re working with a powered-down system and reduces the risk of electrical shock.
- Ground Yourself: Static electricity can damage sensitive computer components. Before touching any internal parts, ground yourself by touching a metal object (e.g., the computer case) to discharge any static electricity buildup.
- Locate RAM Slots: Open your computer’s case or access the RAM compartment, depending on your PC’s design. Locate the RAM slots on the motherboard. They are usually long, narrow slots, and the number of slots can vary depending on the motherboard model.
- Remove Existing RAM (If Applicable): If all the RAM slots are occupied, you will need to remove the existing RAM modules to make room for the new ones. Gently press down on the retaining clips at each end of the RAM module to release it from the slot. Carefully lift the RAM module out of the slot.
- Clean the RAM Slots: Inspect the RAM slots for dust or debris. Use compressed air or a clean, dry cloth to gently remove any dirt or particles that could interfere with the connection of the new RAM.
- Handle RAM Modules Properly: RAM modules are sensitive to static electricity and physical damage. Hold the RAM modules by their sides, avoiding touching the gold contacts or any exposed circuitry. Avoid bending or applying excessive force to the modules.
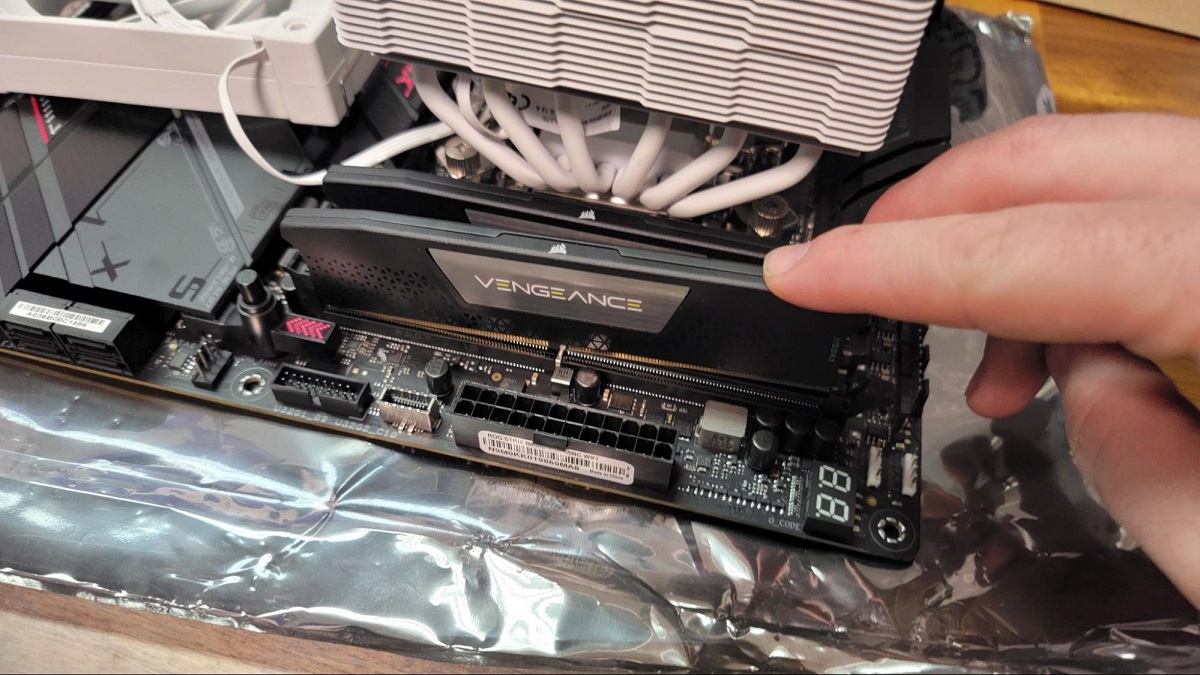
- Insert the RAM Modules: Align the notch on the bottom edge of the RAM module with the corresponding notch in the RAM slot. Insert the module at an angle of about 30 degrees and carefully press it down until the retention clips on both sides engage and secure the module in place. Ensure a firm, but gentle, connection.
- Close the Case: Once the RAM modules are installed, close the computer case and secure it with the appropriate screws or latches. Ensure that all connections are secure and that nothing is obstructing the ventilation for proper cooling.
- Power On and Verify: Plug in your computer and power it on. Check the system information or BIOS settings to verify that the new RAM is recognized. If the RAM is not recognized or if you encounter any issues, refer to the troubleshooting section for assistance.
By following these preparatory steps, you can ensure a safe and successful installation of the new RAM modules. Remember to handle the components with care, take precautions against static electricity, and double-check your connections to ensure optimal performance and compatibility.
Installing RAM in Desktop PCs
Installing RAM in a desktop PC is a relatively straightforward process. Follow these steps to install RAM modules in your desktop computer:
- Prepare Your PC: Shut down your computer, unplug it, and ground yourself to discharge any static electricity.
- Open the Case: Remove the side panel of your computer’s case to access the internal components. Make sure to refer to your computer’s manual for specific instructions on how to open the case.
- Locate the RAM Slots: Identify the RAM slots on the motherboard. They are usually long, narrow slots and are typically located near the CPU. The number of slots may vary depending on your motherboard model.
- Remove Existing RAM (If Applicable): If all the RAM slots are occupied, you will need to remove the existing RAM modules to make room for the new ones. Press down on the retaining clips at each end of the RAM module to release it from the slot. Carefully lift the RAM module out of the slot.
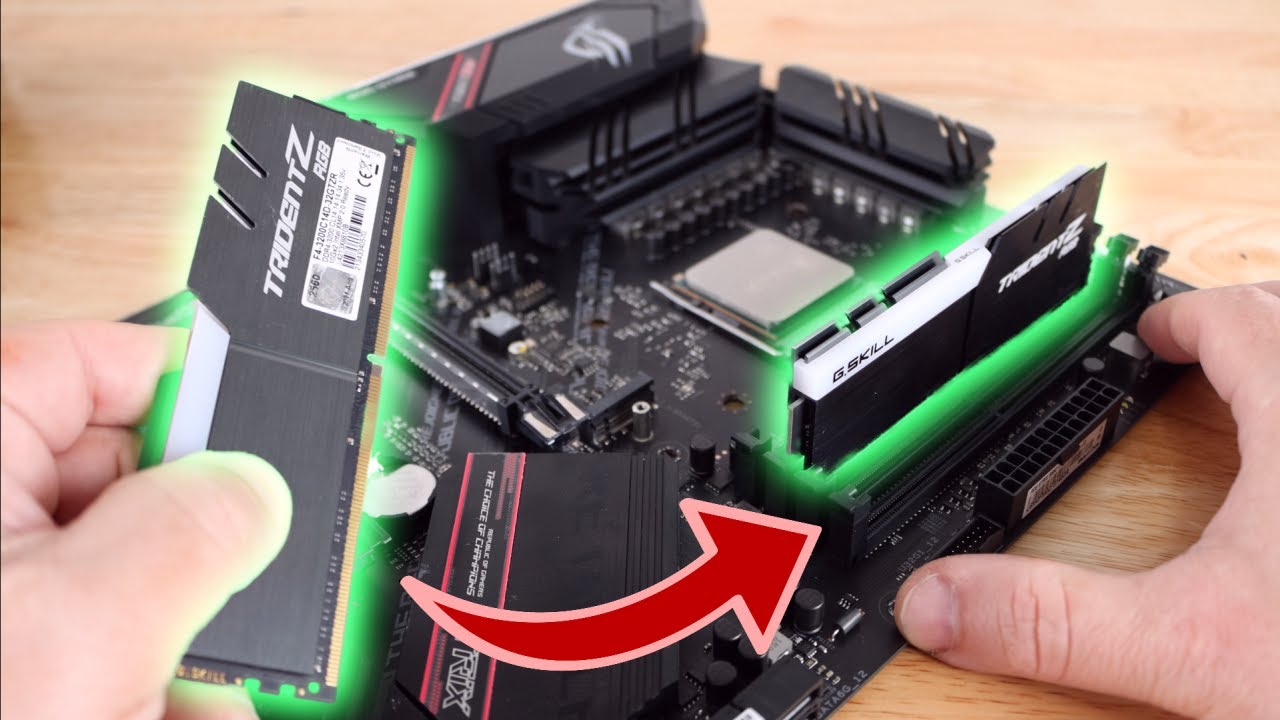
- Insert the New RAM Modules: Align the notch on the bottom edge of the RAM module with the corresponding notch in the RAM slot. Insert the module at an angle of about 30 degrees and gently press it down until the retention clips on both sides click into place, securing the module.
- Check the Alignment: Make sure that the RAM module is inserted evenly and securely. It should be parallel to the motherboard and seated firmly in the slot.
- Close the Case: Once the RAM modules are installed, replace the side panel of your computer’s case and secure it with the appropriate screws or latches.
- Power On and Verify: Plug in your computer, power it on, and check the system information or BIOS settings to verify that the new RAM is recognized. If the RAM is not recognized or if you encounter any issues, refer to the troubleshooting section for assistance.
Remember to handle the RAM modules with care and avoid touching the gold contacts. Take precautions against static electricity and ensure that the modules are inserted correctly and securely into the RAM slots. Closing the case properly is important to ensure proper airflow and cooling for your computer.
If you’re unsure about any step or encounter difficulties during the installation process, consult your computer’s manual or seek assistance from a professional. Proper installation of RAM in your desktop PC can greatly enhance its performance and improve your overall computing experience.
Installing RAM in Laptop PCs
Installing RAM in a laptop requires a bit more caution and precision compared to desktop PCs, as laptops tend to have a more compact and specialized design. Follow these steps to install RAM modules in your laptop:
- Prepare Your Laptop: Shut down your laptop, unplug it from the power source, and ground yourself to discharge any static electricity.
- Locate the RAM Compartment: Determine the location of the RAM compartment on your laptop. This is usually found on the bottom or under a removable panel.
- Remove Existing RAM (If Applicable): If the RAM slots are already occupied, you may need to remove the existing RAM modules. Use your fingers or a small screwdriver to gently press the retaining clips outward and release the module. Carefully slide the module out of its slot.
- Insert the New RAM Modules: Align the notch on the bottom edge of the RAM module with the corresponding notch in the slot. Insert the module at an angle, typically around 30 degrees, and firmly press it down until the retention clips on both sides snap into place.
- Check the Alignment and Locking Mechanism: Ensure that the RAM module is inserted evenly and securely in the slot. The locking mechanism should engage automatically when the RAM module is properly inserted.
- Replace the Cover: If you removed a cover to access the RAM compartment, carefully reattach it and secure it with the appropriate screws or latches.
- Power On and Verify: Plug in your laptop, power it on, and check the system information or BIOS settings to confirm that the new RAM is recognized. If the RAM is not recognized or if you encounter any issues, refer to the troubleshooting section for assistance.
It’s important to follow the manufacturer’s instructions and refer to the laptop’s manual for specific details regarding RAM installation. Be patient and gentle when handling laptop components, taking extra care not to exert excessive force or cause any damage.
Laptops generally have limited upgrade options, including limited RAM slots or soldered RAM modules. Before purchasing new RAM, make sure to verify the maximum supported RAM capacity and the type of RAM your laptop requires. This information can usually be found in the laptop’s manual or on the manufacturer’s website.
If you’re uncertain about the installation process or encounter any difficulties, it’s recommended to seek assistance from a professional or consult the laptop manufacturer’s support resources. Properly upgrading the RAM in your laptop can lead to improved performance and multitasking capabilities, enhancing your overall computing experience.
Troubleshooting RAM Installation Issues
While installing RAM is usually a straightforward process, it’s possible to encounter issues that may prevent your computer from recognizing or properly utilizing the new RAM modules. If you experience any problems after installing RAM, here are some troubleshooting steps to help resolve common issues:
- Recheck Installation: Double-check that the RAM modules are properly inserted into the slots and securely fastened. Ensure that they are aligned correctly and the locking mechanisms on the slots are engaged.
- Compatibility Check: Verify that the RAM modules match the specifications and requirements of your motherboard, including the supported type (DDR, DDR2, DDR3, DDR4), capacity, and speed. Mismatched RAM may cause conflicts or be incompatible.
- Clean the Slots and Contacts: Remove the RAM modules and clean the slots and contacts using compressed air or a soft, lint-free cloth. Dust, debris, or oxidation on the contacts can hinder proper communication between the RAM and the motherboard.
- Swap and Test Modules: If you have multiple RAM modules, try swapping their positions or testing them individually. This can help identify if there is a faulty module causing the issue. Test each module one at a time to determine if any specific module is causing a problem.
- Check BIOS Settings: Access the BIOS settings by pressing the appropriate key during system startup (often Del or F2). Verify that the RAM is correctly detected and configured in the BIOS. Adjust any necessary settings to ensure optimal RAM recognition and performance.
- Update BIOS and Drivers: Check your motherboard manufacturer’s website for any available BIOS updates and install them if necessary. Additionally, ensure that all relevant drivers are up to date, as outdated firmware or drivers can cause compatibility issues.
- Reset CMOS: Resetting the CMOS (Complementary Metal-Oxide-Semiconductor) can sometimes resolve compatibility issues. Refer to your motherboard’s manual for instructions on how to reset the CMOS.
- Seek Professional Help: If you have exhausted all troubleshooting options and still experience issues, it may be best to consult a computer technician or the manufacturer’s support. They can provide more advanced troubleshooting steps or guidance specific to your system.
Remember to handle the RAM modules with care throughout the troubleshooting process and avoid touching the gold contacts. Take notes of any error messages or patterns of behavior to provide precise information when seeking assistance.
It’s worth noting that faulty RAM modules can sometimes be the cause of installation issues. If all troubleshooting steps fail, consider returning or replacing the RAM modules to ensure you have functioning and compatible modules.
By following these troubleshooting steps, you can resolve common RAM installation issues and ensure that your computer recognizes and utilizes the new RAM modules correctly, improving your system’s performance and stability.
Testing RAM and Verifying Its Installation
After installing new RAM modules in your computer, it’s essential to verify their installation and ensure they are functioning correctly. Testing the RAM can help identify any issues or errors that may affect system performance. Here are some methods to test and verify your RAM installation:
- Check System Information: On your computer, go to the system information or system properties to verify that the new RAM modules are recognized. This will allow you to see the total installed memory and confirm that the system is detecting the correct RAM capacity.
- Use Diagnostic Software: Several diagnostic software tools are available that can test the functionality and stability of your RAM. Memtest86 and Windows Memory Diagnostic are popular options. These tools run extensive tests to identify any faults or errors in the RAM modules.
- Run Stress Tests: Utilize stress testing software, such as Prime95 or OCCT, to put your computer under heavy load. These tests can help uncover any instability or crashes that may be caused by the new RAM modules. Monitor your system for any signs of overheating or instability during the stress tests.
- Perform Benchmarking: Run benchmarking software, like PassMark or UserBenchmark, to assess the performance of your computer with the new RAM modules. Compare the results to baseline measurements to ensure the RAM is providing the expected performance boost.
- Monitor System Stability: After installing the new RAM, monitor your system for any signs of instability, crashes, or errors. Pay close attention to any sudden blue screen errors, system freezes, or application crashes that may indicate compatibility or installation issues.
- Test Specific Applications: If you consistently use resource-intensive software, such as video editing or gaming applications, test those specific programs to verify the RAM’s impact on their performance. Monitor for any improvements in loading times, smoother gameplay, or faster rendering speeds.
- Run Multiple Applications: Test the multitasking capabilities of your computer by running several applications simultaneously. Open multiple browser tabs, work on documents, and use resource-intensive applications simultaneously to observe if your system can handle the load without slowdowns or performance issues.
By performing these tests, you can verify that your RAM installation is successful and check for any errors or compatibility issues. If any issues are detected or if you experience system instability, it may be necessary to revisit the troubleshooting section or seek assistance from a professional.
Remember to ensure that you have properly installed and seated the RAM modules. If the tests reveal persistent errors or instability, consider rechecking the installation, swapping RAM modules, or consulting the manufacturer’s support for further assistance.
By thoroughly testing and verifying the RAM installation, you can ensure that your computer is utilizing the new RAM modules correctly and enjoying the improved performance they provide.
Enjoying Increased Performance with More RAM
Adding more RAM to your computer can have a significant impact on its performance, allowing you to enjoy a smoother and more efficient computing experience. Here are some benefits you can expect from increased RAM:
- Improved Multitasking: With more RAM, your computer can handle multitasking with ease. You can run multiple applications simultaneously without experiencing slowdowns or performance degradation. Switching between tasks becomes seamless, allowing you to be more productive and efficient.
- Faster Load Times: Additional RAM means more data can be stored and accessed by your computer quickly. This results in faster load times for applications, files, and websites. You’ll experience snappier response times, reduced waiting, and a more seamless overall user experience.
- Enhanced Gaming Experience: Gamers can enjoy a significant improvement in their gaming experience with extra RAM. Increased RAM capacity allows for smoother gameplay, higher frame rates, and shorter loading times. It also allows modern games to run more smoothly, without stuttering or lag.
- Improved Performance on Resource-Intensive Software: RAM is especially crucial for resource-intensive software like graphic design, video editing, and 3D modeling applications. More RAM allows these programs to run smoothly without slowdowns. Render times are reduced, and editing becomes faster and more efficient.
- Seamless Virtual Machine Performance: If you run virtual machines on your computer, more RAM can greatly enhance their performance. Additional RAM allows you to allocate more memory to the virtual machine, resulting in better efficiency and smoother operation.
- Better System Stability: Having more RAM prevents your computer from relying on virtual memory, which is significantly slower compared to physical RAM. This reduces the chances of system crashes or freezing when memory-demanding tasks are performed.
- Future-Proofing Your System: As software continues to advance, it’s crucial to future-proof your computer. Adding more RAM ensures that your system can handle future updates and requirements. It extends the lifespan of your computer and delays the need for a costly system upgrade.
Remember that adding more RAM is just one component in optimizing your computer’s performance. It’s important to regularly maintain your system, keep software up to date, and monitor resource usage to ensure optimal performance. Additionally, a balanced configuration with a capable processor and a fast storage drive complements the benefits of additional RAM.
By investing in more RAM, you can enjoy increased performance, smoother multitasking, faster load times, and improved stability. Whether you’re a casual user, gamer, or professional, the upgrade can transform your computer into a more powerful and efficient machine.