Introduction
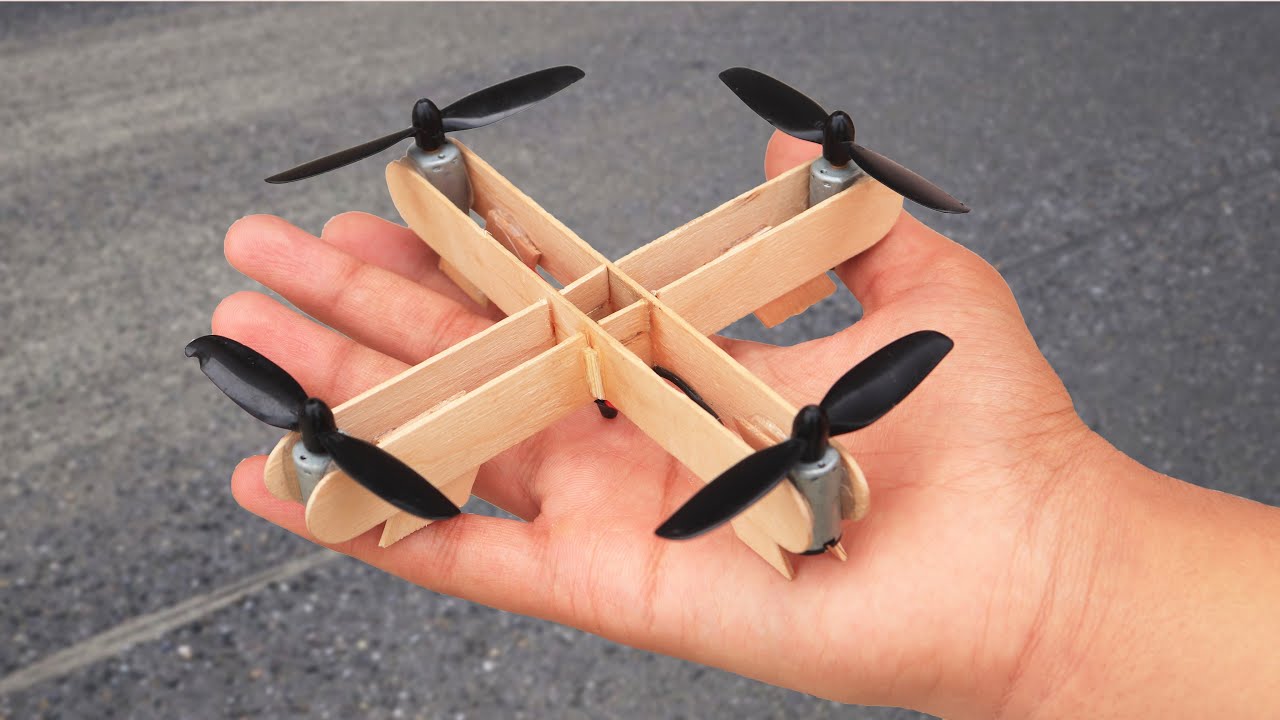
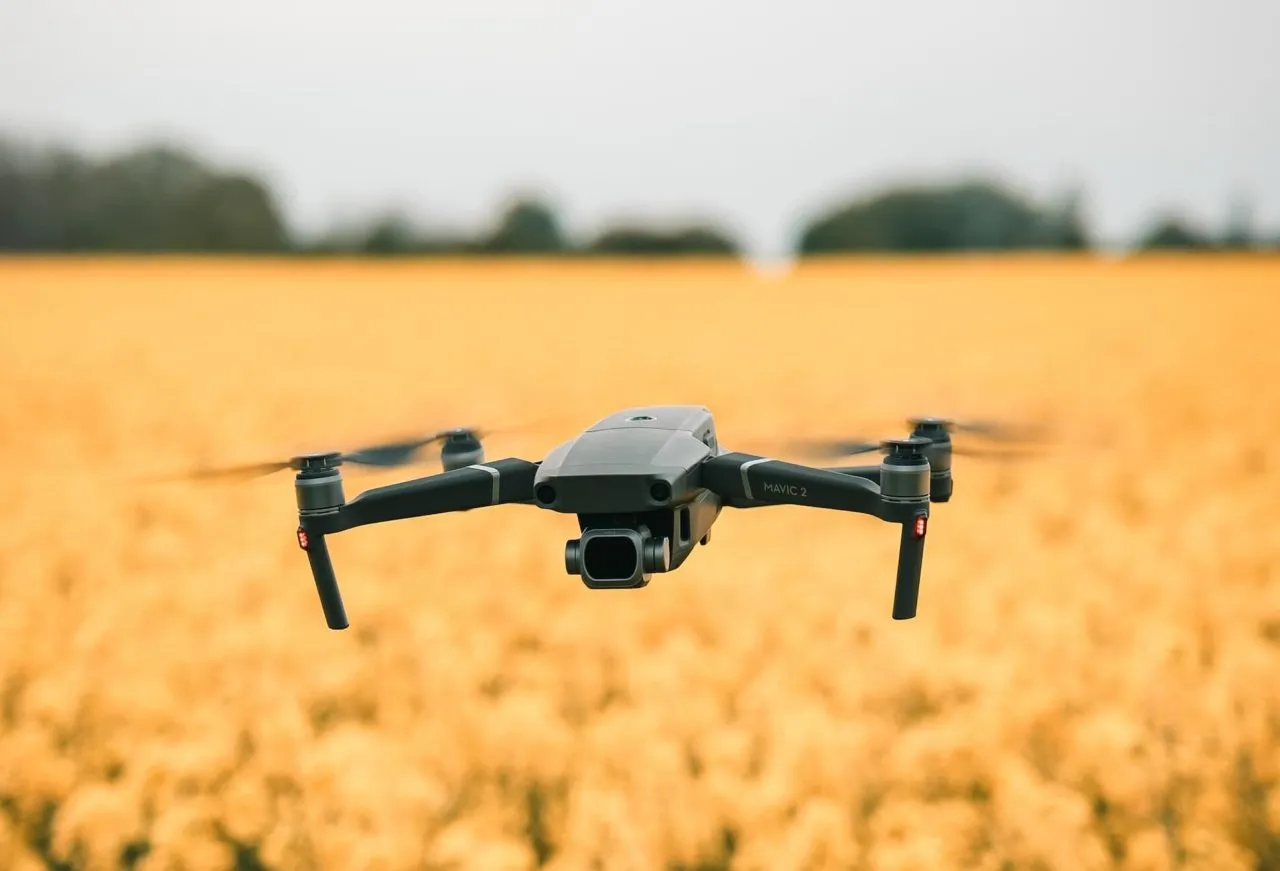
Welcome to the exciting world of drone building! Drones have soared in popularity in recent years, offering endless possibilities for aerial photography, videography, and exploration. Building your own drone gives you the freedom to customize it to your specific needs and preferences, as well as gain a deeper understanding of its inner workings.
Whether you’re a hobbyist or an aspiring professional, this guide will walk you through the process of building your own drone from scratch. No matter your level of experience, this article is designed to provide you with the knowledge and confidence needed to embark on this rewarding journey.
Building a drone requires a combination of technical knowledge and hands-on skills. You’ll need to have a basic understanding of electronics, as well as access to essential tools and equipment. Don’t worry if you’re new to drone building – we’ll break down each step and provide clear instructions to make the process as smooth as possible.
Before we dive in, it’s important to note that building a drone is not only about the physical construction. It also involves configuring and fine-tuning the electronic components to ensure optimal performance and flight stability. So, be prepared to invest time and patience into both the building and setup process.
In this guide, we’ll cover the essential steps involved in building a drone, including choosing the right frame, motors, and flight controller, as well as wiring the components and configuring the flight controller. We’ll also touch on advanced topics like mounting a camera and installing a transmitter and receiver for remote control.
By the end of this guide, you’ll have a fully functional drone that you can take to the skies and capture breathtaking footage. So, let’s get started on this exciting journey and bring your drone-building dreams to life!
Equipment and Tools
Before diving into the drone-building process, it’s important to gather all the necessary equipment and tools to ensure a smooth and efficient construction. Here’s a list of essential items you’ll need:
- Frame: The drone frame serves as the skeleton, providing structural stability and housing for all the components. Choose a frame that suits your needs, taking into account factors like size, weight, and material.
- Flight Controller: The flight controller is the brain of the drone, responsible for stabilizing and controlling its movement. There are various models available, so make sure to select one that is compatible with your frame and offers the features you require.
- Motors and Propellers: Motors generate the thrust needed for the drone to fly, while propellers help in creating lift. Consider the size and power requirements of your frame when selecting motors and propellers that can provide adequate performance.
- Electronic Speed Controllers (ESCs): ESCs regulate the speed of the motors and ensure smooth and responsive control. Match the ESCs with your chosen motors, considering factors like voltage and current ratings.
- Power Distribution Board (PDB): The PDB acts as the central power hub, distributing power from the battery to various components of the drone. Choose a PDB that can handle the current requirements of your setup.
- Battery and Charger: Select a battery that can provide sufficient power for your drone’s flight time, considering factors like voltage and capacity. Additionally, invest in a reliable charger to keep your batteries charged and ready for flight.
- Radio Transmitter and Receiver: The transmitter and receiver enable remote control of your drone. Opt for a reliable and user-friendly set that offers a good range and compatibility with your flight controller.
- Propeller Balancer: A propeller balancer helps ensure that your propellers are properly balanced, reducing vibrations and improving flight stability.
- Soldering Iron and Solder: You’ll need a soldering iron and solder to connect the electronic components securely. Investing in a good-quality soldering iron will make the process easier and more efficient.
- Screwdrivers and Hex Keys: Have a set of screwdrivers and hex keys on hand to assemble and adjust various components of the drone.
- Wire Cutters and Strippers: These tools are essential for cutting and stripping wires to the appropriate lengths during the wiring process.
- Multimeter: A multimeter is useful for testing voltage, continuity, and resistance throughout the building process.
Additionally, it’s advisable to have a workbench or workspace with good lighting, as well as safety equipment like safety glasses and an anti-static wrist strap to protect both yourself and the electronic components.
Gathering all these equipment and tools beforehand will ensure that you have everything you need to build your drone efficiently and with ease. So, let’s move on to the next step – choosing the right frame for your drone!
Choosing the Right Frame
The frame of your drone is like its skeleton – it provides structure and determines the overall size and design. Choosing the right frame is crucial as it impacts the drone’s performance, stability, and payload capacity. Here are some factors to consider when selecting a frame:
1. Size: The size of your drone will depend on its intended use. Smaller frames are more maneuverable and suitable for racing or indoor flying, while larger frames offer stability and are better for aerial photography or heavy payloads.
2. Material: Frames can be made from various materials such as carbon fiber, aluminum, or plastic. Each material has its own advantages and considerations. Carbon fiber frames are lightweight, strong, and offer vibration dampening, but they can be more expensive. Aluminum frames are durable and affordable, but they are heavier. Plastic frames are cost-effective and lightweight, but they may not be as sturdy or durable.
3. Design: Frames come in different designs, including X, H, and + configurations. X frames are popular in racing drones, offering agility and stability. H frames offer a stable platform for aerial photography and are generally larger. + frames provide a good balance between agility and stability and are commonly used in photography drones.
4. Modularity: Consider whether the frame allows for easy customization and future upgrades. Modular frames with standardized mounting patterns can make it easier to add or replace components as needed.
5. Assembly: Look for frames that are easy to assemble and disassemble. Some frames come with integrated power distribution boards and mounting options for flight controllers, making the building process more convenient.
6. Budget: Determine your budget for the drone build and choose a frame that fits within that range. Remember to consider the quality and features offered by the frame, as a cheaper option may compromise durability and performance.
7. Reviews and Recommendations: Research and read reviews from other drone builders to get insights into the performance and reliability of different frame options. Join online forums or communities to seek advice and recommendations from experienced builders.
Remember that the frame is the foundation of your drone, so take the time to evaluate your needs and research different options. Assess trade-offs between size, material, design, and price to find the frame that best suits your requirements. With the right frame, you’ll have a sturdy and reliable platform to build upon.
Selecting the Motors and Propellers
The motors and propellers play a critical role in the flight performance and maneuverability of your drone. Selecting the right combination of motors and propellers is vital to ensure optimal thrust, efficiency, and stability. Here are some factors to consider when choosing motors and propellers for your drone:
1. Thrust Requirements: Determine the thrust requirements of your drone by considering its weight, payload capacity, and desired flight characteristics. It’s essential to choose motors and propellers that can generate enough thrust to lift your drone without overstraining the components.
2. Motor Size and KV Rating: Motor size refers to its physical dimensions, typically denoted by the stator diameter and height. The KV rating indicates the motor’s rotational speed per volt. Higher KV ratings provide more revolutions per minute (RPM) but may consume more battery power. Consider the size constraints of your frame and the desired flight characteristics when selecting motor size and KV rating.
3. Battery Compatibility: Ensure that the motors and propellers are compatible with the battery you plan to use. The battery should be able to supply enough current to the motors without exceeding their maximum ratings.
4. Motor Efficiency: Look for motors with high efficiency to maximize flight time. Efficient motors consume less power and generate less heat, resulting in longer flights and improved overall performance.
5. Propeller Size and Pitch: The propeller size and pitch determine the amount of thrust generated. Larger propellers can move more air and provide higher thrust but may require more powerful motors. Propeller pitch affects the drone’s speed and efficiency, with higher pitches offering faster speeds but potentially sacrificing efficiency.
6. Motor and Propeller Combination: Ensure that the motors and propellers are compatible with each other in terms of size, mounting pattern, and performance. Some propellers are designed specifically for particular motor types, so make sure to check for compatibility.
7. Reviews and Recommendations: Research and read reviews from other drone builders regarding different motor and propeller combinations. Feedback from experienced builders can provide valuable insights and help you make an informed decision.
Remember that the motors and propellers are crucial for achieving a balanced and stable flight. Selecting the right combination requires careful consideration of thrust requirements, motor size and KV rating, battery compatibility, efficiency, and propeller size and pitch. Take your time to research and choose the best combination for your specific drone build, considering factors such as weight, flight characteristics, and desired performance. With the right motors and propellers, you’ll be one step closer to achieving an efficient and enjoyable flying experience.
Understanding Electronic Speed Controllers (ESCs)
Electronic Speed Controllers (ESCs) are essential components that regulate the speed of the motors in your drone. They receive signals from the flight controller and adjust the motor’s power output accordingly. Understanding how ESCs work and selecting the right ones for your drone is crucial for achieving smooth and controlled flight. Here’s what you need to know:
Function: The primary function of an ESC is to regulate the speed and direction of a motor based on the signals received from the flight controller. By controlling the amount of power supplied to the motor, ESCs allow for precise and responsive maneuverability.
Brushed vs. Brushless ESCs: There are two main types of ESCs: brushed and brushless. Brushed ESCs are used with brushed motors, while brushless ESCs are used with brushless motors. Brushless ESCs are more common in modern drones due to their higher efficiency, power, and durability.
Current Rating: ESCs have specific current ratings, which indicate the maximum amount of current they can handle. It’s crucial to select ESCs that can handle the current requirements of your motors to prevent overheating or damage. Consider the voltage and current ratings of your motors when choosing ESCs.
Signal Input: ESCs receive signals from the flight controller via the motor control wires. These signals instruct the ESCs on what speed and direction the motors should rotate. Most ESCs use the industry-standard PWM (Pulse Width Modulation) signal, while some may support other protocols such as Oneshot or Dshot.
Calibration: ESCs need to be properly calibrated to ensure accurate motor control. Calibration involves manually synchronizing the ESCs with the flight controller, allowing for consistent and reliable motor response. The calibration process typically involves following specific instructions provided by the manufacturer.
Programming and Configuration: Some ESCs offer additional features and customization options that can be adjusted through programming software or firmware. These options may include motor timing, startup power, and brake settings. Take time to familiarize yourself with the available settings and adjust them to maximize the performance of your drone.
Reviews and Recommendations: It’s always beneficial to read reviews and seek recommendations from experienced drone builders when choosing ESCs. Feedback from others can provide insights into reliability, performance, and compatibility with your specific setup.
Understanding the function and capabilities of ESCs is crucial for smooth and controlled flight. Ensure that the chosen ESCs have the necessary current rating, are compatible with your motors, and can be calibrated and configured according to your requirements. By selecting the right ESCs, you’ll be on your way to achieving responsive and precise flight control for your drone.
Choosing the Flight Controller
The flight controller is the brain of your drone, responsible for processing and interpreting data from various sensors and controlling the motors and other components. Selecting the right flight controller is crucial for achieving stable and responsive flight performance. Here are the key factors to consider:
1. Compatibility: Ensure that the flight controller is compatible with your chosen frame, motors, and other components. Consider the necessary mounting options, connections, and communication protocols required for seamless integration.
2. Flight Modes and Features: Evaluate the flight modes and advanced features offered by the flight controller, such as stabilizing modes, GPS navigation, altitude hold, and return to home capabilities. Choose a controller that offers the functionalities you require for your specific drone application.
3. Processing Power: Look for a flight controller with sufficient processing power to handle the tasks required for stable flight, data processing, and communication with other components. A more powerful processor can provide faster response times and smoother flight control.
4. Sensor Support: Consider the sensor support provided by the flight controller. Common sensors include accelerometers, gyroscopes, magnetometers, barometers, and GPS modules. Sensor support enables accurate positioning, altitude hold, and overall stability.
5. Software and Firmware: Evaluate the user interface, configurability, and available firmware options for the flight controller. User-friendly software with an intuitive interface can make the setup and configuration process easier. Additionally, good firmware support ensures that your flight controller is kept up to date with the latest features and bug fixes.
6. Community Support: Check the availability of online forums, communities, and resources, as well as the responsiveness of the manufacturer or developer. A robust community can provide valuable support, troubleshooting assistance, and access to firmware updates and new features.
7. Reviews and Recommendations: It’s beneficial to read reviews and seek recommendations from experienced drone builders when choosing a flight controller. Feedback from others can give you insights into reliability, performance, compatibility, and ease of use.
Keep in mind that the flight controller is the heart of your drone’s operations. Take the time to research and choose a flight controller that suits your needs, budget, and level of experience. A well-suited flight controller will ensure stable flight characteristics, precise control, and access to advanced features that enhance the overall drone flying experience.
Installing the Power Distribution Board (PDB)
The power distribution board (PDB) is a crucial component in your drone’s electrical system. It serves as the central hub for connecting and distributing power from the battery to all the necessary components. Installing the PDB correctly is essential to ensure a safe and efficient power supply throughout your drone. Here’s a step-by-step guide on how to install the PDB:
1. Select the Right PDB: Choose a PDB that matches the specific requirements of your drone. Consider factors such as input voltage range, current rating, and the number of connections required for your setup.
2. Plan the Wiring: Before installing the PDB, carefully plan the layout and routing of the wiring. Ensure you have enough space and clearance for all the connections. It is advisable to use a wiring diagram or reference guide provided by the manufacturer or for your specific frame and components.
3. Prepare the Frame: Remove any existing components or covers from your frame that may impede the installation of the PDB. Ensure that the frame is clean and clear of any debris that might come in contact with the electrical connections.
4. Mount the PDB: Securely mount the PDB onto the designated area of the frame, aligning it with the pre-drilled mounting holes or using adhesive pads as recommended by the manufacturer. Double-check the alignment and make sure it is flush against the frame.
5. Connect the Power Source: Connect the positive and negative leads from the battery to the designated input terminals on the PDB. Ensure a secure and tight connection, verifying that the polarity is correct to avoid any potential damage to the electrical components.
6. Connect the Components: Connect the power cables and wires from the various components, such as the flight controller, ESCs, and BECs, to the appropriate output terminals on the PDB. Follow the wiring diagram or reference guide to ensure the correct connections and avoid any shorts or crossed wires.
7. Double-Check the Connections: Before proceeding further, carefully inspect all the connections for any loose wires, exposed wires, or potential short circuits. Ensure that all connections are secure and properly insulated using heat shrink tubing or electrical tape if needed.
8. Secure and Protect the Wiring: Once all the connections are in place, use zip ties or cable management solutions to secure and organize the wiring. This helps prevent any strain on the connections and reduces the chances of wires coming loose during flight.
9. Test the Wiring and Power Supply: Prior to fully assembling your drone, perform a thorough continuity test to ensure all the connections are properly wired and there are no electrical faults. Check the power supply by turning on the drone and verifying that all the components are receiving power.
Proper installation of the PDB is critical for a reliable electrical system in your drone. Take your time during the installation process, ensuring a neat and organized wiring setup. Following these steps will help you avoid any potential electrical issues and provide a solid foundation for the rest of your drone’s construction and configuration.
Wiring the Drone Components
Wiring the components of your drone is a crucial step that ensures proper communication and power distribution among all the electrical parts. A well-organized and correctly wired system not only enhances the efficiency and reliability of your drone but also simplifies troubleshooting and maintenance. Here’s a step-by-step guide on how to effectively wire the drone components:
1. Create a Wiring Plan: Before starting the wiring process, carefully plan and diagram the connections between the components. This will help you understand the required wire lengths, the location of the components, and the routing of the wires.
2. Use the Right Gauge Wire: Select the appropriate wire gauge for each connection, taking into consideration the current requirements of the components. Thicker wires are typically used for high-current components such as motors and power distribution, while thinner wires can be used for low-current components like LEDs or sensors.
3. Cut and Strip the Wires: Measure and cut the wires to the desired lengths, leaving some slack for flexibility. Use wire strippers to remove a small portion of insulation from the ends of the wires, exposing the conductive copper.
4. Solder Connections: Use a soldering iron and solder to create secure and reliable connections. Apply heat to the wire and component terminal simultaneously, then introduce the solder to melt and flow into the connection. Ensure that the solder joint is smooth, shiny, and free from cold solder joints or excessive solder blobs.
5. Insulate Exposed Connections: Once the soldering is complete, cover the exposed connections with heat shrink tubing or electrical tape. This provides insulation and protection against shorts, ensuring a safe and reliable system.
6. Organize and Secure the Wires: Use zip ties, cable management solutions, or adhesive mounts to organize and secure the wires. This helps prevent strain on the connections, reduces the risk of damage or disconnection due to vibration, and promotes an overall neat and professional-looking build.
7. Connect the Flight Controller: Follow the wiring diagram provided by the flight controller manufacturer to connect it to the appropriate components. Ensure proper connection of the motor cables, receiver, ESCs, and any other sensors or peripherals.
8. Double-Check Connections: Before powering on your drone, double-check all the connections to ensure they are secure and properly insulated. Inspect for any exposed wires, crossed connections, or potential shorts. Test the continuity of the circuits to ensure all connections are properly established.
9. Power-On Test: After confirming the connections, power on your drone and test all the components, controls, and sensors. Verify that the flight controller is receiving proper signals, the motors respond correctly, and all other systems are functioning as expected.
Proper wiring is crucial for the overall functionality and safety of your drone. Take your time, follow the wiring plan and diagrams, and double-check every connection. With a well-wired drone, you’ll have a reliable and efficient electrical system that will ensure smooth and enjoyable flights.
Configuring the Flight Controller
Configuring the flight controller is a critical step in setting up your drone for optimal performance and stability. The flight controller serves as the brain of your drone, processing sensor data and executing flight commands. By properly configuring the flight controller, you can customize flight modes, adjust parameters, and calibrate sensors to suit your flying style and specific requirements. Here’s a step-by-step guide on how to configure your flight controller:
1. Choose the Configuration Software: Determine the appropriate configuration software for your flight controller. Many popular flight controllers have dedicated software tools available, such as Betaflight, Cleanflight, or iNav. Download and install the relevant software for your flight controller.
2. Connect the Flight Controller: Connect the flight controller to your computer using a USB cable or utilize any other method specified by the manufacturer. Ensure that the flight controller is powered on and detected by the configuration software.
3. Configure the Basics: Start by configuring the basic settings, including the flight mode preferences, arm and disarm switch configurations, and receiver setup. Follow the instructions provided by the software and refer to the flight controller’s user manual for assistance.
4. Adjust PID Parameters: The Proportional-Integral-Derivative (PID) parameters control the stability and response of your drone. Fine-tuning these parameters allows you to adjust the flight characteristics to match your preferences. Start with the default values recommended by the flight controller manufacturer, and gradually make small adjustments to achieve desired flight performance.
5. Calibrate Sensors: Accurately calibrate the sensors on your flight controller, such as gyroscopes, accelerometers, and magnetometers. Calibration is essential for precise flight control and accurate sensor readings. Follow the provided instructions in your flight controller’s user manual or the configuration software to perform the calibration process.
6. Configure Flight Modes: Set up different flight modes based on your needs. These modes include manual mode, stability mode, altitude hold, GPS navigation, and more. Customize switch assignments and adjust the mode-specific parameters to suit your flying style. Take caution when configuring any advanced flight modes to ensure proper functionality and safety.
7. Test and Fine-Tune: After configuring the basic settings, perform a test flight in a safe and open area. Observe how your drone responds to different inputs, monitor stability, and analyze any issues or anomalies. Make adjustments to the PID parameters if necessary, and continue testing until you achieve stable and responsive flight characteristics.
8. Backup Configuration: Once you have completed the configuration and fine-tuning process, consider saving a backup of your flight controller’s configuration file. This allows you to easily revert to the working settings in case of accidental changes or if you need to restore the configuration on a different flight controller.
Remember to refer to the user manual or online resources specific to your flight controller for detailed instructions and guidance during the configuration process. Each flight controller may have its own unique configuration options and settings. By properly configuring your flight controller, you can optimize the flight performance and tailor your drone to suit your flying preferences and specific requirements.
Calibrating the Electronic Speed Controllers (ESCs)
Calibrating the electronic speed controllers (ESCs) of your drone is a crucial step that ensures accurate motor control and responsiveness. ESC calibration helps synchronize the ESCs with your flight controller, ensuring that each motor operates at the same baseline level. This process also establishes the motor’s minimum and maximum throttle values. Here’s a step-by-step guide on how to calibrate the ESCs:
1. Prepare Your Setup: Make sure your drone is placed on a stable surface, all propellers are removed, and the battery is disconnected. Ensure that you have access to the flight controller and ESCs.
2. Power On the Drone: Connect the flight battery to power on the drone. Verify that the flight controller is receiving power and that the ESCs are powered and initialized. Take note of the ESC initialization tones or LED blinking patterns, as they indicate that the ESCs are ready for calibration.
3. Access the ESC Calibration Mode: ESC calibration involves manipulating the throttle signal during the startup process. Depending on your flight controller and ESC setup, follow the specific procedure to access the ESC calibration mode. This is usually done by a combination of transmitter stick movements or button presses.
4. Enter Calibration Mode: Once in calibration mode, the ESCs will emit a confirmation signal (such as beeping tones or LED patterns) to indicate that they are ready to receive the calibration signal.
5. Calibrate the Throttle Range: Move the throttle stick or transmitter throttle control to its maximum position (full throttle). Wait for a confirmation signal from the ESCs to indicate that the maximum throttle position has been recognized.
6. Move the Throttle to Minimum: Bring the throttle stick or transmitter throttle control to its minimum position (idle or zero throttle). Wait for the ESCs to provide a confirmation signal to indicate that the minimum throttle position has been recognized.
7. Complete the Calibration: After the minimum throttle position has been recognized, follow the specific instructions provided by the ESC manufacturer or flight controller documentation to complete the calibration process. This may involve power-cycling the drone or following additional steps to save the calibration values.
8. Verify Calibration: After completing the calibration process, power off the drone, disconnect the flight battery, and turn on the transmitter/controller. Reconnect the flight battery and check the throttle response through the flight controller software or receiver monitor. Slowly increase the throttle and verify that all motors respond simultaneously and smoothly.
9. Recheck and Refine: If you notice any irregularities or uneven motor response, you may need to recheck and refine the calibration. Repeat the calibration process from the beginning to ensure accurate and synchronized motor control.
Proper ESC calibration ensures consistent motor behavior and enhances flight stability. Follow the specific instructions provided by the ESC manufacturer and flight controller documentation for your specific setup. By effectively calibrating the ESCs, you’ll have a reliable and responsive motor control system for your drone.
Mounting the Motors and Propellers
Mounting the motors and propellers is a crucial step in the assembly of your drone. Properly securing the motors and attaching the propellers ensures stable and efficient flight performance. Here’s a step-by-step guide on how to mount the motors and propellers:
1. Prepare the Frame: Ensure that your drone frame is clean and free of any debris. Remove any protective covers or components that may obstruct motor mounting.
2. Identify Motor Positions: Identify the designated motor positions on your frame. Motors are typically labeled with letters (A, B, C, D) or numbers (1, 2, 3, 4) corresponding to the appropriate corners of the frame.
3. Attach Motor Mounts: Secure the motor mounts or motor screws to the frame using the provided screws or bolts. Ensure that the mounts are firmly attached while allowing proper alignment of the motor.
4. Prepare the Motors: Double-check the motor wires and connectors for any damage or loose connections. If necessary, solder or crimp the motor wires and connectors to secure them properly.
5. Position and Align the Motors: Place the motors onto the motor mounts, aligning them with the screw holes on both the mounts and the motor. Ensure that the motor shaft is aligned with the propeller mounting hole and that the motor wires are facing away from the center of the frame.
6. Screw in the Motors: Carefully screw in the motor screws through the motor holes and into the motor mounts. Use the appropriate screwdriver or hex key to tighten the screws firmly, but avoid overtightening to prevent damaging the motor or mount.
7. Balance the Propellers: If your propellers are not pre-balanced, it’s recommended to balance them before installation. A balanced propeller reduces vibrations and enhances flight stability. Use a propeller balancer and adjust the propeller’s position or add counterweights as needed.
8. Attach the Propellers: Slide the propellers onto the motor shafts, ensuring that they fit snugly and securely. Pay attention to the propeller’s rotation direction, as indicated by the labeling on the propeller and the motor. Clockwise (CW) propellers should be mounted on clockwise spinning motors, and counterclockwise (CCW) propellers on counterclockwise spinning motors.
9. Tighten Propeller Nuts: For safety and to prevent propellers from loosening during flight, tighten the propeller nuts or locknuts. Use the appropriate wrench or pliers to secure them firmly, but again, avoid overtightening.
10. Verify Motor and Propeller Alignment: Ensure that all motors and propellers are aligned and parallel to the frame. Check that there is no excessive wobble or misalignment that could impact flight performance or cause vibrations.
11. Double-Check Connections: Before proceeding, double-check all wiring connections, making sure none have come loose during the motor mounting process. Ensure that motor wires are secured away from propellers and other moving parts.
Properly mounting the motors and propellers is essential for safe and stable flight. Take your time during this step to ensure accurate alignment, tight and secure connections, and balanced propellers. When done correctly, your drone will have reliable propulsion and smooth flight characteristics.
Balancing the Drone
Balancing the drone is a critical step that helps optimize flight performance and stability. Balancing ensures that the weight distribution is evenly distributed, reducing vibrations and improving maneuverability. Here’s a step-by-step guide on how to balance your drone:
1. Check Center of Gravity (CoG): Determine the center of gravity of your drone. This is the point where the drone is perfectly balanced horizontally and vertically. Check the frame’s manual or guidelines for the recommended CoG position.
2. Balance the Frame: Ensure that the frame itself is balanced by checking for any weight discrepancies. If needed, add counterweights or make adjustments to achieve an even weight distribution. This can be done by redistributing components or adding small weights strategically.
3. Balance the Propellers: Propeller balance is crucial for reducing vibrations during flight. Use a propeller balancer to check the balance of each propeller. Add small amounts of adhesive tape or sand the heavier side of the propeller until it is properly balanced.
4. Verify Motor Alignment: Ensure that all motors are aligned straight and perpendicular to the frame. This reduces any unwanted tilting or uneven thrust generated by the motors.
5. Check Payload Distribution: If you plan on adding a payload, verify that it is evenly distributed to maintain balance. Make adjustments to the payload’s position if needed to prevent any excessive weight on one side of the drone.
6. Inspect Wiring and Components: Carefully inspect the drone’s wiring and components, ensuring that nothing is dangling or exerting unnecessary strain on the frame. Secure any loose wires or cables, and route them away from moving parts or propellers.
7. Perform Hover Test: Power on your drone and perform a hover test to evaluate its stability. Observe any abnormal vibrations or tilting during the hover. If imbalances or vibrations persist, recheck the balance of the propellers and weight distribution.
8. Make Fine Adjustments: Gradually fine-tune the balance by making small adjustments based on the results of the hover test. Add or remove slight counterweights, shift components, or further balance the propellers until you achieve optimal stability and smooth flight.
9. Recheck Regularly: It’s important to periodically recheck the balance of your drone, especially after any modifications or component upgrades. Any changes to the drone’s weight or configuration can affect its balance and performance.
By properly balancing your drone, you’ll experience improved flight characteristics, reduced vibrations, and more precise control. Taking the time to carefully balance your drone ensures a stable and enjoyable flight experience.
Adding a Camera (Optional)
Adding a camera to your drone opens up a world of possibilities, allowing you to capture stunning aerial photographs and videos. Whether you’re a photography enthusiast or a professional filmmaker, integrating a camera with your drone can enhance your creative endeavors. Here’s a guide on how to add a camera to your drone:
1. Select the Right Camera: Consider your specific needs and budget when choosing a camera for your drone. Look for a camera that meets your desired specifications, such as resolution, frame rate, image stabilization, and low-light performance.
2. Check Weight and Size: Ensure that the camera you select is suitable for your drone in terms of weight and size. Check the payload capacity of your drone and verify that it can handle the additional weight of the camera without compromising flight performance.
3. Choose a Mounting Mechanism: Research and select a suitable mounting mechanism for your chosen camera. Depending on your drone’s design and compatibility with accessories, options may include gimbal mounts, vibration dampeners, or custom brackets.
4. Install a Gimbal (If Necessary): If your camera requires stabilization during flight, consider installing a gimbal. A gimbal provides smooth and steady footage by actively compensating for drone movements. Follow the instructions provided by the gimbal manufacturer to properly install and calibrate it.
5. Ensure Proper Wiring and Power: Connect the camera to the appropriate cables, ensuring that wiring is secure and protected. Also, verify that the camera is receiving power from the drone’s electrical system or a separate power source, depending on the camera’s requirements.
6. Check Camera Orientation: Adjust the camera’s positioning and alignment to ensure the desired field of view and framing. Consider the drone’s flight characteristics and ensure that the camera is mounted safely and securely, minimizing any obstructions in the field of view.
7. Test Camera Functionality: Power on the drone and test the camera’s functionality. Check the live feed or monitor to ensure that the camera is capturing and transmitting footage correctly. Verify that the settings, such as resolution and frame rate, are configured according to your preferences.
8. Monitor Stability: When adding a camera, it’s important to monitor the drone’s stability and flight performance. Ensure that the additional weight and aerodynamics of the camera do not negatively impact the drone’s maneuverability and balance.
9. Comply with Regulations: Be aware of any local regulations or restrictions regarding drone cameras. Familiarize yourself with the applicable laws, permits, and guidelines to ensure that you operate within legal boundaries and in a respectful manner towards privacy and safety concerns.
Adding a camera to your drone can take your aerial photography and videography to new heights. It’s a thrilling way to capture breathtaking perspectives and tell captivating stories. By carefully selecting and integrating a camera into your drone, you’ll have the opportunity to explore your creativity and showcase the world from a unique perspective.
Installing a Transmitter and Receiver
Installing a transmitter and receiver is a crucial step in preparing your drone for remote control. The transmitter allows you to wirelessly command and control the drone, while the receiver receives and translates these commands to the flight controller. A properly installed transmitter and receiver combination ensures reliable and seamless communication. Here’s a step-by-step guide on how to install a transmitter and receiver:
1. Select the Transmitter and Receiver: Choose a transmitter and receiver that are compatible with each other and suitable for your drone’s needs. Consider the number of channels, compatibility with your flight controller, and the range required for your flying environment.
2. Mount the Receiver: Determine a suitable location on the drone’s frame to mount the receiver. Consider factors such as accessibility, interference from other components, and the positioning of antennas for optimal signal reception. Securely attach the receiver using adhesive tape, Velcro straps, or mounting brackets.
3. Identify Receiver Channels: Identify the receiver channels required for your specific drone setup. These channels control various functions on your drone, such as motor control, flight modes, camera tilt, or LEDs. Follow the manufacturer’s instructions on which channels to connect to specific components.
4. Connect the Receiver to Flight Controller: Connect the receiver to the flight controller using the appropriate cables or connectors. Match the receiver’s channels to the corresponding connections on the flight controller, such as throttle, yaw, pitch, and roll.
5. Maintain Wire Organization: Ensure that the receiver’s wires are neatly organized and secured to avoid tangling or interference with other components. Use zip ties, adhesive mounts, or cable management solutions to route and secure the wires along the drone’s frame.
6. Bind the Transmitter and Receiver: Follow the manufacturer’s instructions to bind your transmitter and receiver. This process establishes a unique connection between the two, ensuring that commands from your transmitter are received and recognized by the receiver.
7. Verify Receiver Signal Strength: After binding the transmitter and receiver, perform a range and signal strength test. Walk away from the drone while checking the transmitter’s signal strength indicator. Ensure that the signal remains strong and consistent within your desired flying range.
8. Test Control Inputs: Power on your drone, transmitter, and receiver. Verify that all control inputs from the transmitter are properly recognized and translated by the receiver. Check the response of the drone’s motors, servos, or any other controlled components to ensure smooth and accurate control.
9. Double-Check Connections: Before flying your drone, double-check all connections between the transmitter, receiver, and flight controller. Ensure that the connections are secure and free from any loose or exposed wires.
Installing a transmitter and receiver is an important step in setting up remote control for your drone. Ensure compatibility, secure mounting, proper wire organization, and robust signal reception for reliable and precise control. By following these steps, you’ll have a well-integrated and responsive control system for your drone.
Testing and Fine-Tuning the Drone
Testing and fine-tuning your drone is a critical phase that ensures optimal performance and flight characteristics. By thoroughly testing and making necessary adjustments, you can achieve stable flight, responsive controls, and an enjoyable flying experience. Here’s a step-by-step guide on how to test and fine-tune your drone:
1. Pre-Flight Check: Before taking your drone to the skies, conduct a thorough pre-flight check. Inspect all components, including motors, propellers, wiring, and connections, to ensure they are secure and in good condition. Ensure that the flight battery is fully charged and correctly installed.
2. Choose a Suitable Flying Location: Find an open area with minimal obstacles and interference for your test flights. A large field or an empty, unpopulated area is ideal for the initial flights. Avoid flying near people, buildings, or restricted airspace.
3. Power On and Calibrate: Power on your drone and allow it to initialize. Calibrate the flight controller, as well as any sensors, such as the compass or GPS, as per the manufacturer’s instructions. This ensures accurate data processing and reliable flight performance.
4. Perform Hover Test: Gradually increase the throttle to lift the drone off the ground and observe its behavior during hovering. Check for any oscillations, vibrations, or irregular movements. Make necessary adjustments to the PID parameters to achieve smooth and stable hovering.
5. Test Basic Maneuvers: Begin with simple maneuvers to evaluate the responsiveness and stability of your drone. Test forward and backward flight, altitude changes, and left and right turns. Assess how well the drone responds to your control inputs and make adjustments to the rate or expo settings for better control.
6. Monitor Flight Characteristics: Observe flight characteristics such as pitch, roll, and yaw responsiveness. Ensure that the drone’s movements are smooth and predictable. If necessary, further adjust the PID parameters to fine-tune the drone’s flight characteristics.
7. Check Motor Heat: After several minutes of flight, check the temperature of the motors. If any motor feels excessively hot to the touch, it may be an indication of inefficient performance or inadequate cooling. Investigate the issue and make appropriate adjustments to prevent overheating.
8. Assess Battery Performance: Monitor the flight time and overall battery performance during test flights. Note any inconsistencies or unexpected voltage drops. This information helps you understand the battery’s capabilities and may lead to adjusting flight parameters or upgrading the battery in the future.
9. Record and Analyze Flight Data: Utilize flight data recording or logging features, if available, to capture data during test flights. Analyze this data afterwards to identify any patterns, trends, or anomalies. Use this information to make informed adjustments for better flight performance.
10. Iterative Fine-Tuning: Fine-tuning is an iterative process. Continue test flights, assess flight characteristics, and make incremental adjustments to the drone’s configuration. Consider factors such as flight mode settings, control rates, stabilization gains, and motor thrust.
11. Perform Routine Maintenance: Regularly inspect and maintain your drone after the test flights. Check for any wear and tear, tighten loose screws, and clean the drone to keep it in optimal condition. Ensuring the drone is well-maintained enhances performance and extends its lifespan.
By conducting thorough test flights and making incremental adjustments, you can fine-tune your drone for optimal flight performance. Regular testing and maintenance help you ensure a safe and enjoyable flying experience. Take the time to understand your drone’s behavior and make gradual adjustments to achieve the desired flight characteristics.
Conclusion
Building and configuring your own drone is an exciting and rewarding endeavor. It allows you to customize your drone to meet your specific needs and gain a deeper understanding of its inner workings. Through careful selection of components, meticulous assembly, and fine-tuning, you can create a drone that delivers excellent flight performance, stability, and functionality.
Throughout this guide, we have covered the essential steps involved in building a drone, from selecting the right frame, motors, and propellers to wiring the components and configuring the flight controller. We also explored optional additions such as adding a camera to capture stunning aerial footage and installing a transmitter and receiver for remote control.
By following the steps outlined in this guide, you can ensure that your drone is built safely and correctly. Proper installation, calibration, and testing are key to achieving optimal flight performance. Continuously monitor and fine-tune your drone, making incremental adjustments as needed to maximize stability, responsiveness, and flight characteristics.
Remember, safety should always be a top priority. Familiarize yourself with local regulations and guidelines for drone use, and operate your drone responsibly and within the designated areas. Regularly inspect and maintain your drone to ensure it remains in good condition and performs optimally.
Building your own drone is not only a fulfilling experience, but it also opens up a world of possibilities for aerial photography, videography, and exploration. Enjoy the thrill of taking to the skies and capturing breathtaking footage from a unique perspective. So, take the knowledge gained from this guide, embark on your drone-building journey, and soar to new heights!


