Introduction
Are you looking to sign up for Google Workspace, formerly known as G Suite? Google Workspace is a powerful suite of productivity and collaboration tools designed for businesses, organizations, and individuals. From email and cloud storage to document collaboration and video conferencing, Google Workspace offers a wide range of features to streamline your work and boost your productivity.
Signing up for Google Workspace is a straightforward process that can be completed in just a few simple steps. Whether you’re a small business owner, a freelancer, or part of a larger organization, this guide will walk you through the sign-up process and help you get started with Google Workspace in no time.
In this article, we will explore the step-by-step process of signing up for Google Workspace. From visiting the official website to setting up your administrator account and choosing the right plan for your needs, we’ll cover all the essential information you need to know to get started.
So, if you’re ready to unlock the full potential of Google’s suite of productivity tools, let’s dive into the process of signing up for Google Workspace.
Step 1: Go to the Google Workspace website
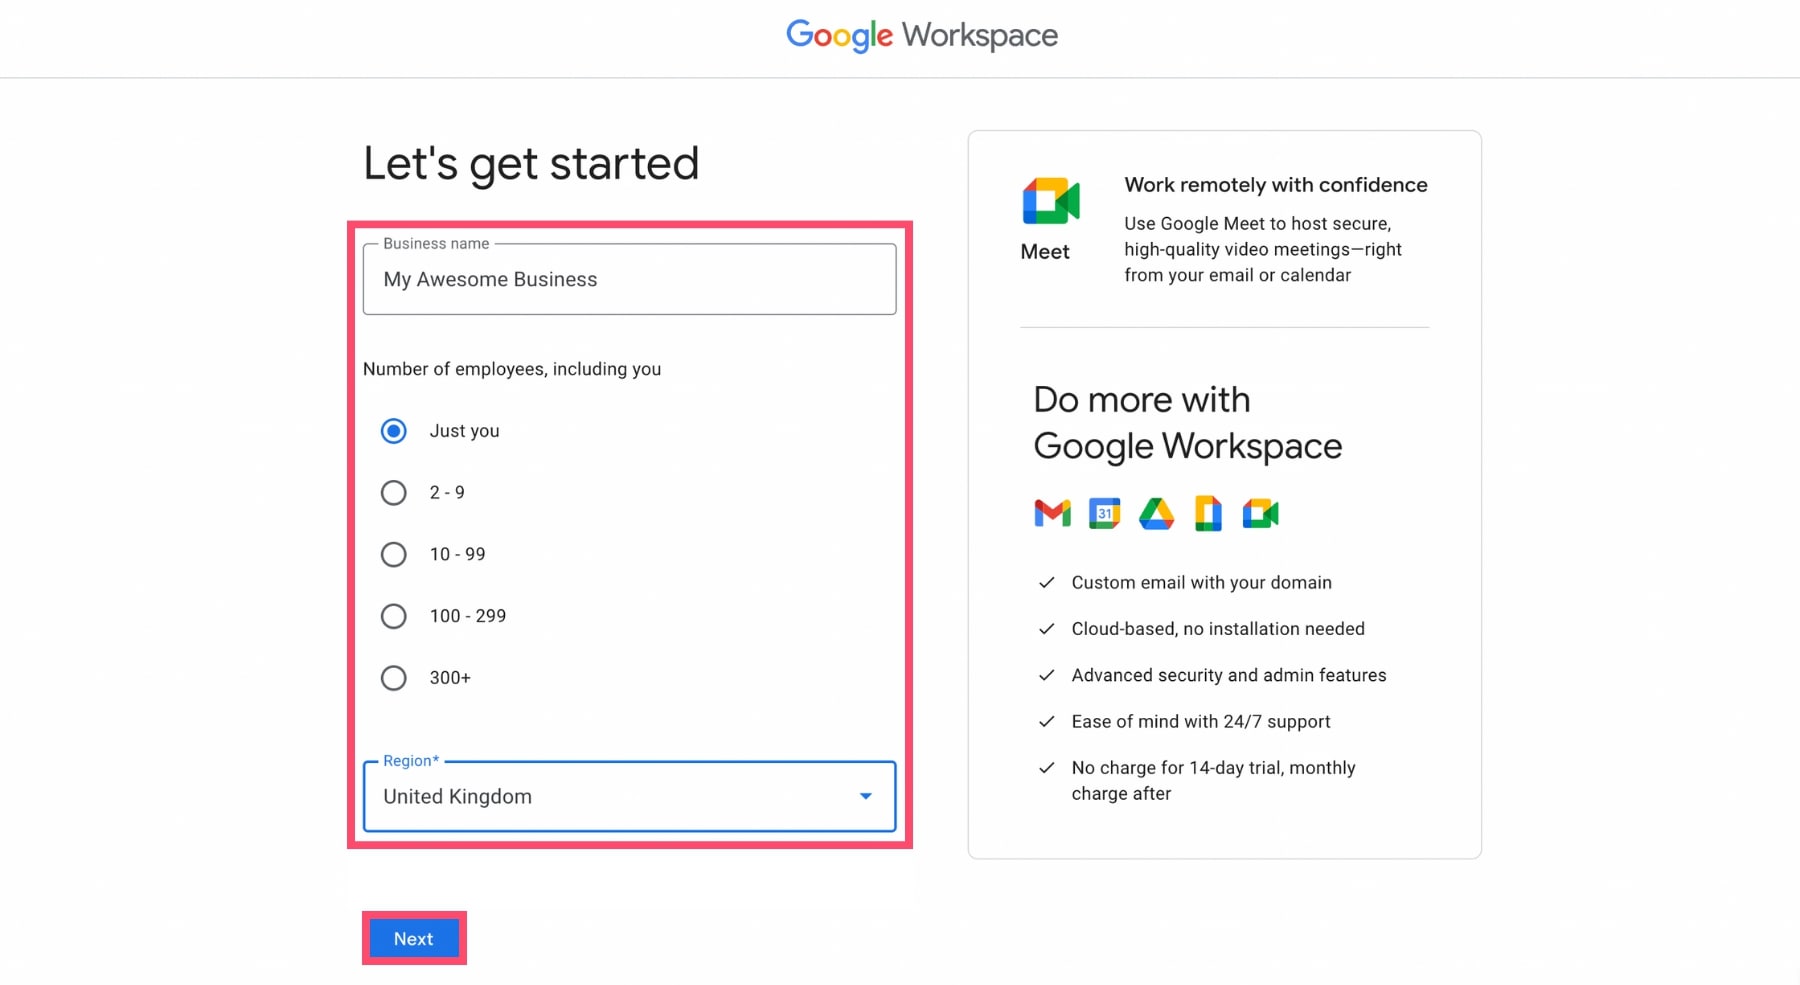
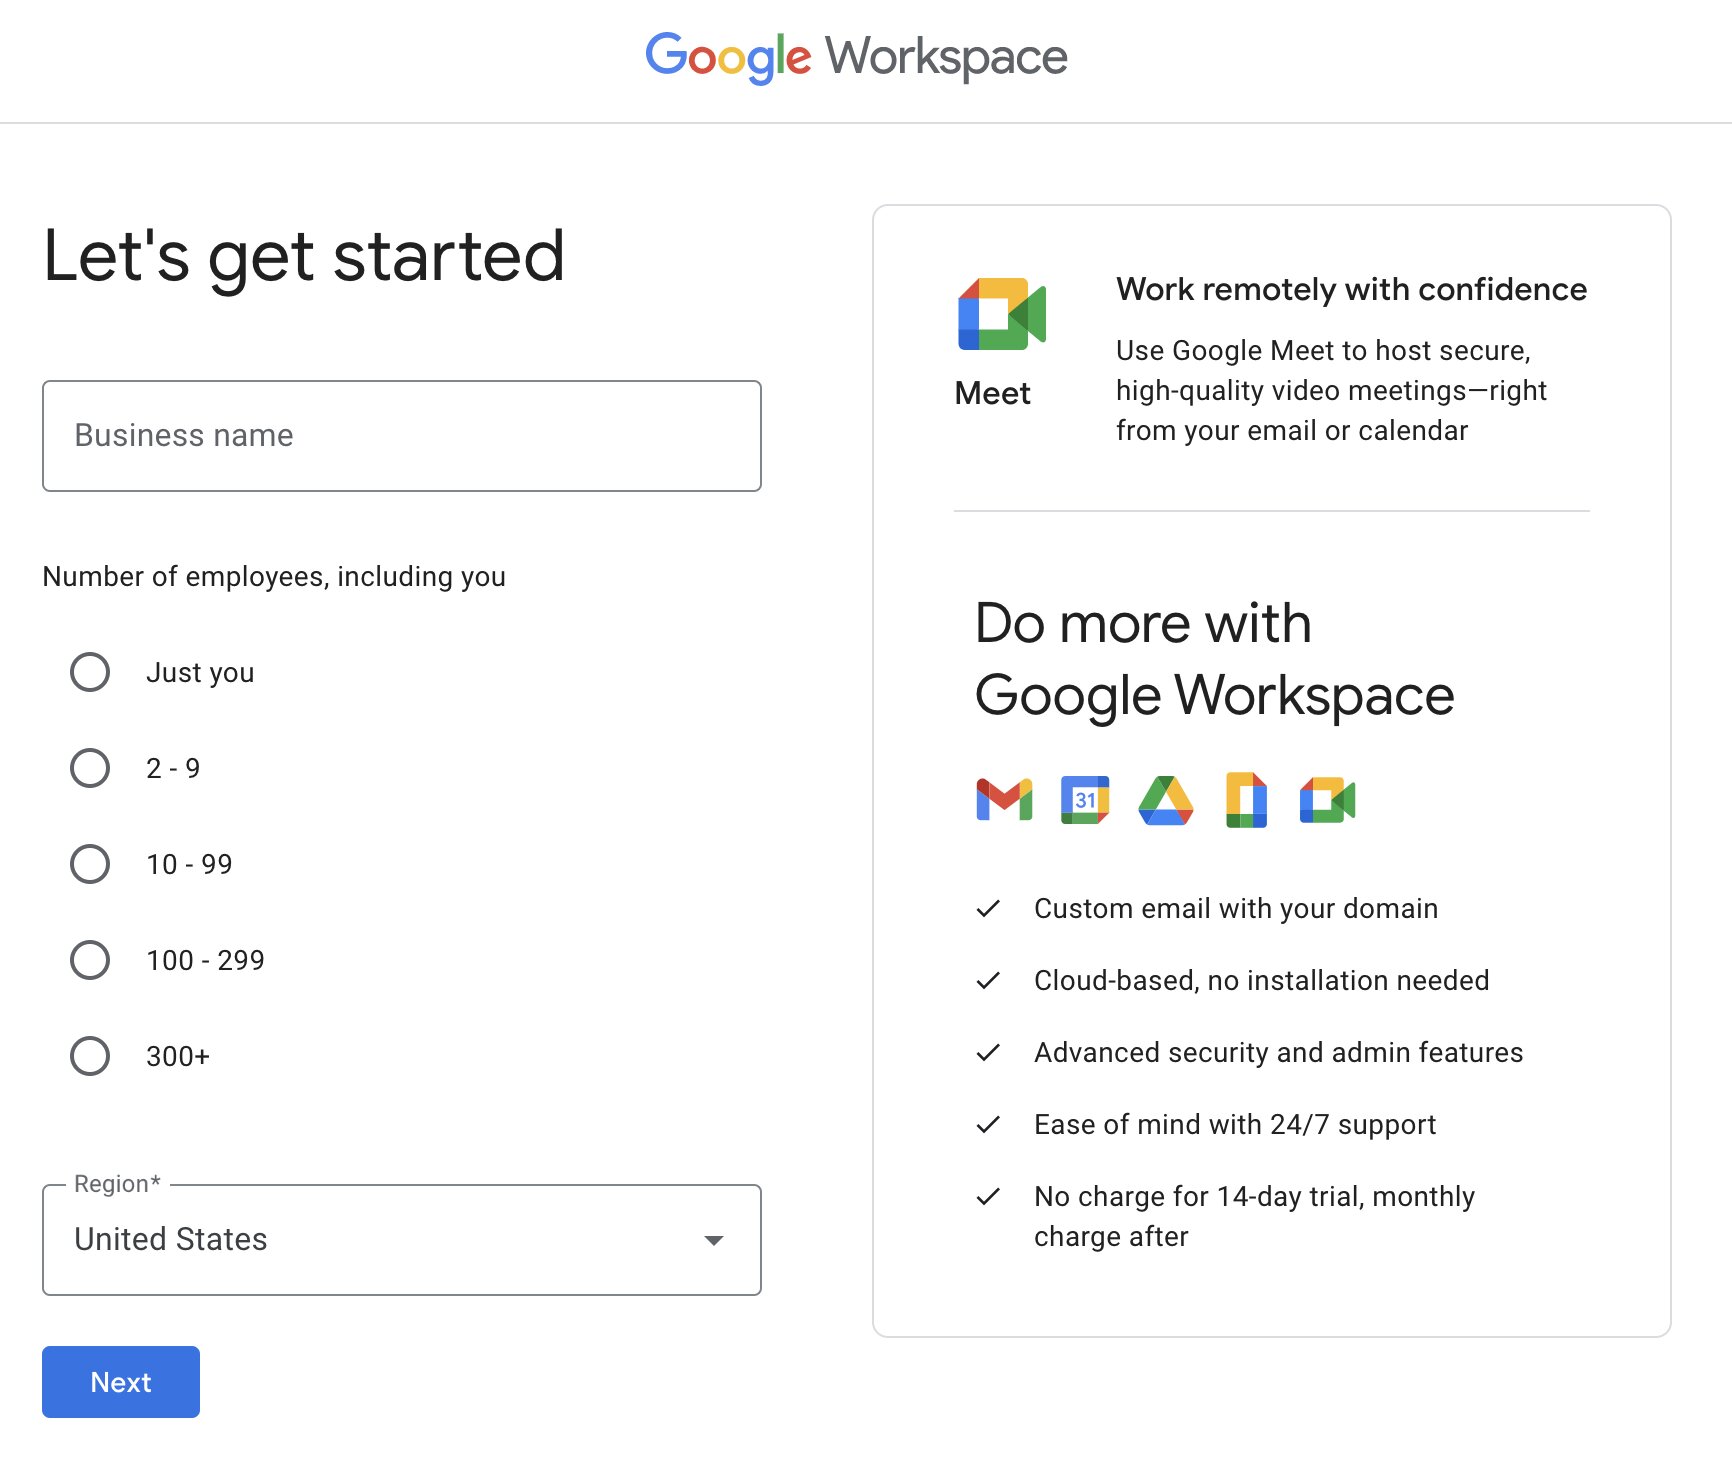
The first step to sign up for Google Workspace is to visit the official website. Open your web browser and navigate to https://workspace.google.com. This is the official website where you can find all the information about Google Workspace and start the sign-up process.
Once you’re on the Google Workspace website, take a moment to explore the various features and benefits of the platform. You’ll find details about different plans, pricing, and the tools available within each plan.
If you’re still unsure whether Google Workspace is the right choice for you, you can also check out customer testimonials, case studies, and other resources available on the website. These can give you a better understanding of how Google Workspace can transform your work and improve collaboration.
When you’re ready to proceed with the sign-up process, look for the “Get Started” button on the website. This button is usually prominently displayed on the homepage or in the header section of the website. Click on it to begin the process of signing up for Google Workspace.
By clicking on the “Get Started” button, you will be taken to the next step, where you can choose the plan that best suits your needs. We’ll explore this step in more detail in the next section.
Step 2: Click on the “Get Started” button
After landing on the Google Workspace website, the next step is to click on the “Get Started” button. This button is a crucial part of the sign-up process as it will take you to the plan selection page.
The “Get Started” button is typically prominently displayed on the website’s homepage or in the header section. Look for a button with this label and give it a click to proceed.
Upon clicking the “Get Started” button, you will be redirected to a page where you can explore and choose from the different plans offered by Google Workspace. Each plan is tailored to cater to specific needs and budgets.
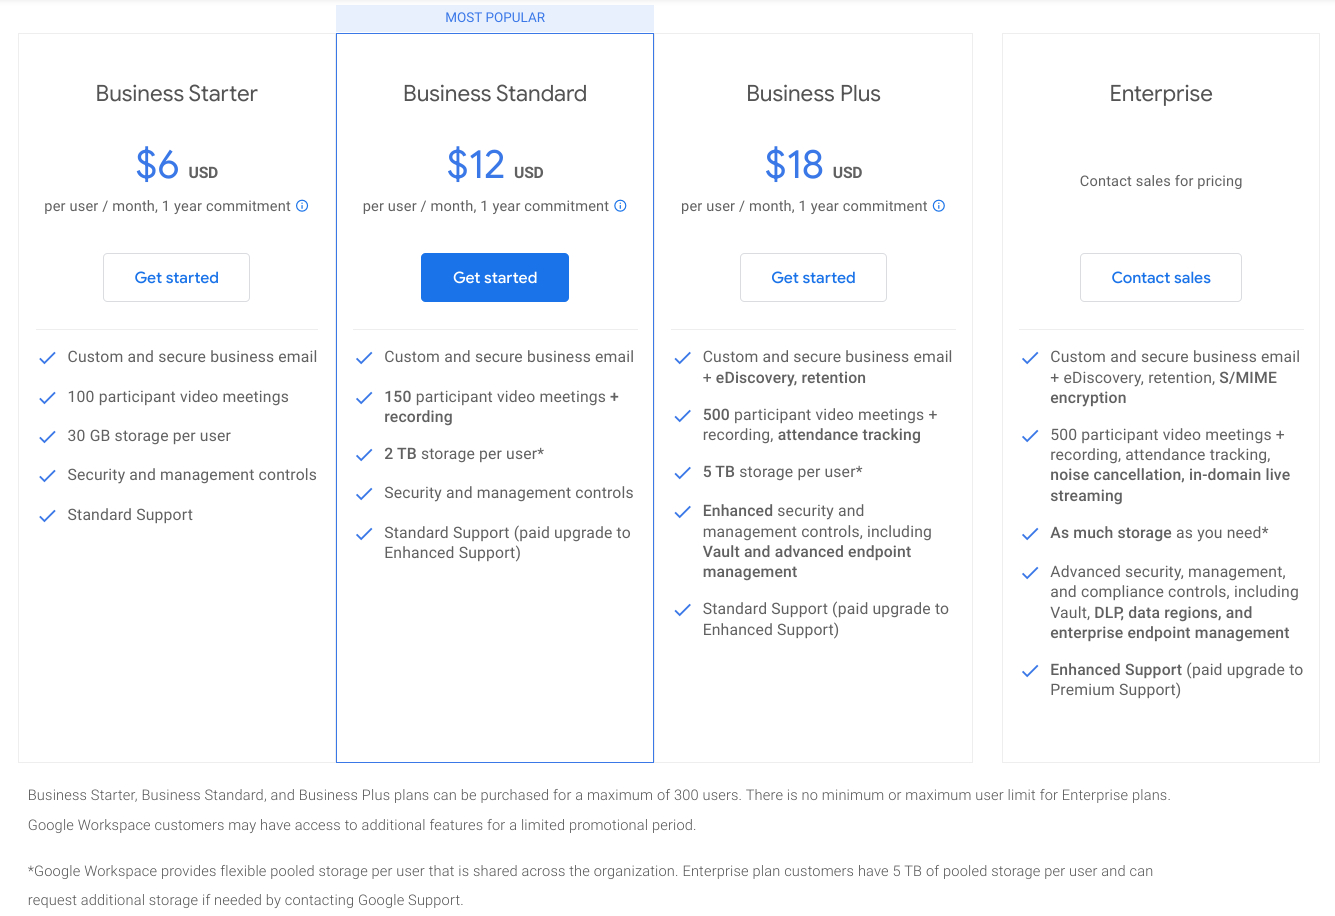
Take your time to review the available plans and their features. You will usually find options such as Basic, Business, and Enterprise. These plans differ in terms of storage capacities, collaboration tools, security features, 24/7 support, and more. Consider your requirements and budget to select the most suitable plan for your organization or personal use.
It’s worth noting that Google Workspace offers a free trial period, so you have the opportunity to test the platform before committing to a paid plan.
Once you have decided on a plan, click on the applicable plan button to move on to the next step of the sign-up process. In the following steps, you will need to provide your domain name, set up your administrator account, and customize your Google Workspace experience.
By reaching this step, you are one step closer to unlocking the powerful features and benefits of Google Workspace. Let’s move on to the next step and explore how to enter your domain name.
Step 3: Choose a plan that suits your needs
Choosing the right plan is an important decision when signing up for Google Workspace. It’s essential to select a plan that aligns with your requirements, budget, and desired features.
When you reach the plan selection page after clicking on the “Get Started” button, you will see a list of available plans offered by Google Workspace. Each plan comes with its own set of features and pricing.
To make an informed decision, consider the following factors:
- Business Size: Assess the size of your organization or team. Google Workspace plans are designed to cater to both small businesses and larger enterprises. Consider whether you need a plan that supports a handful of users or provides scalability for a growing team.
- Features: Review the features included in each plan. Basic plans typically offer essential tools like Gmail, Google Drive, Google Calendar, and Docs. Business and Enterprise plans include advanced features such as advanced admin controls, eDiscovery, and data loss prevention. Take note of the features that are most important for your work.
- Storage: Evaluate your storage needs. Higher-tier plans generally provide larger storage capacities, which can be crucial for organizations that deal with large files or require significant storage space for collaboration.
- Support: Consider the level of support you require. Basic plans offer support through email and community forums, while higher-tier plans provide 24/7 phone, email, and chat support. Assess the level of support that aligns with your needs and preferences.
- Pricing: Compare the pricing for each plan and determine which fits within your budget. Google Workspace offers flexible pricing options, and you can choose between monthly and annual billing cycles.
By carefully evaluating these factors, you can choose a plan that best suits your needs. Once you have made your decision, select the plan by clicking the corresponding button. This will move you to the next step in the sign-up process.
Next, we will look at how to enter your domain name in order to proceed with the sign-up process.
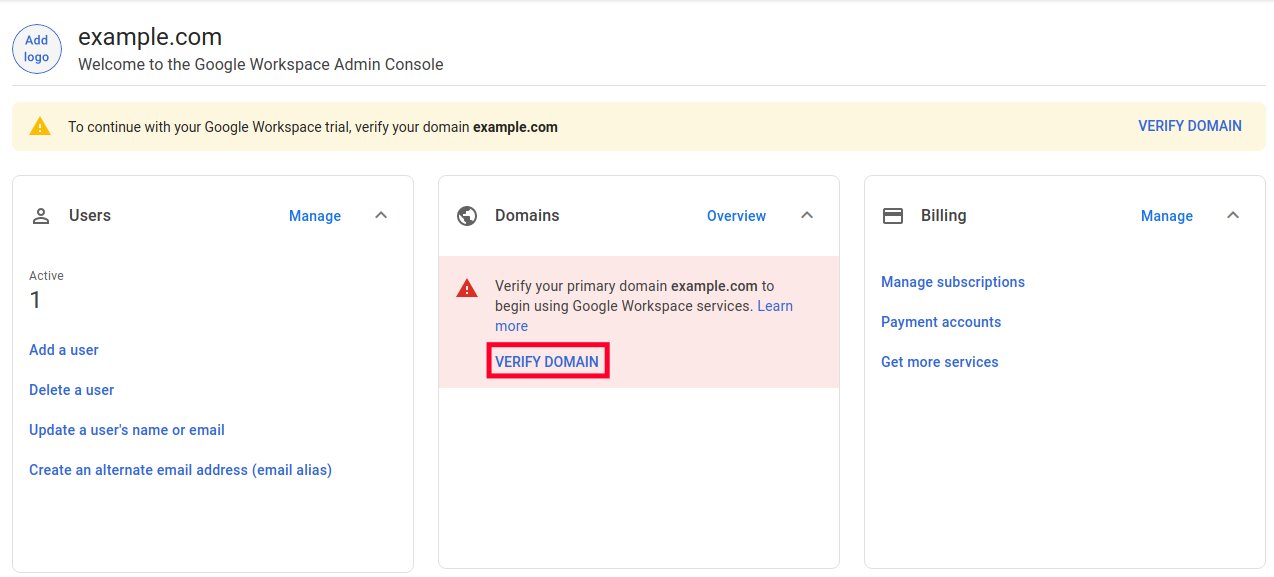
Step 4: Enter your domain name
Entering your domain name is a crucial step in the sign-up process for Google Workspace. Your domain name represents your website or email address and will be associated with your Google Workspace account.
After selecting the appropriate plan, you will be prompted to enter your domain name. This is the web address that visitors will use to access your website or the email address associated with your business or organization.
Typically, you will see a field where you can input your domain name. For example, if your business is called “examplecompany” and your website is “www.examplecompany.com,” you would enter “examplecompany.com” in the provided field.
If you already have a domain name registered with a domain registrar, you can use that domain name. On the other hand, if you don’t have a domain name yet, Google Workspace also offers the option to purchase a domain through their partner domain registrar.
It’s important to ensure that the domain you enter is correctly spelled and formatted. Double-check for any typos or errors to avoid complications later on. If you’re unsure about how to format your domain name, consult the guidelines or examples provided on the sign-up page.
Once you have entered your domain name, click on the “Next” or equivalent button to proceed. This will take you to the next step of the sign-up process, which involves setting up your administrator account.
Entering your domain name is an important step as it connects your Google Workspace account with your organizational or business identity. Take your time to verify the accuracy of your domain name before moving on to the next step.
In the next section, we will explore how to set up your administrator account, which will grant you administrative access to manage your Google Workspace account and users.
Step 5: Set up your administrator account
Setting up your administrator account is a crucial step in the sign-up process for Google Workspace. As the administrator, you will have full control over your organization’s Google Workspace account, including user management, security settings, and access to administrative features.
After entering your domain name, you will be prompted to set up your administrator account. This account will serve as the main point of contact and control for managing your Google Workspace account.
To set up your administrator account, you will typically need to provide the following information:
- Name: Enter your full name or the name of the person who will be responsible for managing the Google Workspace account.
- Username: Choose a unique username for your administrator account. This will be the email address associated with your Google Workspace admin account. It’s recommended to use an email address that is easy to remember and identifies you or your organization.
- Password: Create a strong and secure password for your administrator account. Make sure to include a combination of uppercase and lowercase letters, numbers, and special characters. It’s important to choose a password that is not easy to guess to ensure the security of your account.
- Security Questions: Set up security questions and provide answers for account recovery purposes. These security questions will be used to verify your identity in case you forget your password or need to regain access to your account.
Follow the prompts and provide the necessary information to set up your administrator account. Take note of the email address and password you choose, as you will need them to log in to your Google Workspace admin console in the future.
It’s important to ensure that the information you provide is accurate and up to date. Double-check for any typos or errors to avoid complications later on.
Once you have completed the setup process for your administrator account, click on the “Next” or equivalent button to proceed. This will take you to the next step, where you can choose additional services and products to add to your Google Workspace account.
In the following section, we will explore how to choose additional services and products to enhance your Google Workspace experience.
Step 6: Choose additional services and products
Once you have set up your administrator account, it’s time to customize your Google Workspace experience by choosing additional services and products that align with your needs. Google Workspace offers a wide range of features and add-ons that can enhance collaboration, communication, and productivity within your organization.
After completing the setup of your administrator account, you will be presented with a list of optional services and products to add to your Google Workspace account. These may include:
- Google Meet: A video conferencing tool that allows you to host virtual meetings and collaborate with team members and clients.
- Google Chat: A messaging platform for real-time communication and collaboration with colleagues.
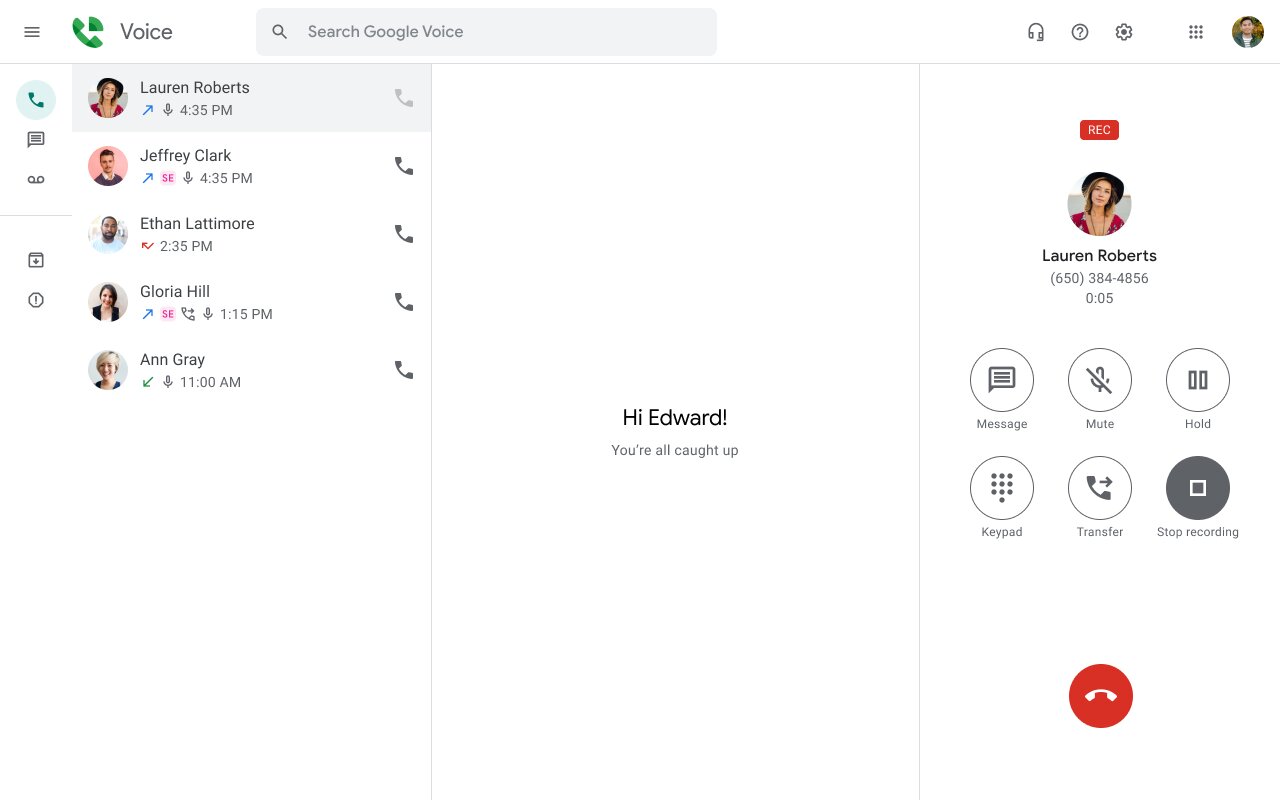
- Google Voice: A cloud-based telephony service that enables you to make and receive phone calls using your Google Workspace account.
- Google Drive Storage Enhancements: Additional cloud storage options to accommodate your organization’s growing data needs.
- Enterprise Security Features: Advanced security measures that provide additional protection against cybersecurity threats.
Review the available options and select the services and products that best suit your organization’s requirements. Consider factors such as the size of your team, communication needs, and data storage requirements when choosing these additional features.
Keep in mind that some services and products may incur additional costs or require specific technical configurations. Take the time to explore the details and pricing associated with each option before making your selections.
Once you have chosen the additional services and products, click on the “Next” or equivalent button to proceed to the next step of the sign-up process.
In the final step, we will review the information provided and complete the sign-up process for Google Workspace. Let’s move on to the next section.
Step 7: Review your information and complete the sign-up process
As you reach the final step of signing up for Google Workspace, it’s crucial to carefully review the information you have provided to ensure its accuracy. By reviewing your information, you can avoid any potential issues or errors that may affect the functionality of your Google Workspace account.
On this page, you will see a summary of the information you have entered throughout the sign-up process. Take the time to verify the following details:
- Plan: Confirm that the selected plan is the one you intended to choose, and it aligns with your organization’s needs.
- Domain Name: Double-check that the domain name you provided is correctly spelled and accurately represents your organization’s website.
- Administrator Account: Ensure that the information associated with your administrator account, such as name, username, and password, is correct and up to date.
- Additional Services and Products: Review the selected add-ons and features to ensure they meet your organization’s requirements.
If you spot any mistakes or inconsistencies, you can usually navigate back to the respective steps and make the necessary corrections before proceeding.
Once you have verified that all the information is accurate, you can click on the “Agree and Continue,” “Submit,” or equivalent button to complete the sign-up process. This action confirms your acceptance of the terms and conditions associated with Google Workspace and signifies the completion of the sign-up process.
After submitting your information, you may be prompted to set up payment details and provide billing information if you have chosen a paid plan. Follow the instructions provided to finalize the payment process.
Once the sign-up process is complete, you will receive a confirmation email with additional details, including instructions on how to access your Google Workspace account. Congratulations, you are now officially signed up for Google Workspace!
It’s important to familiarize yourself with the admin console and the various features and settings available to you as the administrator. This will enable you to manage users, customize settings, and make the most of Google Workspace’s capabilities.
With the sign-up process complete, you can begin exploring the tools and features of Google Workspace, allowing you to collaborate more effectively, communicate seamlessly, and enhance productivity within your organization.
Conclusion
Signing up for Google Workspace is a straightforward process that empowers businesses, organizations, and individuals to leverage the power of Google’s suite of productivity tools. By following the step-by-step guide outlined in this article, you can seamlessly navigate through the sign-up process and unlock the full potential of Google Workspace.
We started by visiting the official Google Workspace website and clicking on the “Get Started” button. From there, we discussed the importance of choosing a plan that suits your needs, considering factors such as business size, features, storage, support, and pricing.
Next, we explored how to enter your domain name, which is essential for associating your Google Workspace account with your organization or business identity. We then moved on to setting up the administrator account, providing the necessary details like name, username, password, and security questions for account recovery.
In the subsequent step, we discussed the process of choosing additional services and products to enhance your Google Workspace experience. We highlighted some of the options available, such as Google Meet, Google Chat, Google Voice, and more.
Finally, we reviewed the importance of carefully evaluating and confirming the information provided before completing the sign-up process. We emphasized the need to ensure accuracy in plan selection, domain name entry, administrator account setup, and additional services and products selection.
By following these steps and reviewing your information, you can confidently complete the sign-up process for Google Workspace and embark on a journey of increased productivity, collaboration, and communication.
Remember to familiarize yourself with the admin console and explore the various features and settings available to you as the administrator. This will enable you to customize your Google Workspace experience, manage users effectively, and harness the full potential of the platform.
Now that you have successfully signed up for Google Workspace, seize the opportunity to streamline your work, improve collaboration, and elevate productivity within your organization or business. Get ready to embrace the numerous features and tools offered by Google Workspace and take your work to new heights!