Introduction
Welcome to our guide on how to add Google Voice to Google Workspace. Google Voice is a powerful communication tool that allows you to make and receive phone calls, send text messages, and manage voicemail all in one place. By integrating Google Voice with your Google Workspace account, you can streamline your communication and take advantage of the many features and functionalities offered by these platforms.
Whether you’re a freelancer, a small business owner, or part of a larger organization, adding Google Voice to your Google Workspace can greatly enhance your productivity and professionalism. With Google Voice, you can have a dedicated phone number that you can use to make business-related calls, send text messages, and set up custom voicemail greetings – all while keeping your personal number private.
In this guide, we will walk you through the step-by-step process of adding Google Voice to your Google Workspace account. We will cover everything from setting up Google Voice, adding it to your Workspace, configuring the settings, connecting it to your phone, and customizing it to meet your specific needs.
Ready to get started? Let’s dive in and learn how to seamlessly integrate Google Voice into your Google Workspace.
Step 1: Set Up Google Voice
The first step in adding Google Voice to Google Workspace is setting up your Google Voice account. If you already have a Google Voice account, you can skip this step and proceed to the next one. If not, follow these steps to create your Google Voice account:
- Go to the Google Voice website and sign in with your Google account credentials.
- Choose the option to get a new phone number or use your existing number. If you choose to get a new number, you’ll be guided through the process of selecting and verifying your new Google Voice number.
- Once your number is set up, you’ll be prompted to link it to an existing phone number. This step is optional but recommended, as it allows you to forward calls from your Google Voice number to your phone.
- Follow the on-screen instructions to complete the setup process. You’ll have the option to set up voicemail, customize greetings, and manage other settings.
After setting up your Google Voice account, you’re now ready to add it to your Google Workspace.
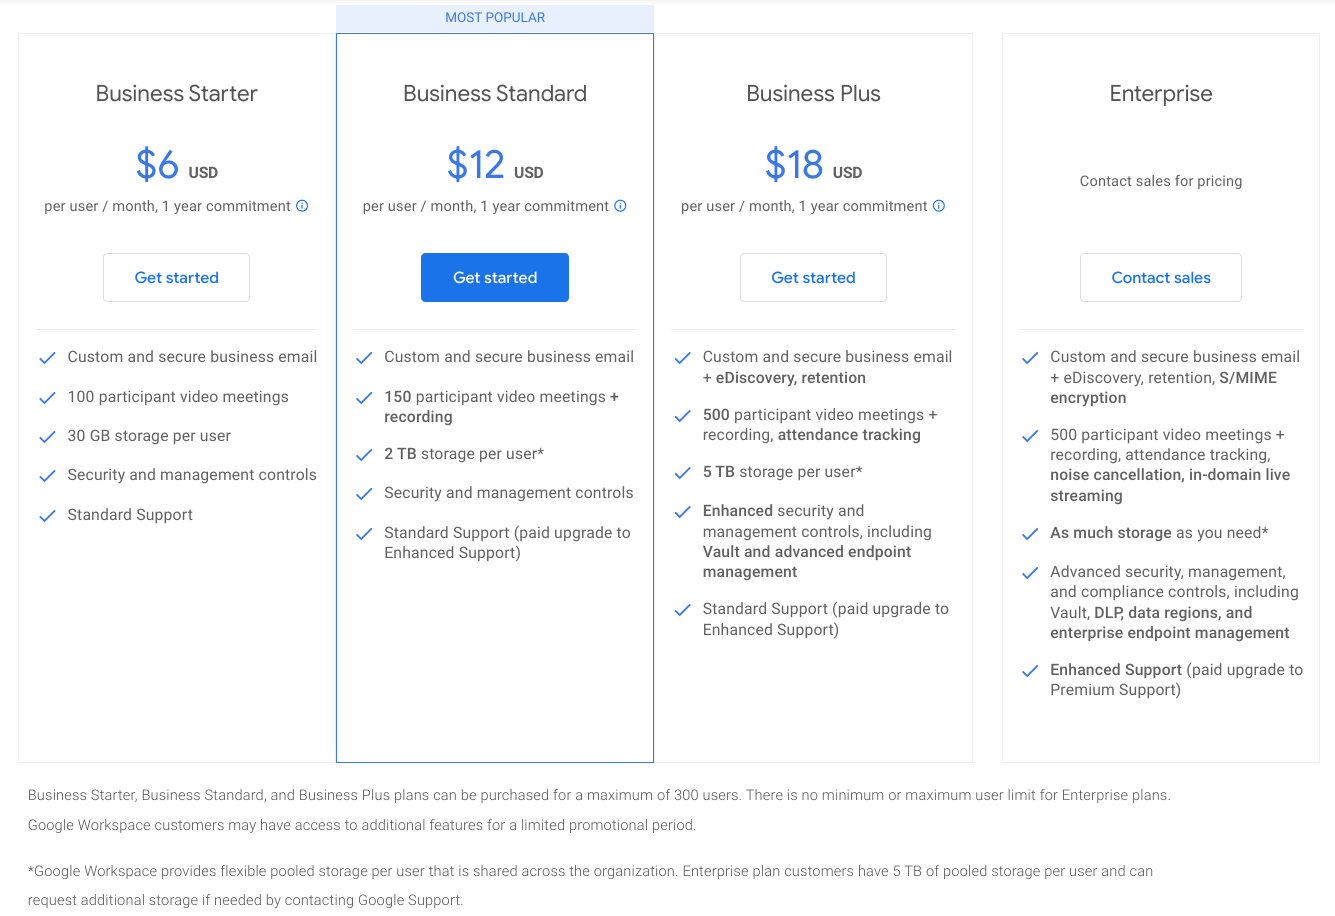
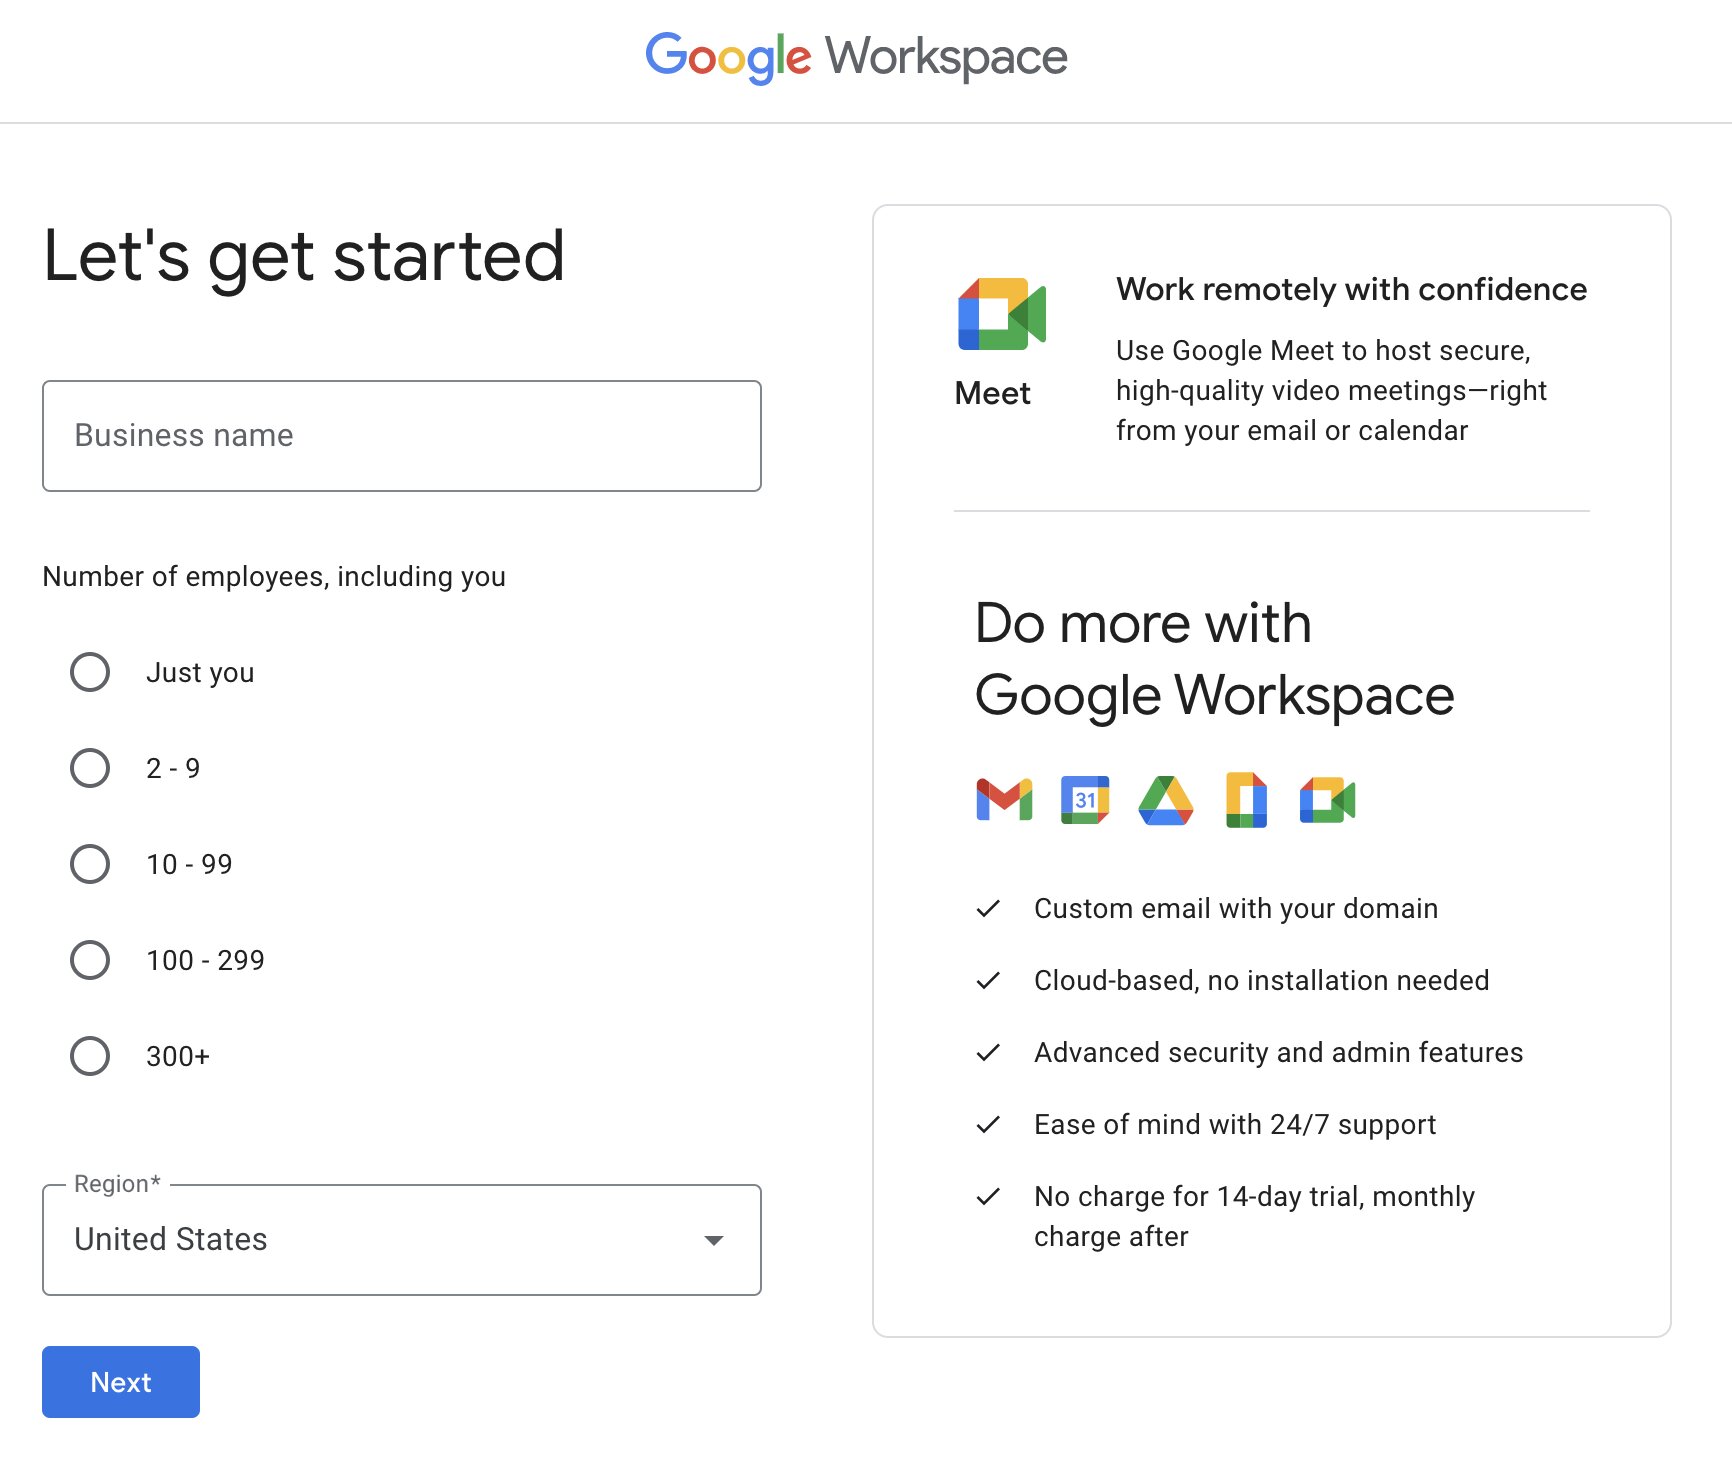
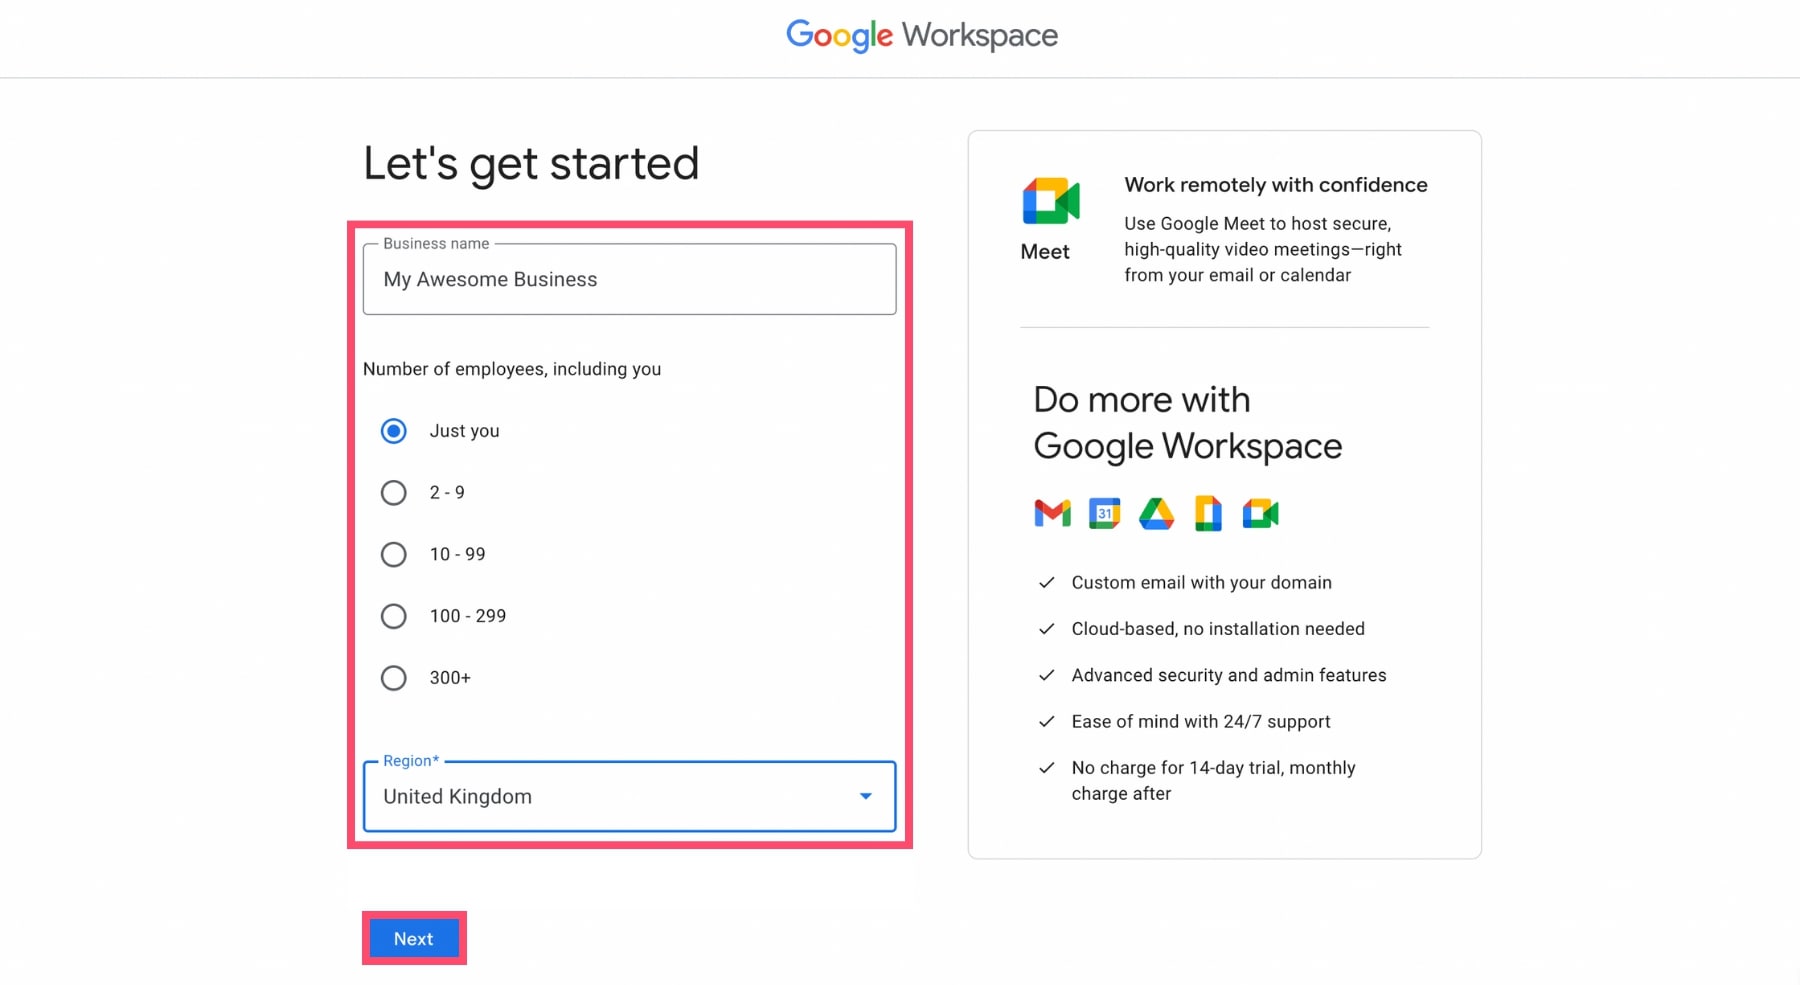
Before we move on, make sure you have a Google Workspace account. If you don’t have one yet, you can sign up for Google Workspace by visiting the website and choosing the plan that suits your needs. Once you have your Google Workspace account, we can proceed to the next step.
Step 2: Add Google Voice to Google Workspace
Now that you have your Google Voice account set up, it’s time to add it to your Google Workspace. Follow these steps to seamlessly integrate Google Voice with your Google Workspace:
- Sign in to your Google Workspace admin console using your admin account credentials.
- In the admin console, navigate to the “Apps” section and click on “Google Workspace Marketplace.”
- Search for “Google Voice” in the marketplace and click on the Google Voice app.
- Click on the “Install” button to add Google Voice to your Google Workspace.
- Review the permissions and click on “Continue” to proceed with the installation.
- Choose the organizational unit(s) where you want to enable Google Voice, and click on “Install” to complete the process.
Once the installation is complete, Google Voice will be added to your Google Workspace. However, it may take some time for the changes to propagate across your organization.
It’s important to note that adding Google Voice to Google Workspace requires the necessary privileges and permissions within your organization’s Google Workspace account. If you don’t have access to the admin console or if you’re not the account administrator, reach out to your organization’s IT department or the person in charge to assist you with the installation.
Congratulations! You have successfully added Google Voice to your Google Workspace. In the next step, we will explore how to configure the settings for Google Voice.
Step 3: Configure Google Voice Settings
After adding Google Voice to your Google Workspace, it’s essential to configure the settings to optimize your experience. Here are the steps to configure the Google Voice settings:
- Sign in to your Google Voice account using your Google account credentials.
- In the Google Voice interface, click on the gear icon in the top right corner to access the settings menu.
- Within the settings menu, you can customize various options such as voicemail greetings, call forwarding, and spam filtering.
- Set up your voicemail greeting by recording a personalized message or choosing from the available pre-recorded options.
- Configure call forwarding by adding your existing phone number or choosing to forward calls to specific devices or contacts.
- Take advantage of the spam filtering options to reduce unwanted calls and messages.
- Explore other settings like Do Not Disturb mode, call screening, and call recording to customize your Google Voice experience further.
- Once you have configured the settings according to your preferences, click on the “Save Changes” button to apply the updates.
By configuring the Google Voice settings, you can personalize your communication preferences and ensure that the service aligns with your specific needs. Take the time to explore the available options and make adjustments as necessary.
Now that your Google Voice settings are configured, it’s time to connect Google Voice to your phone in the next step.
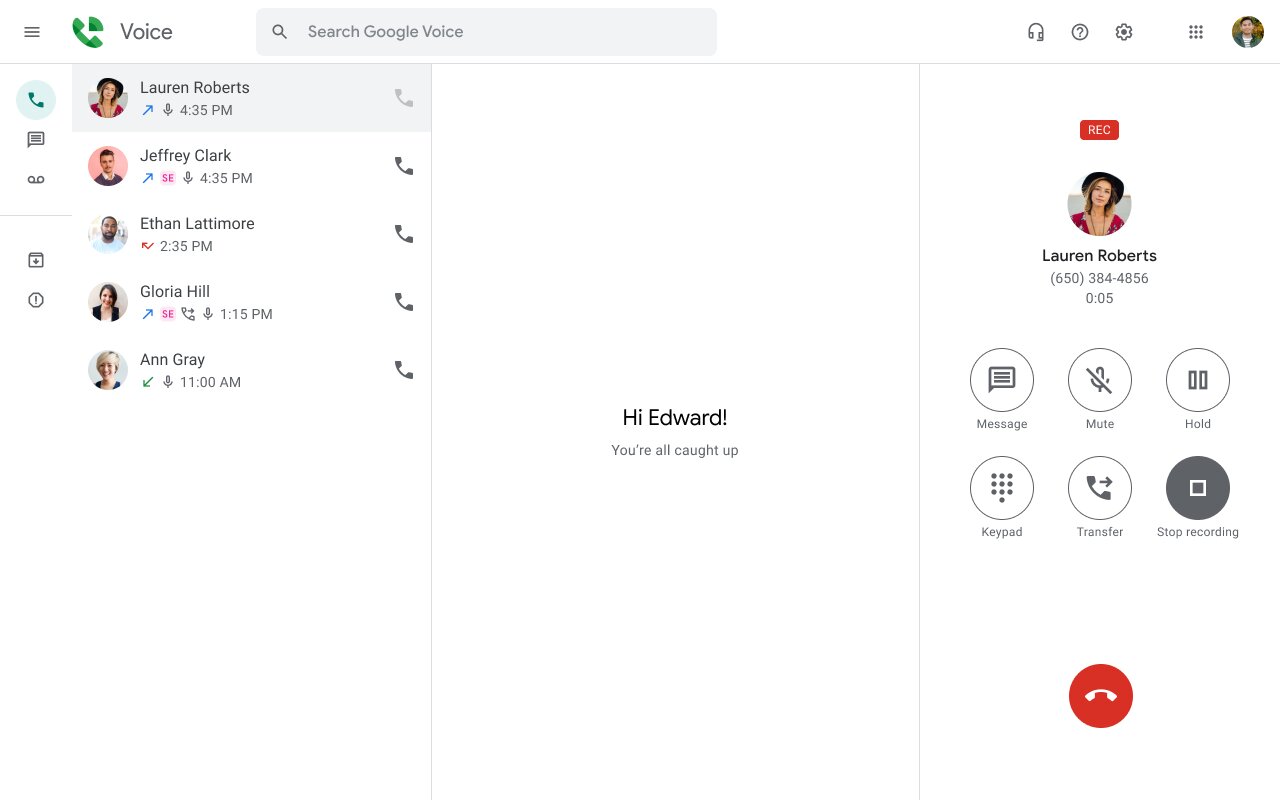
Step 4: Connect Google Voice to Your Phone
One of the key features of Google Voice is the ability to connect it to your phone, enabling you to receive calls and messages conveniently. Follow these steps to connect Google Voice to your phone:
- Open the Google Voice app on your phone or visit the Google Voice website on your computer.
- Sign in to your Google Voice account using your Google account credentials.
- In the Google Voice interface, click on the menu icon (three horizontal lines) to access the navigation menu.
- From the navigation menu, select “Settings” to access the Google Voice settings.
- In the settings, click on “Linked numbers” to manage the phone numbers linked to your Google Voice account.
- Click on the “+” button to add a new linked number.
- Choose the type of number you want to link (mobile, home, work, etc.) and enter the phone number.
- Proceed with the verification process, which may involve receiving a code or following certain instructions to validate the number.
- Once the number is successfully linked, you can enable or disable call forwarding and voicemail settings for that specific number.
By connecting Google Voice to your phone, you’ll be able to receive calls and messages on the device of your choice while maintaining the privacy of your primary phone number. This flexibility allows you to switch between devices seamlessly and stay connected wherever you go.
Now that you have successfully connected Google Voice to your phone, it’s time to move on to the next step and learn how to customize Google Voice for your Google Workspace.
Step 5: Customize Google Voice for Your Workspace
Customizing Google Voice for your Google Workspace allows you to tailor the service to your organization’s specific needs and branding. Follow these steps to customize Google Voice for your workspace:
- Sign in to your Google Voice admin console using your admin account credentials.
- In the admin console, navigate to the Google Voice settings by clicking on “Apps” and then selecting “Google Workspace Marketplace.”
- Find the Google Voice app and click on it to access the settings.
- Within the Google Voice settings, you can configure options such as outgoing caller ID, default country code, and voicemail greetings.
- Set up your outgoing caller ID to display your organization’s name or phone number to recipients when making calls using Google Voice.
- Specify the default country code to ensure accurate dialing when making international calls.
- Customize voicemail greetings with professional and personalized messages that align with your organization’s branding and communication style.
- Review and adjust other settings such as call screening, call recording, and Do Not Disturb mode as per your organization’s preferences.
- Click on the “Save Changes” button to apply the customized settings.
By customizing Google Voice for your workspace, you can maintain a consistent branding experience, improve professionalism, and optimize the functionality of the service to align with your organization’s communication requirements.
Once you have customized Google Voice for your workspace, you’re ready to start using it in your daily operations. Let’s move on to the final step where we explore how to utilize Google Voice in Google Workspace effectively.
Step 6: Start Using Google Voice in Google Workspace
Now that you have set up and customized Google Voice for your Google Workspace, it’s time to start using this powerful communication tool in your daily operations. Here are some ways you can leverage Google Voice within your workspace:
- Make and receive calls: Utilize the Google Voice app or website to make and receive calls using your Google Voice number. This allows you to separate your personal and business communications while ensuring a professional and consistent presence.
- Send and receive text messages: Take advantage of the SMS capabilities of Google Voice to send and receive text messages directly from your workspace. This enables convenient and efficient communication with your clients, customers, or team members.
- Manage voicemail: Use Google Voice to effectively manage your voicemail messages. Set up customized greetings, receive voicemail transcripts via email, and easily access and organize your voicemail messages – all within your Google Workspace environment.
- Collaborate with team members: Share your Google Voice number with your team members to facilitate collaboration and seamless communication. By integrating Google Voice into your Google Workspace, you can enhance teamwork and productivity.
- Utilize advanced features: Explore advanced features such as call recording, call screening, and call forwarding to optimize your communication workflows. These features can help you streamline your operations and improve efficiency.
- Access voicemail and call history: View and manage your voicemail messages and call history within your Google Workspace. This allows for easy tracking and organization of your communication interactions.
By incorporating Google Voice into your Google Workspace, you can centralize and streamline your communication activities, enhance collaboration, and improve overall productivity. Take advantage of the powerful tools and features offered by Google Voice to optimize your business communications.
Congratulations! You’ve now successfully integrated and implemented Google Voice in your Google Workspace. Enjoy the benefits of seamless communication and efficient workflows as you leverage this powerful tool in your daily operations.
Conclusion
Adding Google Voice to your Google Workspace has the potential to transform your communication experience. By following the step-by-step guide outlined in this article, you have learned how to set up Google Voice, add it to your Google Workspace, configure the settings, connect it to your phone, customize it for your workspace, and start using it effectively in your daily operations.
Google Voice provides a seamless and unified platform for making and receiving calls, sending text messages, managing voicemail, and collaborating with team members. By integrating Google Voice with your Google Workspace, you can streamline your communication efforts, maintain a professional presence, and enhance productivity.
Remember to regularly review and adjust the Google Voice settings to ensure they align with your evolving needs. The customization options available allow you to tailor the service to your organization’s branding and preferences.
Now that you have gained a deeper understanding of how to add Google Voice to your Google Workspace, take the time to explore the advanced features and functionalities it offers. Discover how these tools can further enhance your communication workflows and contribute to the success of your business or organization.
By leveraging the power of Google Voice in your Google Workspace, you are well-equipped to communicate efficiently, collaborate seamlessly, and take your business to new heights.
So, what are you waiting for? Take the plunge and start exploring the possibilities of Google Voice in your Google Workspace today!