Introduction
Welcome to the world of Google Workspace – a suite of powerful productivity tools designed to streamline your work processes and enhance collaboration within your organization. With a Google Workspace trial, you get a chance to experience the benefits and features of the platform before committing to a subscription. However, if you find that Google Workspace is not the right fit for your business or if you encounter any issues during the trial period, you may need to cancel the trial.
In this article, we will guide you through the process of canceling your Google Workspace trial. Whether it’s because you have found an alternative solution that better suits your needs or if you simply wish to explore other options, we’re here to help you navigate through the cancellation process smoothly.
Canceling a Google Workspace trial may seem like a daunting task, but rest assured, it is a straightforward process. We will walk you through each step, ensuring that you have a hassle-free experience. So, let’s dive in and discover how to cancel your Google Workspace trial!
Step 1: Accessing the Google Workspace Admin Console
To cancel your Google Workspace trial, the first step is to access the Google Workspace Admin Console. This is the central hub where you can manage your organization’s Google Workspace settings and subscriptions.
Here’s how you can access the Google Workspace Admin Console:
- Open a web browser and navigate to admin.google.com.
- Enter your Google Workspace trial account’s email address and password to sign in.
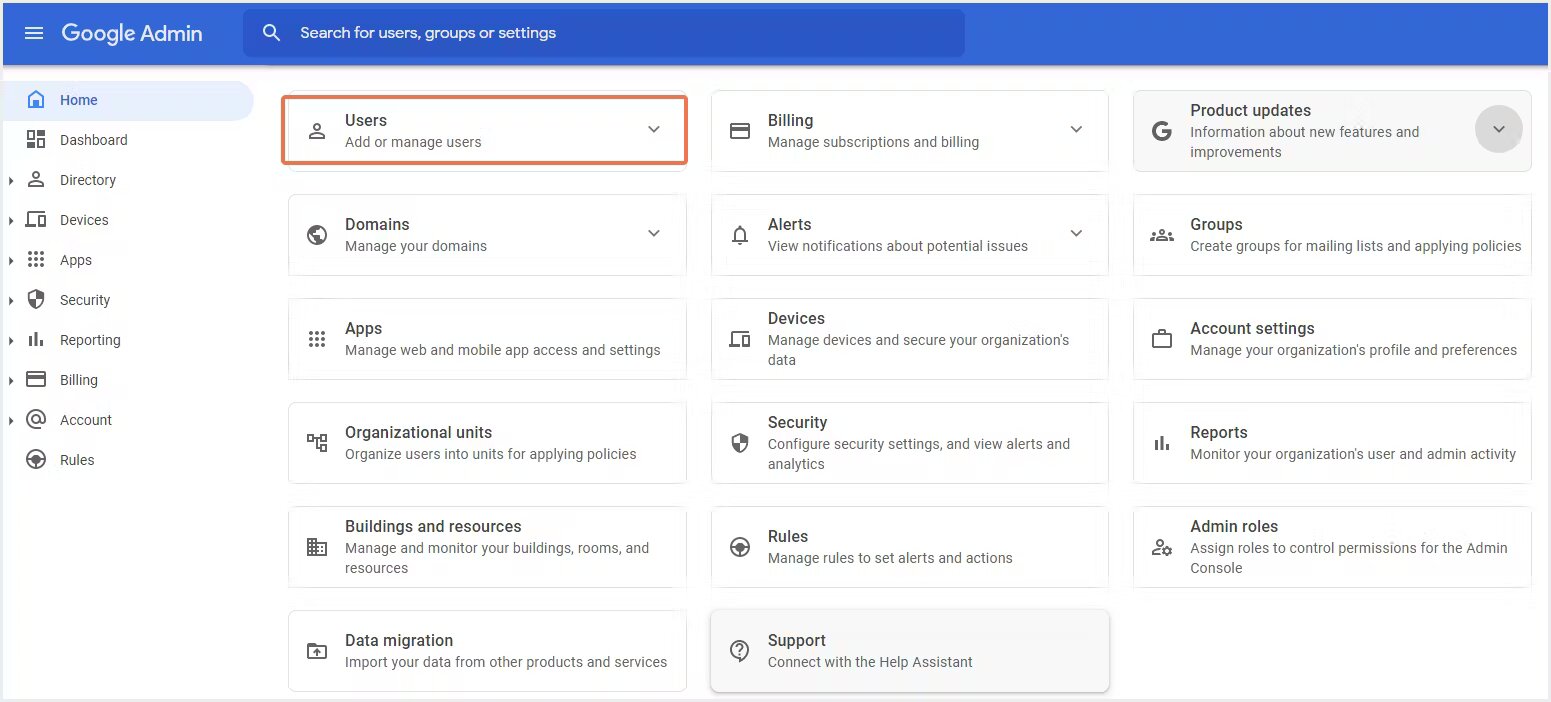
- Once signed in, you will be redirected to the admin console dashboard, where you have access to various settings and options.
It’s important to note that only users with administrative privileges can access the Google Workspace Admin Console. If you do not have administrative access, you will need to reach out to your organization’s administrator or IT department for assistance.
Now that you’re successfully logged into the Google Workspace Admin Console, you’re ready to proceed to the next step – navigating to the Billing section.
Step 2: Navigating to the Billing section
Once you have accessed the Google Workspace Admin Console, the next step is to navigate to the Billing section. This is where you can manage your subscription and make any necessary changes.
Follow these simple instructions to find the Billing section:
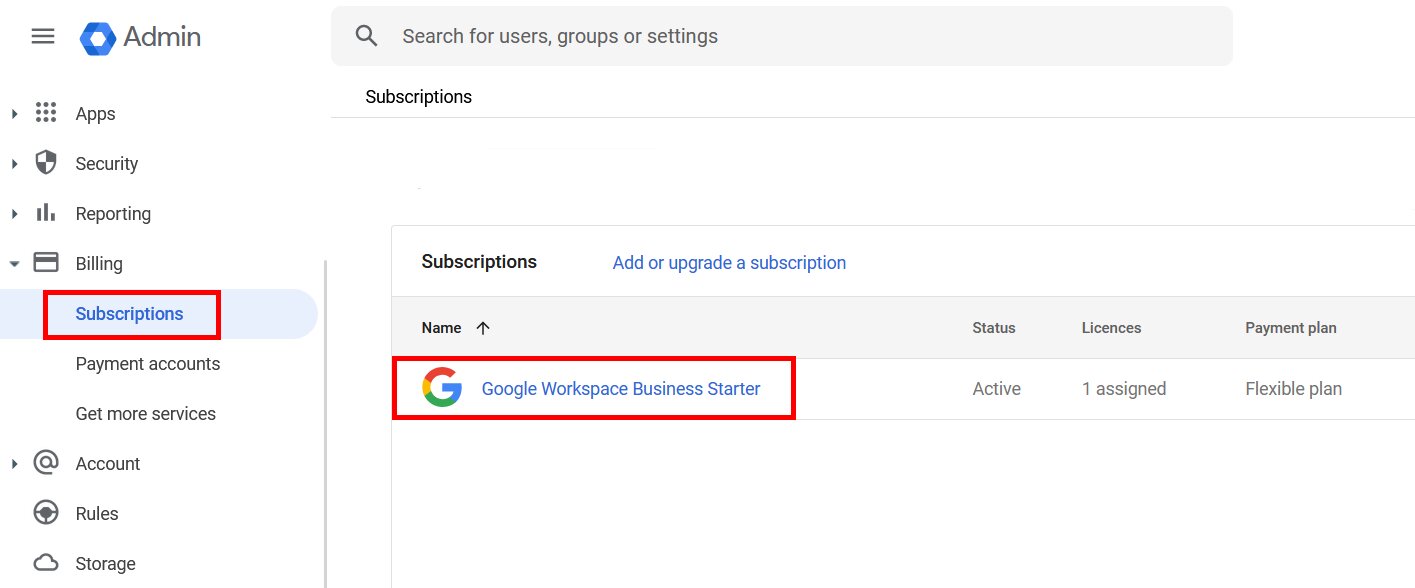
- From the admin console dashboard, locate and click on the “Billing” option.
- You will be directed to the Billing page, where you can view and manage your payment information and subscription details.
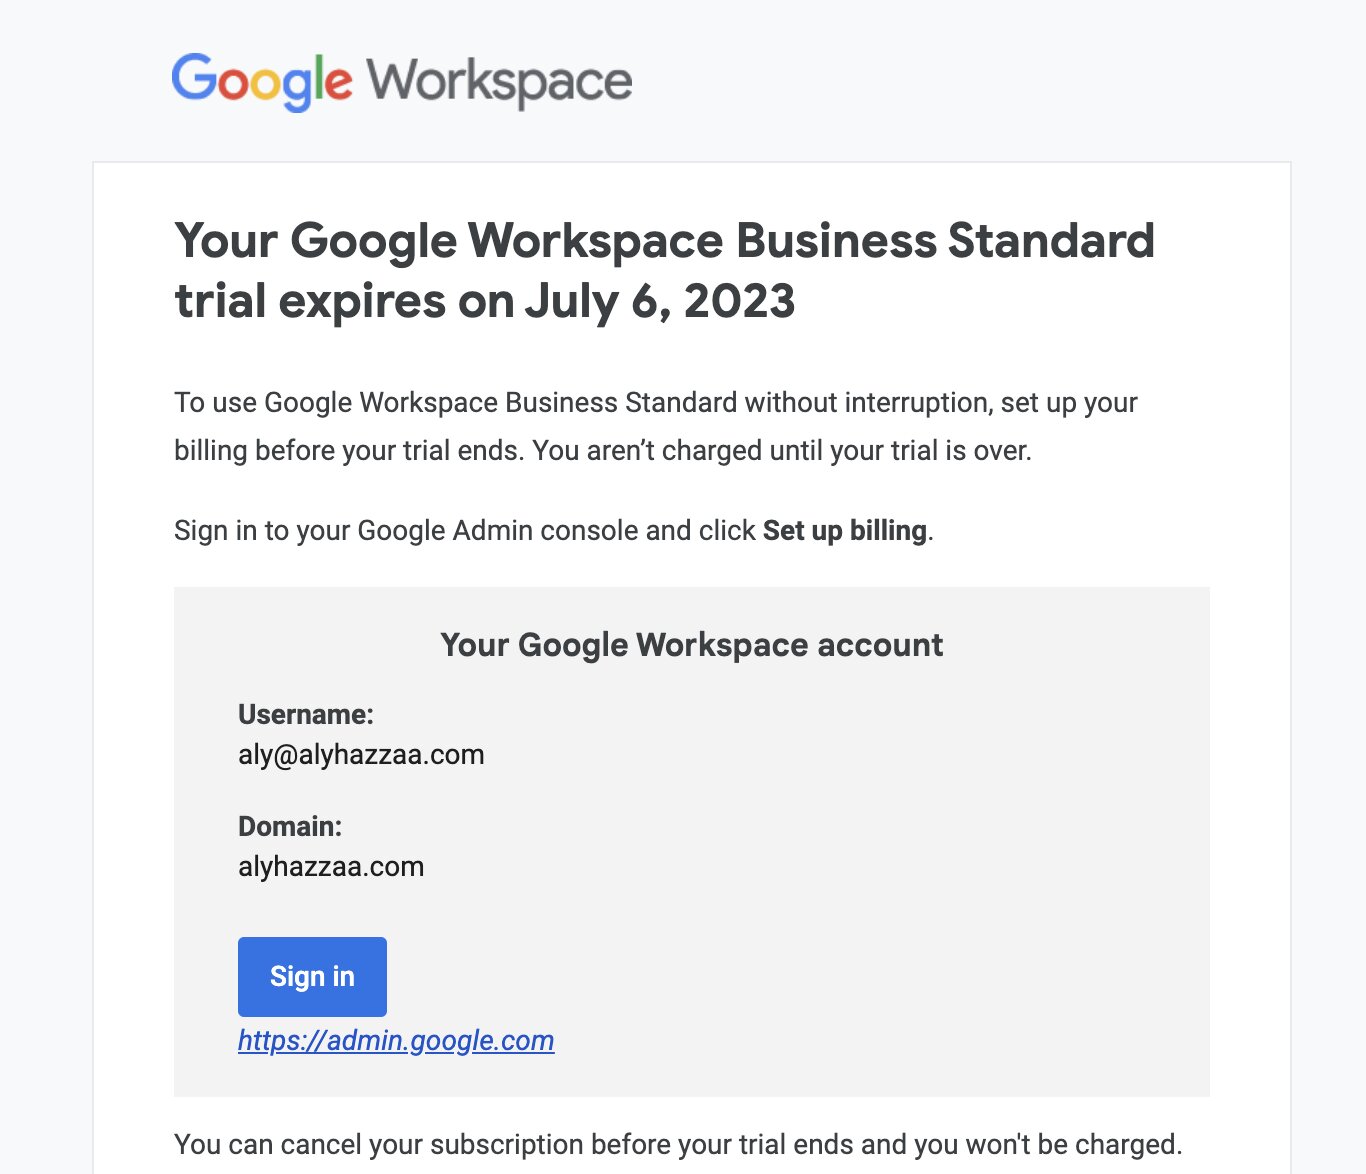
- On the Billing page, you will see an overview of your current subscription, including the trial period information and upcoming payments.
It’s essential to navigate to the Billing section to cancel your Google Workspace trial effectively. This section provides you with all the necessary options and information related to your subscription, allowing you to make the required changes.
Now that you have successfully reached the Billing section, you’re ready to move on to the next step – canceling the Google Workspace trial.
Step 3: Cancelling the Google Workspace trial
Cancelling your Google Workspace trial is a straightforward process once you have accessed the Billing section. Follow these steps to cancel your trial:
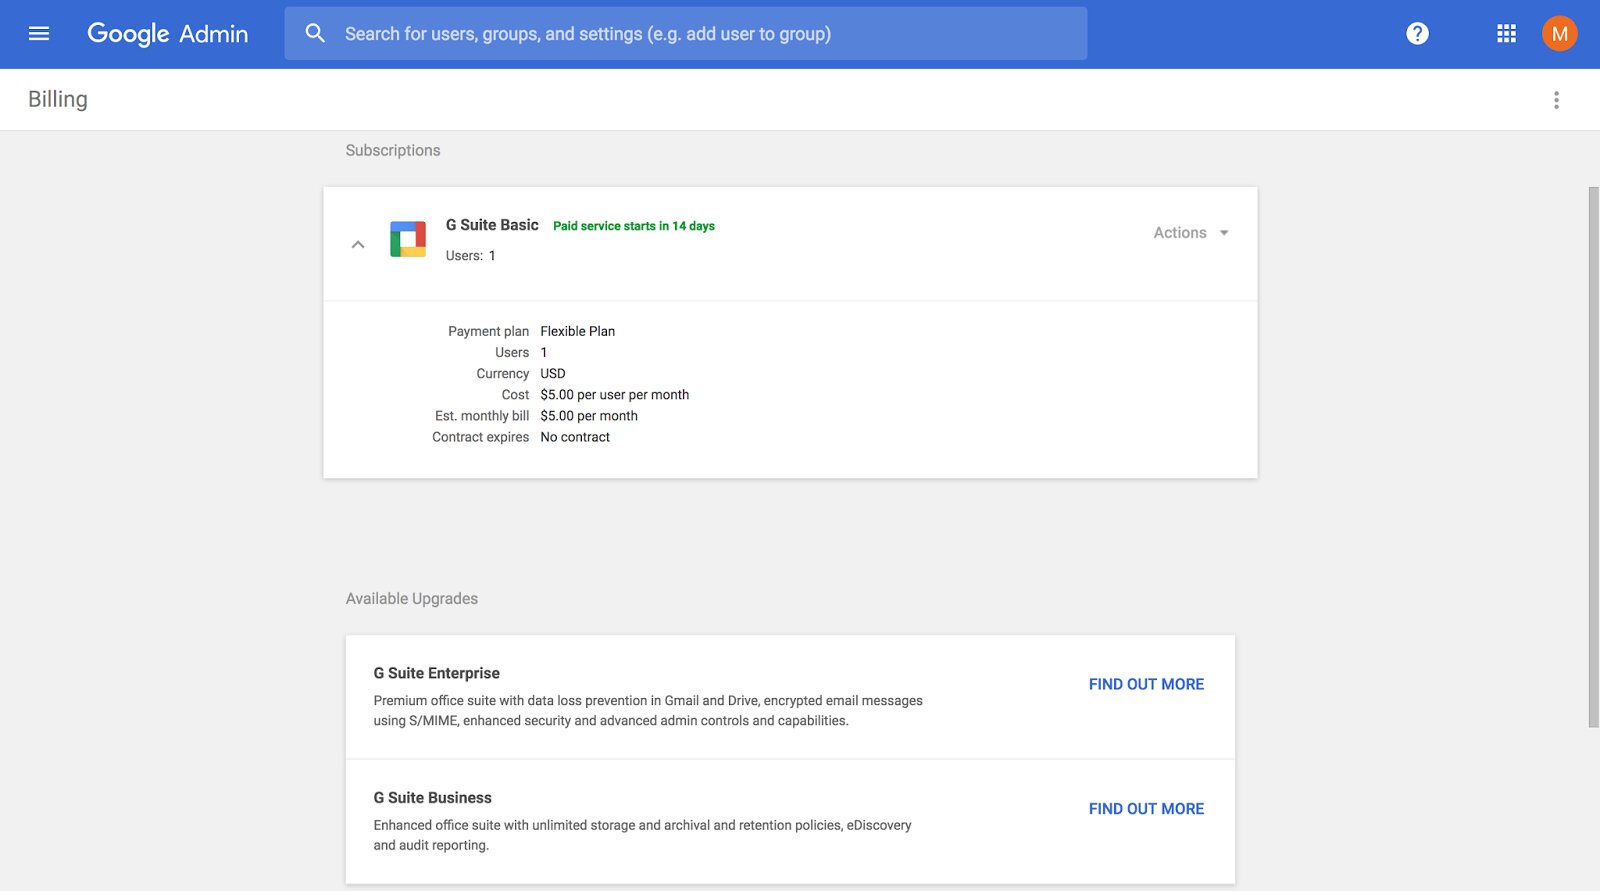
- On the Billing page, look for the “Cancel trial” or “Cancel subscription” option. Click on it to initiate the cancellation process.
- You may be asked to provide a reason for canceling. Select the most appropriate option or provide your own reason if it is not listed.
- Review the cancellation details and ensure that you understand the implications. Take note of any important information, such as the date when the cancellation will take effect.
- Confirm the cancellation by following the on-screen prompts or clicking on the appropriate button. This step may involve re-entering your account password for security purposes.
Once you have completed these steps, your Google Workspace trial will be officially canceled. It’s important to remember that canceling your trial means you will lose access to the features and services offered by Google Workspace, so ensure that you have made an informed decision.
If at any point you change your mind and decide that you would like to continue with Google Workspace, you may have the option to reactivate your trial or subscribe to a paid plan. However, it’s best to reach out to Google Workspace support or visit their official website for further assistance in such cases.
Now that you have successfully canceled your Google Workspace trial, let’s move on to the next step – confirming the cancellation.
Step 4: Confirming the cancellation
After canceling your Google Workspace trial, it is important to confirm the cancellation to ensure that it has been processed correctly. Here’s how you can confirm the cancellation:
- Return to the Google Workspace Admin Console.
- Navigate to the Billing section, where you previously canceled your trial.
- On the Billing page, look for the cancellation confirmation message or notification. It may state that your trial has been successfully canceled.
- Take a moment to review your account status and ensure that it reflects the cancellation. Look for any indications that your trial has ended and that your subscription is no longer active.
If you encounter any issues or do not see a clear confirmation of your cancellation, it is recommended to contact Google Workspace support for further assistance. They will be able to verify the cancellation status and address any concerns or questions you may have.
Confirming the cancellation is an important step to ensure that your Google Workspace trial has been successfully terminated. It provides peace of mind and helps you avoid any unexpected charges or issues in the future.
Now that you have confirmed the cancellation, let’s proceed to the final step – verifying the cancellation status.
Step 5: Verifying the cancellation status
Once you have canceled your Google Workspace trial and confirmed the cancellation, it’s crucial to verify the cancellation status to ensure that everything has been processed correctly. Here’s how you can verify the cancellation status:
- Access the Google Workspace Admin Console and navigate to the Billing section.
- On the Billing page, look for any notifications or messages that confirm the cancellation of your trial.
- Check your payment history or statements to see if there are any charges related to the Google Workspace subscription. If you no longer see any charges, it indicates that the cancellation has been successful.
- Visit your Google Workspace account and verify that you no longer have access to the features and services of Google Workspace. This is a clear indication that your trial has been terminated.
If you have followed these steps and confirmed that the cancellation was successful, congratulations! You have officially canceled your Google Workspace trial. It’s important to keep track of any future billing statements or invoices to ensure that you are no longer billed for the subscription.
However, if you still encounter any issues or have doubts about the cancellation status, it is highly recommended to reach out to Google Workspace support for further assistance. They will be able to provide you with specific information related to your account and help address any concerns.
Verifying the cancellation status is the final step in the process of canceling your Google Workspace trial. By double-checking the cancellation, you can have the peace of mind knowing that your trial has been successfully terminated.
Frequently Asked Questions
Here are some common questions that users often have when it comes to canceling a Google Workspace trial:
Q: Can I cancel my Google Workspace trial before the trial period ends?
A: Yes, you can cancel your Google Workspace trial at any time before the trial period expires. However, keep in mind that canceling early may result in the immediate termination of your trial access and services.
Q: Will canceling my Google Workspace trial delete my data?
A: Canceling your trial does not automatically delete your data. Your data and files will remain intact even after the trial is canceled. However, it’s important to note that you may need to back up your data or transfer it to another platform if you decide to discontinue using Google Workspace.
Q: Can I reactivate my canceled Google Workspace trial?
A: In some cases, Google may offer the option to reactivate a canceled trial or provide alternative plans. However, it’s best to reach out to Google Workspace support or visit their official website for the most accurate and up-to-date information regarding reactivation options.
Q: What happens if I don’t cancel my Google Workspace trial?
A: If you don’t cancel your Google Workspace trial before the trial period ends, you may be automatically enrolled in a paid subscription, and your credit card or payment details may be charged accordingly. It’s essential to cancel your trial if you do not wish to continue using Google Workspace.
Q: Can I cancel my trial and sign up for a different trial later?
A: It depends on the terms and conditions set by Google. Some users may have the option to sign up for a new trial after canceling a previous one, while others may be limited to one trial per account. It’s best to contact Google Workspace support for specific information regarding trial limitations and eligibility.
If you have any additional questions or concerns about canceling your Google Workspace trial, it’s recommended to reach out to Google Workspace support or consult their official documentation for further assistance.
Conclusion
Cancelling your Google Workspace trial doesn’t have to be a complicated process. By following the steps outlined in this article, you can effectively cancel your trial and ensure a smooth transition.
We started by accessing the Google Workspace Admin Console, where we gained control over our trial account. Then, we navigated to the Billing section, allowing us to manage our subscription and make necessary changes.
Next, we canceled the Google Workspace trial by following the steps provided, ensuring that we understood the implications of our decision. After confirming the cancellation, we verified the status to ensure that everything was processed correctly.
Finally, we addressed some frequently asked questions, offering clarity on common concerns users may have about canceling their Google Workspace trial.
Remember, if you have any specific questions or encounter any issues during the cancellation process, don’t hesitate to reach out to Google Workspace support for assistance. They are there to help you navigate through any challenges you may face.
Whether you decide to explore alternative solutions or simply need a break from the trial period, canceling your Google Workspace trial is an important step in finding the right fit for your organization’s needs.
We hope this guide has provided you with the information and guidance necessary to cancel your Google Workspace trial effortlessly. Wishing you success on your journey to find the perfect productivity tools for your team!