Introduction
Welcome to the world of Android smartphones! If you’re new to using an Android phone, one of the features you may want to set up is voicemail. Voicemail allows callers to leave you messages when you are unable to answer your phone. It’s an essential feature that ensures you never miss an important message.
Setting up voicemail on your Android phone is a straightforward process. In just a few easy steps, you’ll have your voicemail up and running, ready to receive messages from friends, family, and colleagues. Whether you’re using a brand-new Android device or have recently switched from another smartphone, this guide will help you get started.
In this article, we’ll walk you through the step-by-step process of setting up voicemail on your Android phone. You’ll learn how to access the voicemail settings, set up your voicemail greeting, record your voicemail message, and customize voicemail settings to suit your preferences.
Before we begin, it’s important to note that the specific steps may vary slightly depending on the make and model of your Android phone, as well as the version of the operating system it is running. However, the general process should be similar for most Android devices.
So, let’s get started and learn how to set up voicemail on your Android phone!
Step 1: Open the Phone app
The first step in setting up voicemail on your Android phone is to open the Phone app. The Phone app is the default app that lets you make and receive phone calls. It may be represented by the phone icon on your home screen or in the app drawer.
To open the Phone app, simply locate the phone icon and tap on it. This will launch the app and take you to the dialer screen, where you can enter phone numbers to make calls.
If you’re having trouble finding the Phone app, you can use the search function on your Android device. Swipe down from the top of the screen to open the notification panel, and then enter “Phone” in the search bar. The search results will display the Phone app, allowing you to open it with a single tap.
Once the Phone app is open, you’re ready to move on to the next step in setting up voicemail on your Android phone.
Pro Tip: If you frequently use the Phone app, consider adding it to your home screen for quick and easy access. To do this, find the Phone app in the app drawer, press and hold it, and then drag it to an empty spot on your home screen.
Step 2: Access the voicemail settings
After opening the Phone app, the next step in setting up voicemail on your Android phone is to access the voicemail settings. The voicemail settings menu allows you to enable voicemail, customize your voicemail greeting, and manage other voicemail-related options.
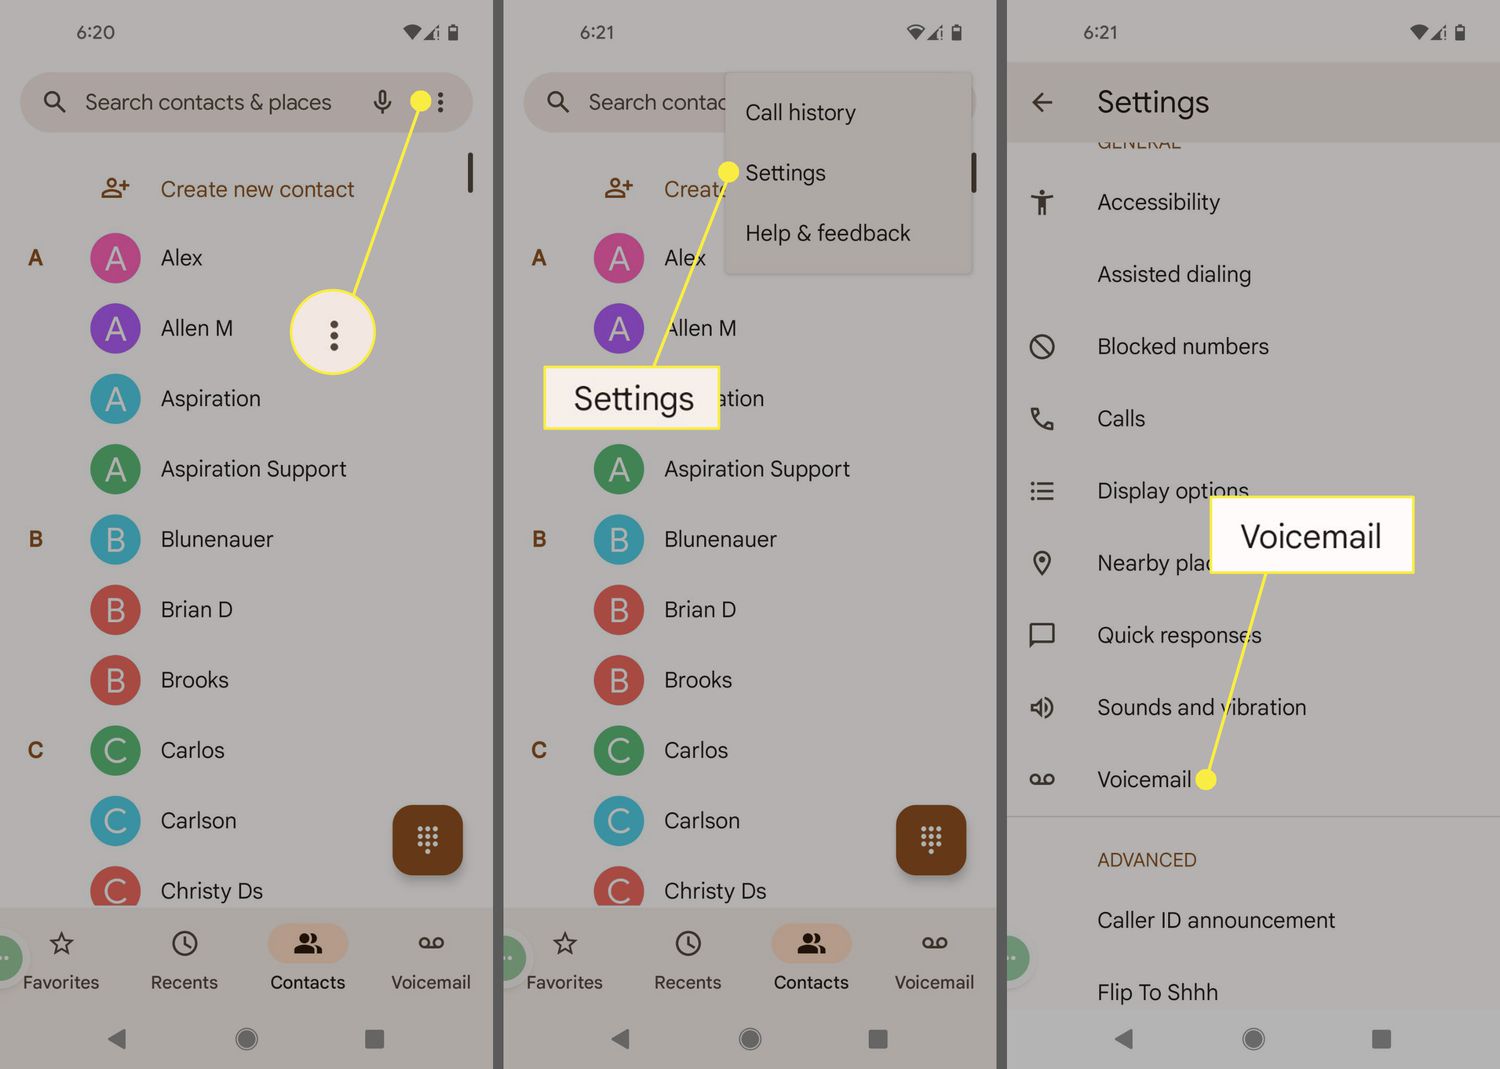
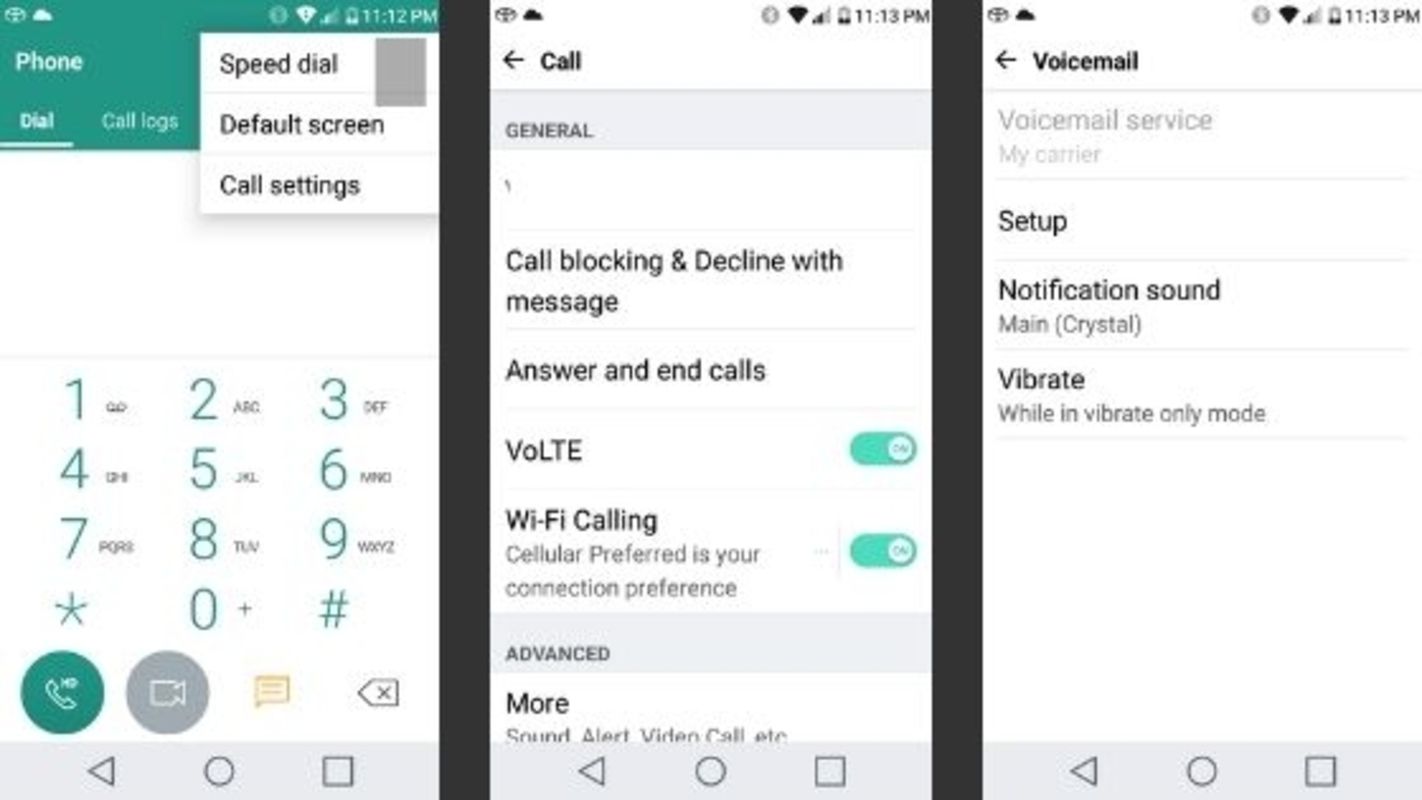
To access the voicemail settings, look for the three-dot menu icon or the settings gear icon on the top-right corner of the Phone app. Tap on it to open the menu.
In the menu, you should see an option named “Settings” or “Voicemail settings”. Tap on this option to access the voicemail settings screen.
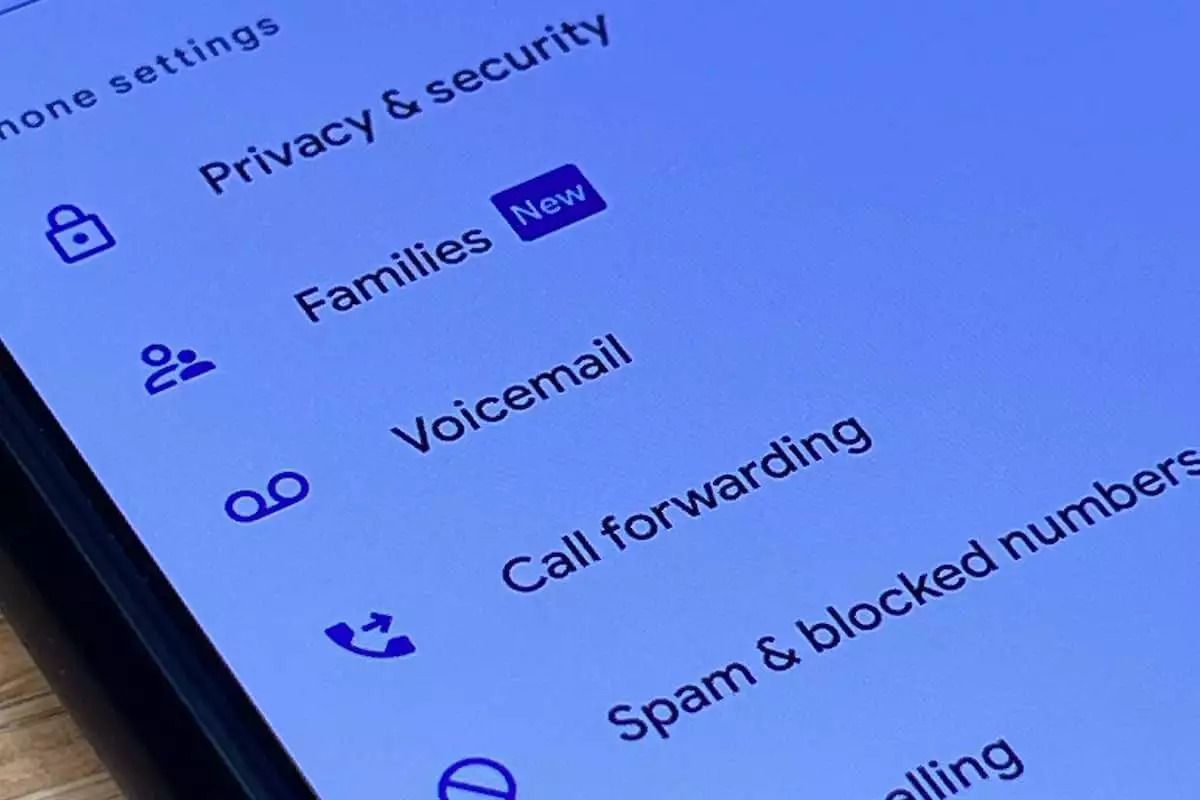
On some Android phones, you may find the voicemail settings under the “Call settings” or “Voice call” section in the main settings menu of your device. To access this menu, go to your device’s settings app, scroll down or search for “Call settings”, and tap on it. Look for the “Voicemail” or “Voicemail settings” option within the call settings menu.
Once you have located the voicemail settings, you’re ready to move on to the next step and set up your voicemail greeting.
Pro Tip: If you’re unable to find the voicemail settings on your Android phone, refer to the user manual or support documentation specific to your device. Alternatively, you can do a quick online search using the model number of your phone along with the keywords “voicemail settings” for more detailed instructions.
Step 3: Set up your voicemail greeting
Now that you have accessed the voicemail settings, it’s time to set up your voicemail greeting. The voicemail greeting is the recorded message that callers hear when they reach your voicemail. It’s an opportunity to provide personalized information or instructions to the callers.
To set up your voicemail greeting, look for the “Greeting” or “Voicemail greeting” option within the voicemail settings menu. Tap on it to proceed.
In the voicemail greeting settings, you will typically find two options: “Default greeting” and “Custom greeting”. The default greeting is a generic pre-recorded message provided by your phone carrier. If you prefer a personal touch, choose the “Custom greeting” option.
When selecting the custom greeting option, you will be prompted to record your own voicemail message. Tap on the “Record” button or icon to start recording your greeting. Follow the instructions provided on the screen, and speak clearly into the microphone of your phone. You can introduce yourself, mention your name or phone number, and provide any additional information you deem necessary.
After recording your greeting, listen to it to ensure it sounds clear and professional. If you’re not satisfied with the recording, most Android phones allow you to re-record your greeting until you get it just right. Take your time and make sure your message is concise, polite, and accurately reflects your personal or professional style.
Once you’re happy with your voicemail greeting, save it by tapping on the “Save” or “Apply” button. The system will confirm that your greeting has been updated, and callers will now hear your personalized message when they reach your voicemail.
Pro Tip: If you wish to revert to the default greeting provided by your phone carrier, you can easily do so within the voicemail greeting settings. Simply select the “Default greeting” option, and your voicemail greeting will be reset to the pre-recorded message.
Step 4: Record your voicemail message
With your voicemail greeting set up, the next step is to record your voicemail message. Unlike the voicemail greeting, which is played to callers when they reach your voicemail, the voicemail message is what you will hear when checking your voicemail.
To record your voicemail message, navigate to the voicemail settings menu again. Look for an option called “Voicemail message” or “Record message”. Tap on it to proceed.
In the voicemail message settings, you will typically find a button or icon labeled “Record” or “Start recording”. Tap on this button to start recording your voicemail message.
When recording your voicemail message, speak clearly and provide any instructions or information you believe is helpful for callers. You might want to include your name, a polite message, and a request for the caller to leave their message after the tone.
While recording, remember to pause briefly after your message to allow callers enough time to leave their message. This will ensure that they don’t feel rushed or interrupted while leaving their important message for you.
After recording your voicemail message, listen to it to ensure that it sounds clear and understandable. Android phones usually allow you to re-record your message if you wish. Take the opportunity to review and make any necessary modifications to your voicemail message until you are satisfied with the recording.
Once you’re happy with your voicemail message, save it by tapping on the “Save” or “Apply” button. Your voicemail message is now set and will be played to you whenever you check your voicemail.
Pro Tip: Consider keeping your voicemail message concise and professional. Avoid using overly long messages or including personal information that may compromise your privacy. Remember to periodically check and update your voicemail message to ensure that it stays relevant and reflects your current availability or any changes in contact information.
Step 5: Customize voicemail settings
In addition to setting up your voicemail greeting and message, you can customize various voicemail settings on your Android phone. These settings allow you to personalize your voicemail experience and tailor it to your preferences.
To access the voicemail settings, go back to the voicemail settings menu where you previously set up your greeting and message.
Within the voicemail settings, you may find a range of options available for customization, such as:
- Notification preferences: You can choose how you want to be notified when a new voicemail arrives. This can include visual notifications, sound alerts, or even vibrating patterns.
- Voicemail password: Some carriers may require you to set up a password for accessing your voicemail. You can update your password in the voicemail settings.
- Voicemail storage: Depending on your phone’s configuration, you may have options to specify how long voicemail messages should be stored on your device before being automatically deleted.
- Voicemail forwarding: If you want to forward your voicemail messages to another number or email address, you can enable and configure this feature in the voicemail settings.
- Greetings for specific contacts: Some Android phones allow you to set up custom greetings for specific contacts. This can be useful if you want to have a different voicemail greeting for certain callers.
Take some time to explore these customization options and make adjustments based on your preferences. Keep in mind that the availability of these settings may vary depending on your phone model and carrier.
Pro Tip: Regularly check your voicemail settings to ensure they are still tailored to your needs. As your communication requirements change, making adjustments to your voicemail settings can help optimize your voicemail experience and make it more efficient.
Conclusion
Congratulations! You have successfully set up voicemail on your Android phone. By following the simple step-by-step process outlined in this guide, you have ensured that callers can leave you messages when you are unable to answer your phone.
Remember, setting up your voicemail is just the beginning. Take the time to personalize your voicemail greeting and message to enhance the caller experience and provide relevant information. Additionally, explore the various customization options available in the voicemail settings to tailor your voicemail system to your preferences.
Having a functional voicemail system not only helps you stay connected with friends, family, and colleagues, but it also ensures you never miss important messages. Whether you’re in a meeting, traveling, or unable to reach your phone for any reason, voicemail acts as your virtual assistant, capturing valuable communication on your behalf.
As you continue to use your Android phone, don’t forget to periodically check and manage your voicemail. Listen to your voicemail messages promptly, respond to any urgent ones, and delete unwanted messages to maintain an organized and efficient voicemail system.
Thank you for following this guide to set up voicemail on your Android phone. We hope you found it informative and easy to follow. If you have any further questions or need assistance, refer to your device’s user manual or reach out to your phone carrier’s customer support. Now, stay connected and never miss a beat with your fully functional voicemail system!


