Introduction
Welcome to the guide on how to move events from one Google Calendar to another. If you find yourself needing to transfer events between different calendars, whether it’s for personal or professional reasons, Google Calendar offers a simple and efficient process to accomplish this task.
Perhaps you have created a new calendar and want to consolidate all your events in one place. Or maybe you are collaborating with others and need to move events from your personal calendar to a shared one. Whatever the reason, this guide will walk you through the steps to seamlessly transfer events from one Google Calendar to another.
By following this guide, you will be able to save time and effort by avoiding the tedious task of manually recreating each event in the new calendar. You’ll also maintain the accuracy of the event details, ensuring that important information is preserved during the transfer.
To successfully complete the process, you will need to have access to both the source calendar, which contains the events you want to move, and the destination calendar, where you want to import the events. The process involves exporting events from the source calendar and then importing them into the destination calendar.
Whether you’re a busy professional managing multiple calendars or an individual trying to streamline your event organization, this guide will provide you with a clear roadmap to accomplish your goal. So, let’s get started with the step-by-step process of moving events from one Google Calendar to another!
Step 1: Exporting Events from the Source Google Calendar
The first step in moving events from one Google Calendar to another is to export the events from the source calendar. This process allows you to create a file containing all the event details, which can then be imported into the destination calendar.
Follow these steps to export events from the source Google Calendar:
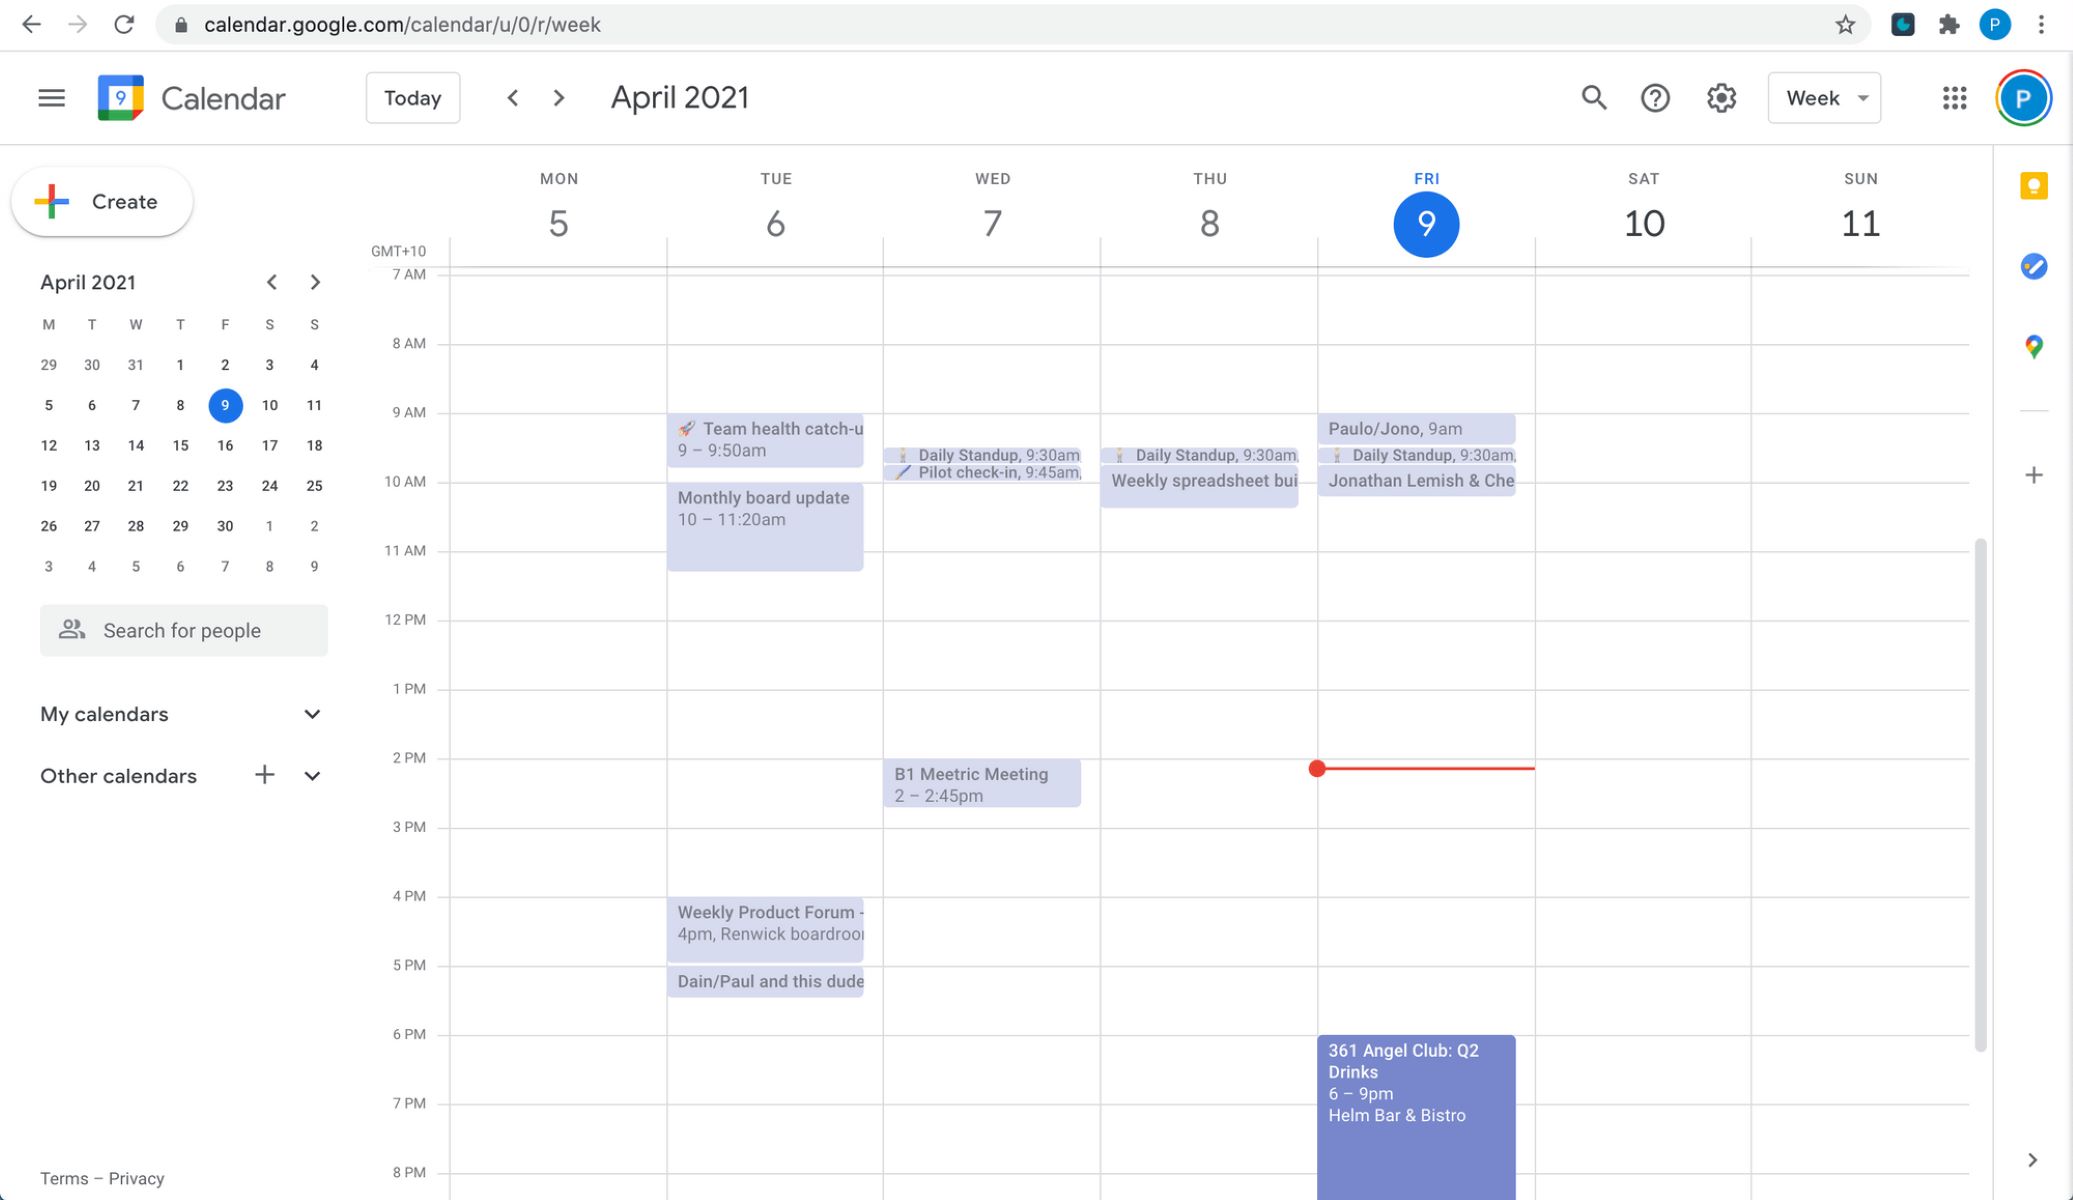
- Open your web browser and navigate to calendar.google.com.
- Sign in to your Google account if you haven’t already.
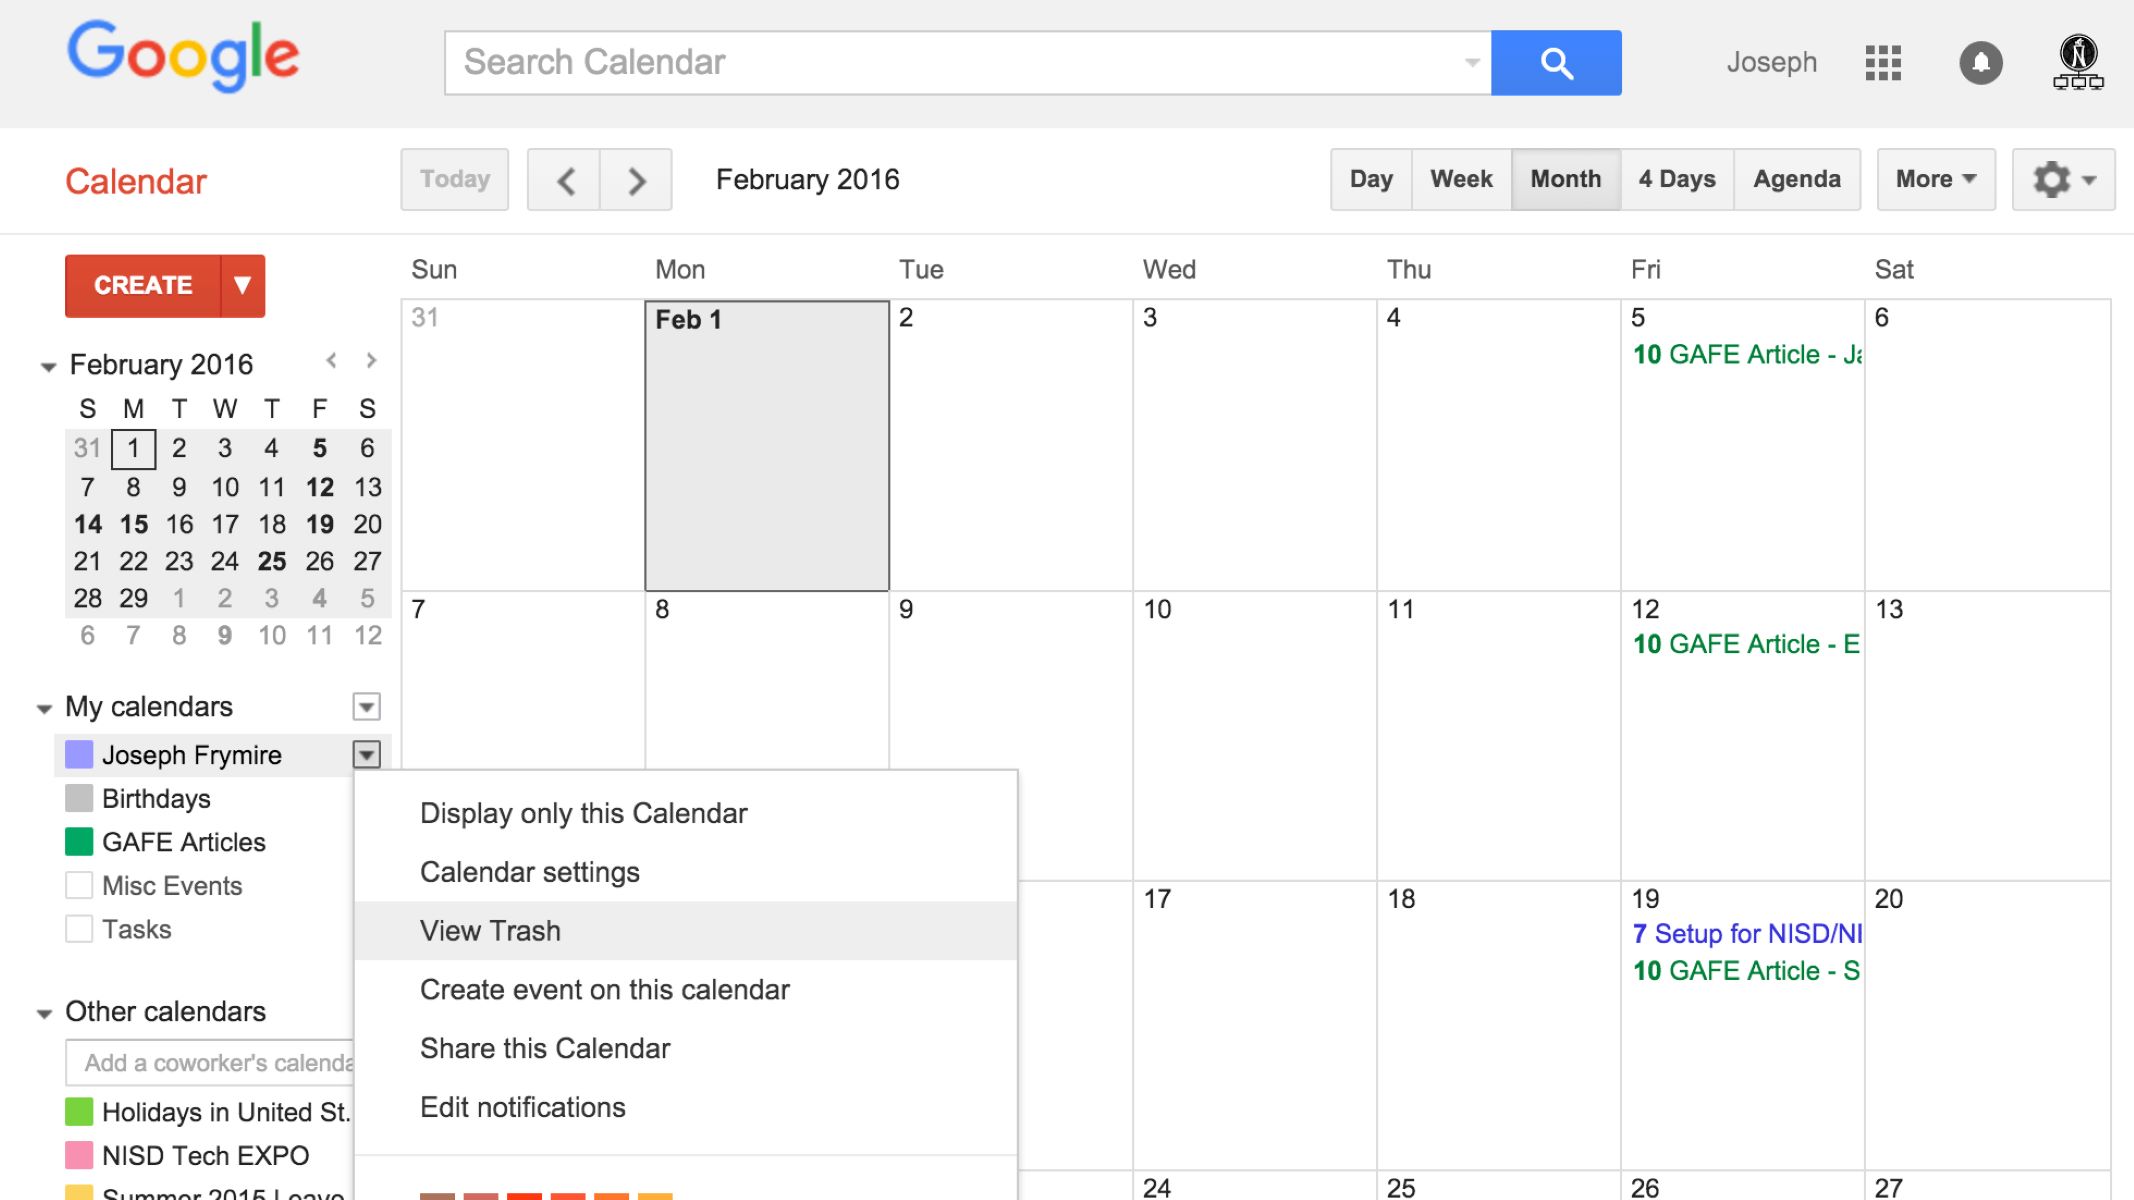
- In the left panel, click on the three horizontal lines to open the side menu.
- Scroll down and click on “Settings” to access the calendar settings.
- In the settings menu, click on the calendar you want to export events from.
- Scroll down to the “Export” section and click on the “Export” button.
- A file named “calendar_events.ics” will be downloaded to your computer. This file contains all the events from the selected calendar.
Once you have successfully exported the events, you are now ready to proceed to the next step: importing the events into the destination Google Calendar. Remember to keep the downloaded .ics file in a safe location on your computer.
Exporting events from the source Google Calendar is a straightforward process that ensures you have a backup of the events before transferring them to a new calendar. This step sets the foundation for a seamless transition and ensures that no event details or important information are lost during the transfer.
In the next section, we will walk you through the process of importing the events into the destination Google Calendar. Let’s move on to Step 2: Importing Events to the Destination Google Calendar.
Step 2: Importing Events to the Destination Google Calendar
Now that you have exported the events from the source Google Calendar, it’s time to import them into the destination Google Calendar. This step will allow you to transfer all the events seamlessly, ensuring they are accurately added to the new calendar.
Follow these steps to import events into the destination Google Calendar:
- Open your web browser and navigate to calendar.google.com.
- Sign in to your Google account if you haven’t already.
- In the left panel, click on the three horizontal lines to open the side menu.
- Scroll down and click on “Settings” to access the calendar settings.
- In the settings menu, click on the calendar you want to import events into.
- Scroll down to the “Import & export” section and click on the “Import” button.
- Click on the “Select file from your computer” button and locate the .ics file you previously downloaded.
- Click on the “Open” button to start the import process.
- You will be prompted to choose the calendar where you want to import the events. Select the desired destination calendar.
- Click on the “Import” button to begin importing the events.
Google Calendar will proceed to import the events from the .ics file into the selected destination calendar. Depending on the number of events being imported, the process may take a few moments to complete.
Once the import is finished, you will be able to see the transferred events in the destination Google Calendar. Make sure to check that the imported events appear correctly, with all the relevant details intact, such as event titles, dates, times, and any additional information associated with each event.
With the events successfully imported into the destination Google Calendar, you have taken a significant step towards consolidating your events and ensuring that they are conveniently located in one calendar.
In the next section, we will cover the final step: verifying the imported events to ensure all the information transferred accurately. Let’s move on to Step 3: Verifying the Imported Events.
Step 3: Verifying the Imported Events
After importing the events into the destination Google Calendar, it is essential to verify that the transferred events appear correctly and all the information has been accurately imported. This step will ensure that the events are properly organized and accessible in the new calendar.
Here’s how you can verify the imported events in the destination Google Calendar:
- Open your web browser and navigate to calendar.google.com.
- Sign in to your Google account if you haven’t already.
- Locate and click on the calendar where you imported the events.
- Scroll through the calendar to review the imported events.
- Check that the event titles, dates, times, and any additional information associated with each event are correct.
- Ensure that any recurring events are still set up correctly and occur as expected.
- If you notice any discrepancies or missing information, you may need to repeat the import process or manually adjust the events in the destination calendar.
By verifying the imported events, you can have peace of mind knowing that the transfer was successful. This step allows you to confirm that all the event details are intact and accurately reflected in the destination Google Calendar.
If everything looks correct, congratulations! You have successfully moved events from one Google Calendar to another. The events are now consolidated in the destination calendar, making it easier for you to manage and access them.
However, in the rare event that you encounter any issues or discrepancies during the verification process, don’t panic. In the next section, we will explore some common issues and their possible solutions, providing troubleshooting tips to help you resolve any problems that may arise.
Troubleshooting: Common Issues and Solutions
While the process of moving events from one Google Calendar to another is generally smooth, you may encounter some common issues along the way. In this section, we will explore these issues and provide solutions to help you overcome them.
1. Missing or incomplete events: If some events are missing or have incomplete information after the import, it could be due to an error during the export or import process. To resolve this, try re-exporting the events from the source calendar and repeat the import process into the destination calendar.
2. Inaccurate event dates or times: If event dates or times appear incorrect in the destination calendar, double-check the time zone settings in both the source and destination calendars. Ensure that both calendars are set to the same time zone, and try importing the events again.
3. Importing into the wrong calendar: If you accidentally import events into the wrong destination calendar, you can easily fix it by deleting the imported events from the incorrect calendar and then re-importing them into the correct calendar.
4. Duplicate events: In some cases, you may end up with duplicate events after the import. This can happen if events were already present in the destination calendar before the import. To address this, you can manually delete the duplicate events or use the “Find duplicates” feature in Google Calendar to help identify and remove them.
5. Failed import: If the import process fails or encounters an error, ensure that you are using a valid .ics file and that it is not corrupted. Double-check that you have followed all the import steps correctly. If the issue persists, try exporting the events again from the source calendar and repeat the import process.
If none of the above solutions resolve your issue, you may need to reach out to Google support for further assistance. They can help troubleshoot specific cases and provide additional guidance.
Remember, troubleshooting common issues is part of the process when moving events between Google Calendars. By being aware of these potential challenges and using the provided solutions, you can overcome any obstacles and successfully complete the event transfer.
With the common issues addressed, you should now have a good understanding of how to troubleshoot problems that may arise during the process of moving events from one Google Calendar to another. In the next section, we will wrap up the guide with a summary of the key steps and tips covered.
Conclusion
Congratulations on successfully moving events from one Google Calendar to another! By following the step-by-step process outlined in this guide, you have consolidated your events and ensured that they are conveniently located in the destination calendar.
Starting with the export of events from the source Google Calendar, you took the necessary precautions to create a backup and preserve all the event details. Then, through the import process, you seamlessly transferred the events into the destination calendar, maintaining accuracy and organization.
Remember to verify the imported events in the destination Google Calendar to ensure that all the information has been accurately transferred. This step allows you to confirm that the events appear as expected, and any discrepancies can be resolved promptly.
In the event that you encounter common issues during the process, refer to the troubleshooting section for solutions. Addressing these issues will help you overcome any obstacles and achieve a successful event transfer.
With your events now consolidated in the destination calendar, you can enjoy the convenience of having all your important dates and appointments in one place. Whether you’re managing personal or professional events, this process allows for better organization and streamlined access to your schedule.
Should you need to move events between Google Calendars in the future, you can refer back to this guide as a reference. Remember to export the events from the source calendar, import them into the destination calendar, and verify the transferred events for accuracy.
Thank you for choosing this guide as your resource for moving events between Google Calendars. We hope that it has been helpful and that you feel confident in managing your events across different calendars.
Wishing you a seamless and efficient event management experience in the future!